Mixed Media Nature Collage Prints


Use Arrows above to toggle through examples!
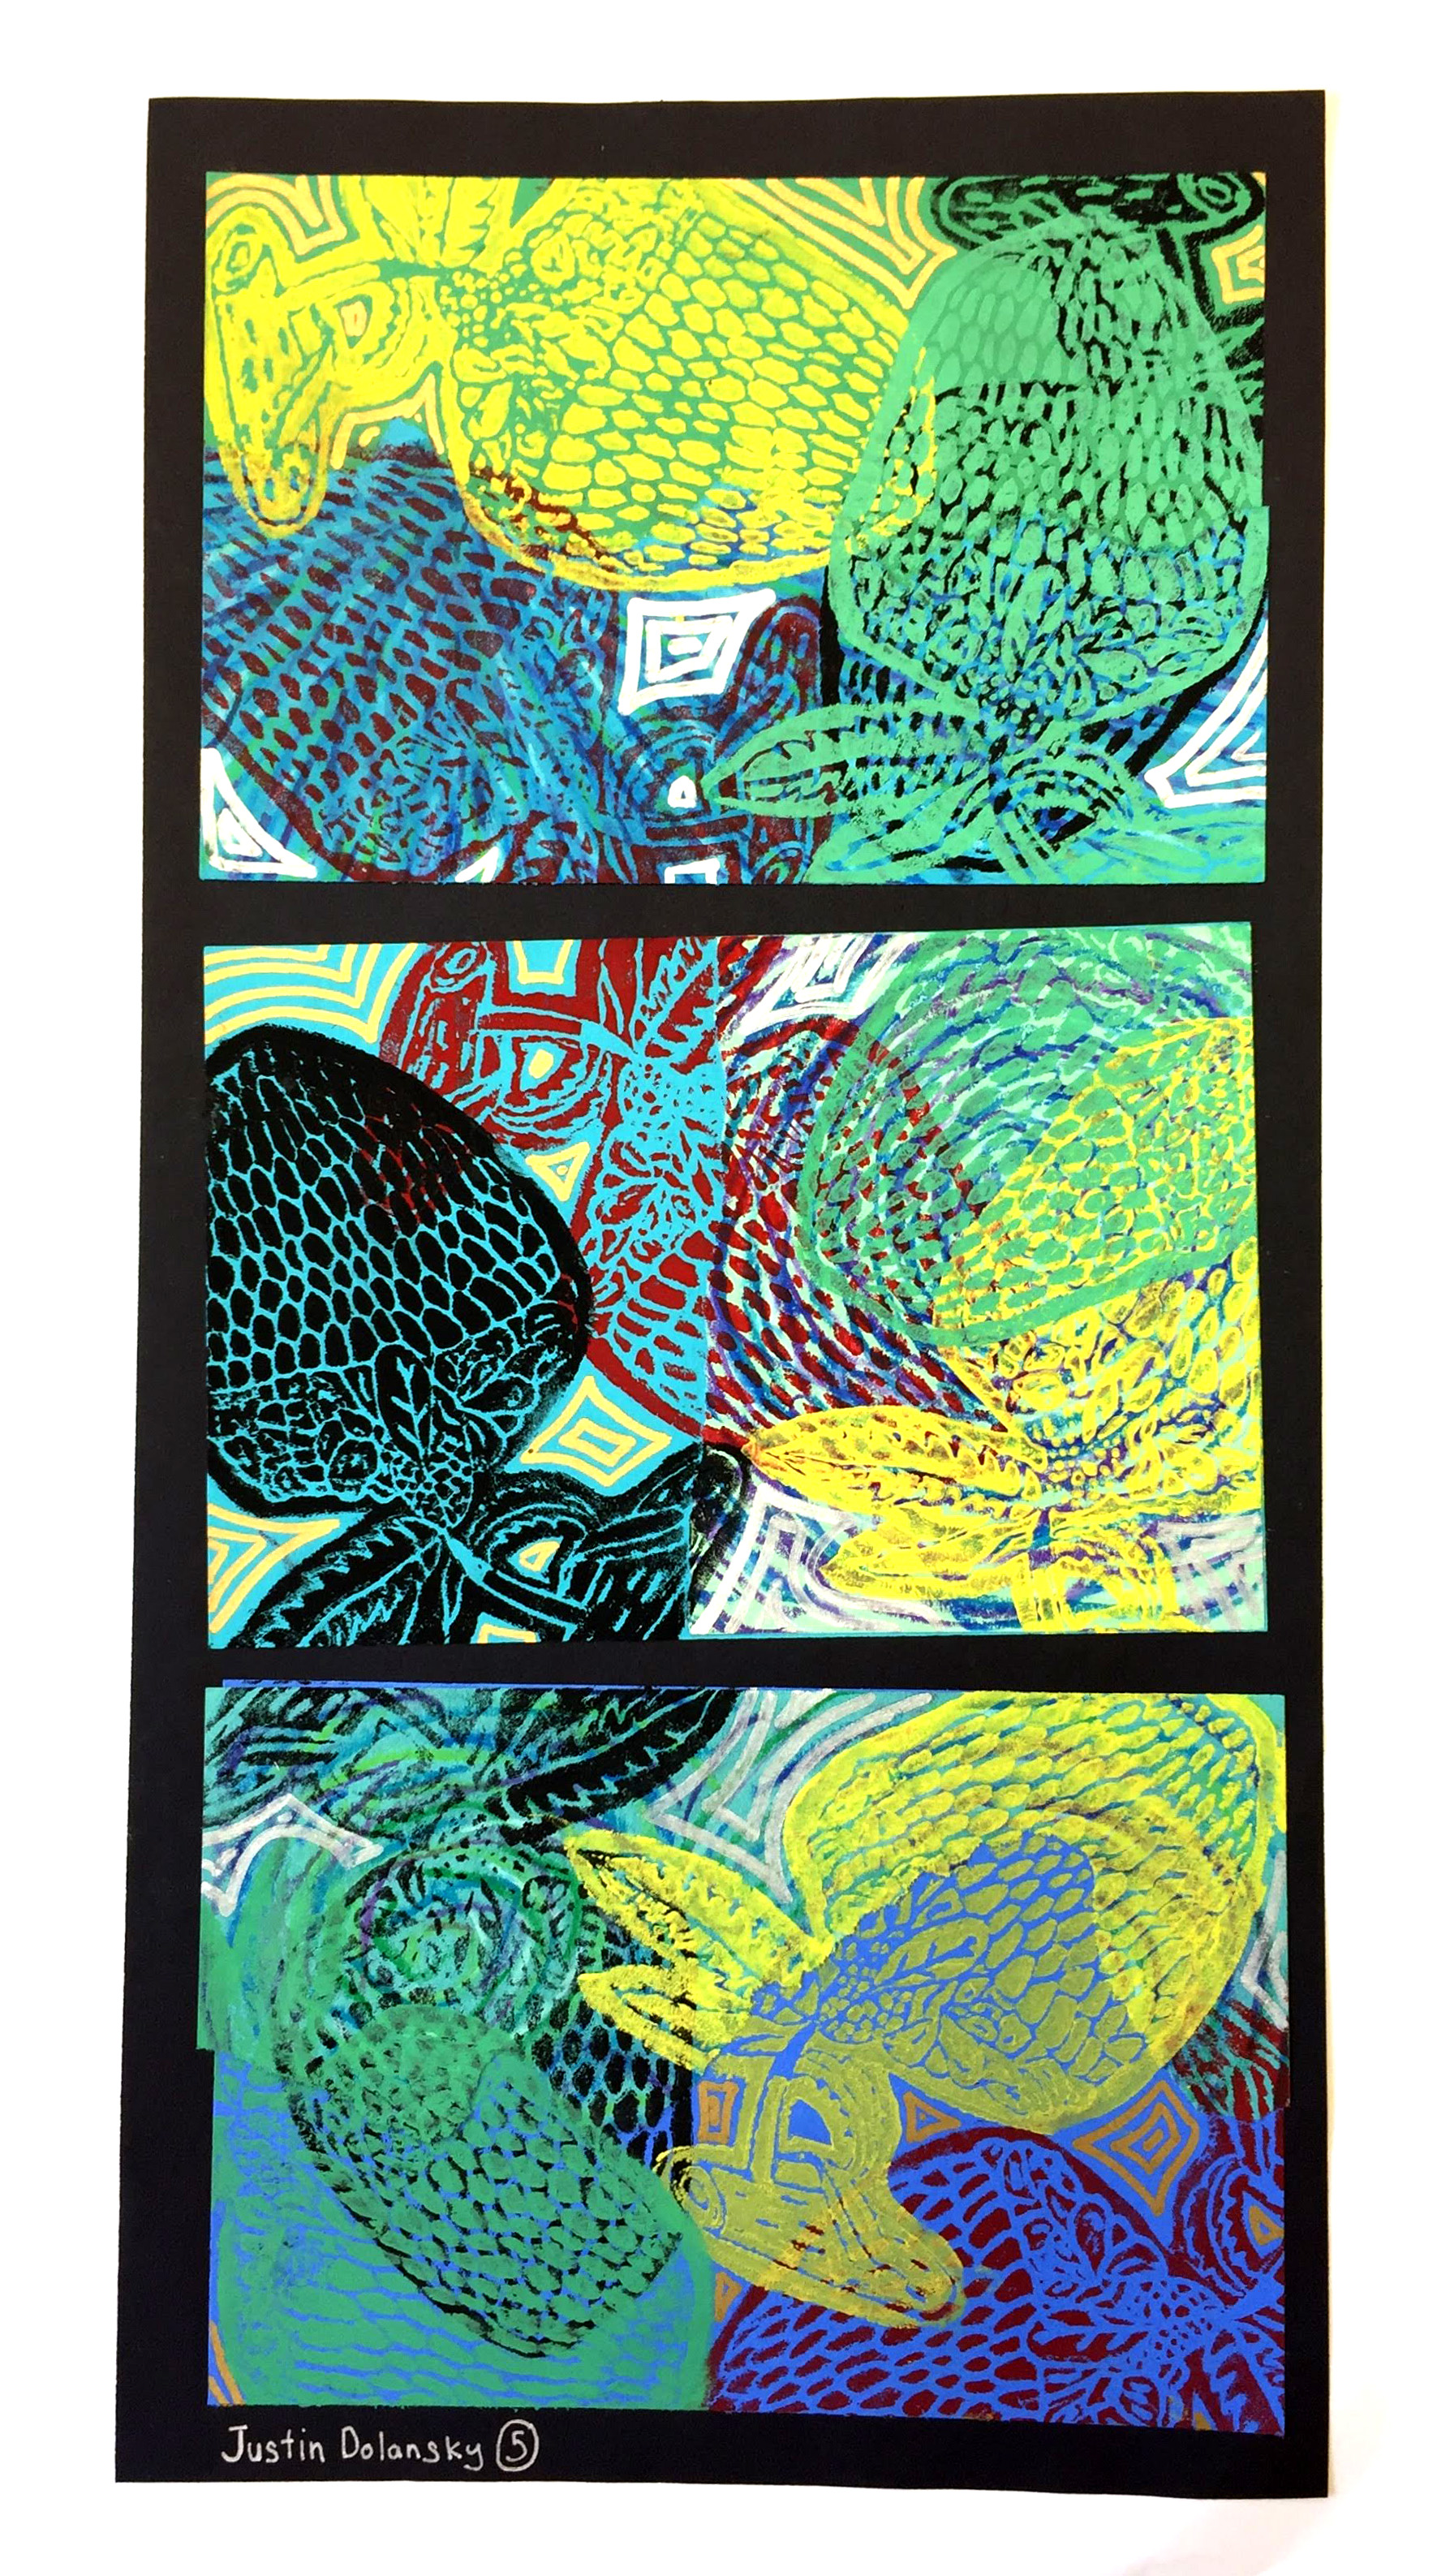
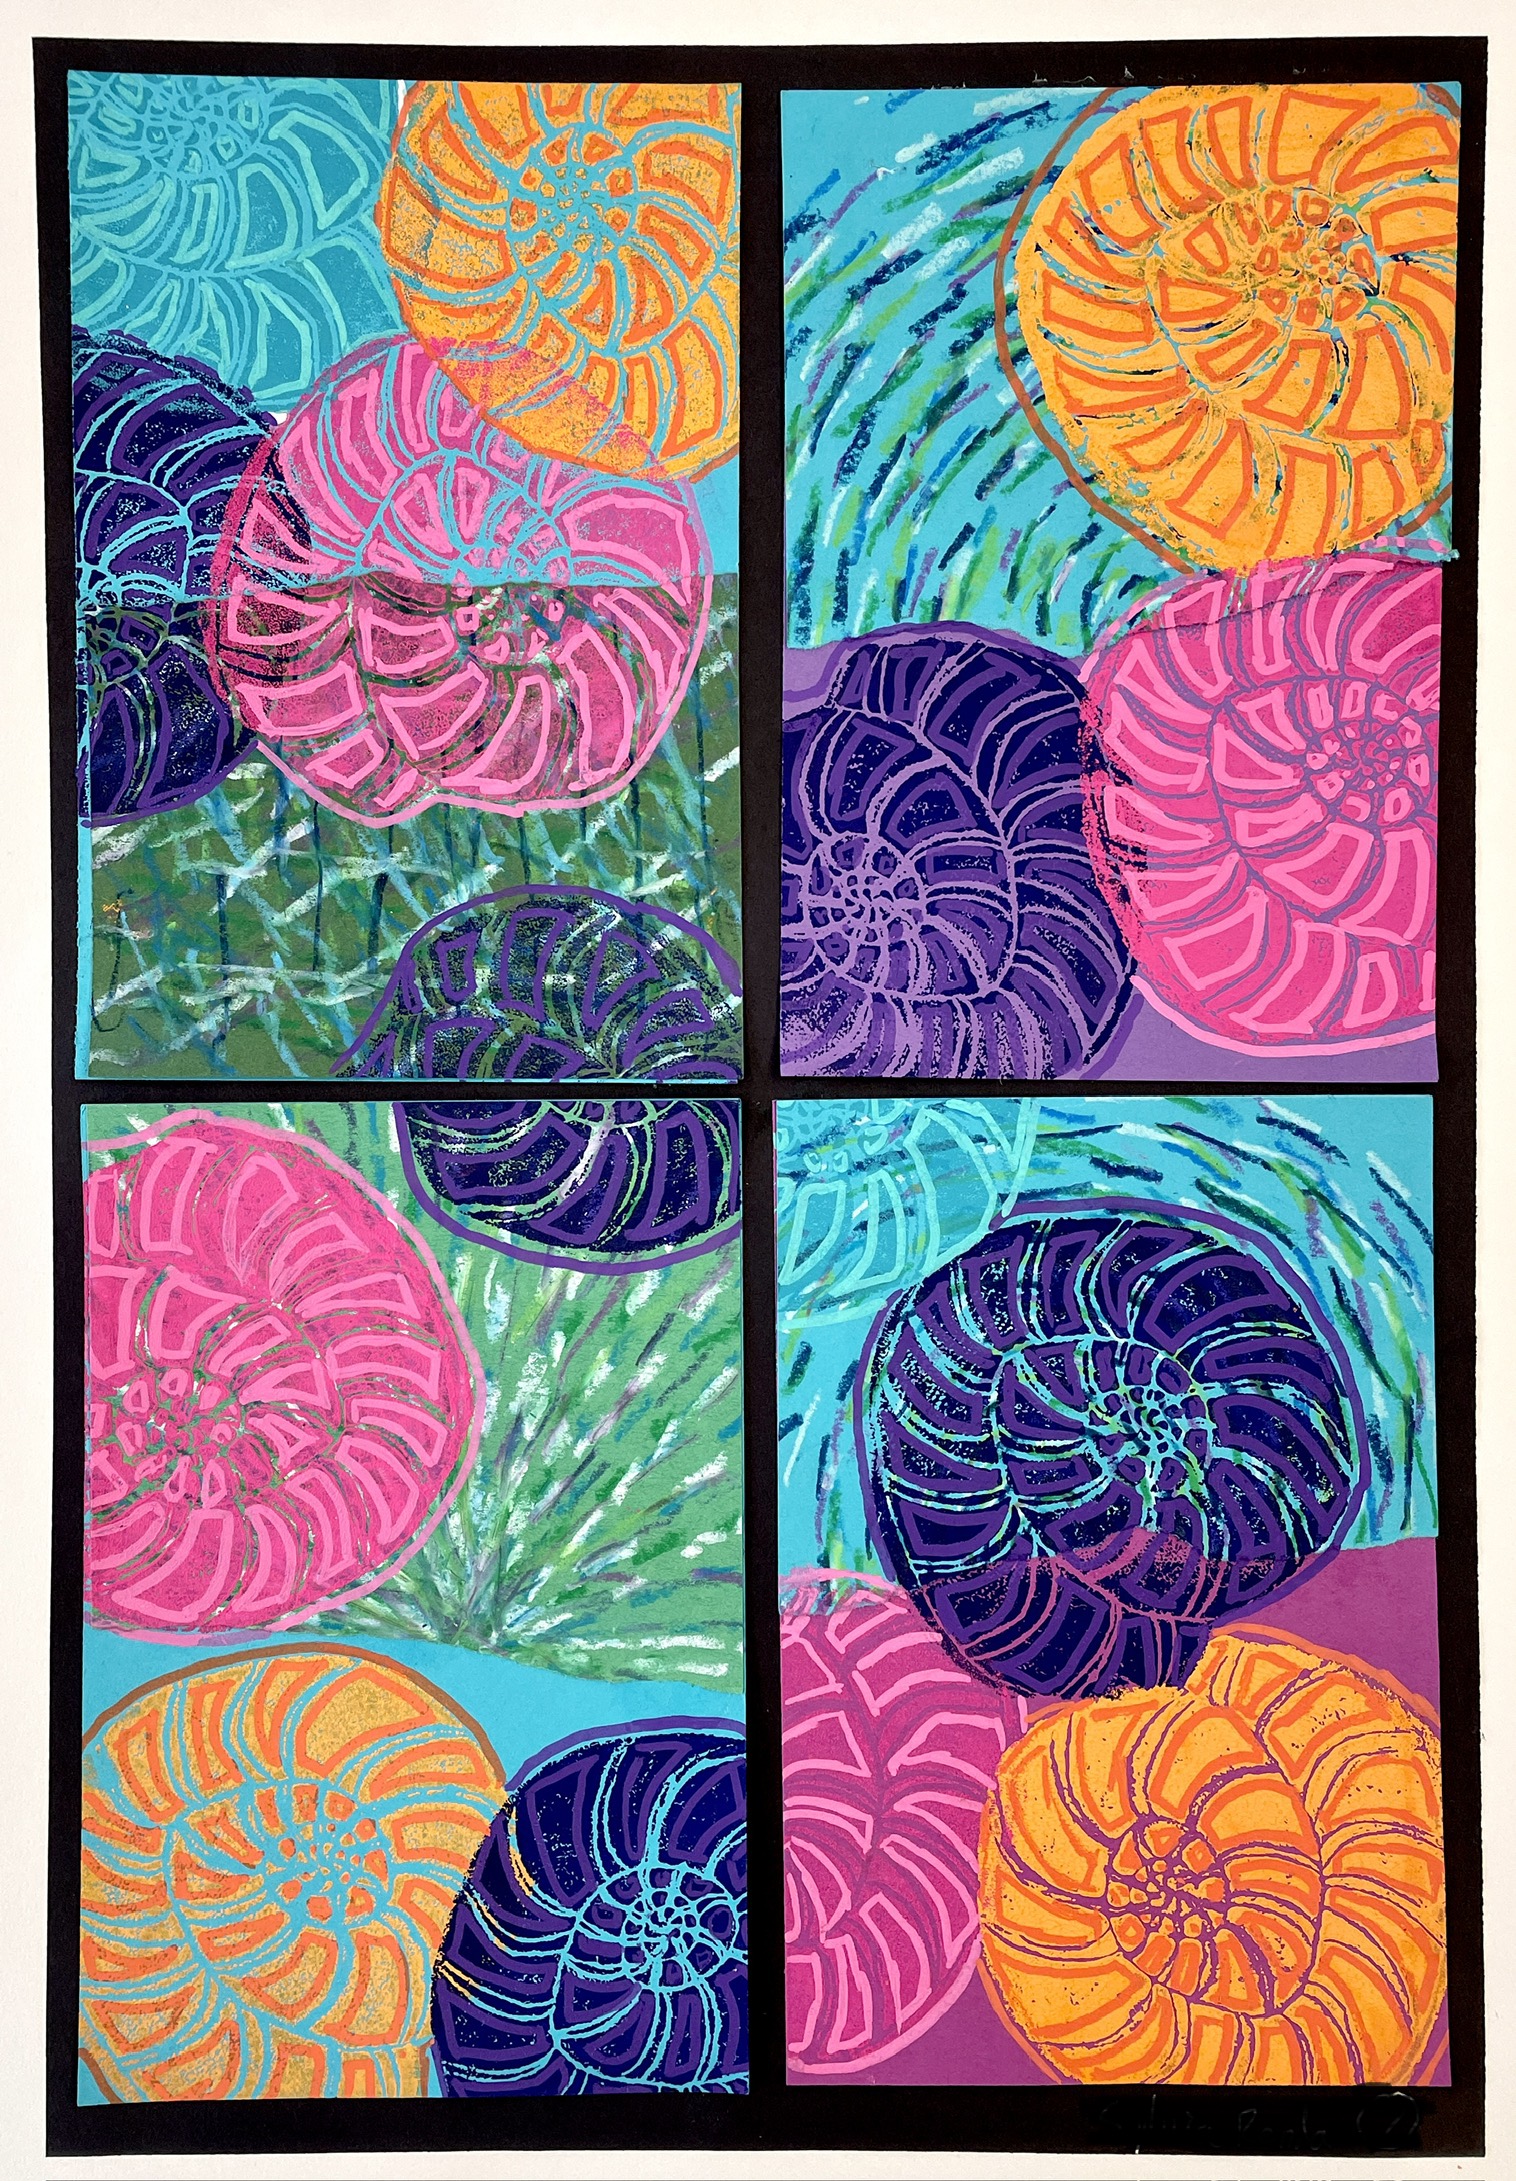
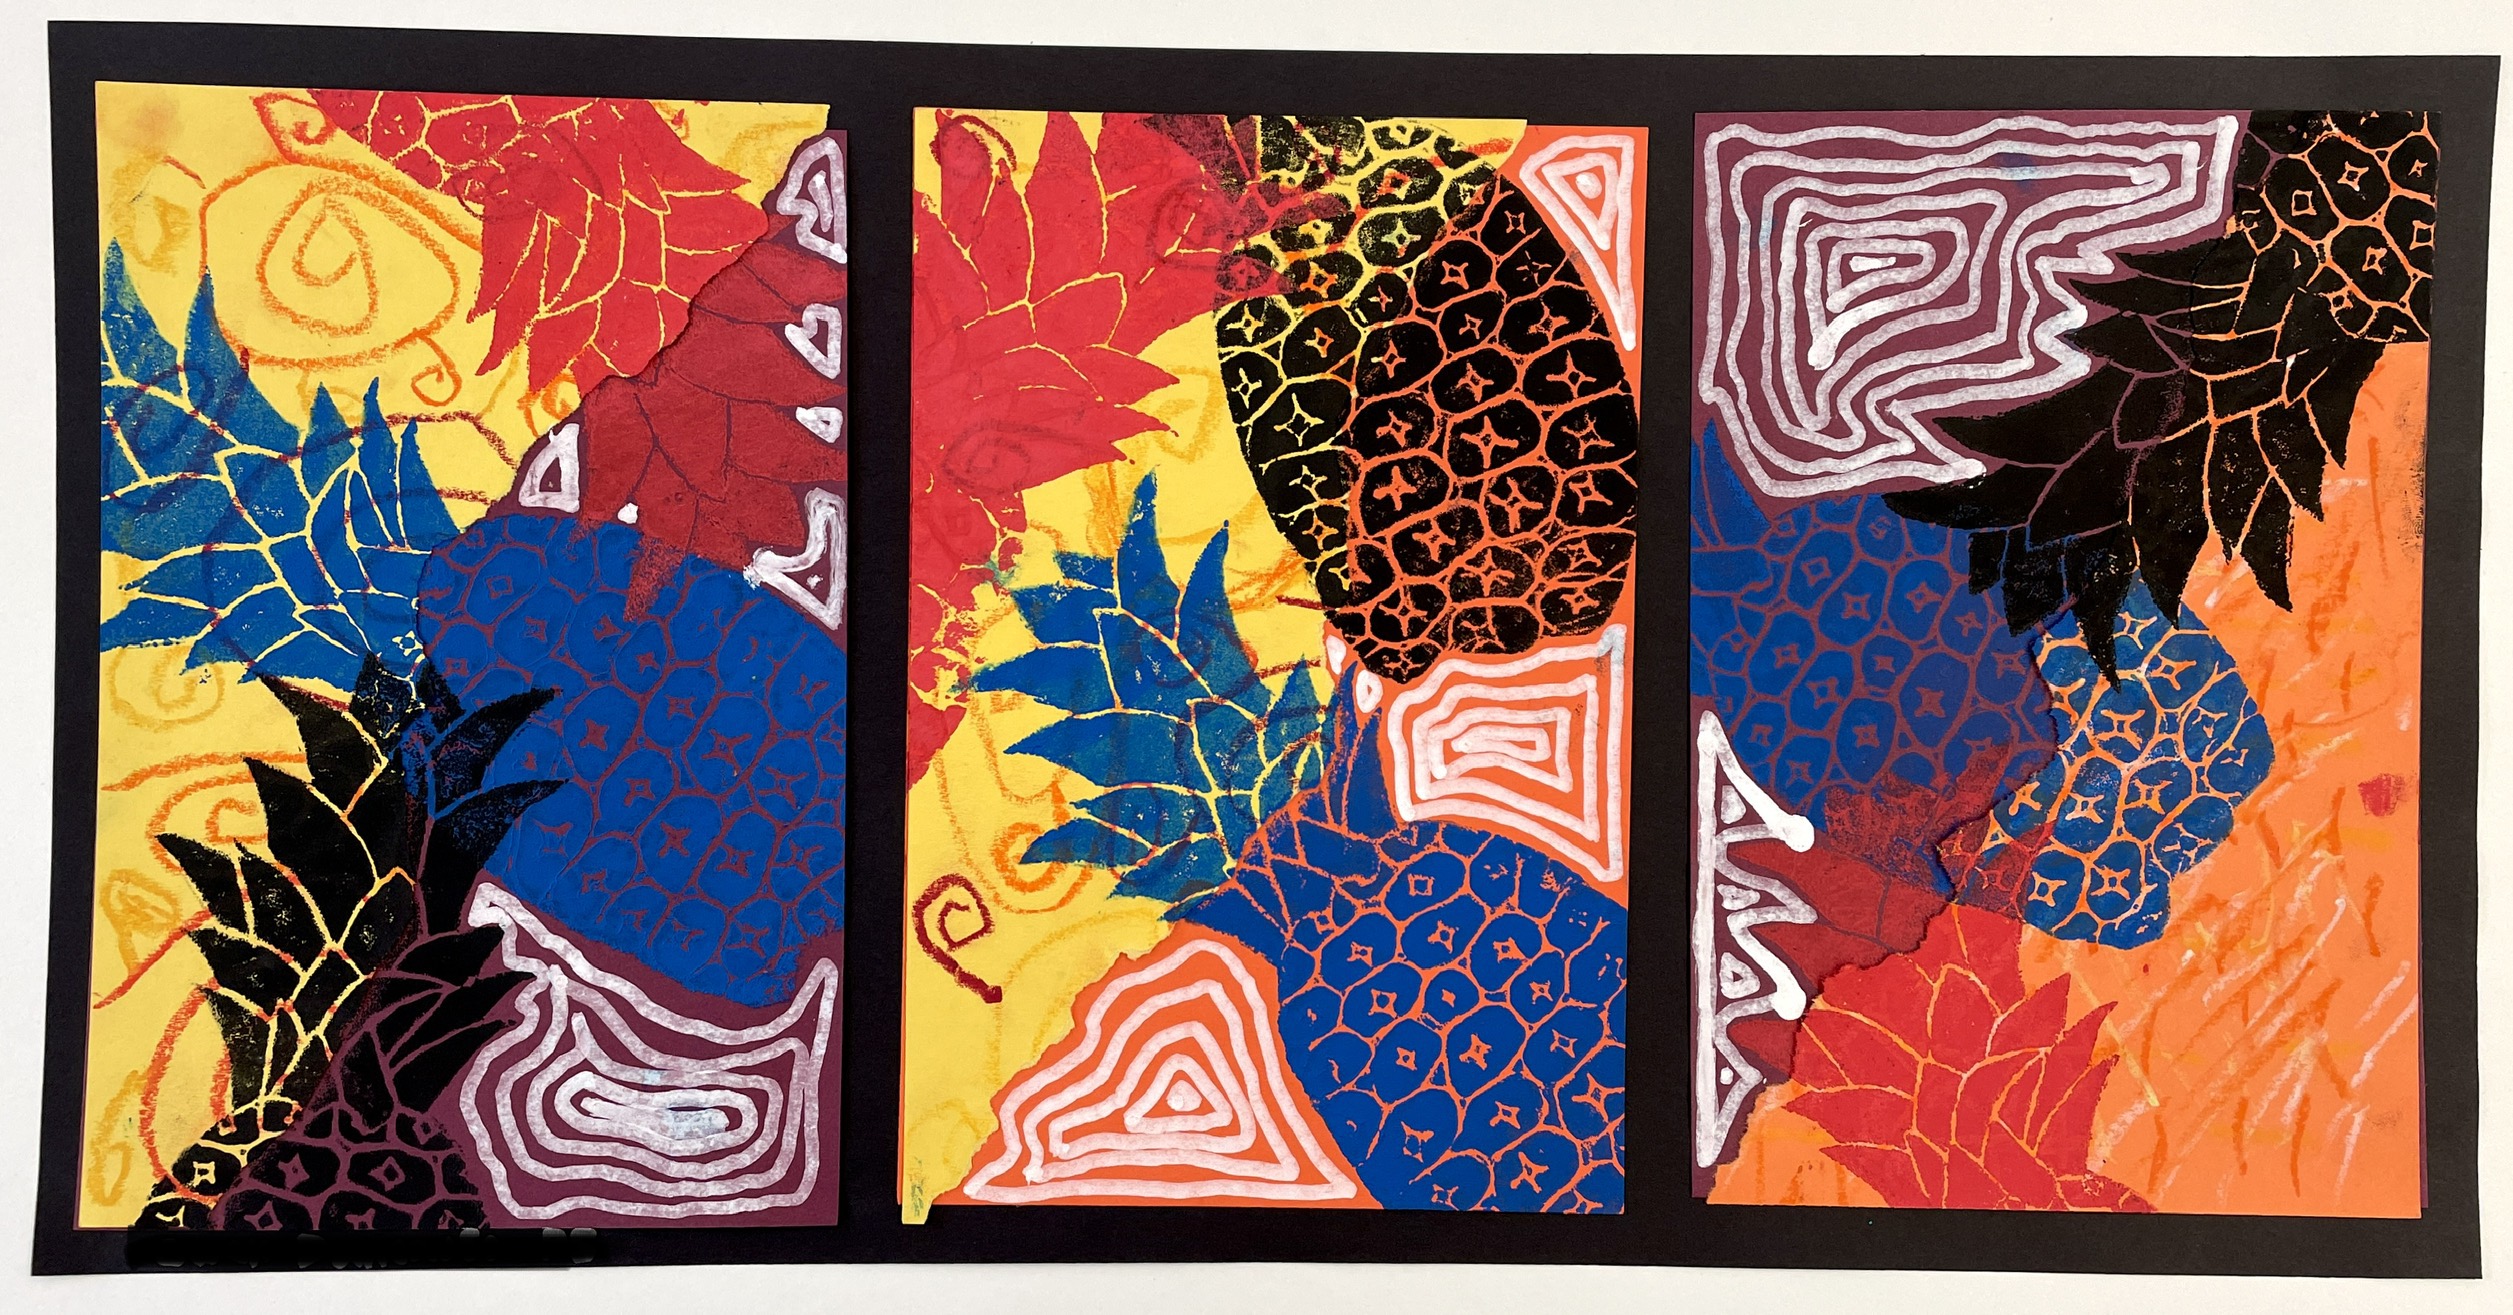
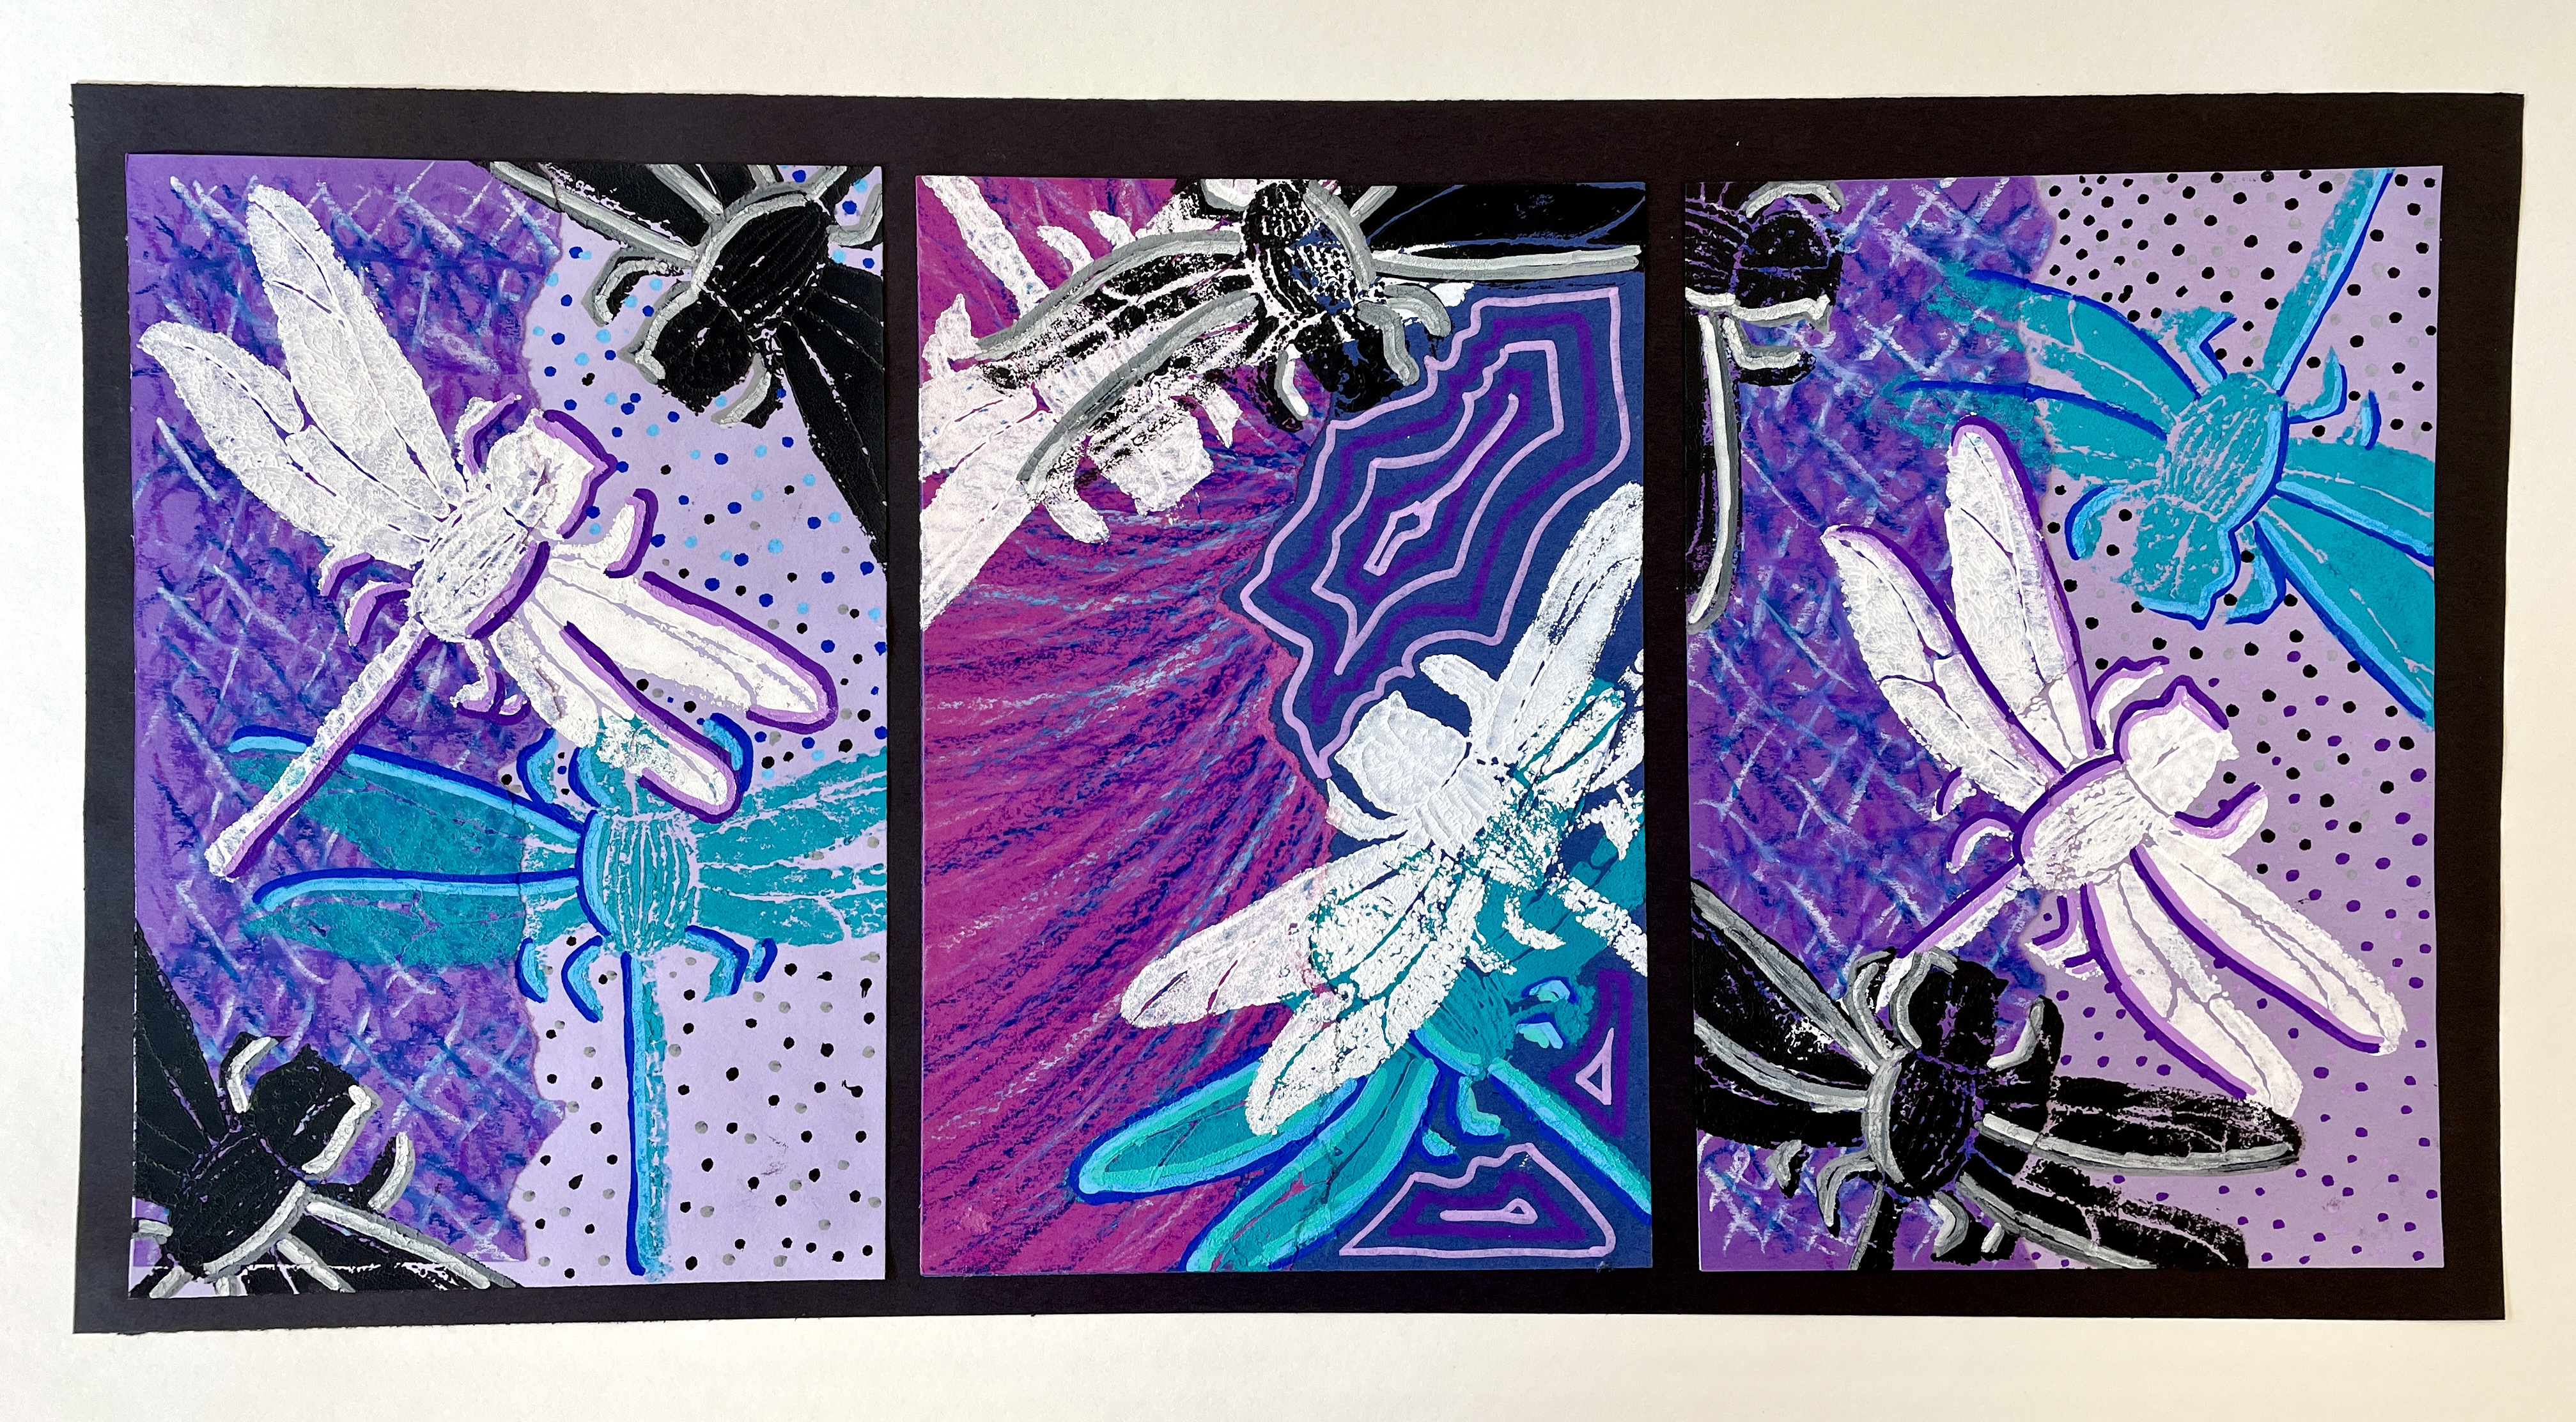
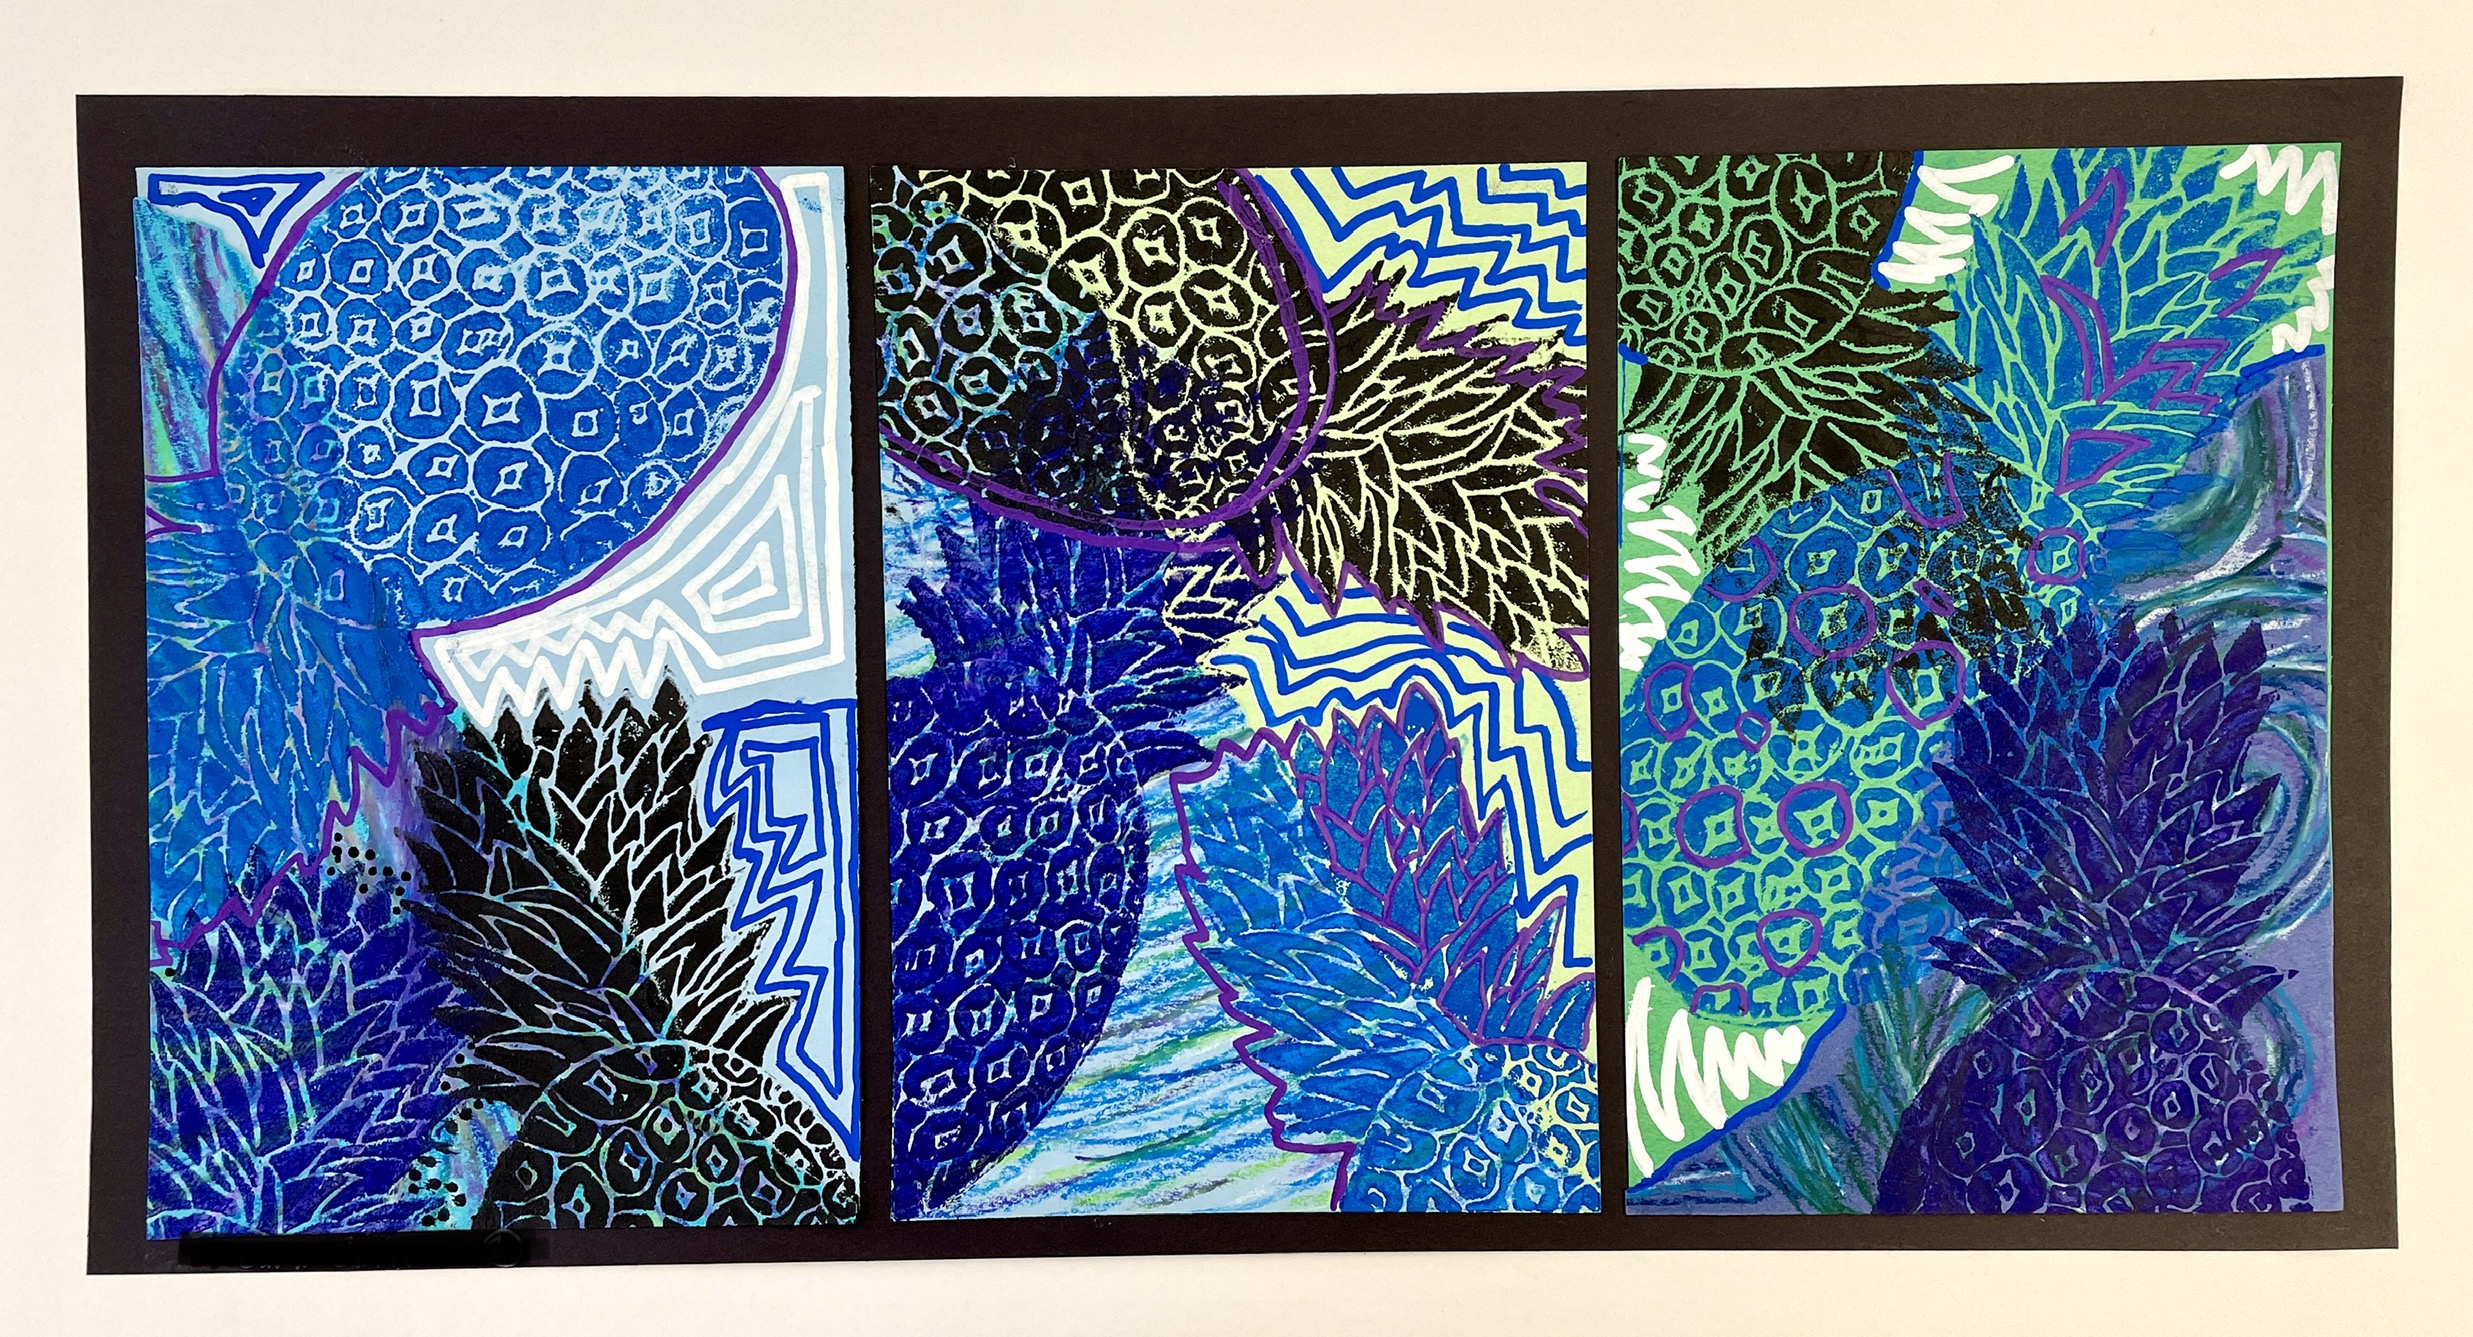
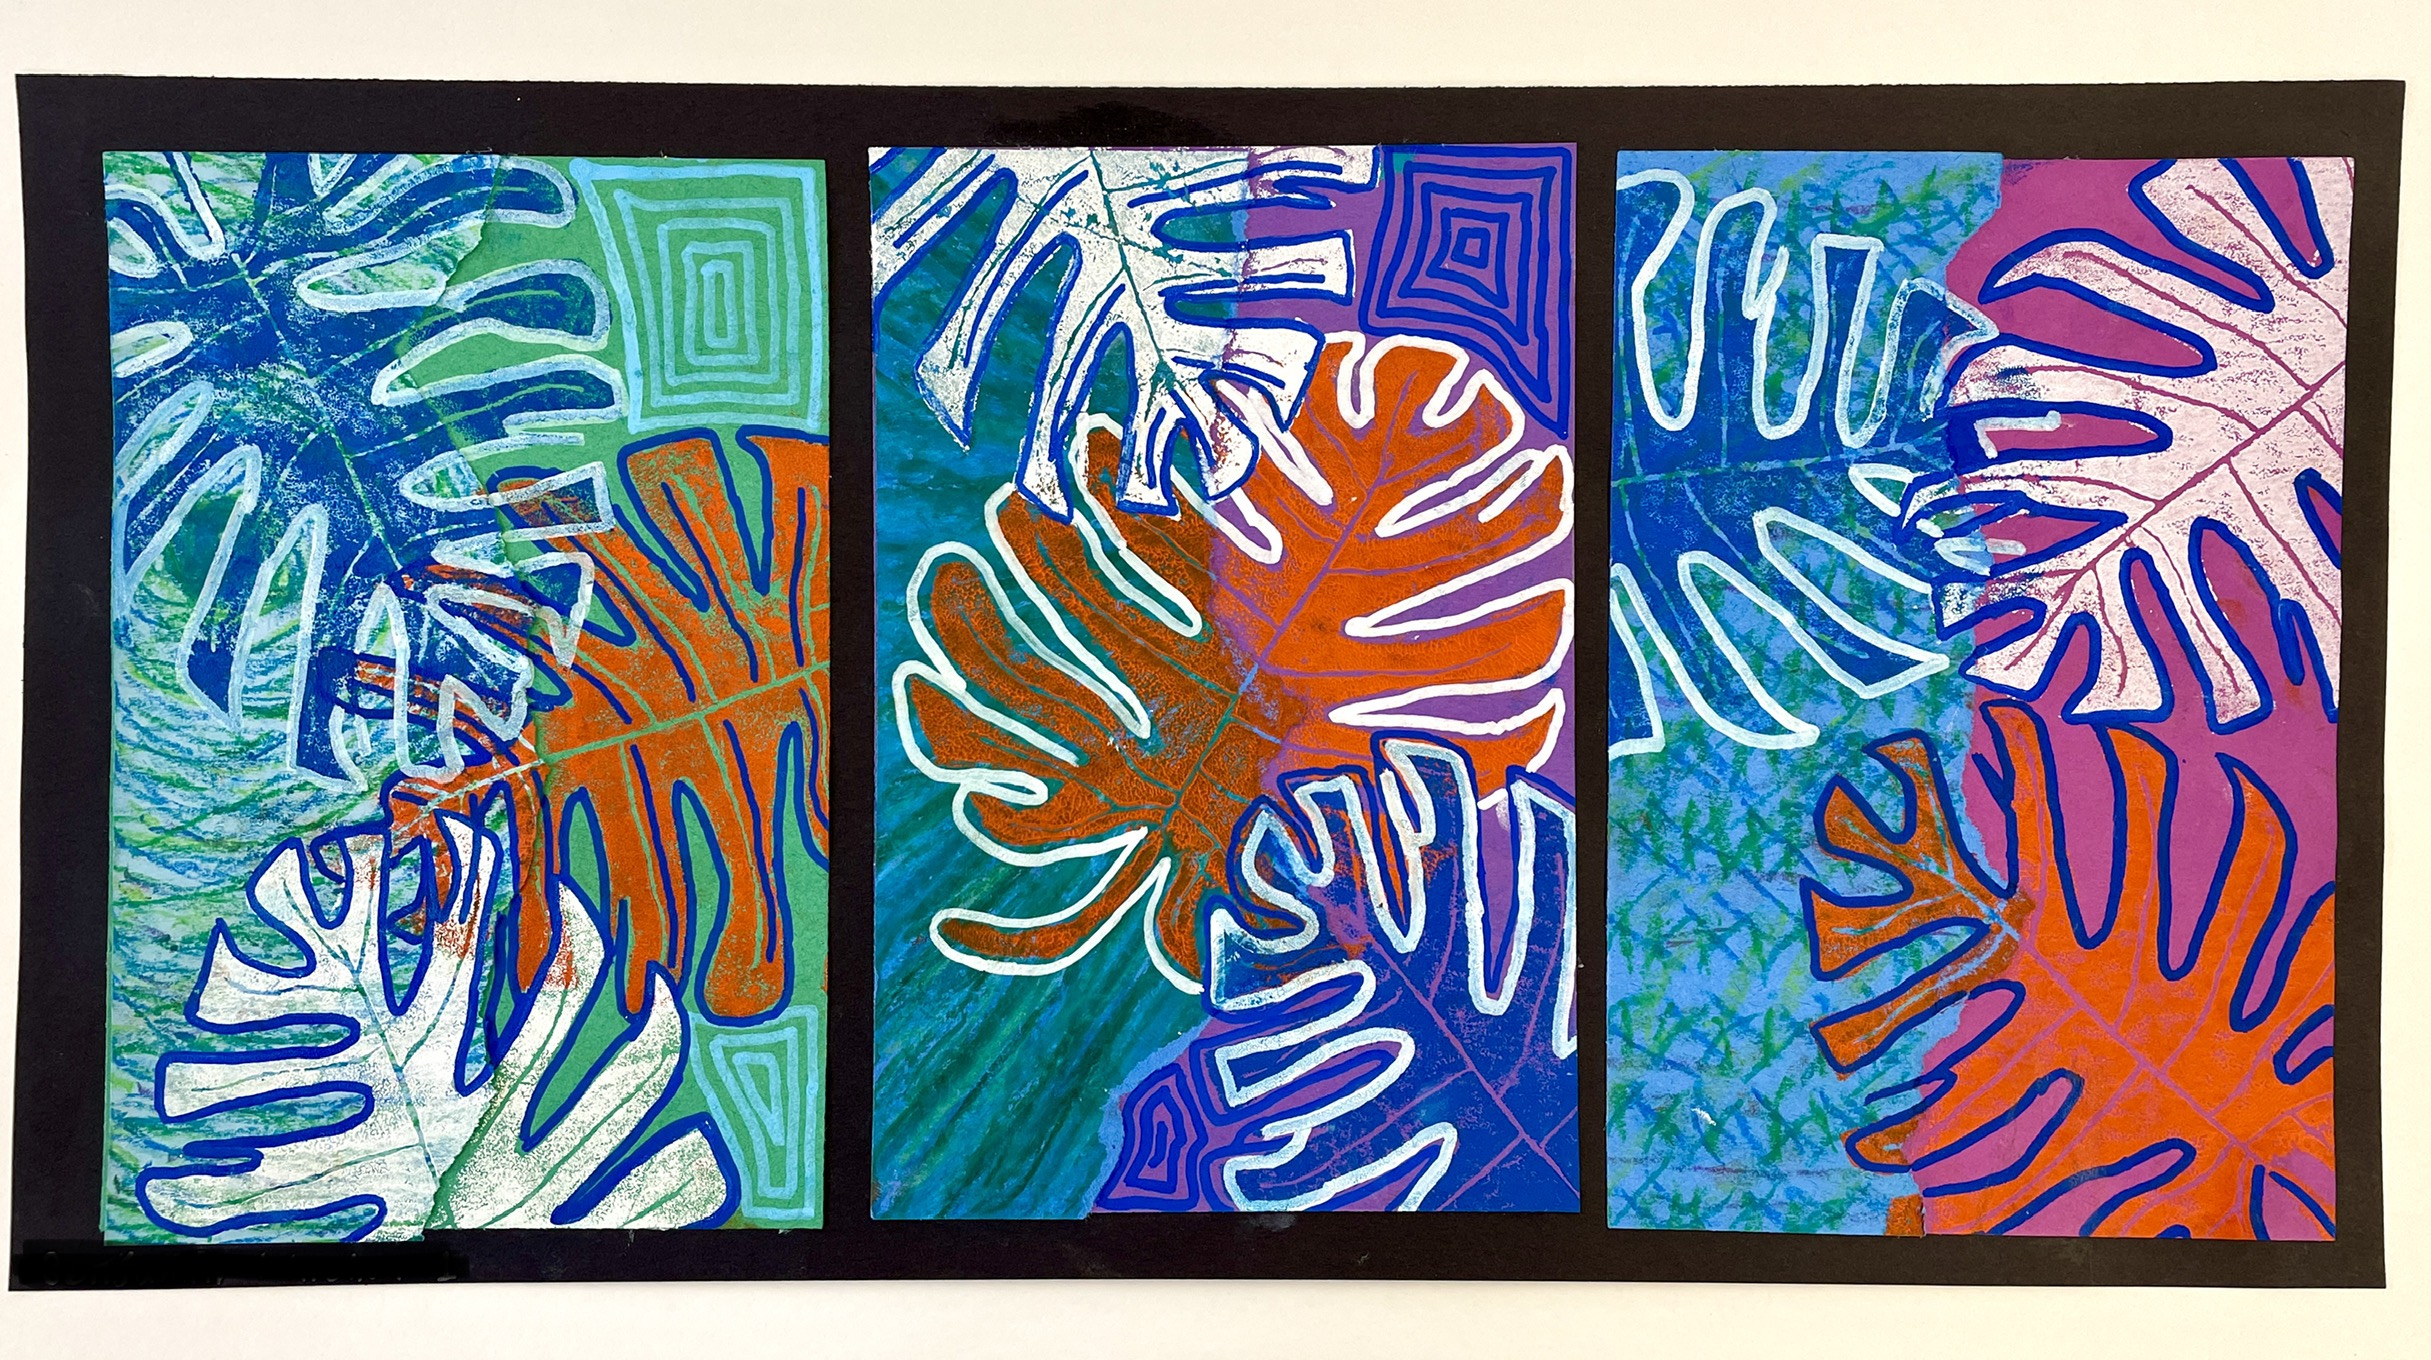
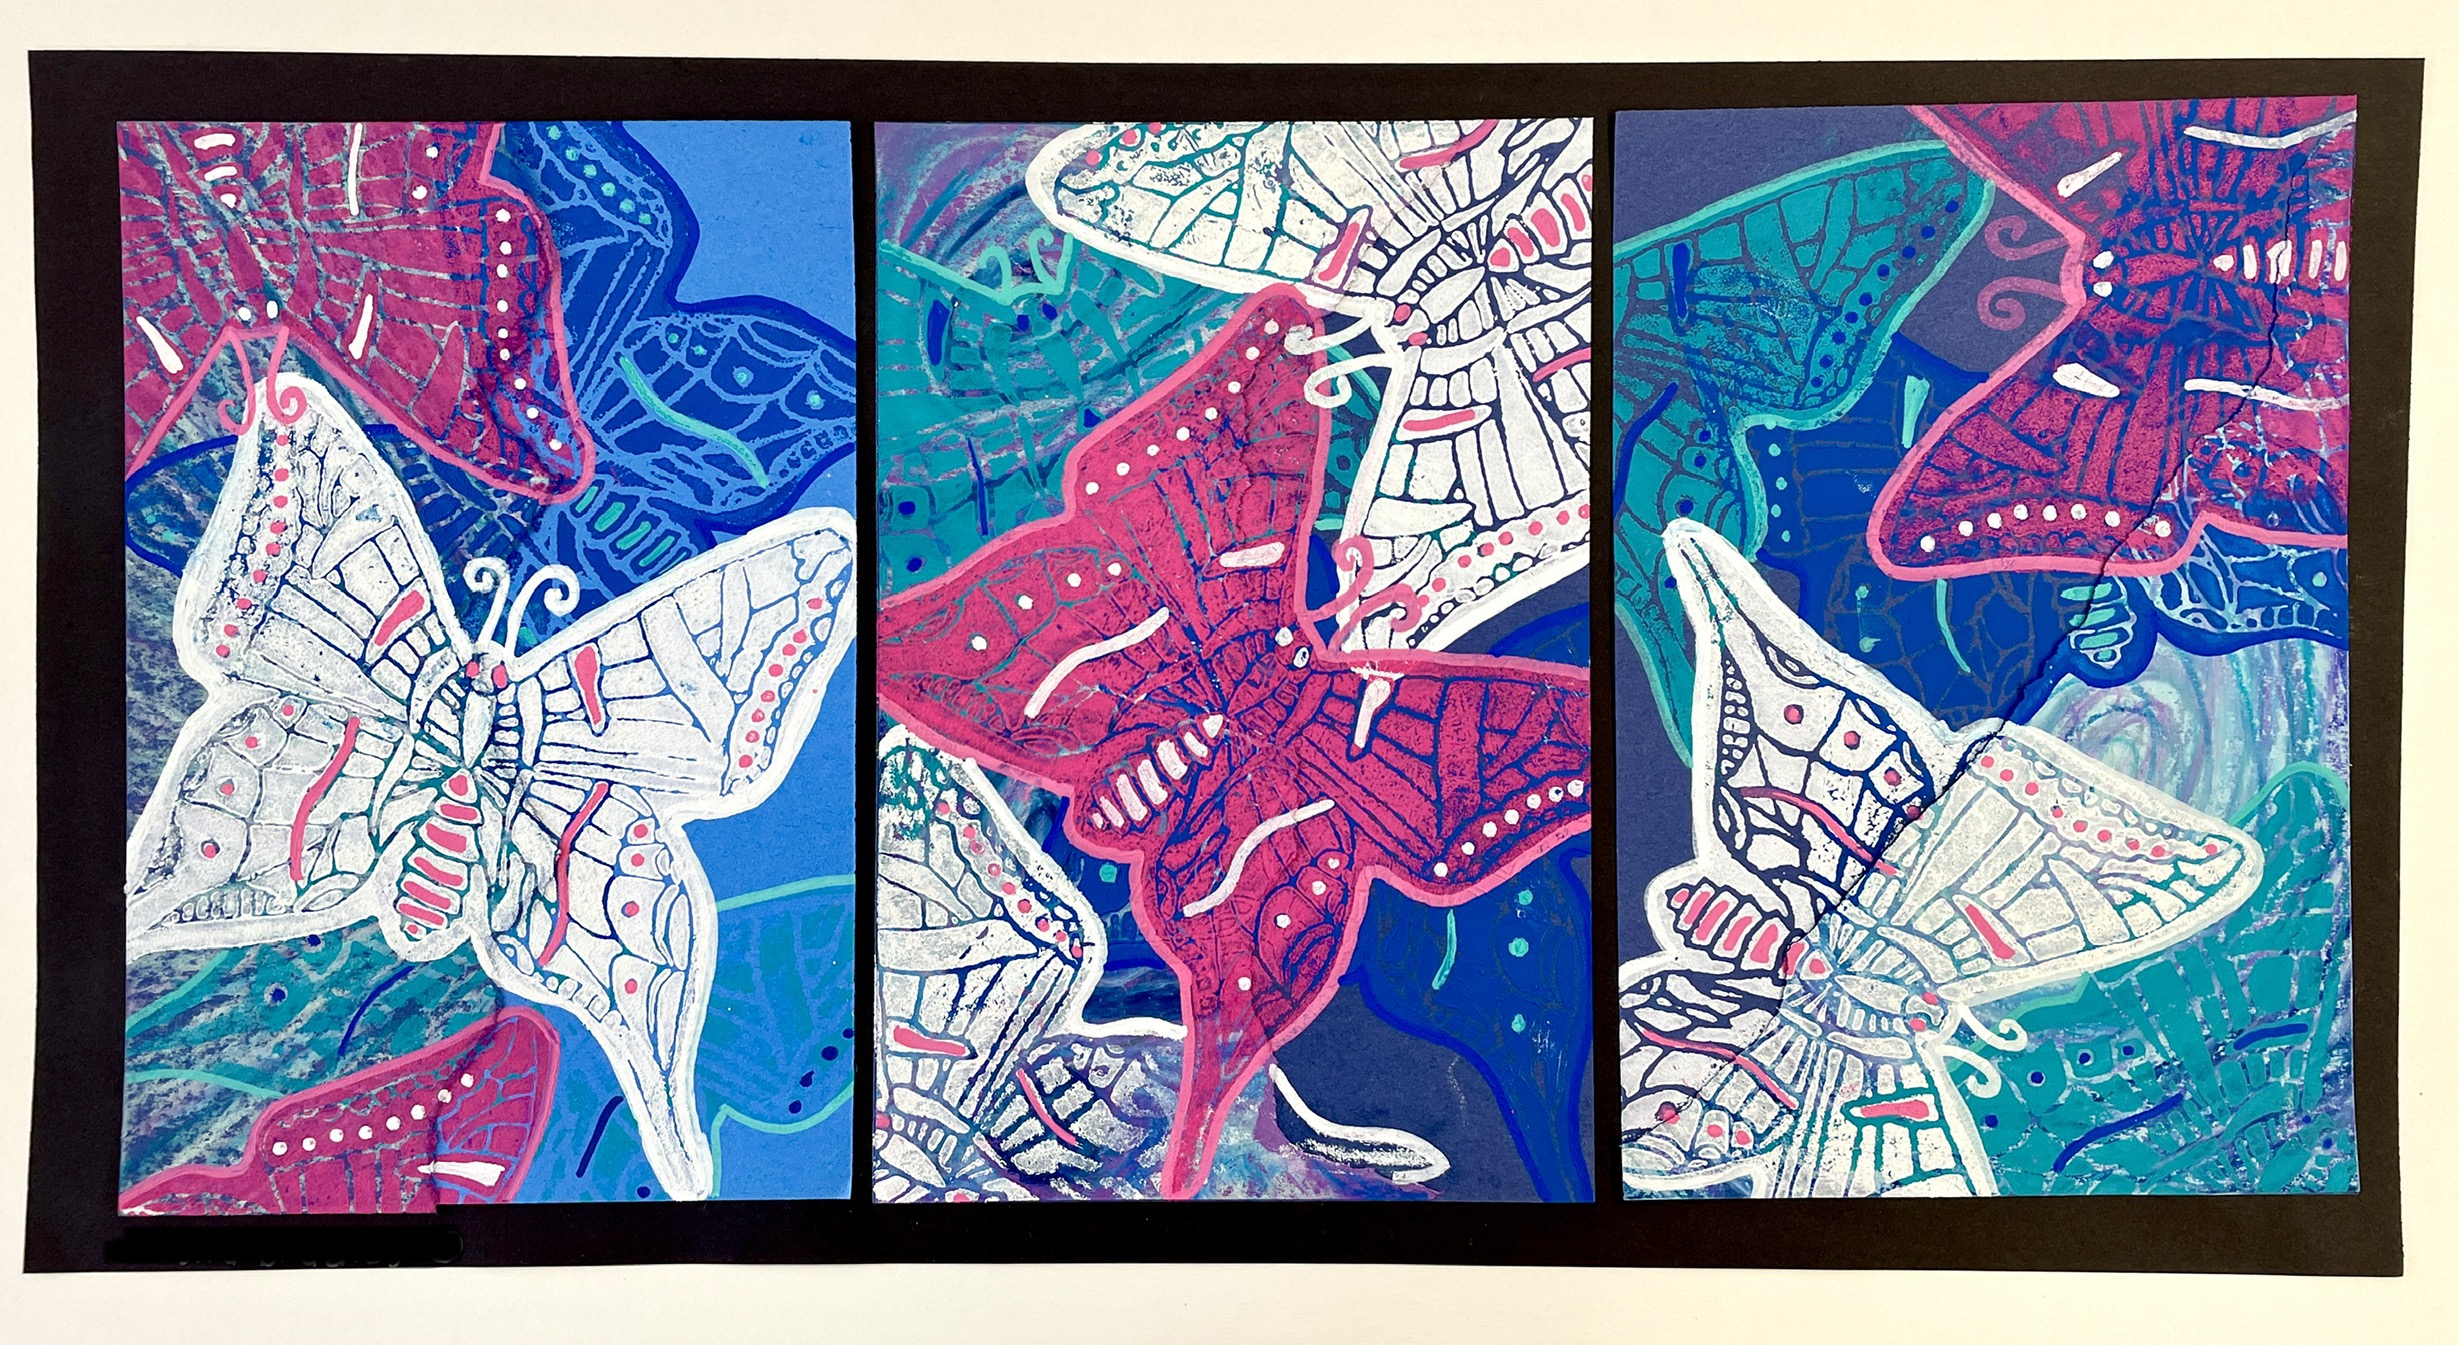
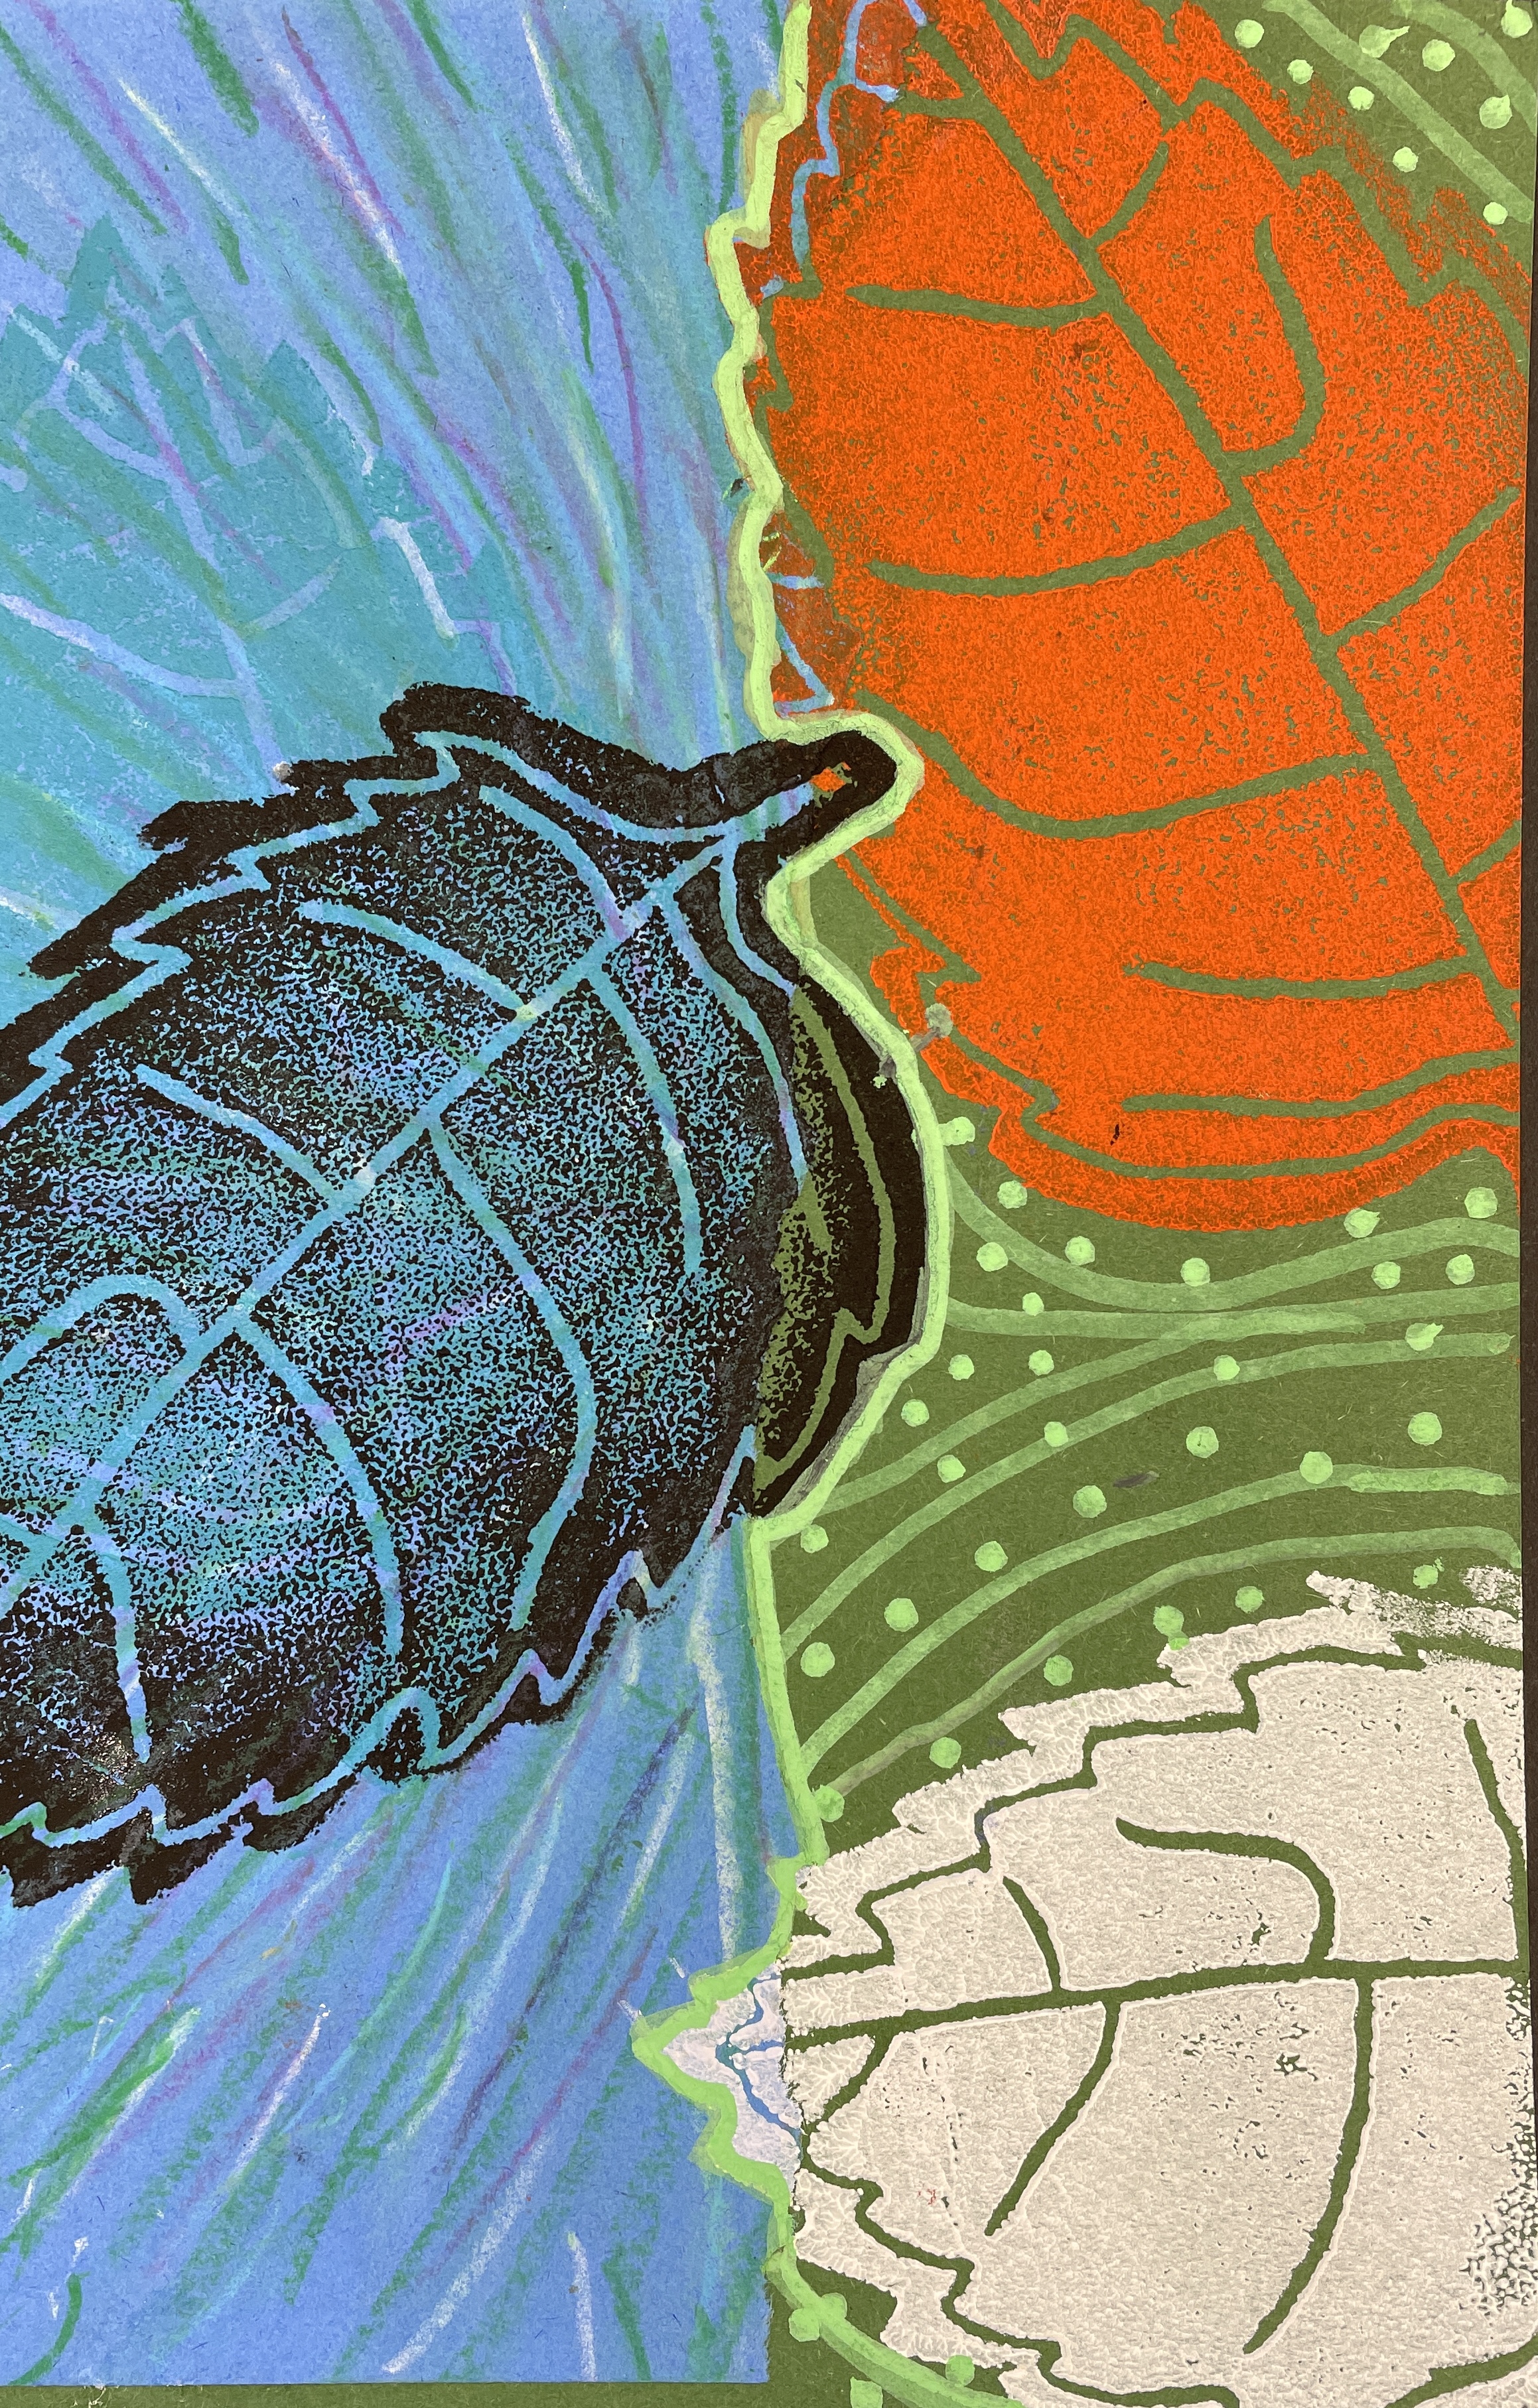
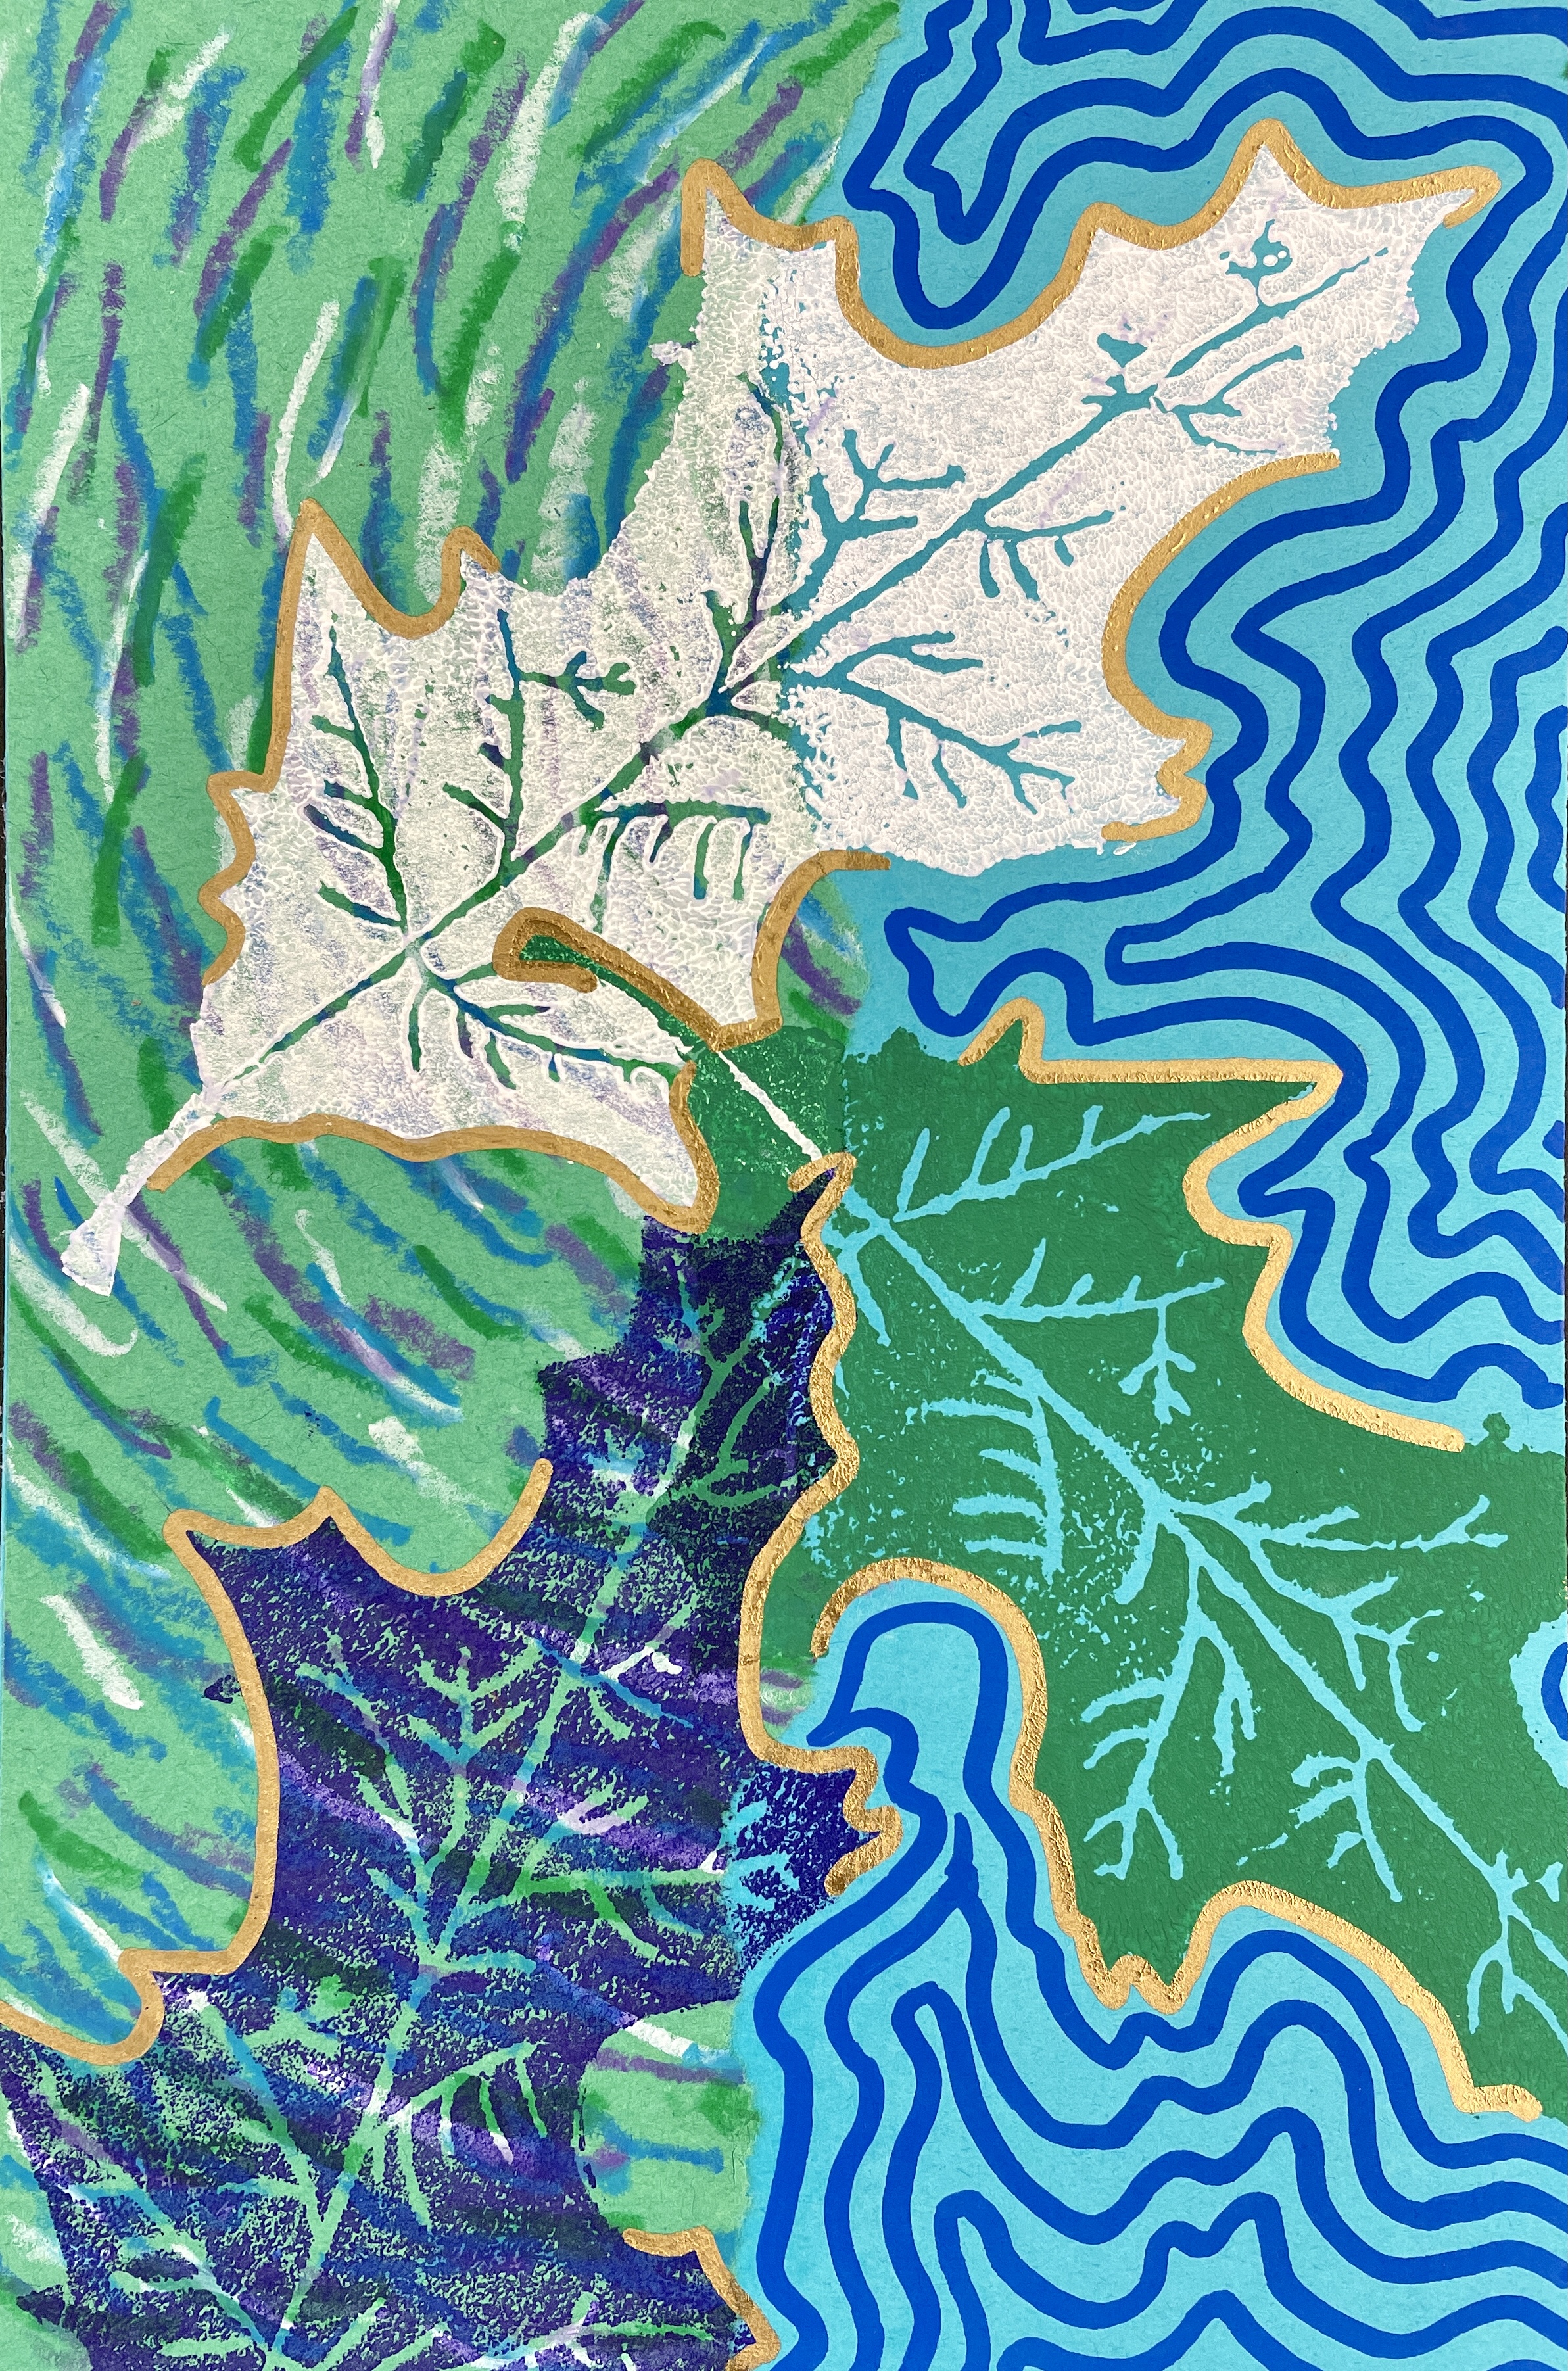
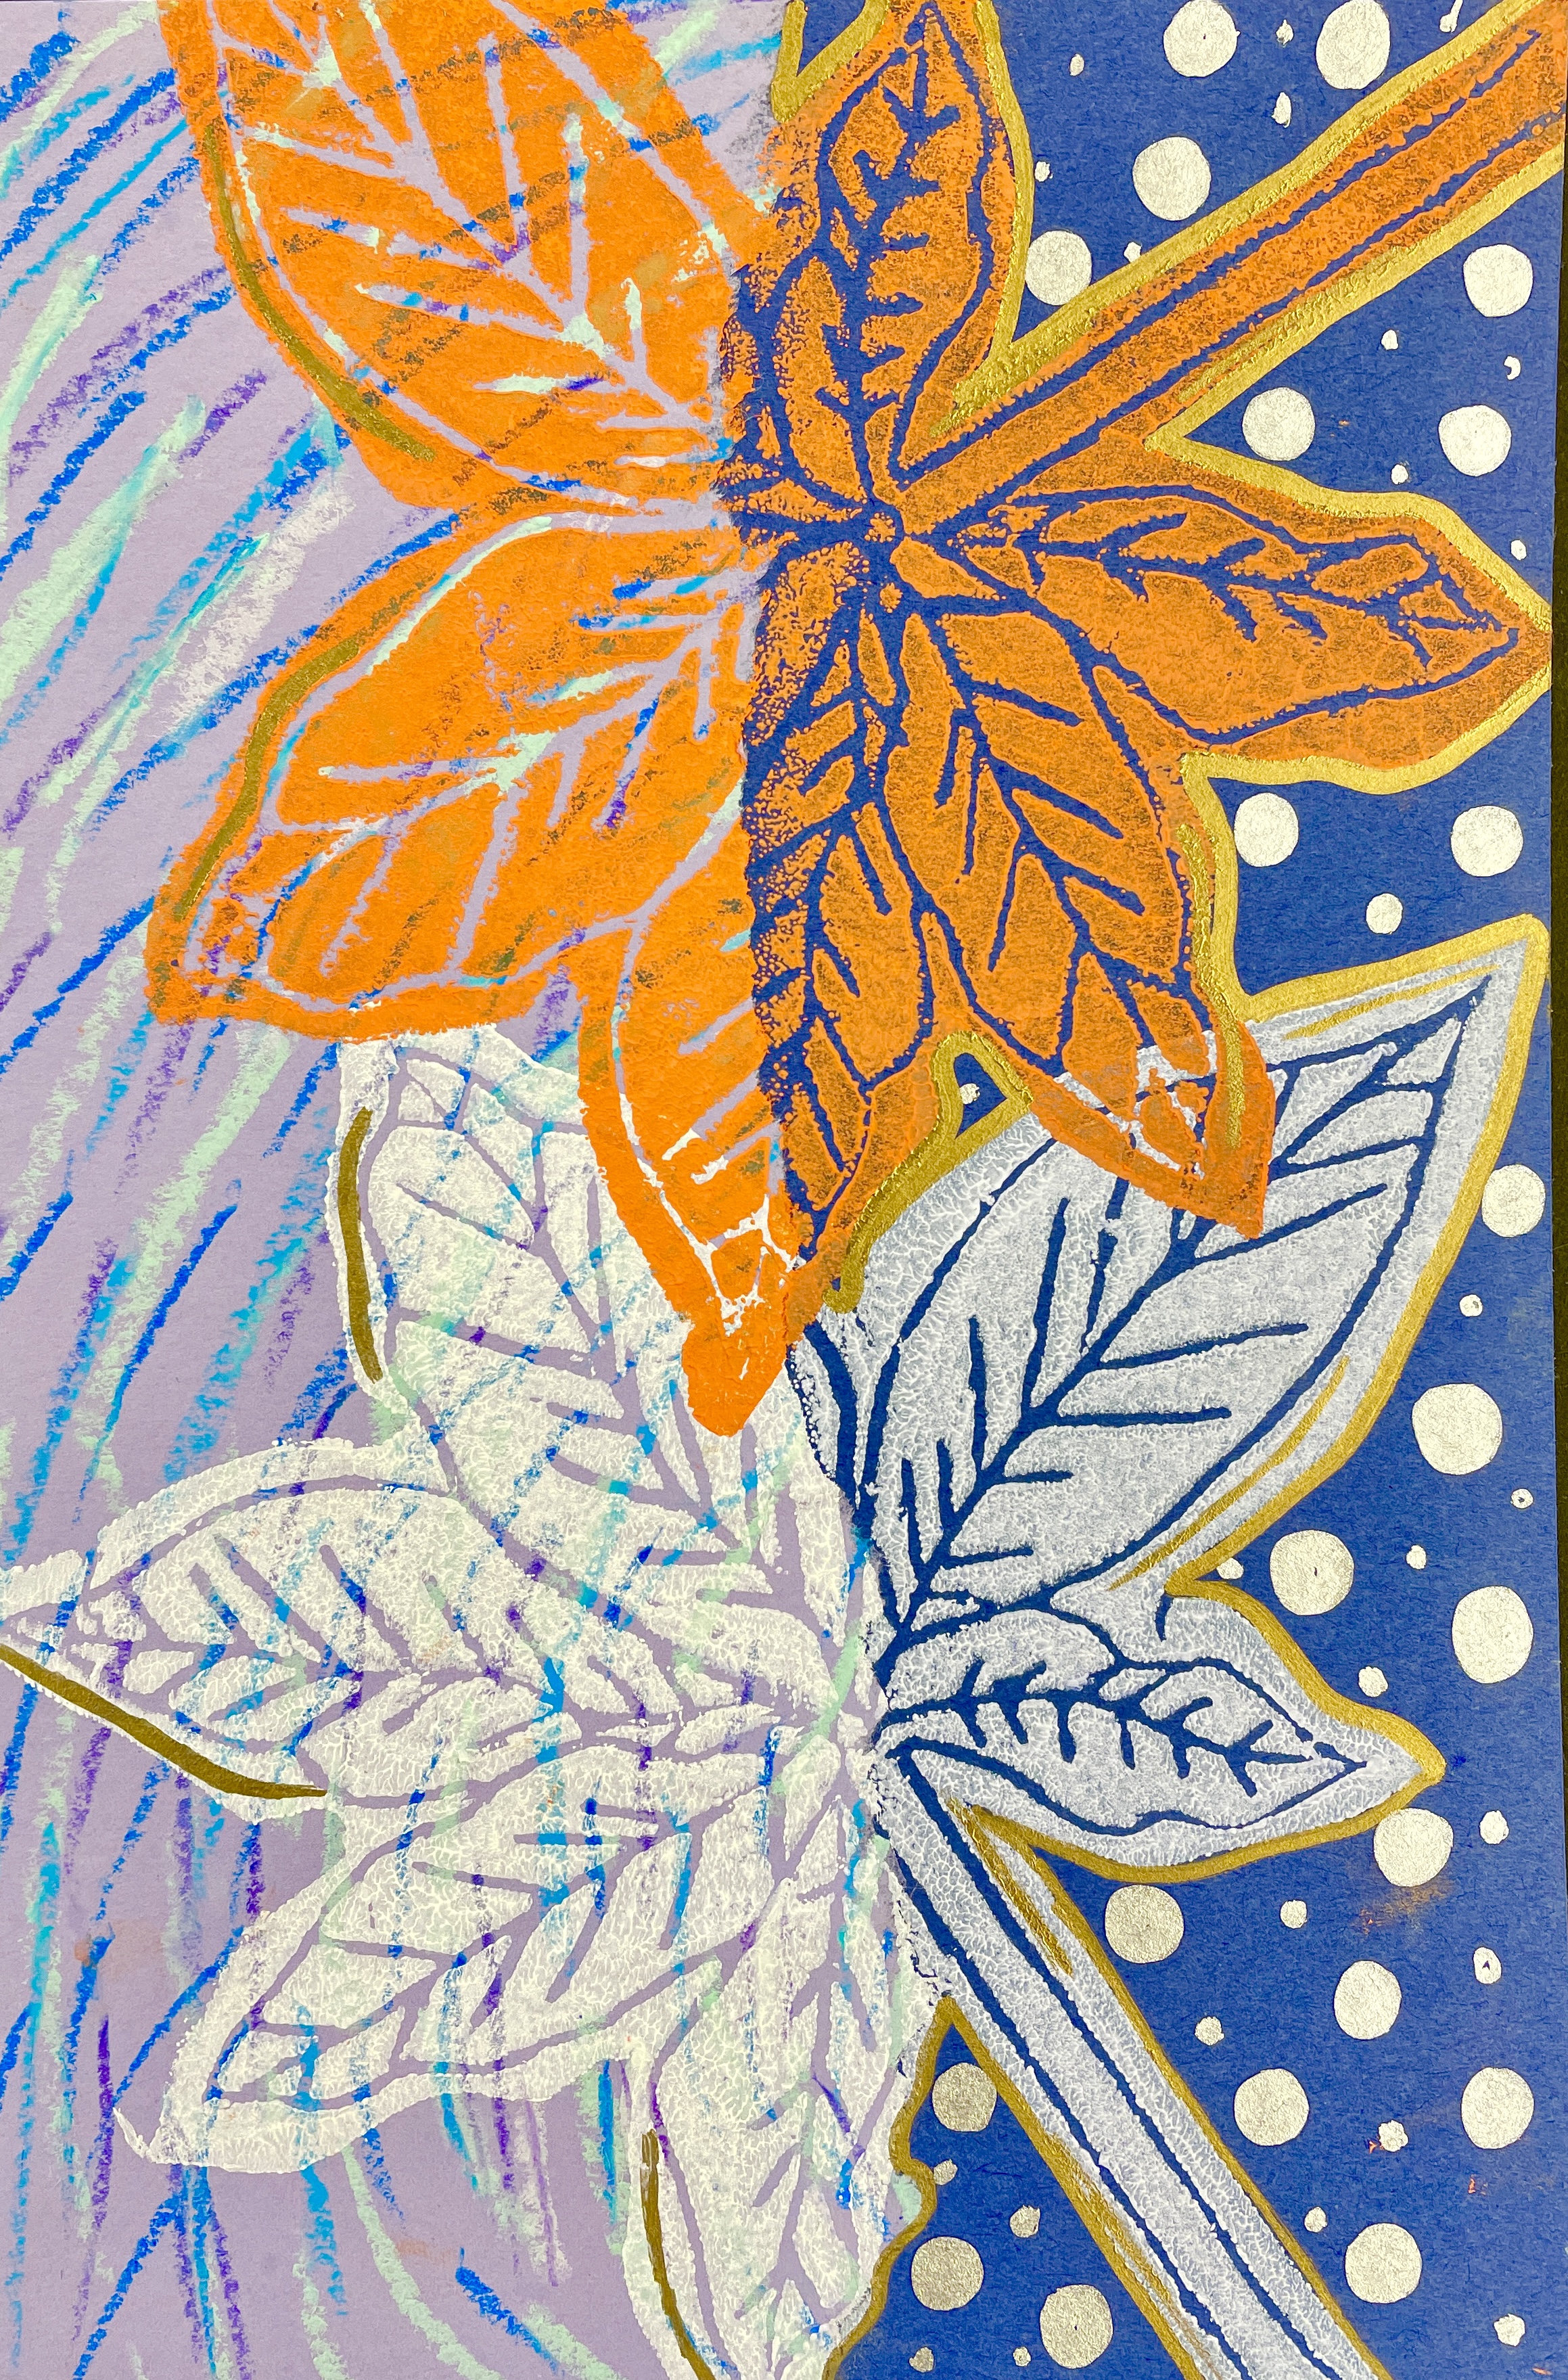
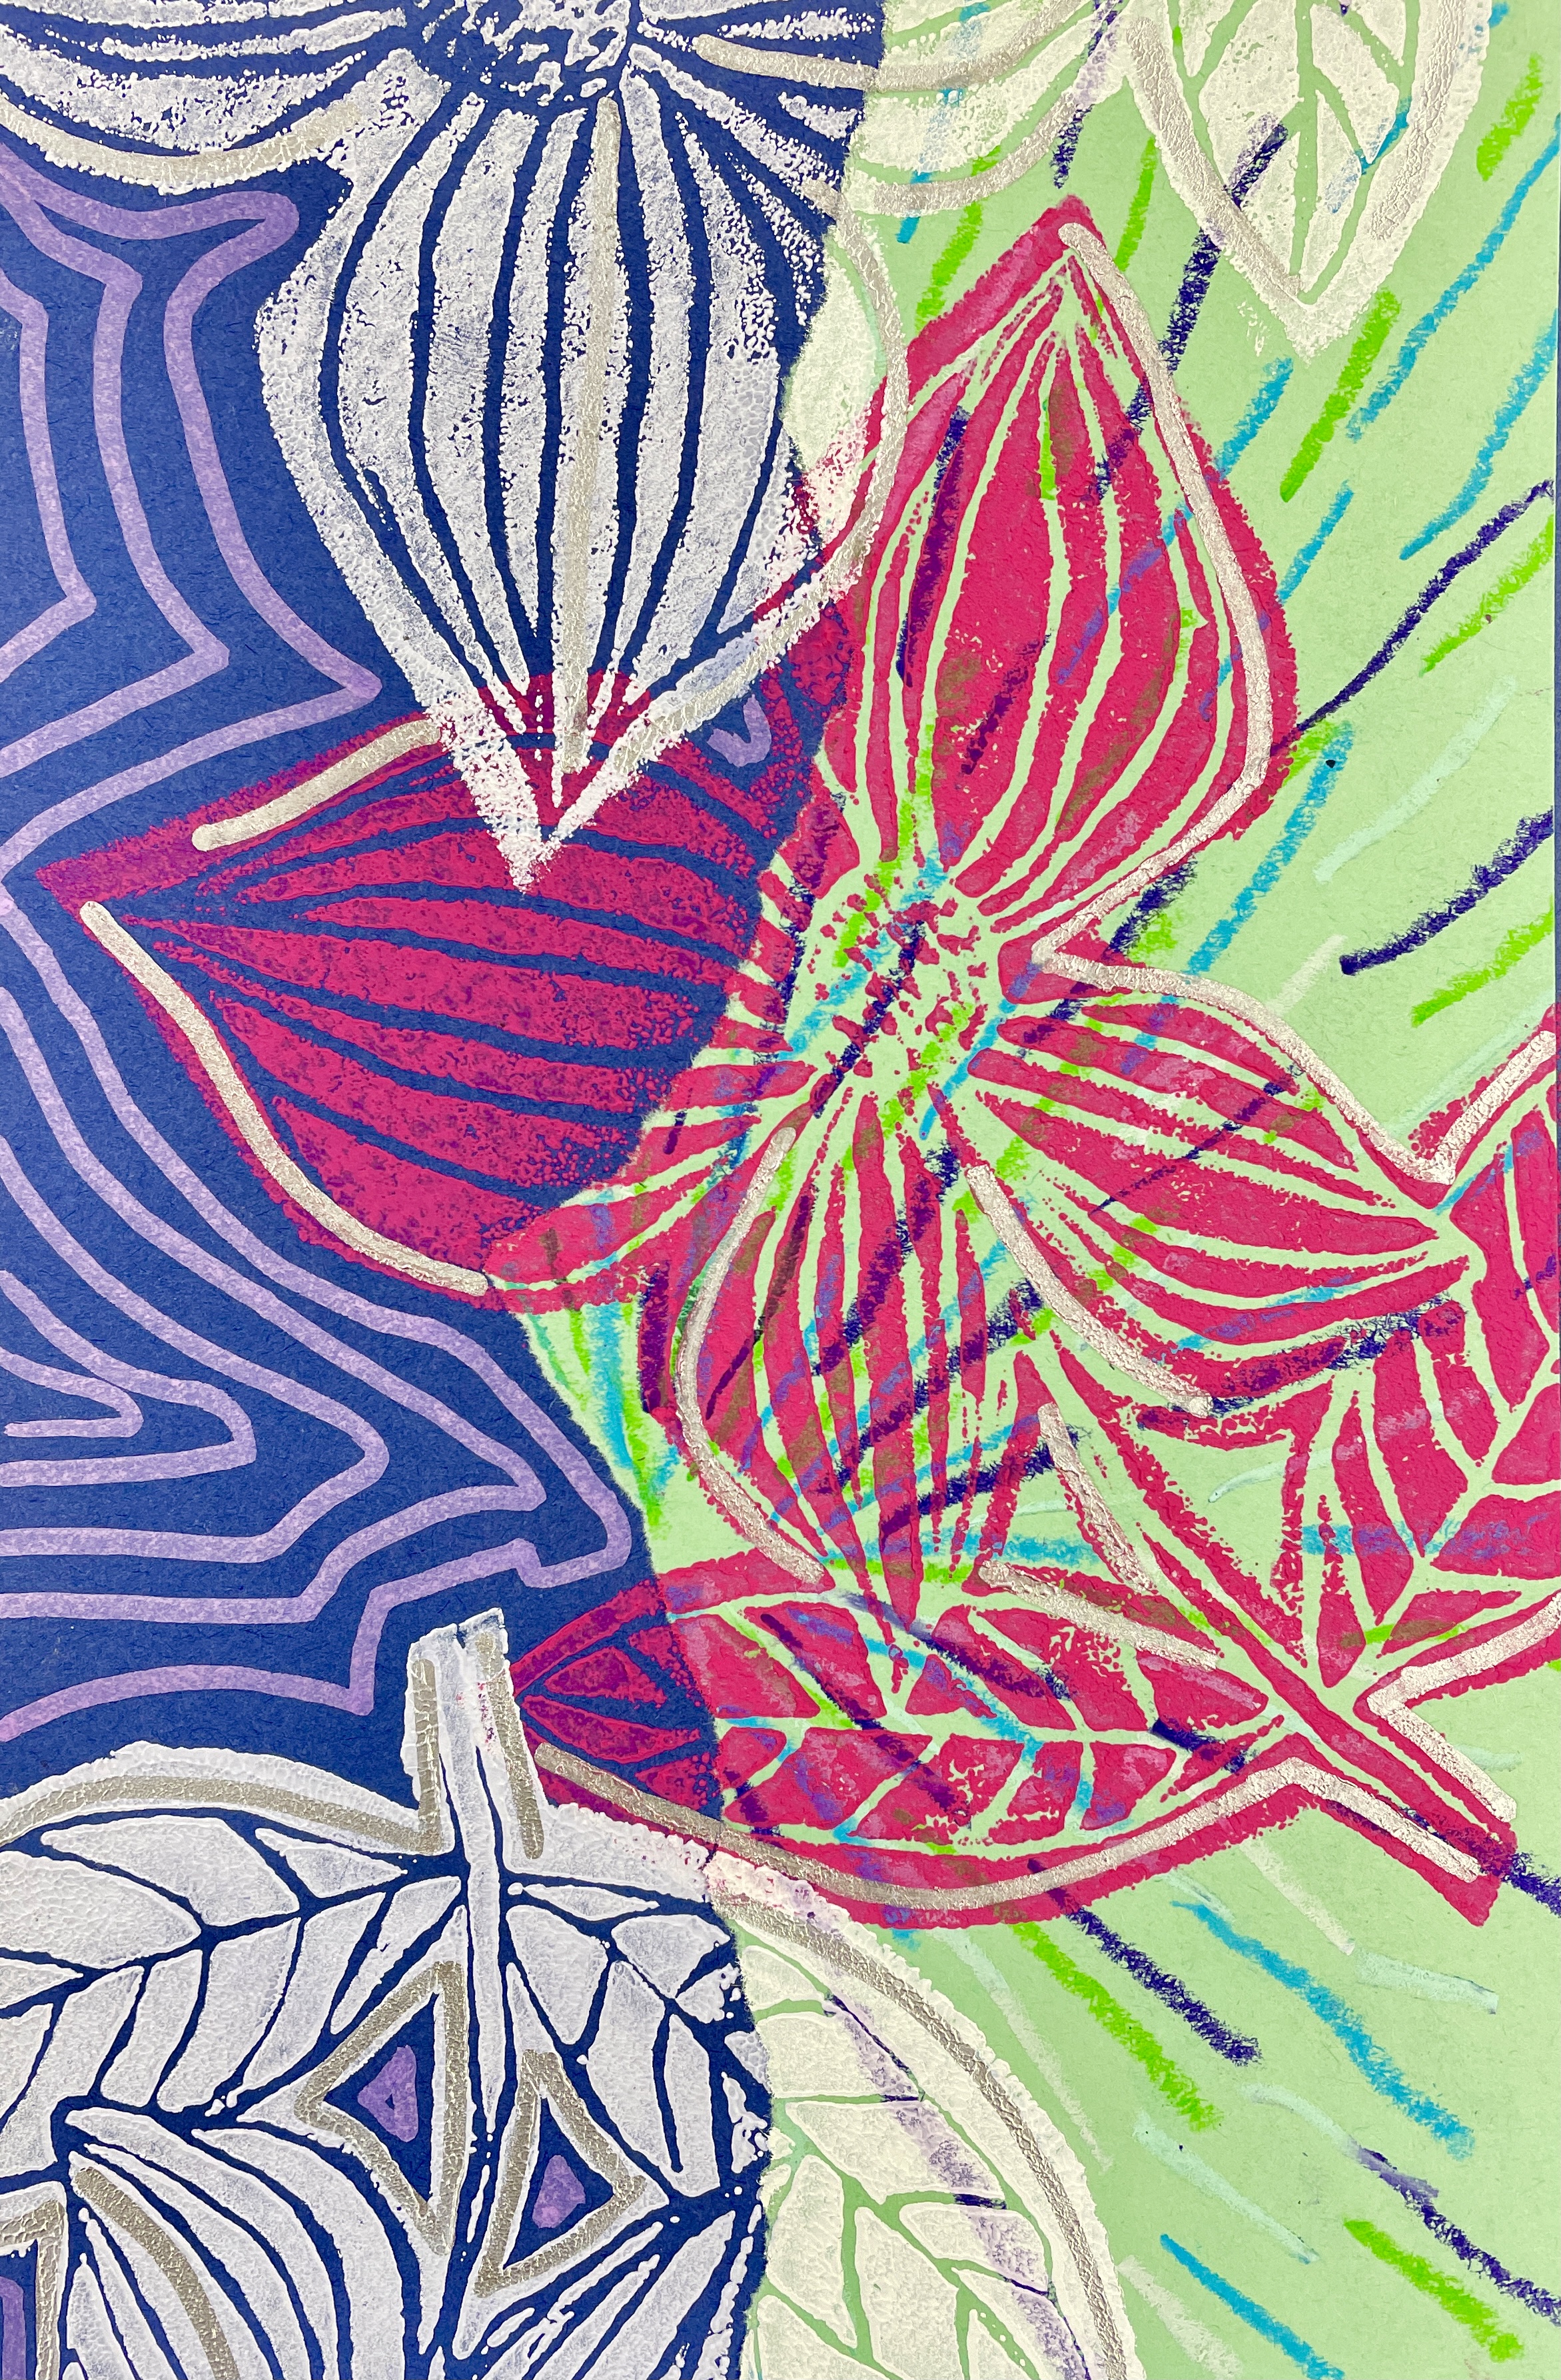
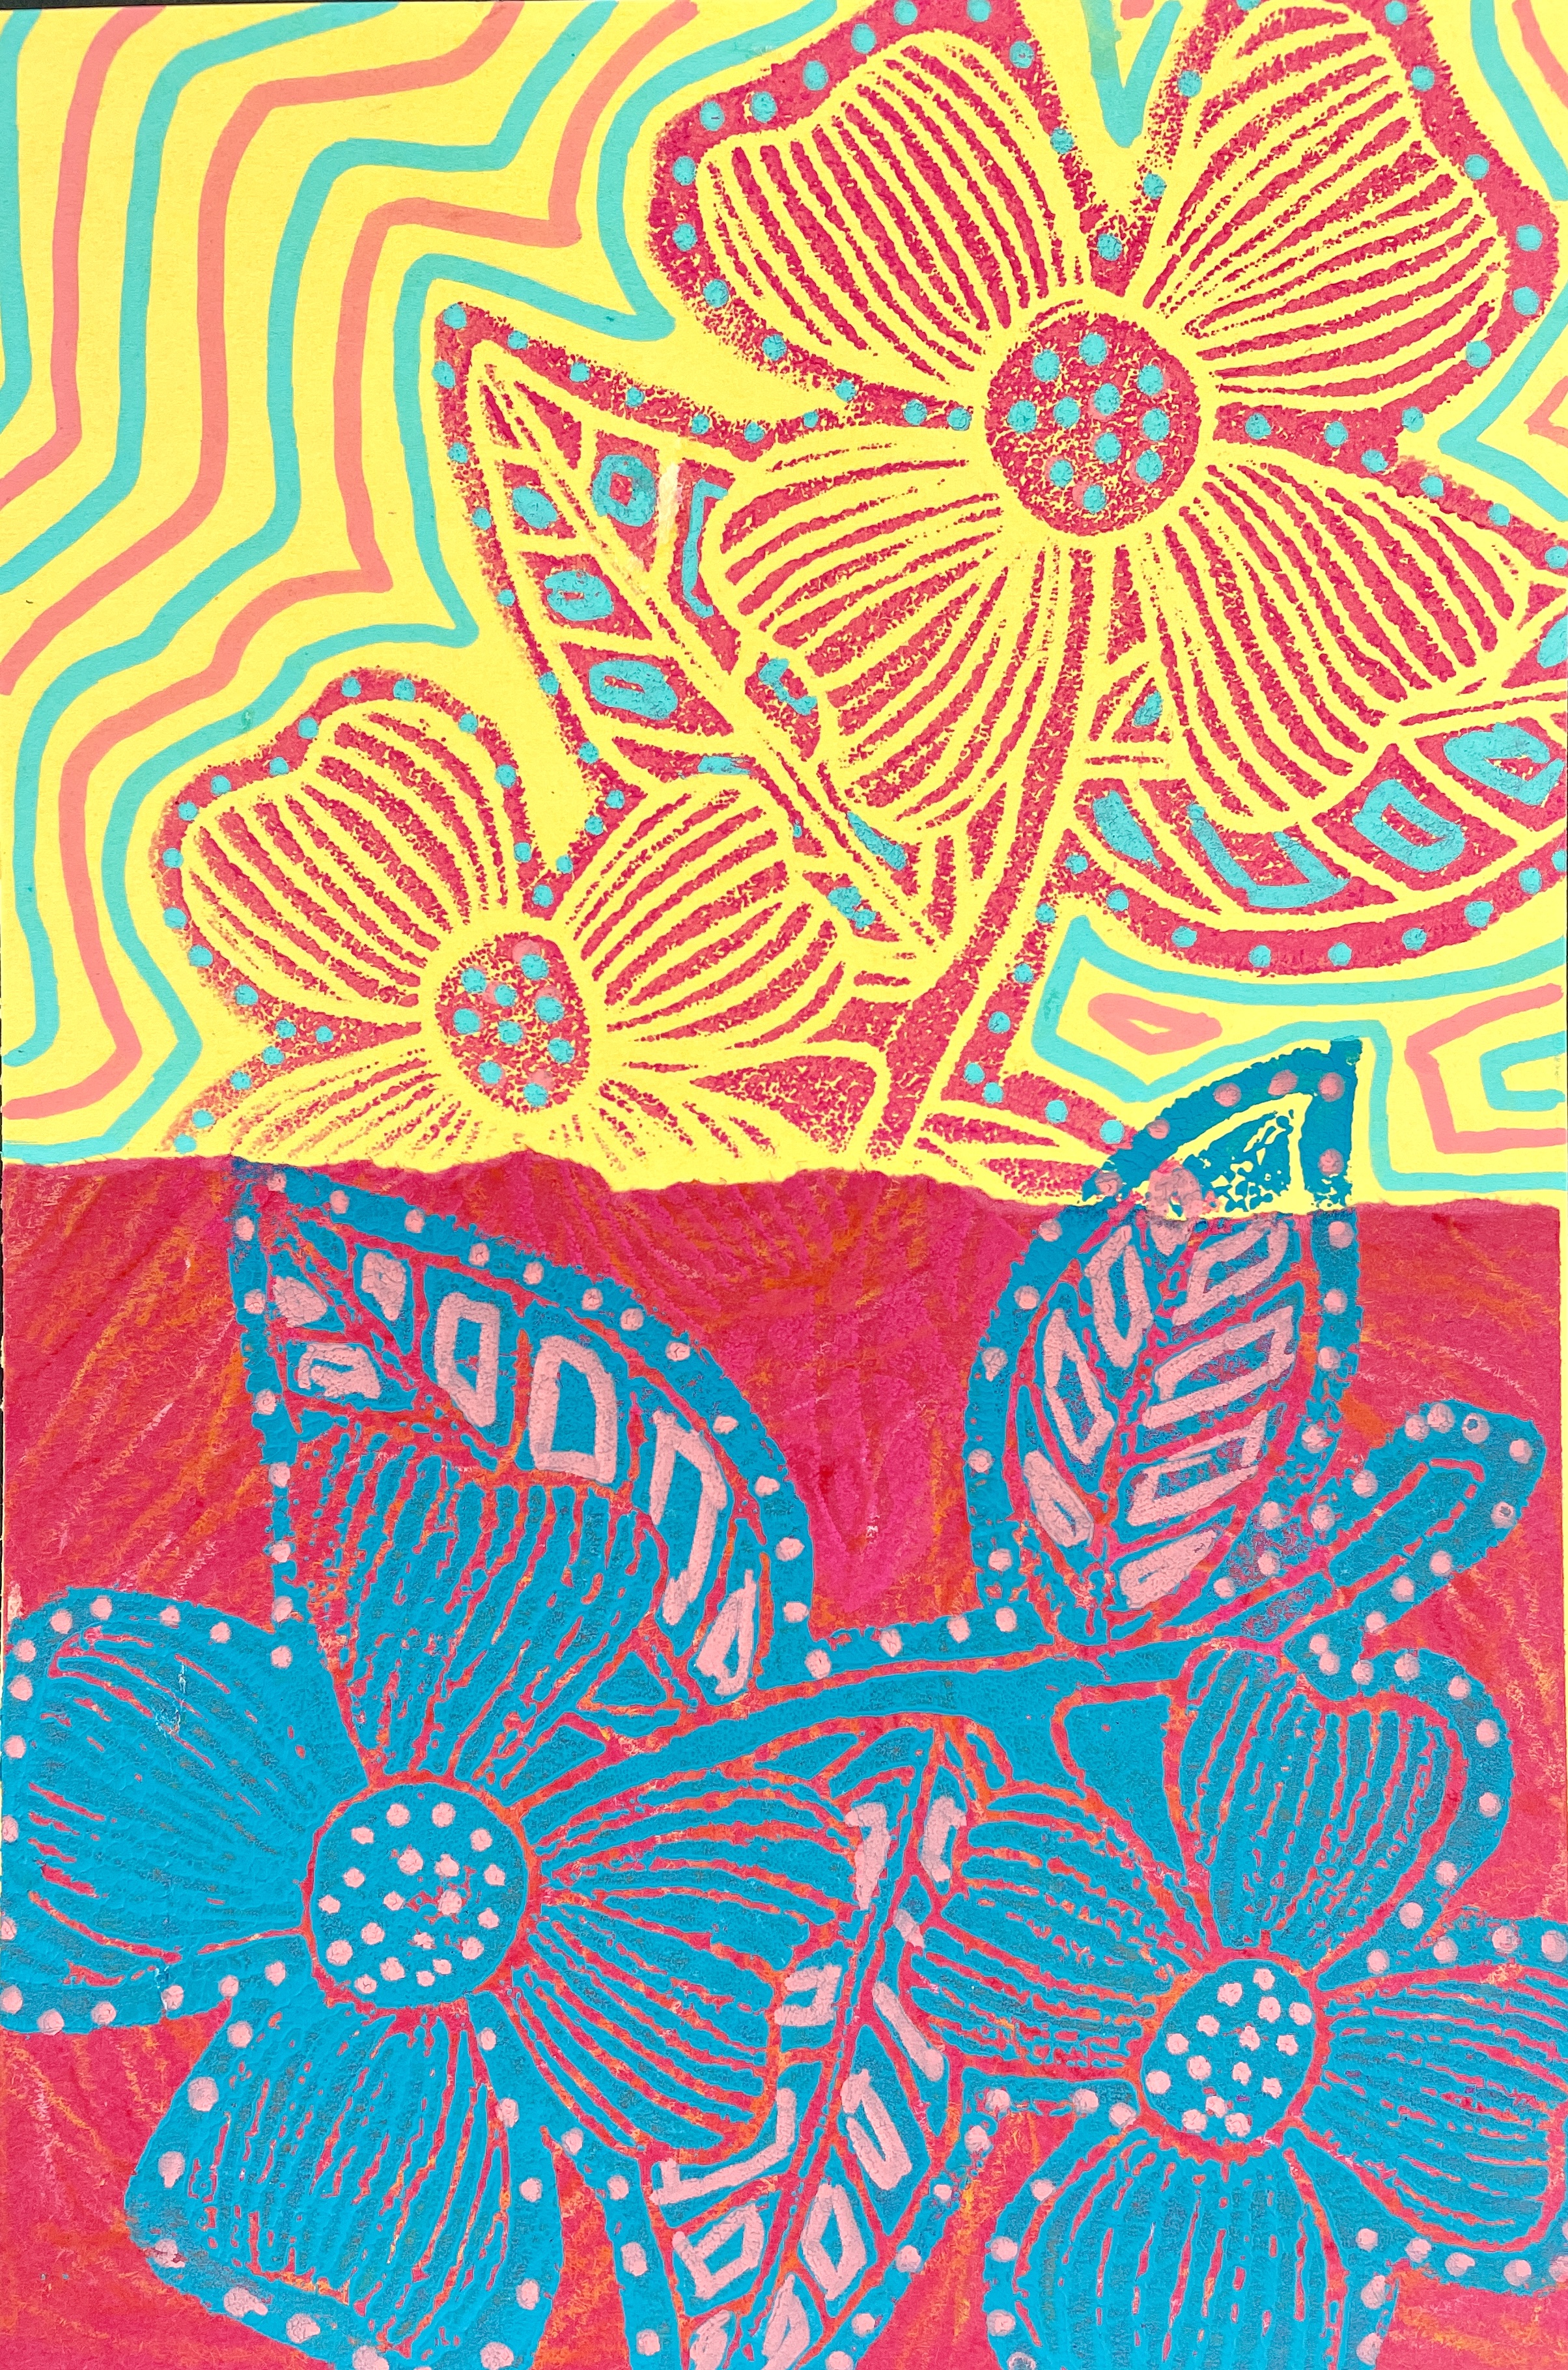
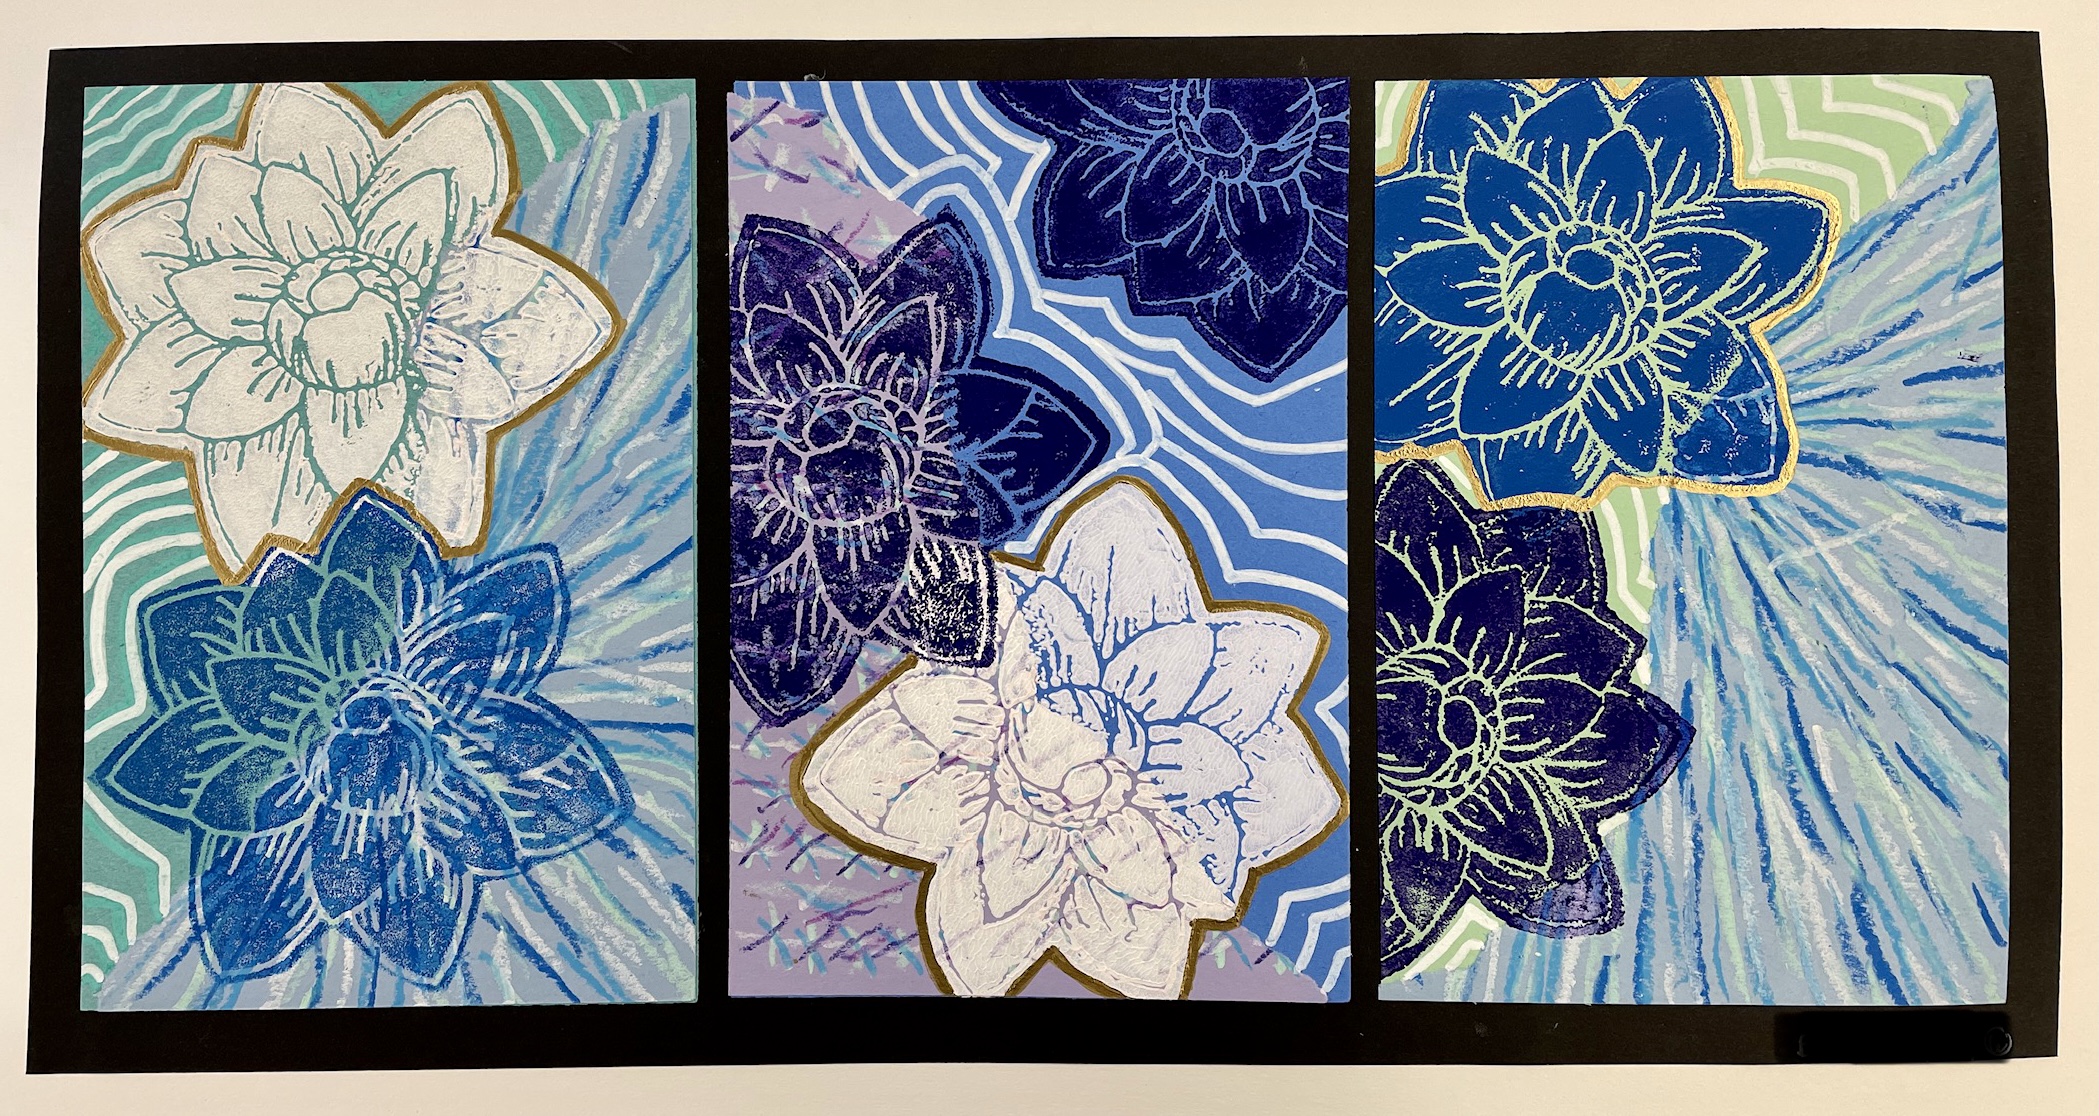
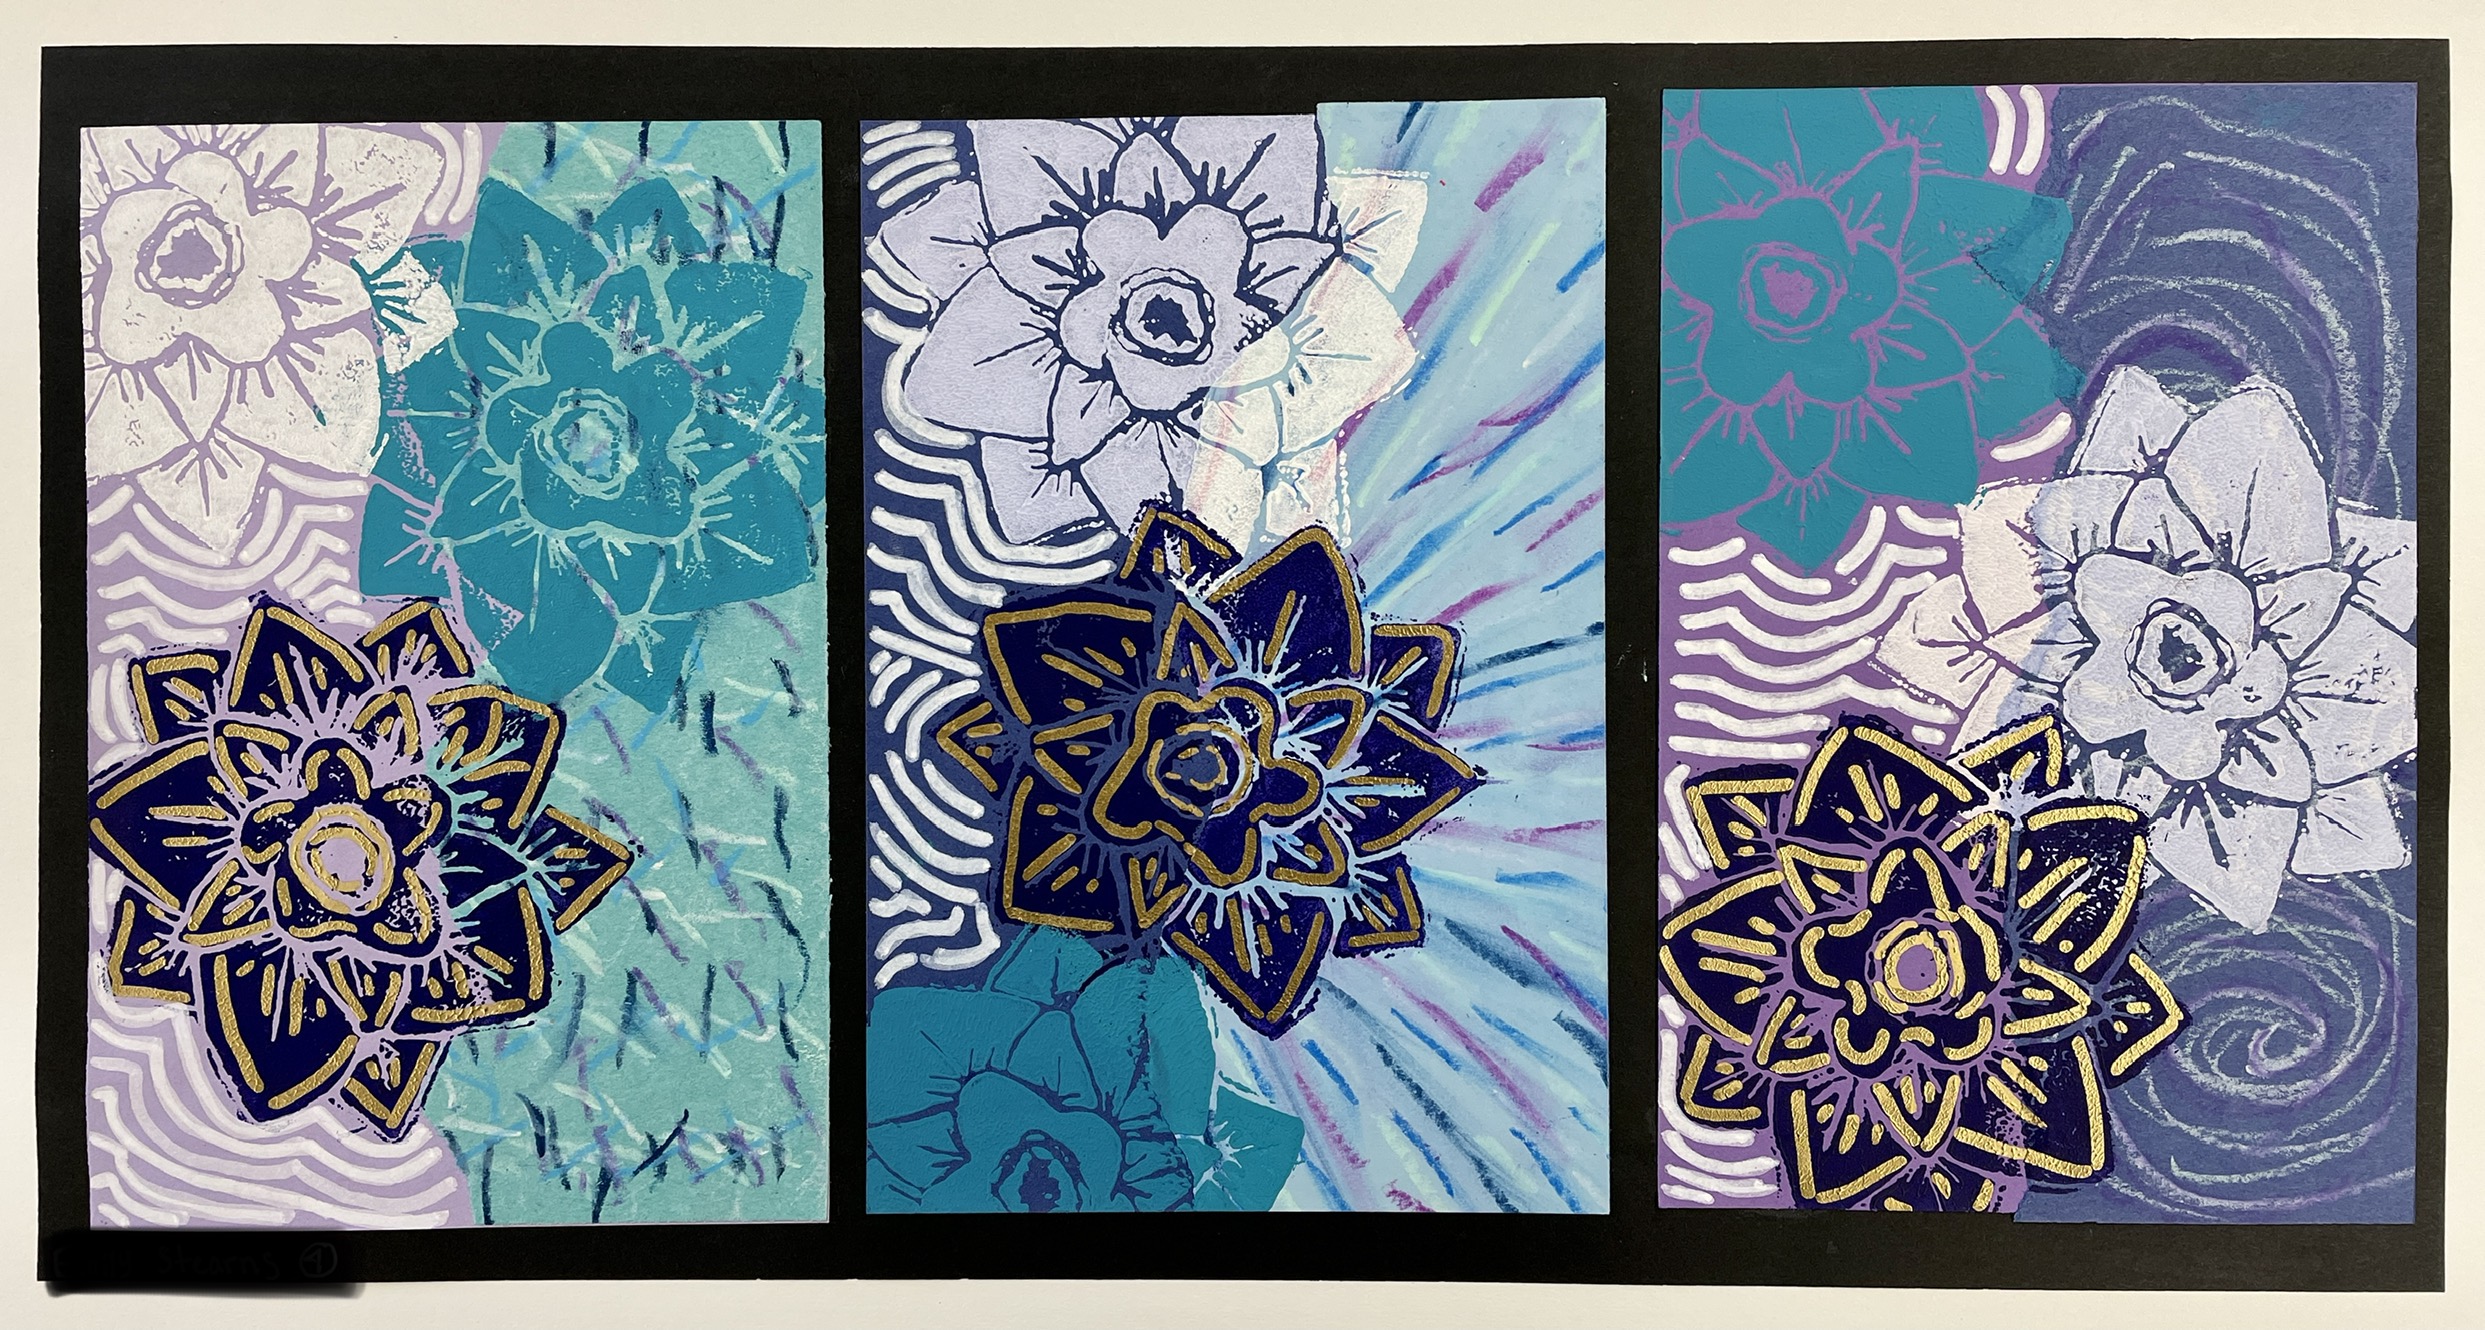
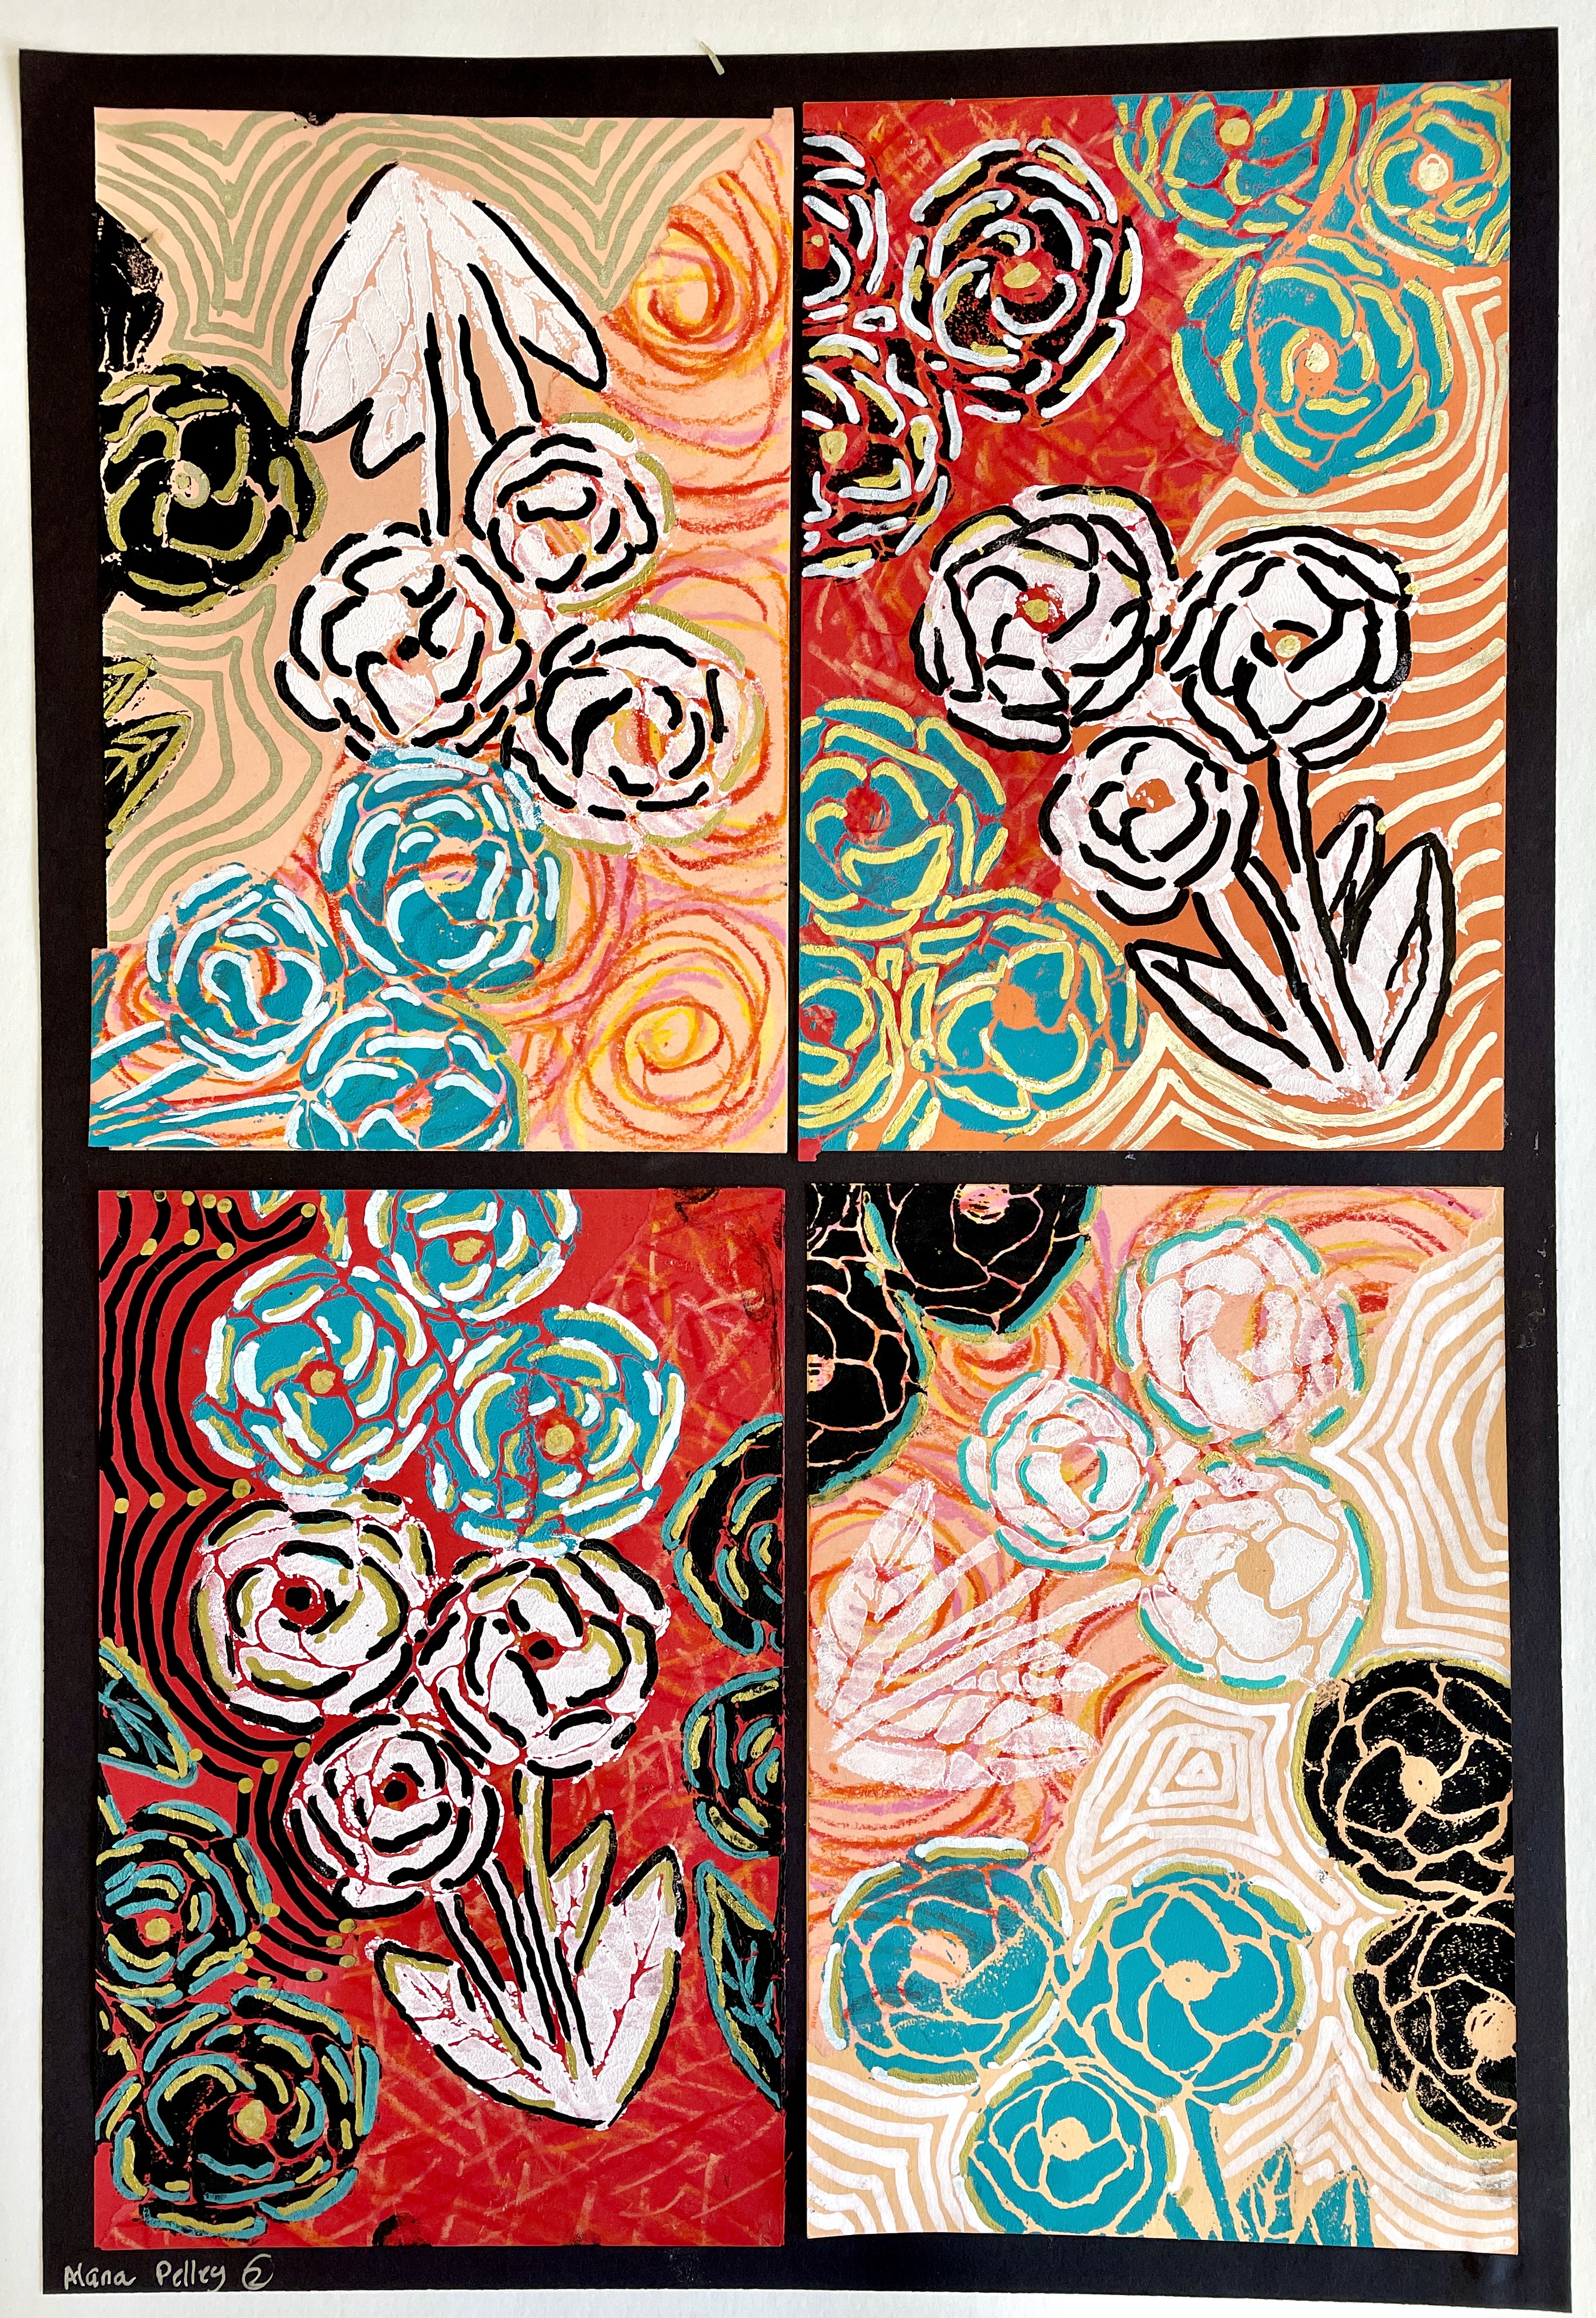
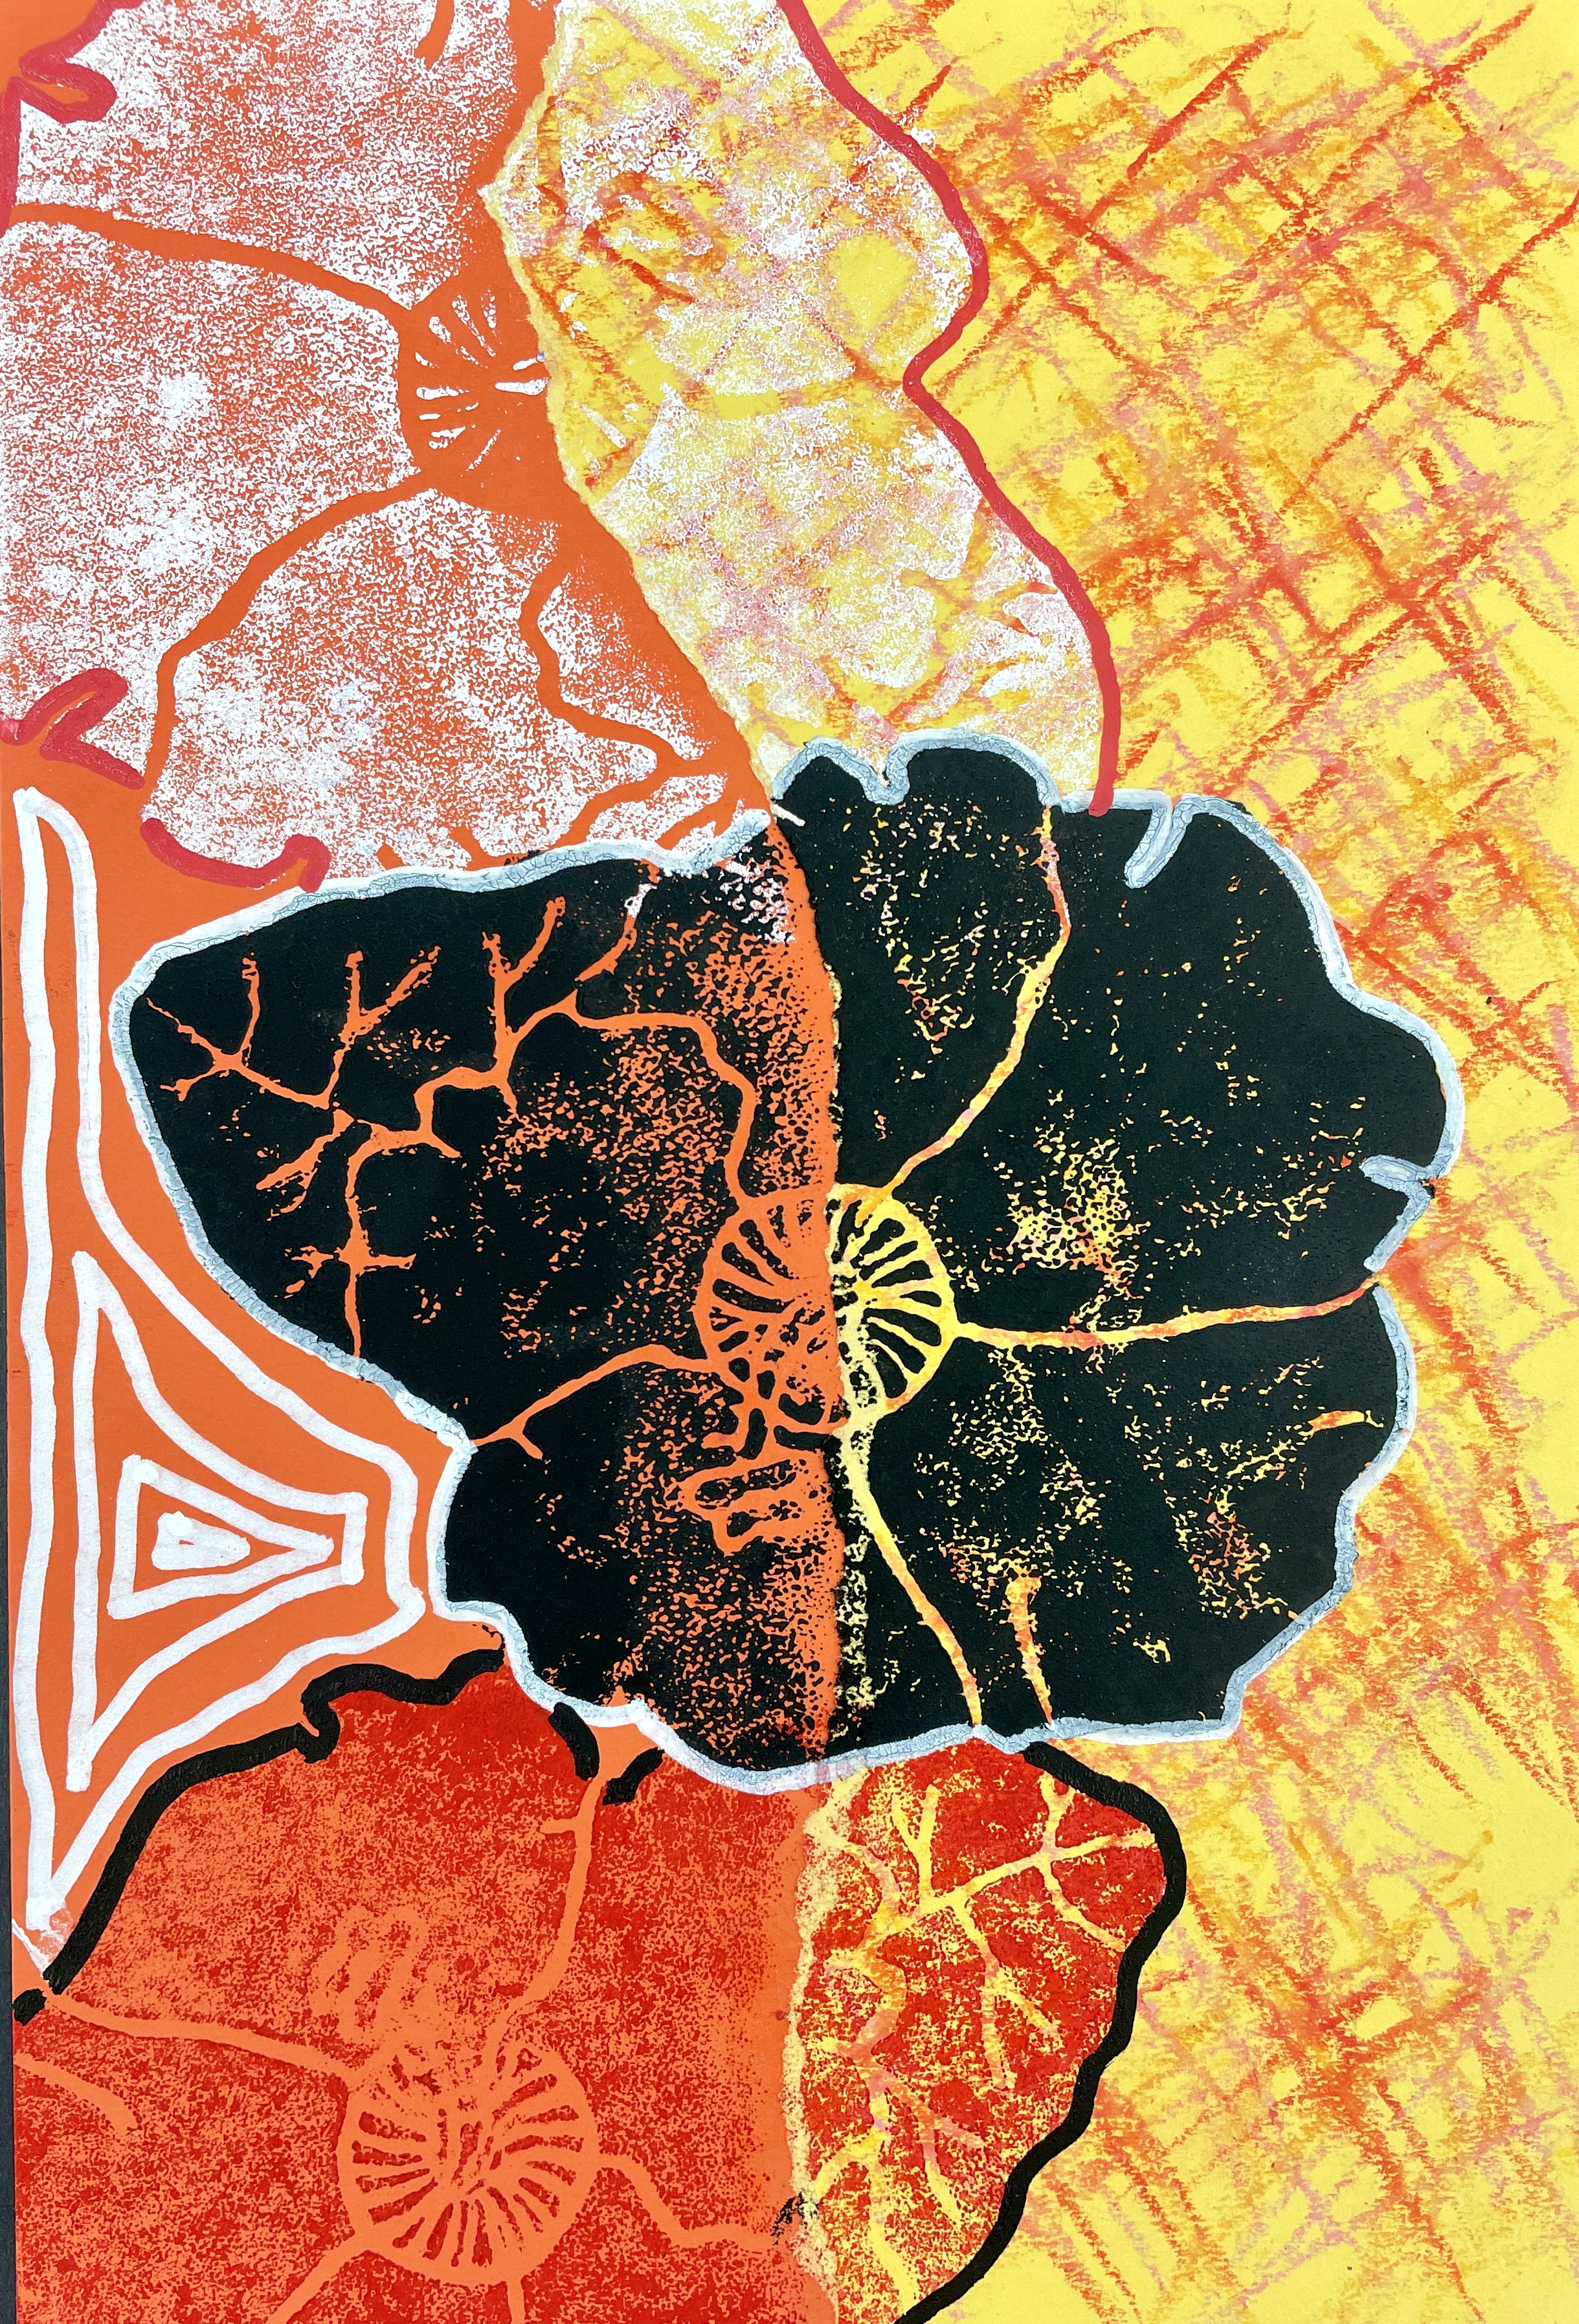
SUMMARY: We began this lesson by creating a series of oil pastel-patterned papers. Working with distinct warm or cool color schemes, the students created a total of four patterned rectangles with different mark-making techniques. We then tore each paper in half and glued it onto a solid piece of colored paper, creating a total of eight collaged papers on which to print. For this portion of the lesson, students had to stick to either a cool or warm color scheme. Next, we created nature-inspired printing plates on thin Styrofoam, which we rolled with various colors of ink and printed repeatedly on the collaged papers. (The kids were allowed to break free of their warm/cool color scheme at this point!) After several classes of printing, students selected their favorite three or four prints and embellished them with metallic pens, color pencil, and/or glitter glue with the intent of visually tying together their best prints. Students mounted their own prints on black paper, again focusing on how the individual prints could be displayed together to suggest balance and unity.
February 2024 update: Here is a new GOOGLE SLIDE PRESENTATION full of instructions, pictures, and videos that I use to help teach this lesson to my 7th grade students!
HERE’S A BREAK DOWN OF THE STEPS:
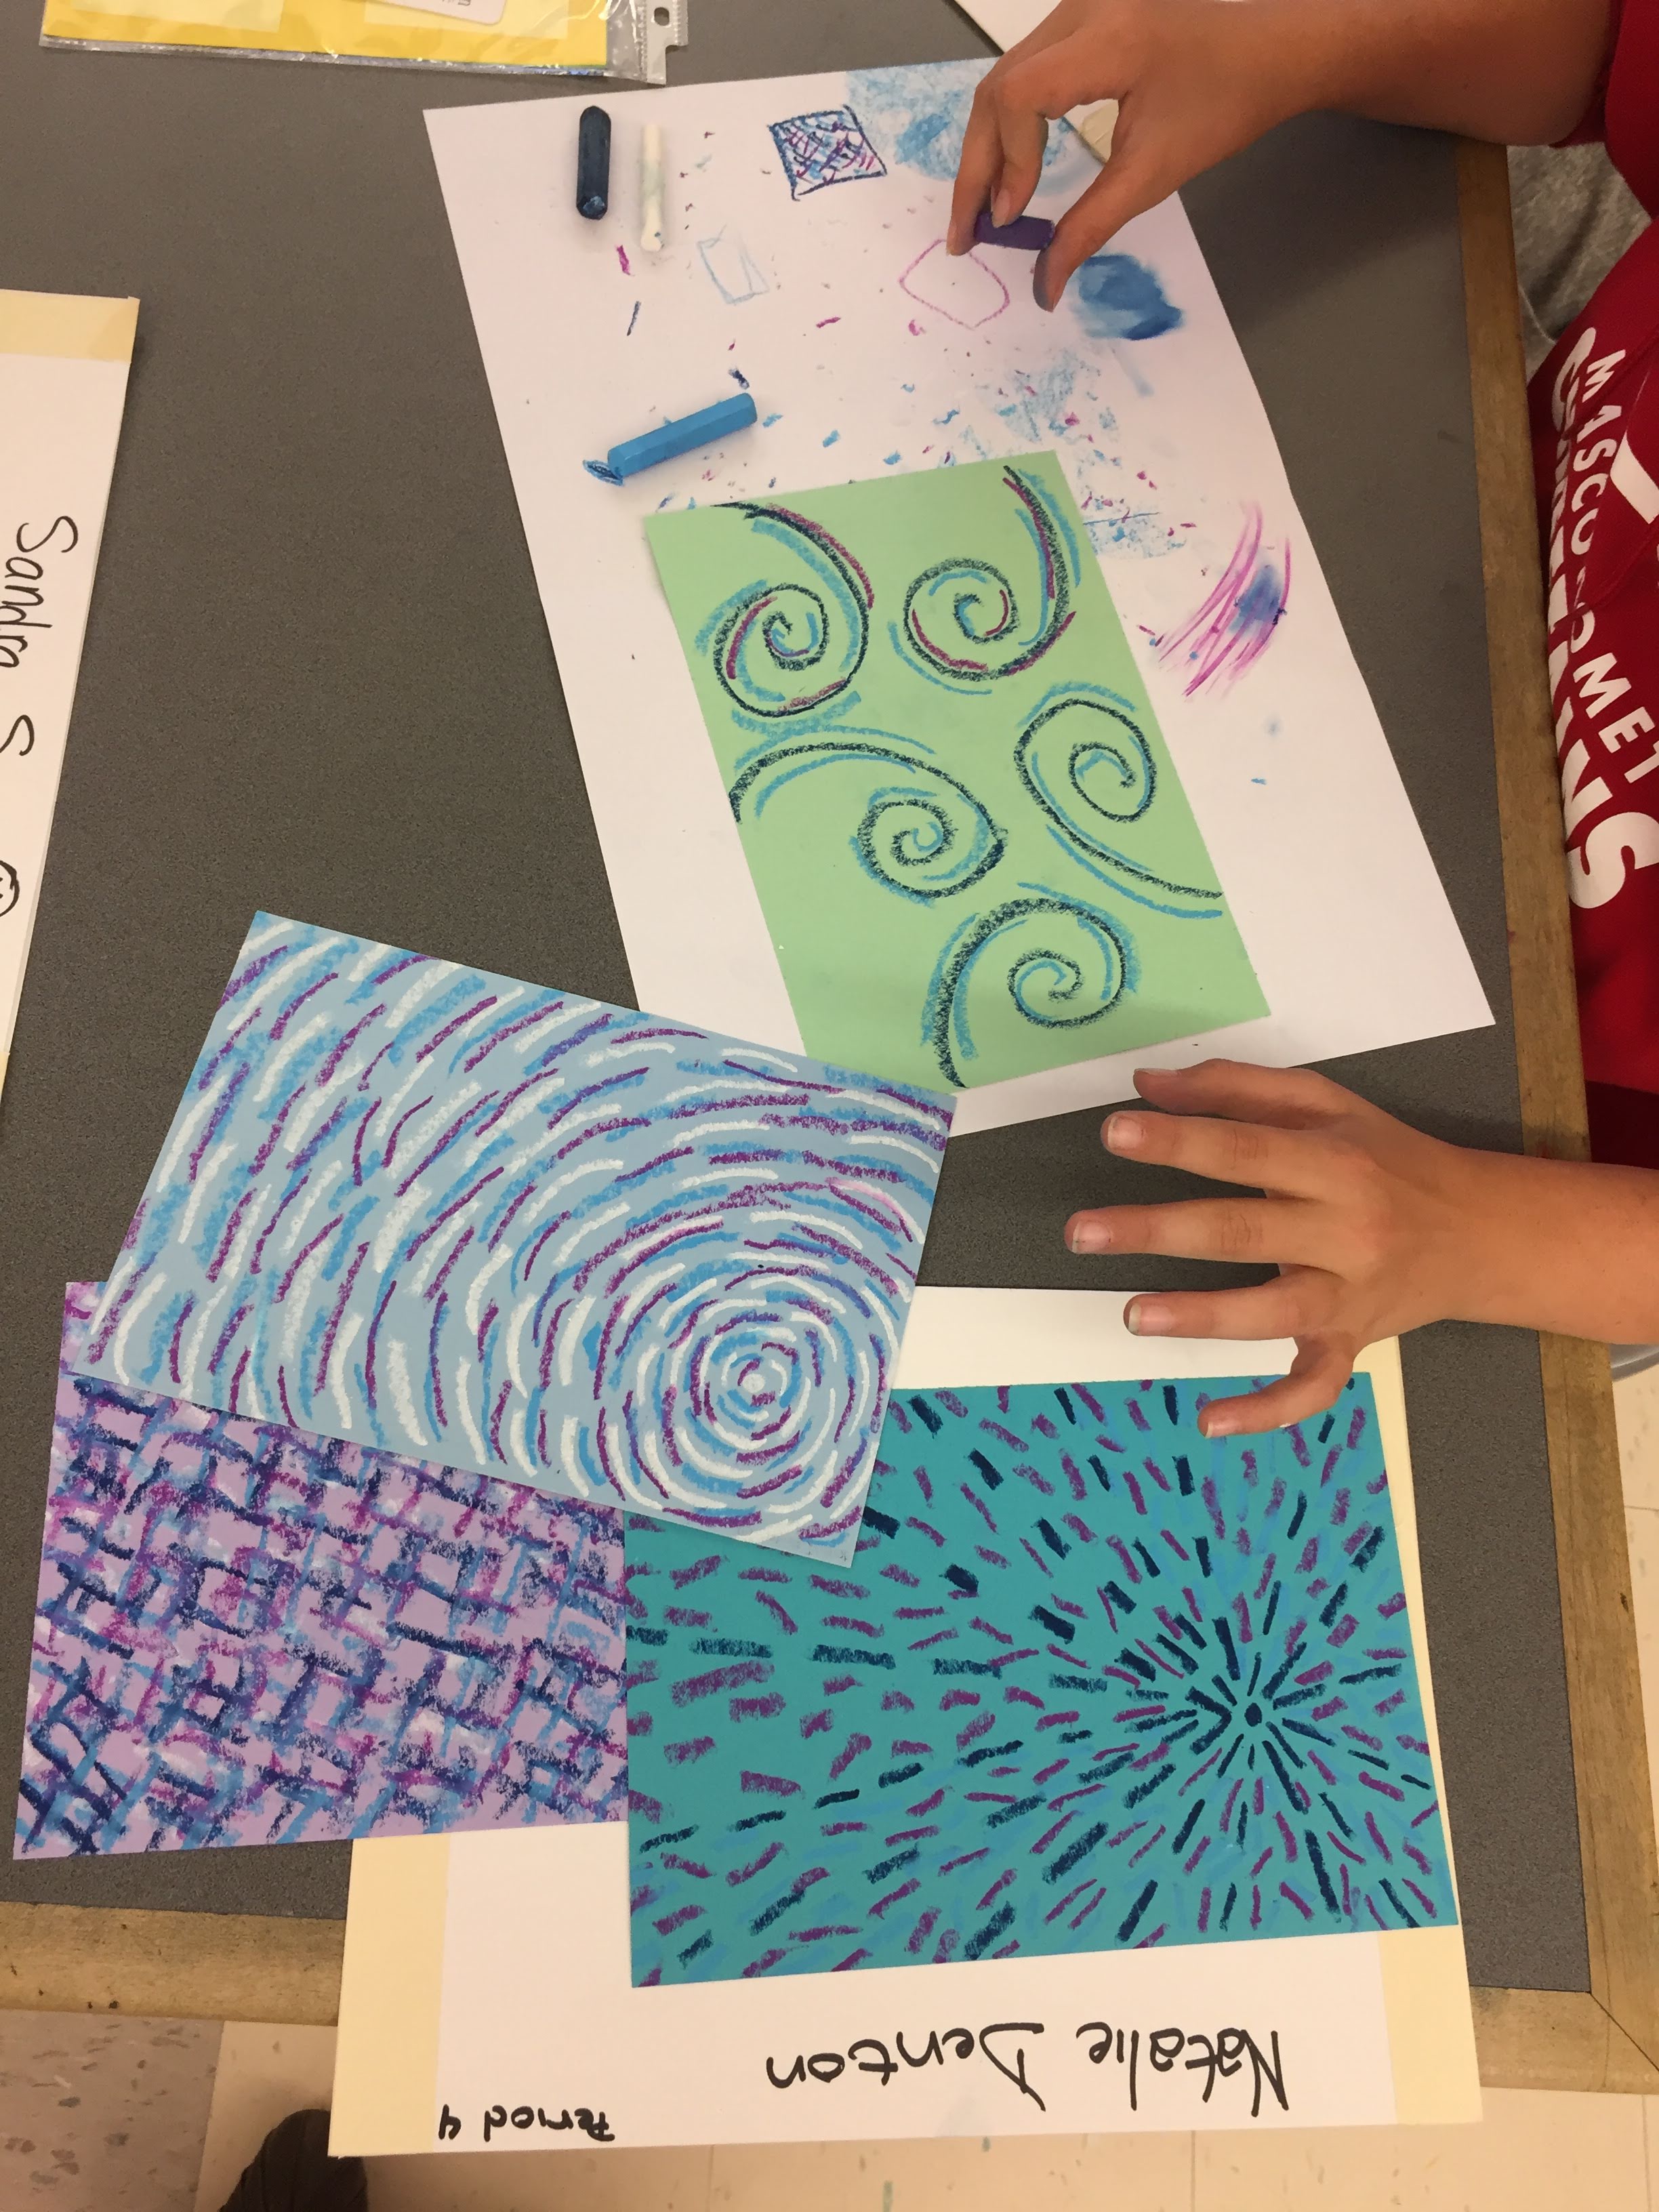
First students worked on their 6″ by 9″ colored papers, working with warm or cool colors to make a series of four patterned papers.
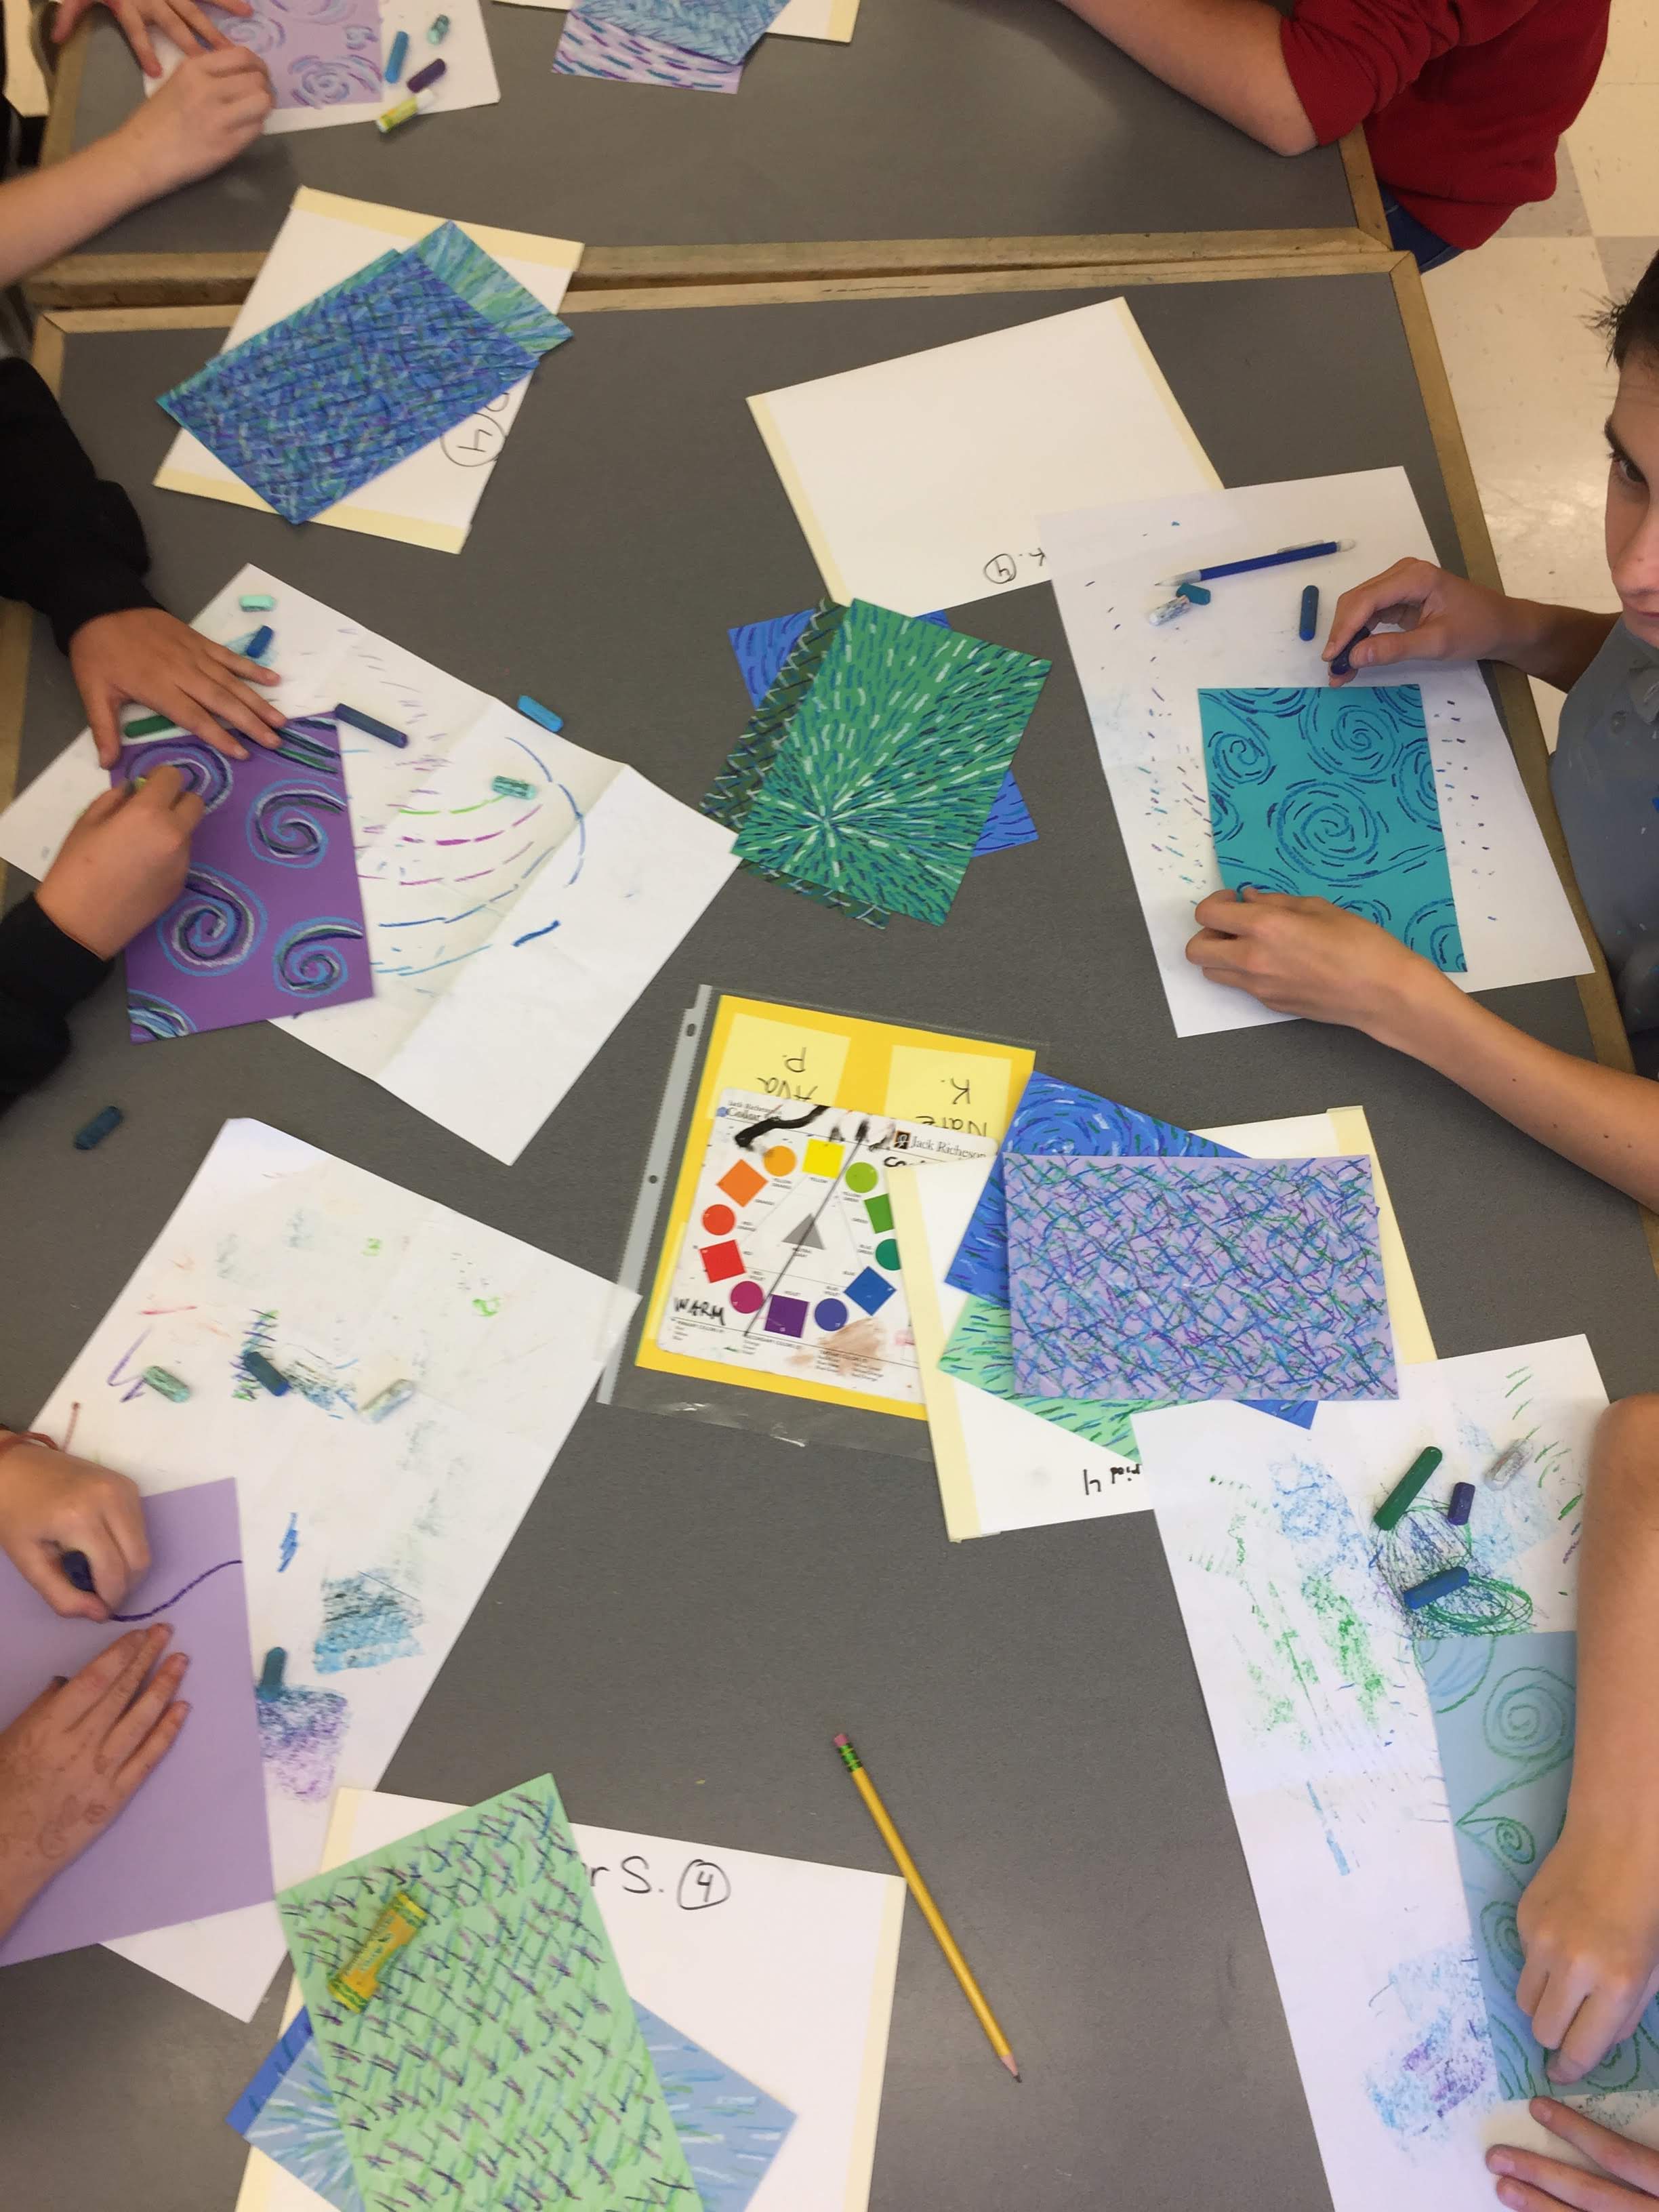
– – –
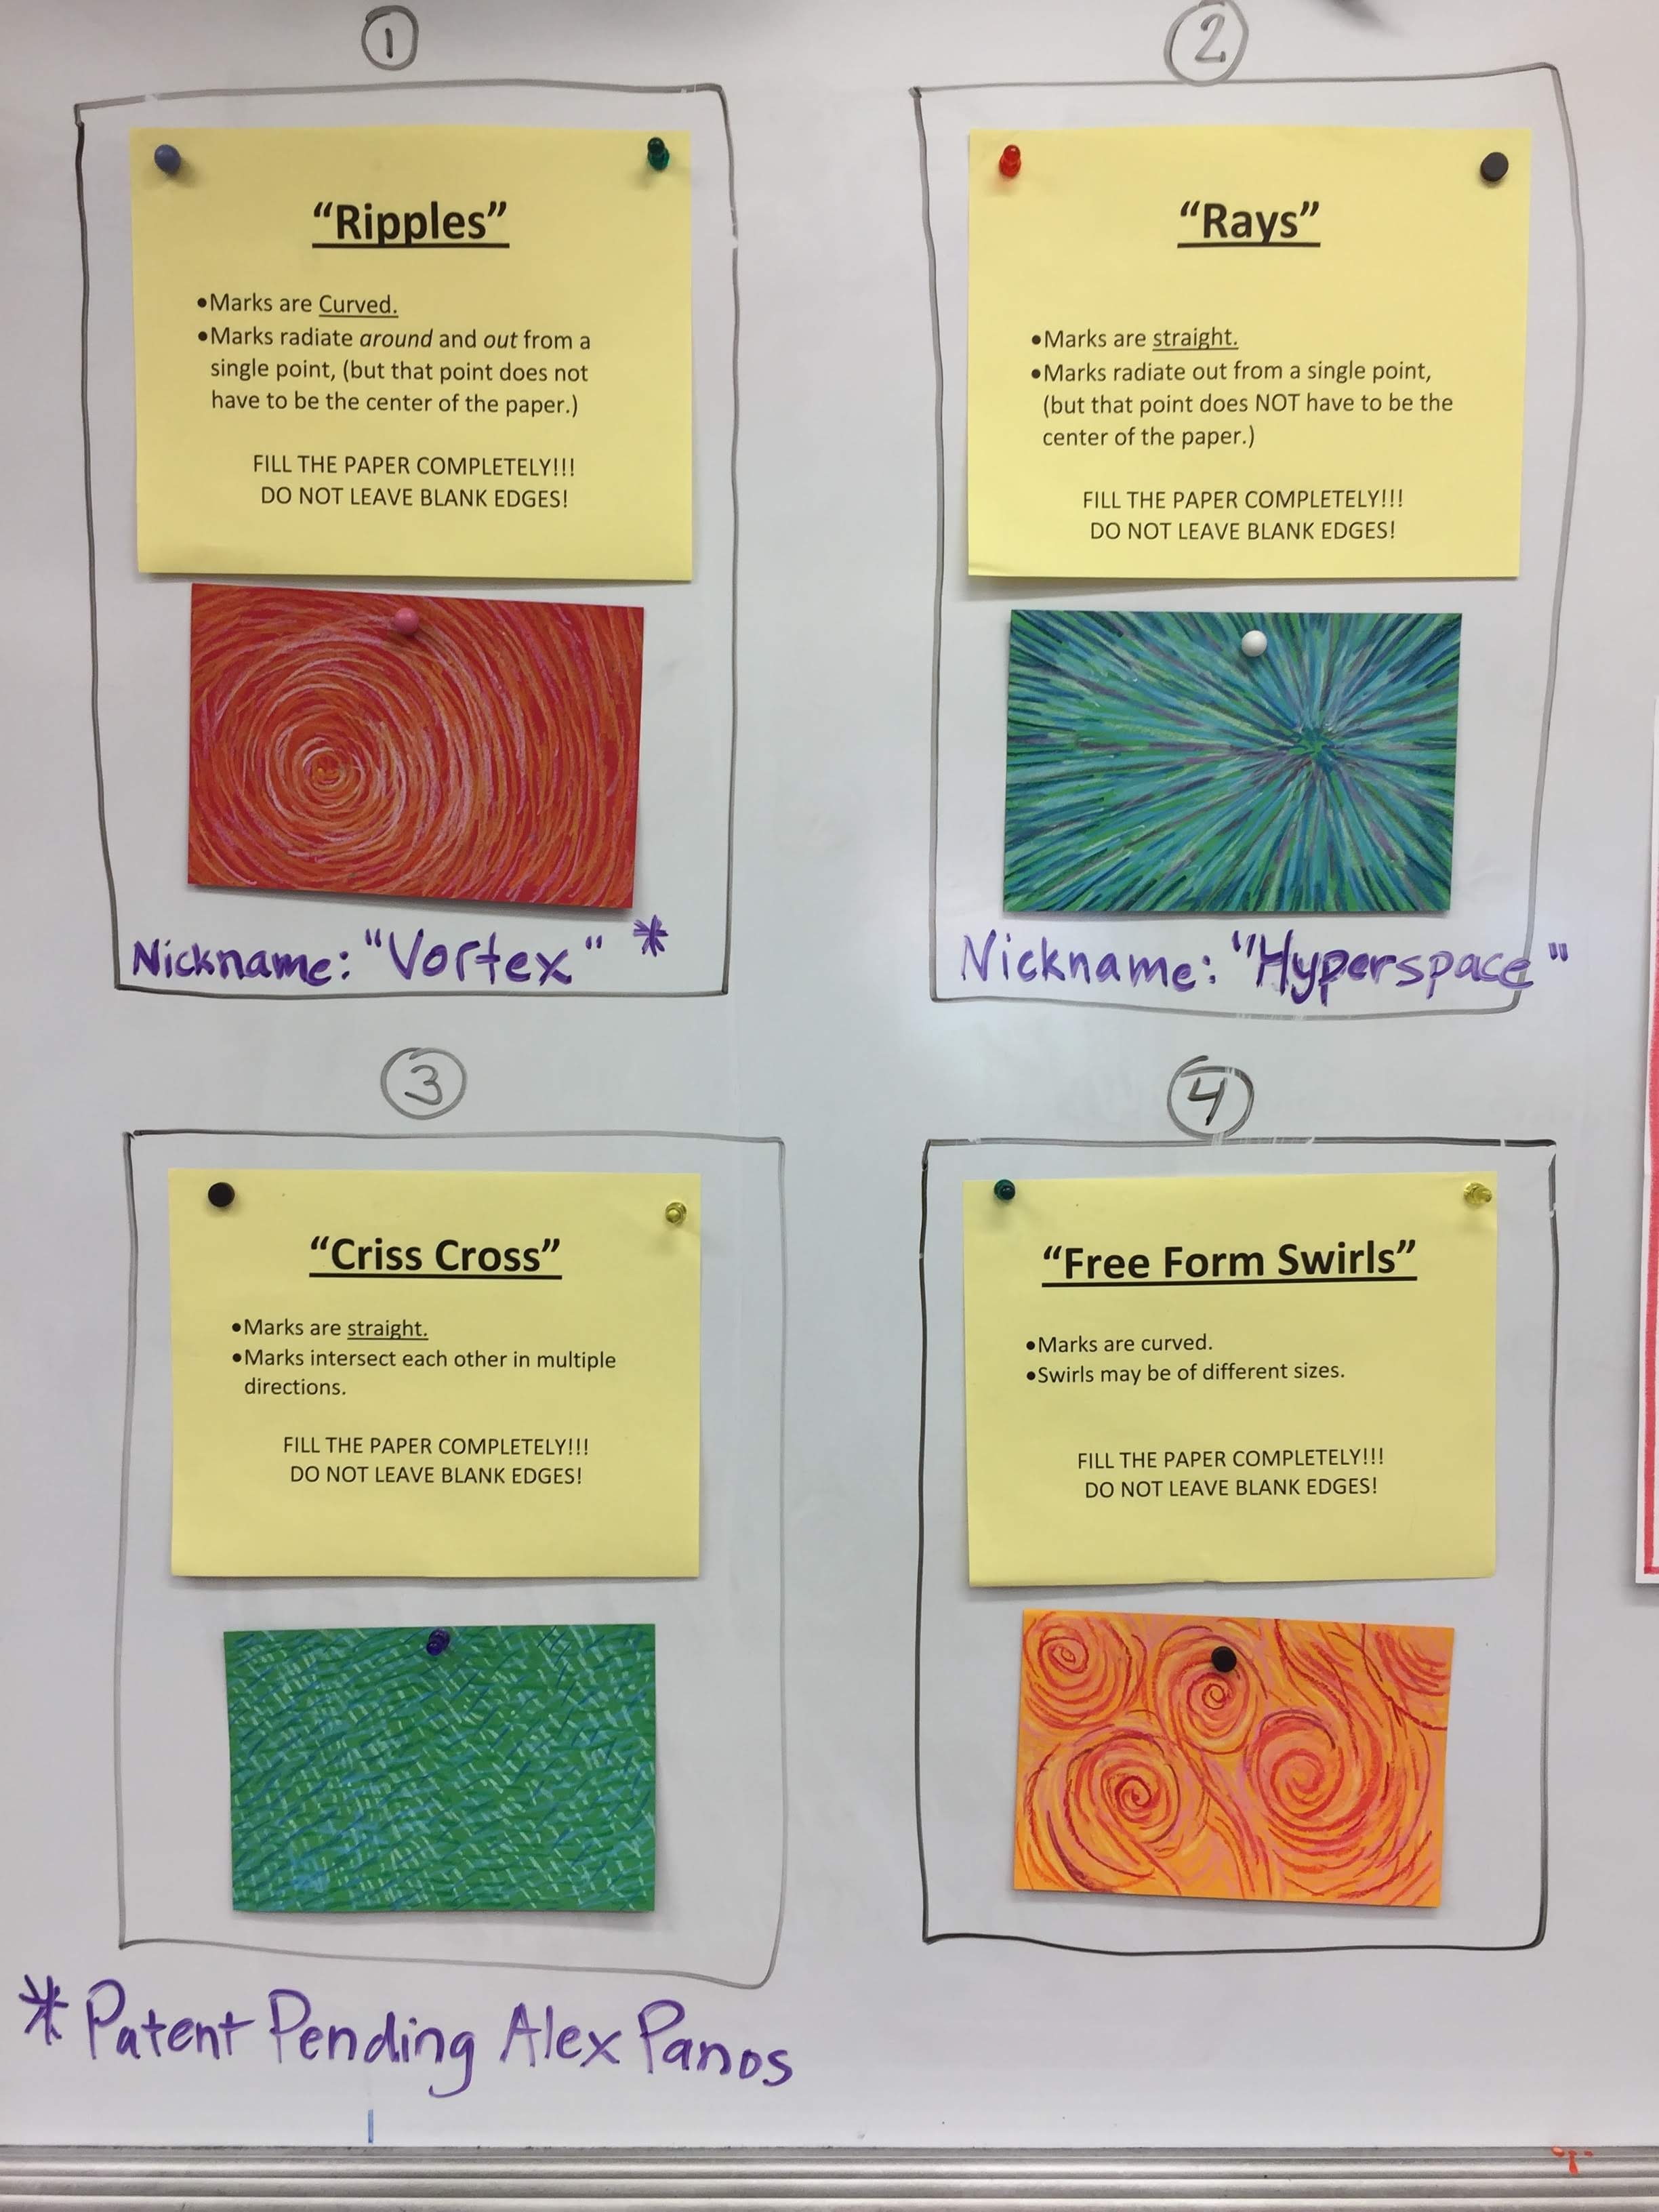
Here are the samples and instructions I have posted during this step! (Better visuals for sharing with your studentsa are in the Google Slide show link above.)
– – –
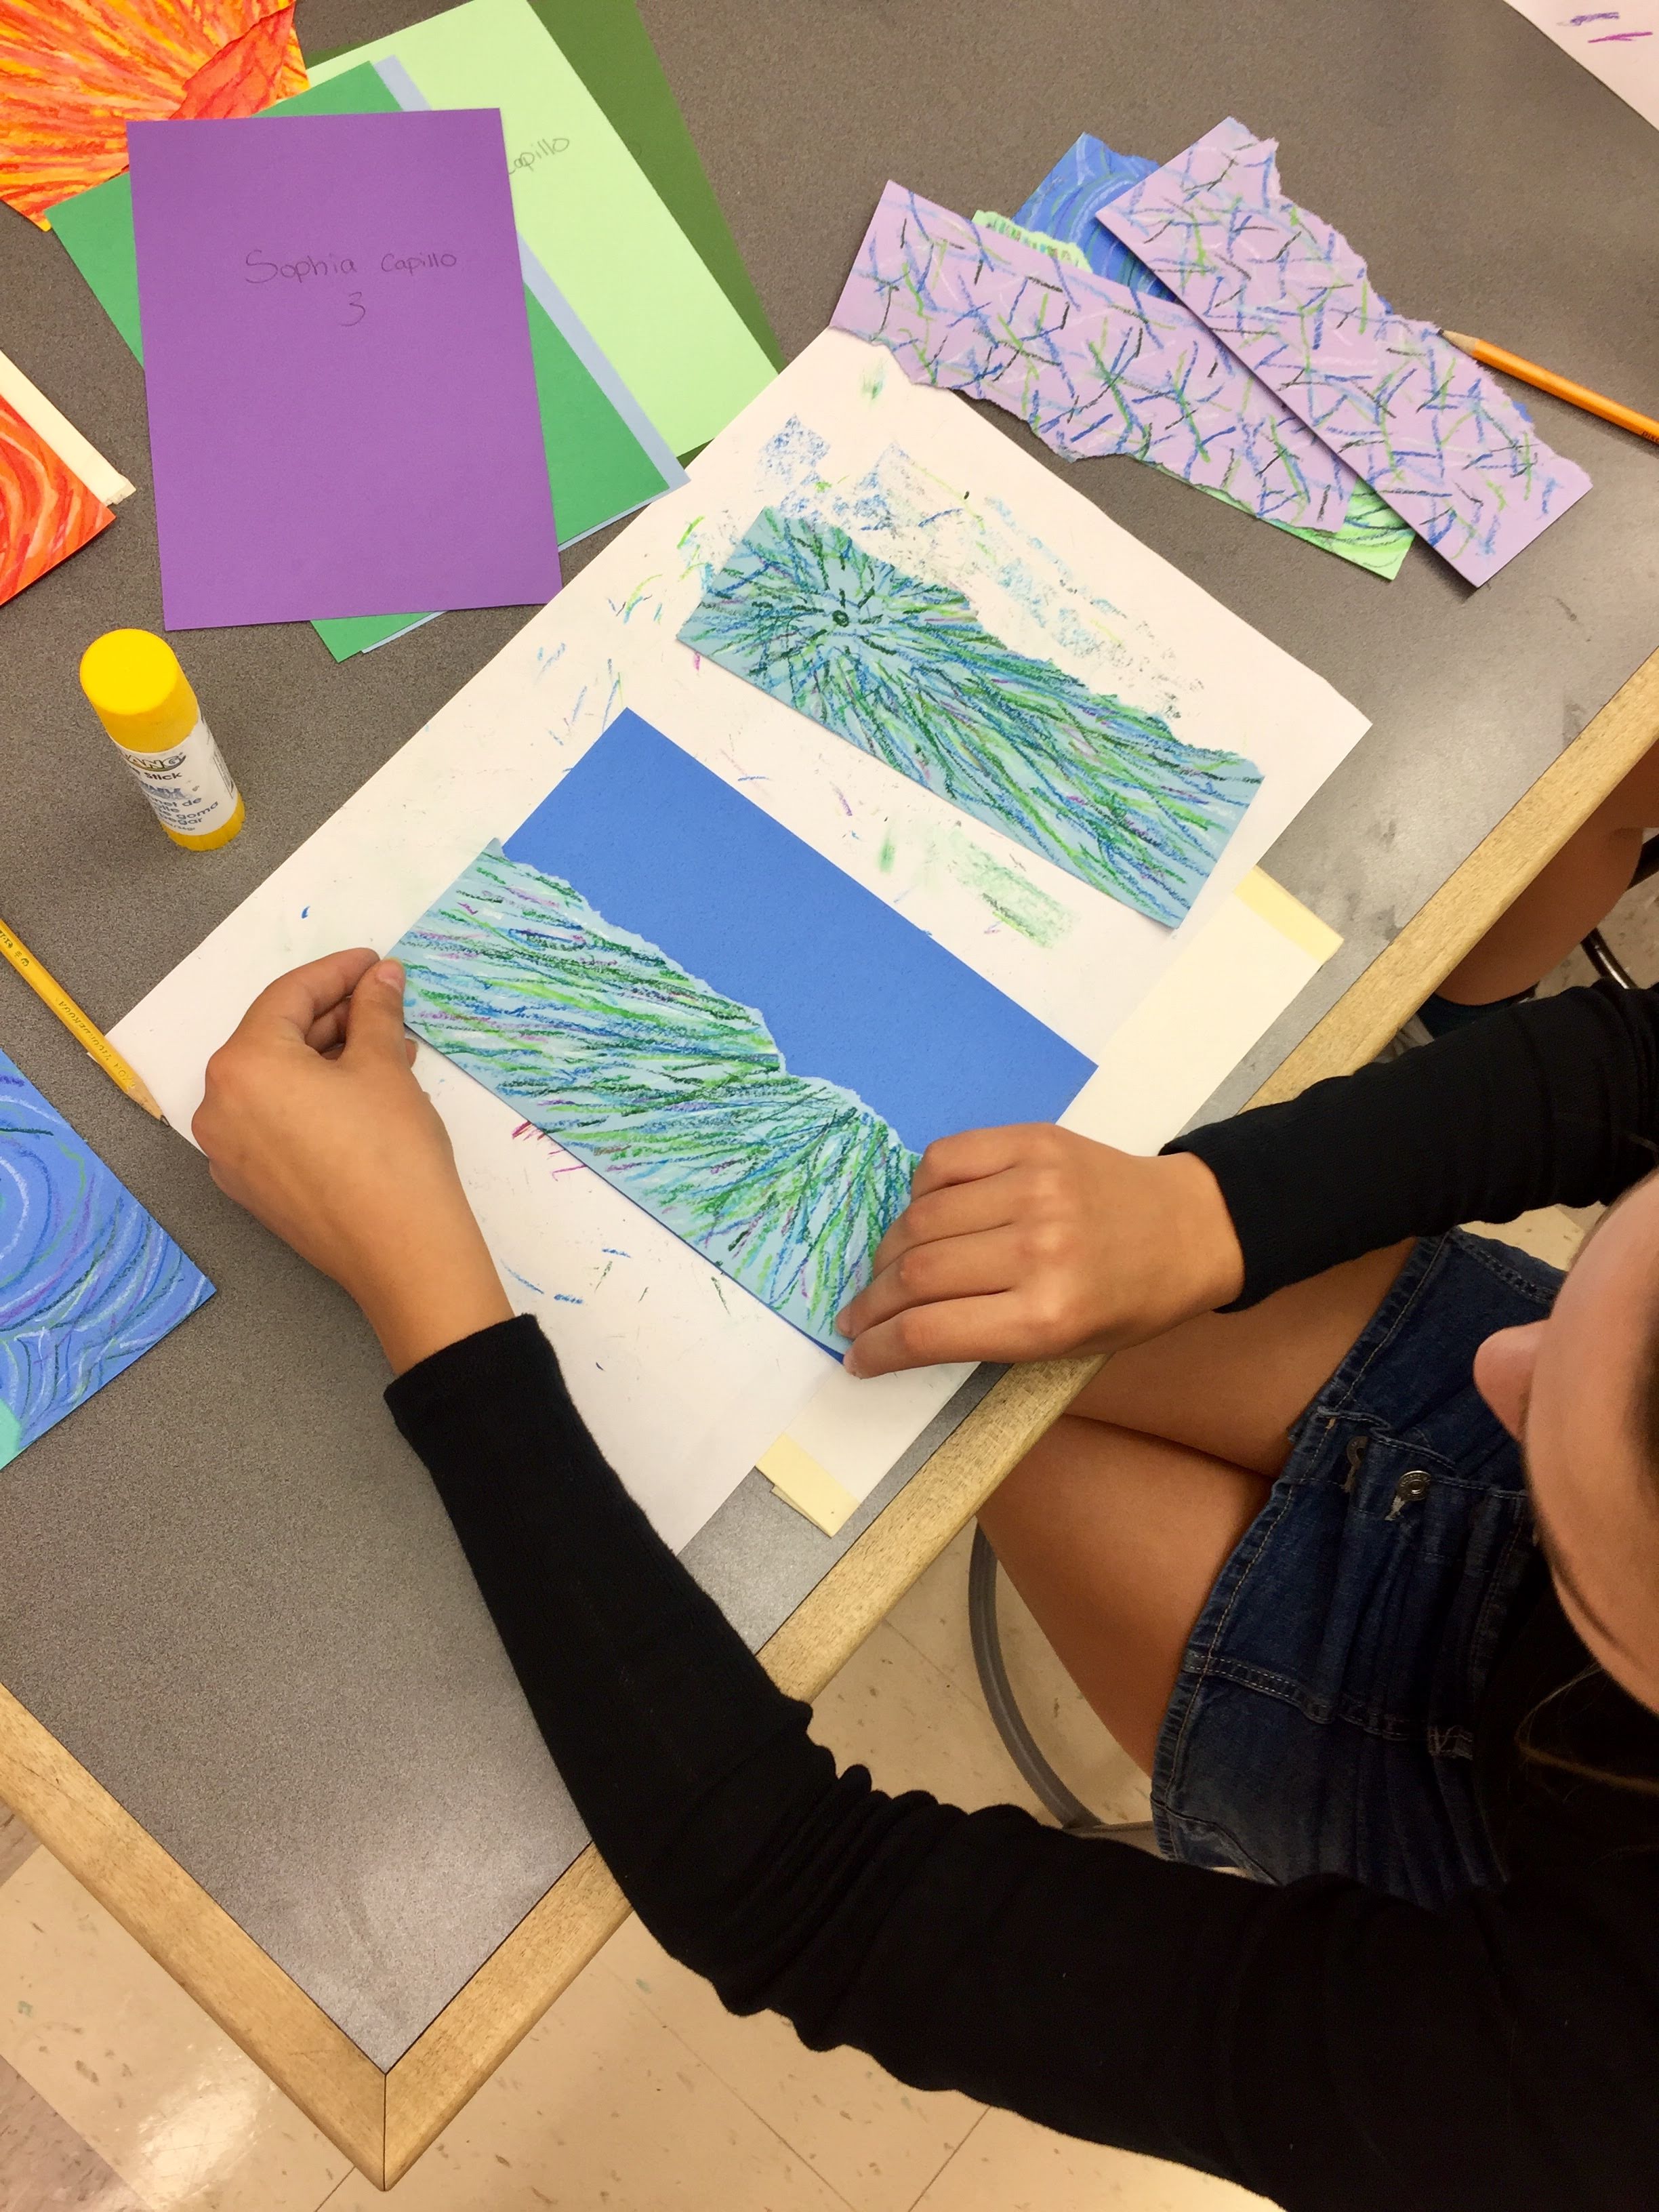
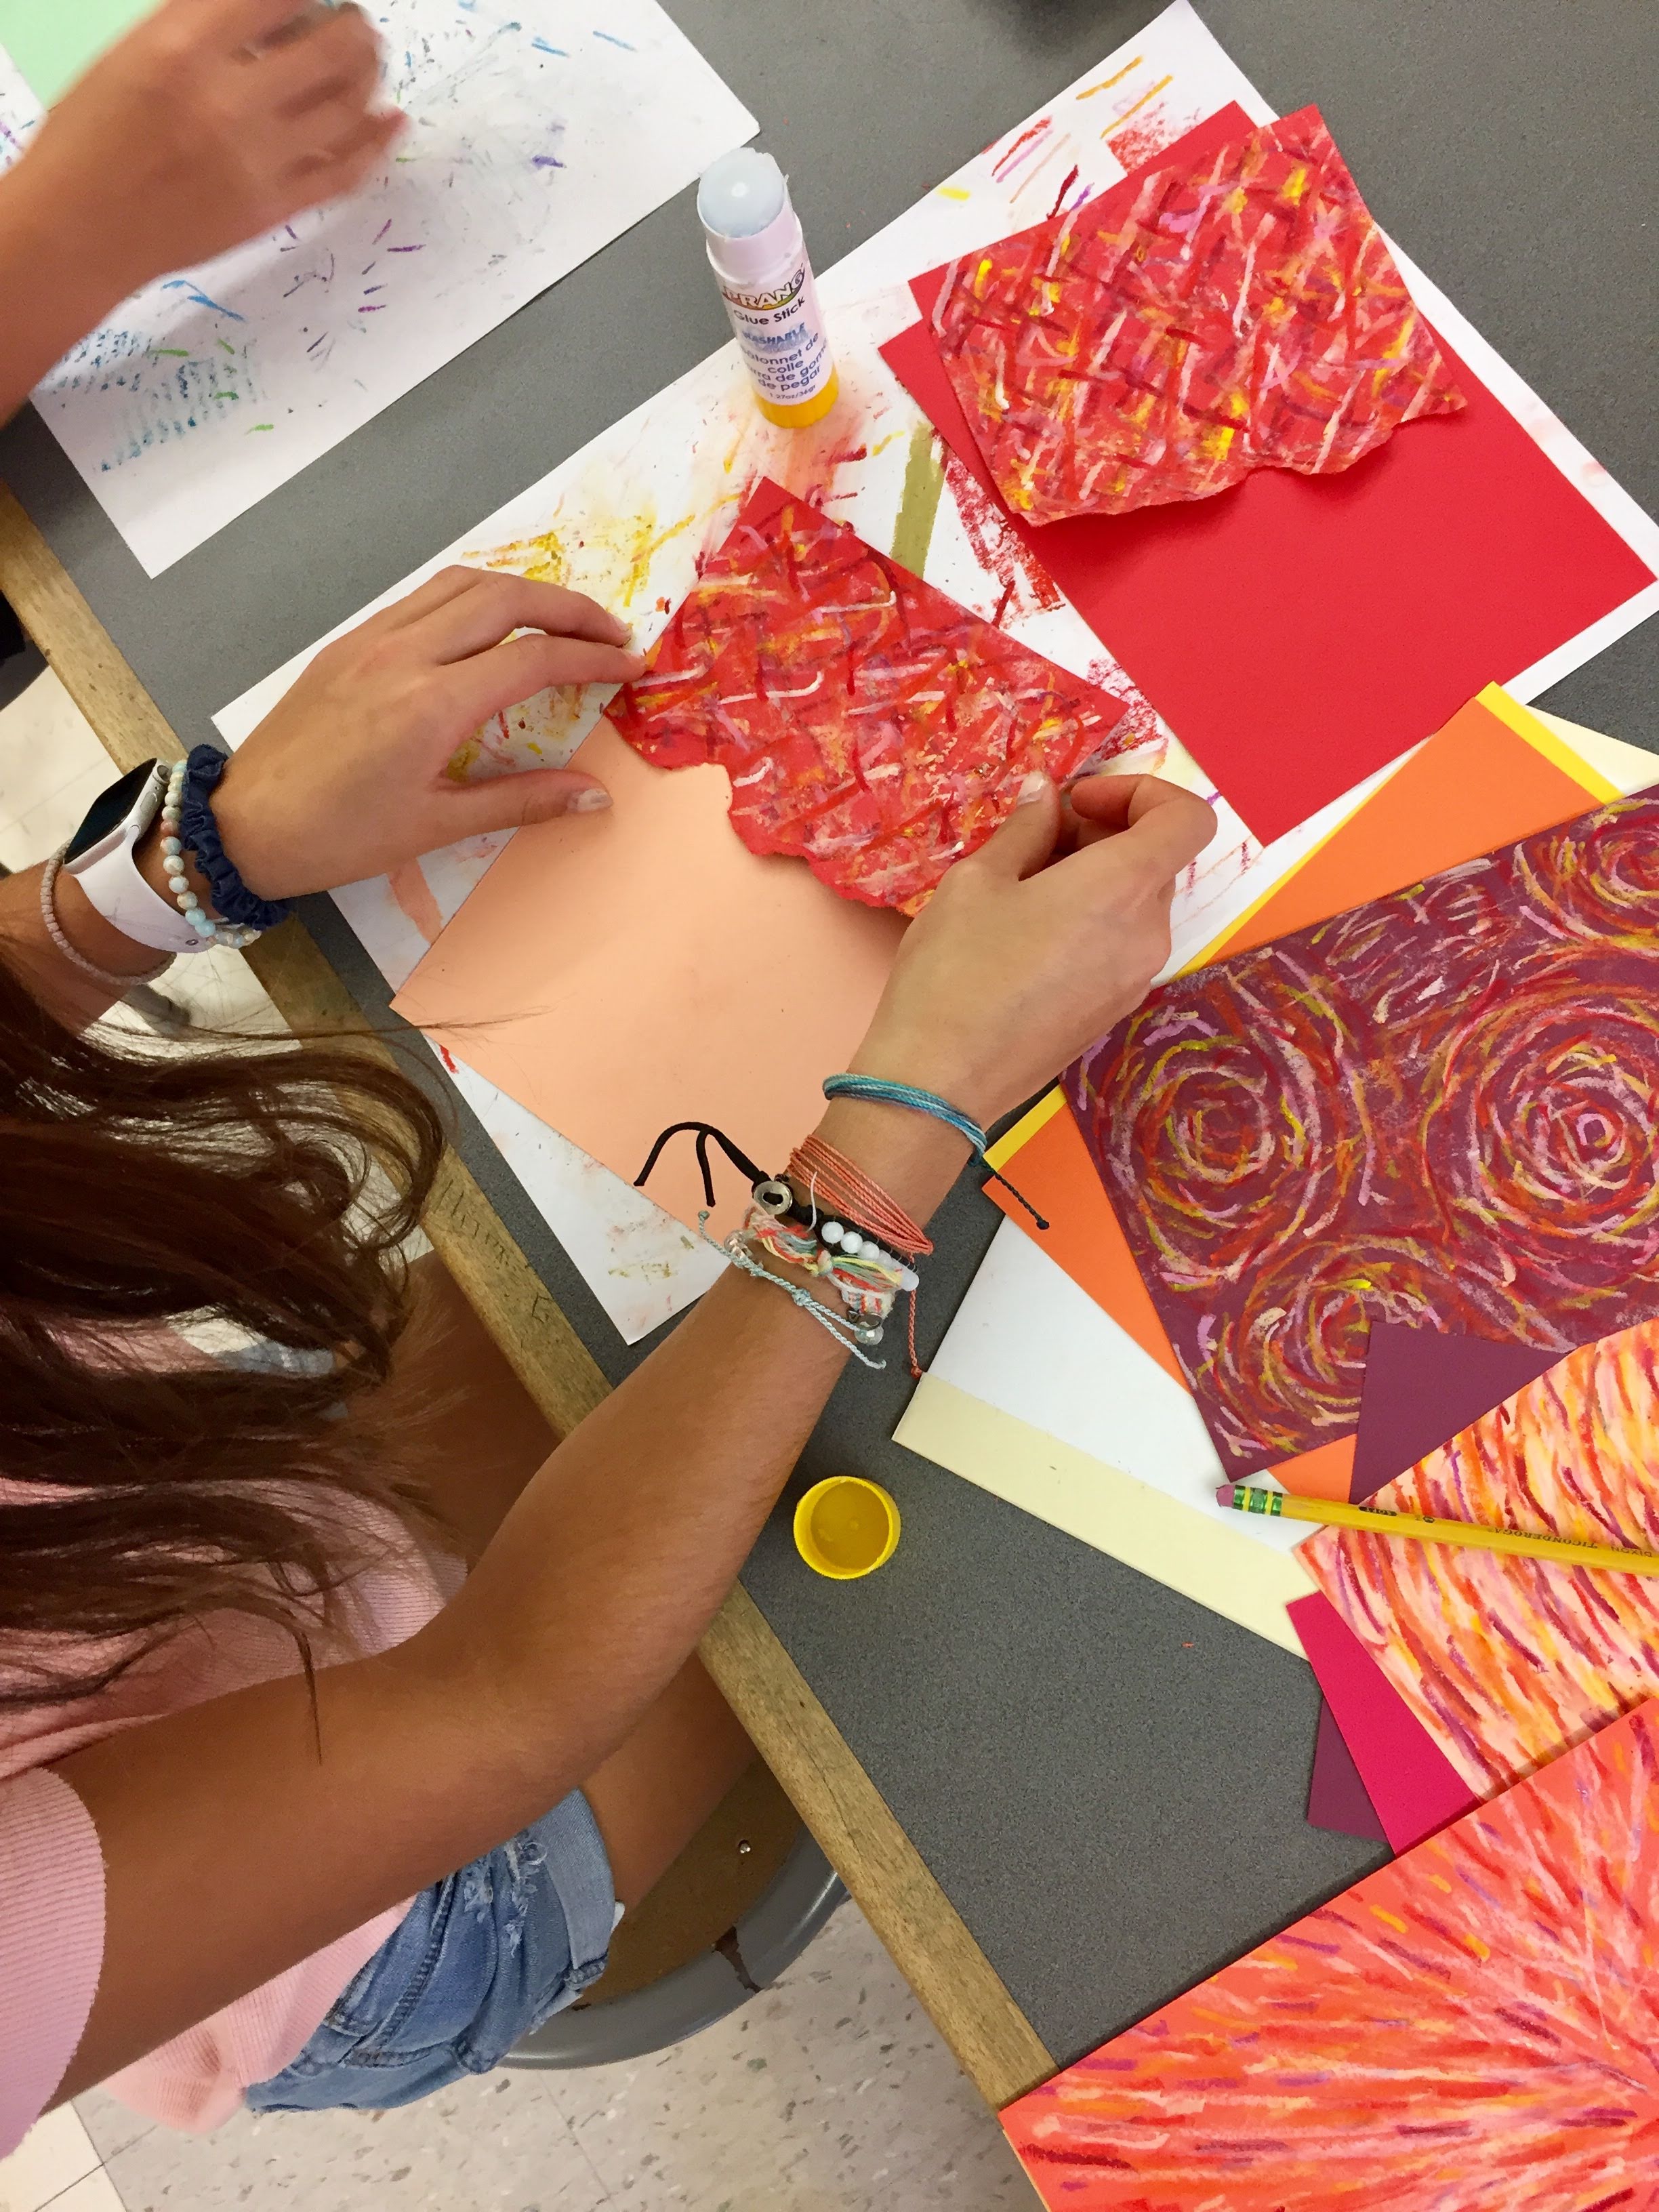
Next, students tear and collage their patterned papers on to other 6″ by 9″ solid color papers. (They still are sticking to their chosen warm or cool color scheme).
– – –
When this step is done, they have eight beautiful patterned, collaged papers!

– – –
Next we spend about 4 classes printing. The printing plates are made foam sheets like these. This thin foam is easily incised with a pencil or ballpoint pen. Students worked out their design on copy paper first, and then taped their drawing to the foam. When they trace over the image with a ballpoint pen, the pressure of the pen creates a faint impression in the foam which can then be deepened to ensure a good printed image. We reinforced the back of the foam with overlapping strips of masking tape for strength—especially important for thin-stemmed flowers and leaves— and then cut the foam out with scissors. This material is a great alternative to linoleum, and is much easier to use for making relief prints! Here are some examples of the finished foam plates, which can be easily washed with warm water and re-used from day to day:

– – –
Here you can see students using Speedball brand water-based block printing ink rolled on to their foam plates to print on their collaged papers.


– – –
Printmaking with Middle Schoolers can be CRAZY! Here’s a video explaining how I manage and set up my classroom on printing days: PRINTMAKING WITH MIDDLE SCHOOLERS!
– – –
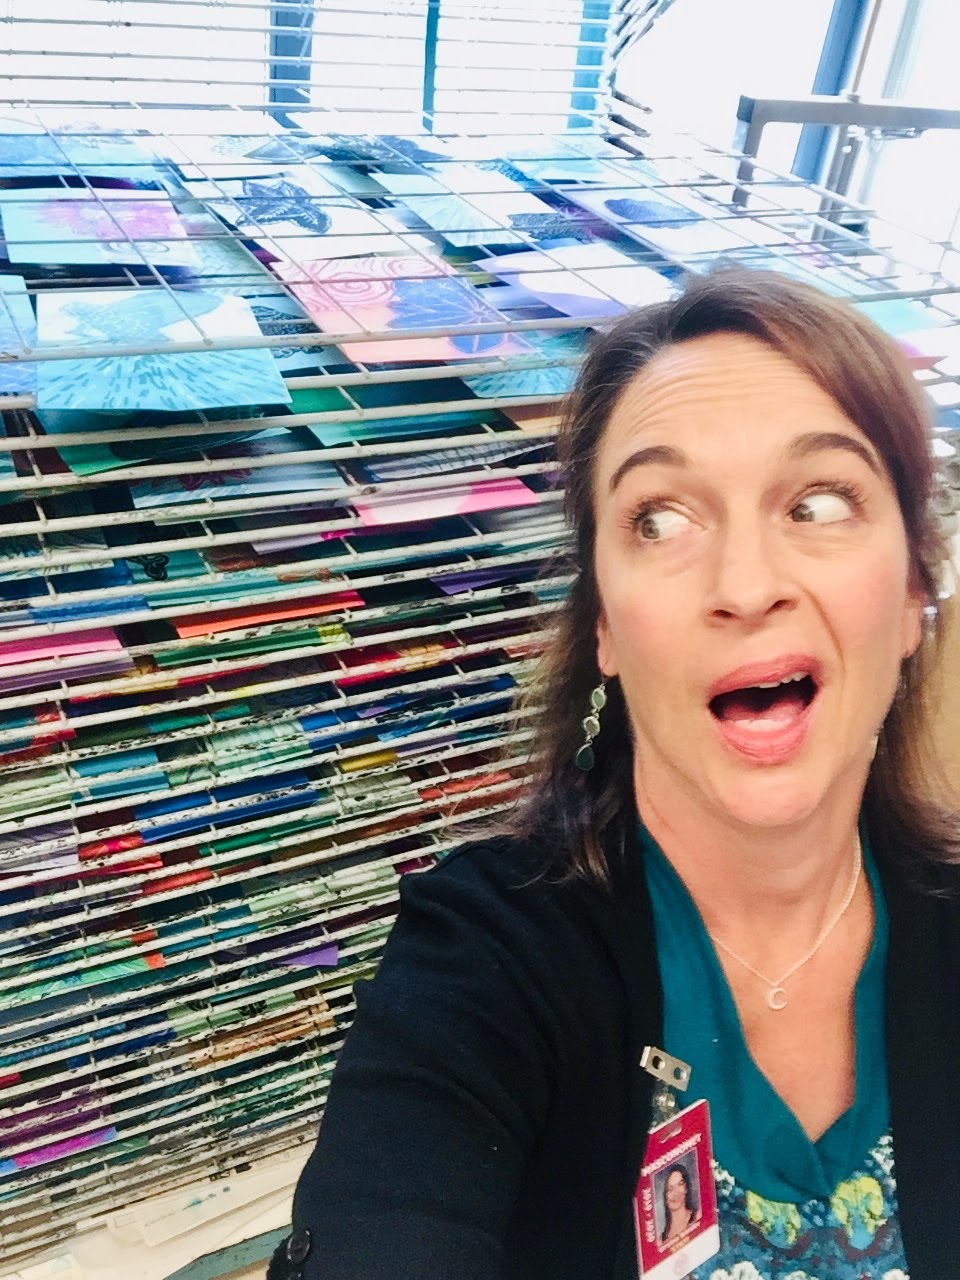
90+ kids printing per day makes for a loooooot of work to unload from the drying rack each morning!!!

– – –
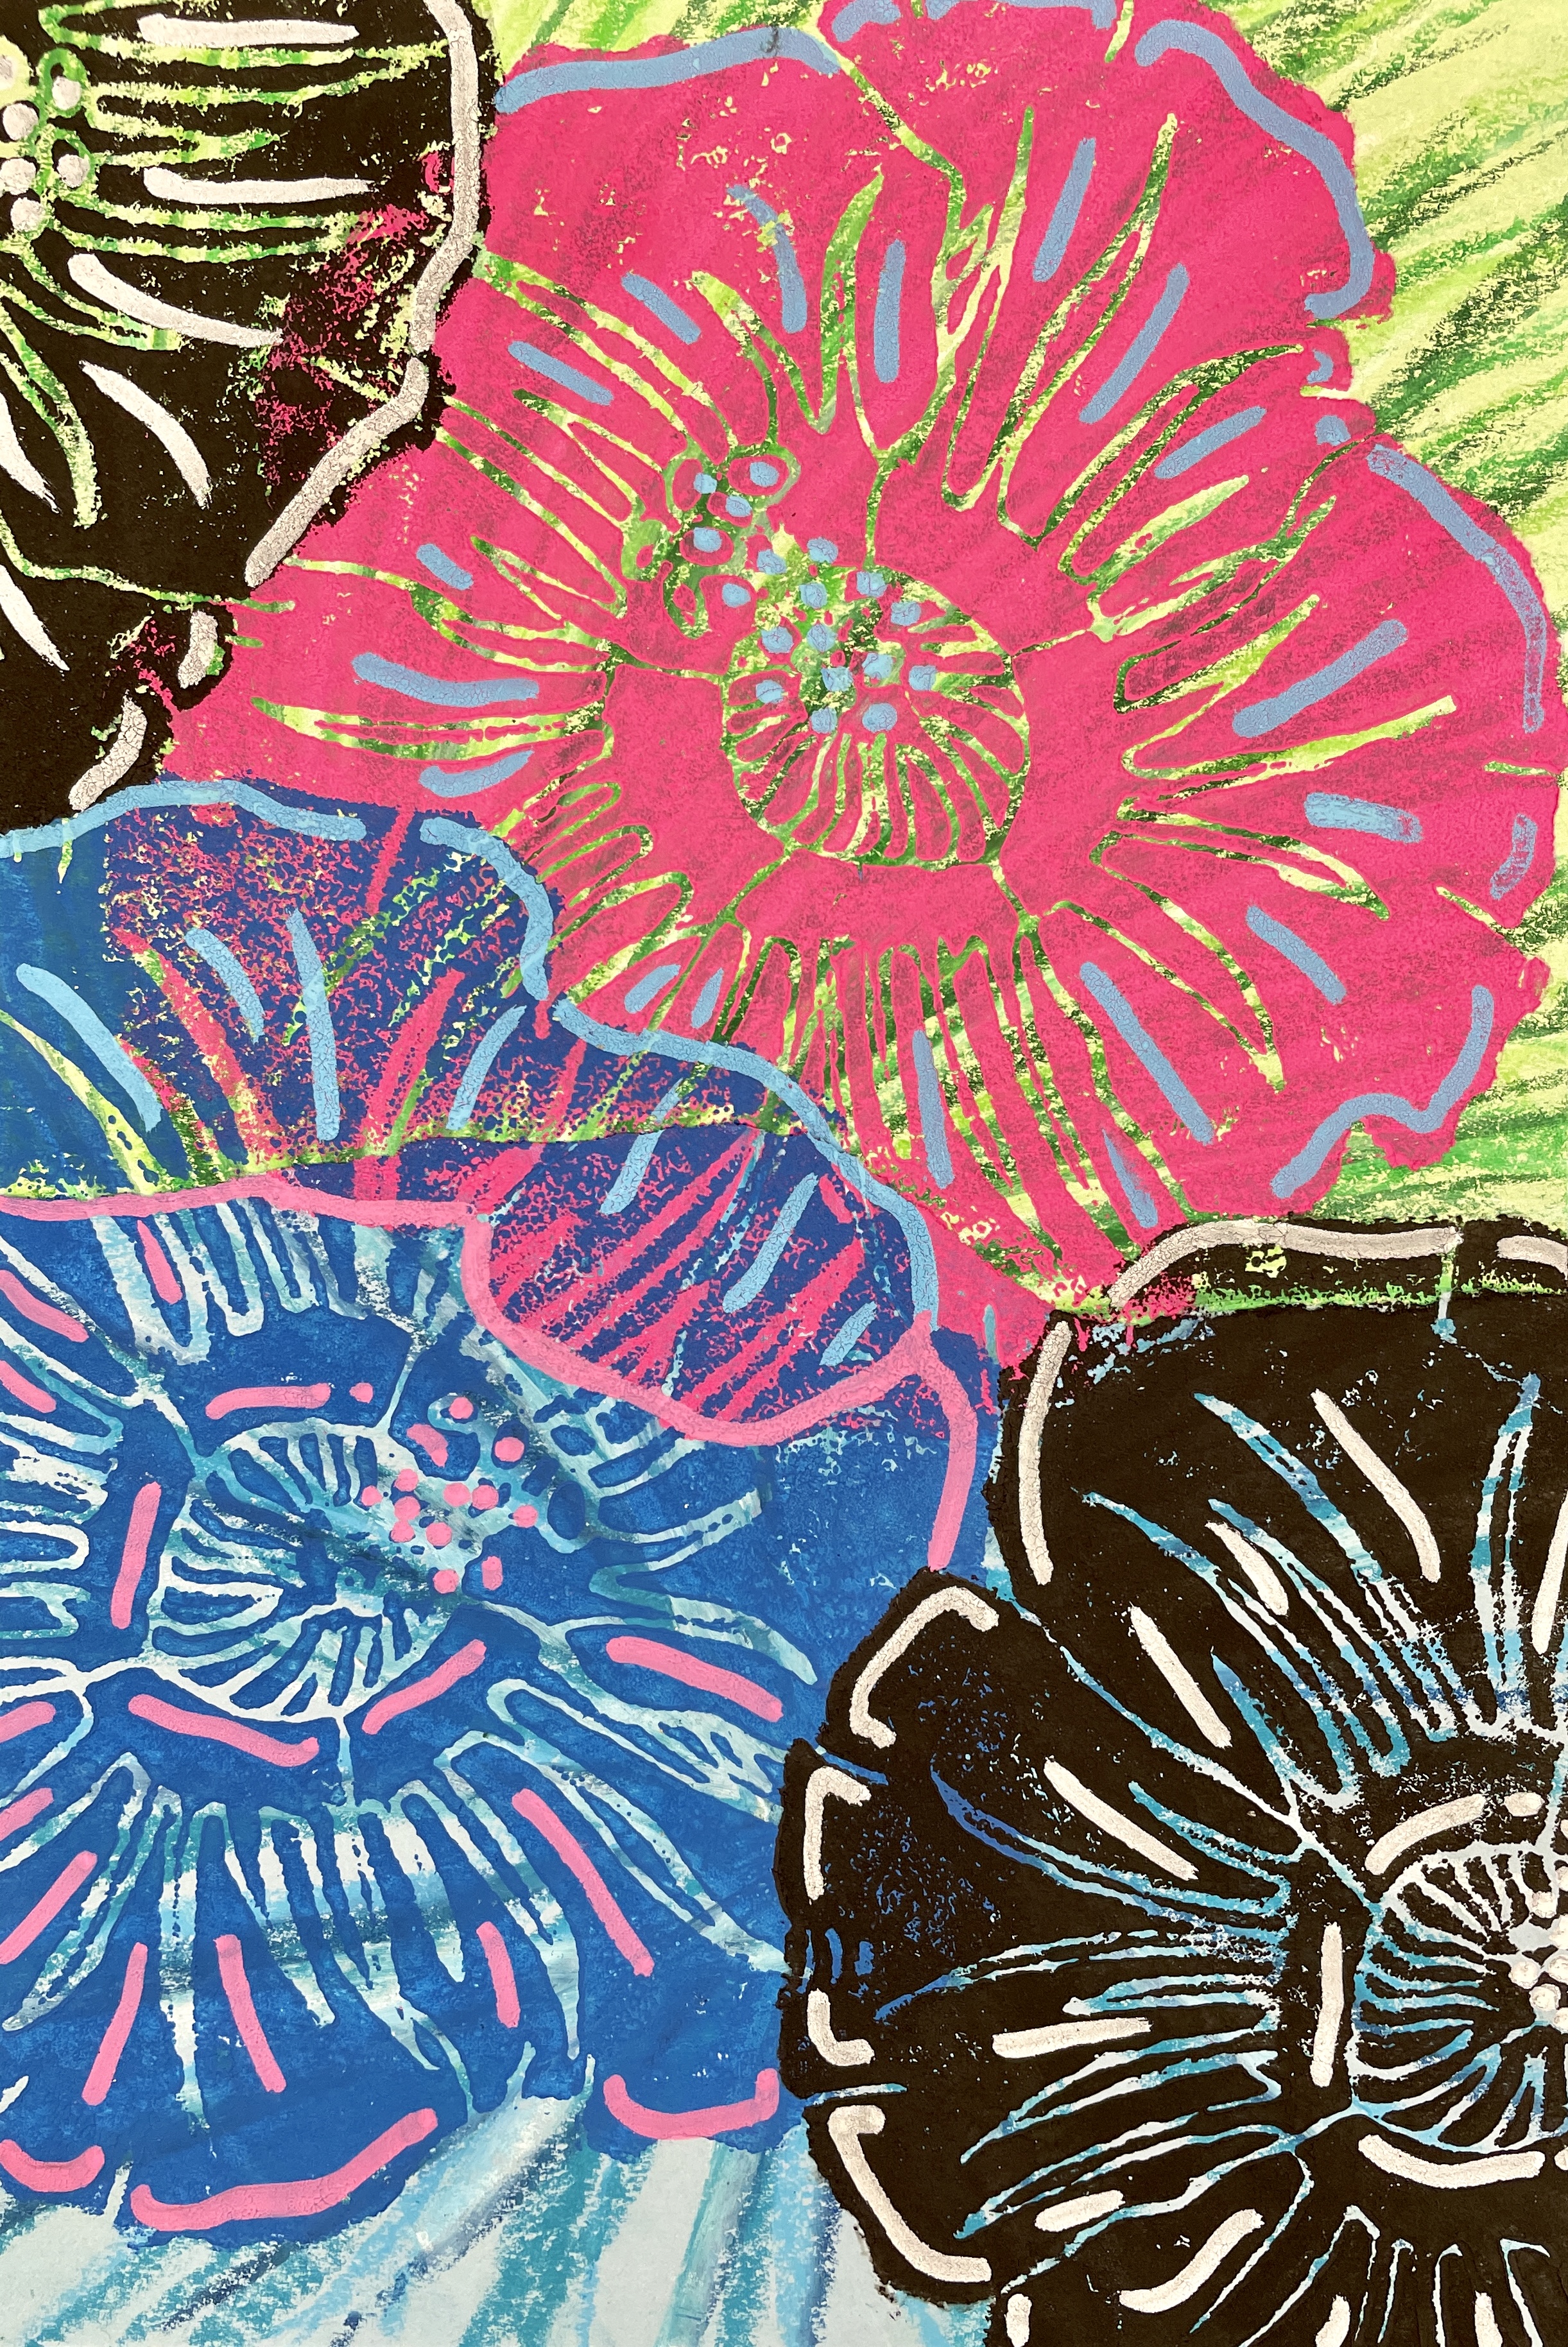
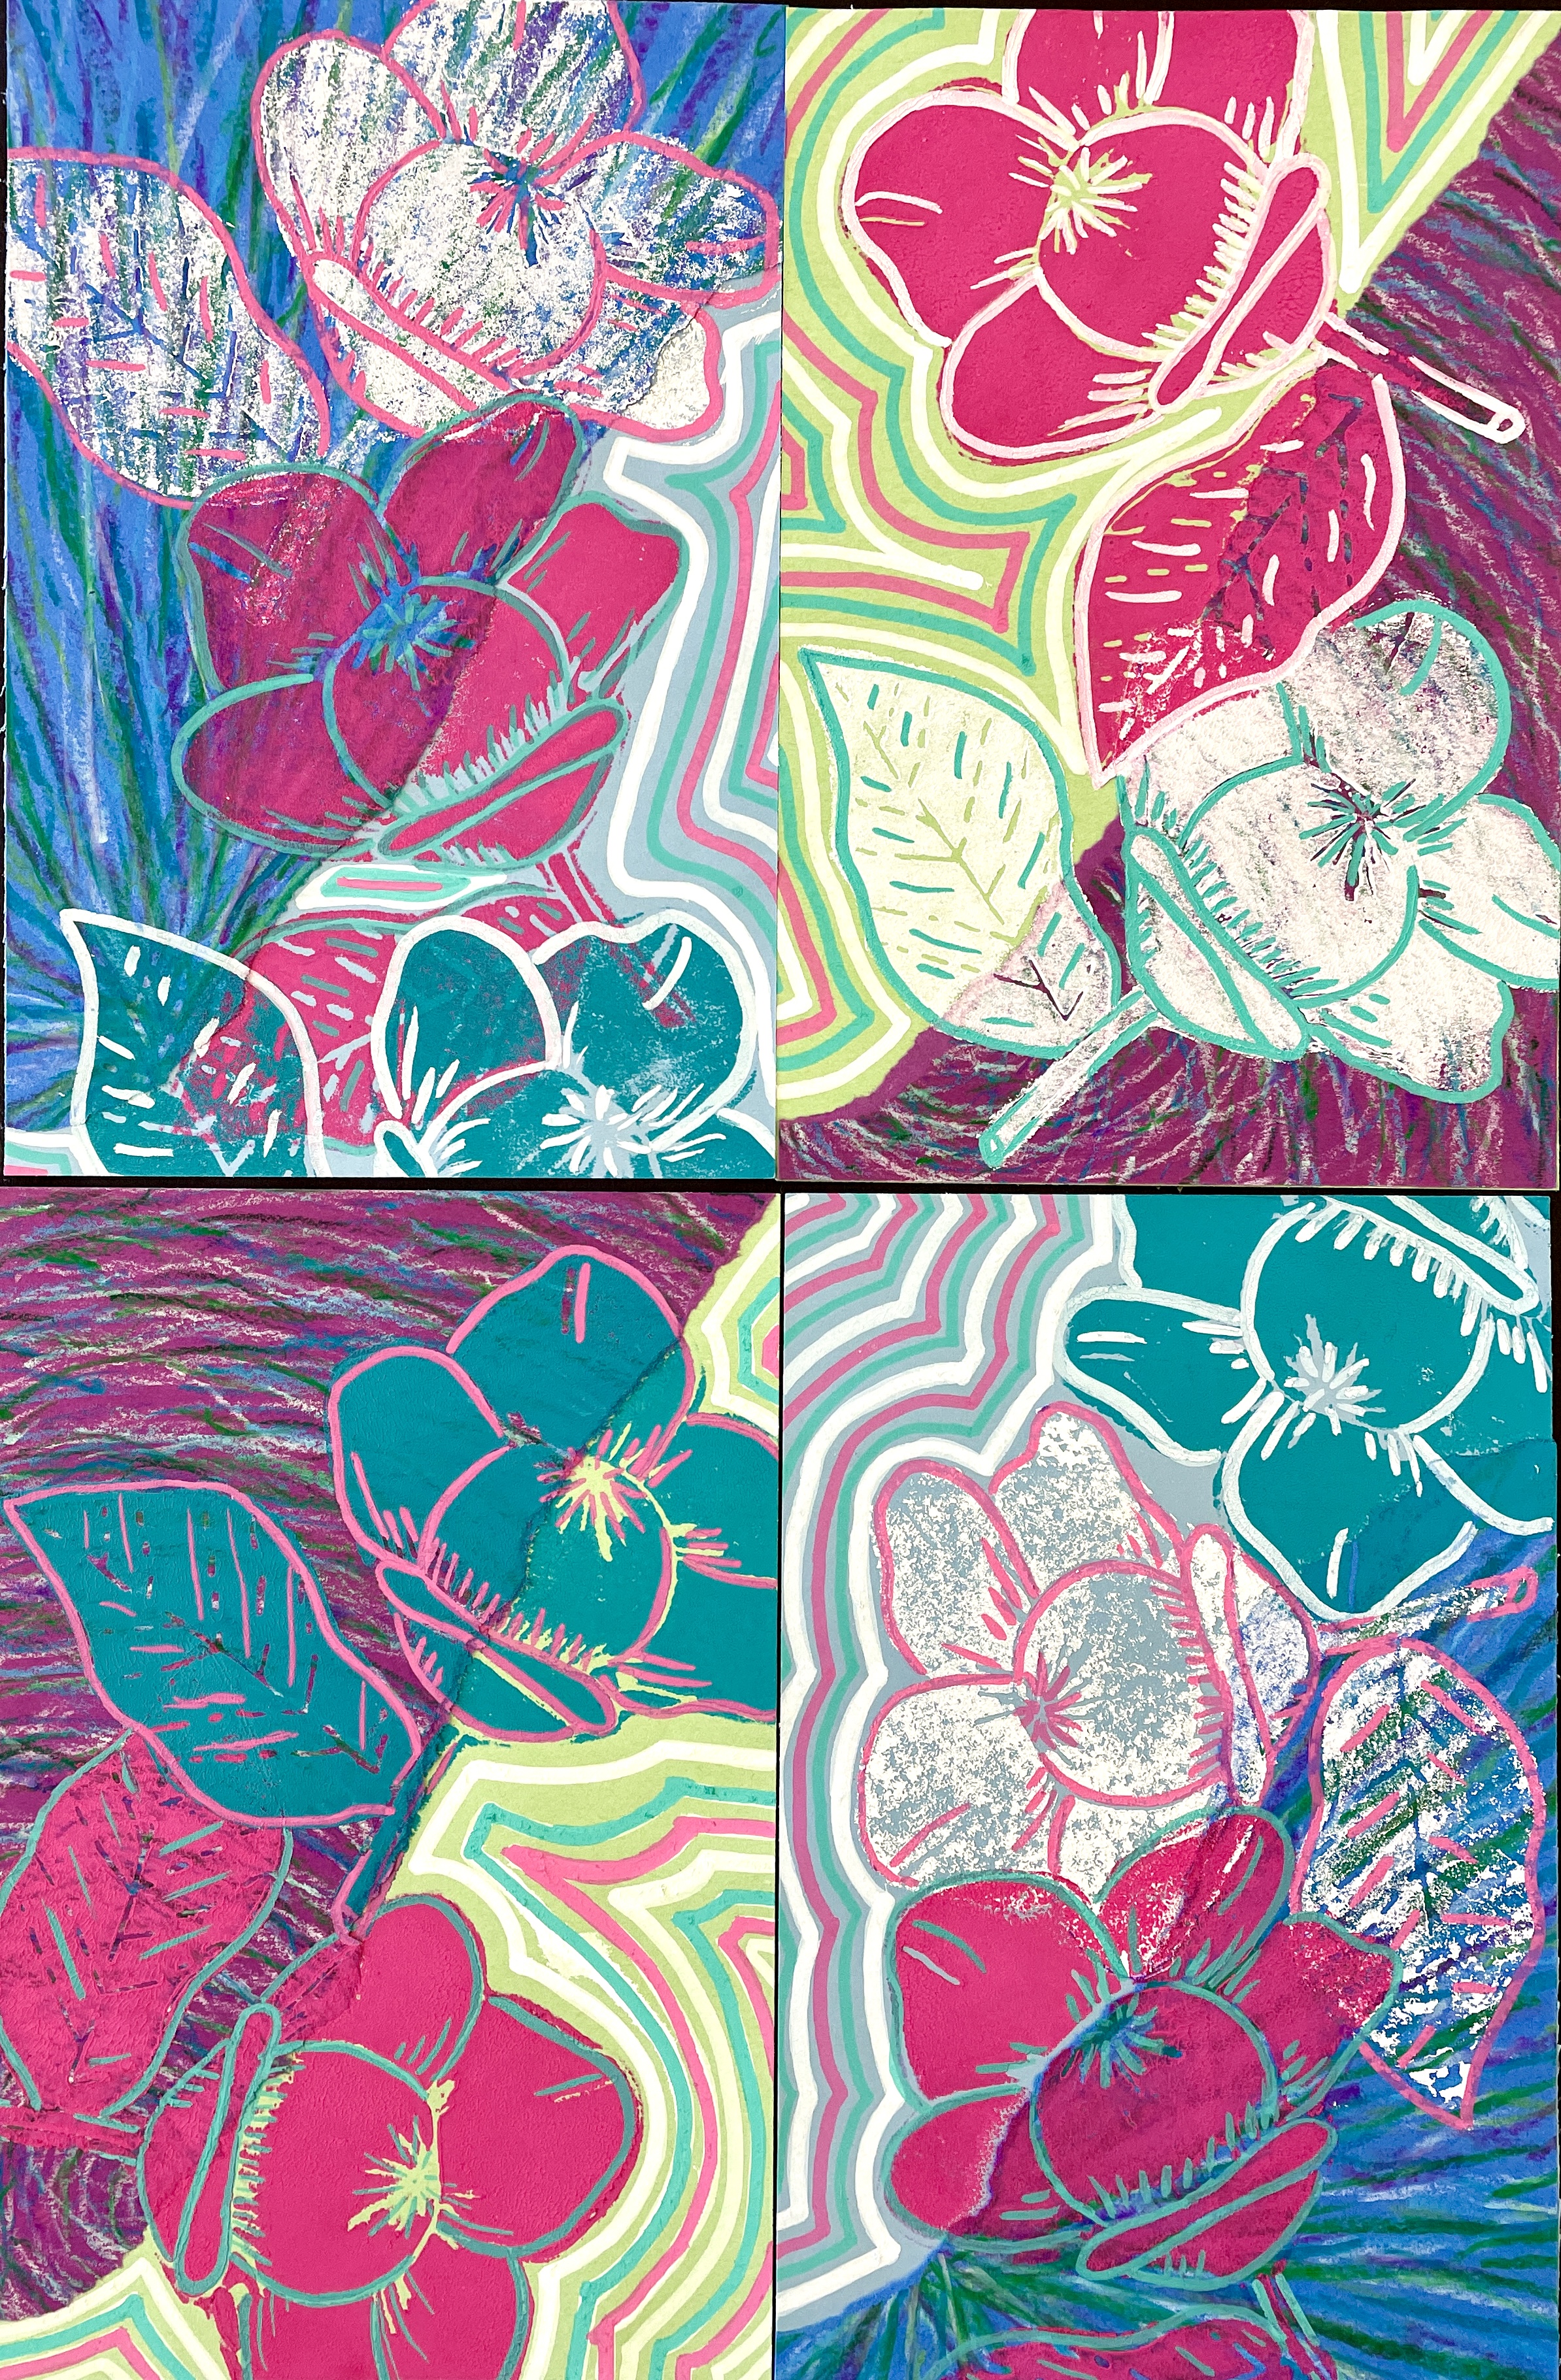
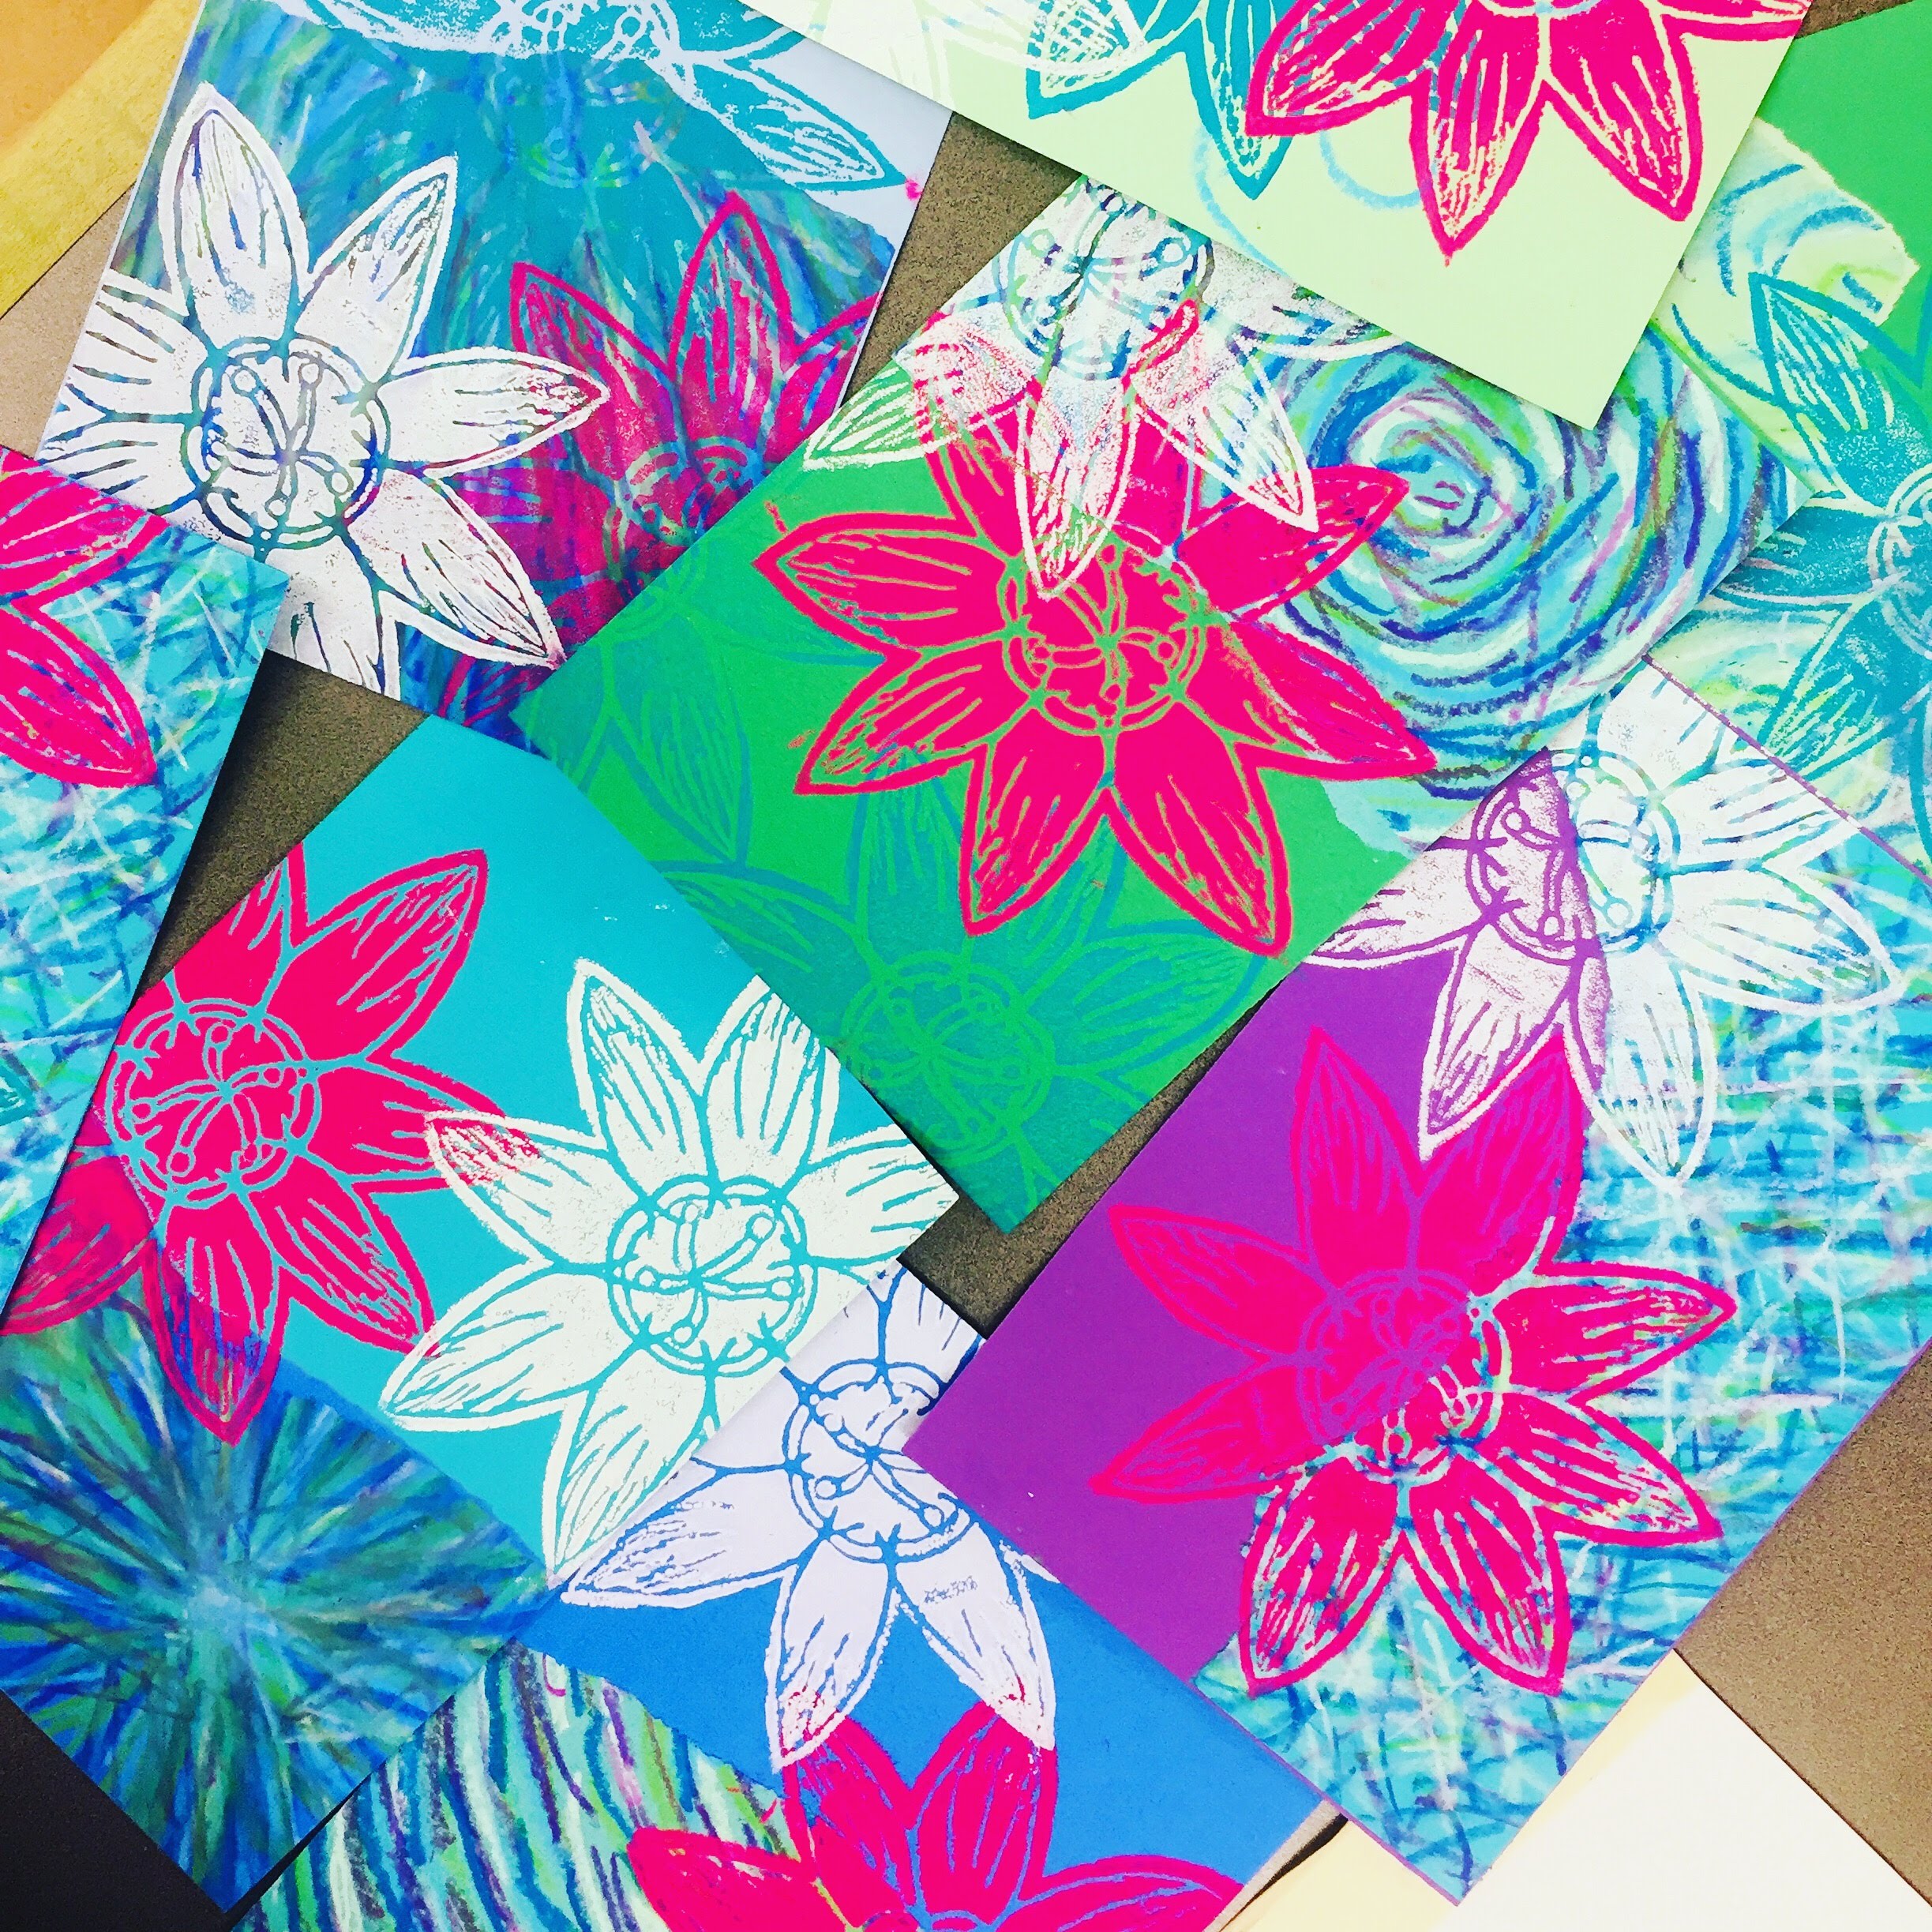
After several class periods of printing, the kids have quite a collection of prints. Note: I let them break out of their cool/warm color scheme when it comes time to print!
– – –
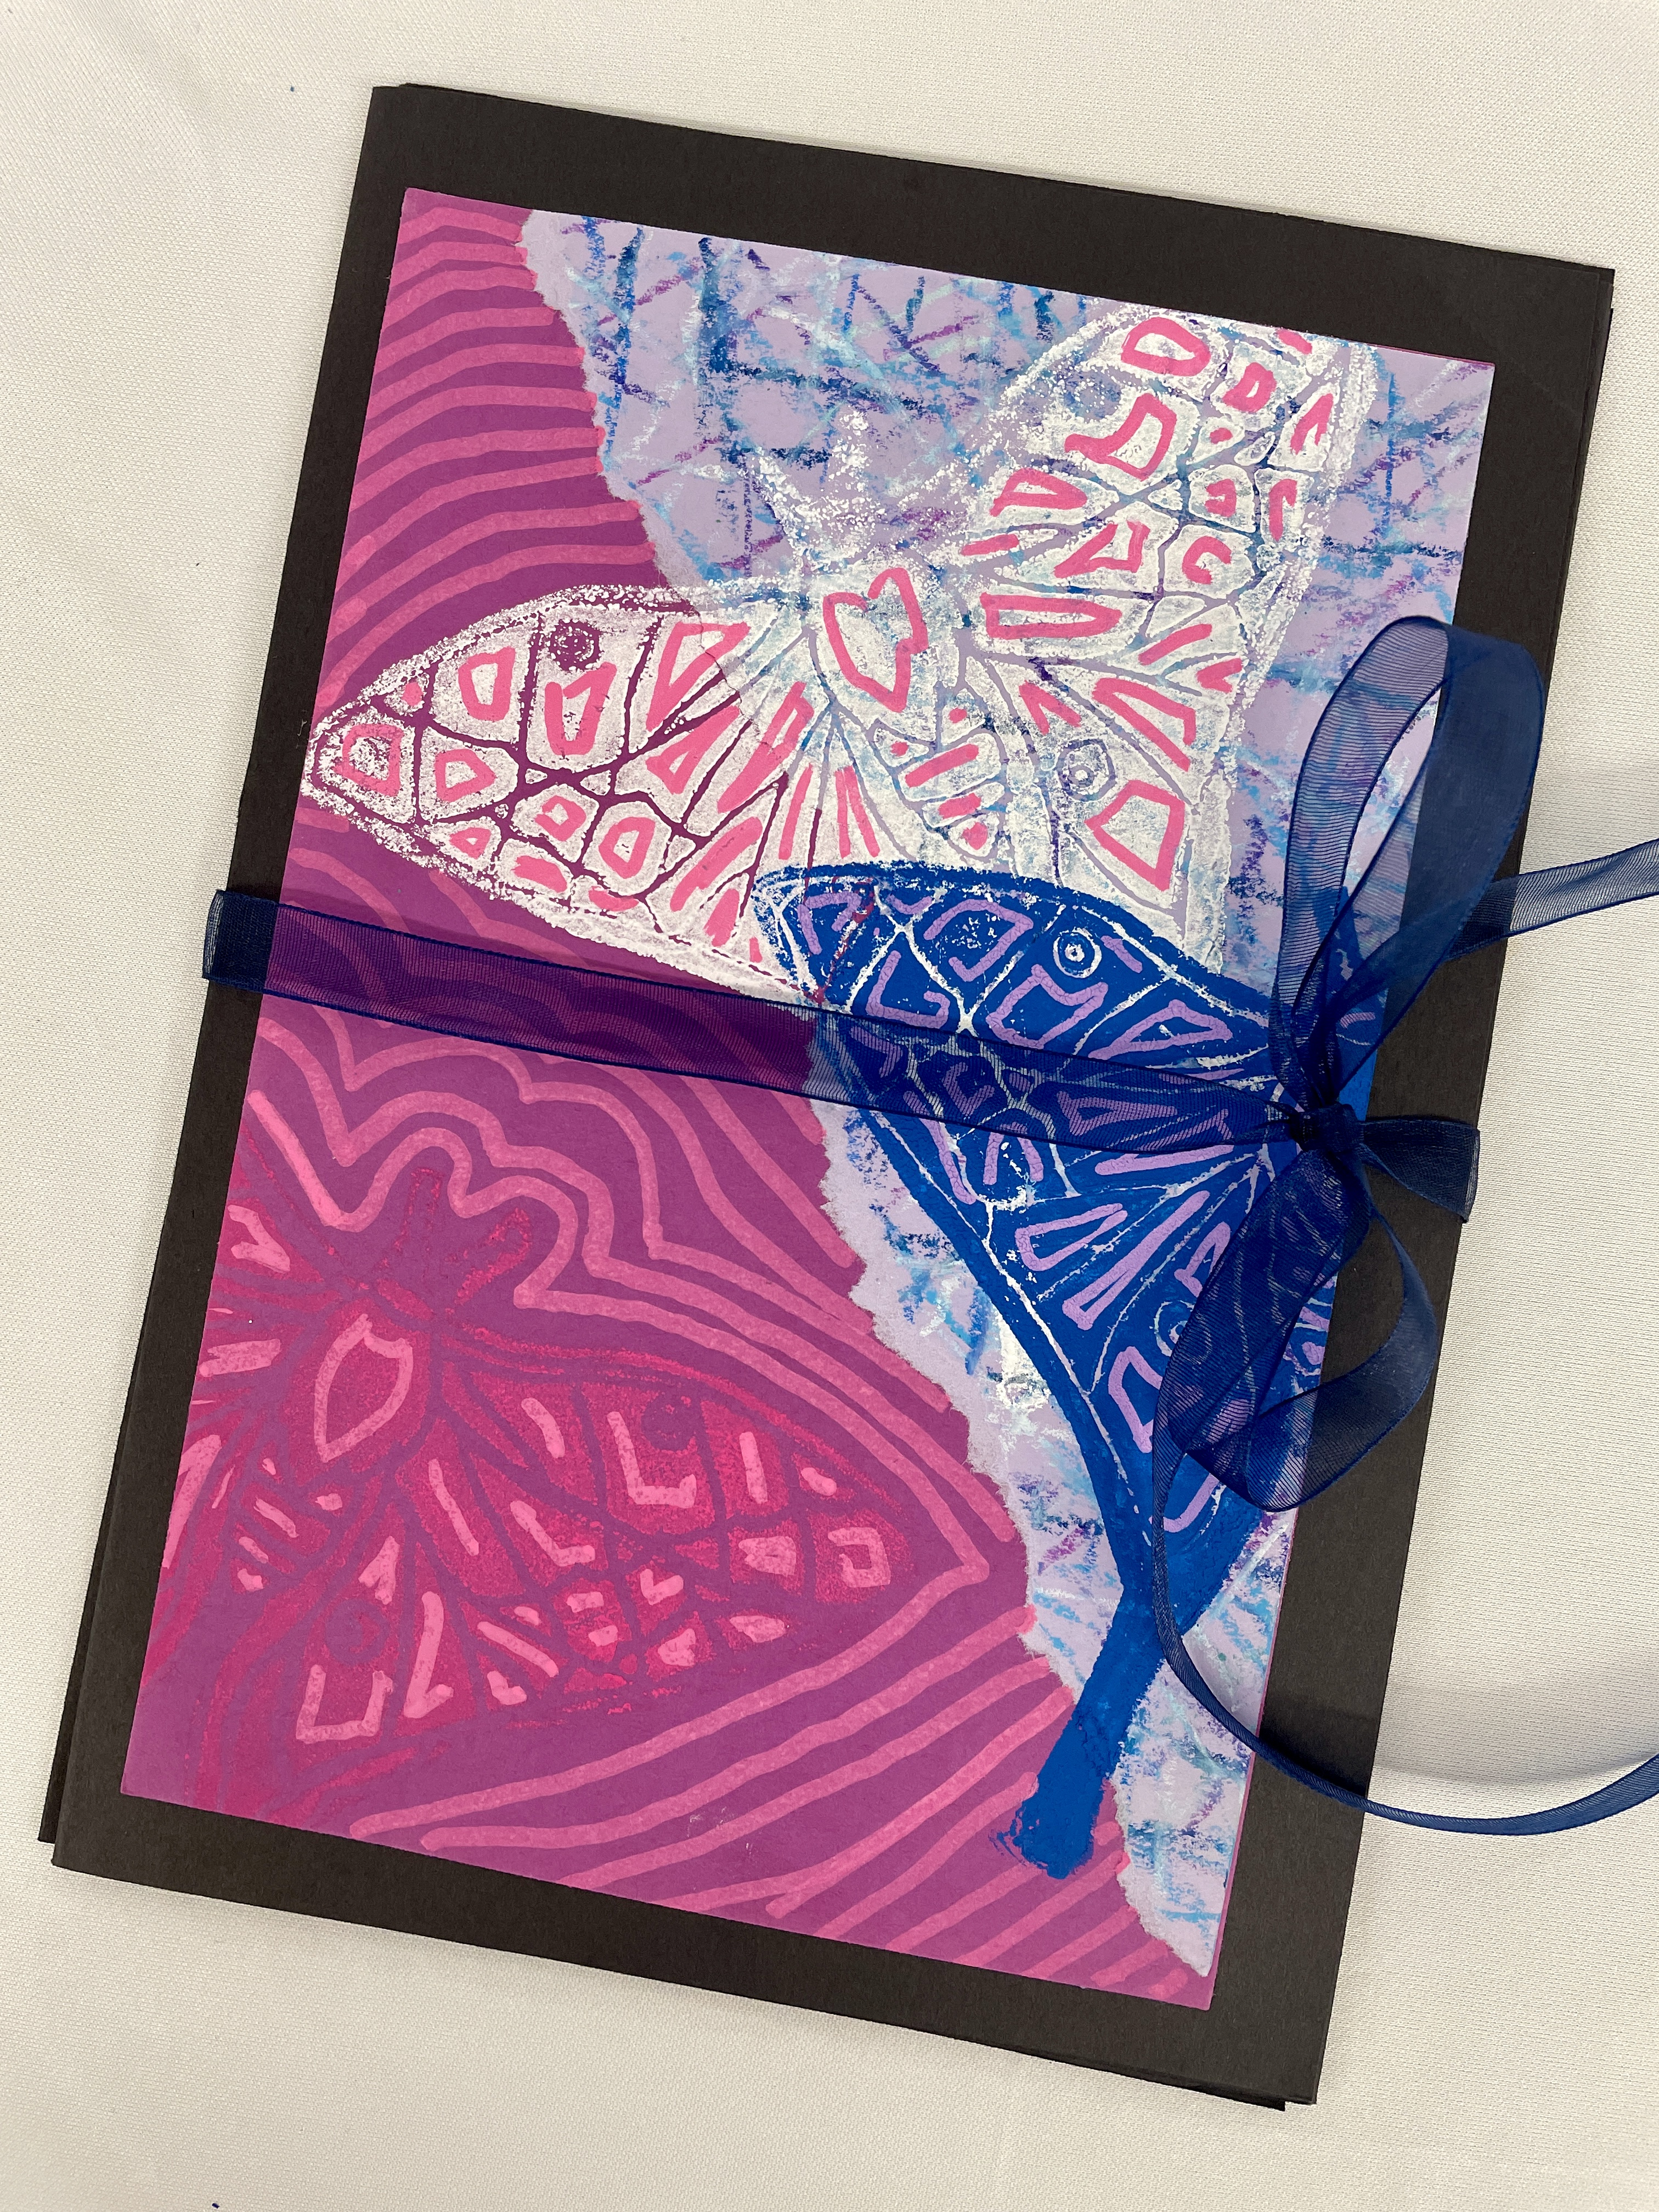
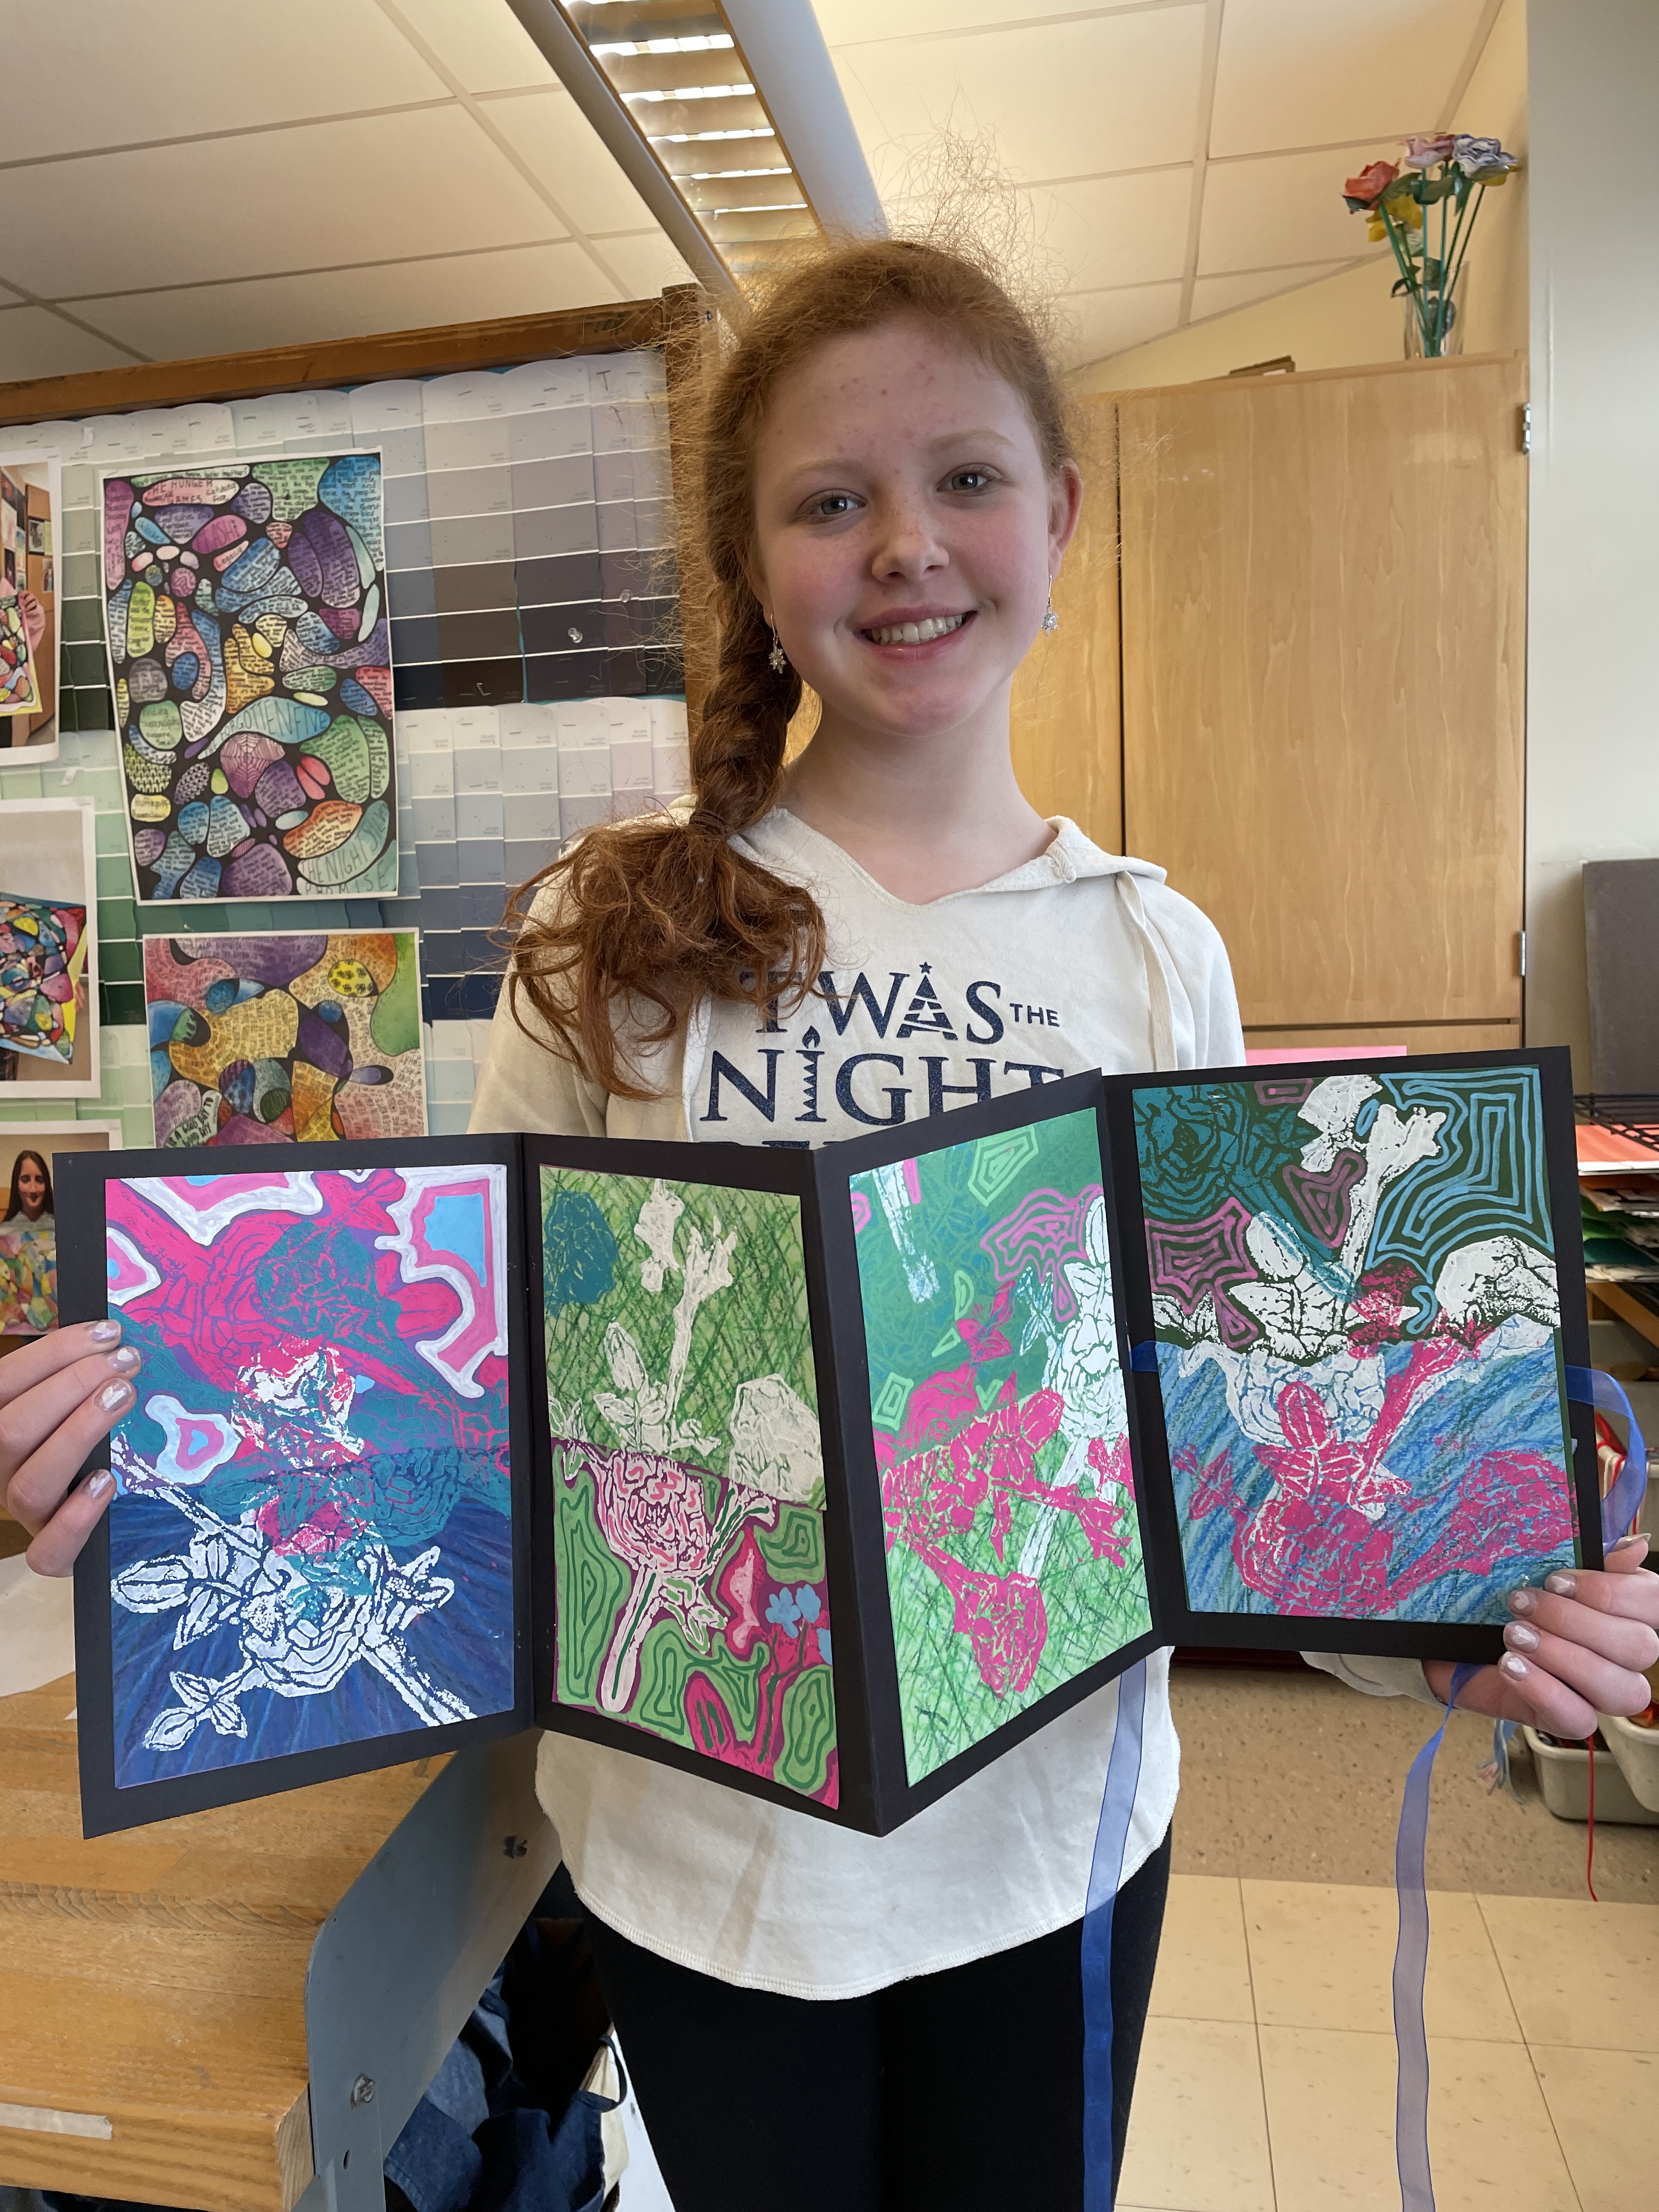
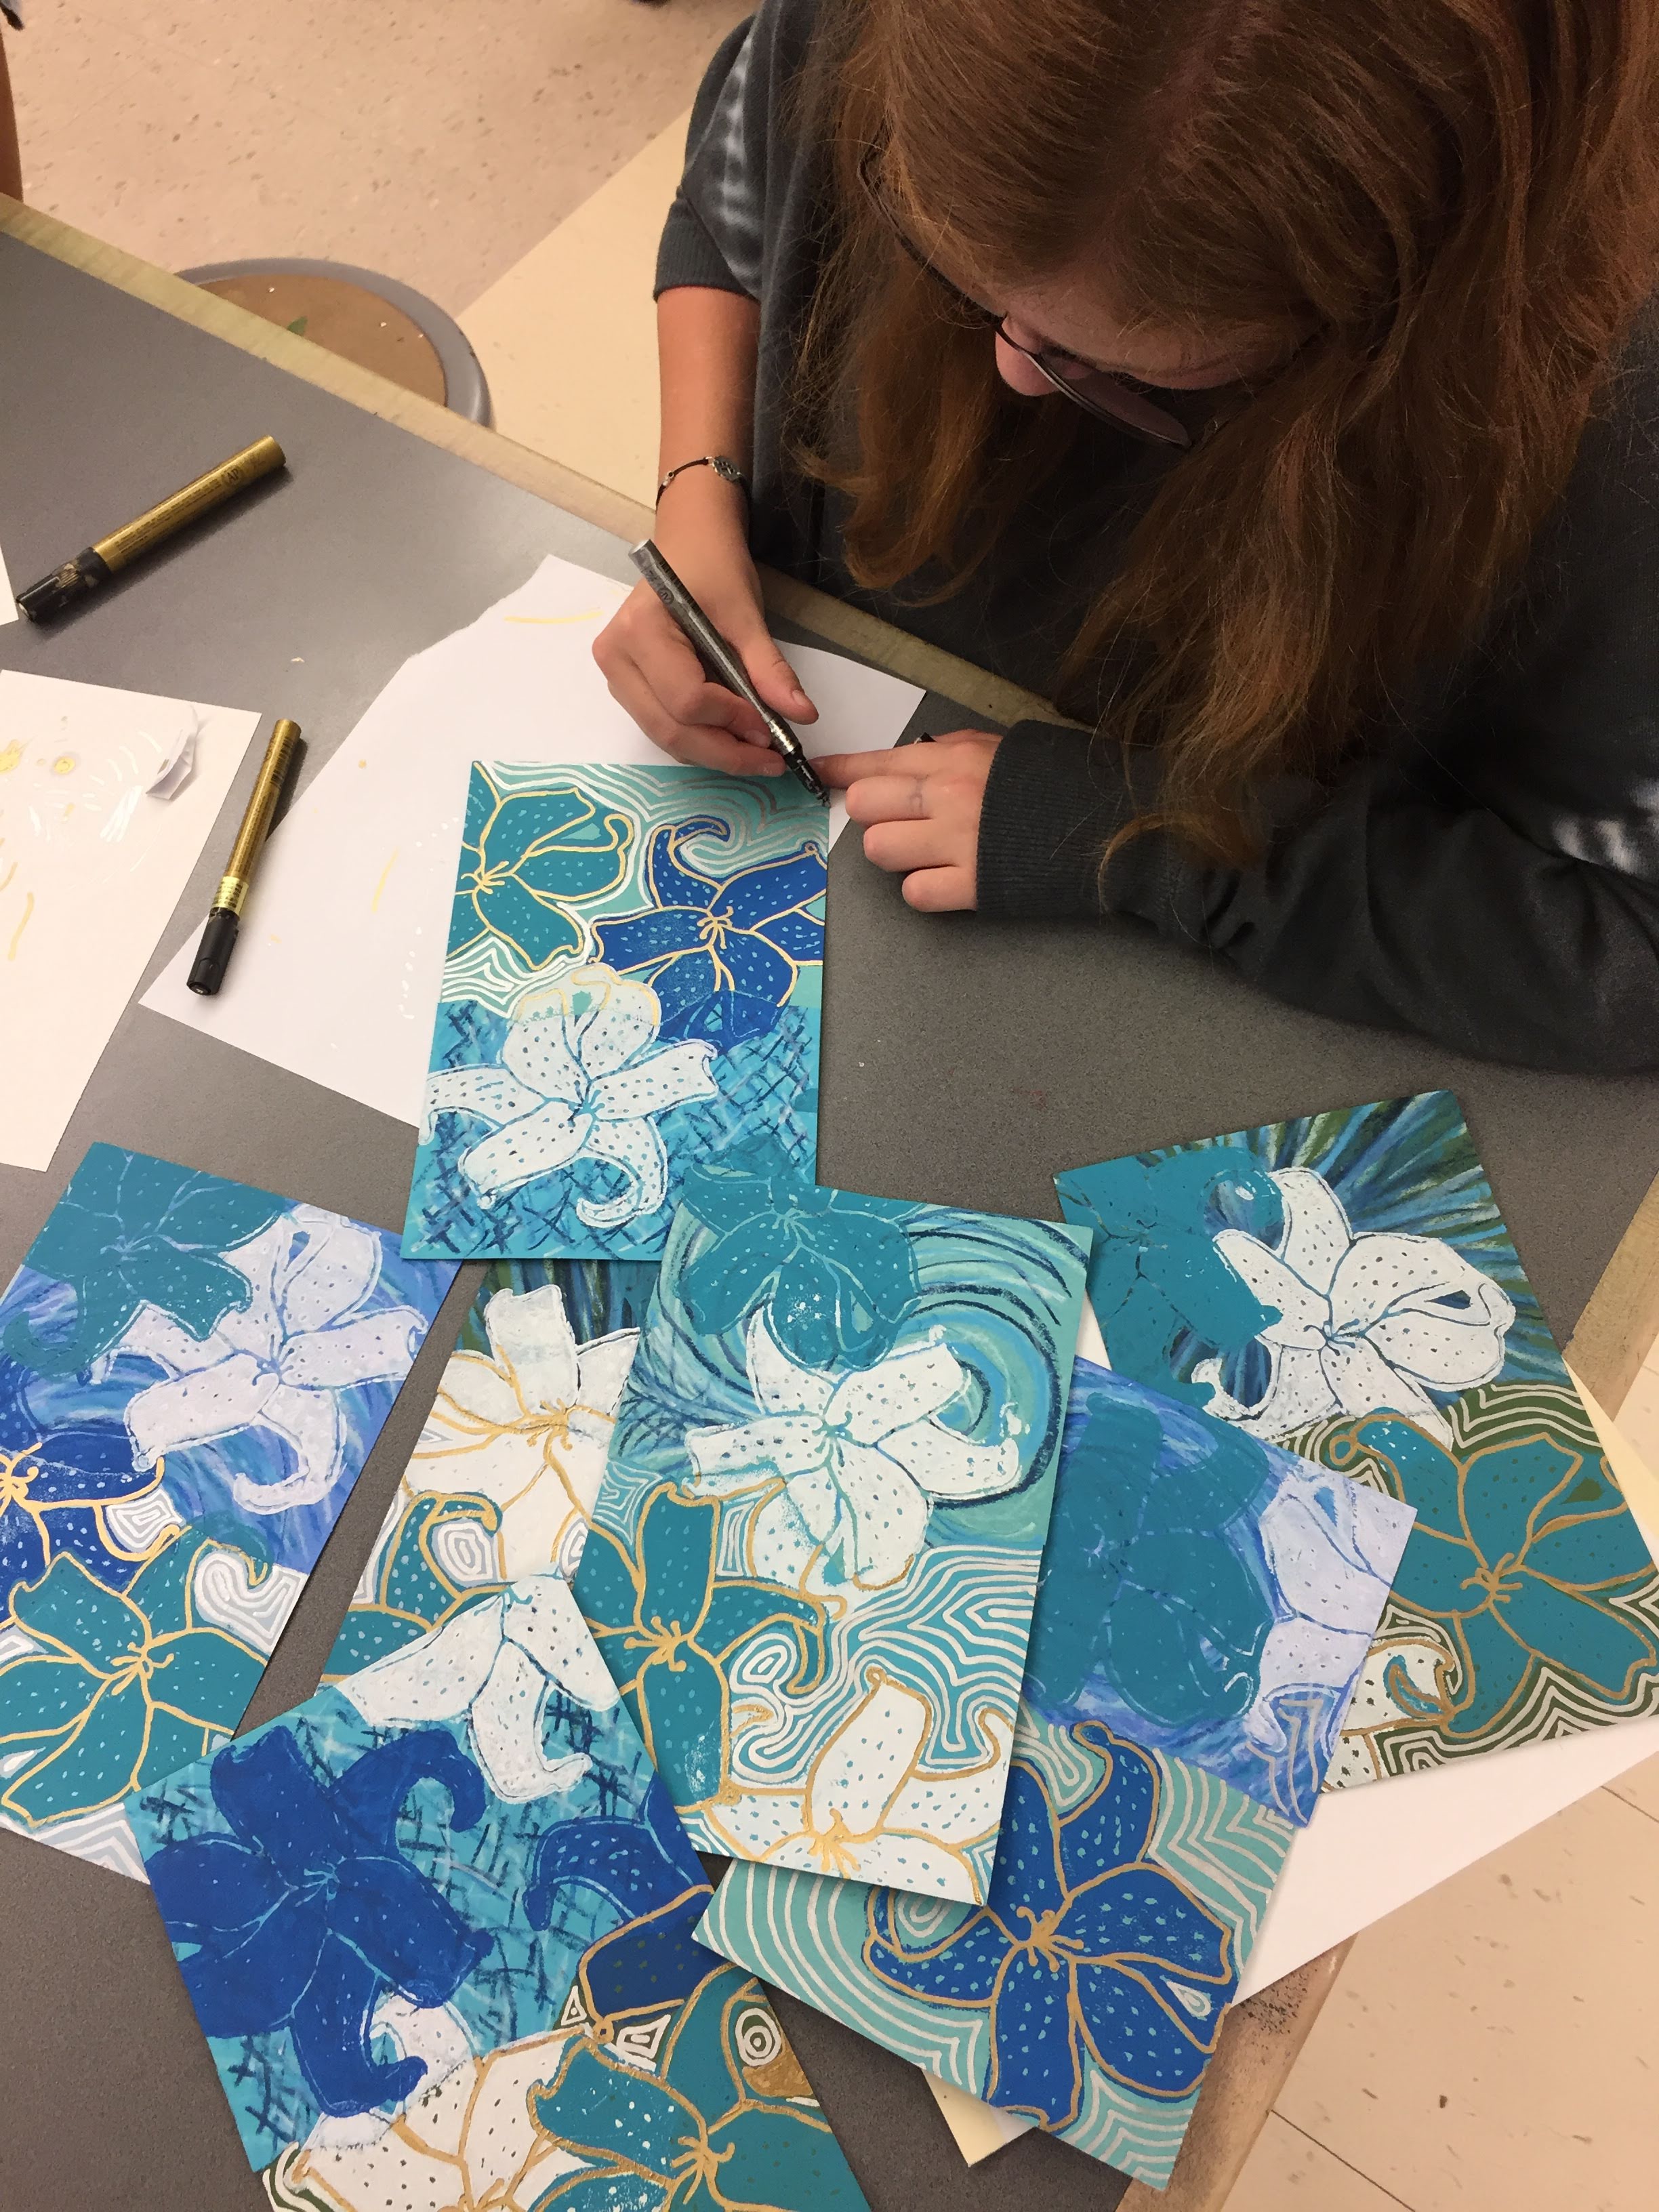
Students then select their best three or prints to embellish with their choice of metallic pen, colored pencil, and/or glitter glue. The goal is to visually unify their prints into a pleasant grouping. (This student decided to embellish ALL of her prints!)
– – –
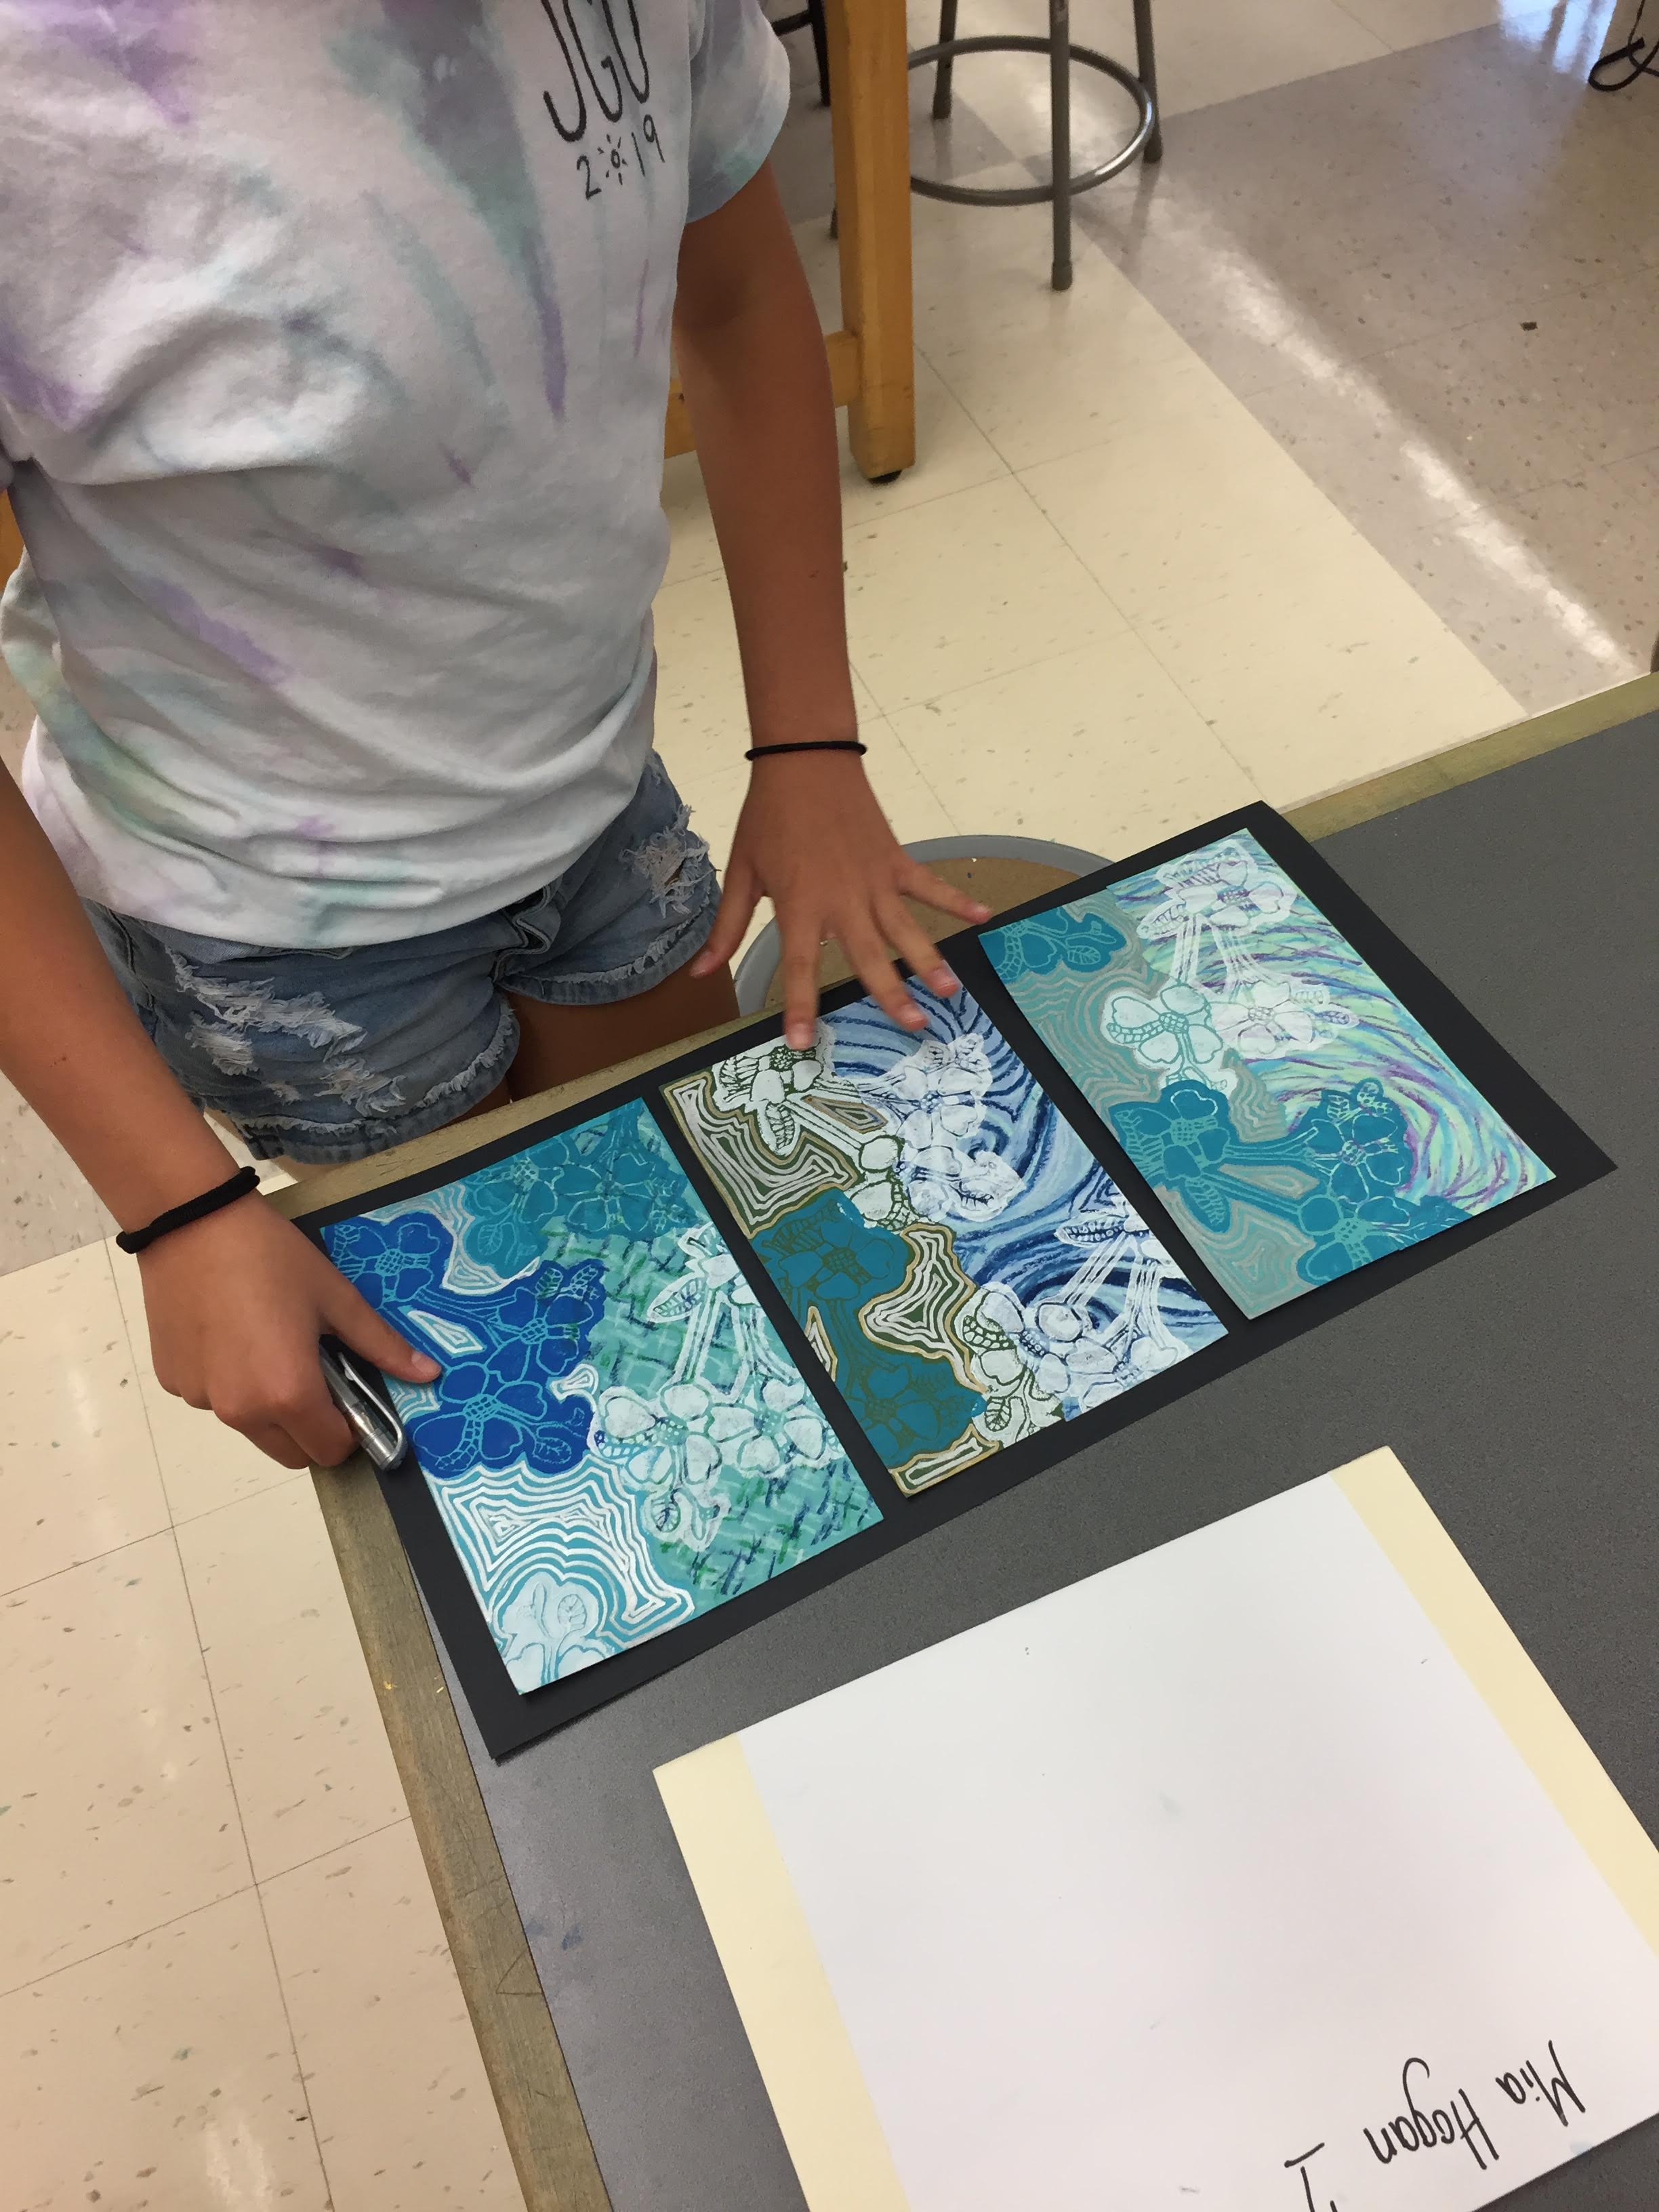
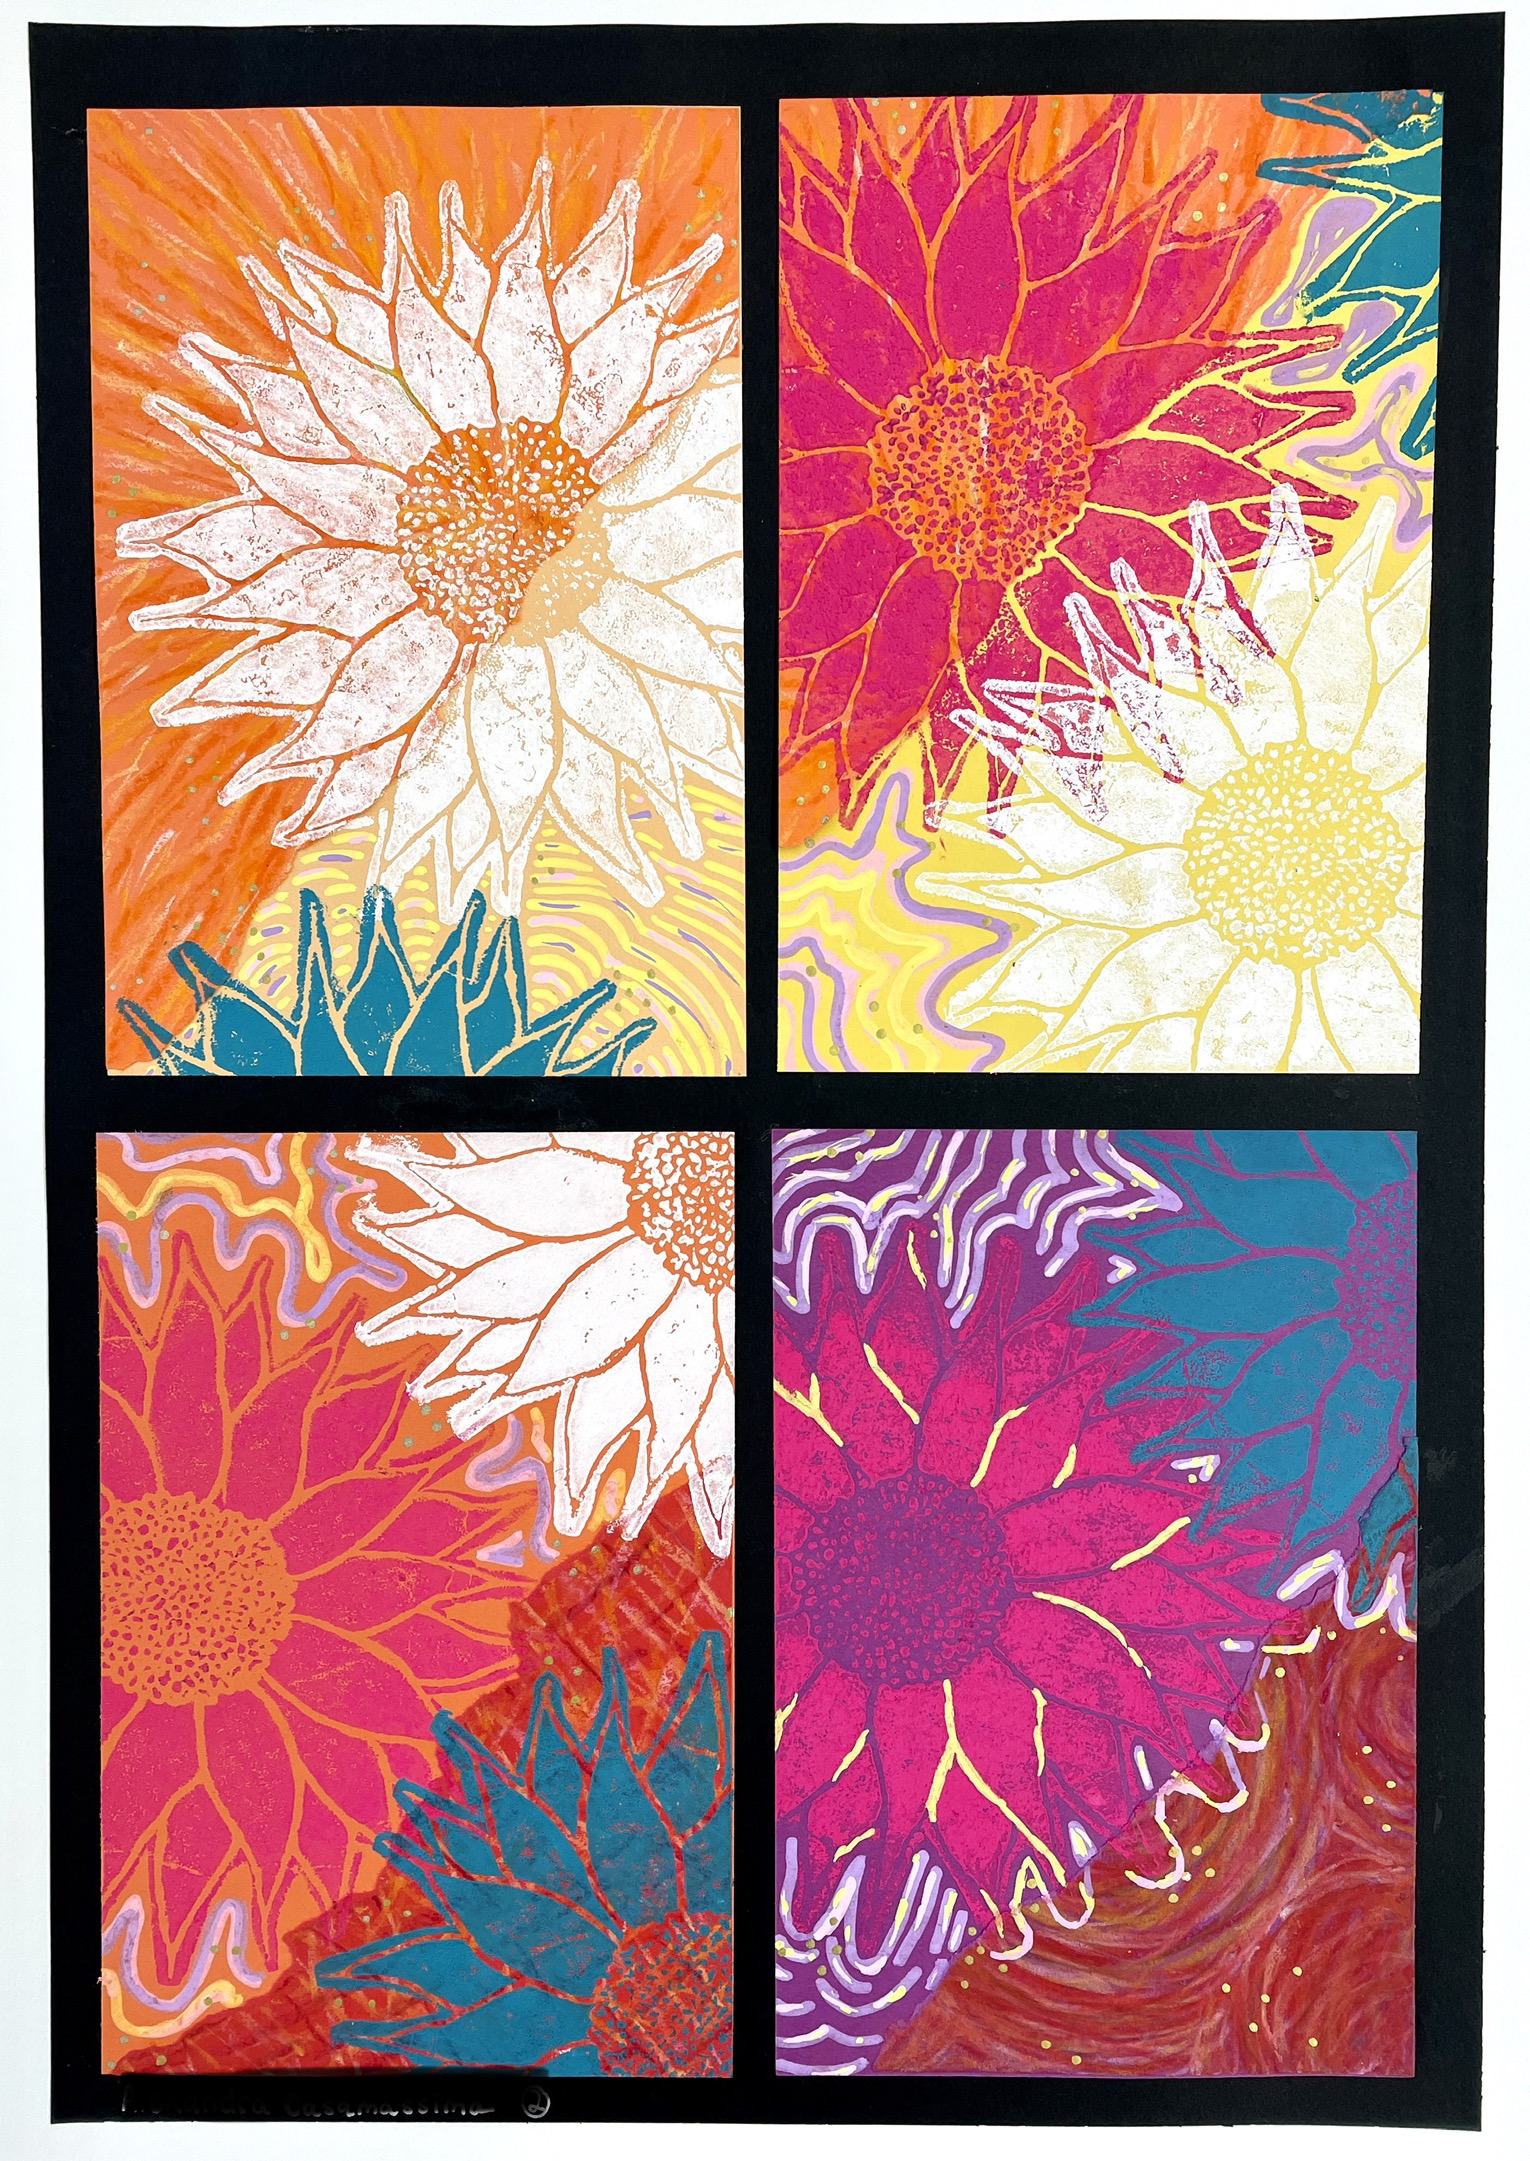
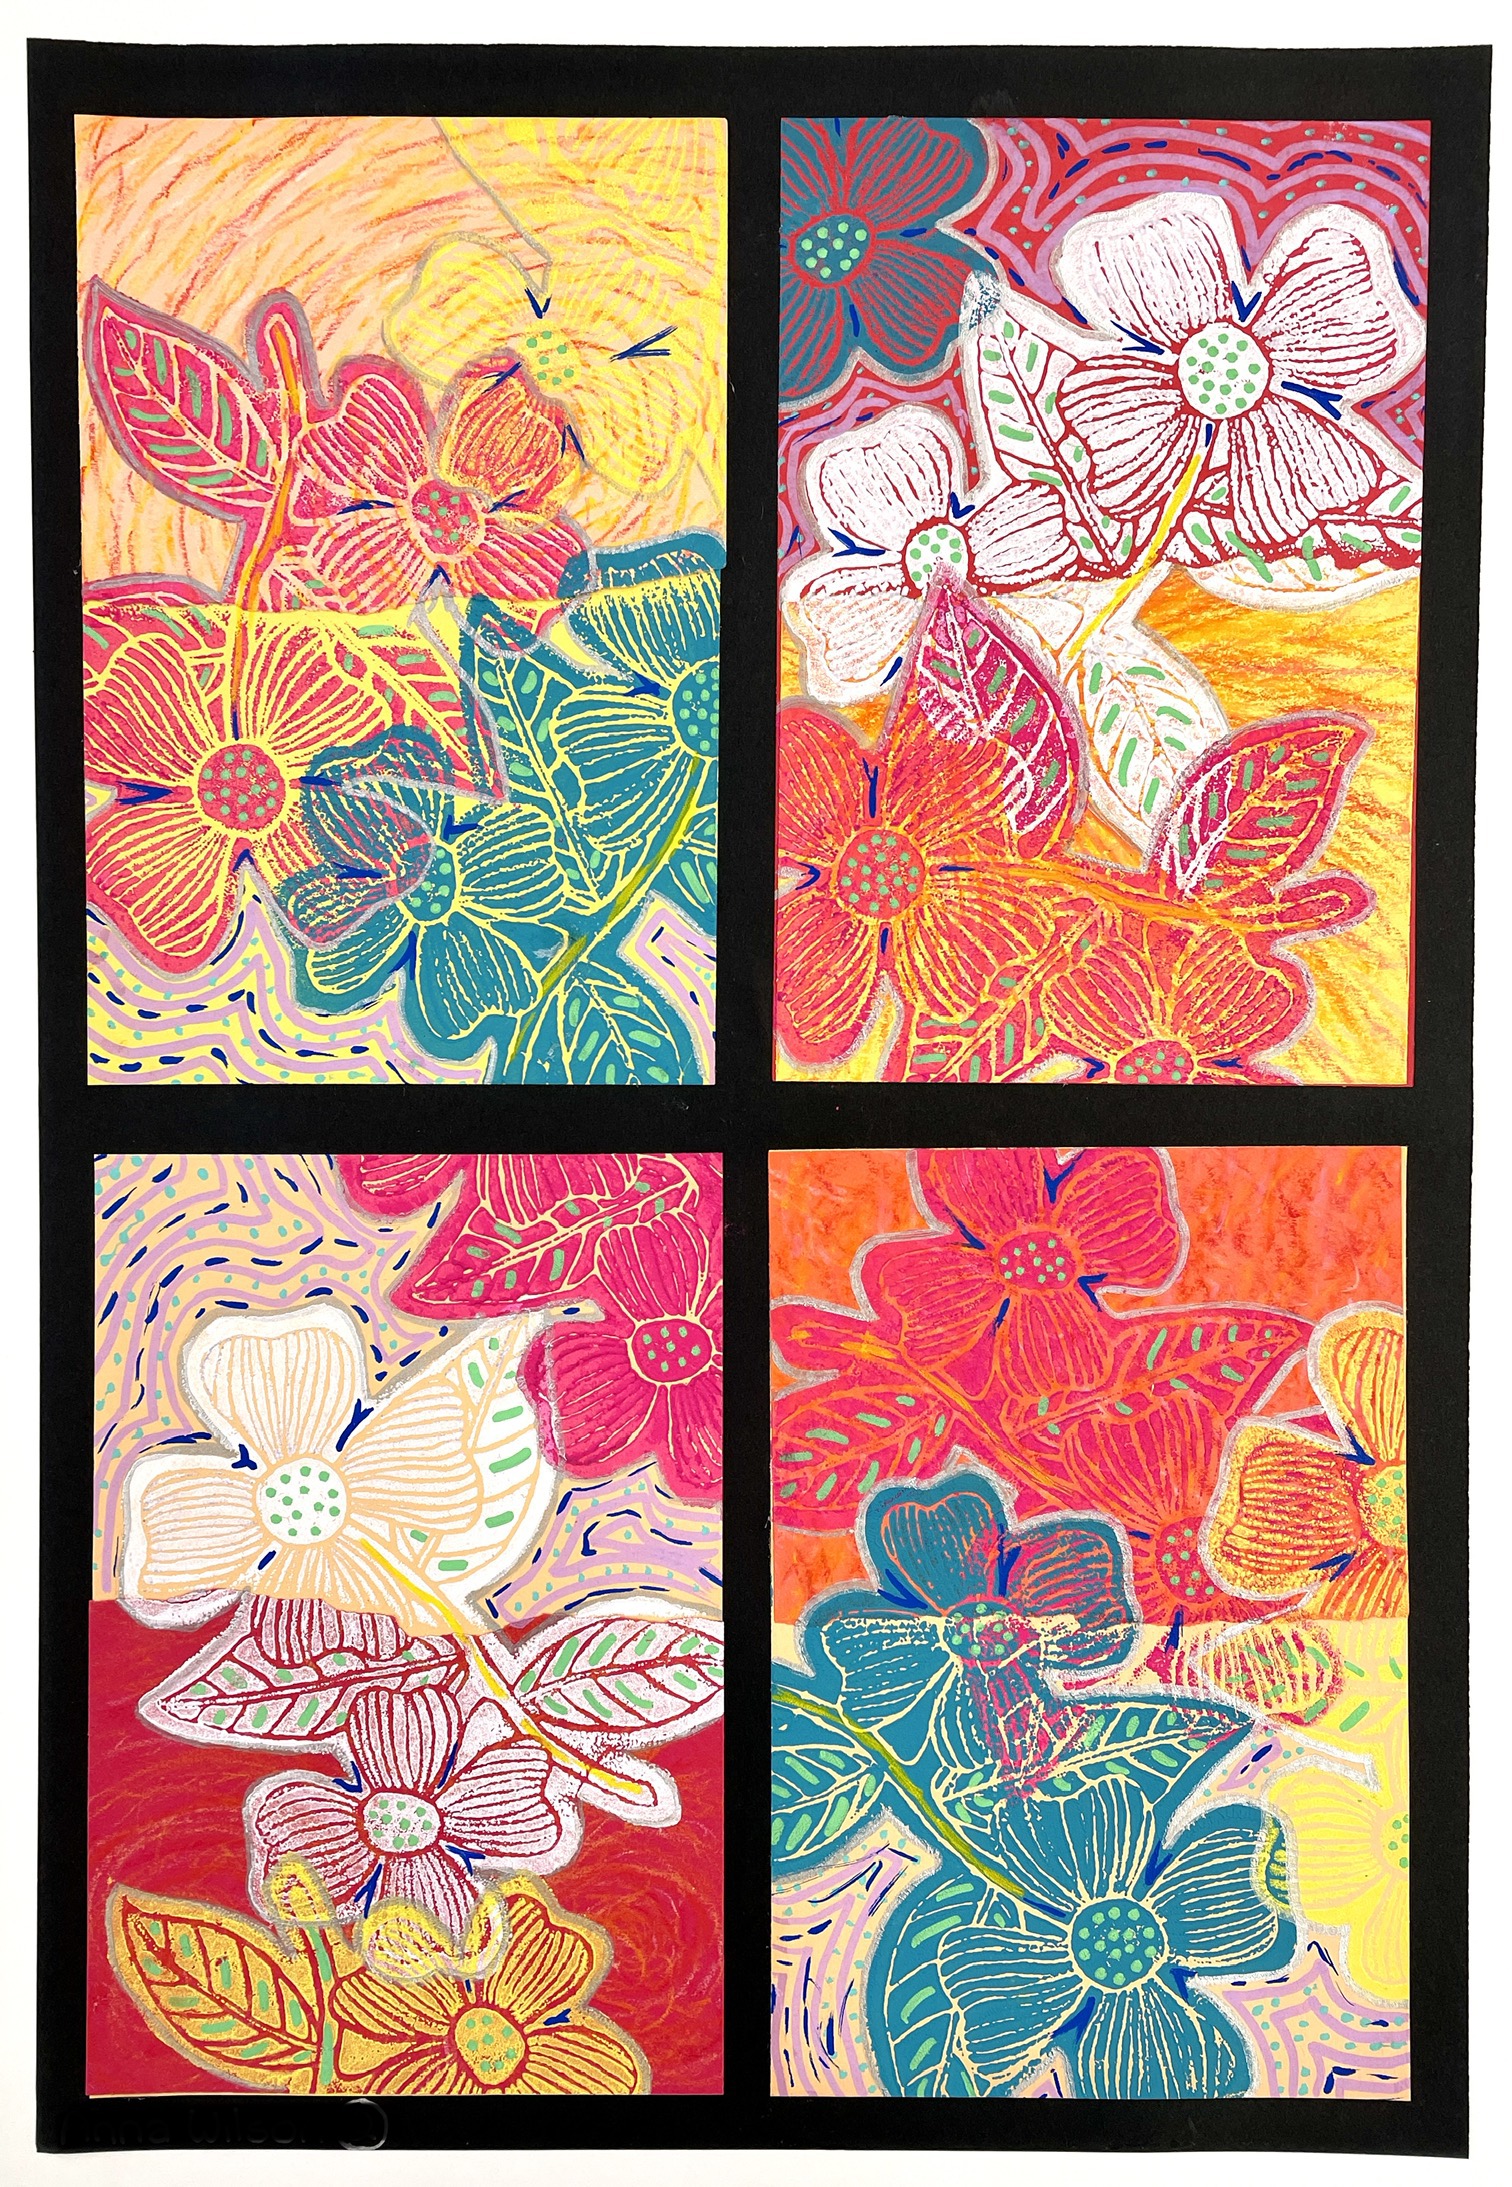
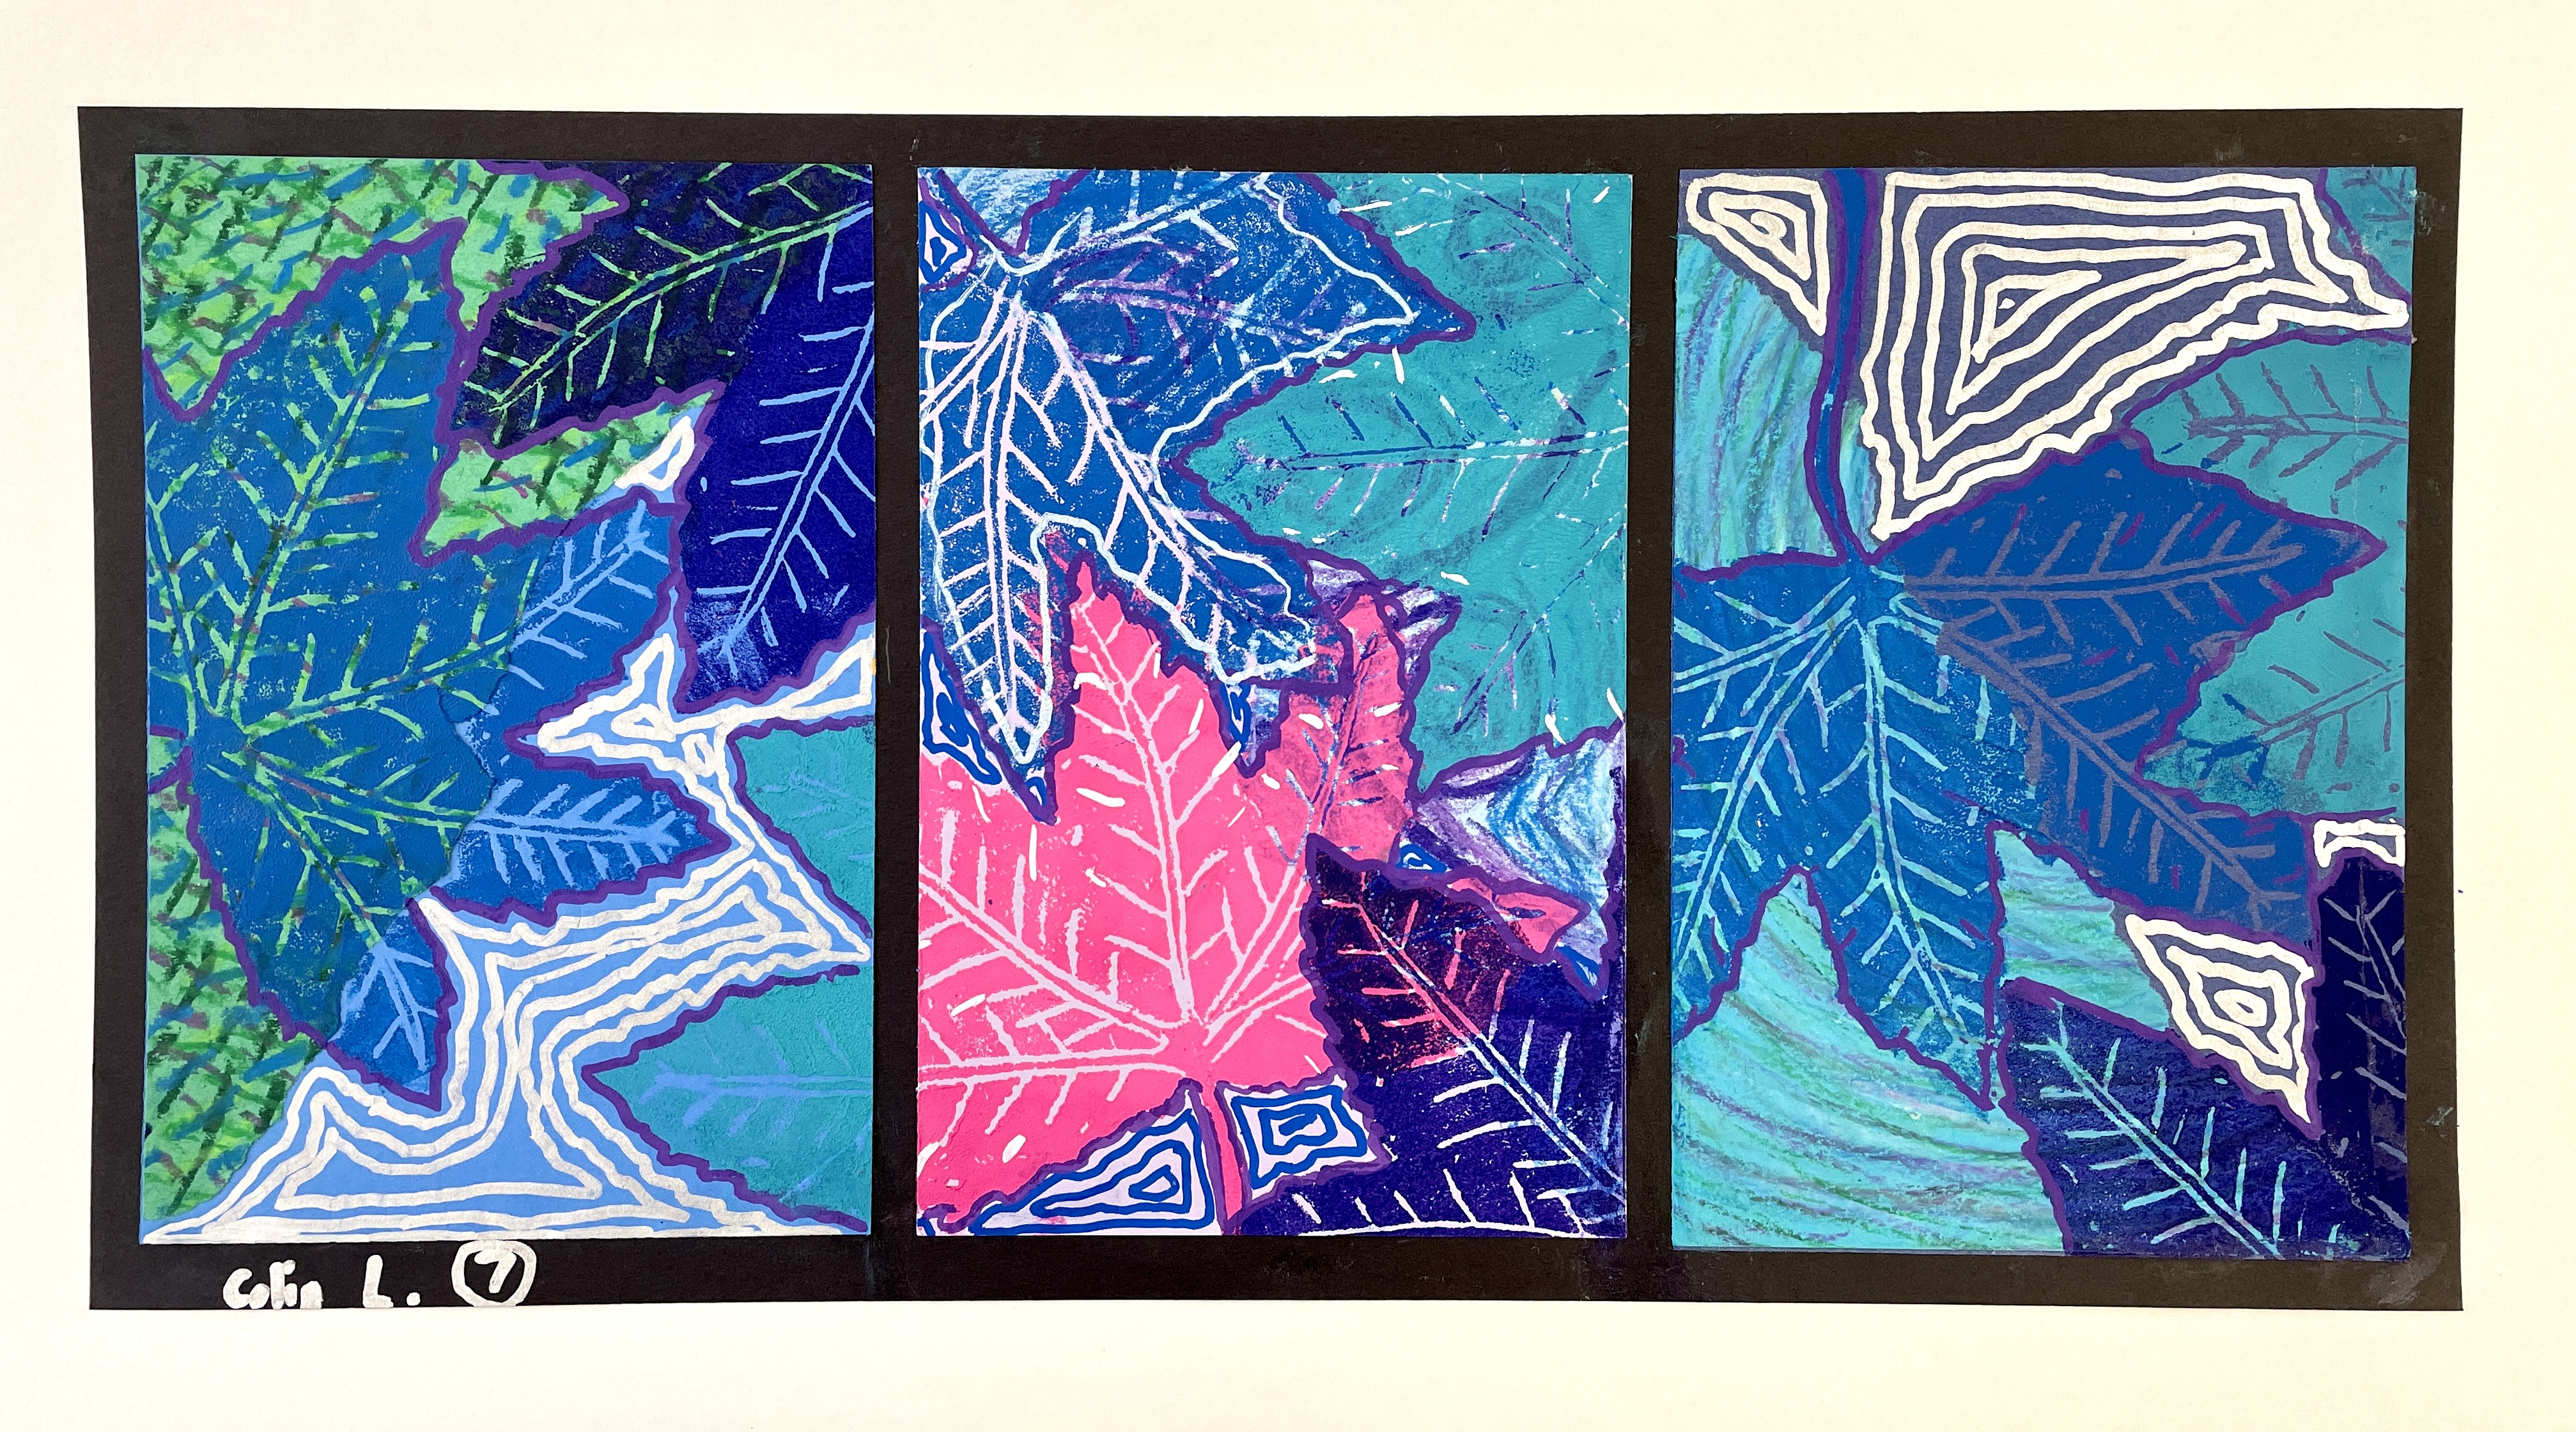
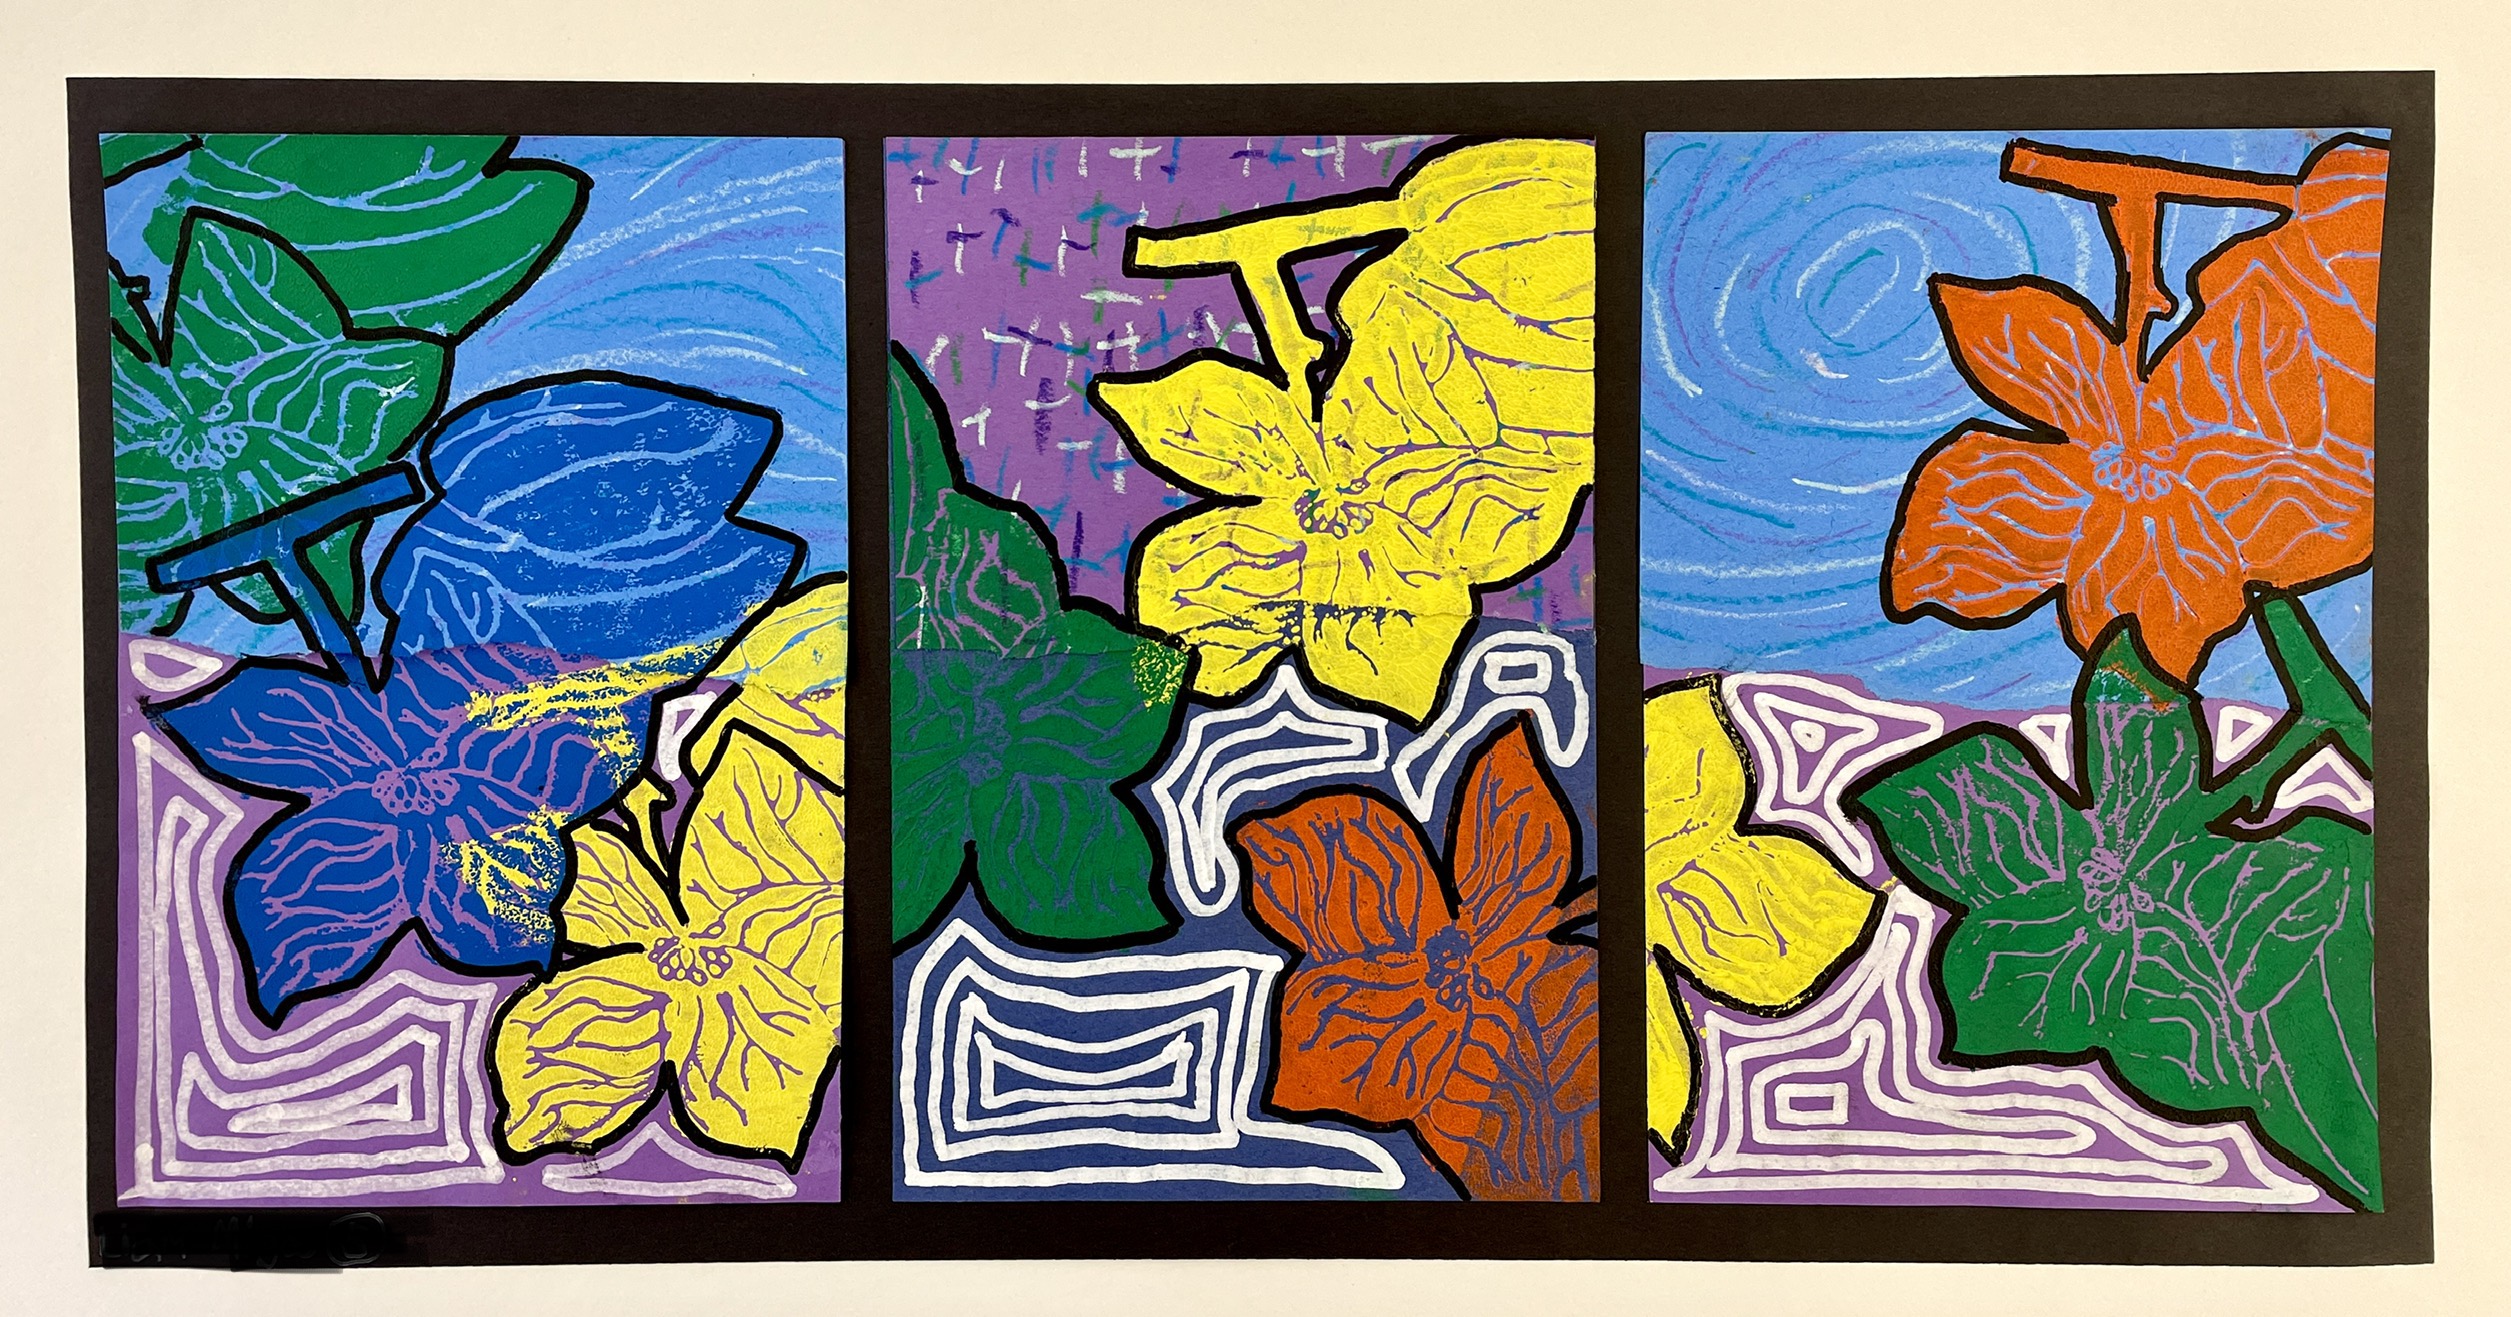
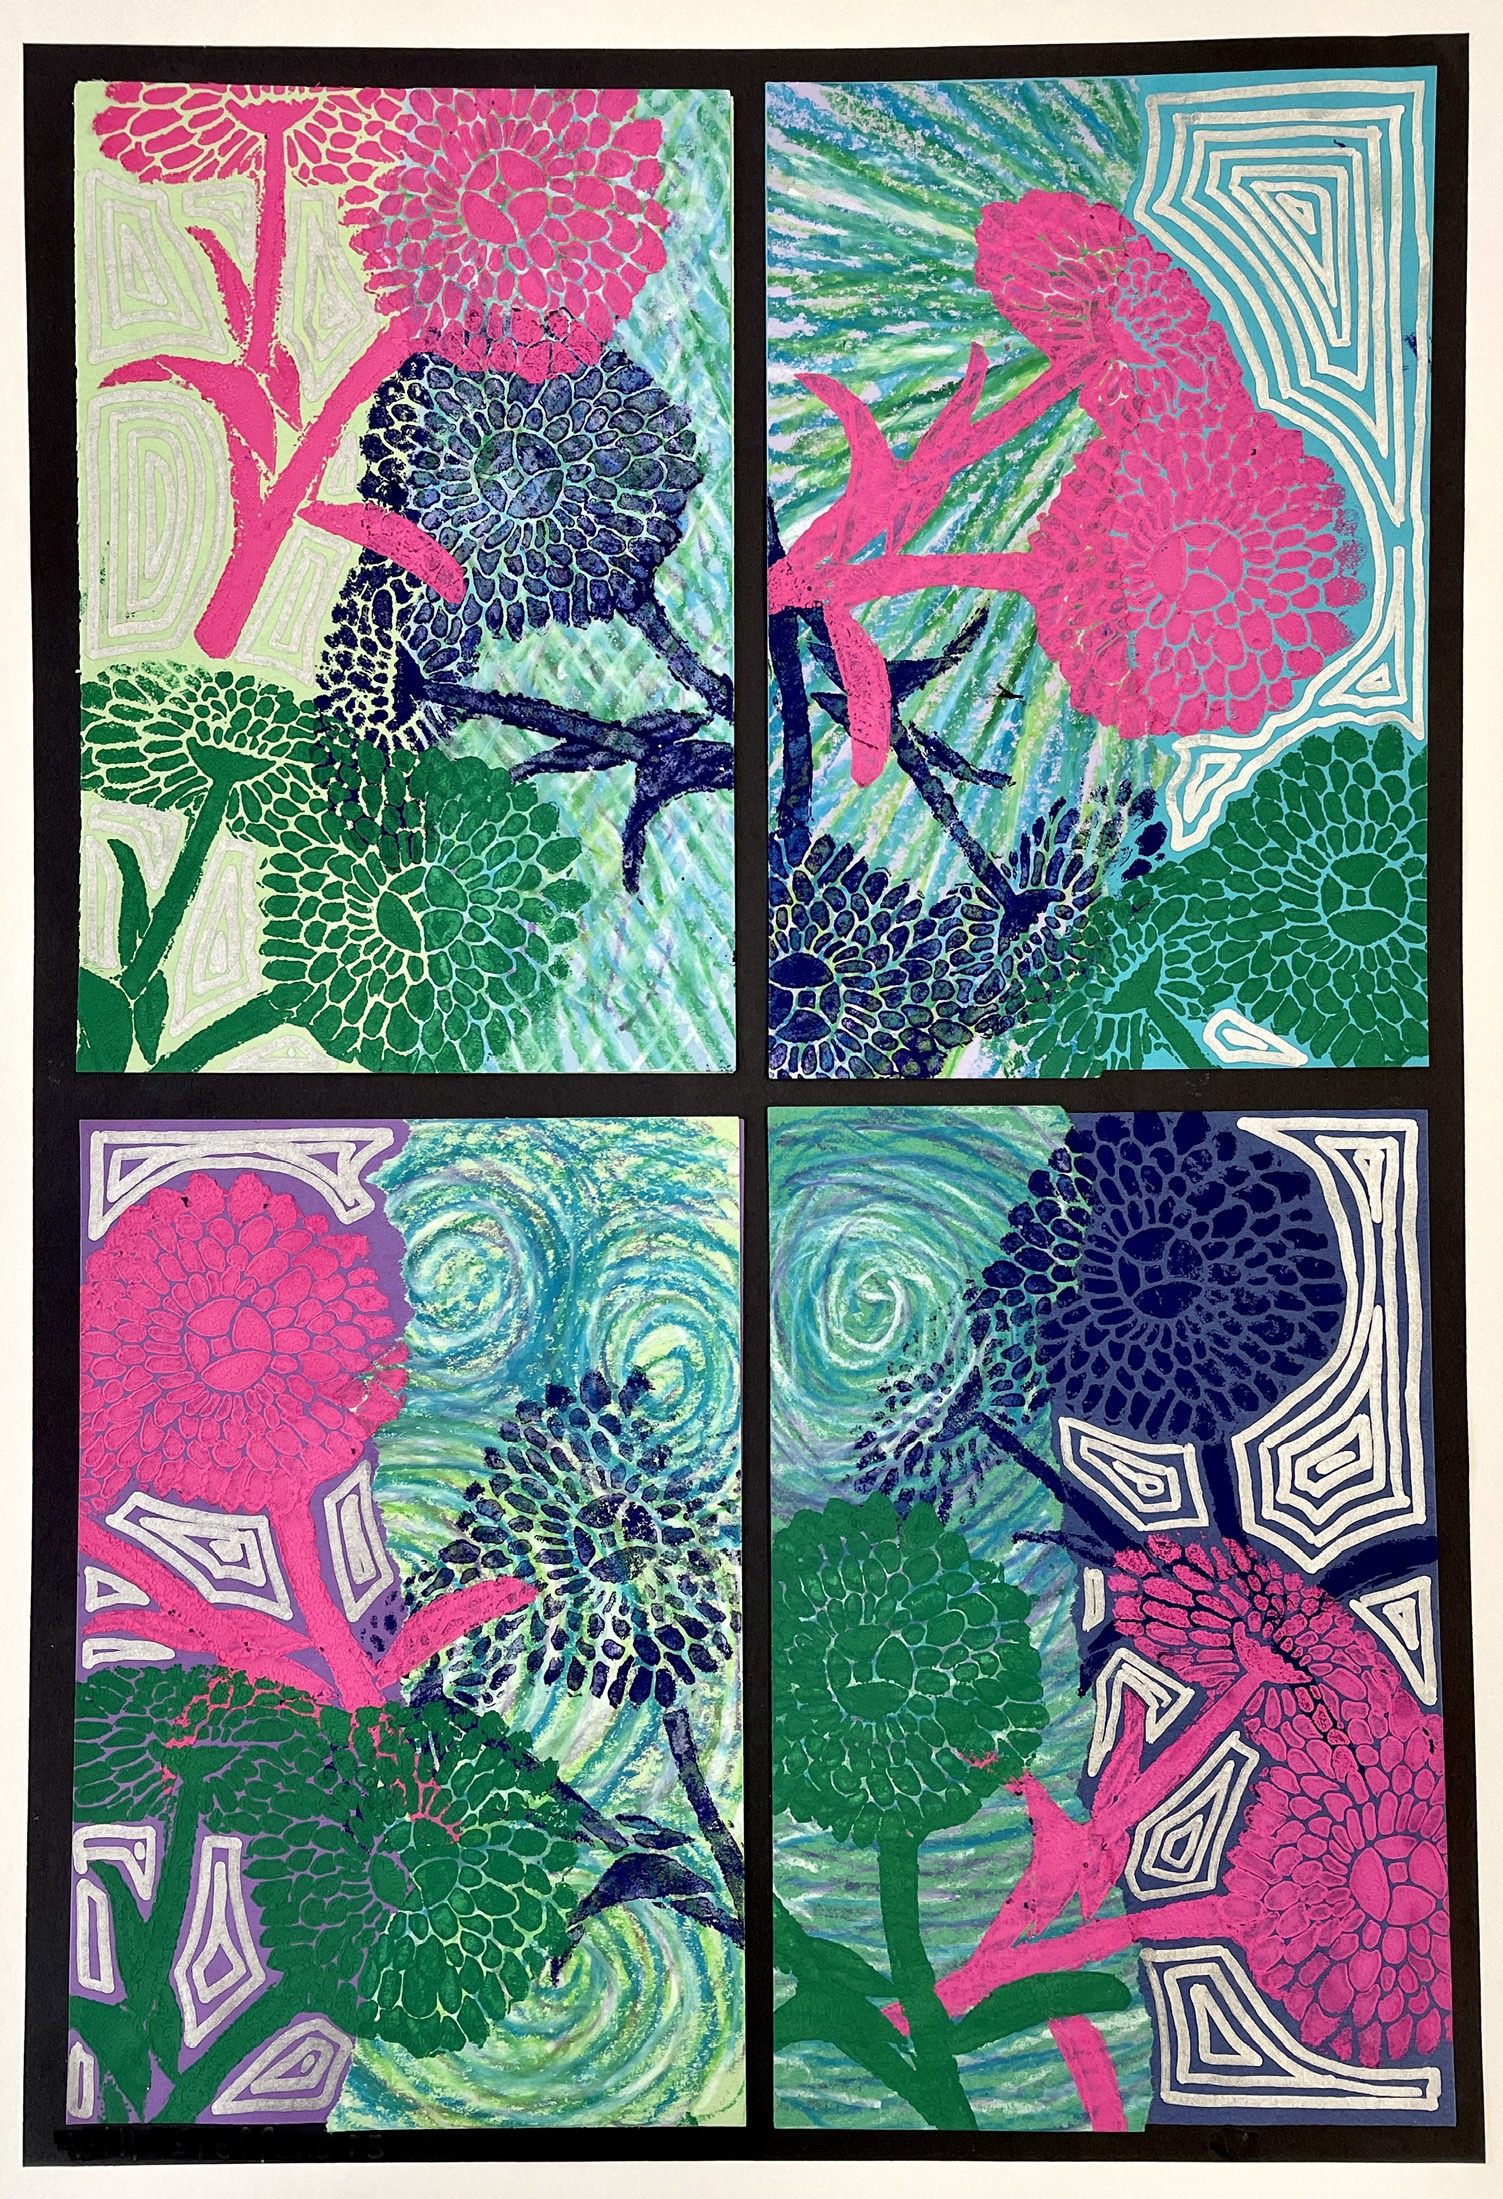
I precut black paper for both 3 and 4-print arrangements, and the students make the ultimate decision of how to mount their best prints. Neat gluing and craftsmanship factor in to their final grade!
MOUNTING PRO TIP! It is crucial to press your mounted prints under something heavy in order to ensure they dry flat. Use glue stick, NOT liquid glue. Any moisture will temporarily “reactivate” the printing ink and can result in them sticking to anything laid on top. I use sheets of tracing paper layered between the mounted works to prevent ripping and damage. These sheets can be re-used, even if they get a little dirty—- I have a folder saved that I reuse year to year. If making the accordion book, layer tracing paper between facing pages as well as on the cover before pressing.
– – –
This lesson took a total of about twelve 47 minute classes, which included the nature drawing, making the printing plate, creating the oil pastel patterned papers, printing, embellishing and mounting! Students generally had enough prints to submit one mounted grouping of 3 or 4 prints, as well as one “stand alone” print for extra credit.
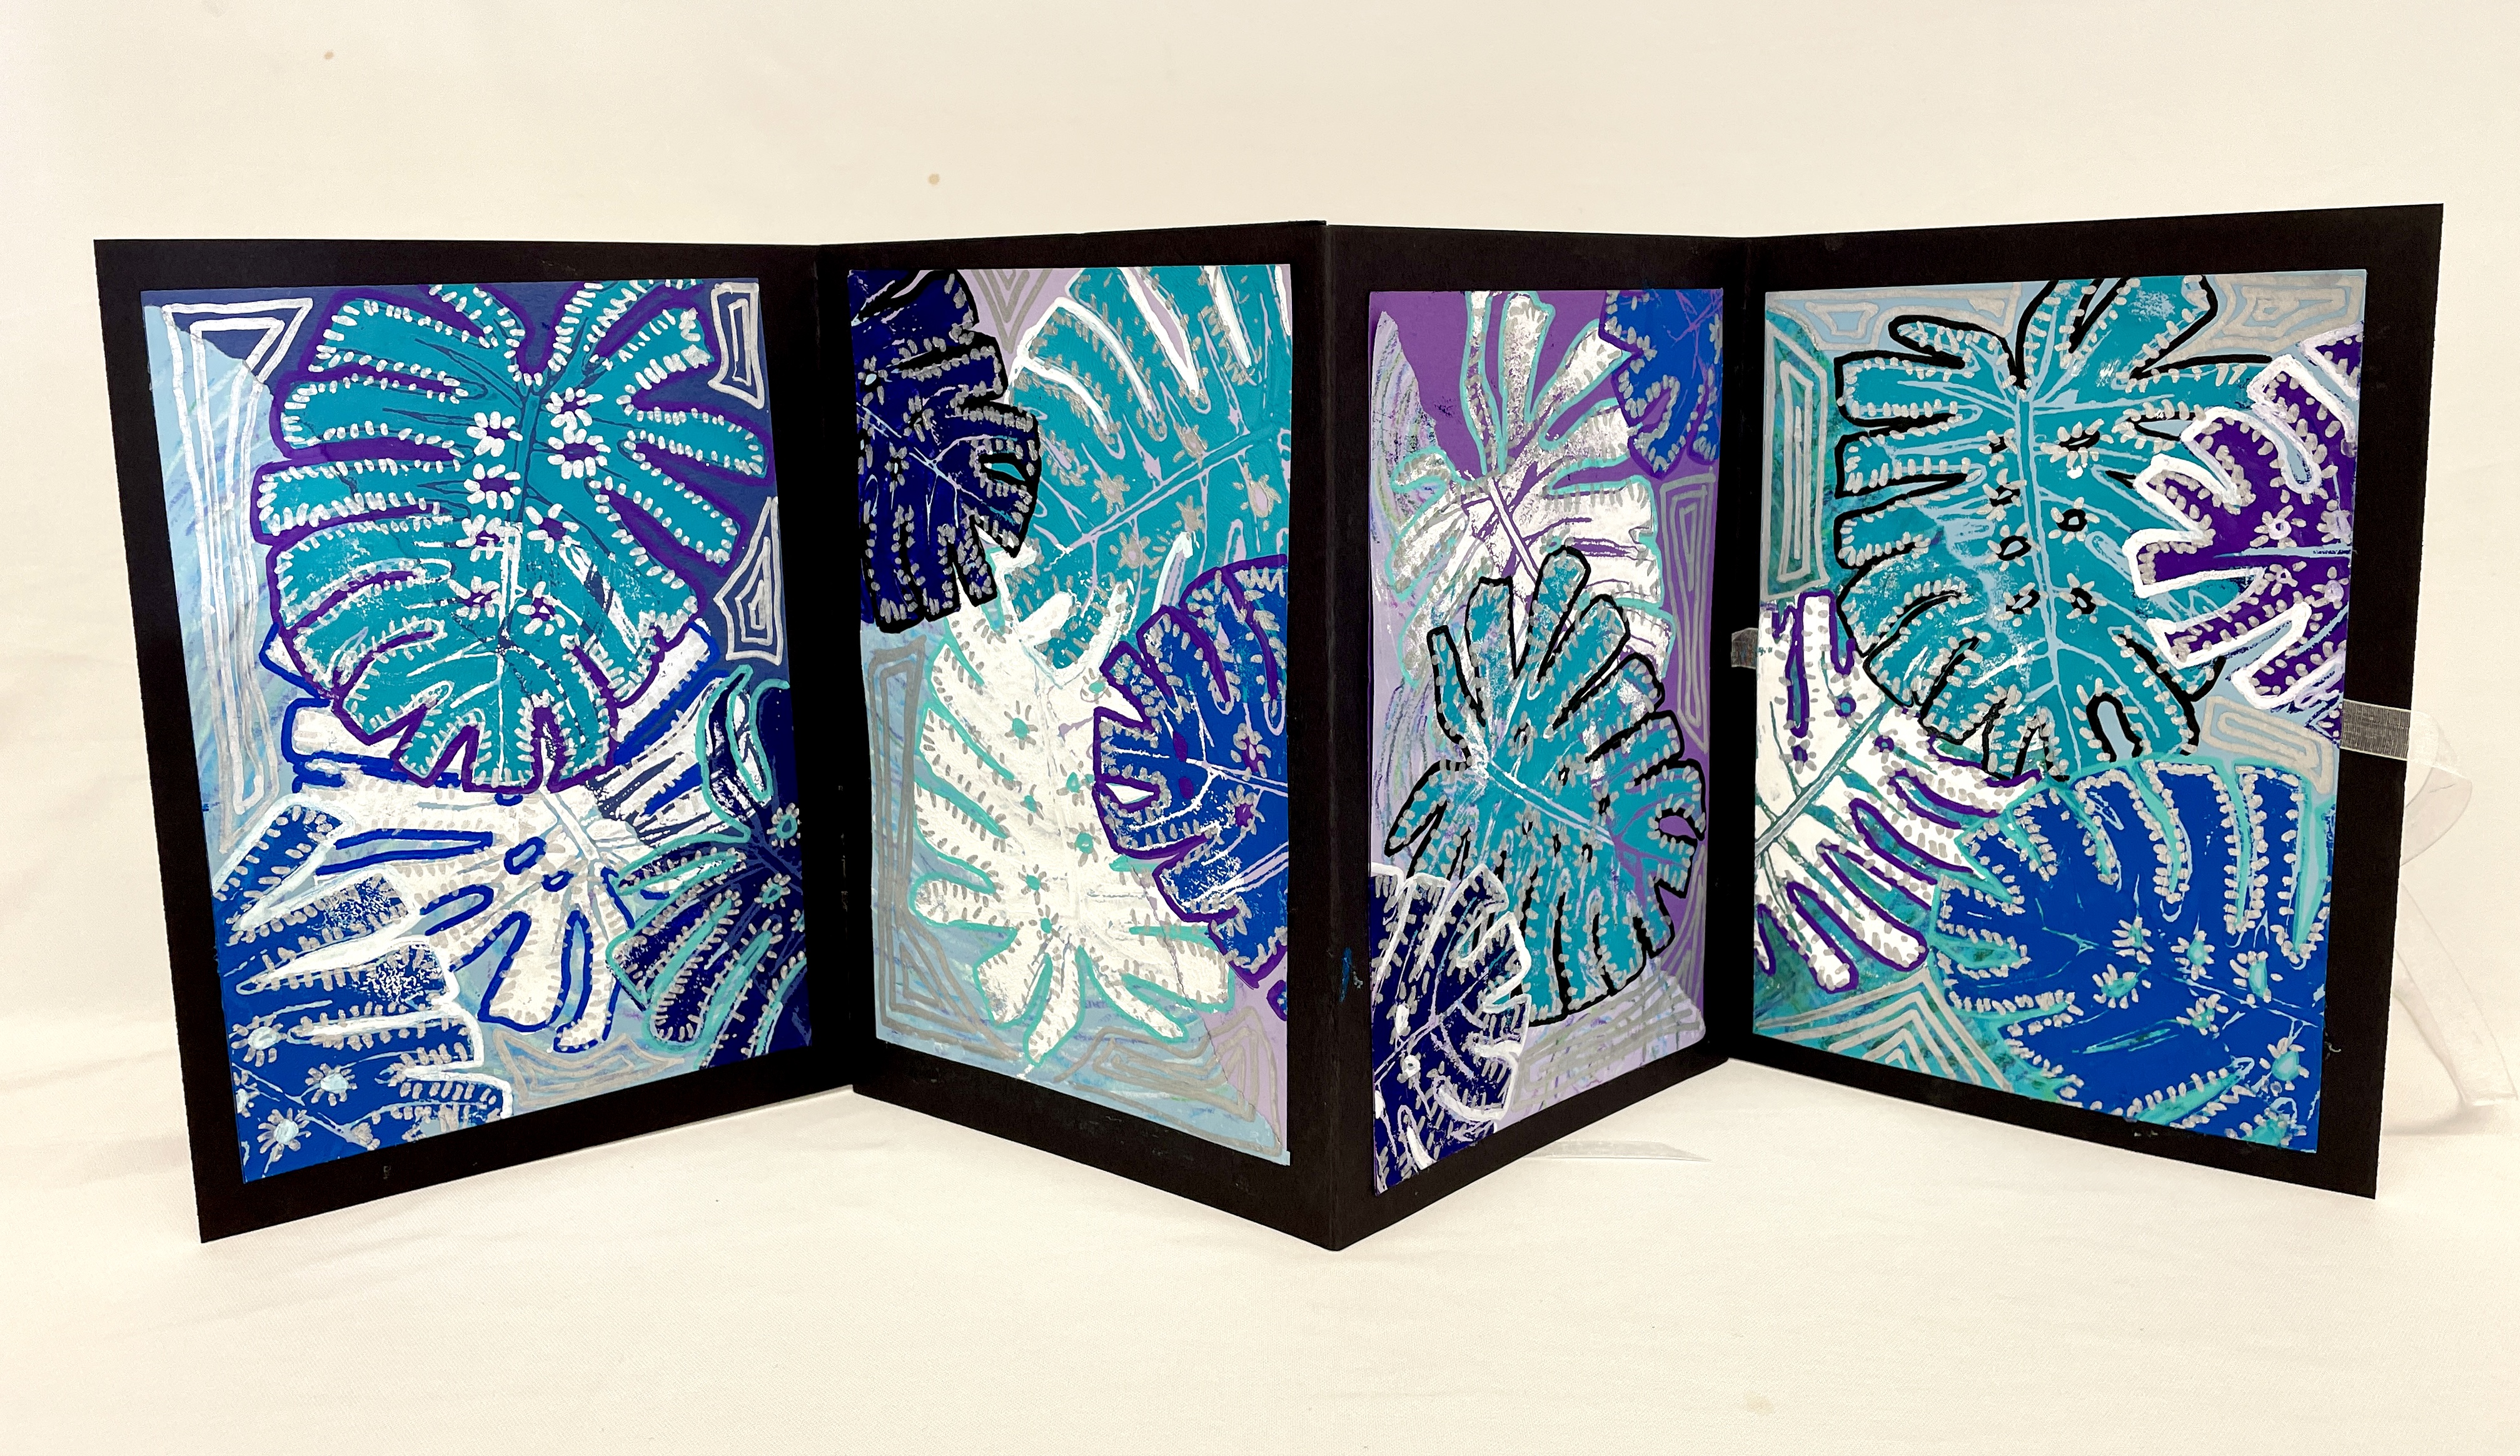
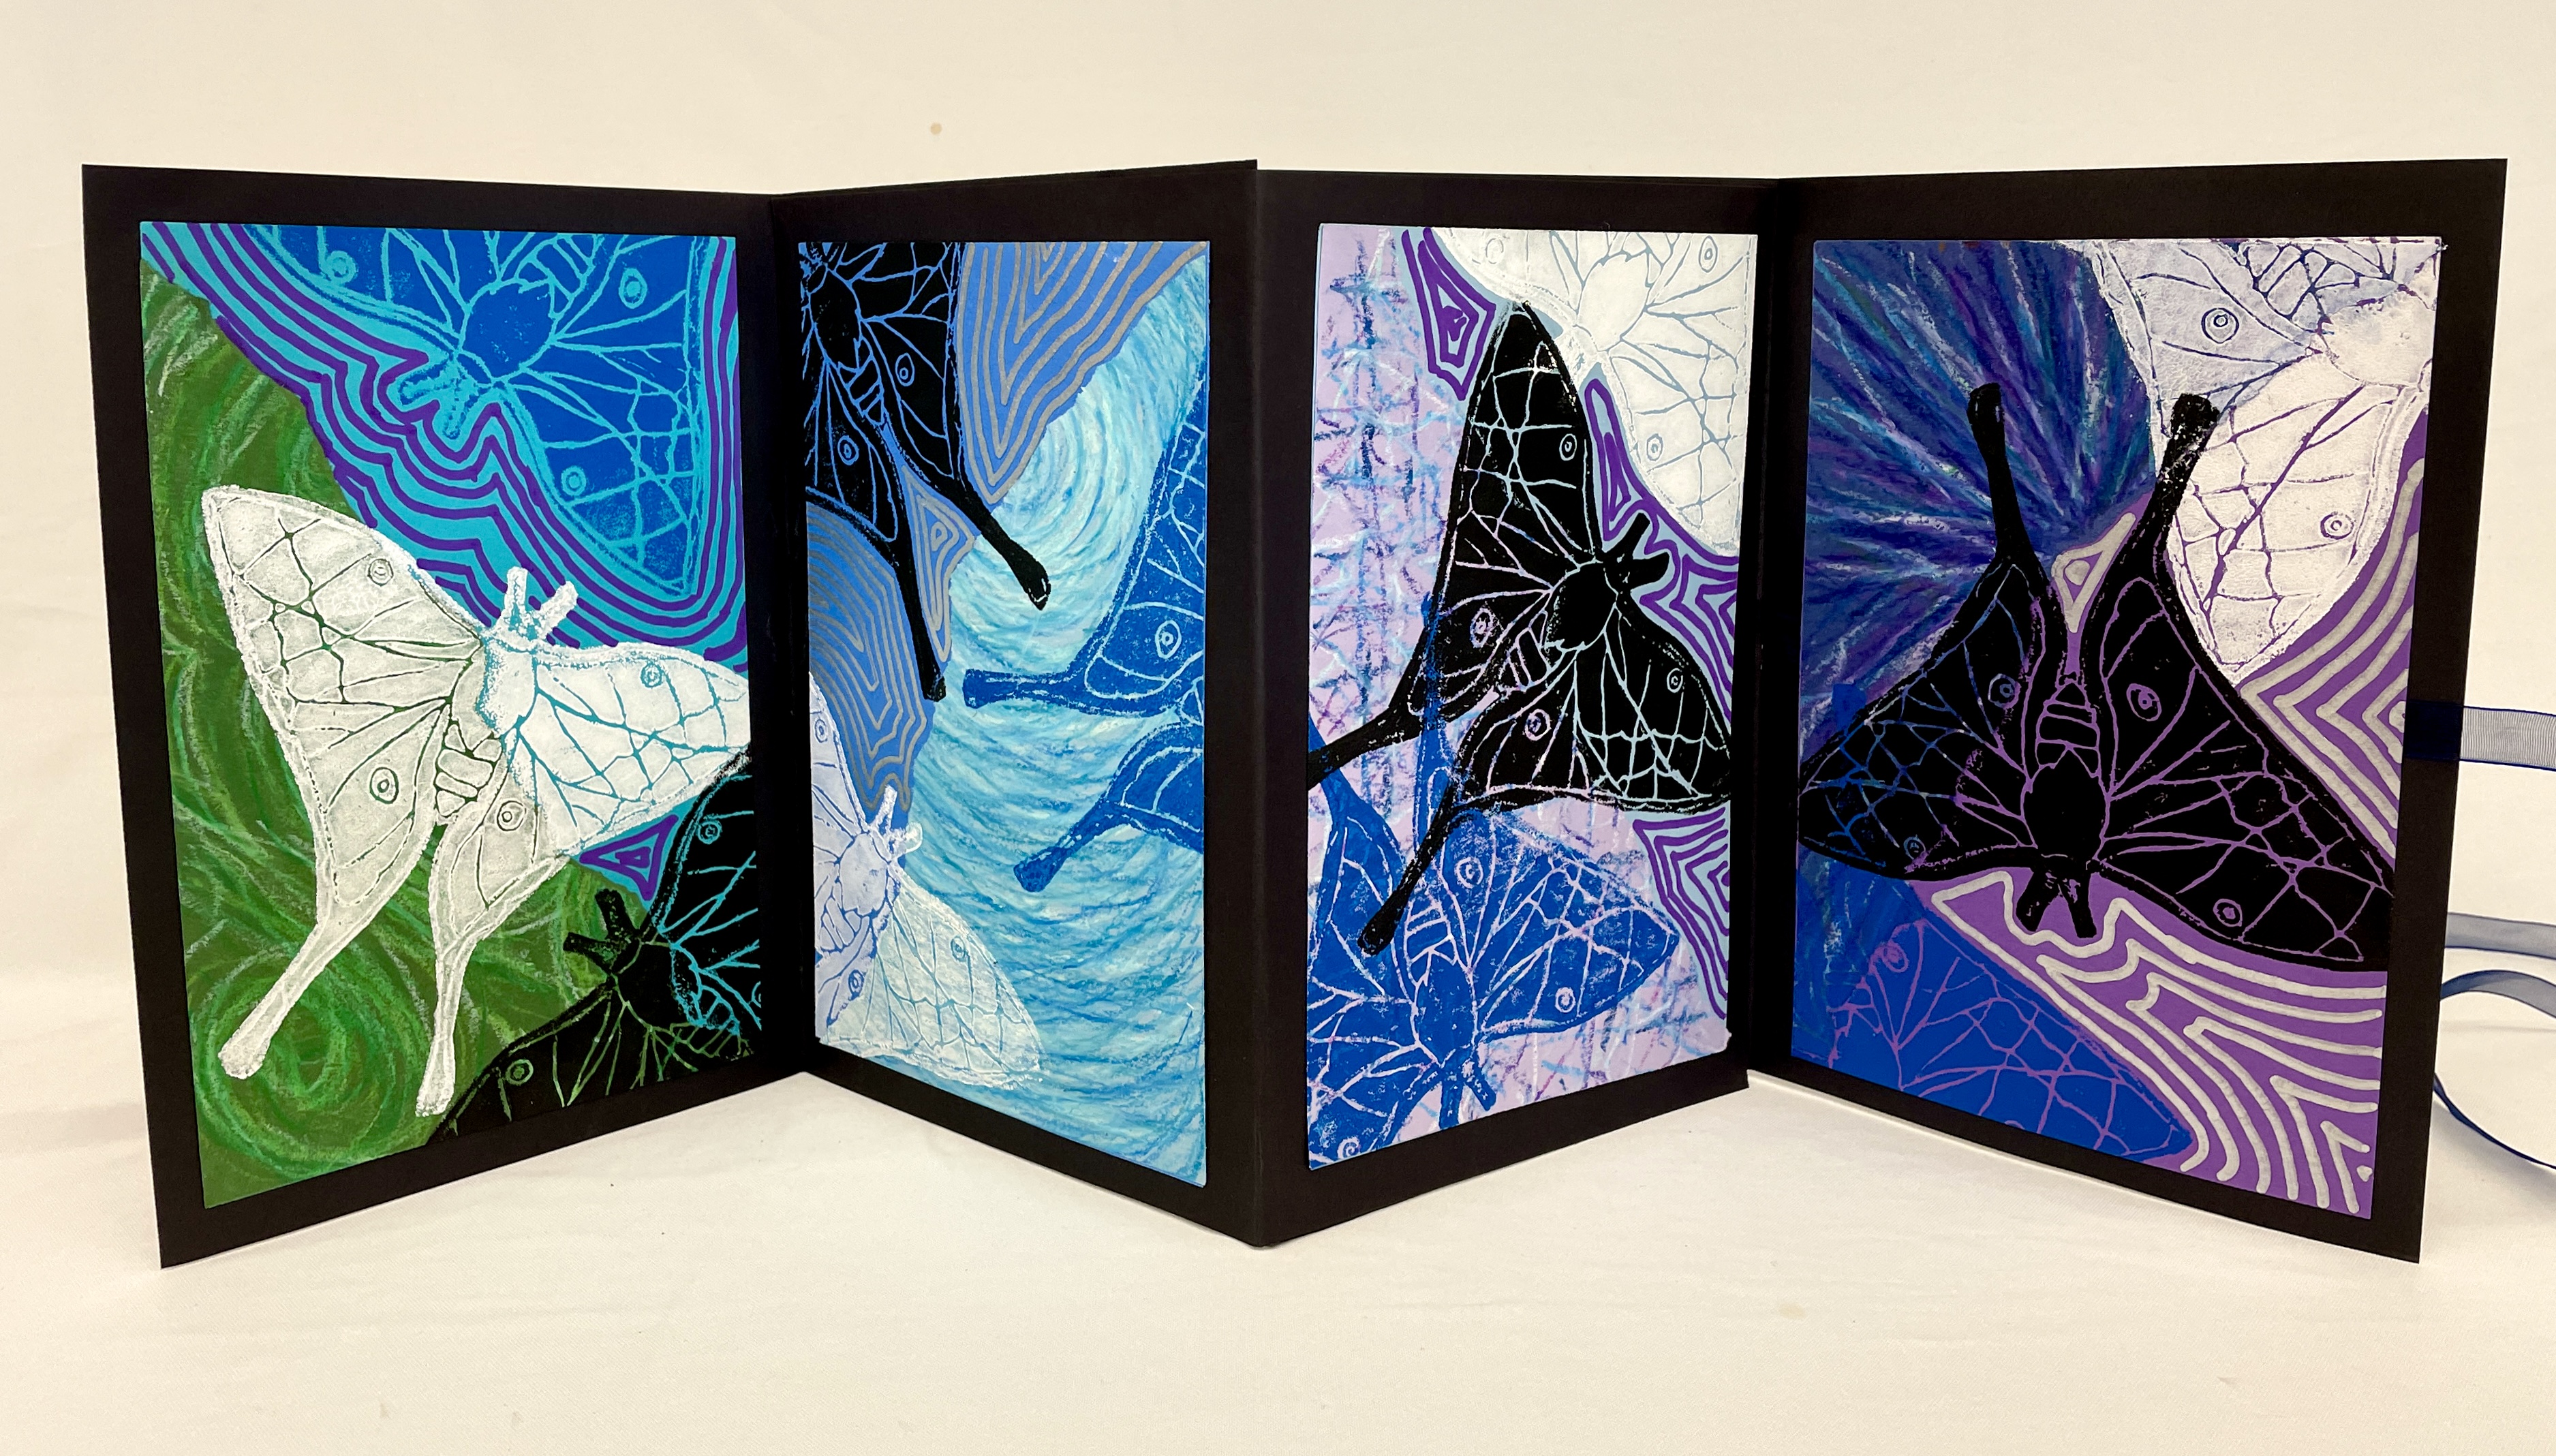
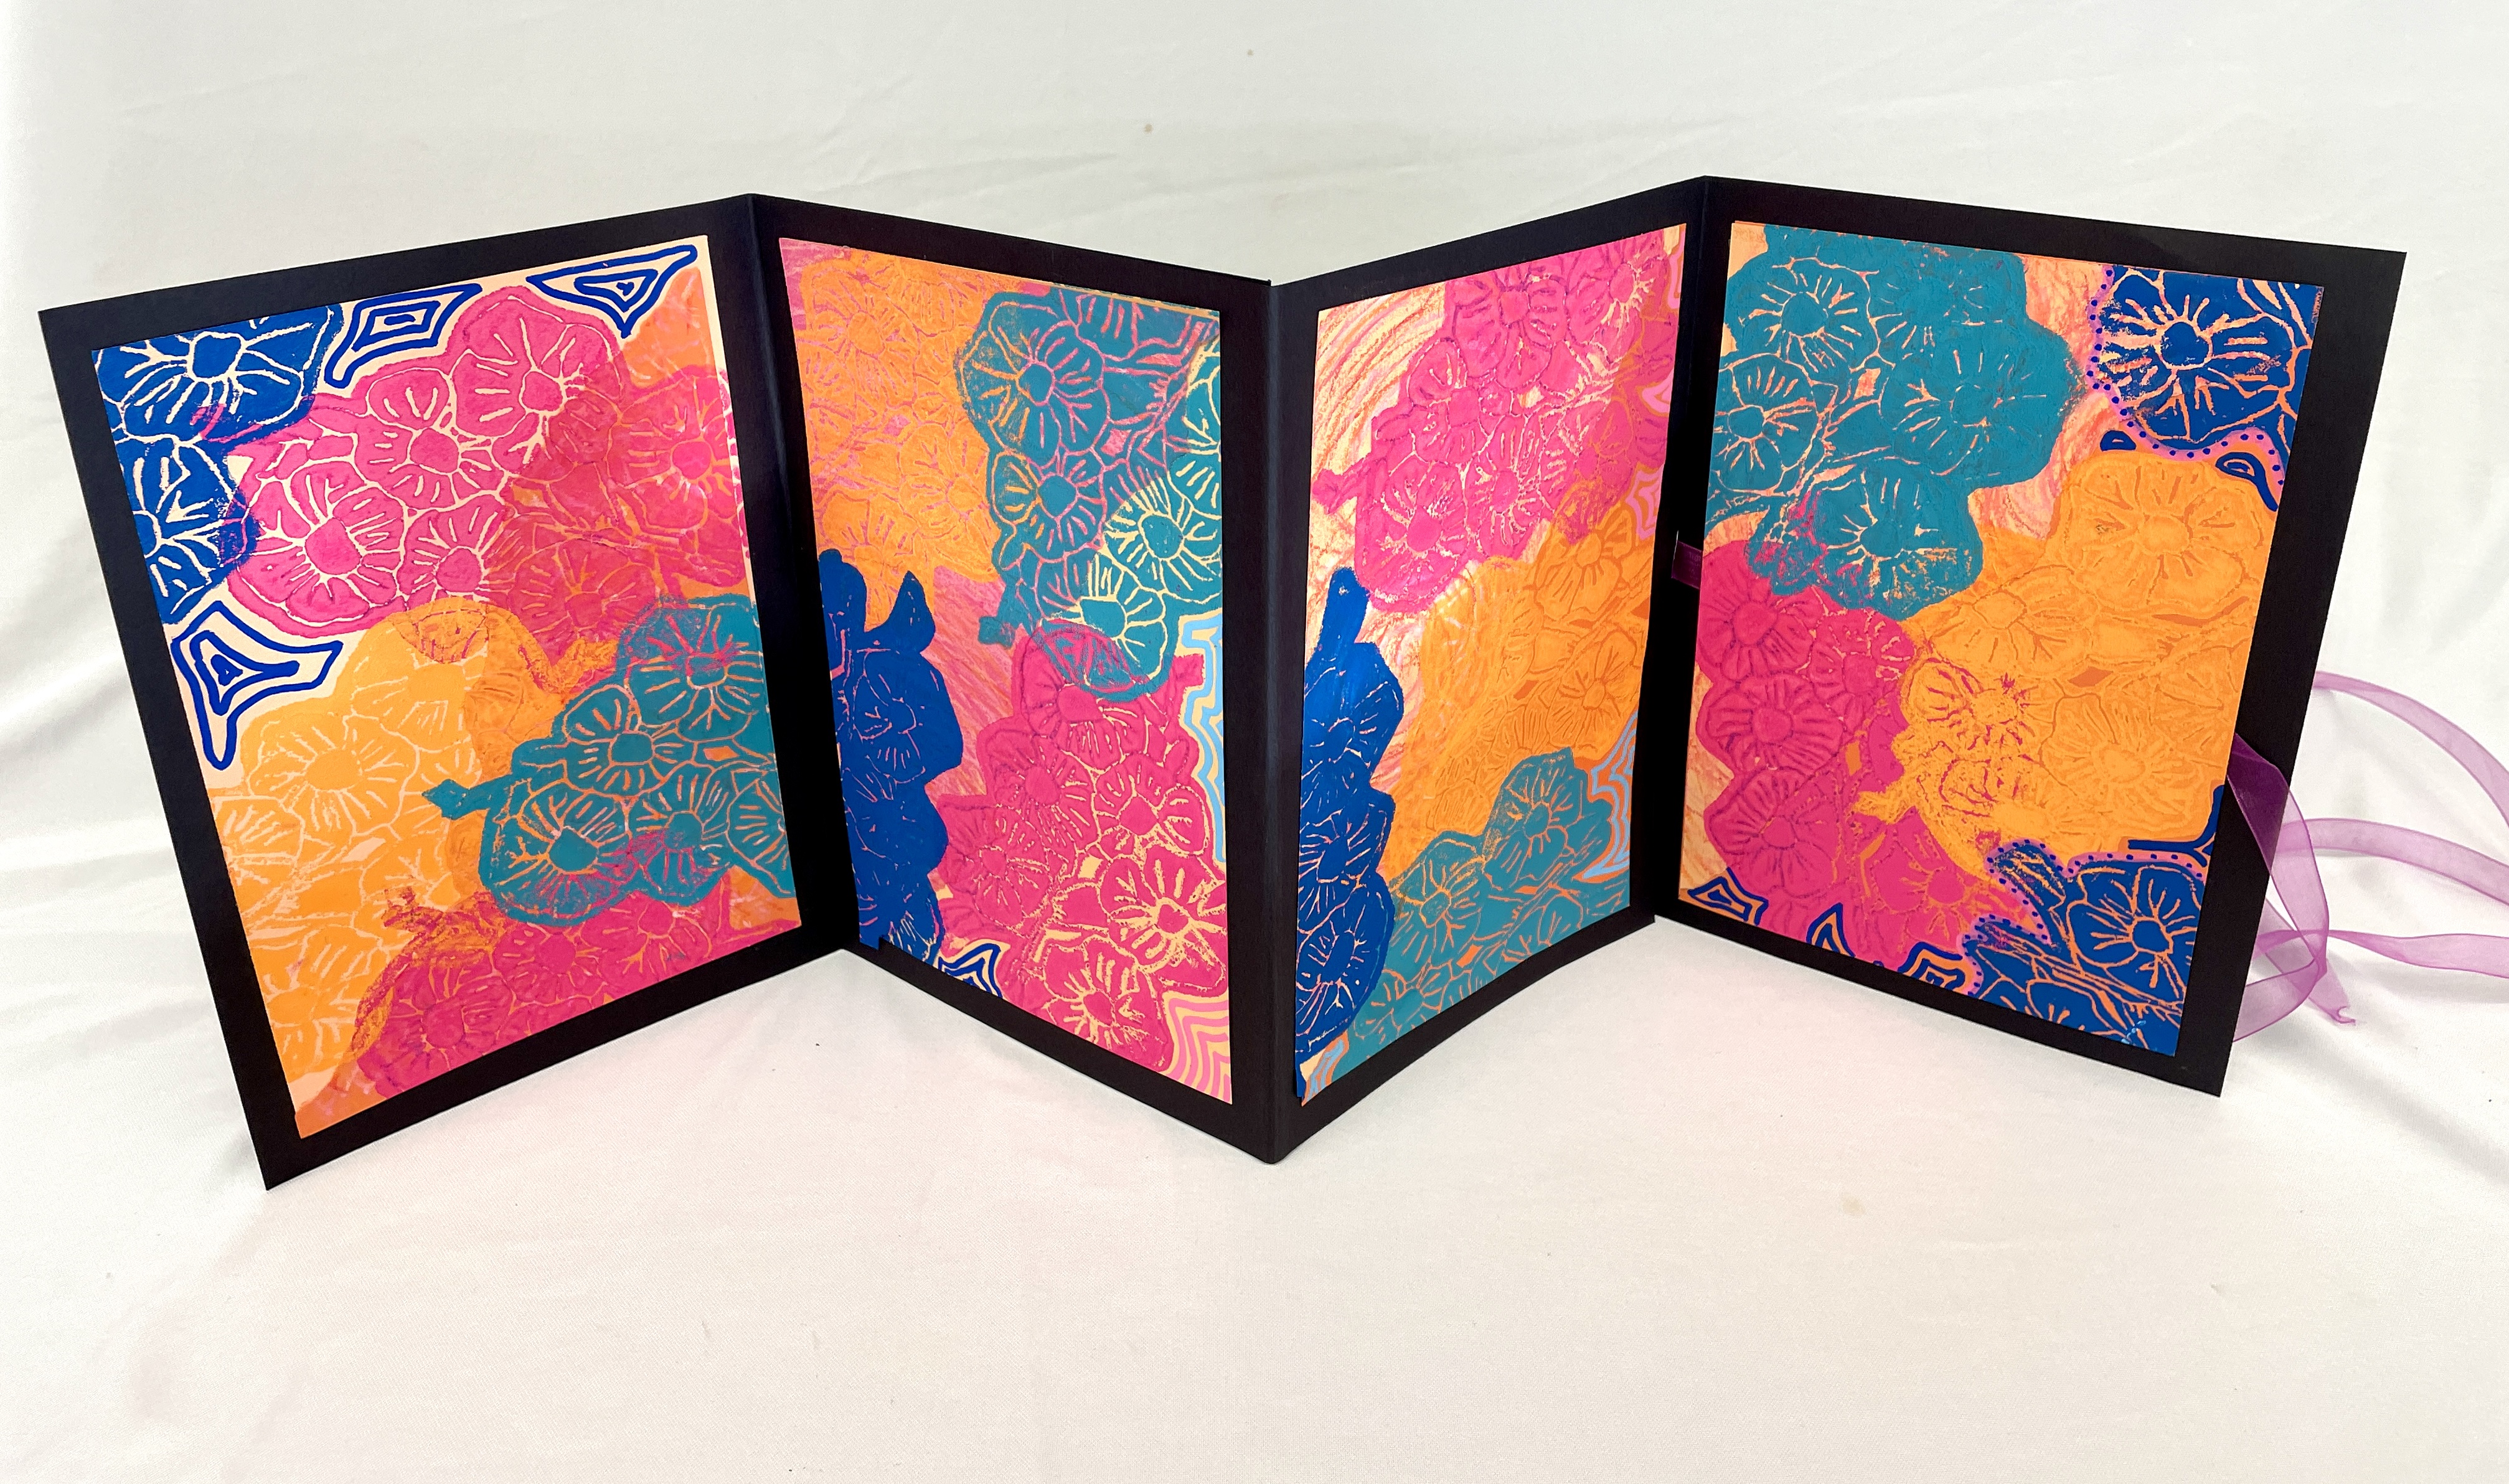
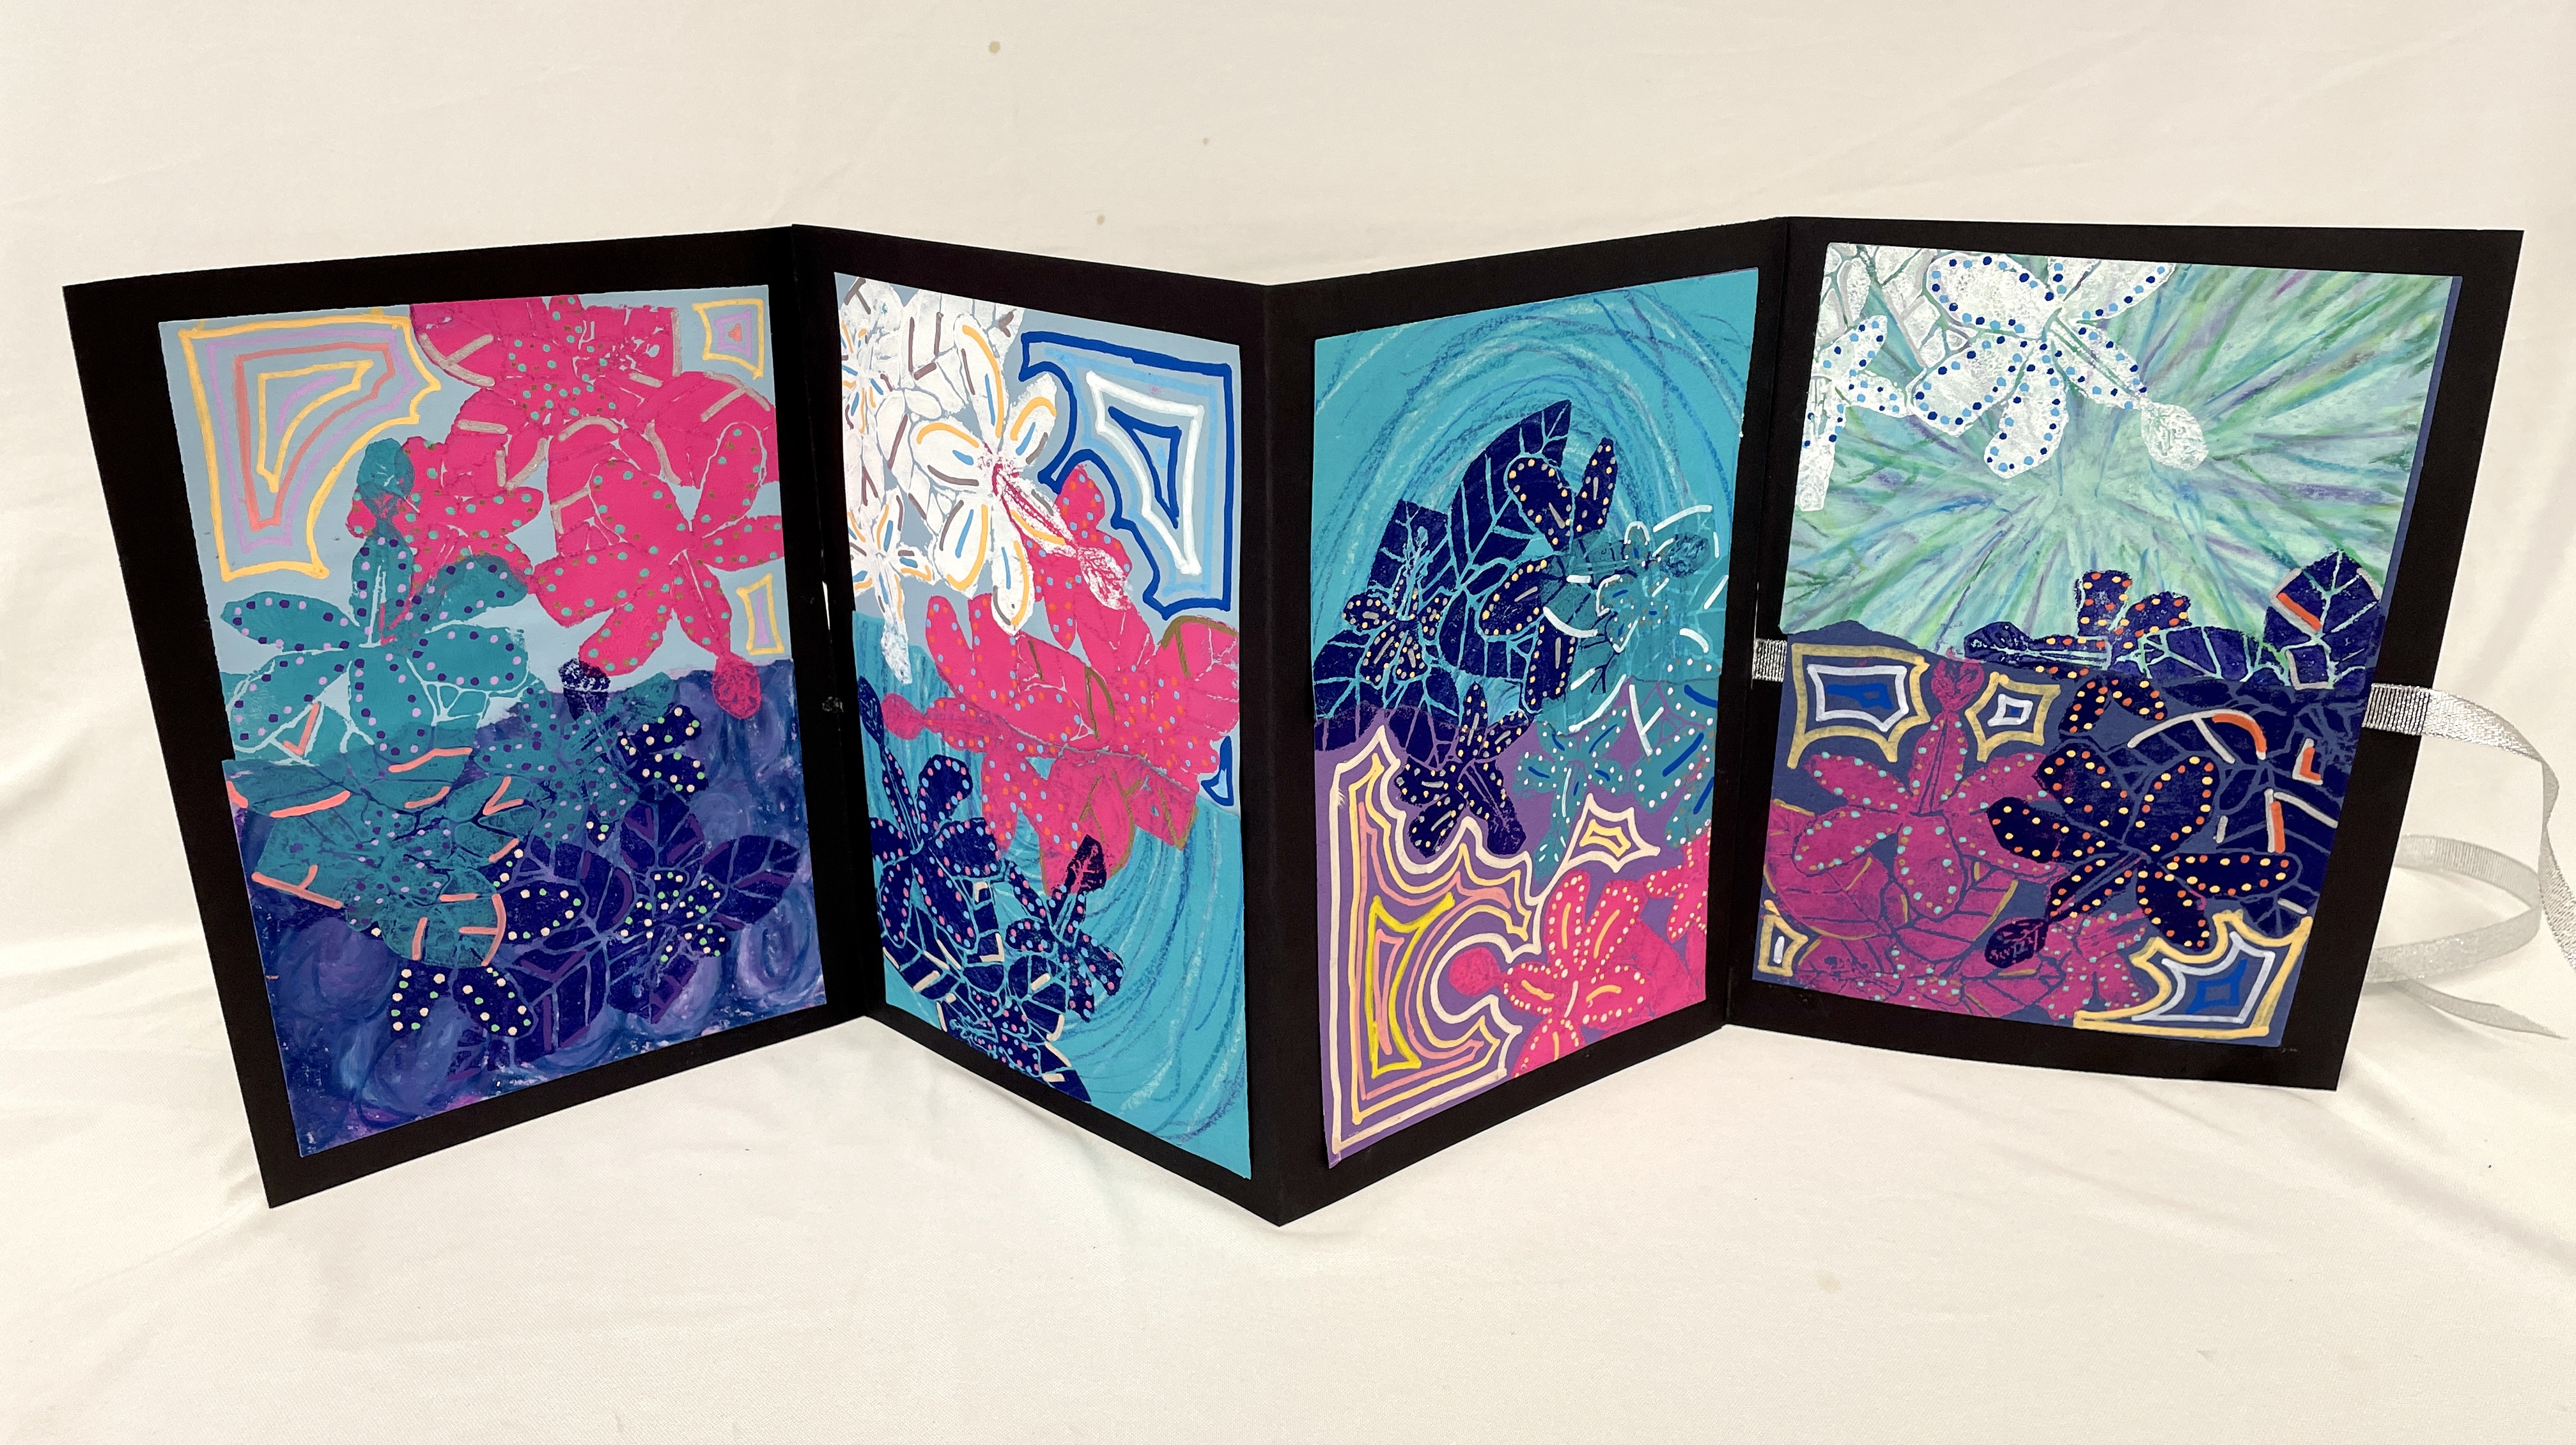
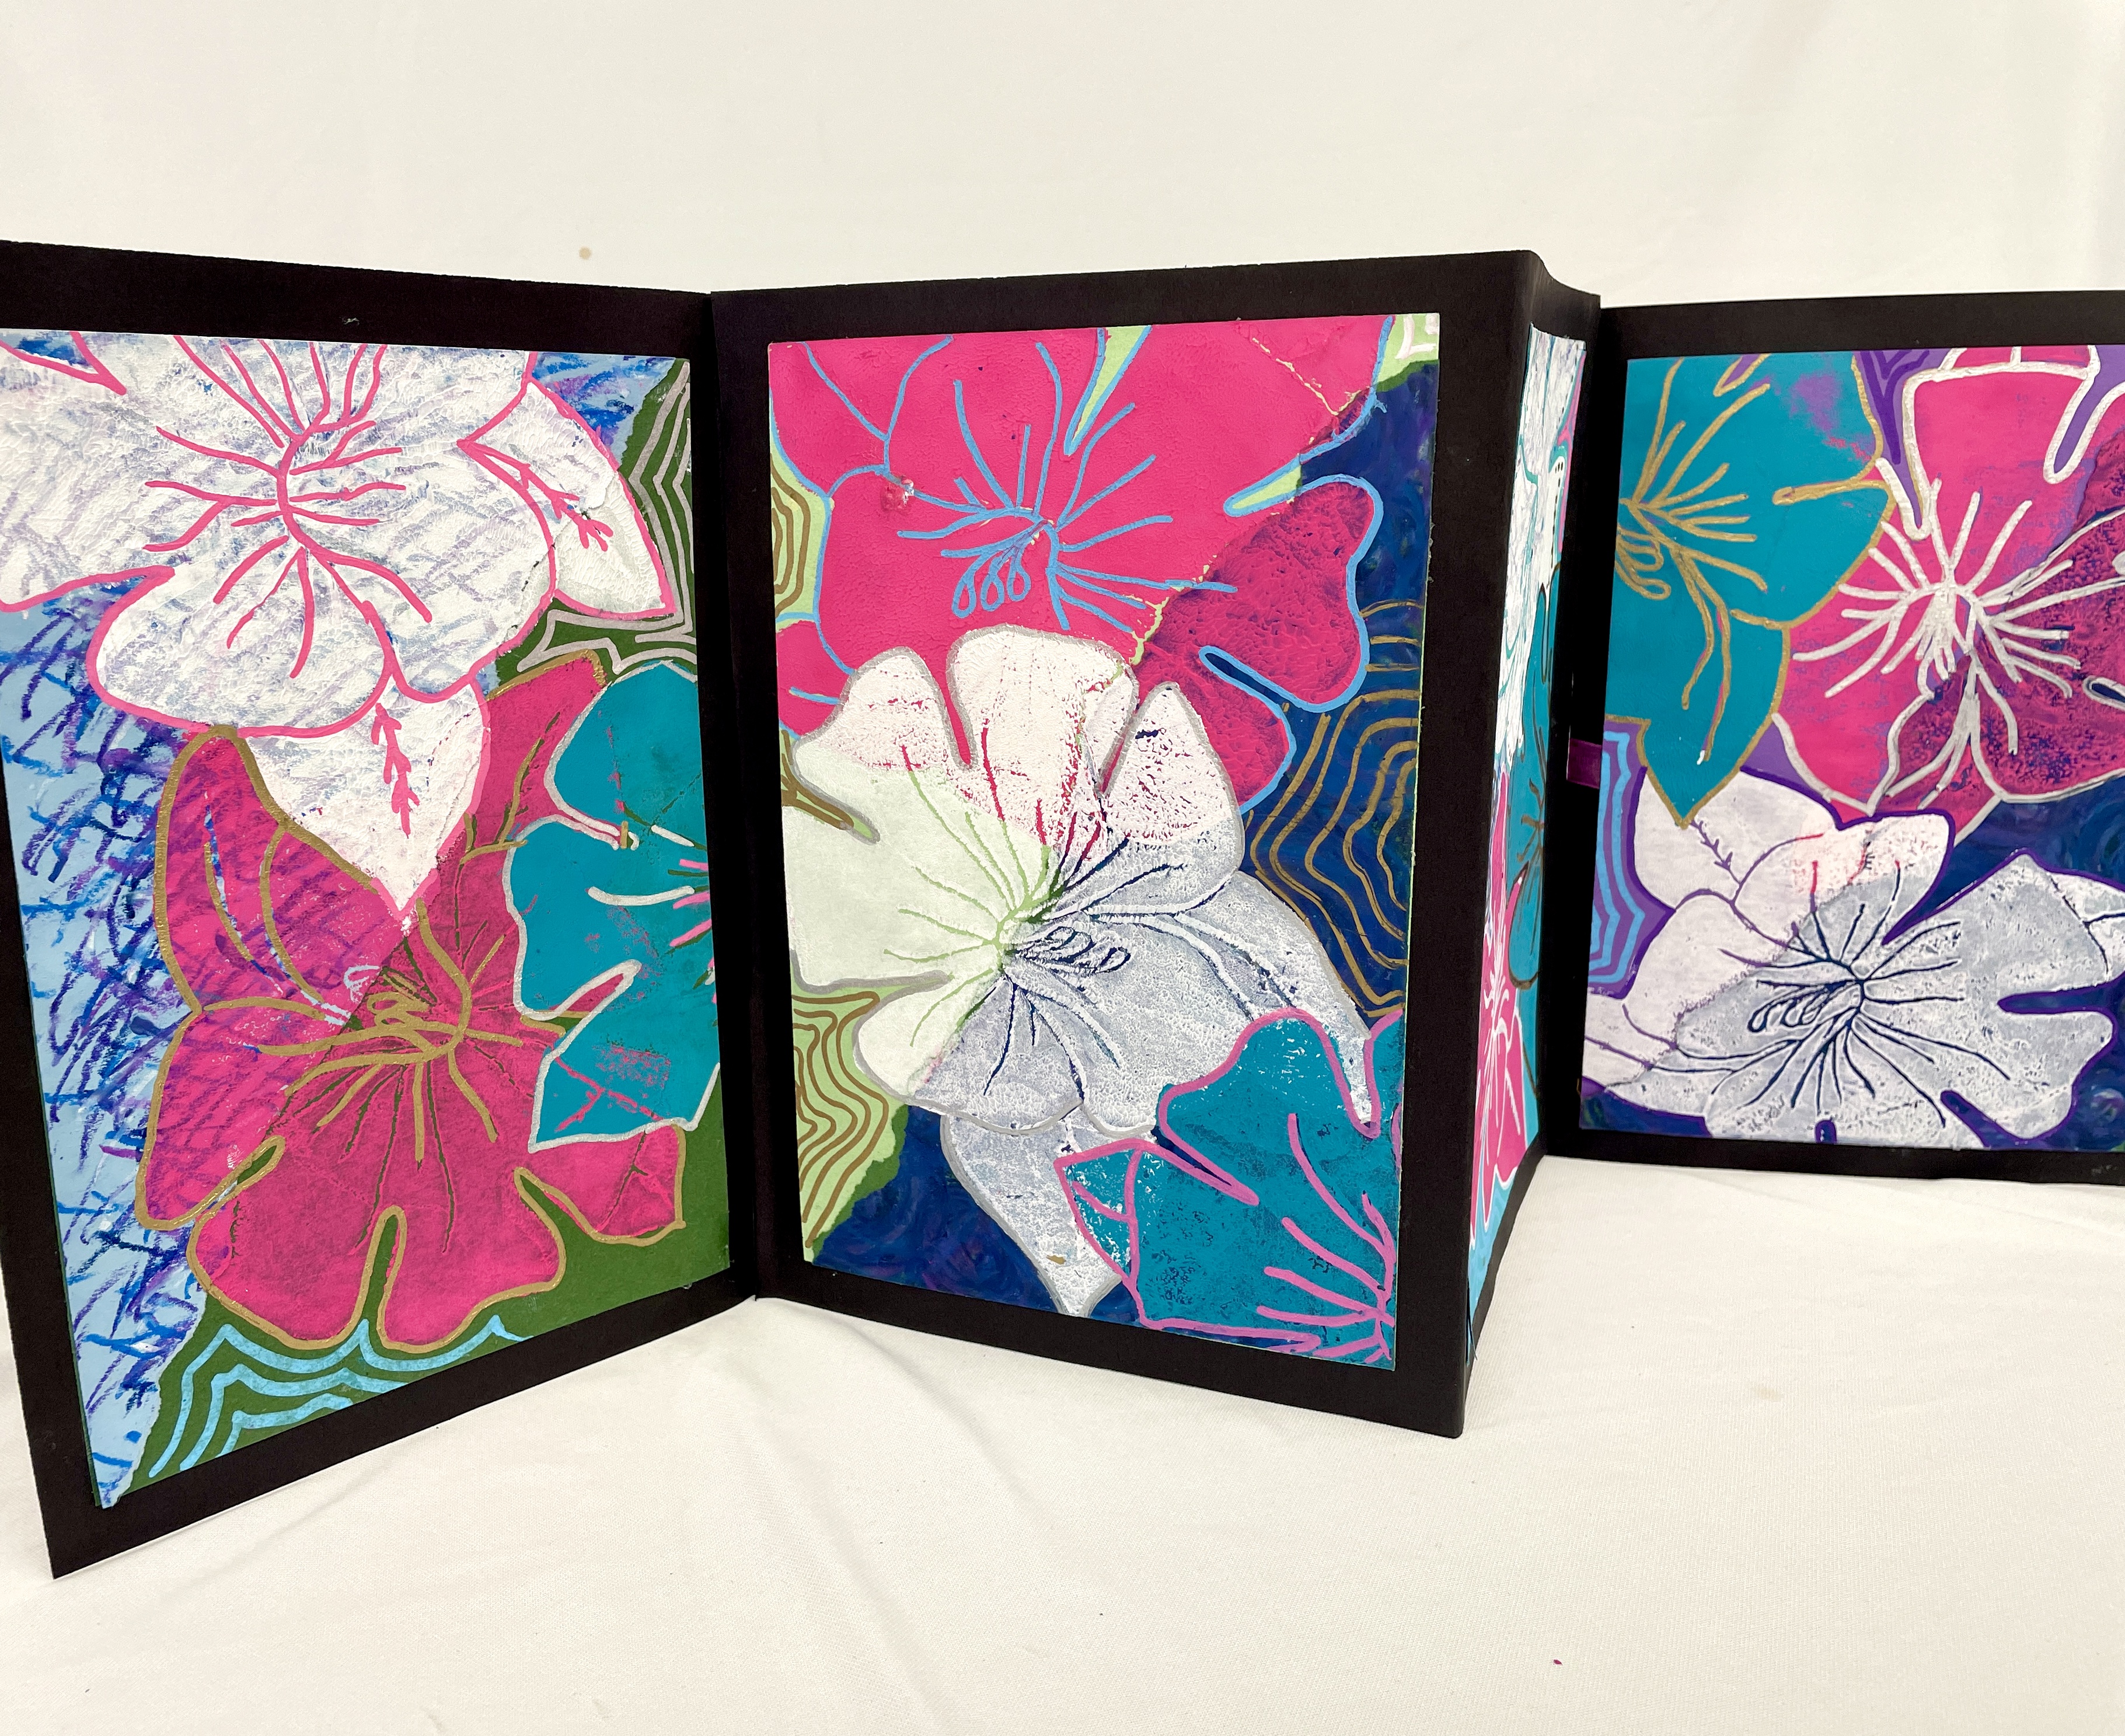
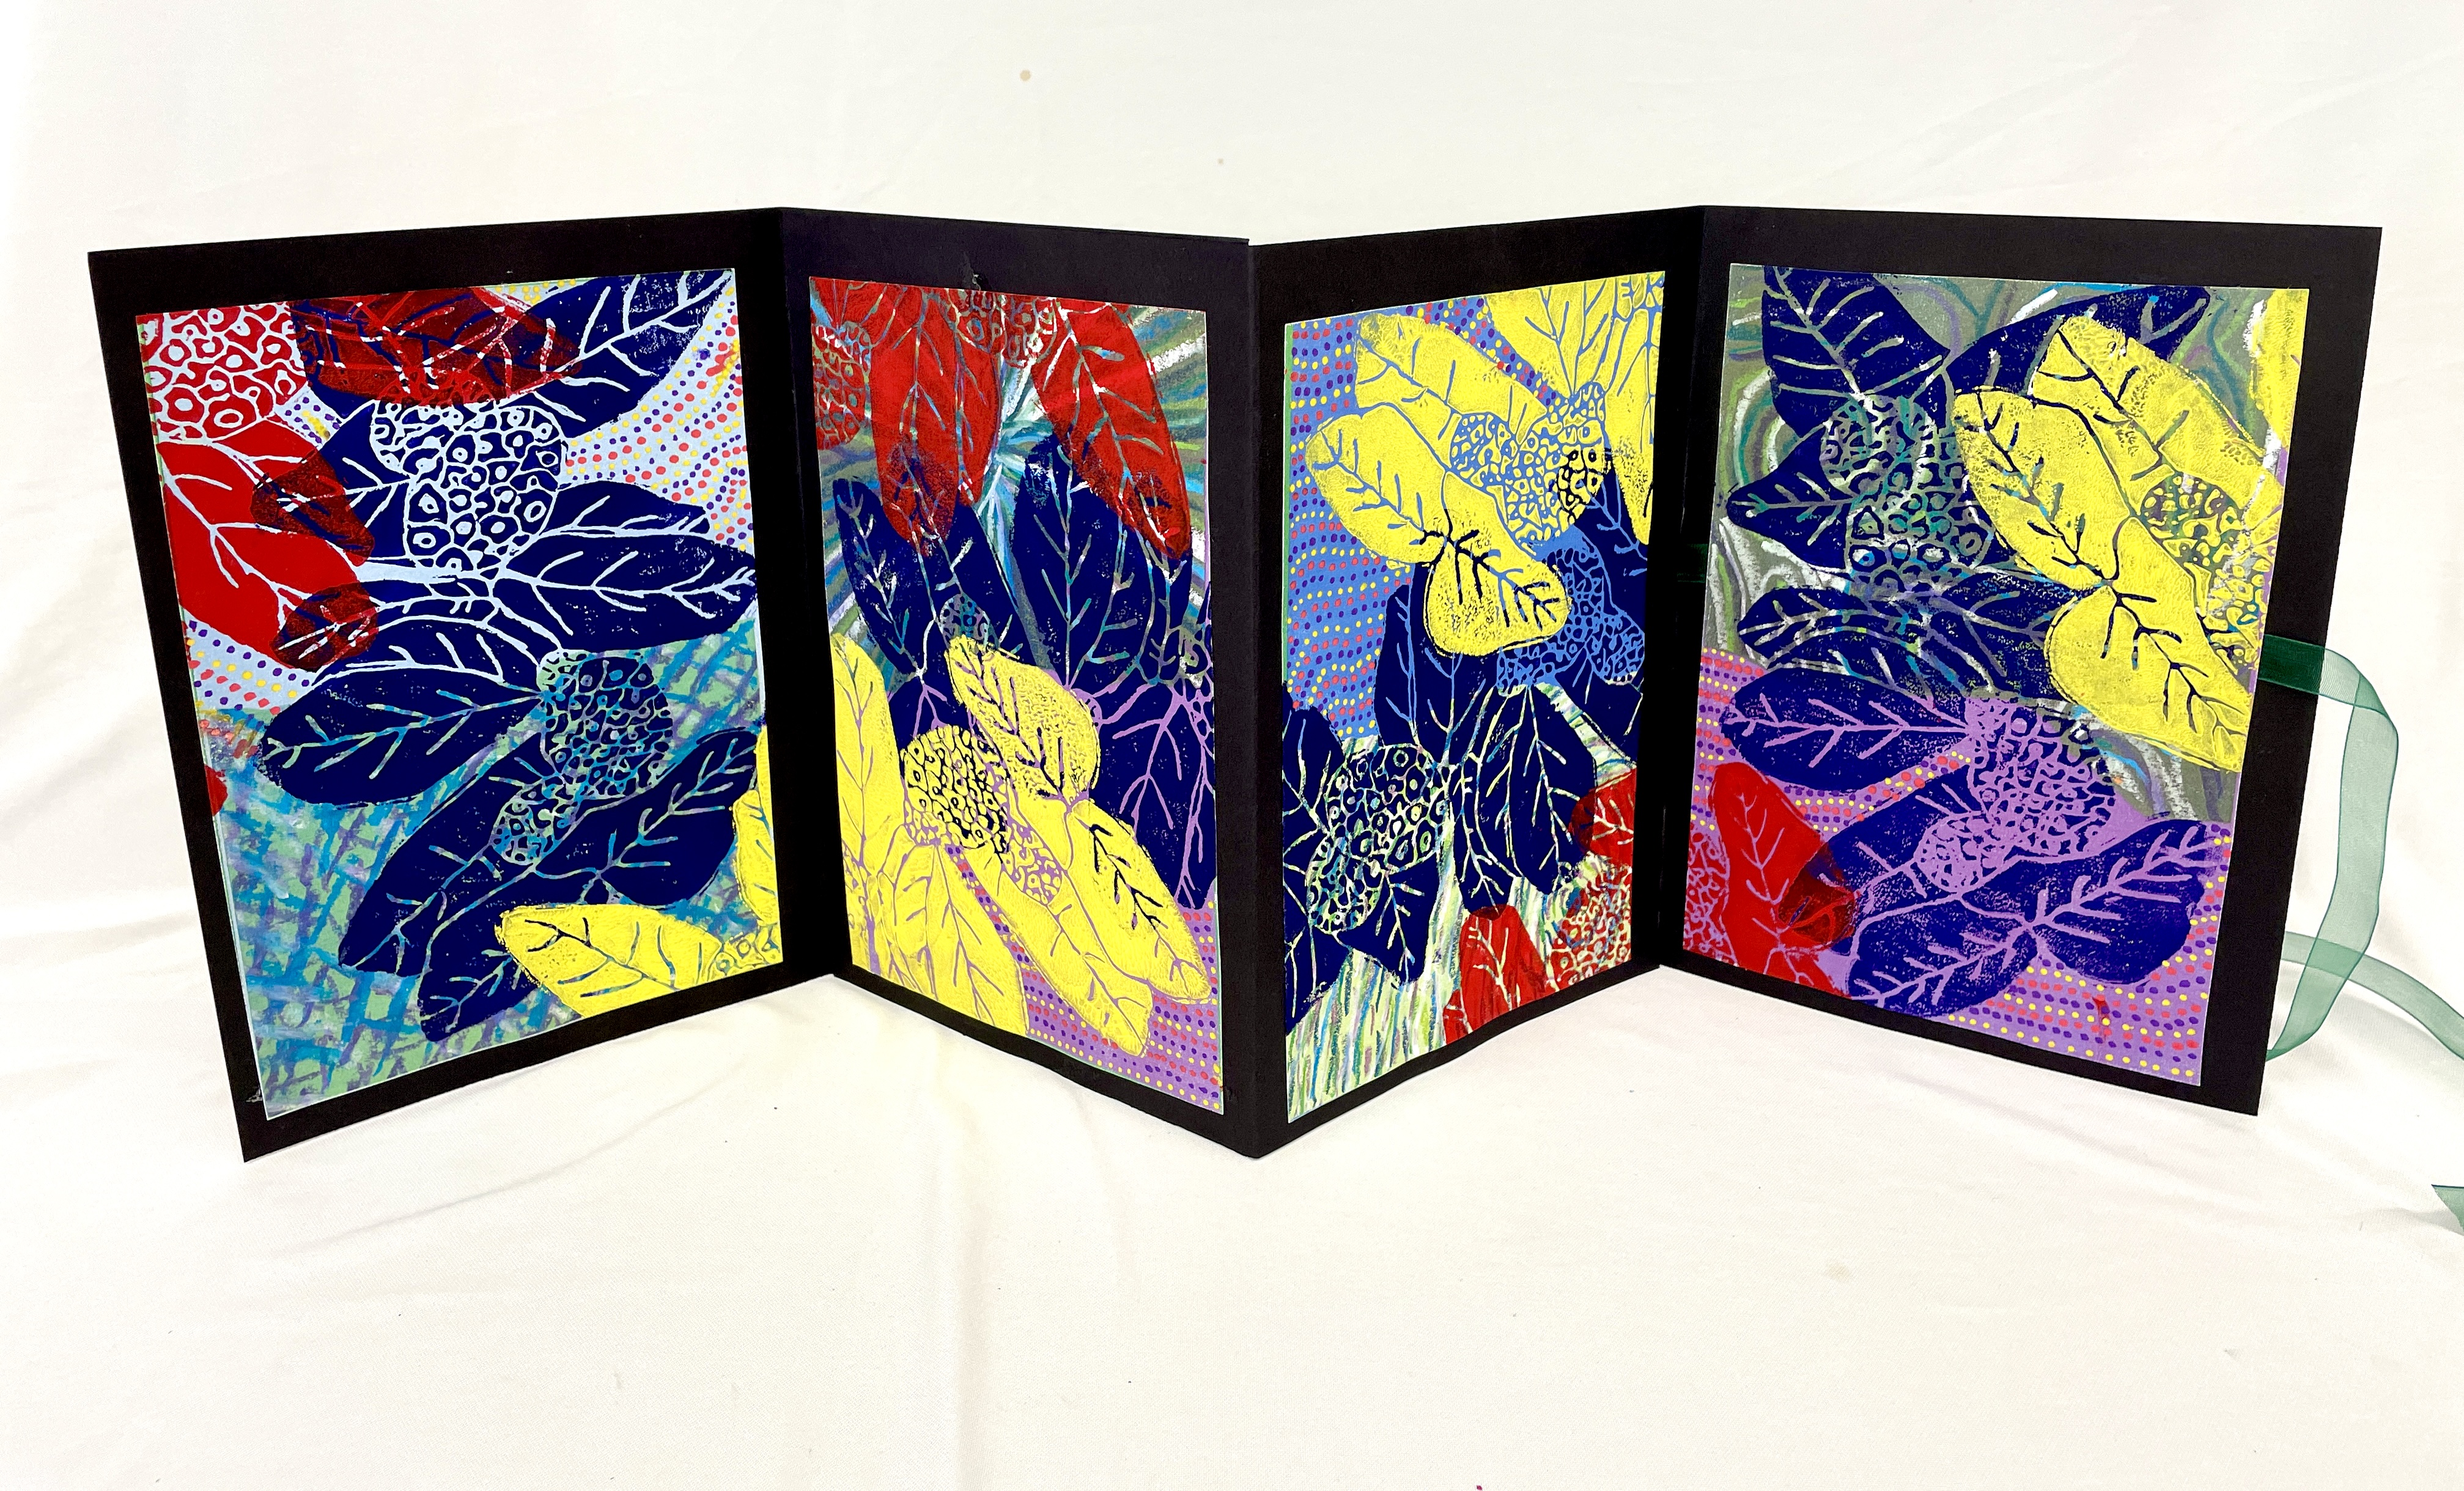
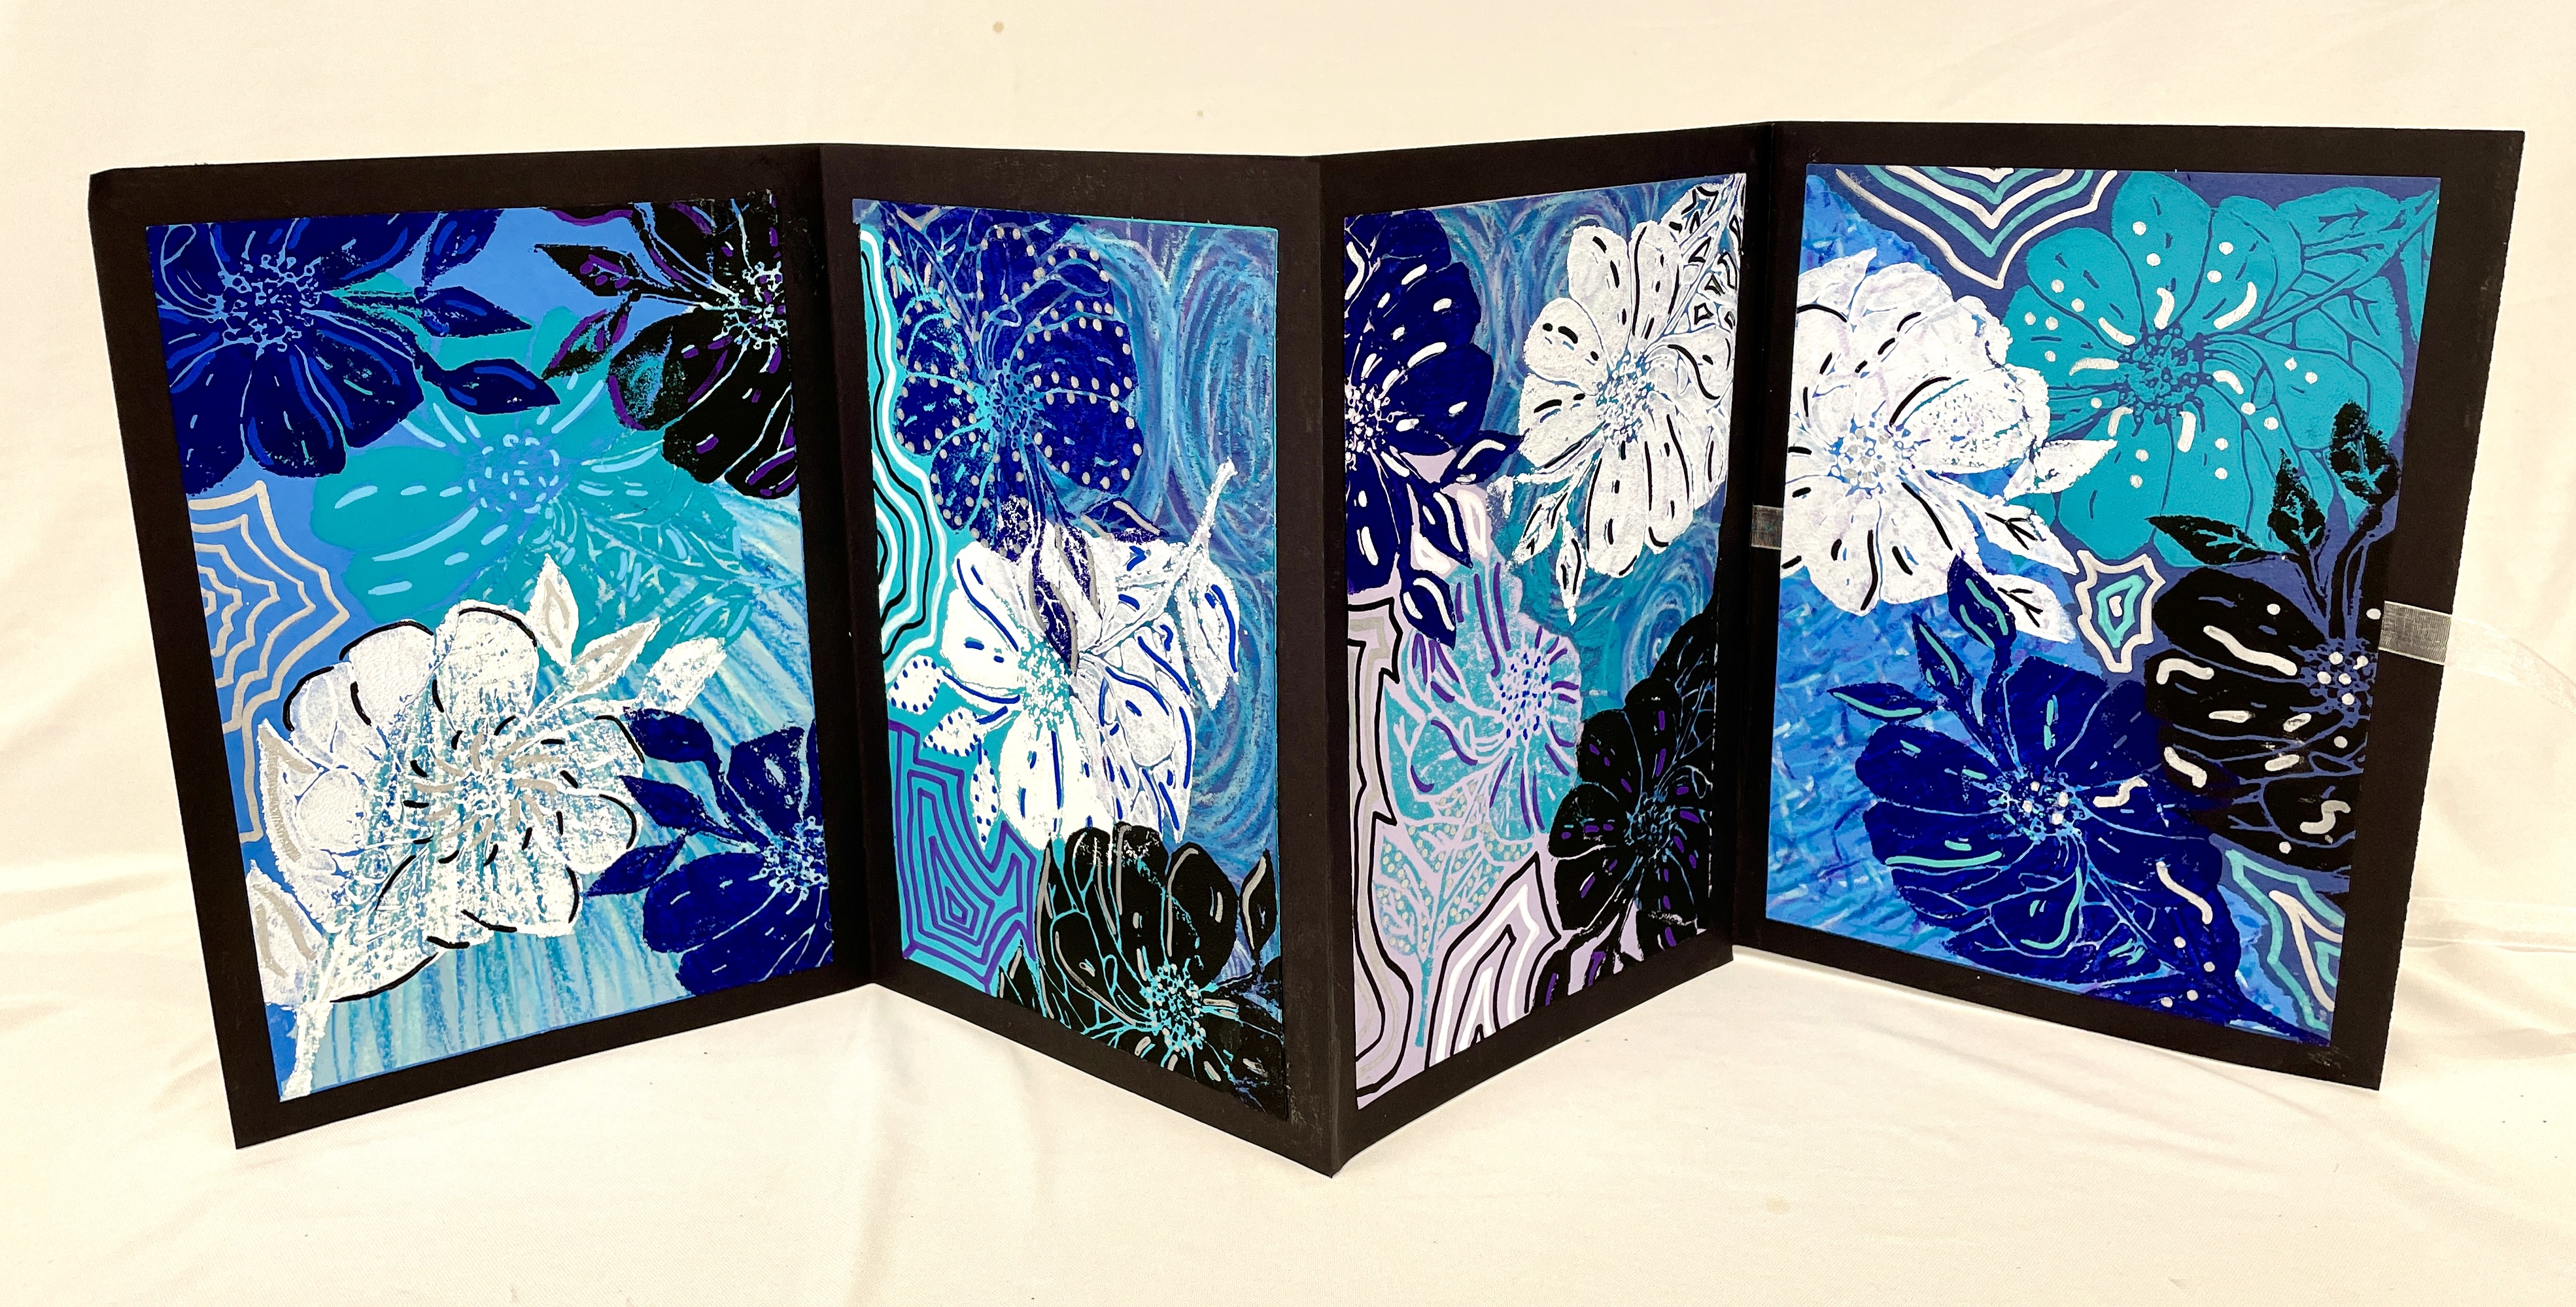
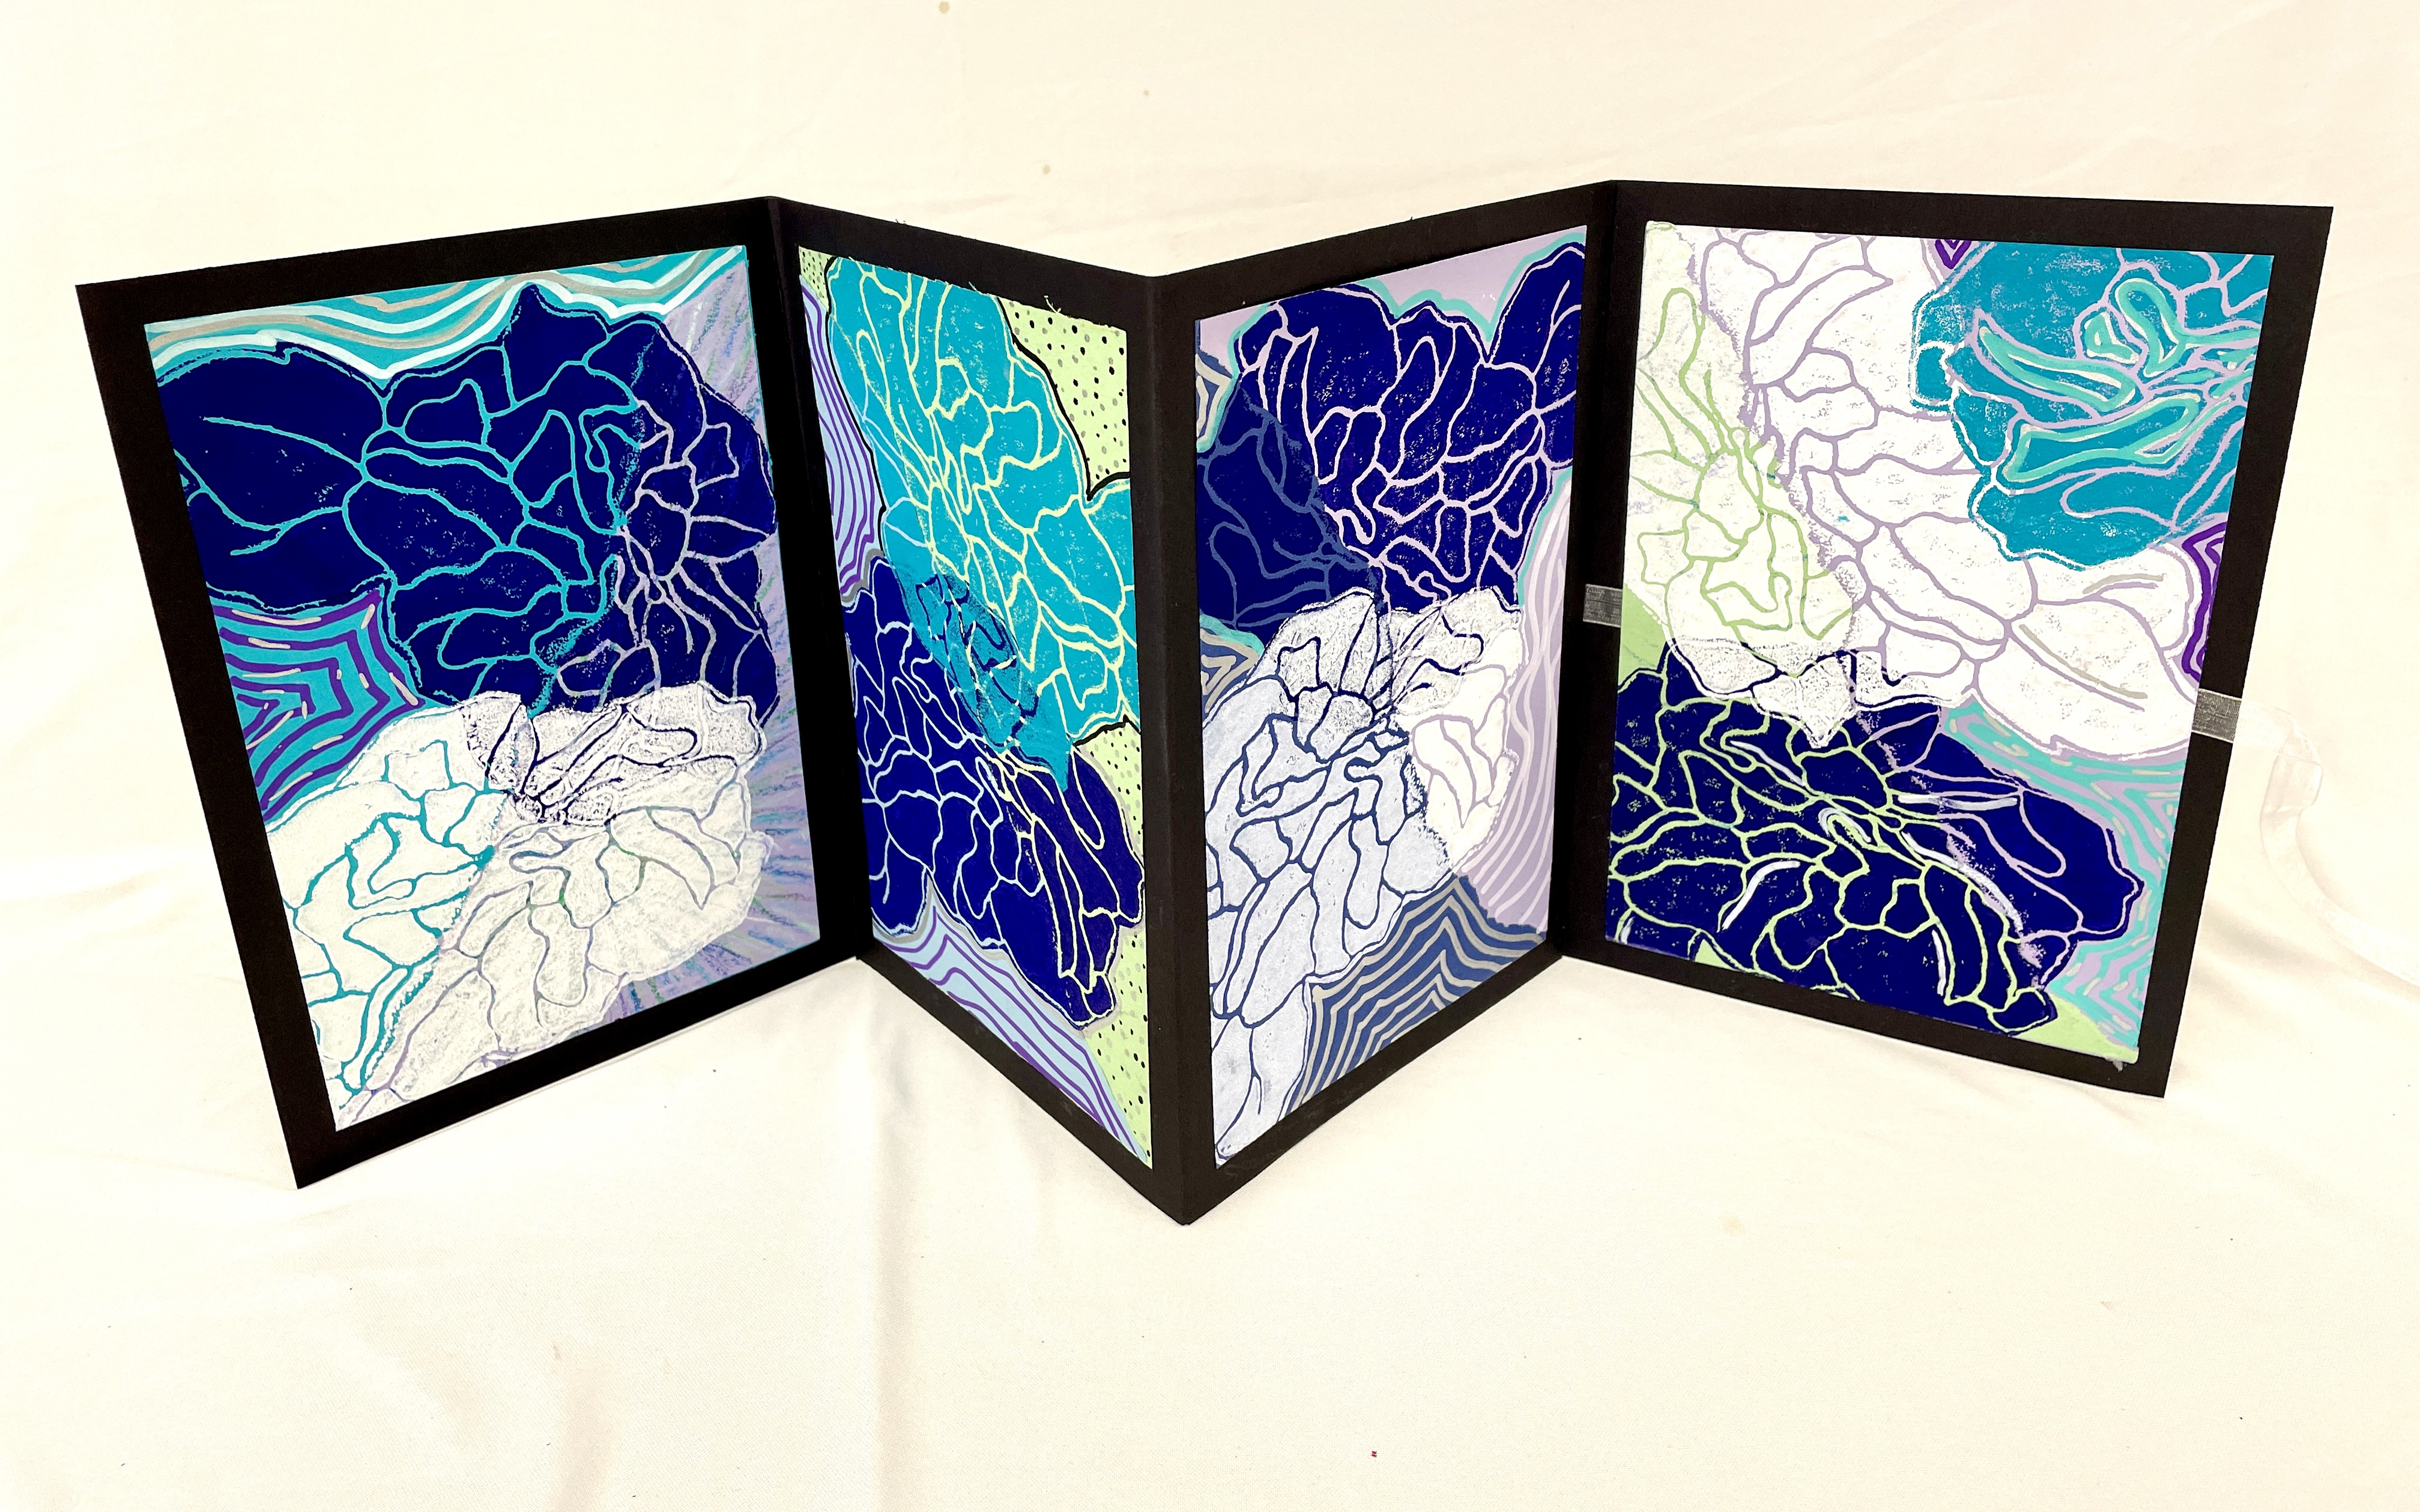
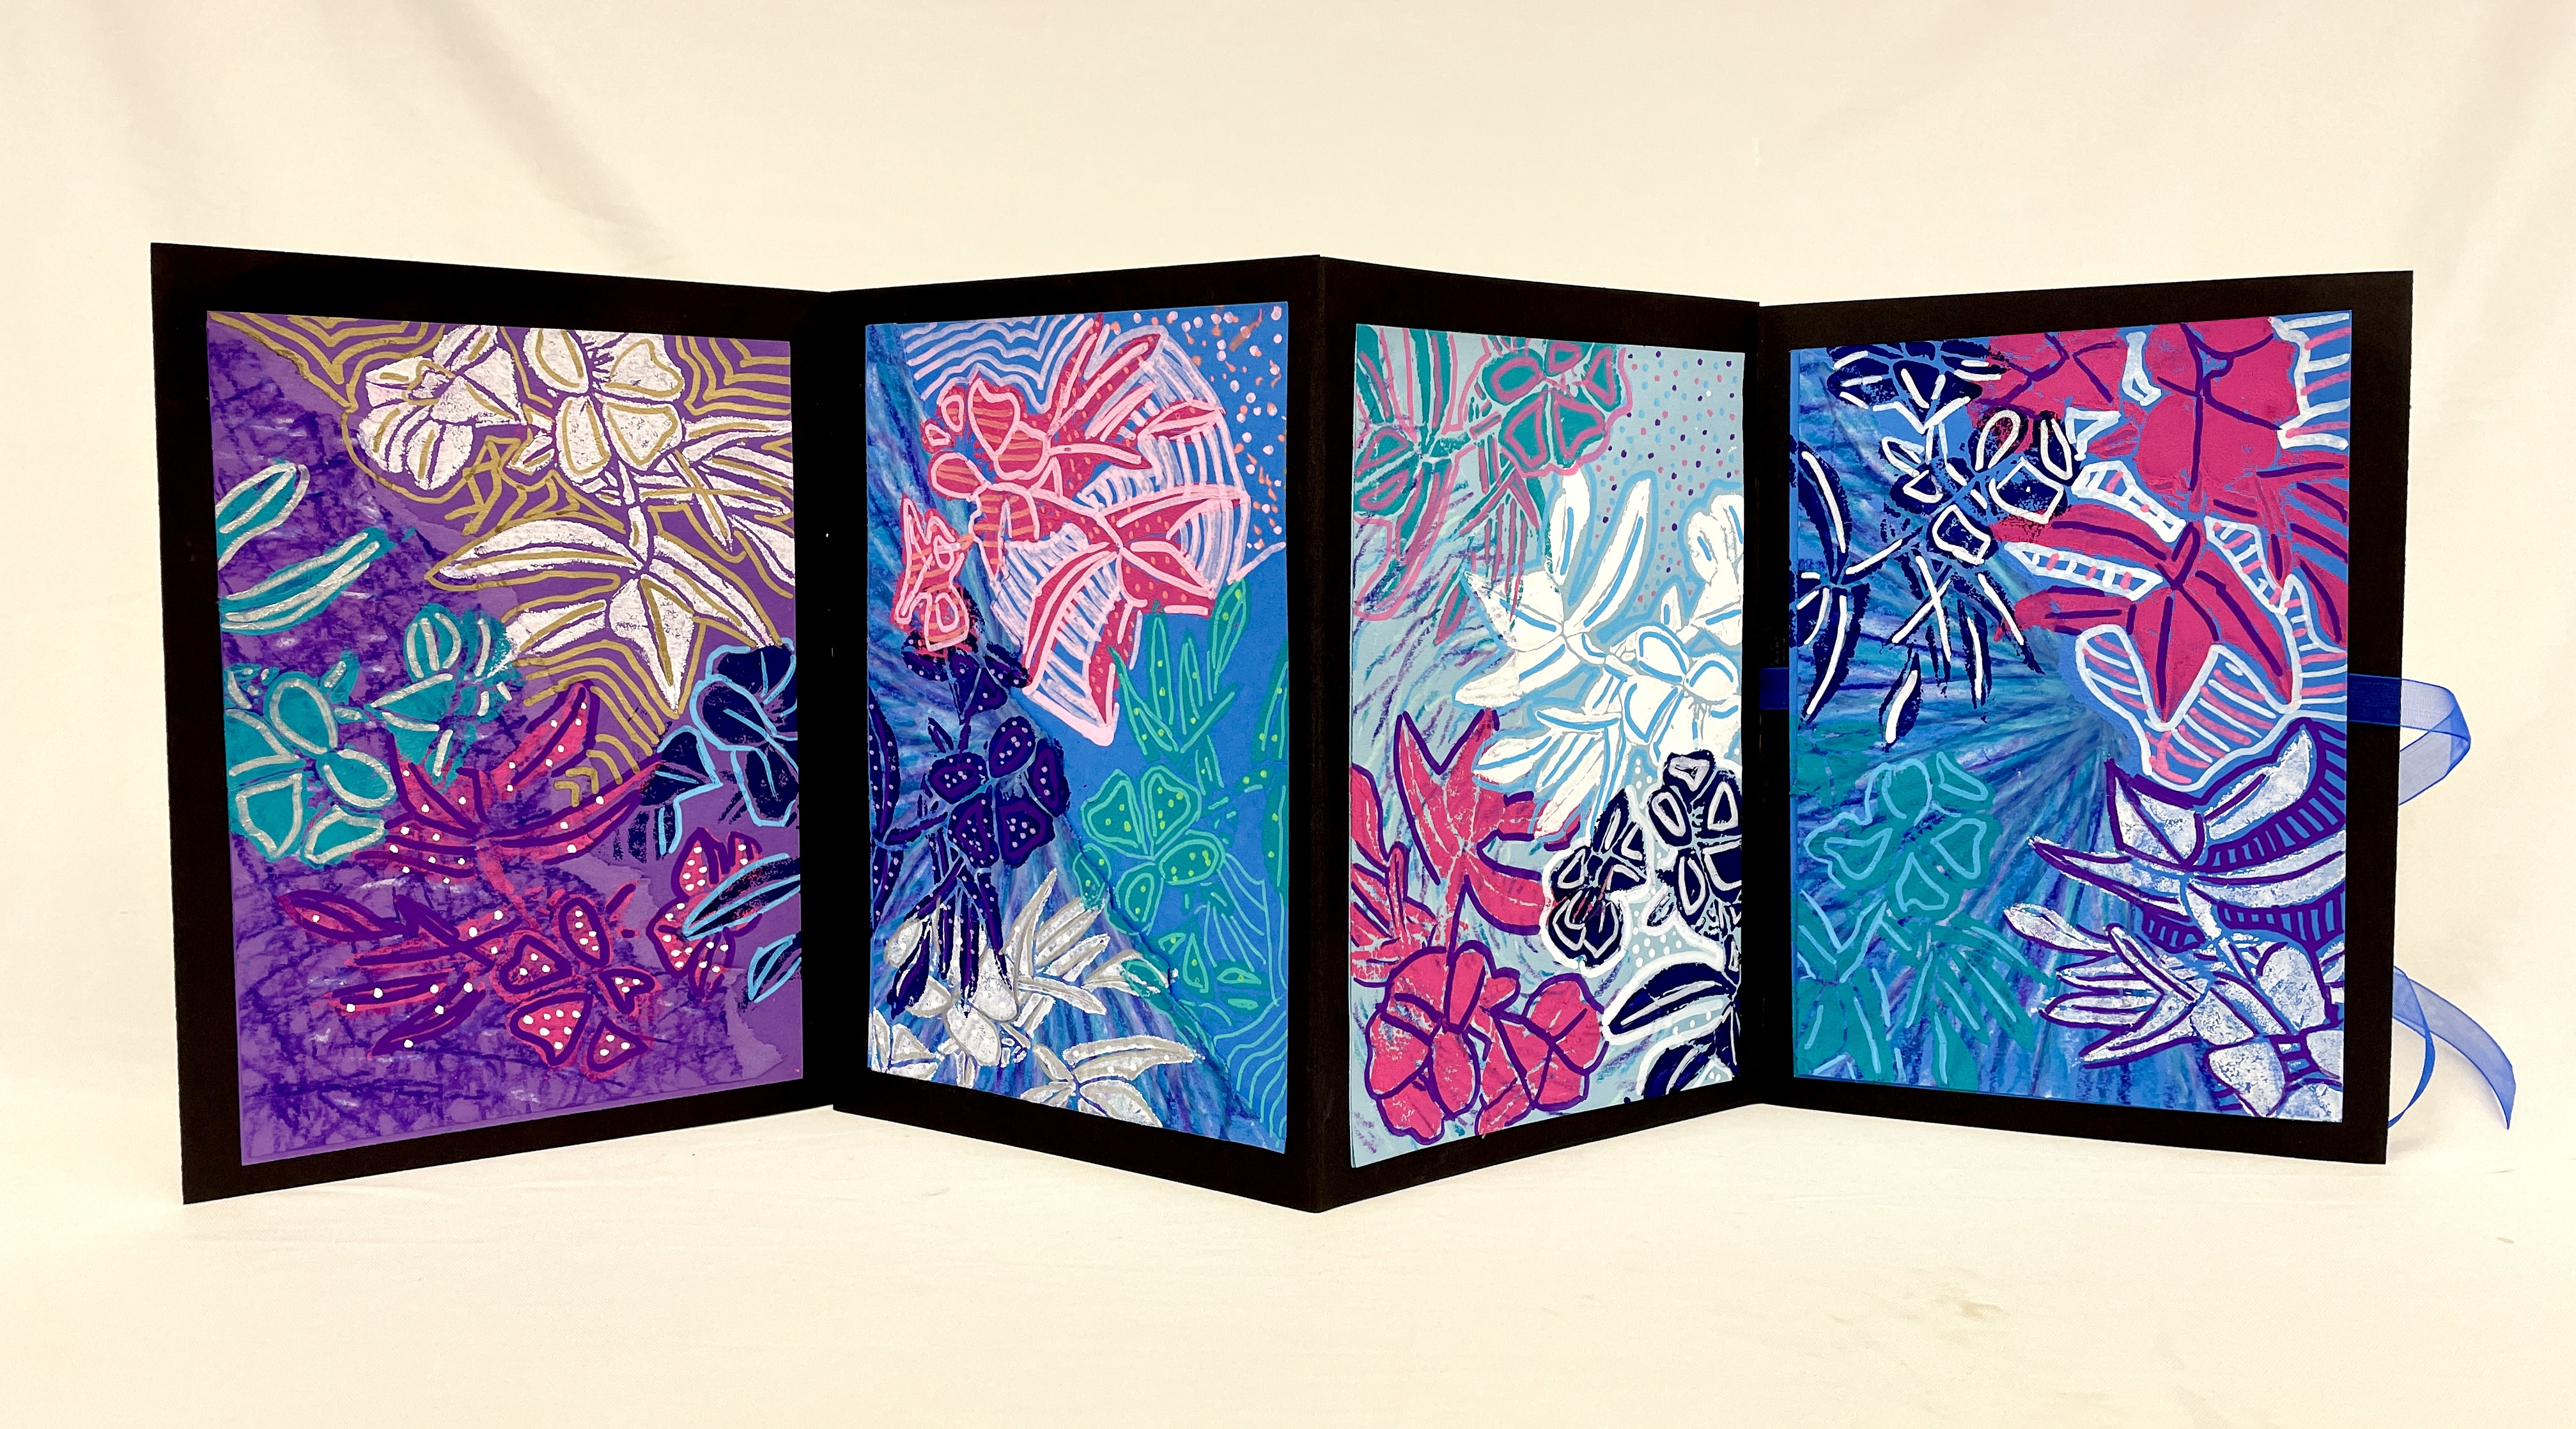
BONUS IDEA! Another option for display is to make a simple accordion-style book! The books pictured below require three pieces of 10″ by 14″ paper, folded in half. We glued them together, overlapping two flaps at a time, to make a “W” shaped booklet. This option also requires one print for the cover, (not seen in these pictures,) for a total of five quality prints. If your prints are a different size than 6″ by 9″, you can adjust the sizing of your book pages— I allowed for a half inch of paper to be shown around each print. Visual instructions for making this book are included in my Google Slide Presentation.


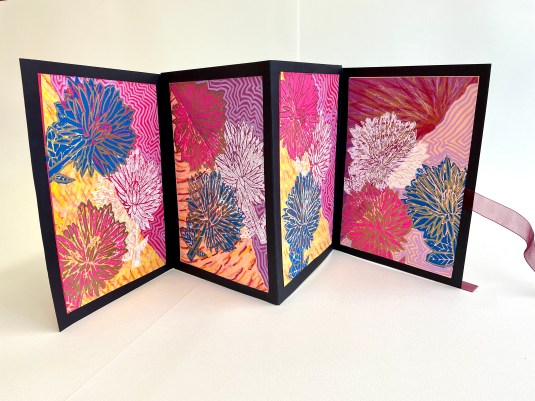
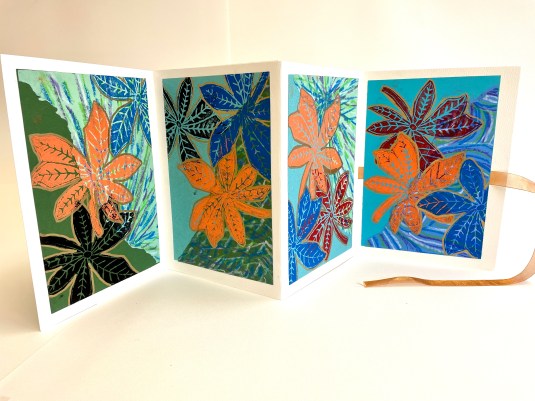
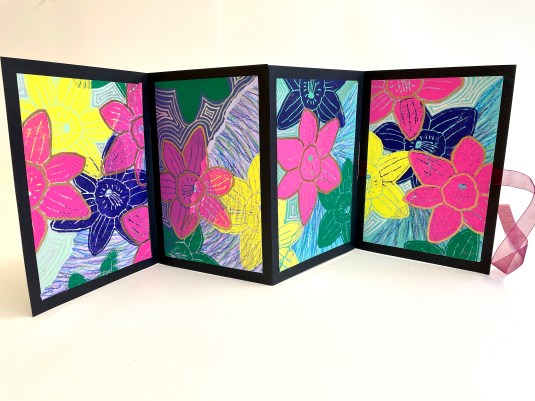

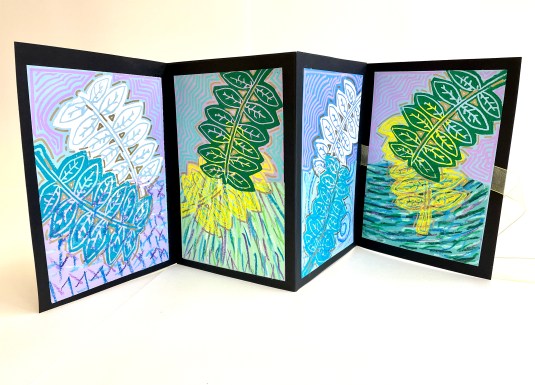


Use Arrows above to toggle through examples of Accordion Books
– – –

– – –
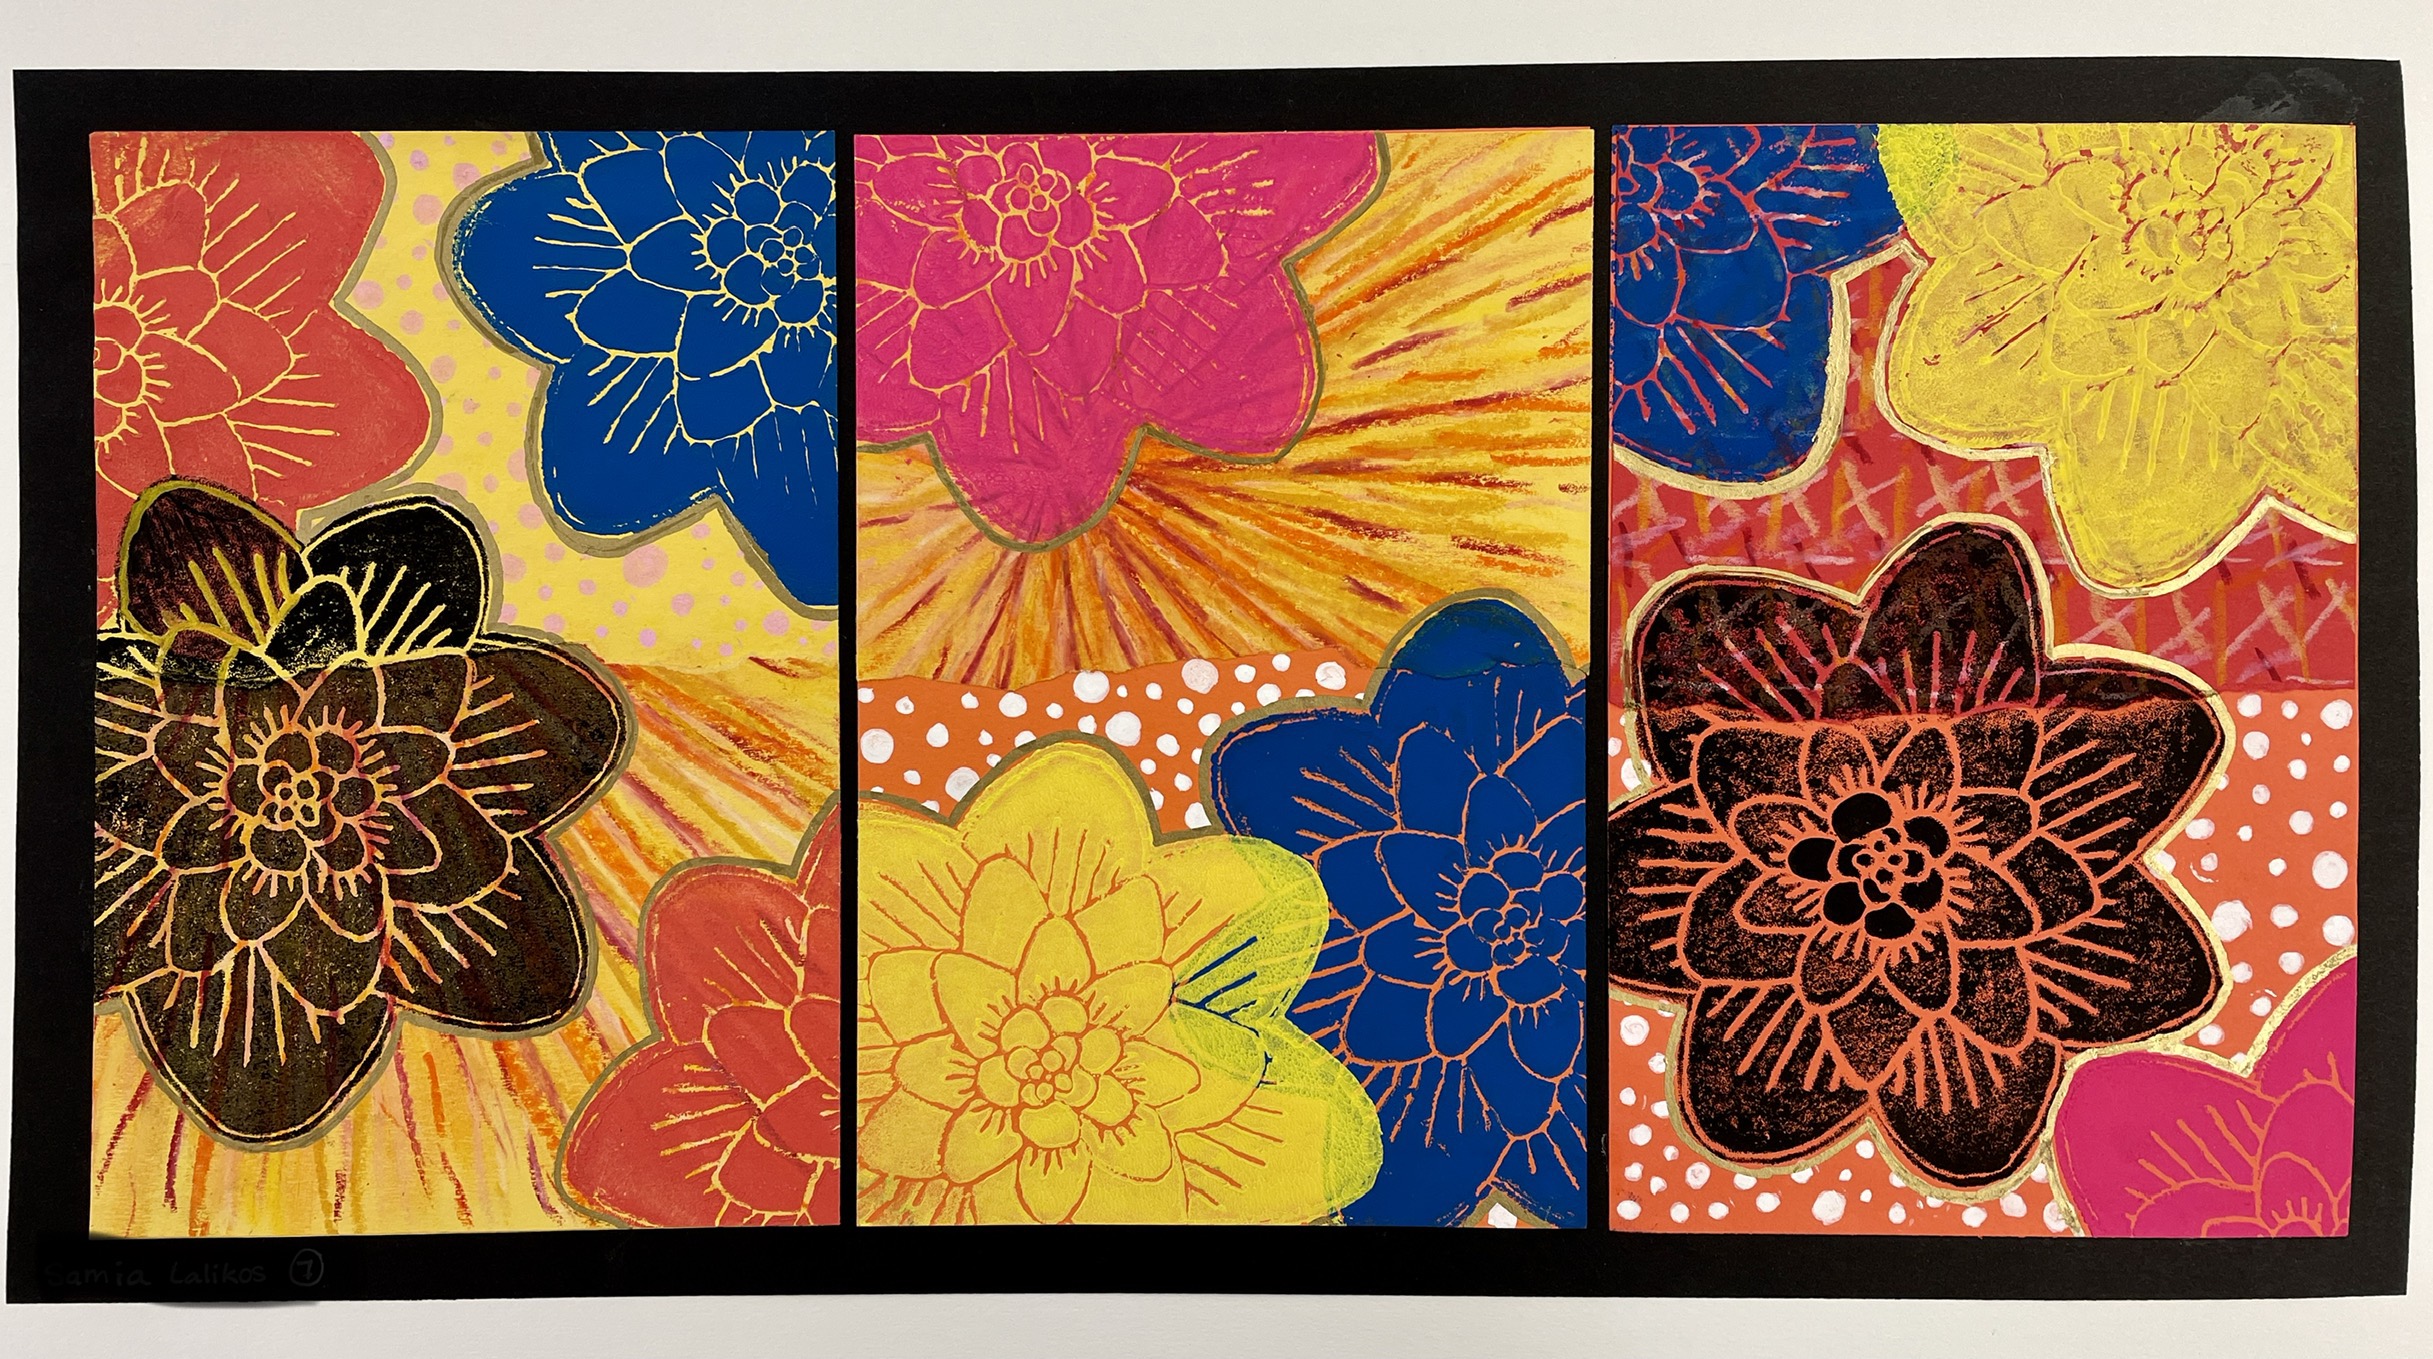
MORE beautiful examples of accordion Books, stand alone prints, “2 by 2’s” and Triptychs, —there are so many ways to display your final prints!


Dec 15, 2020 @ 09:15:23
Hi,
Thank you so much for all this wonderful information! Question: in the printing unit, did you have them print with water based ink over oil pastel designs? Did the water based ink stick ok to the oil based medium? CHEERS and THANKS
Dec 15, 2020 @ 17:31:30
Hi Rowan, YES: It’s Speedball brand water based block printing ink and it covers the oil pastel wonderfully!
Jul 23, 2021 @ 19:05:48
Love it! These are BEAUTIFUL! I love print making with my students and can’t wait to try this with my middle schoolers! Do you have issues with kids ruining your metallic markers on the oil pastel portions of the art piece?
Jul 25, 2021 @ 03:20:20
I try to have them avoid it: There are generally enough other places to apply it— 🙂
Oct 14, 2021 @ 18:20:43
Just finishing this lesson with my 6th grade. I was worried in the beginning about them being able to pull it off, but they have done a great job. I am very appreciative of your sharing of this lesson. I managed to guide my students to find unity just through the collage and printing without further embellishment -though I like your students’ embellishments. My students would have taken too long with another stage….
I was ready for a new printmaking project and this is striking. Thank you.
Nov 10, 2021 @ 10:04:50
This is BRILLIANT! You have some BEAUTIFUL images showing a even more beautiful process! Thanks for the inspiration!
Nov 10, 2021 @ 16:46:31
Thank you so much!
Nov 10, 2021 @ 23:51:19
These are pretty awesome! The students should be proud of these, and you should be proud as their instructor! I have printmaking on my schedule for spring. I’m trying to decide, but this could be good during April testing since it can be split into several lesson. I have 7th AND 8th graders in every class, so I would have smaller groups on testing days. Since you’re a pro at this lesson, do you think that’s a good idea?
Nov 11, 2021 @ 02:40:36
I’ve done it as two lessons as well: The oil pastel and collage work can be done and those papers submitted and evaluated as a first grade. Then, a couple of days of observational drawing, making the foam plate, and finally, devote 4-5 classes to print. Embellishing and mounting usually takes another two classes.
Nov 11, 2021 @ 03:13:40
I think this is an amazing and beautiful lesson. I tried the project with my 6th graders for the first time this Fall. It took us quite a long time, but I was fine with that. One thing I learned was that there are drawings that work better than others for the stamps. Delicate stems didn’t work well- for us- even when I reinforced the styrofoam. I now see that Ms. Amsler’s student stamps with acorns, mushrooms, big flowers etc…. work really well. Something for me to think about for next time. Also, I knew it was a gamble trying it with my 6th grade students, they managed it, but I think it would be a better experience with 7th and older. Thank you, Ursula for sharing your inspiring and beautiful projects. Grateful.
Nov 11, 2021 @ 20:30:58
Thin stems are an issue! I usually have my kids make them a bit thicker than normal, and when they cut out the foam, they cut a border around the image, which adds some extra heft. The masking tape reinforcement on the back (before cutting out,) is also very helpful!
Nov 11, 2021 @ 23:40:33
I have been looking for a different kind of print. My students have already done two sets of Styrofoam prints but I wanted a new approach. I love these and will do them next with my eighth graders. What kind of colored paper did you use?
Nov 12, 2021 @ 03:18:39
Tru-Ray Construction paper.
Nov 12, 2021 @ 03:19:49
I used construction paper.
Nov 15, 2021 @ 03:43:36
what metallic pens did you use?
Nov 15, 2021 @ 21:22:54
Pentouch for gold/silver. Posca brand for the colored paint pens.
Jan 14, 2022 @ 20:55:27
What size foam did you give students?
Jan 14, 2022 @ 21:31:17
Usually 6 by 9, (we print on 6 by 9,) but they cut the foam into the shape of their image so ultimate size varies
Jan 17, 2022 @ 03:14:16
Thanks so much – these are amazing!
Mar 06, 2022 @ 17:02:49
How large are the styrofoam flowers? Students added so many details.
Mar 06, 2022 @ 18:36:23
They vary in size, but average 4-6 inches in any direction.
Apr 30, 2023 @ 12:46:20
I love this!
Feb 17, 2024 @ 11:43:36
Thank you for sharing all the details of this project! The students’ works are stunning. I have printed (with the same styrofoam and block printing inks) on liquid watercolour applications previously but it had not occurred to me to try printing over oil pastel. I love the contrast of medium. Where did you get the idea to try that?
Feb 17, 2024 @ 17:37:38
Honestly… I don’t remember, ha ha! I’ve been tweaking this lesson for years, and just added a new Google Slide presentation with even more detailed instructions! Check it out.
Mar 12, 2024 @ 10:13:48
Does every student have his/her own printing station at their desk, or do you have a section in class set up with a few printing stations?
Apr 05, 2024 @ 15:52:32
So glad the lesson was successful for you and your students!