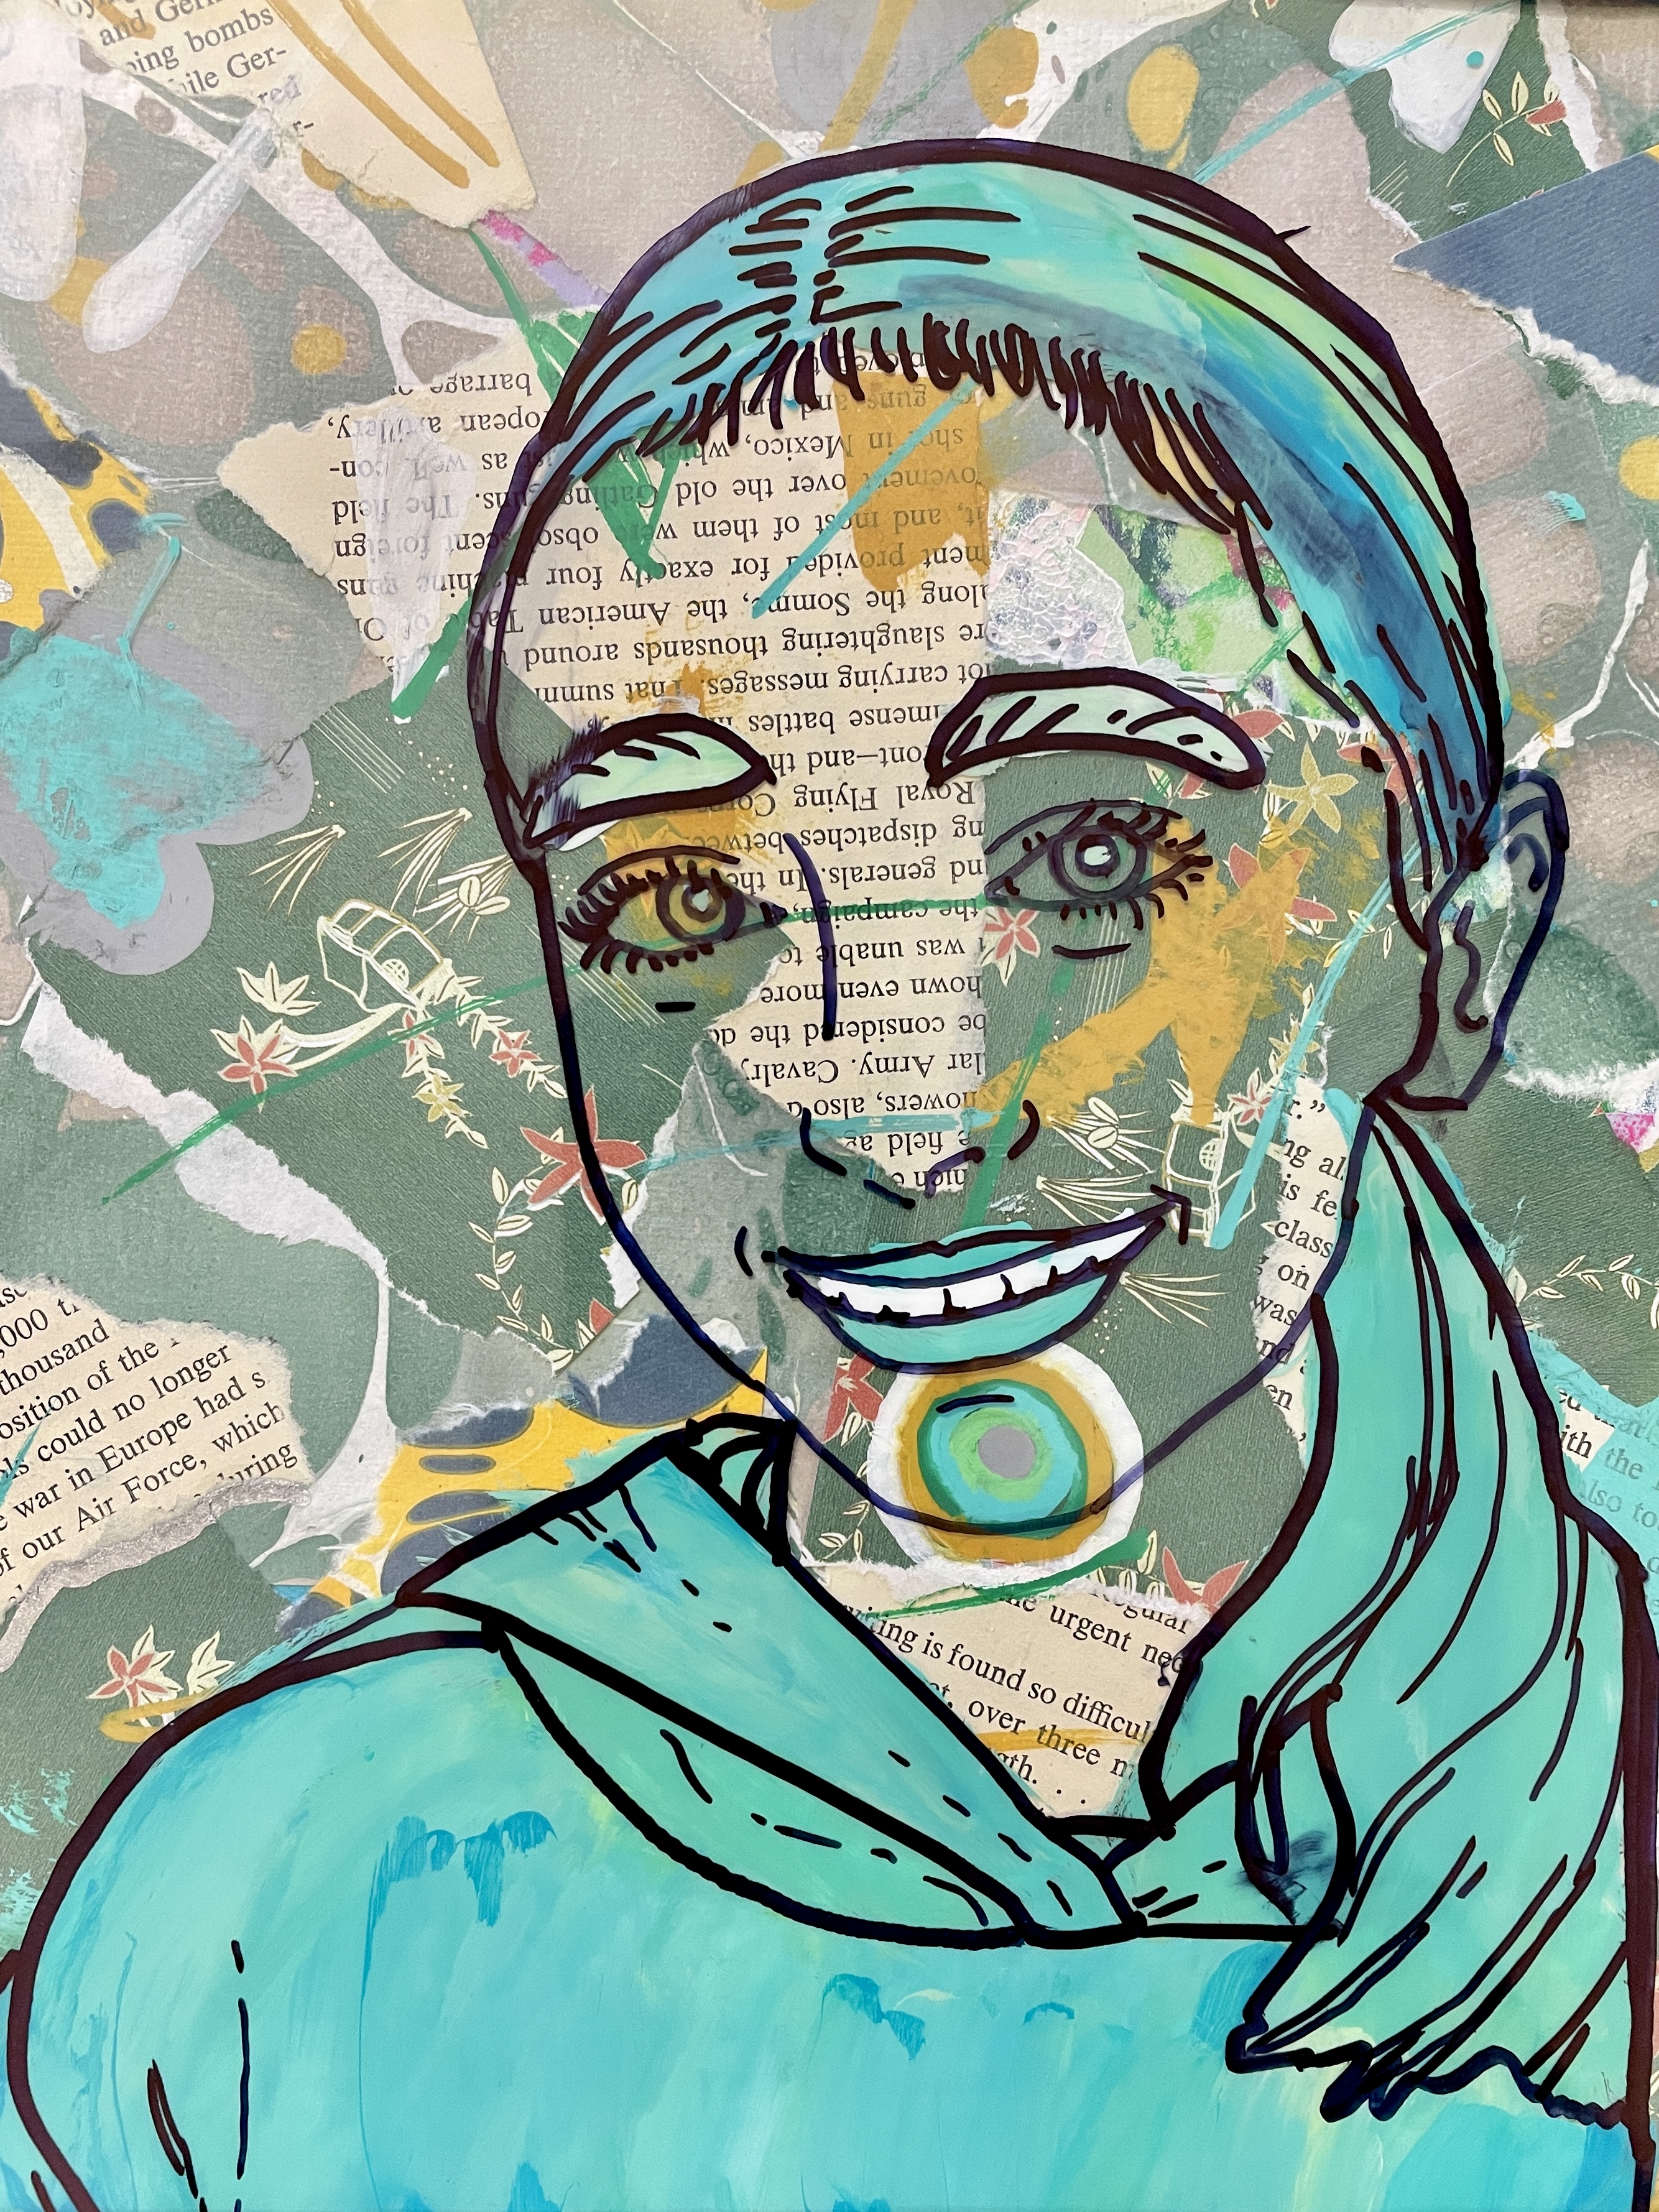
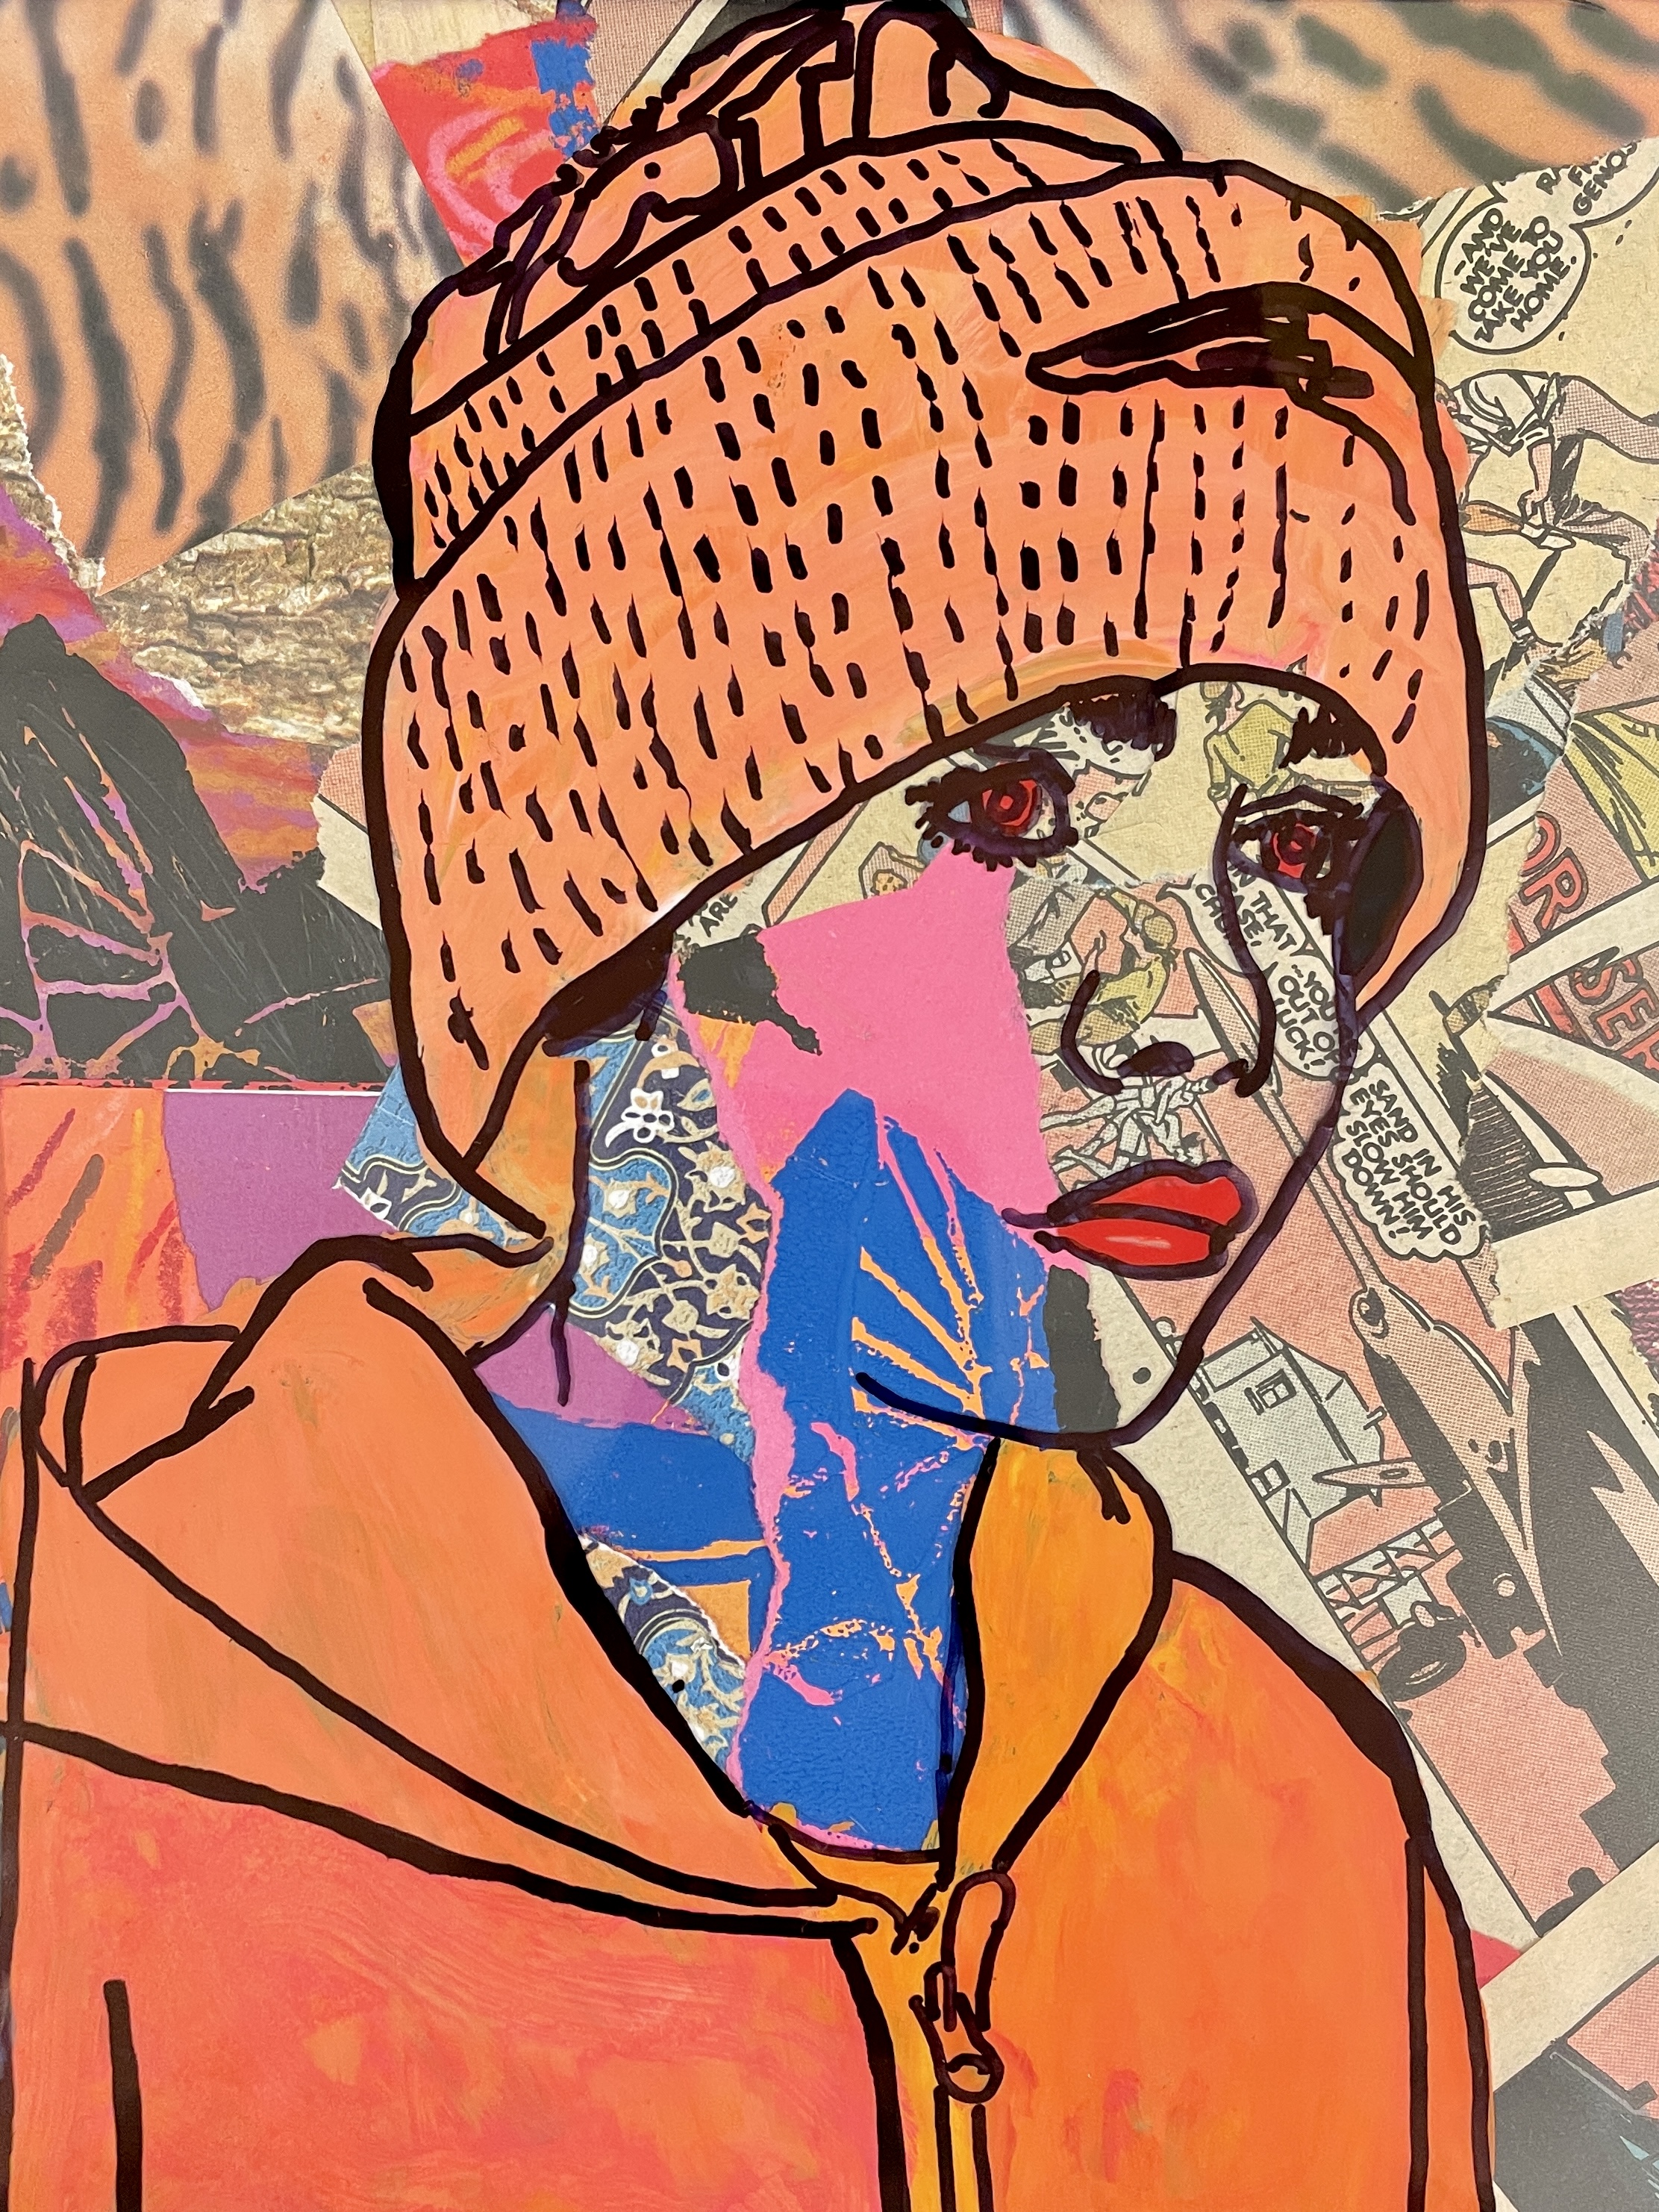
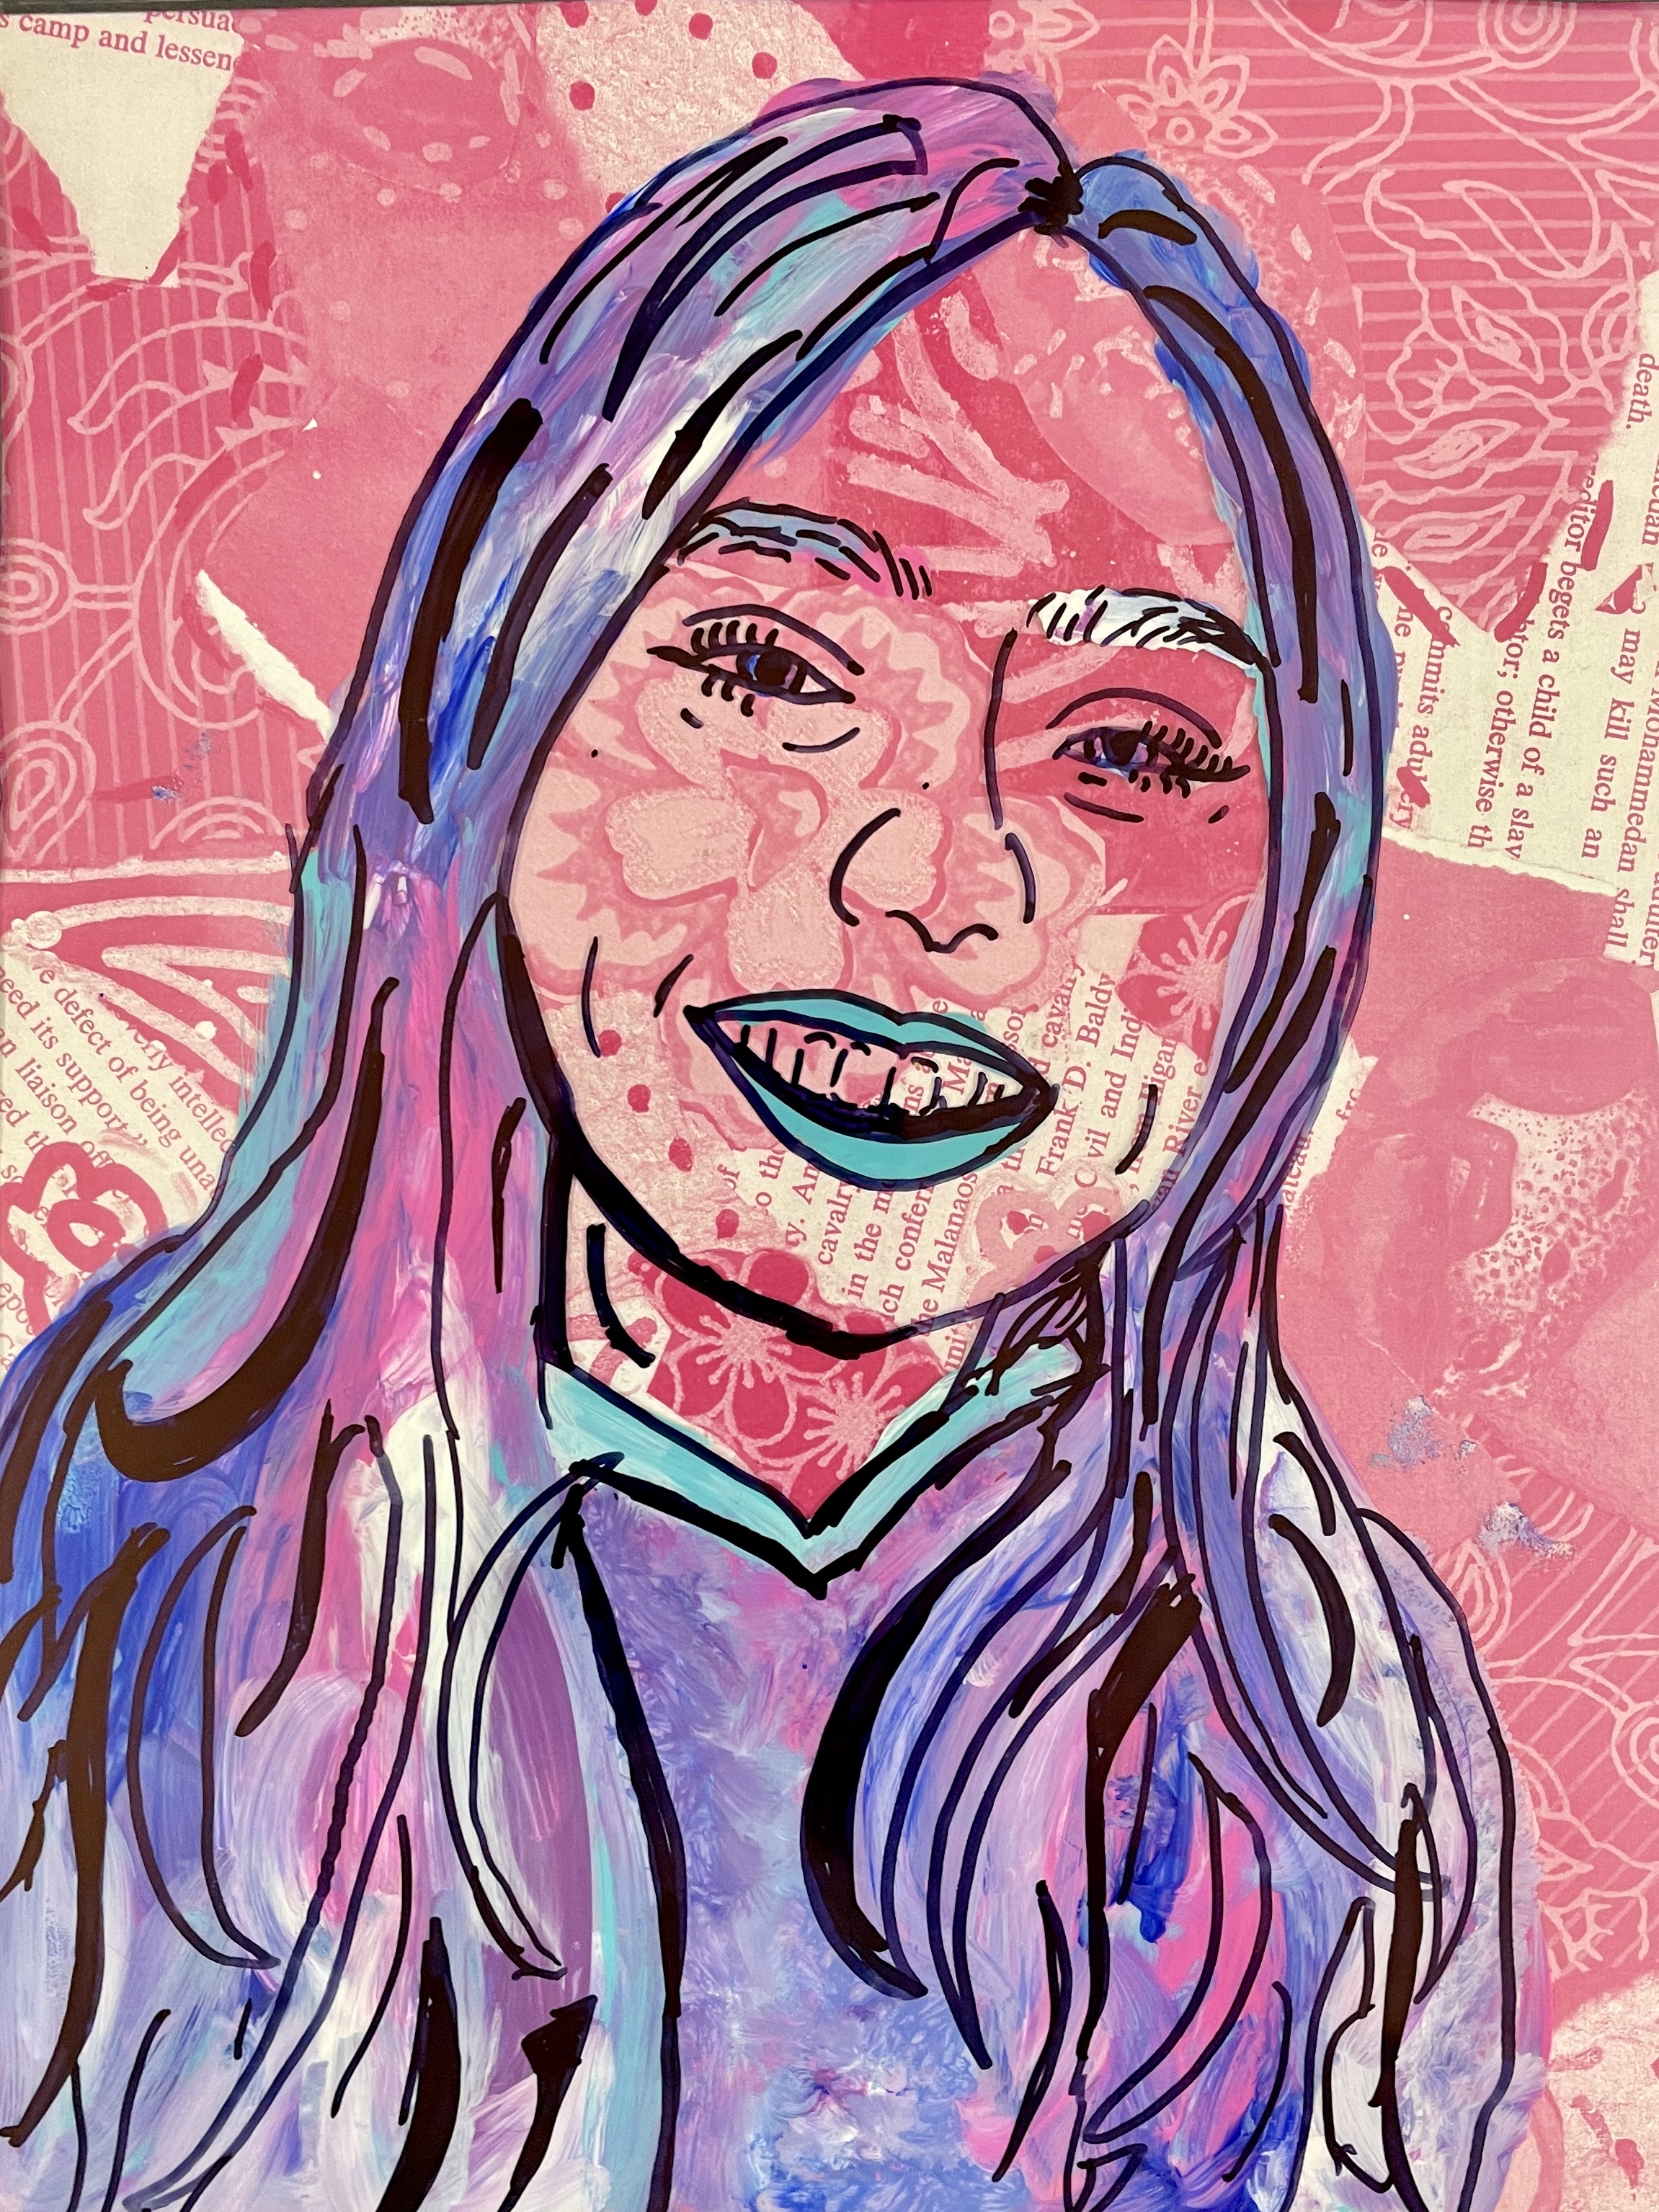
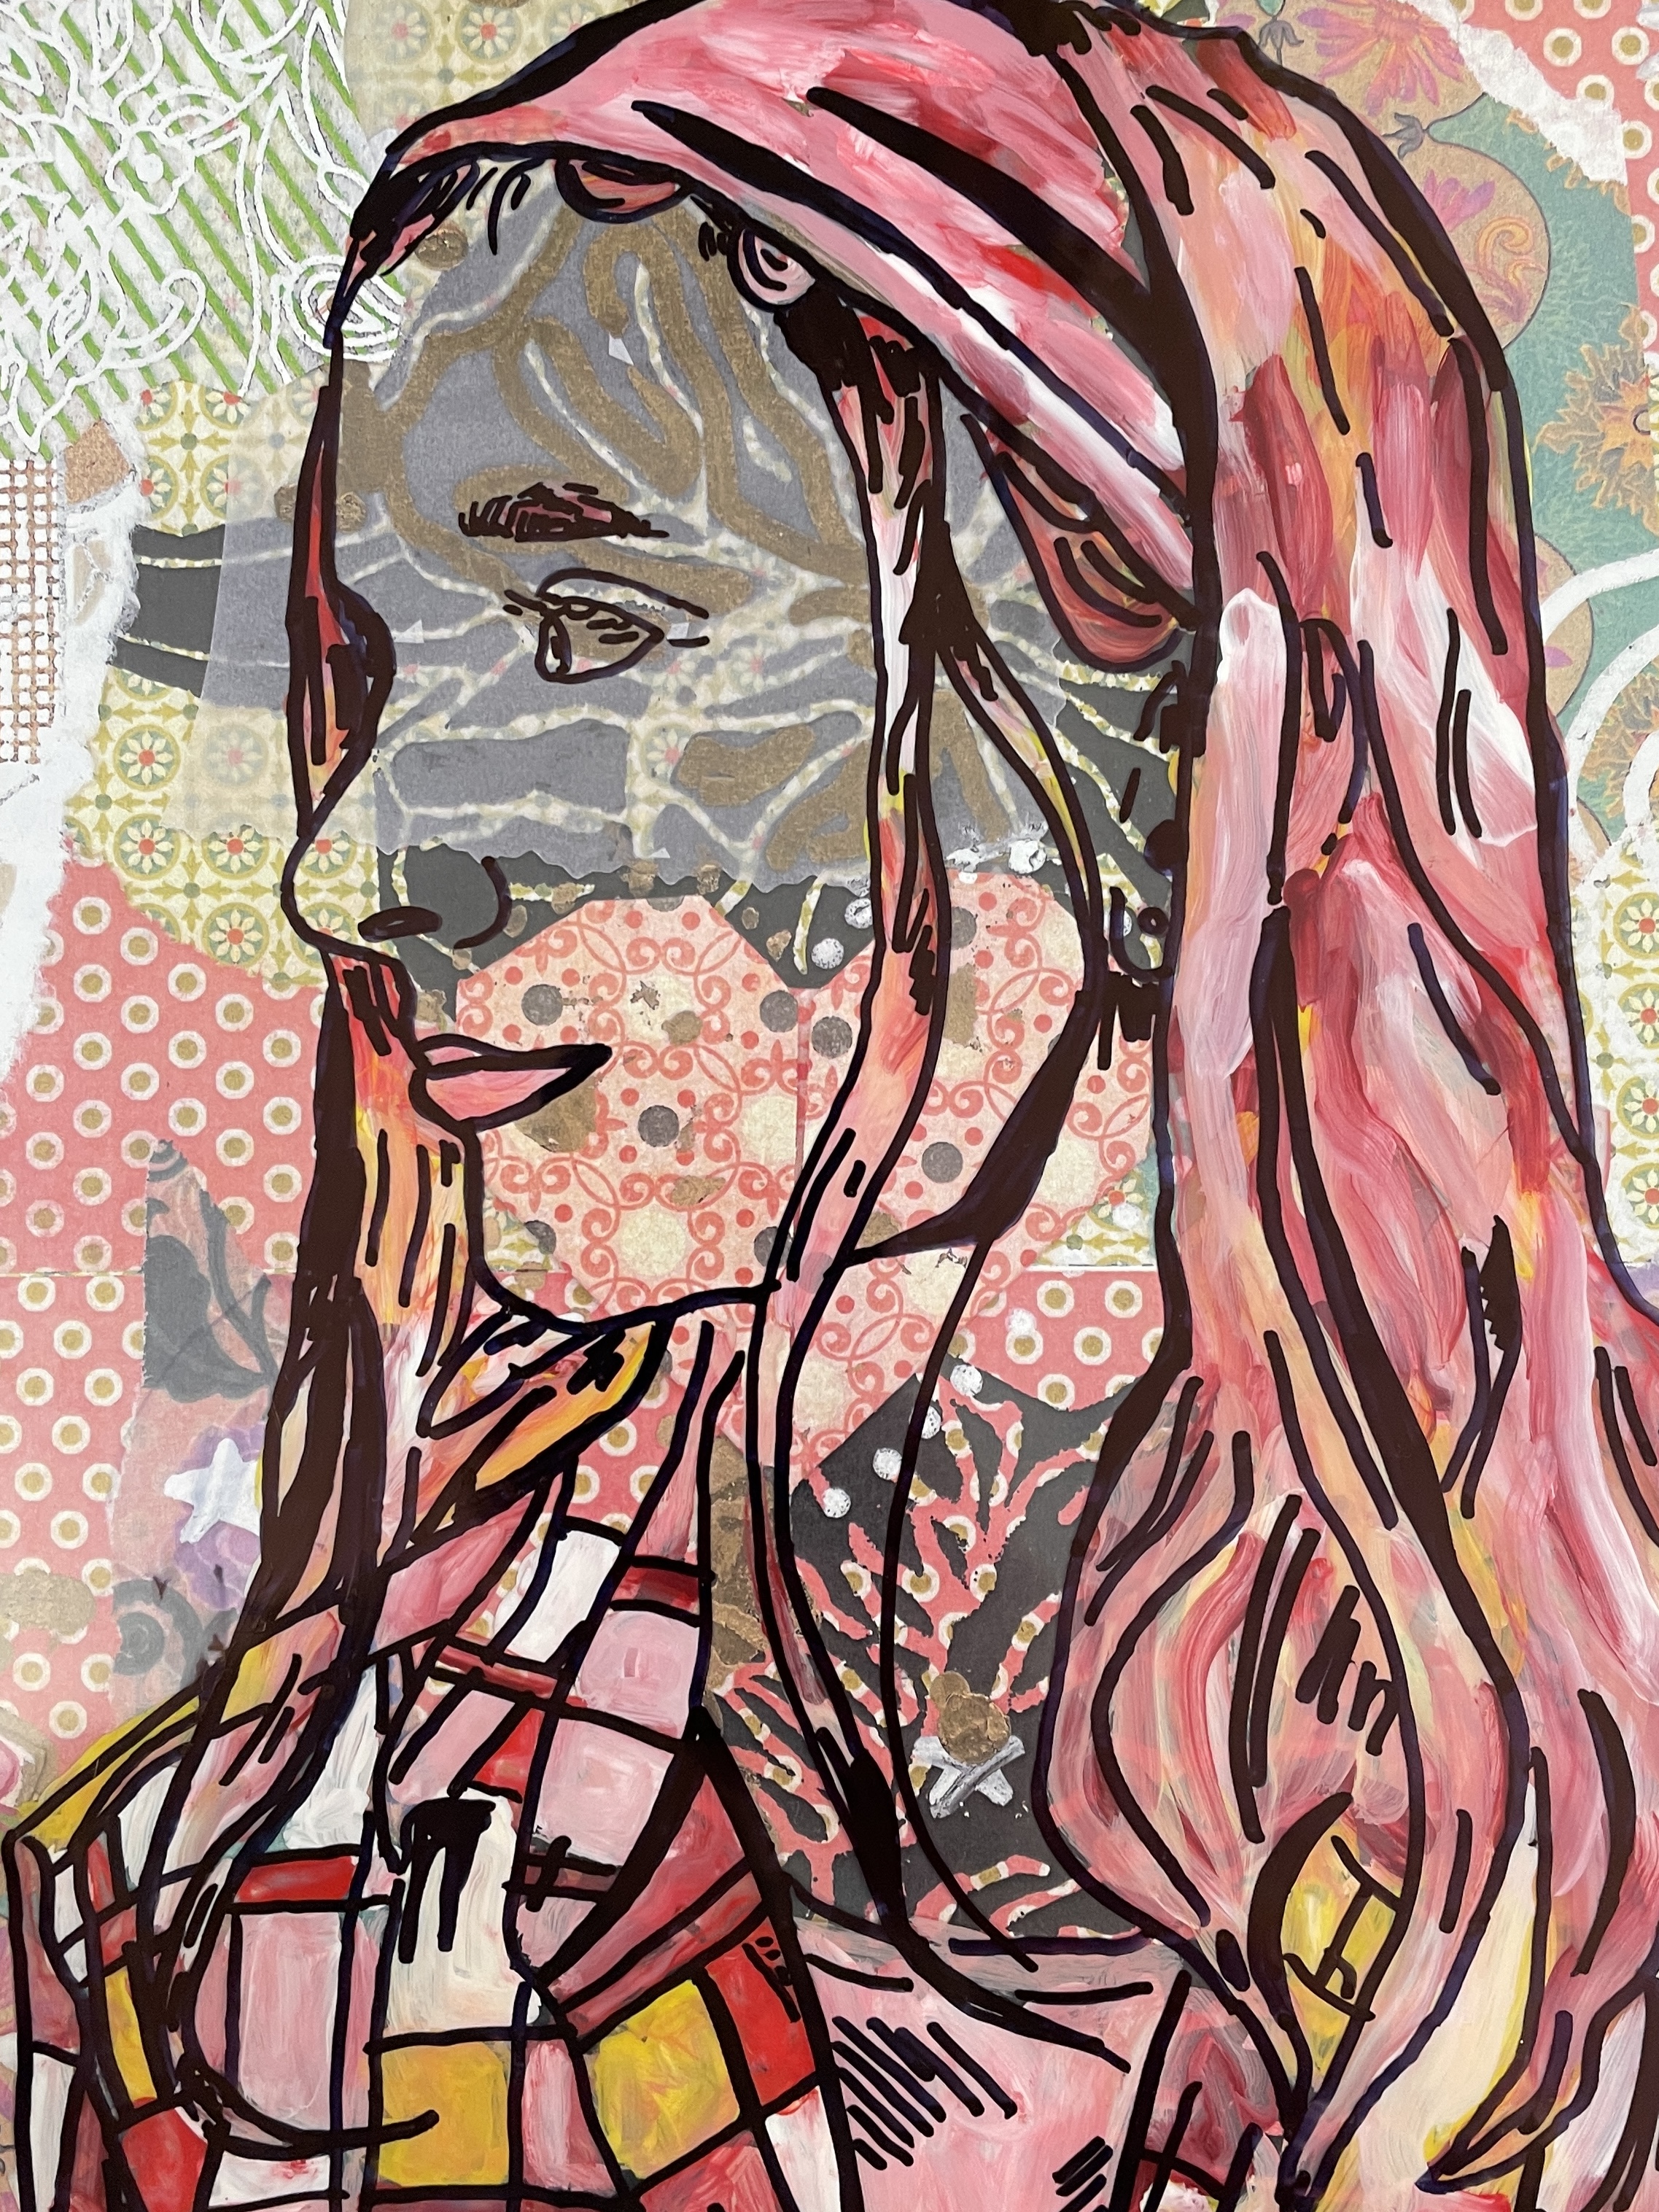
Reverse Painting Acetate Self Portraits
Ready, set, POSE! I use my iPhone to take photos of my students. I usually do this on a day during which they are intently engaged with another lesson, and pull one or two students at a time into the hall, where they can feel a bit less self-conscious. They have the freedom to pick how they want to pose and whether they wanted to express an emotion through their pose. We printed out 8” by 10” photos and students traced the main contours of their face and body onto acetate with Sharpie.
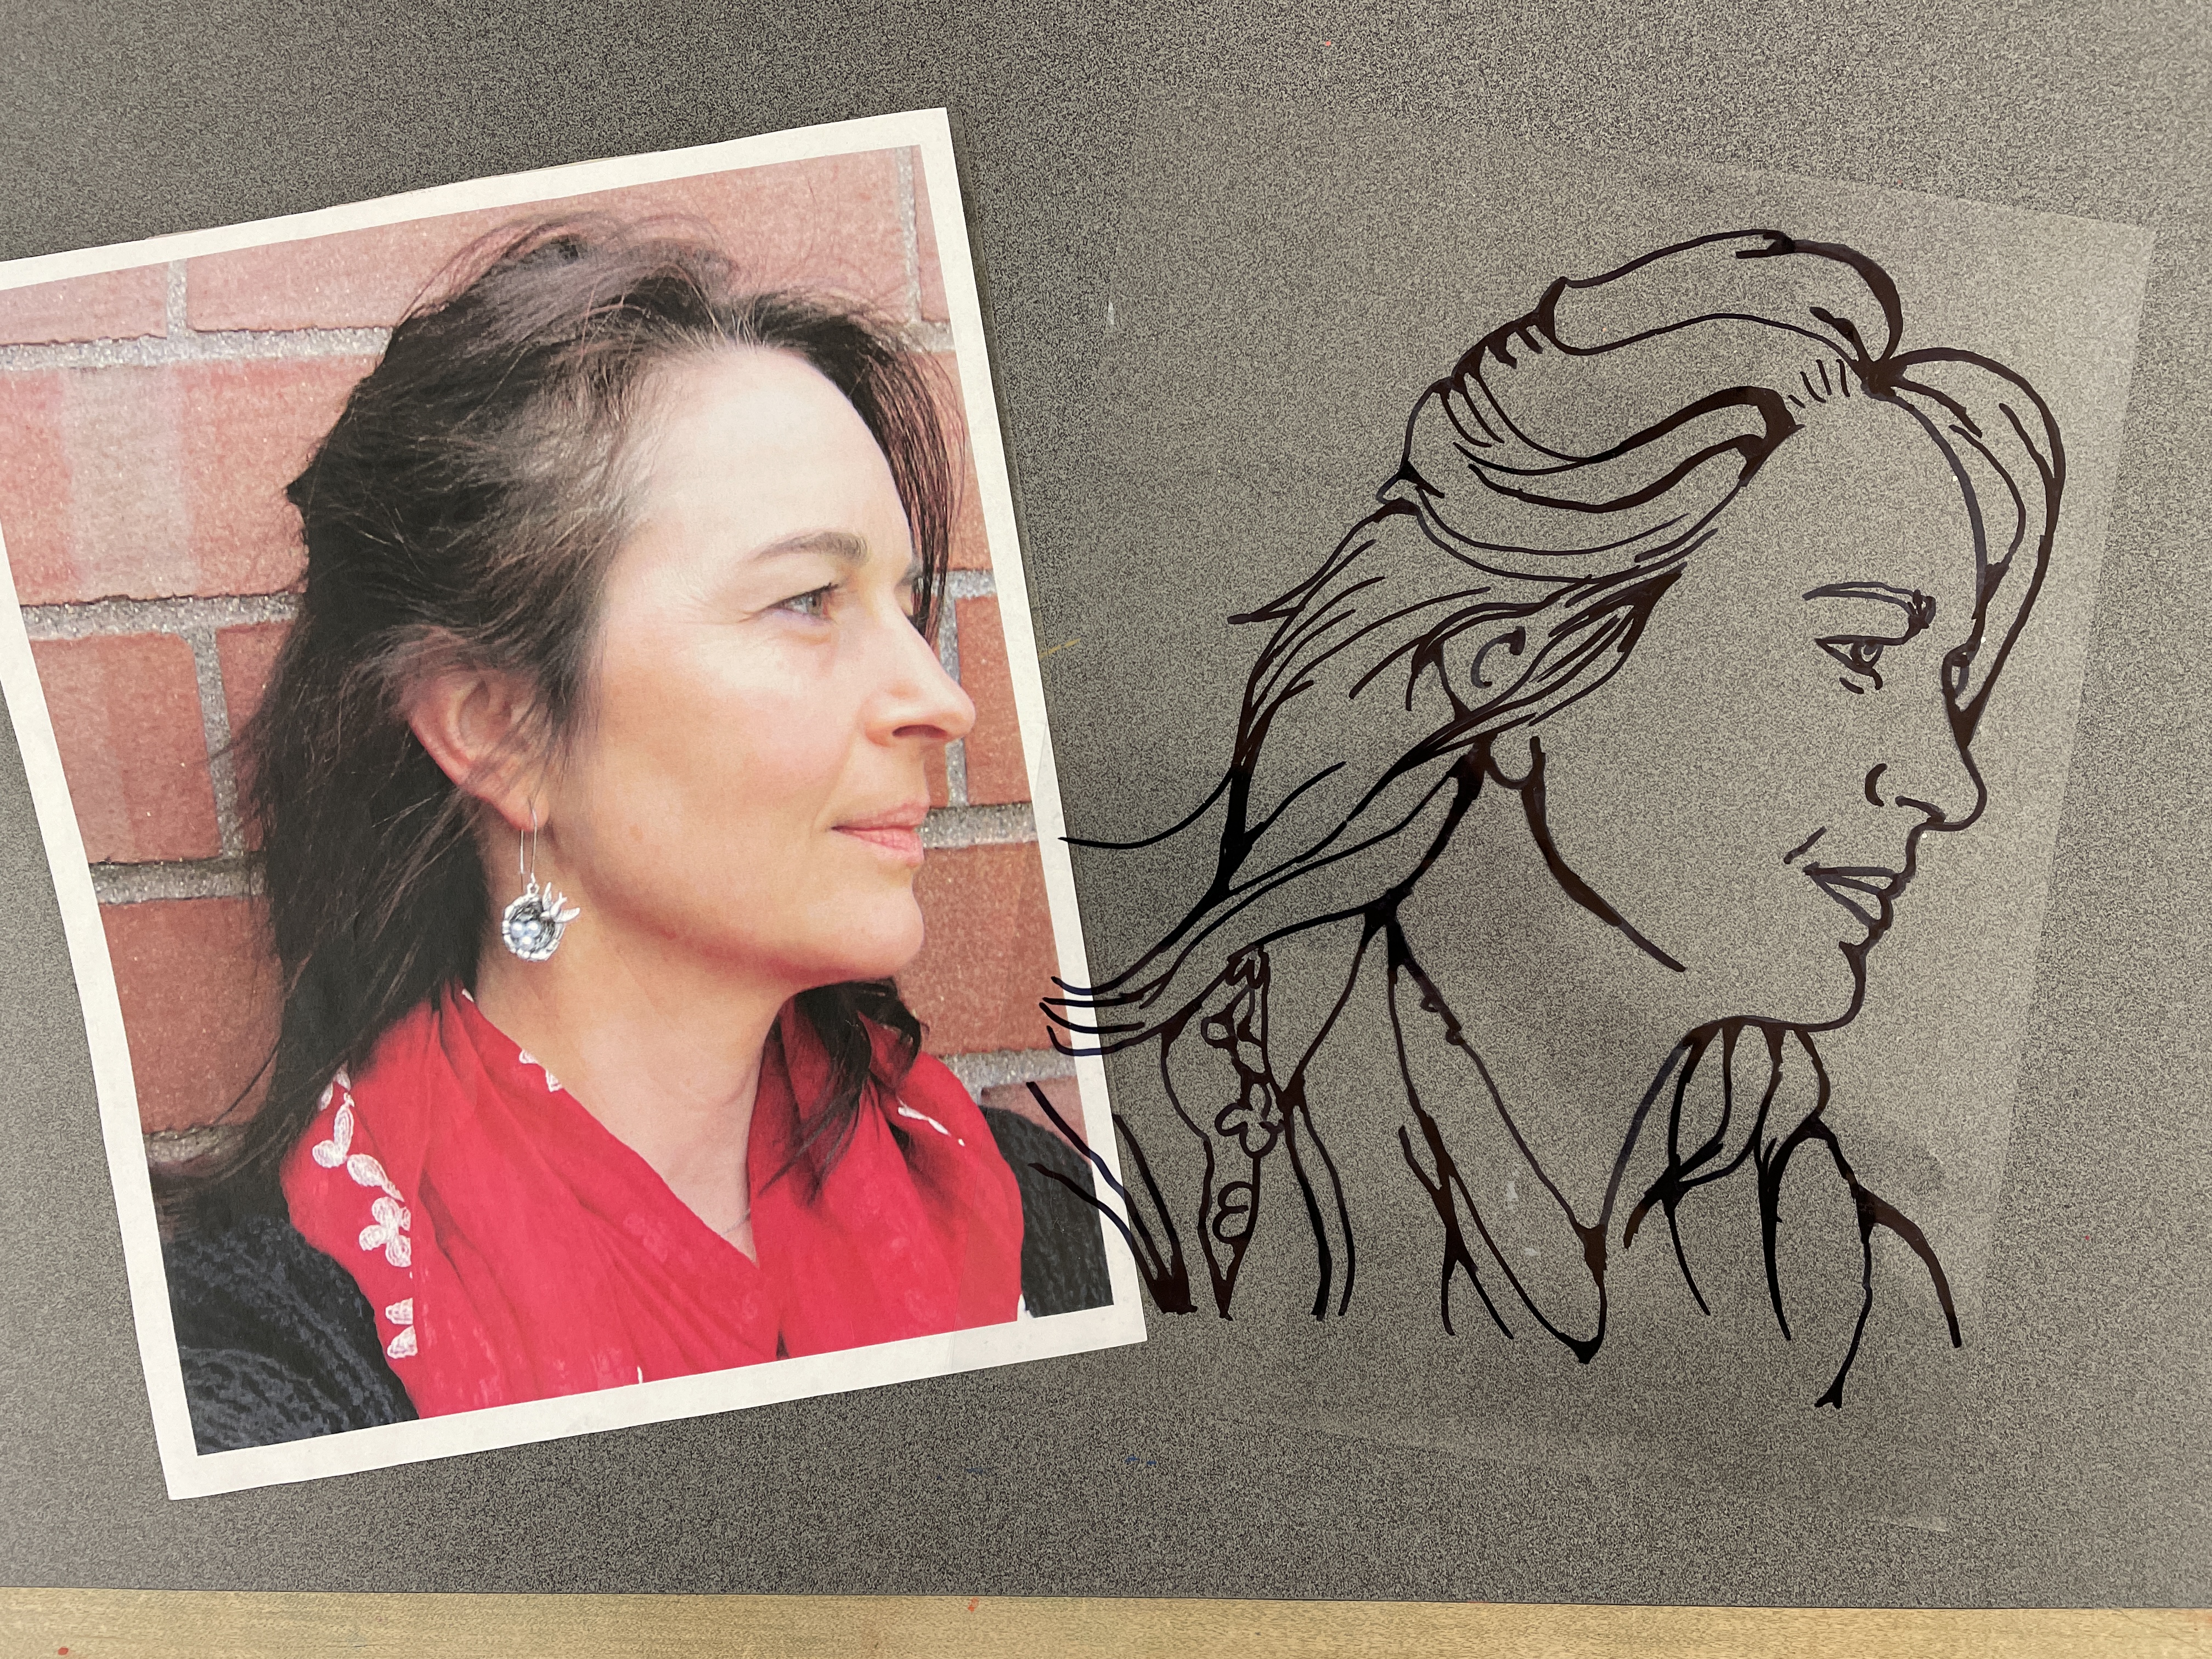
Here is my example of tracing on acetate. Playing with the line thickness can create more visual interest and variety!
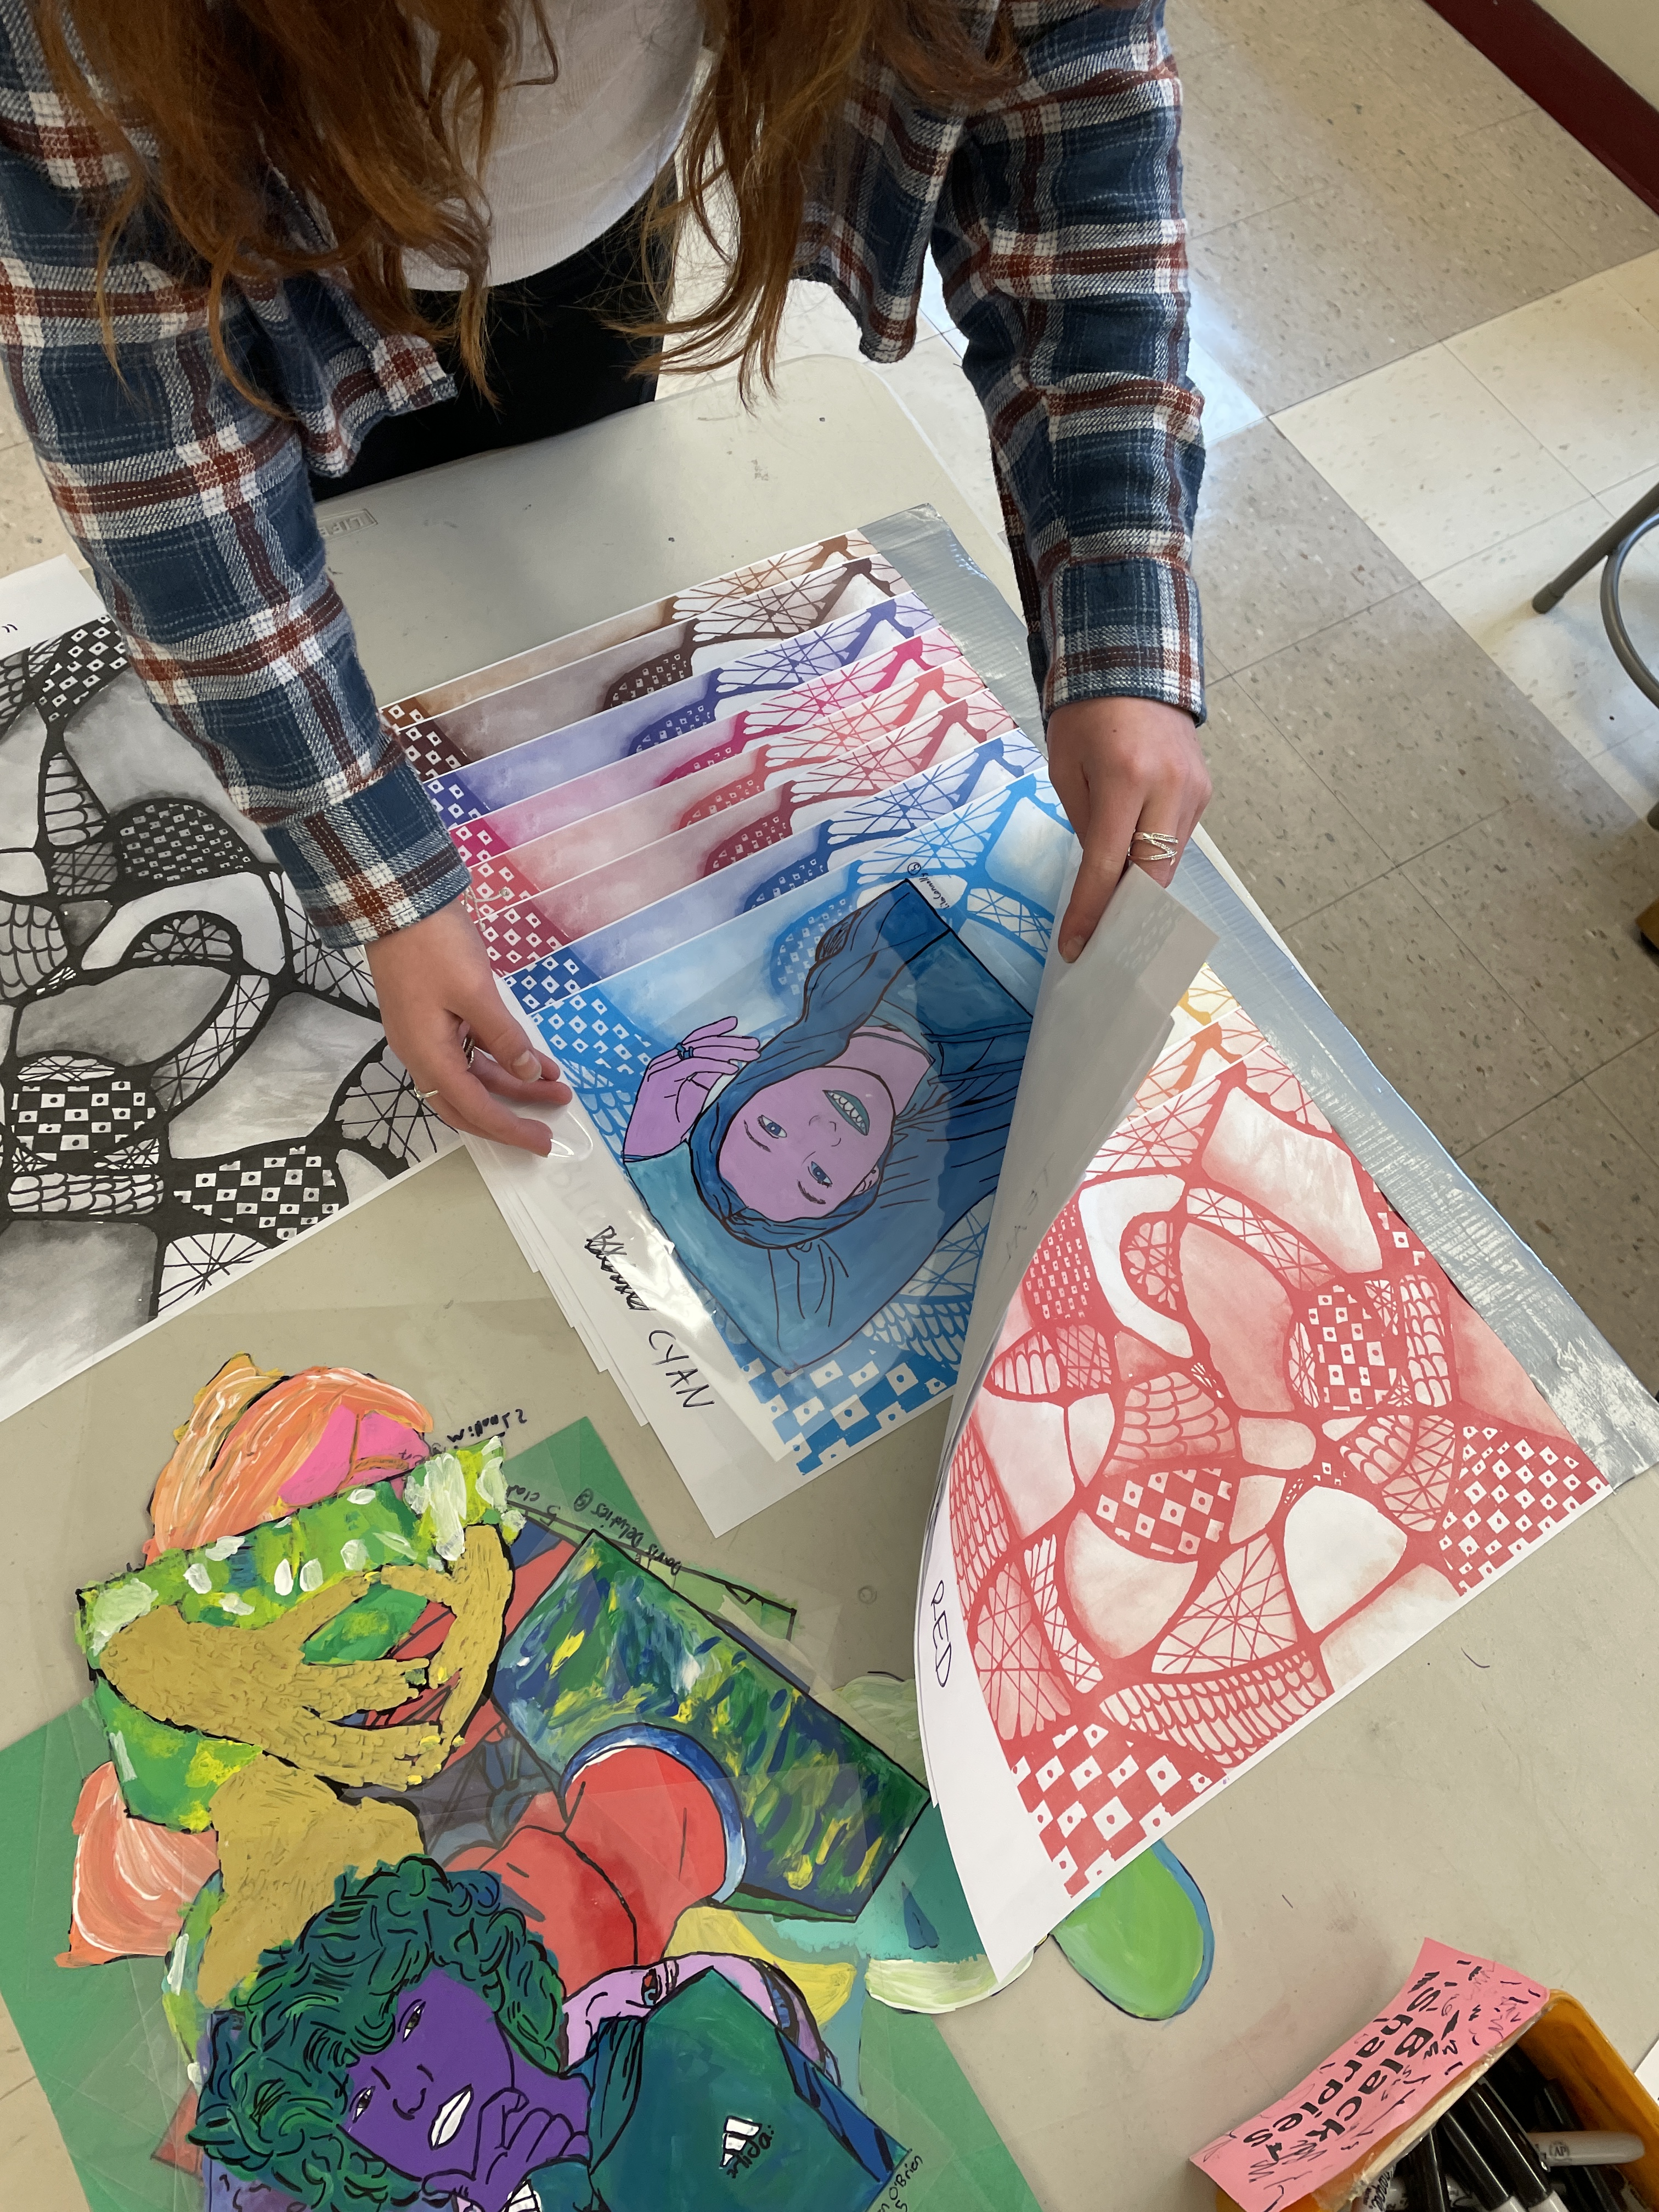
We then painted the back of the acetate using acrylic paint. Students had to select an analogous color scheme thoughtfully as well as apply their paint in directional marks to best accentuate the flow of hair and clothing. Because they painted the reverse side, students had to think carefully about the fact that the first strokes of paint applied are what is most visible once the painting is done, dried, and flipped back over.


Students painting the back of their traced portrait.


Students checking their painting, mid-progress!
The background seen through the unpainted sections of the acetate is an example of handmade “paste paper”.
Paste paper is a surface decorating technique in which a mixture of paint and paste, (in our case, papier mache paste,) is applied thickly to white or colored paper. Patterns and textures can be created in the wet paint with tools such as combs and plastic forks, or even finger tips.
CLICK HERE to see the Instruction Packet for this Lesson,
(complete with video tutorials on the acetate painting and making paste paper!)
– – – – –
A variation of this project had students use leftover abstract paintings from a previous lesson as the background piece behind their acetate paintings. Any interesting patterned paper, handmade or not, makes a fun background element for this project! Wallpaper or wrapping paper work nicely as well!
- – – – – –
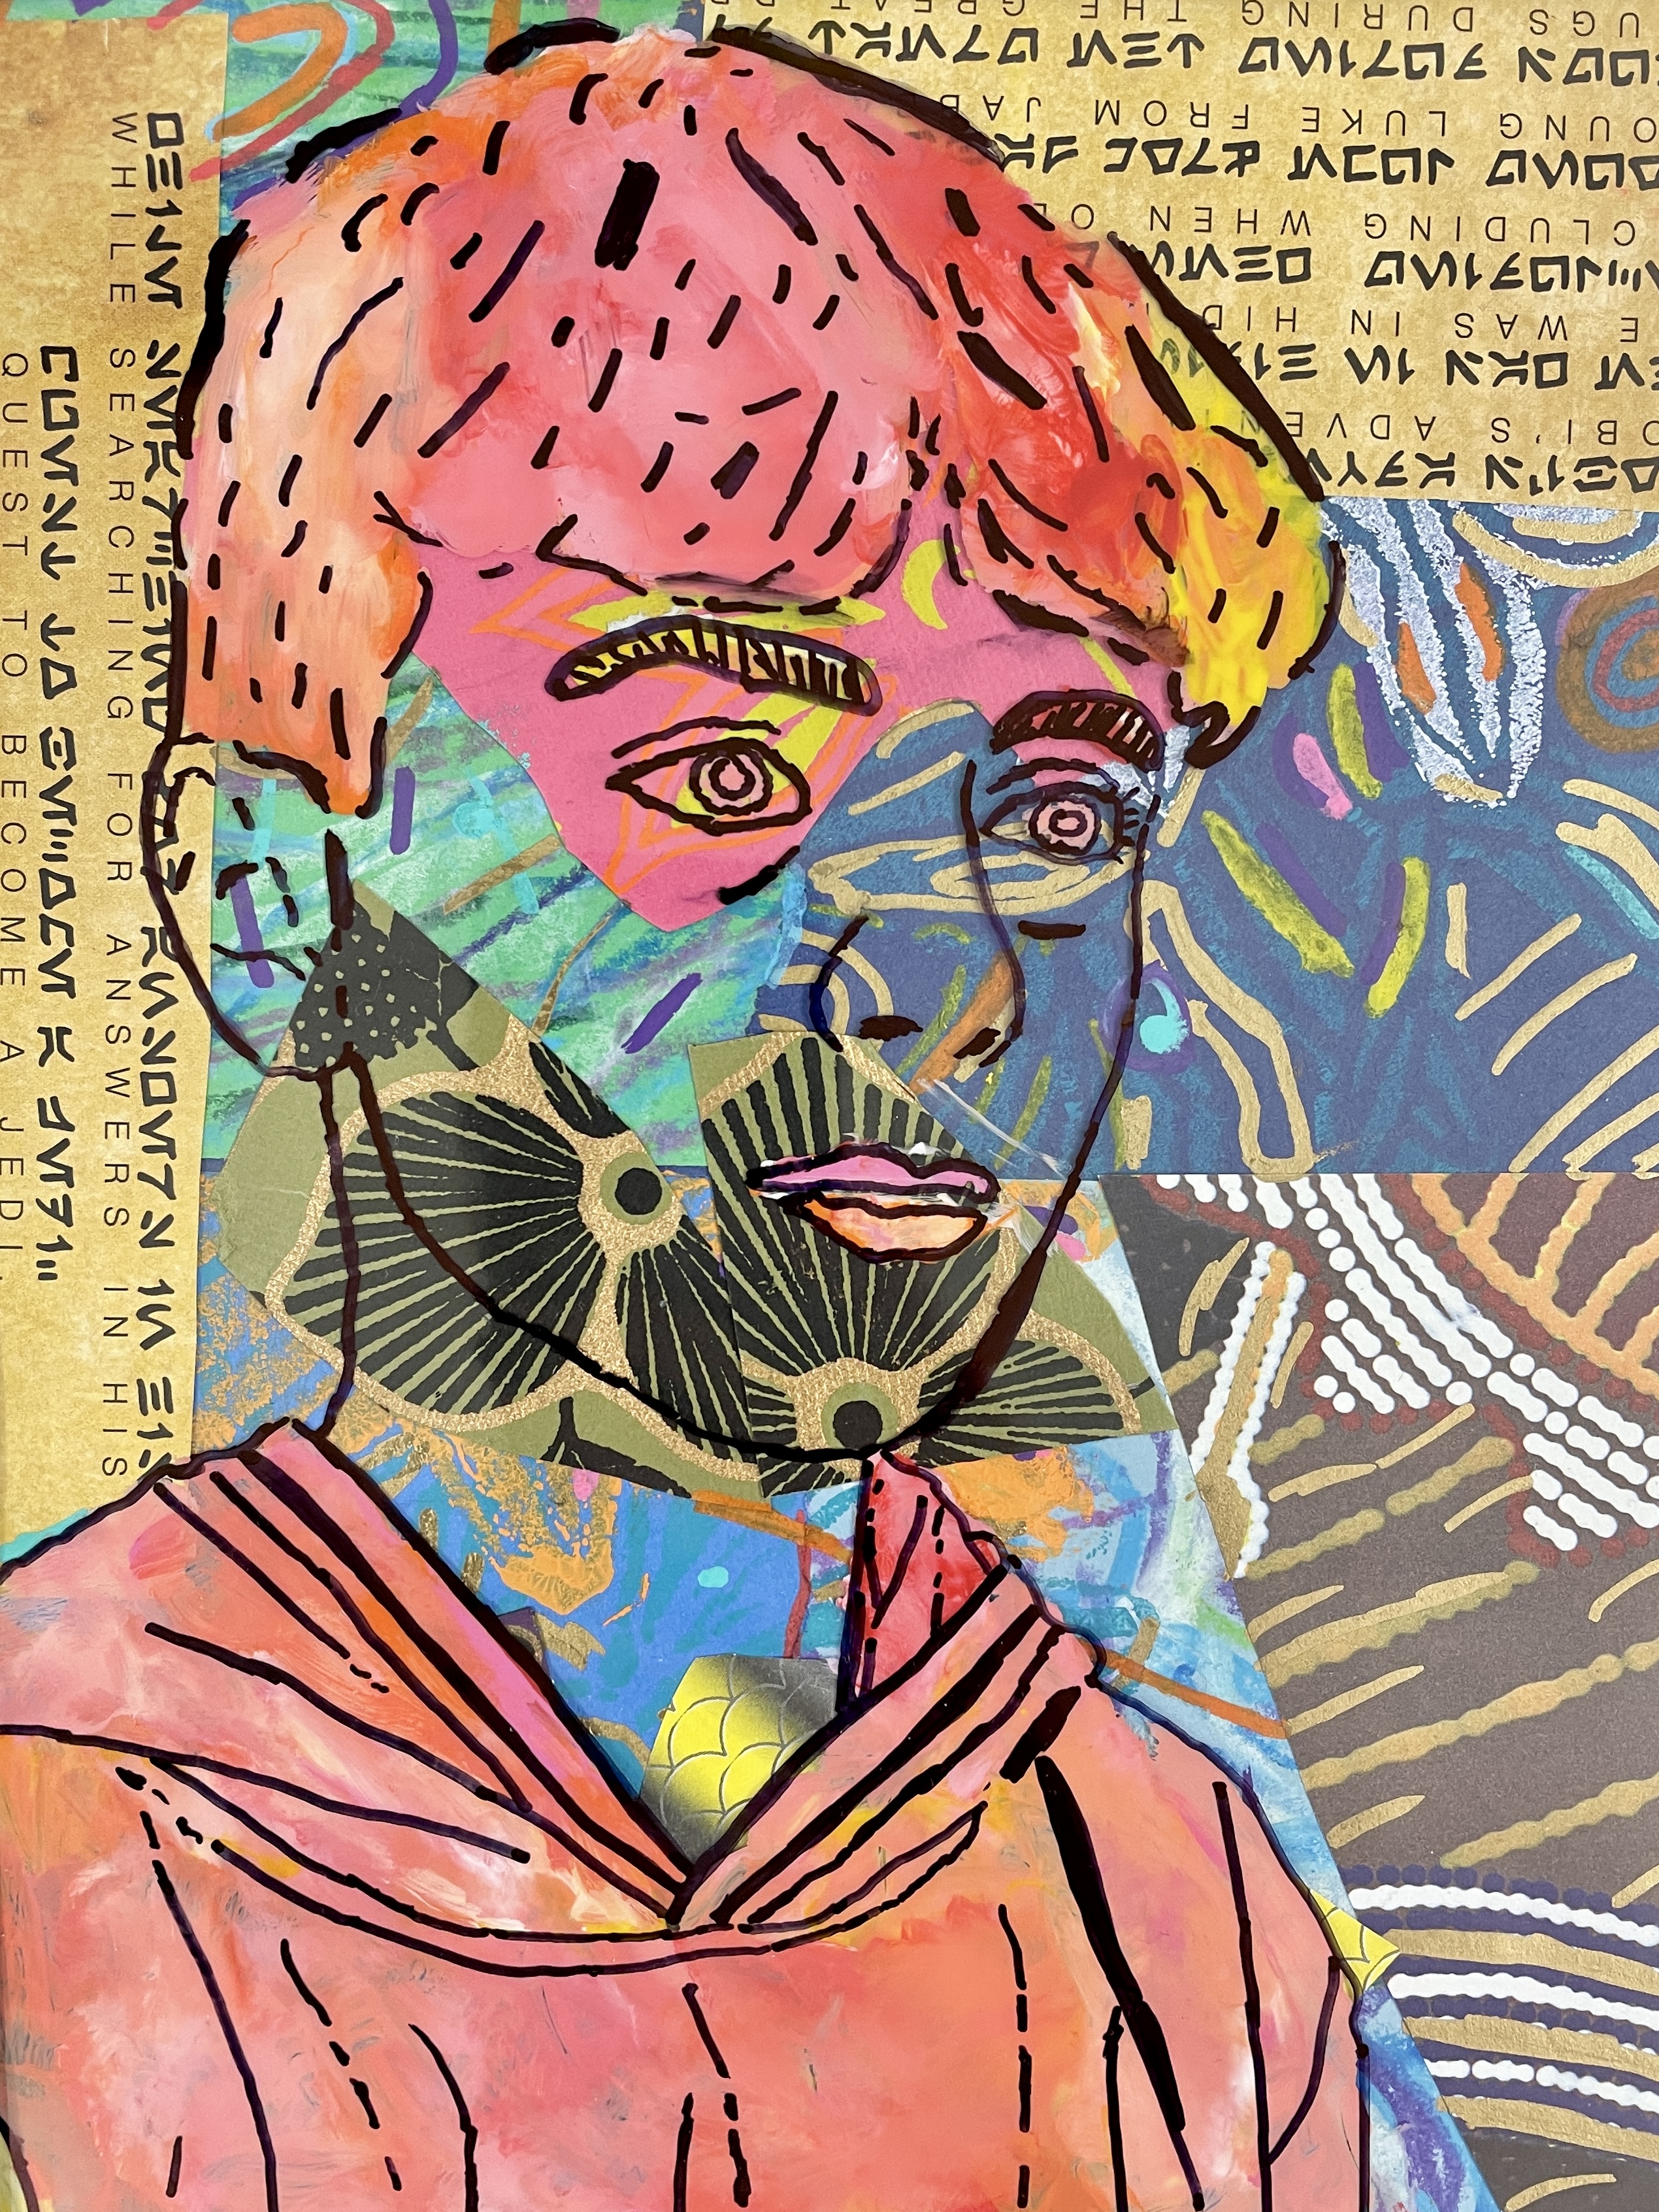
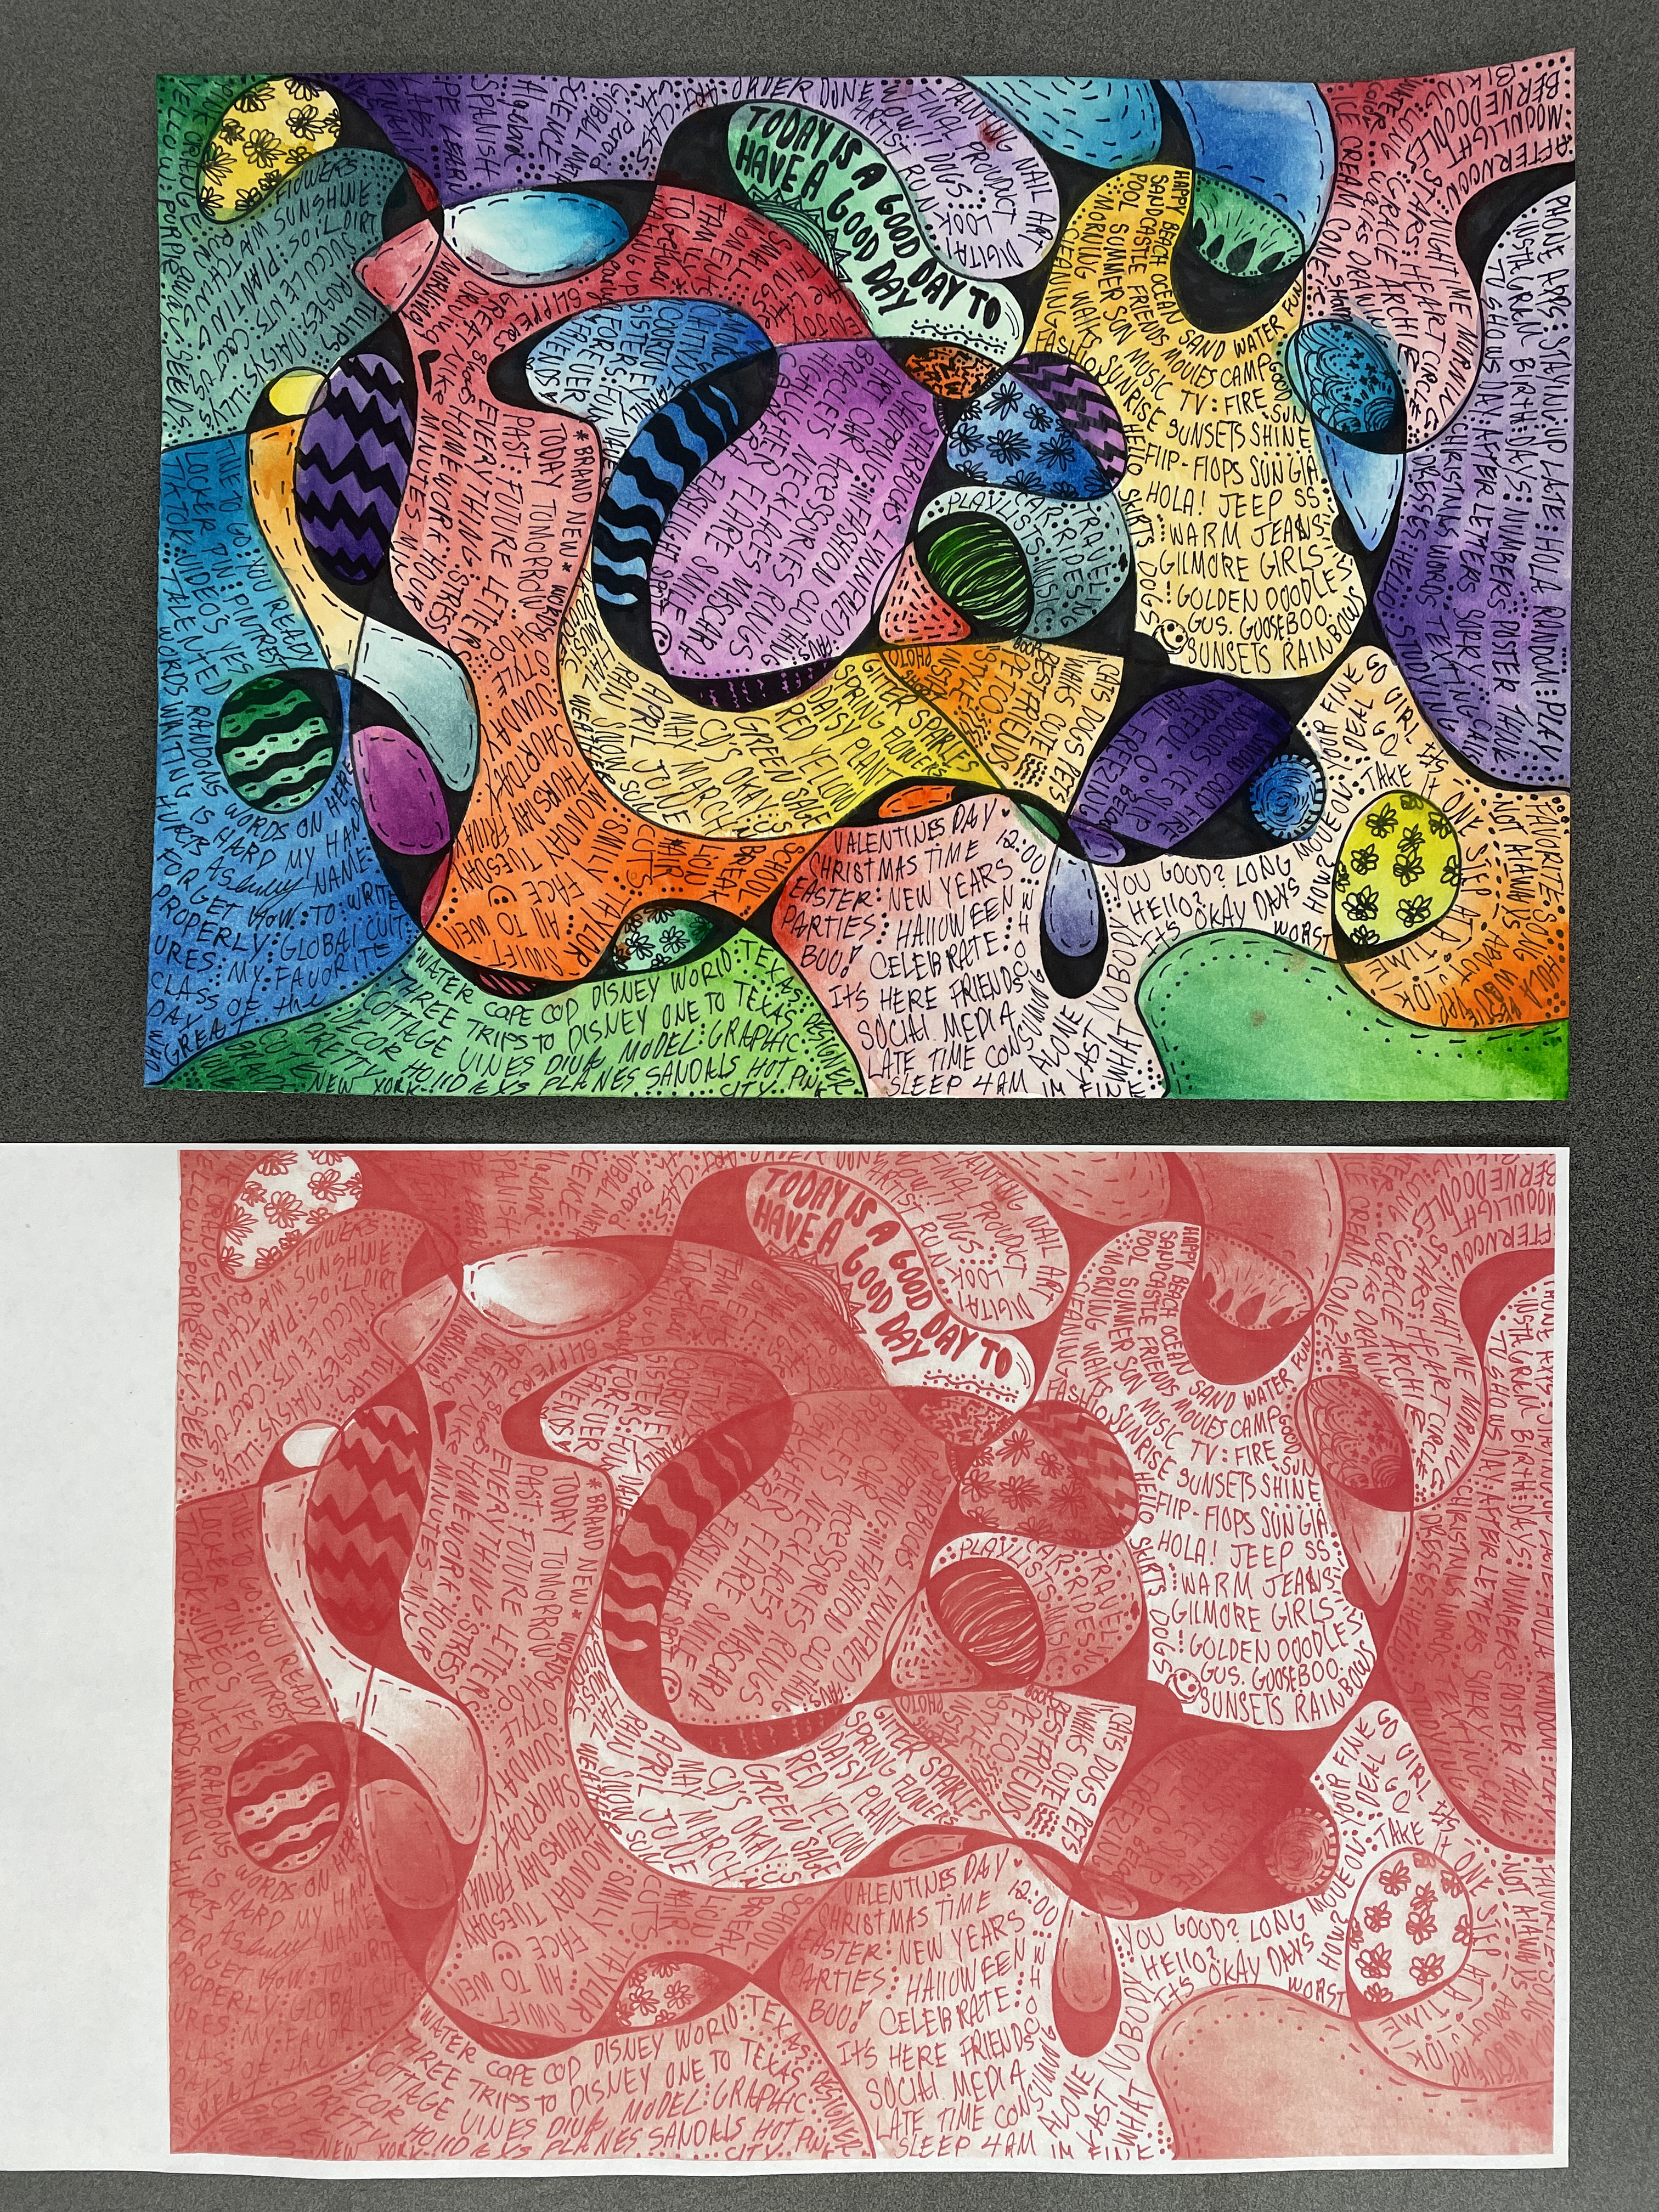
And yet another variation is to combine this lesson with Neurographic art to create truly personal and unique backgrounds! For the examples below, my students create Neurographic Art works and we made photocopies of the finished pieces to use as the background element of the portrait. (This way, the original Neurographic pieces could remain stand-alone works in their own right!)


Students had the option of a full color or grey scale photocopy, or a monochromatic copy in a single hue of their choosing. (I am lucky that our school as color copiers with some pretty advanced features!) You’ll notice that for these portraits, most students painted their faces. I found that the strong line elements and patterns of the Neurographic Art made it difficult to see the facial features when they remained transparent… For subtler background options, you may not need to have students paint their skin.
The picture below shows a student selecting from a variety of color copy options:
The picture below shows a student’s finished piece and the color copy of the piece which she will use as the background for her self portrait:
CLICK HERE for details on how we created our Neurographic Artworks!
– – –
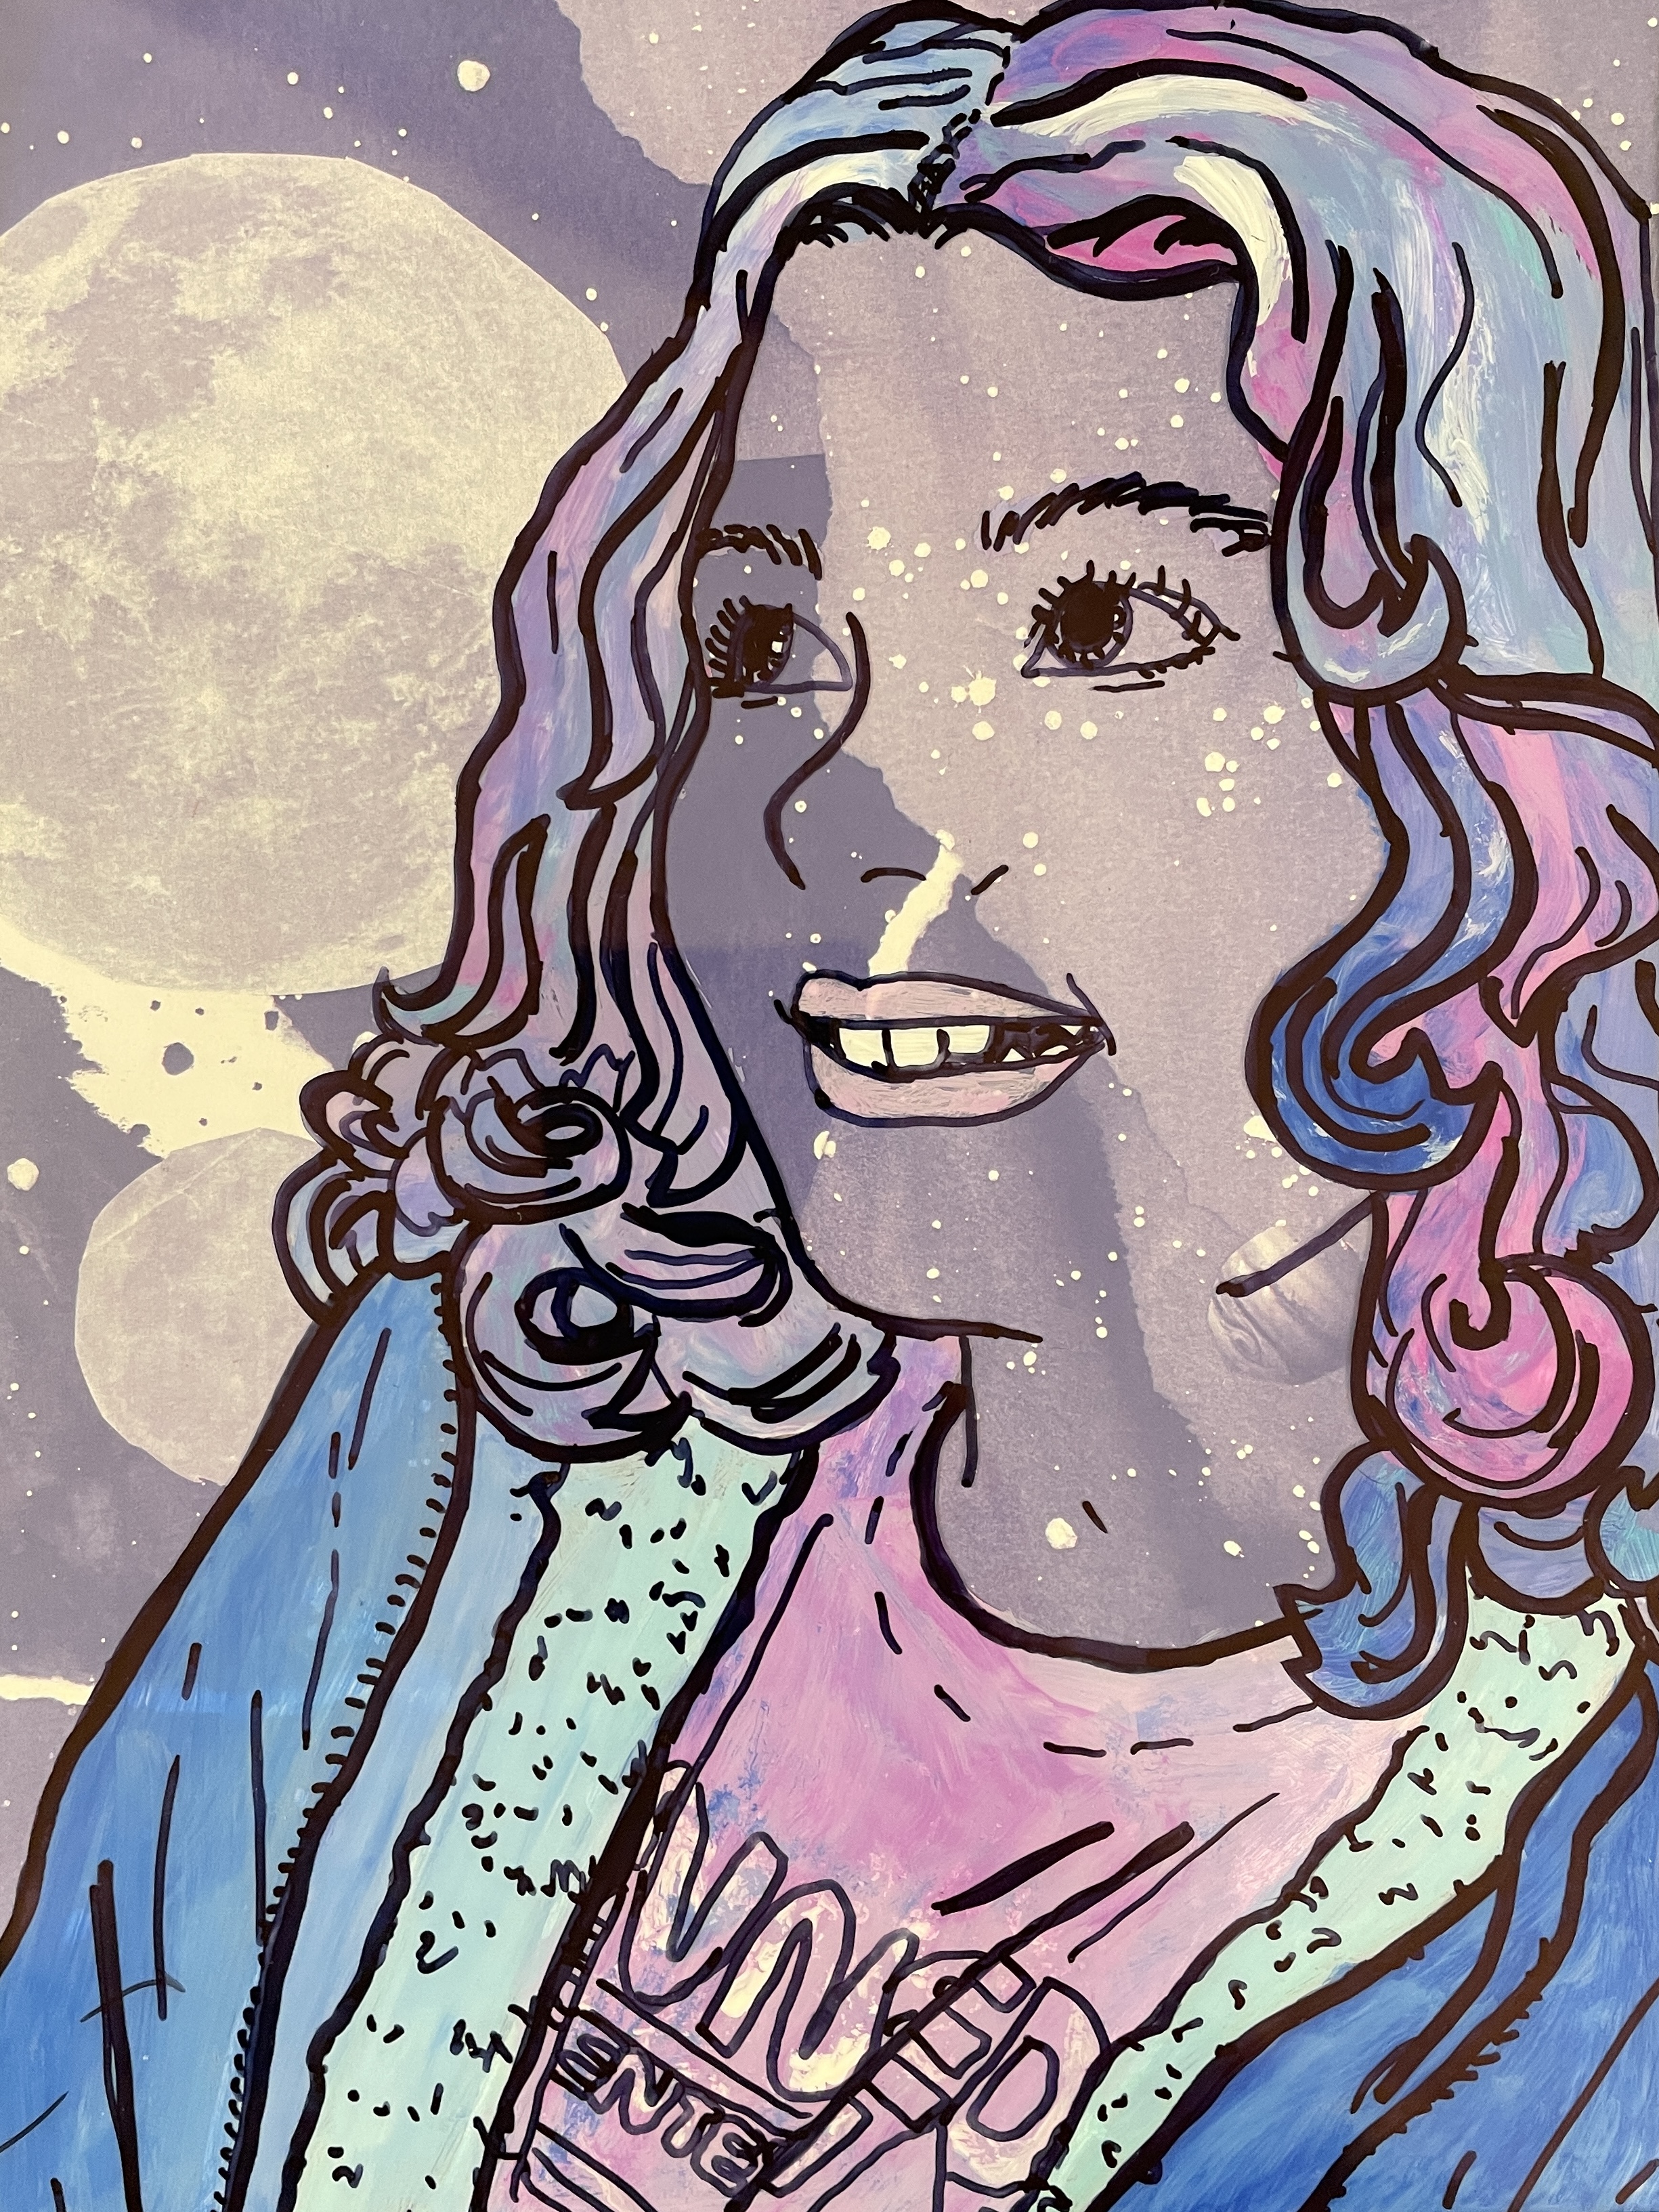
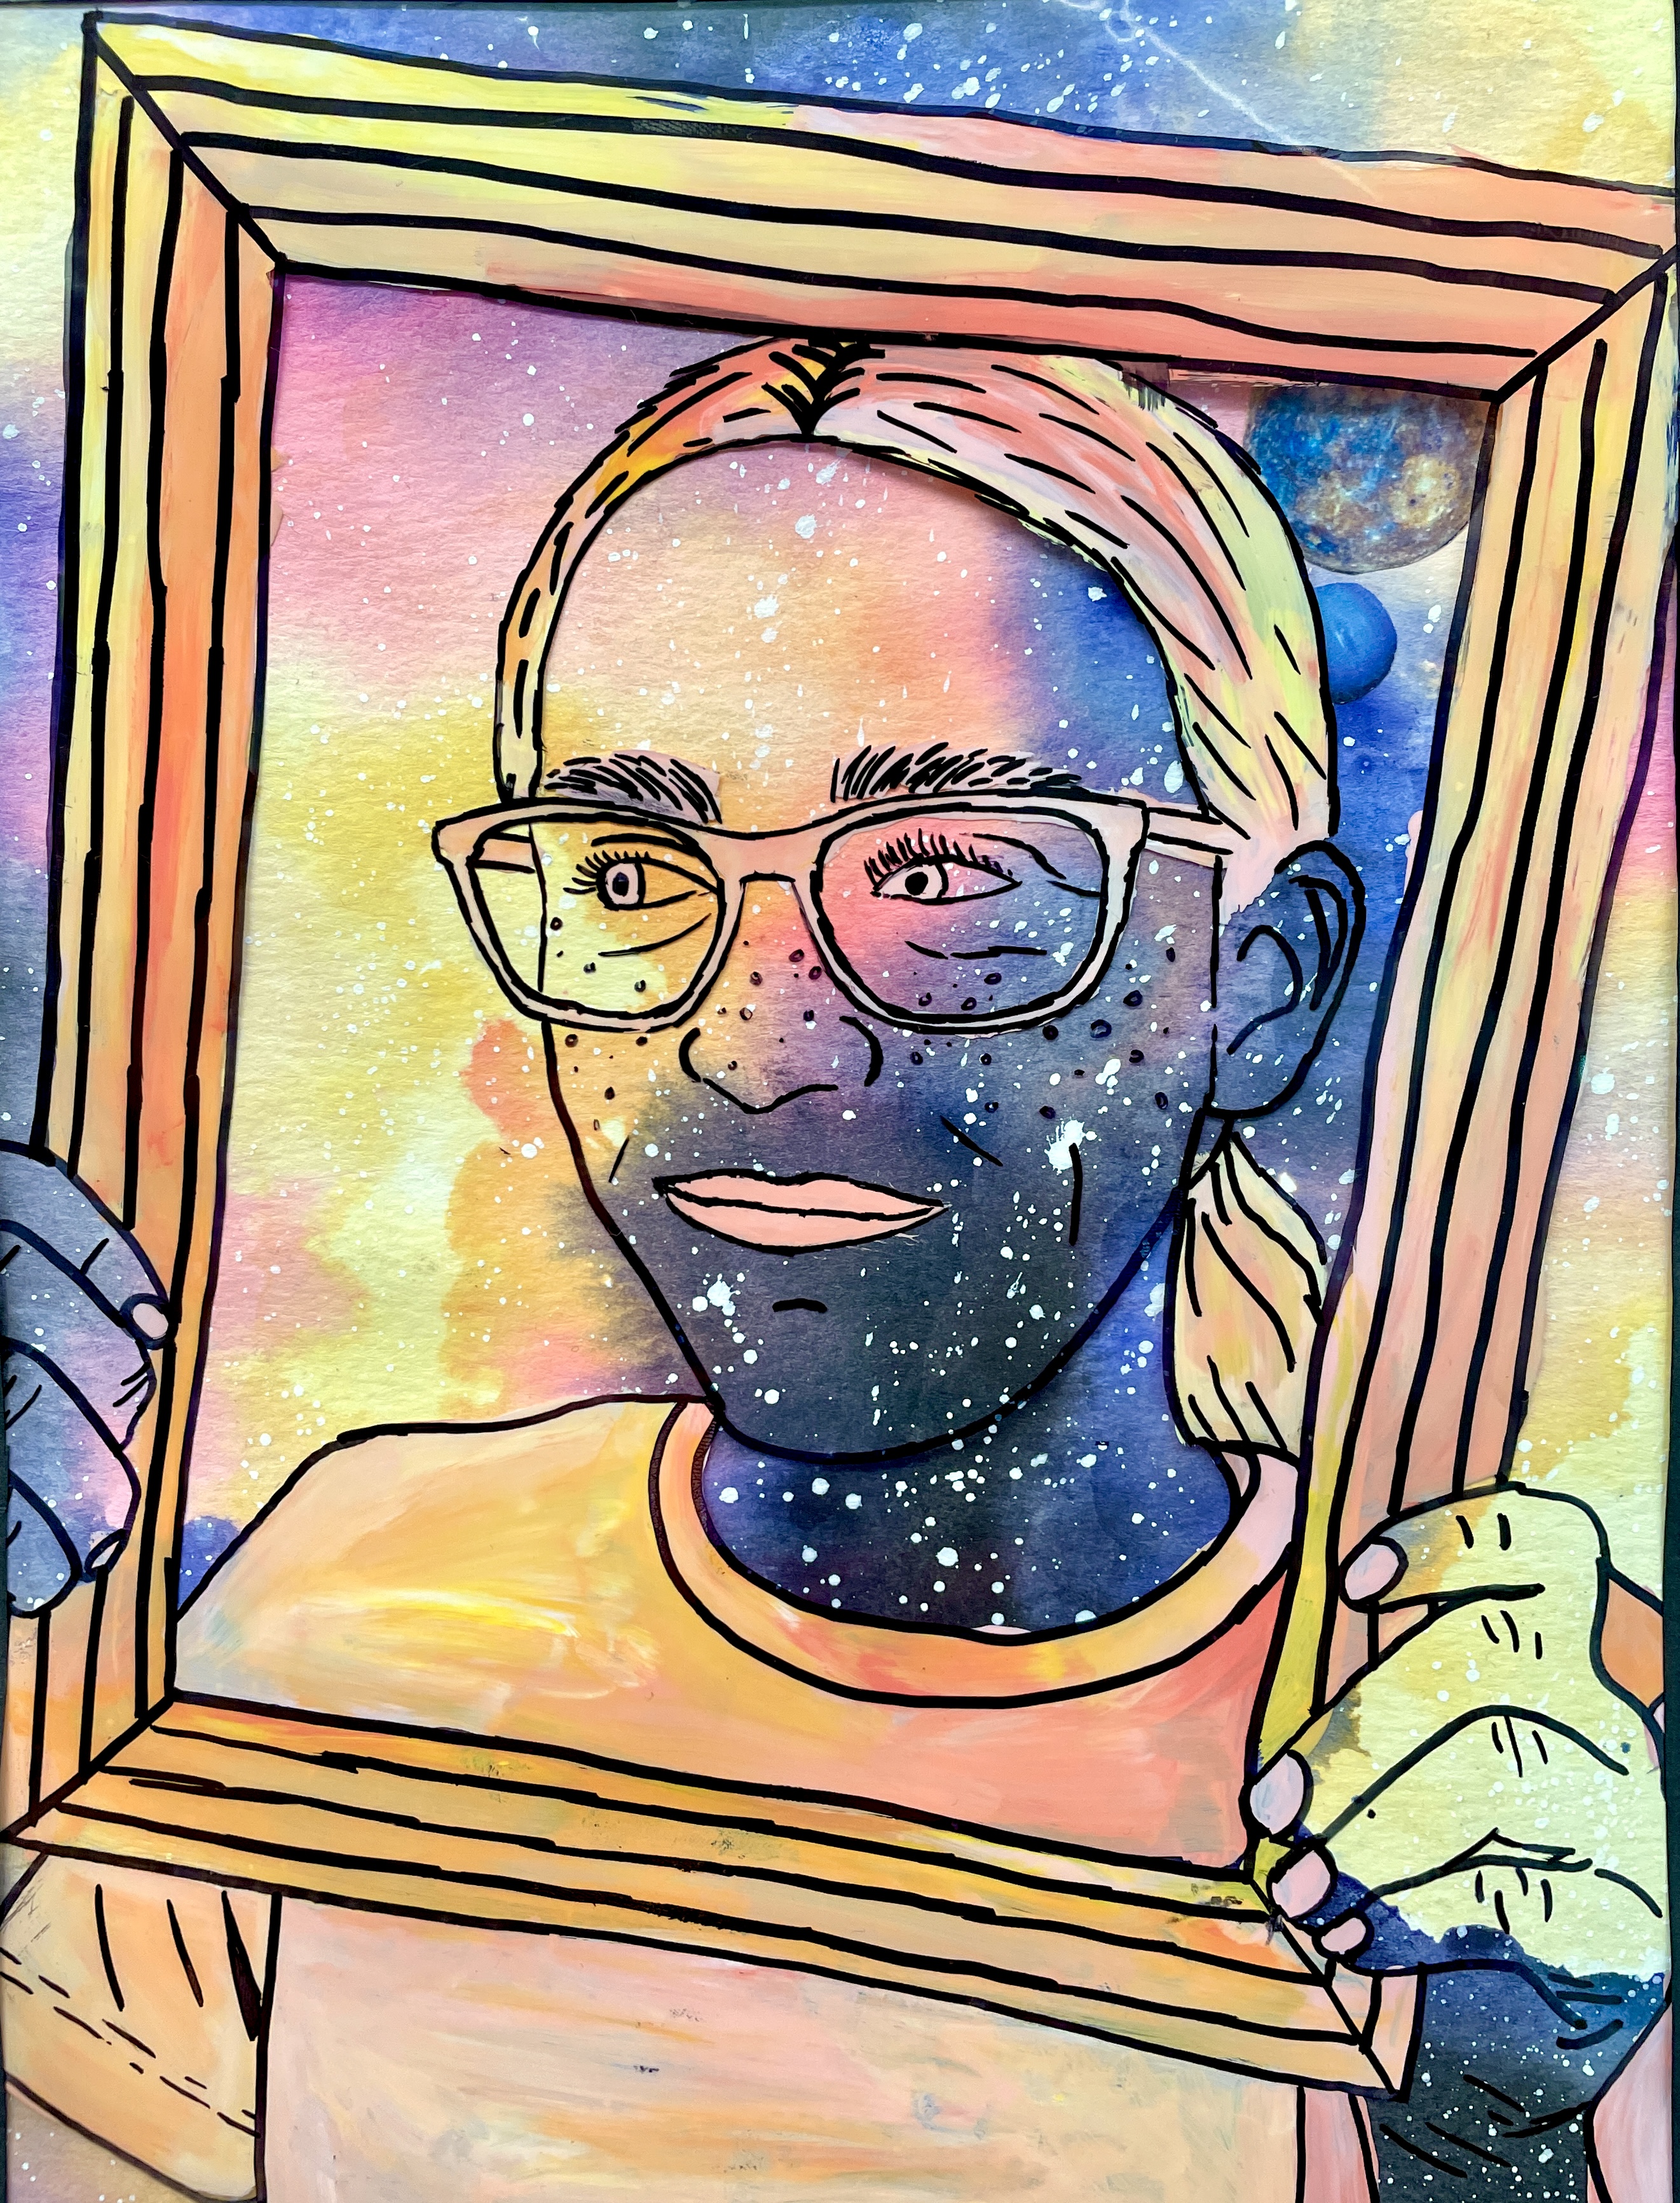
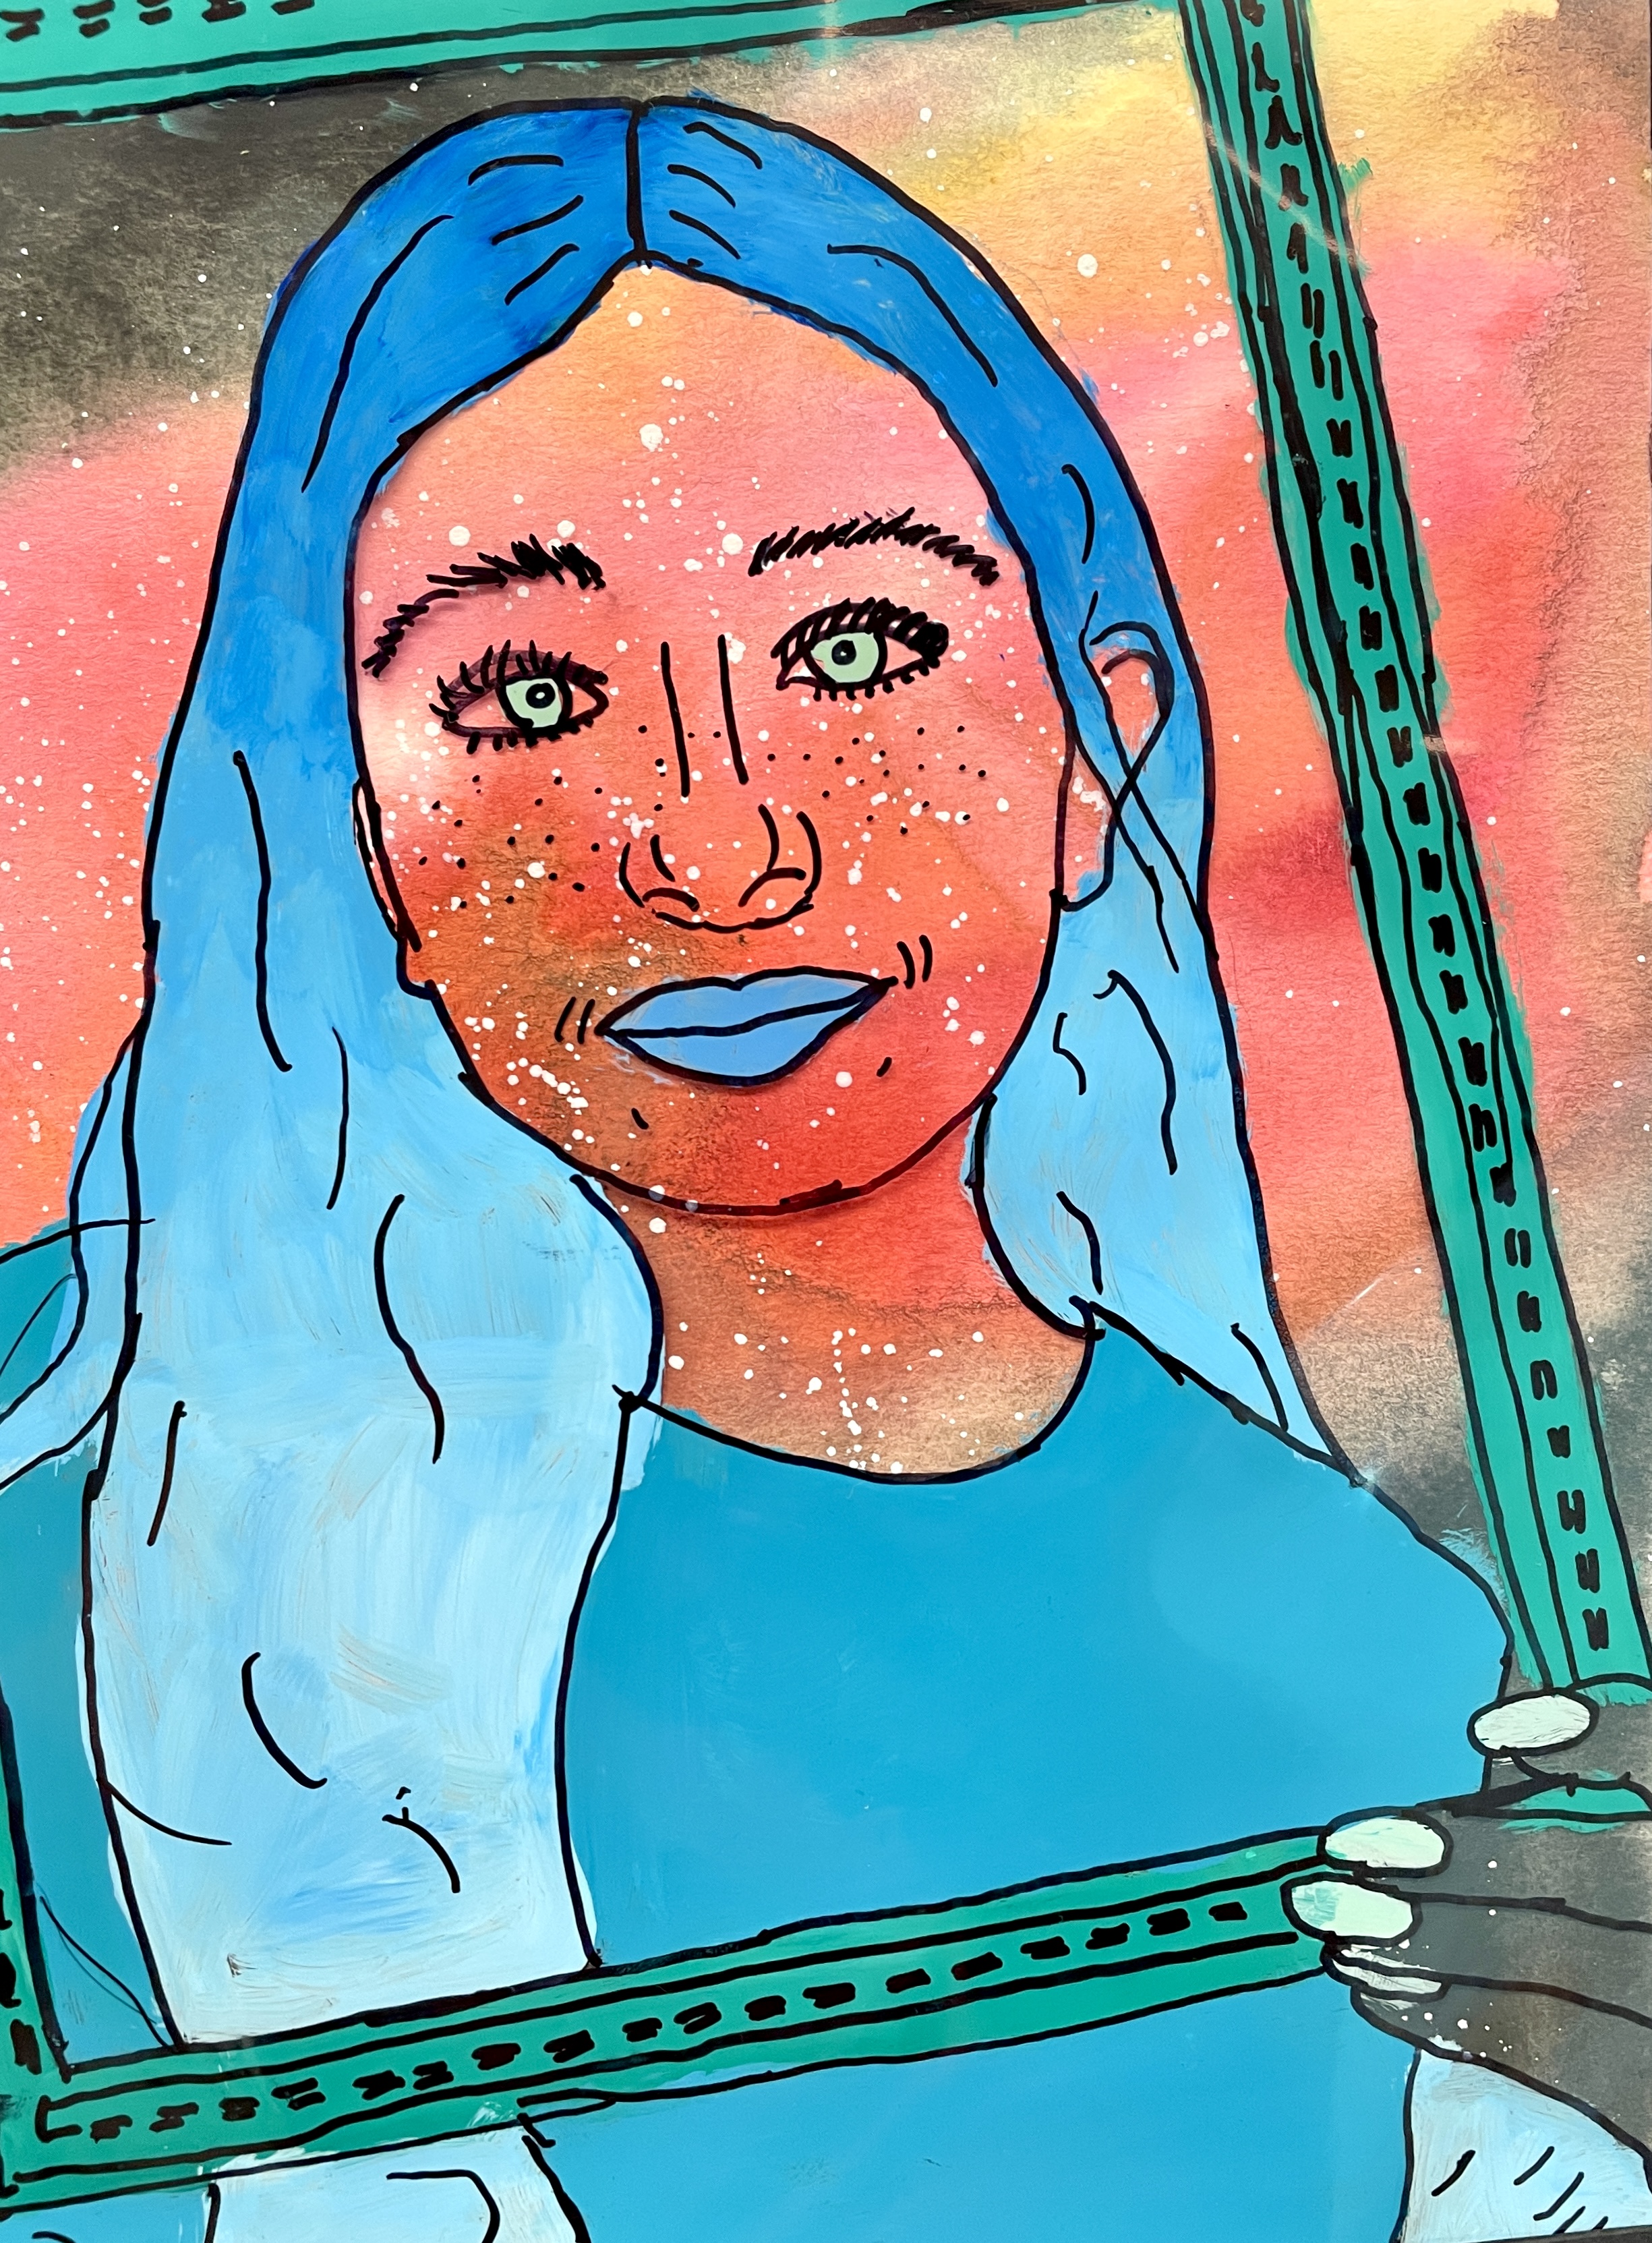
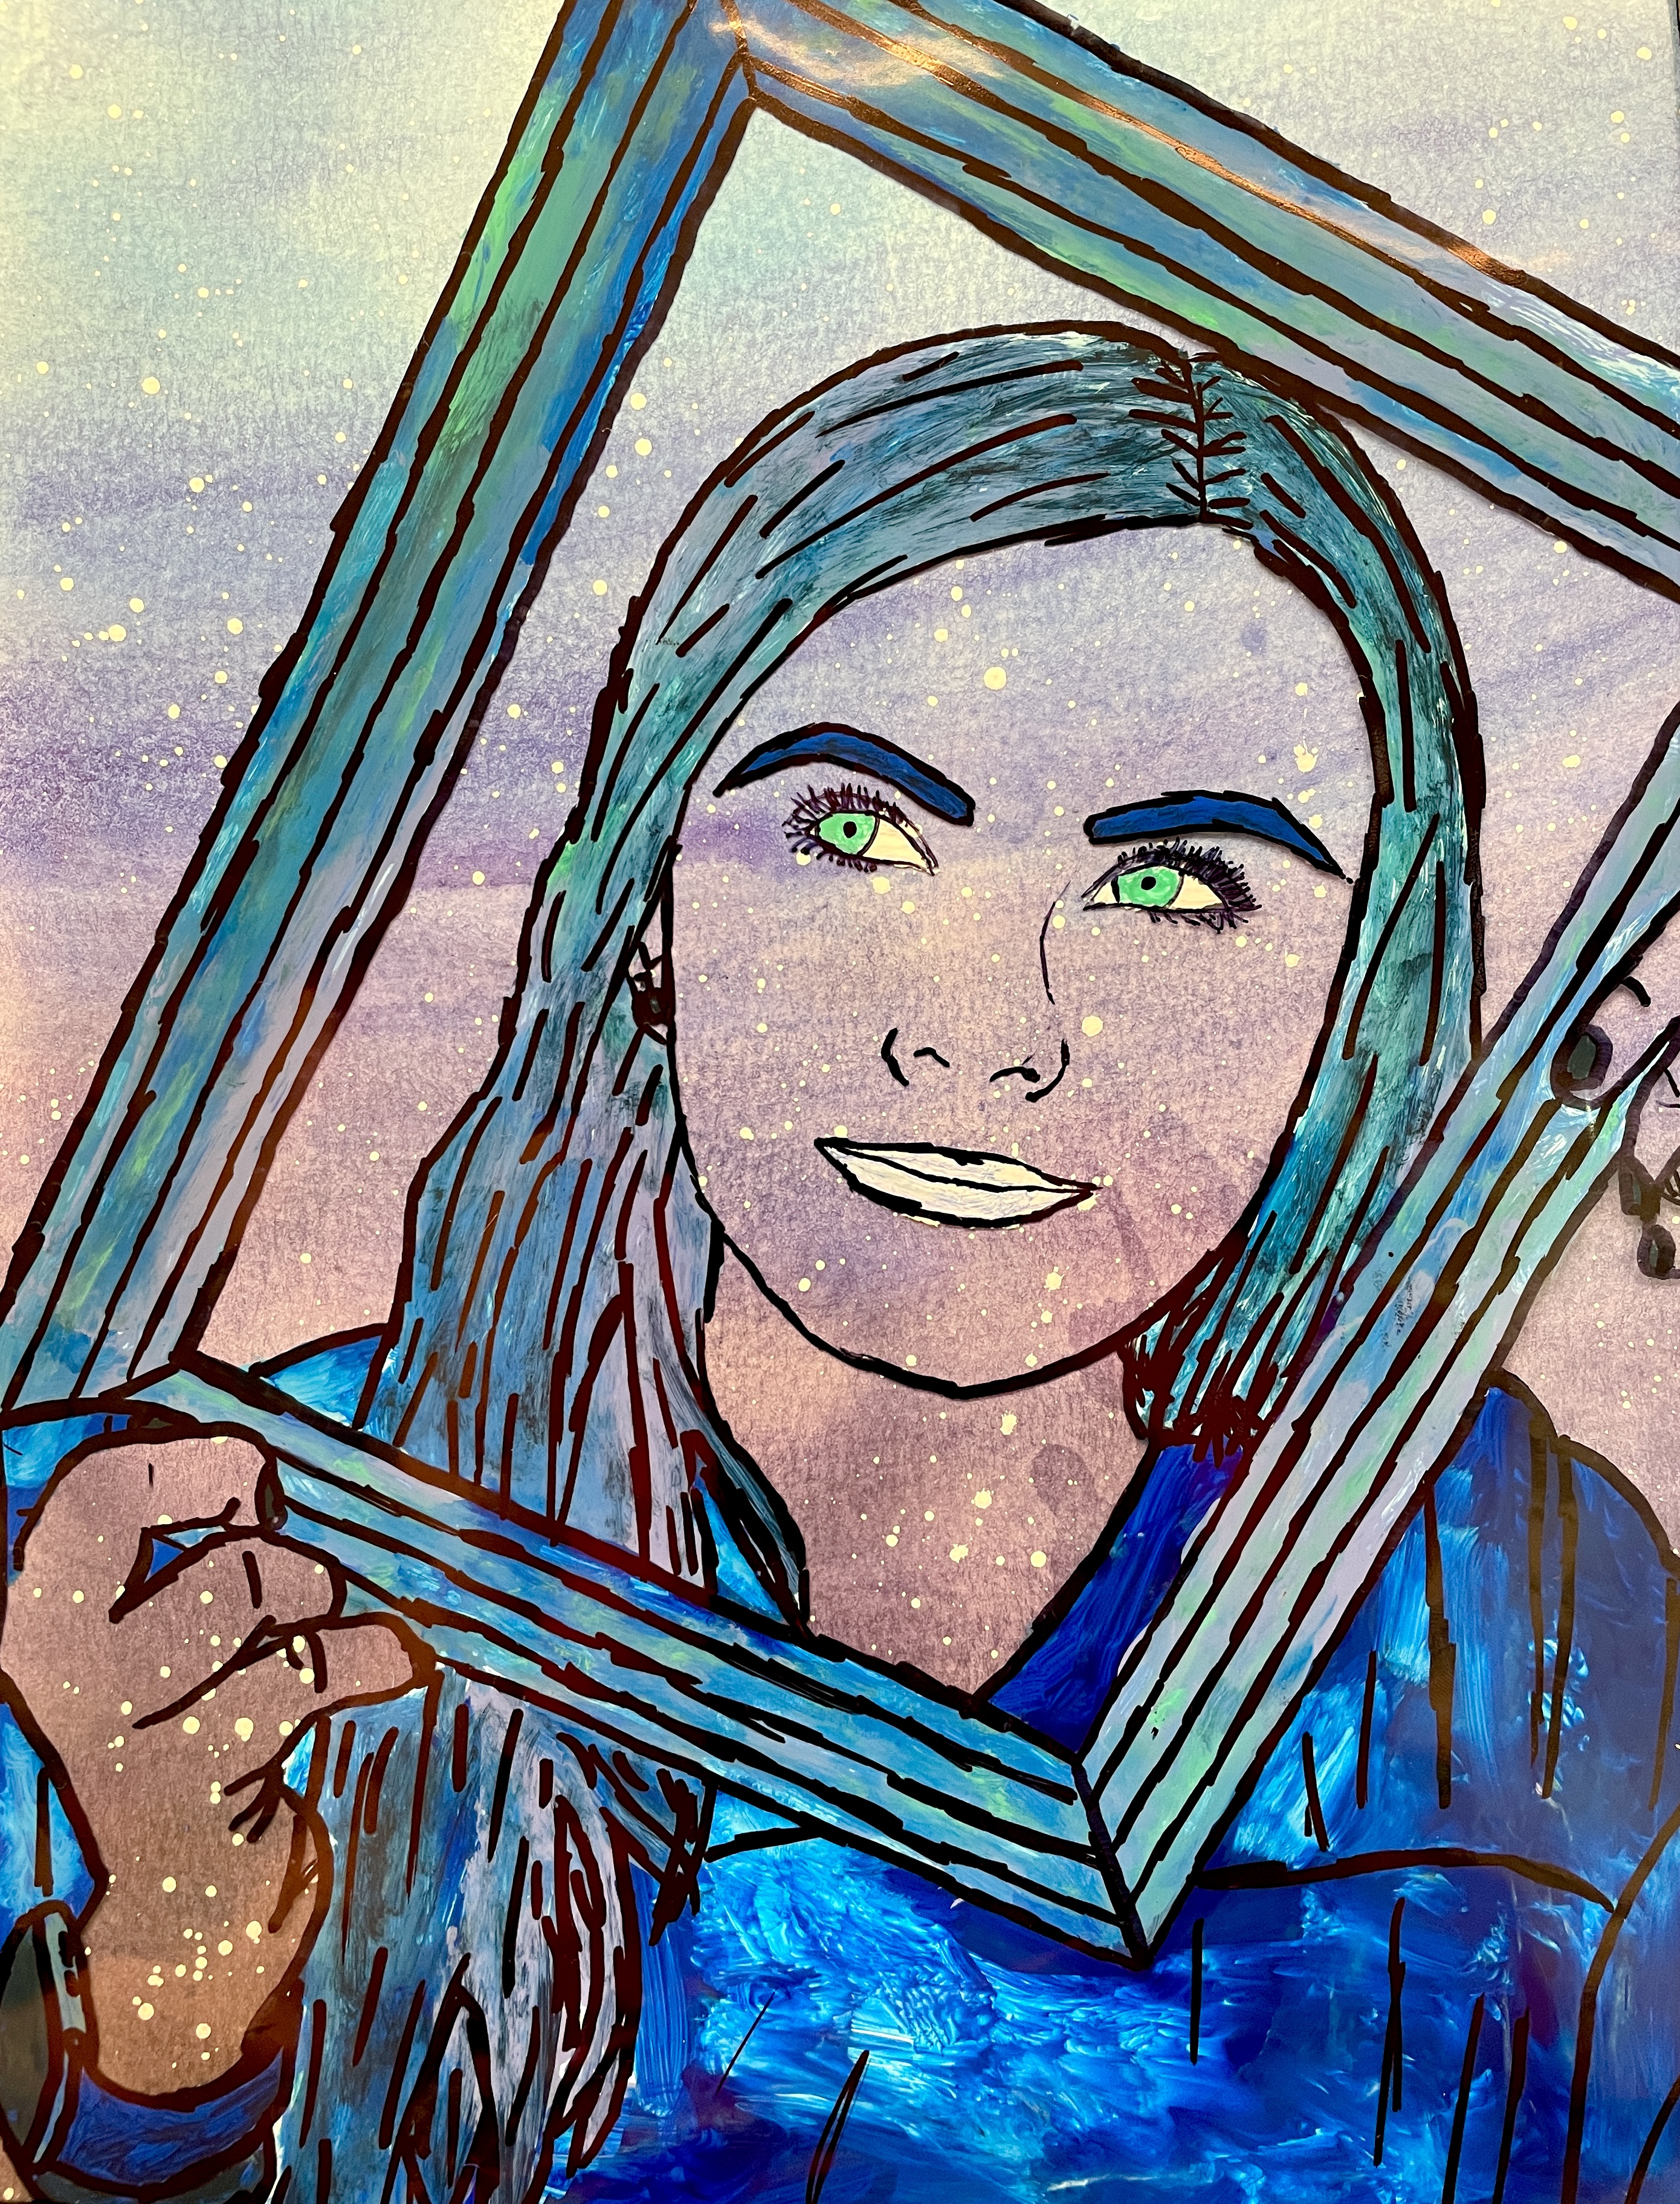
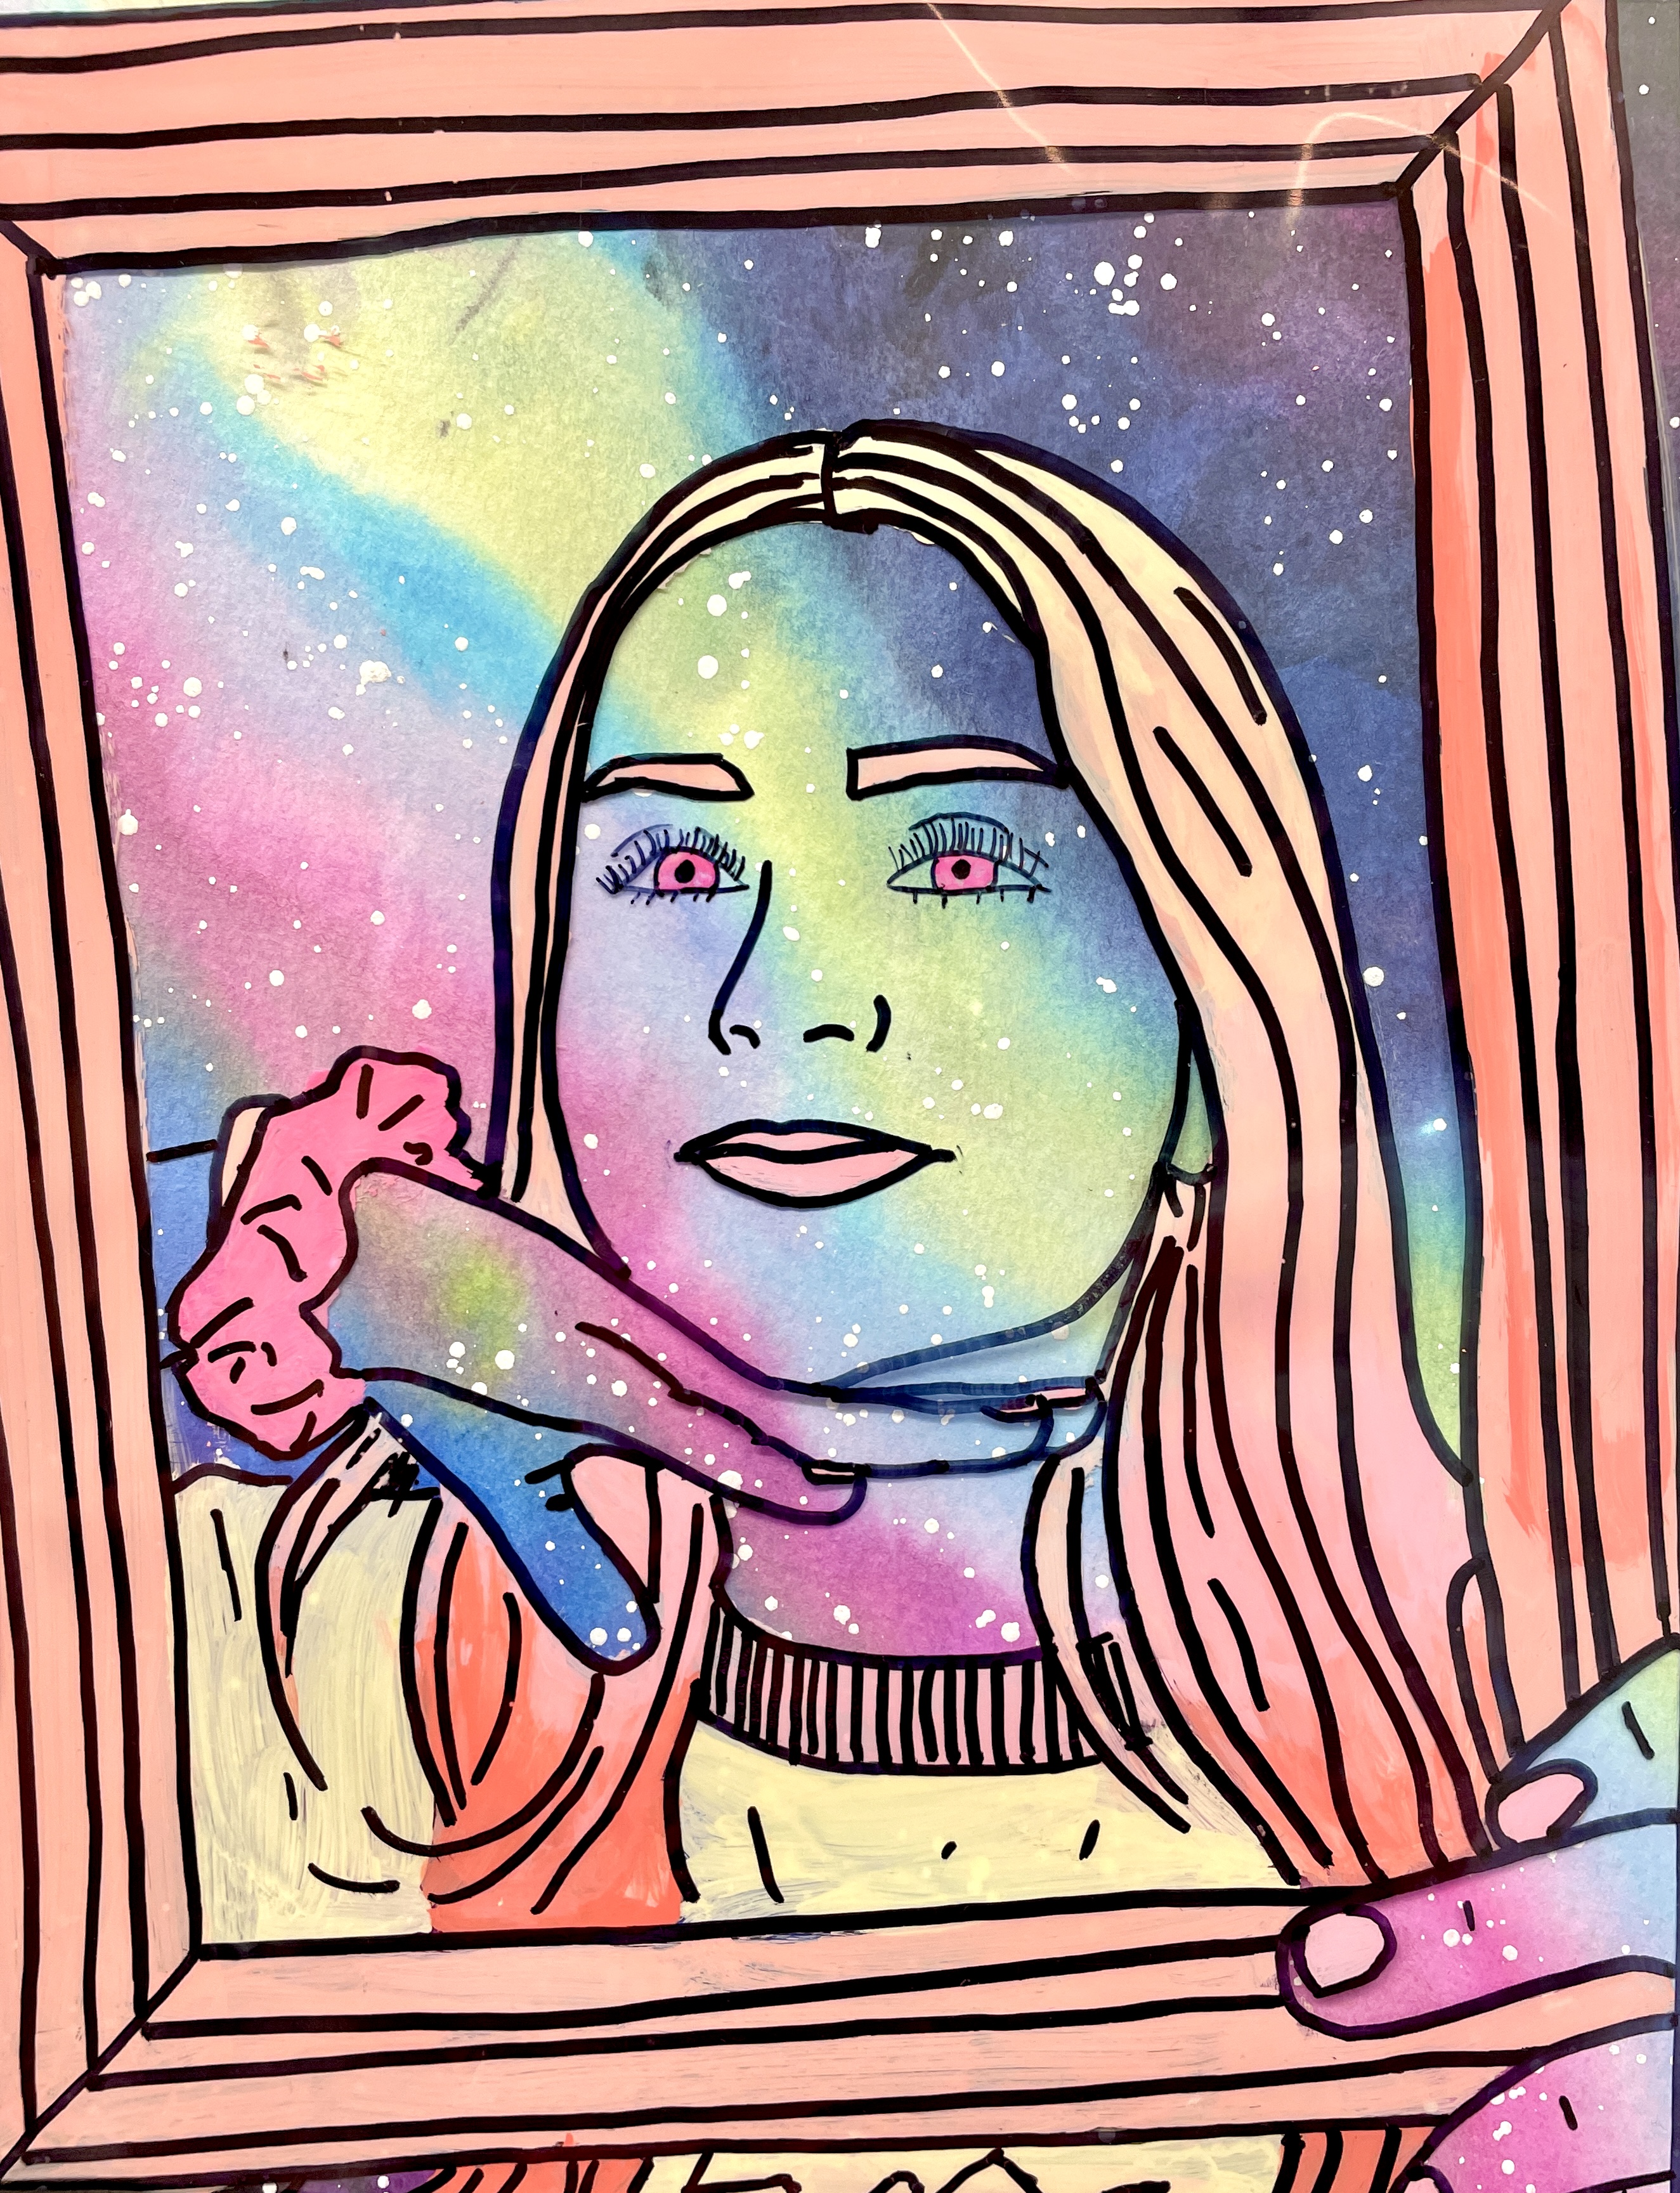
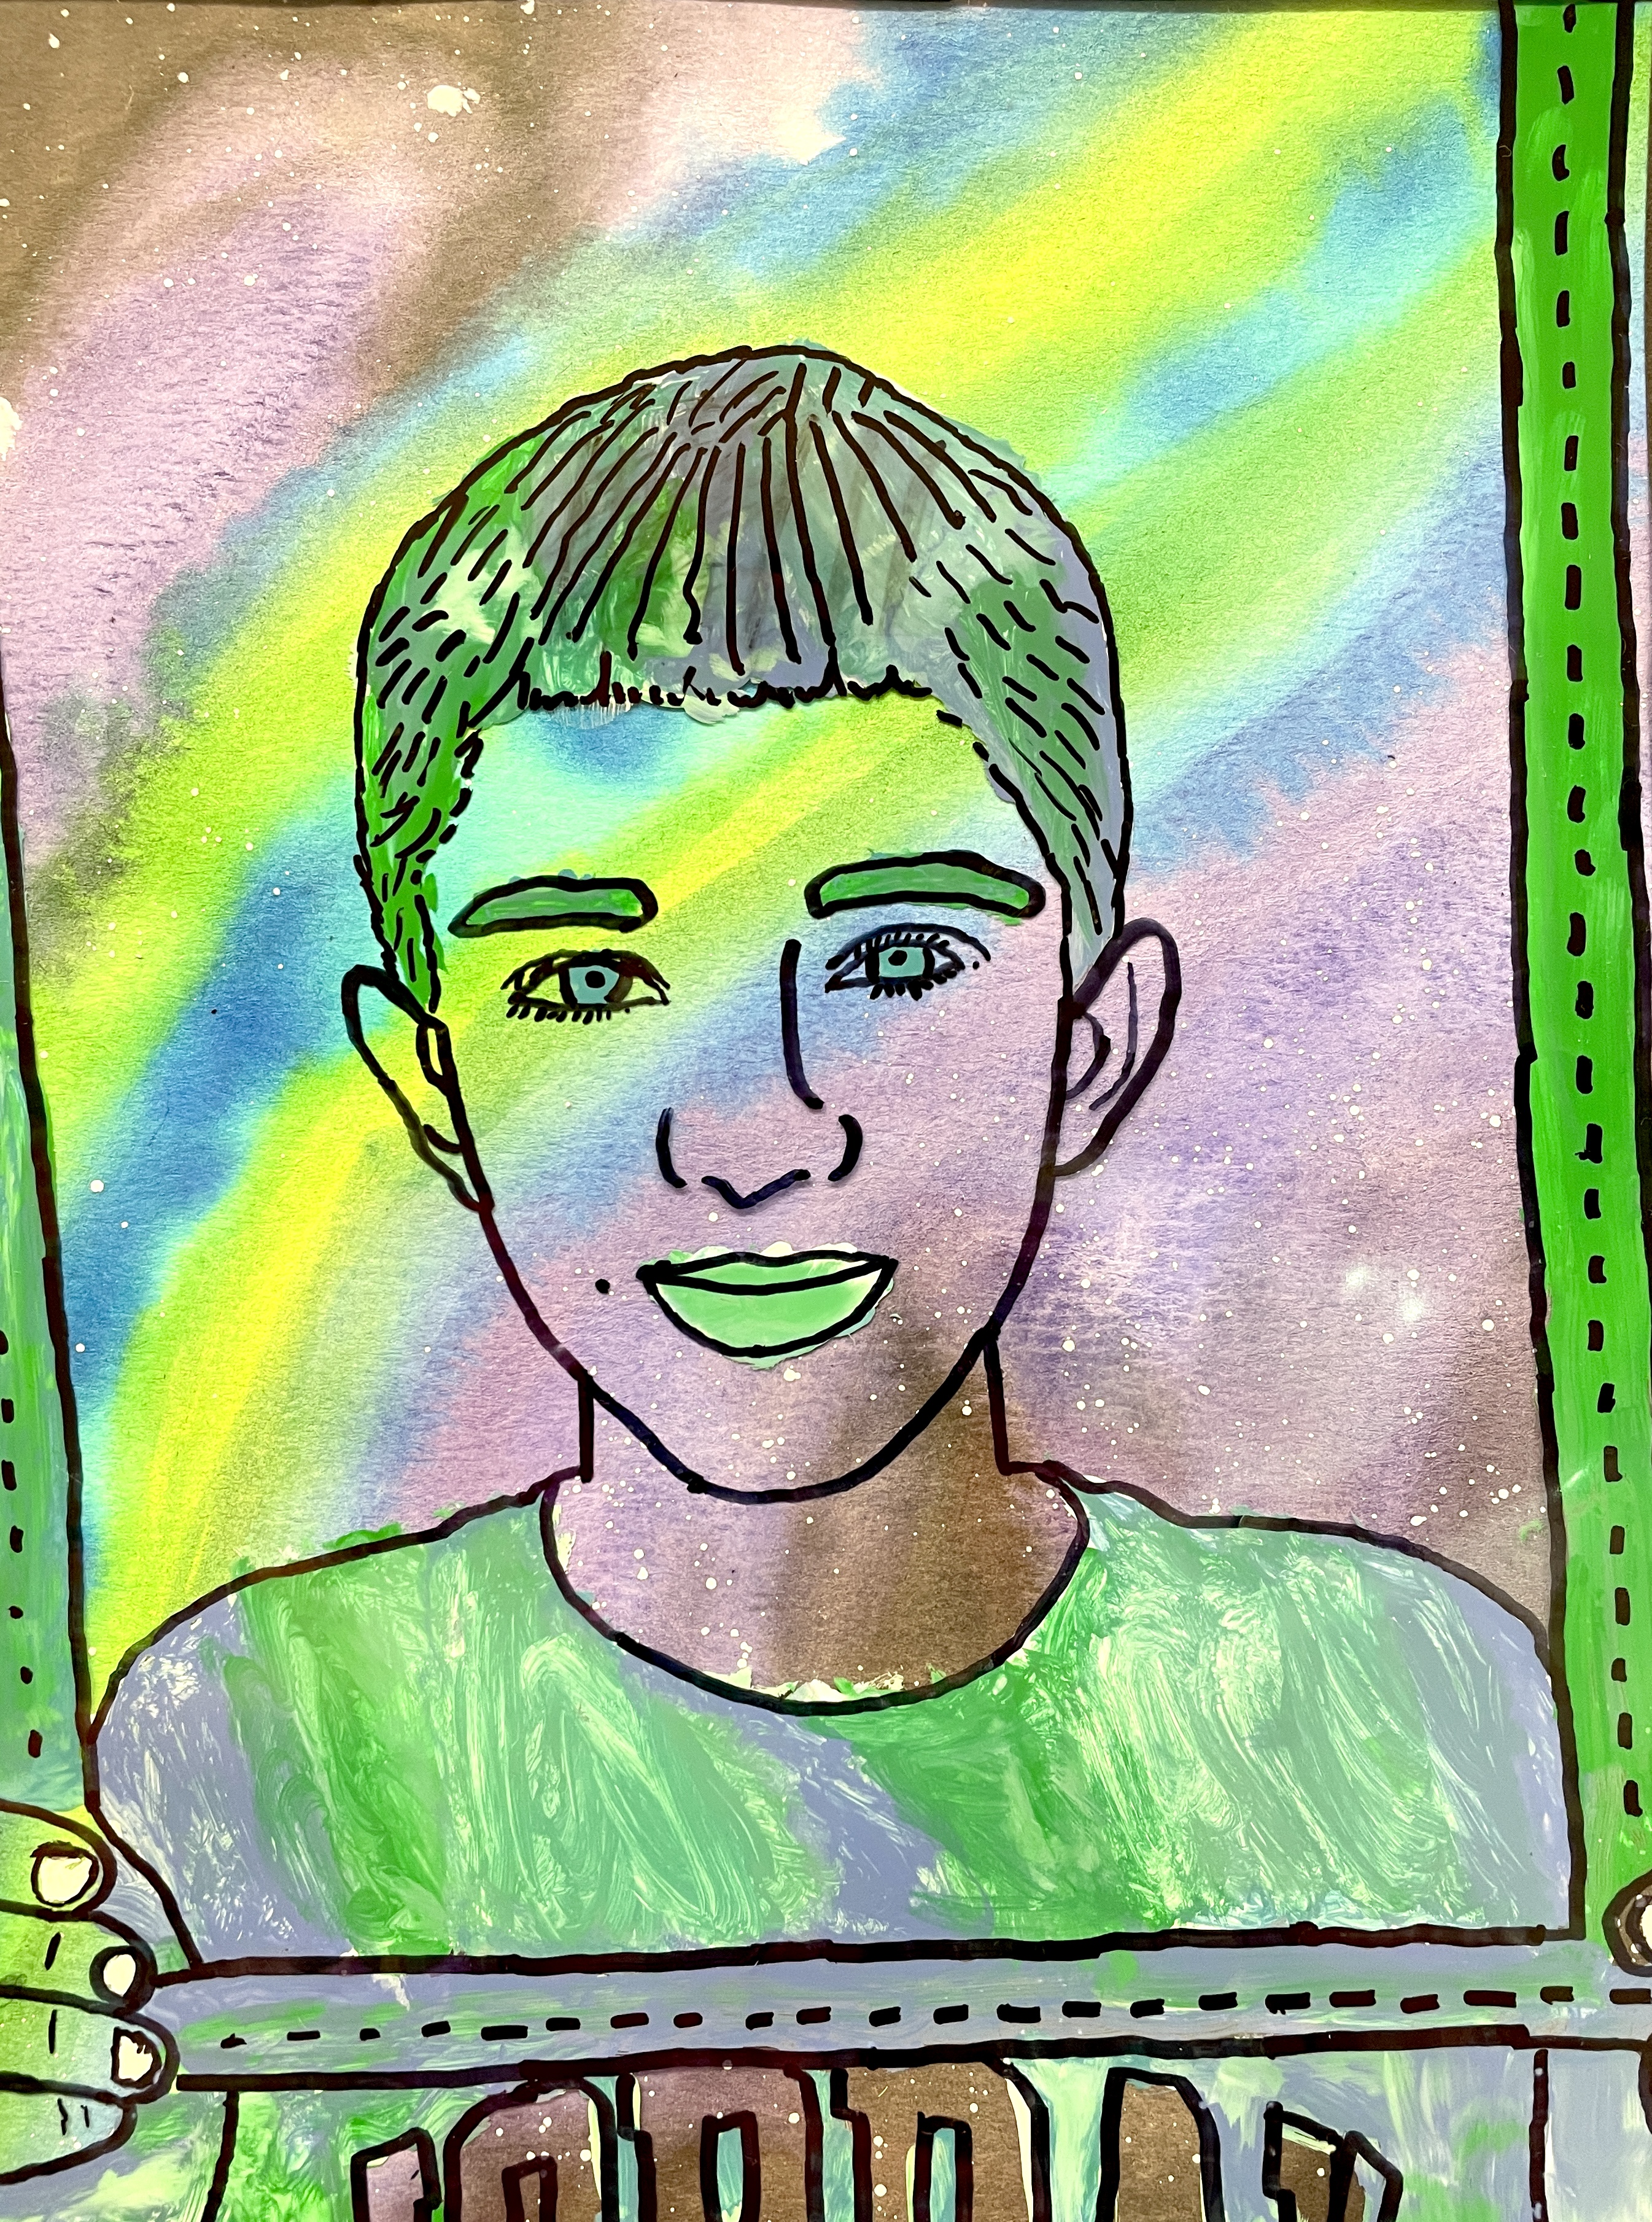
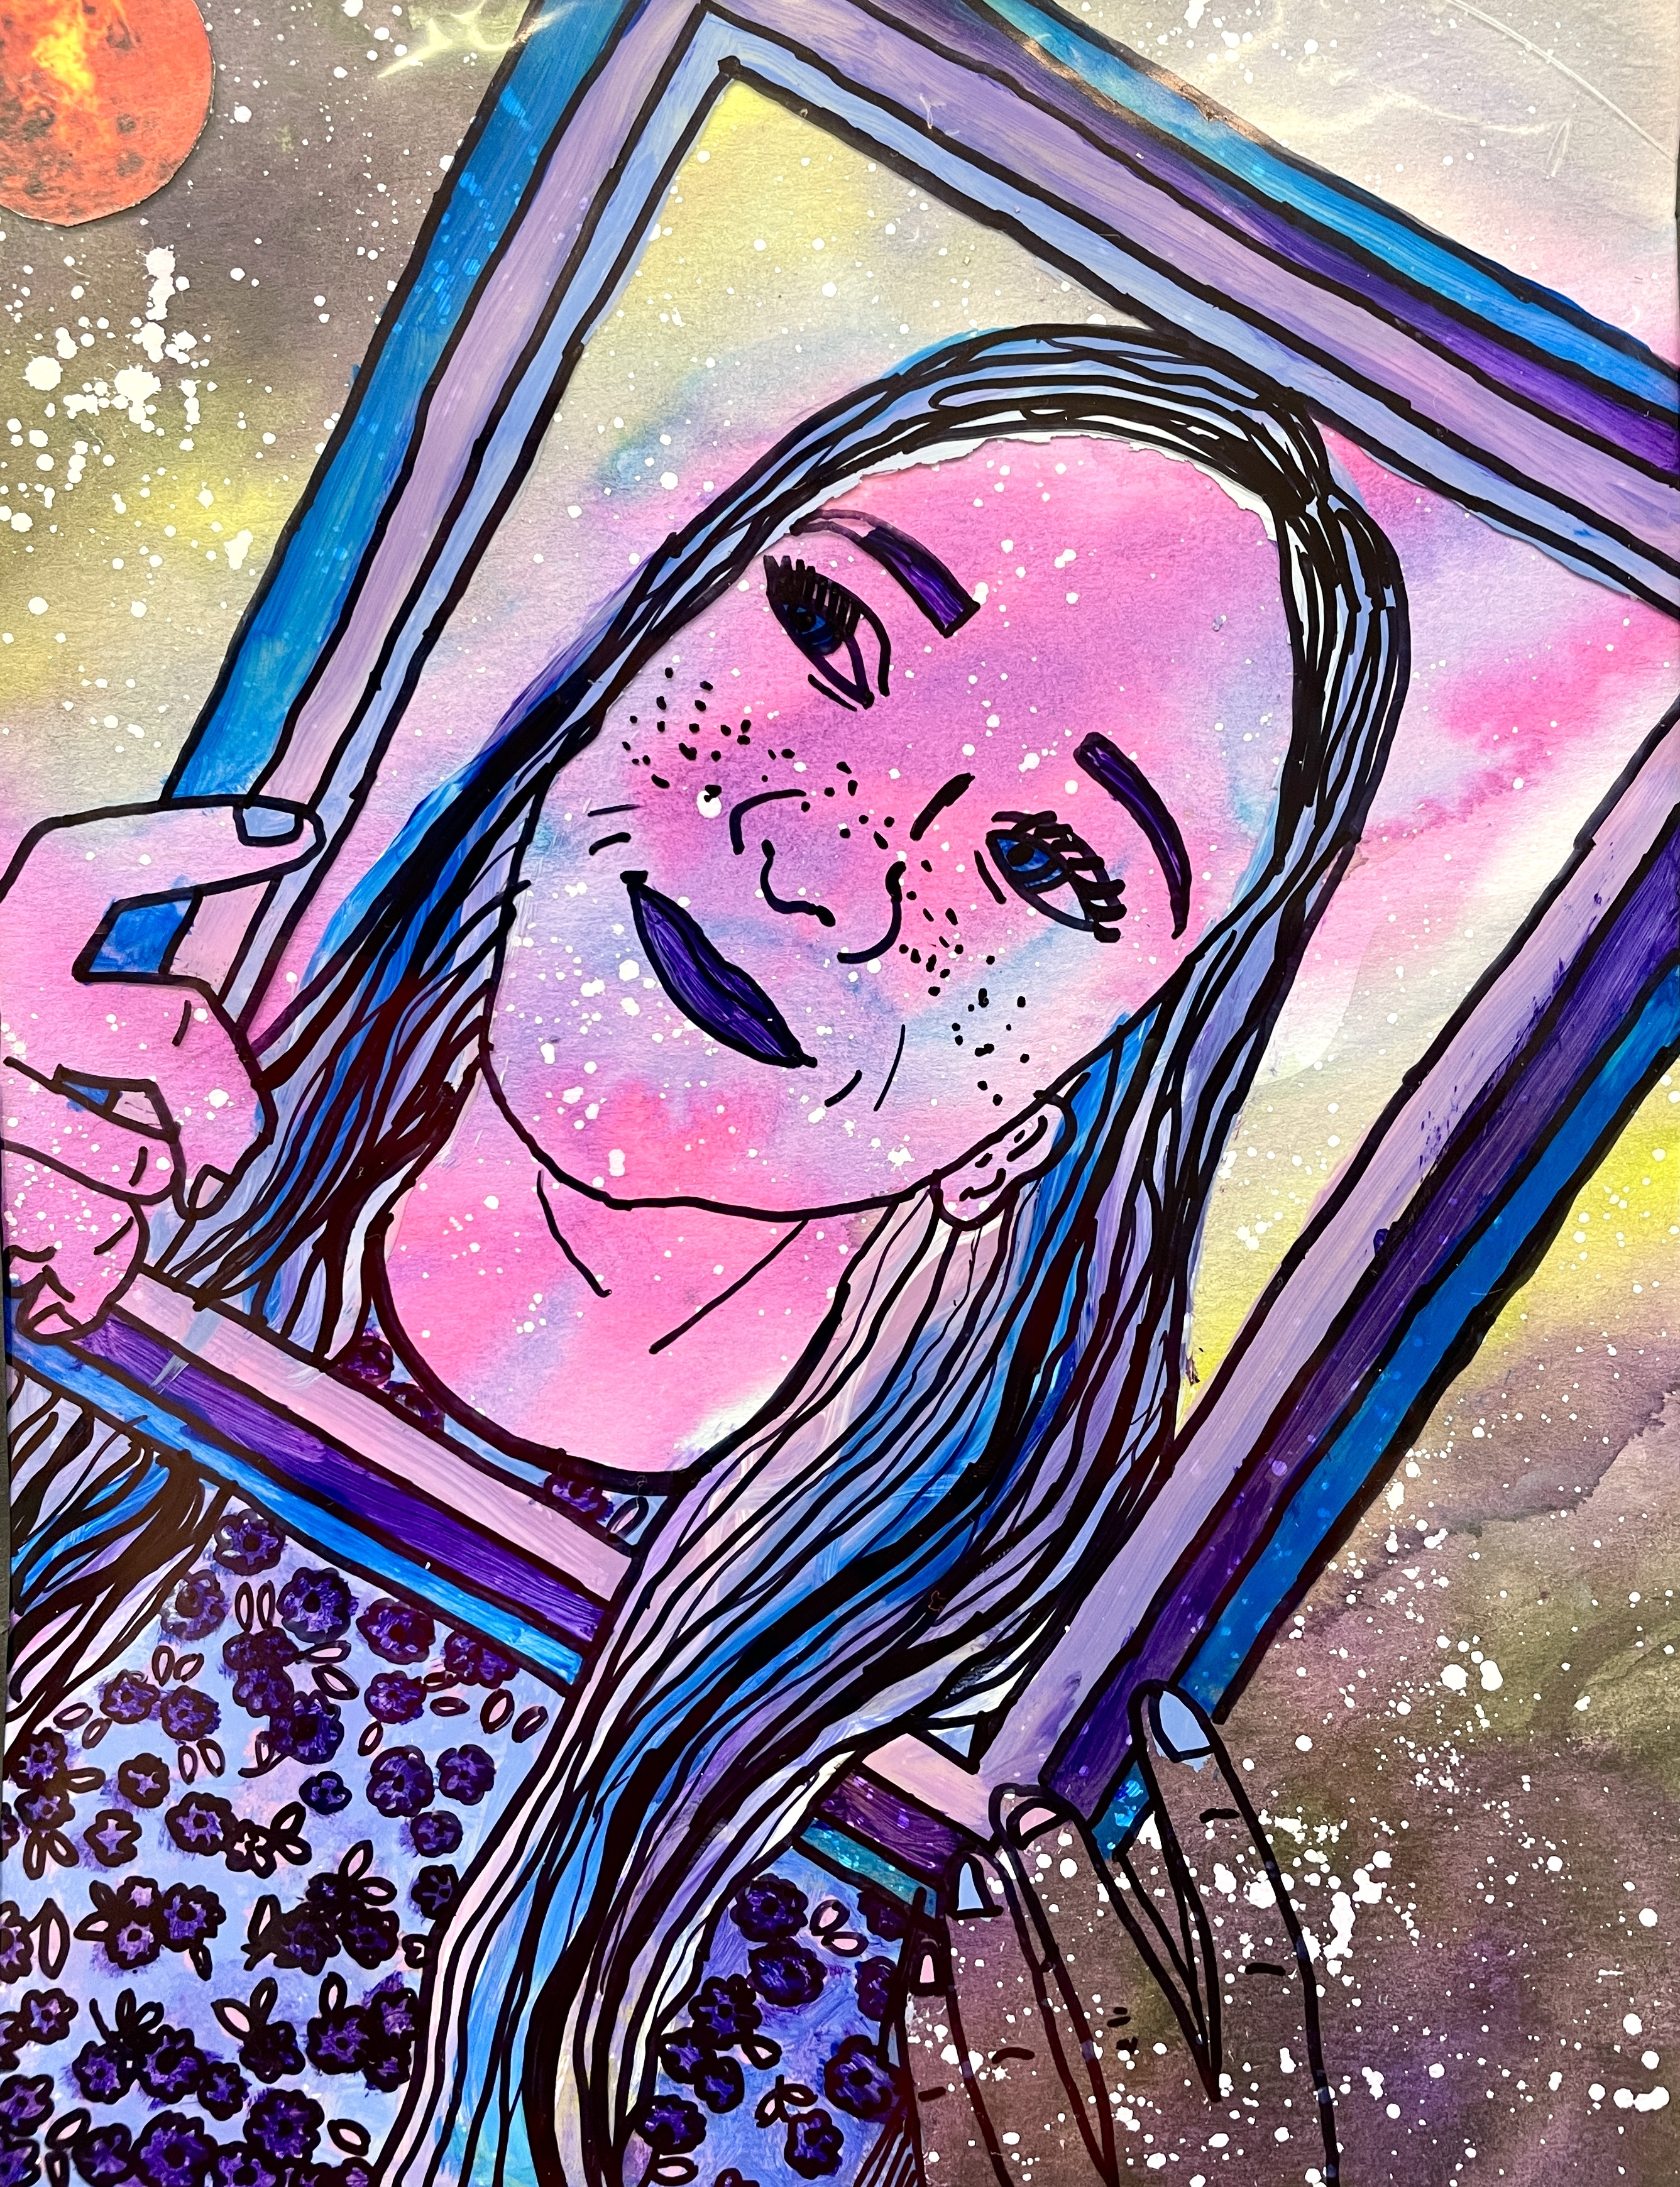
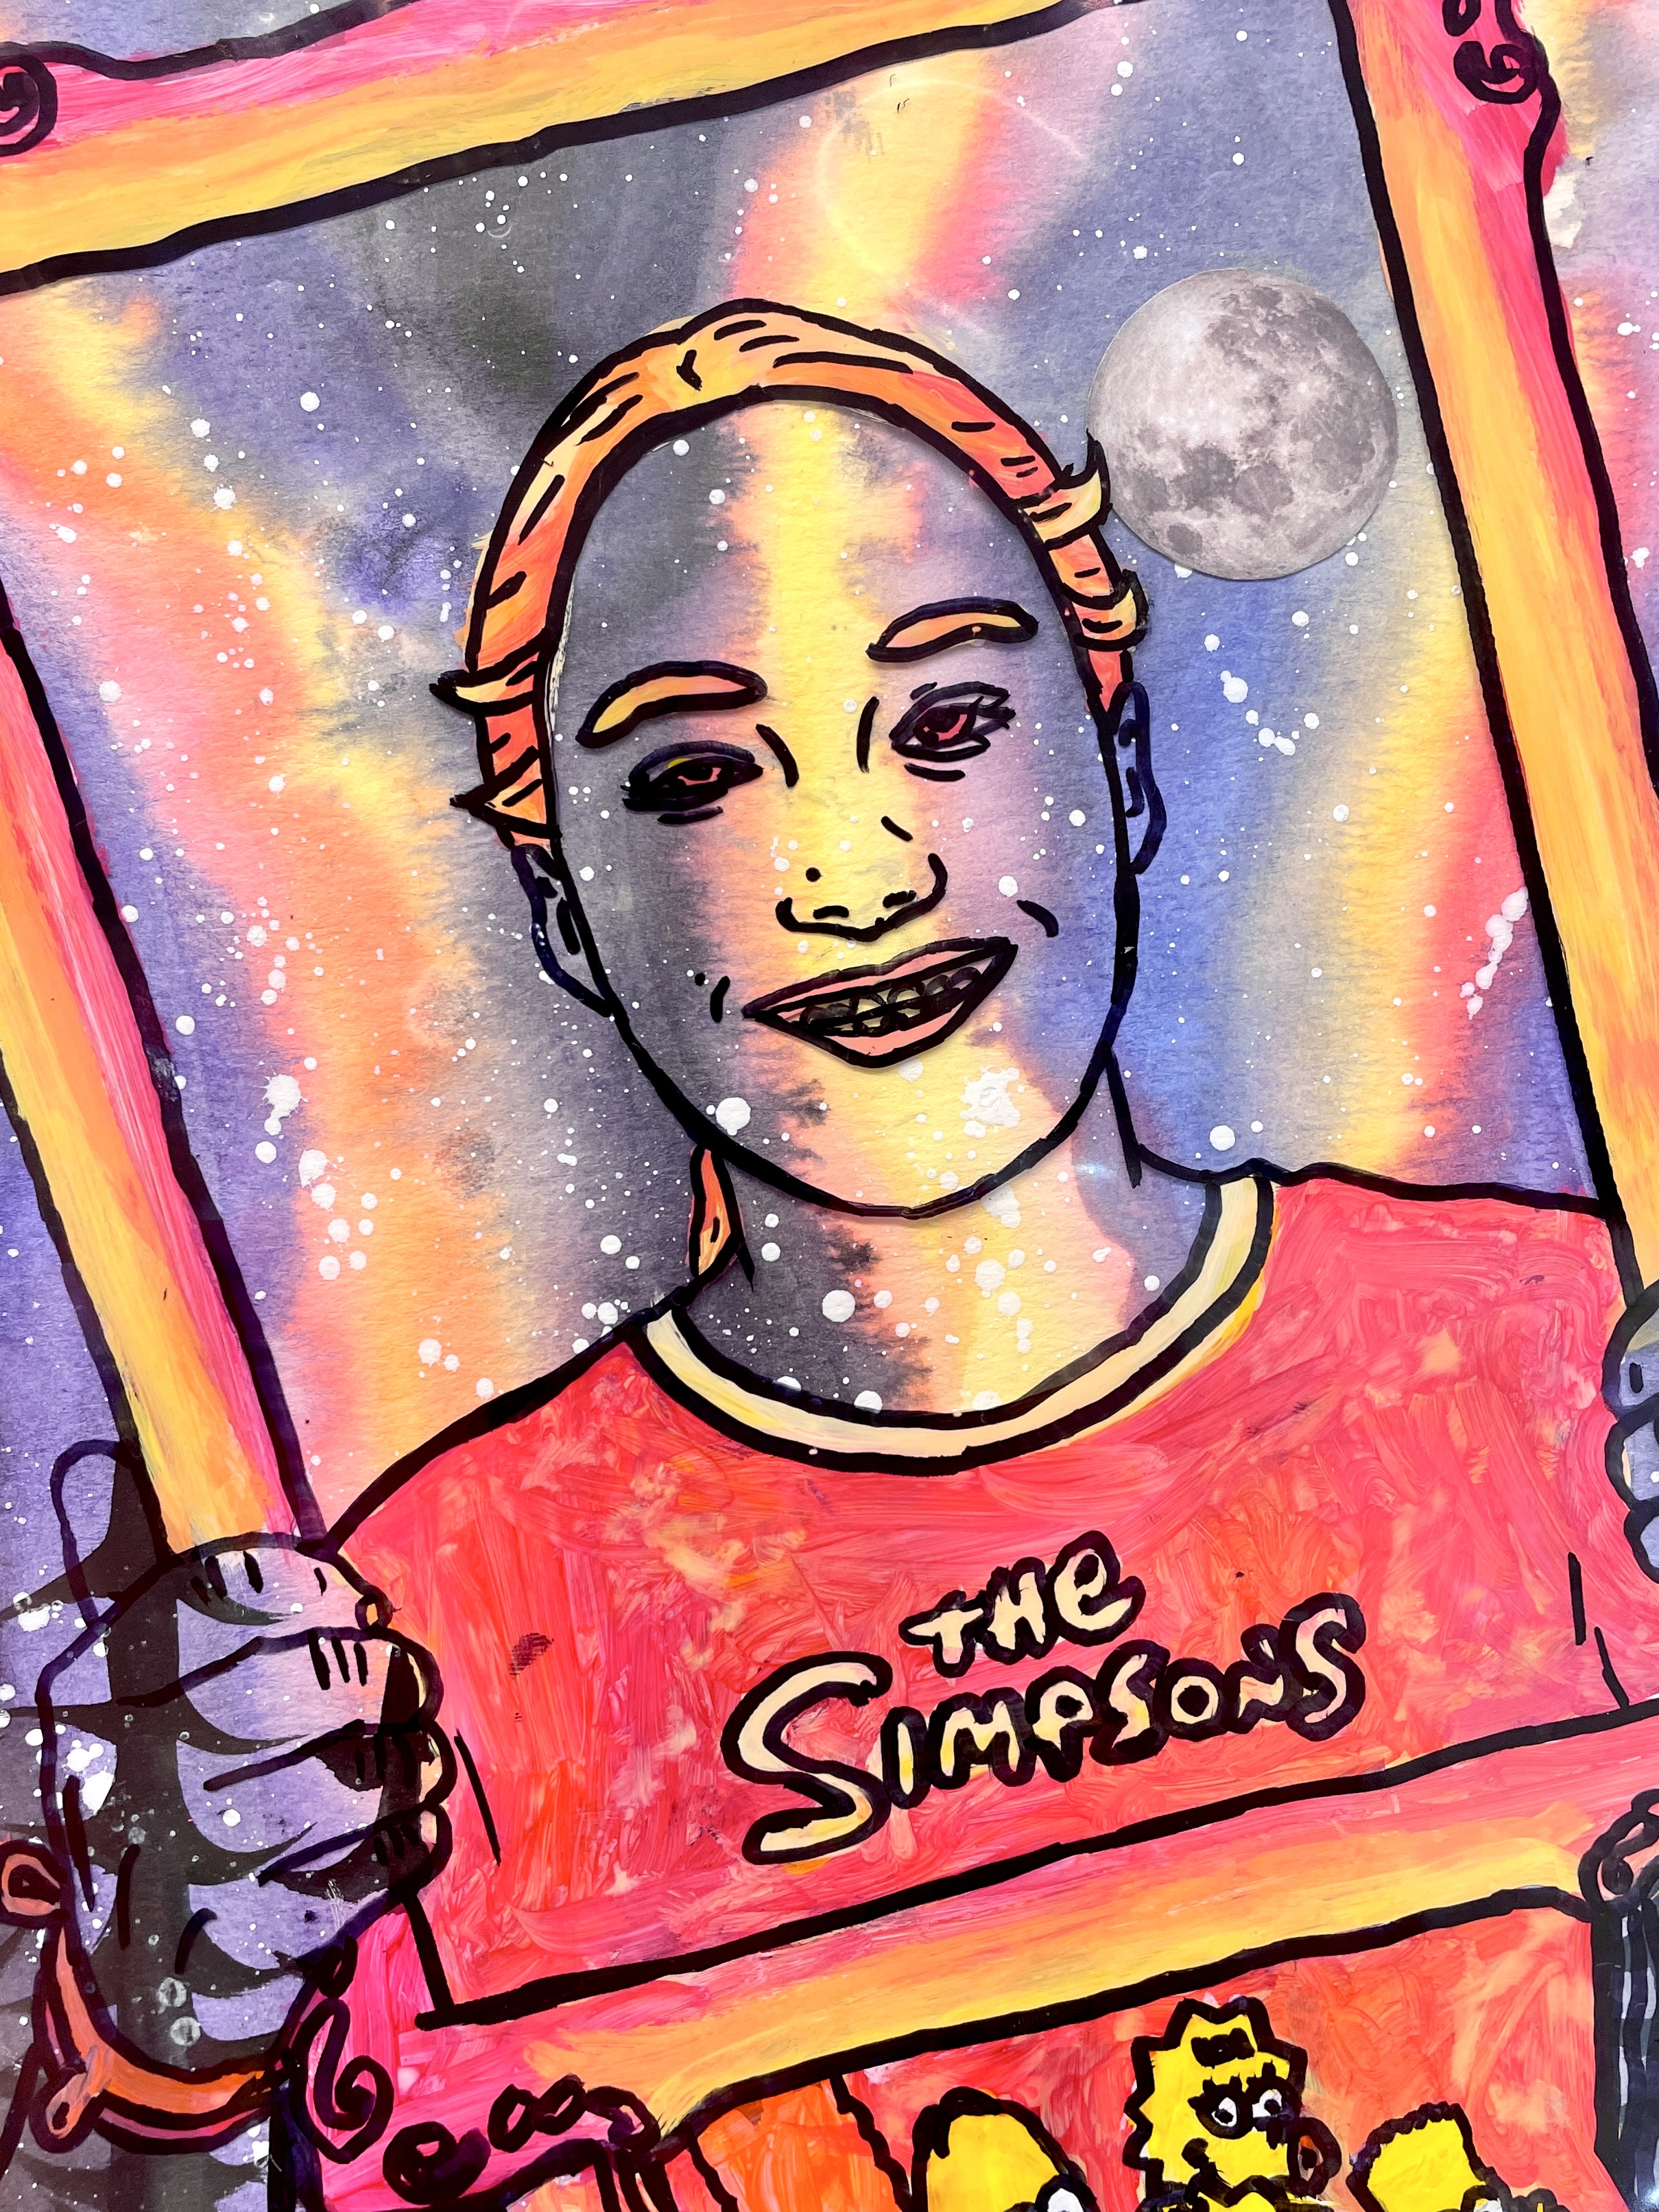
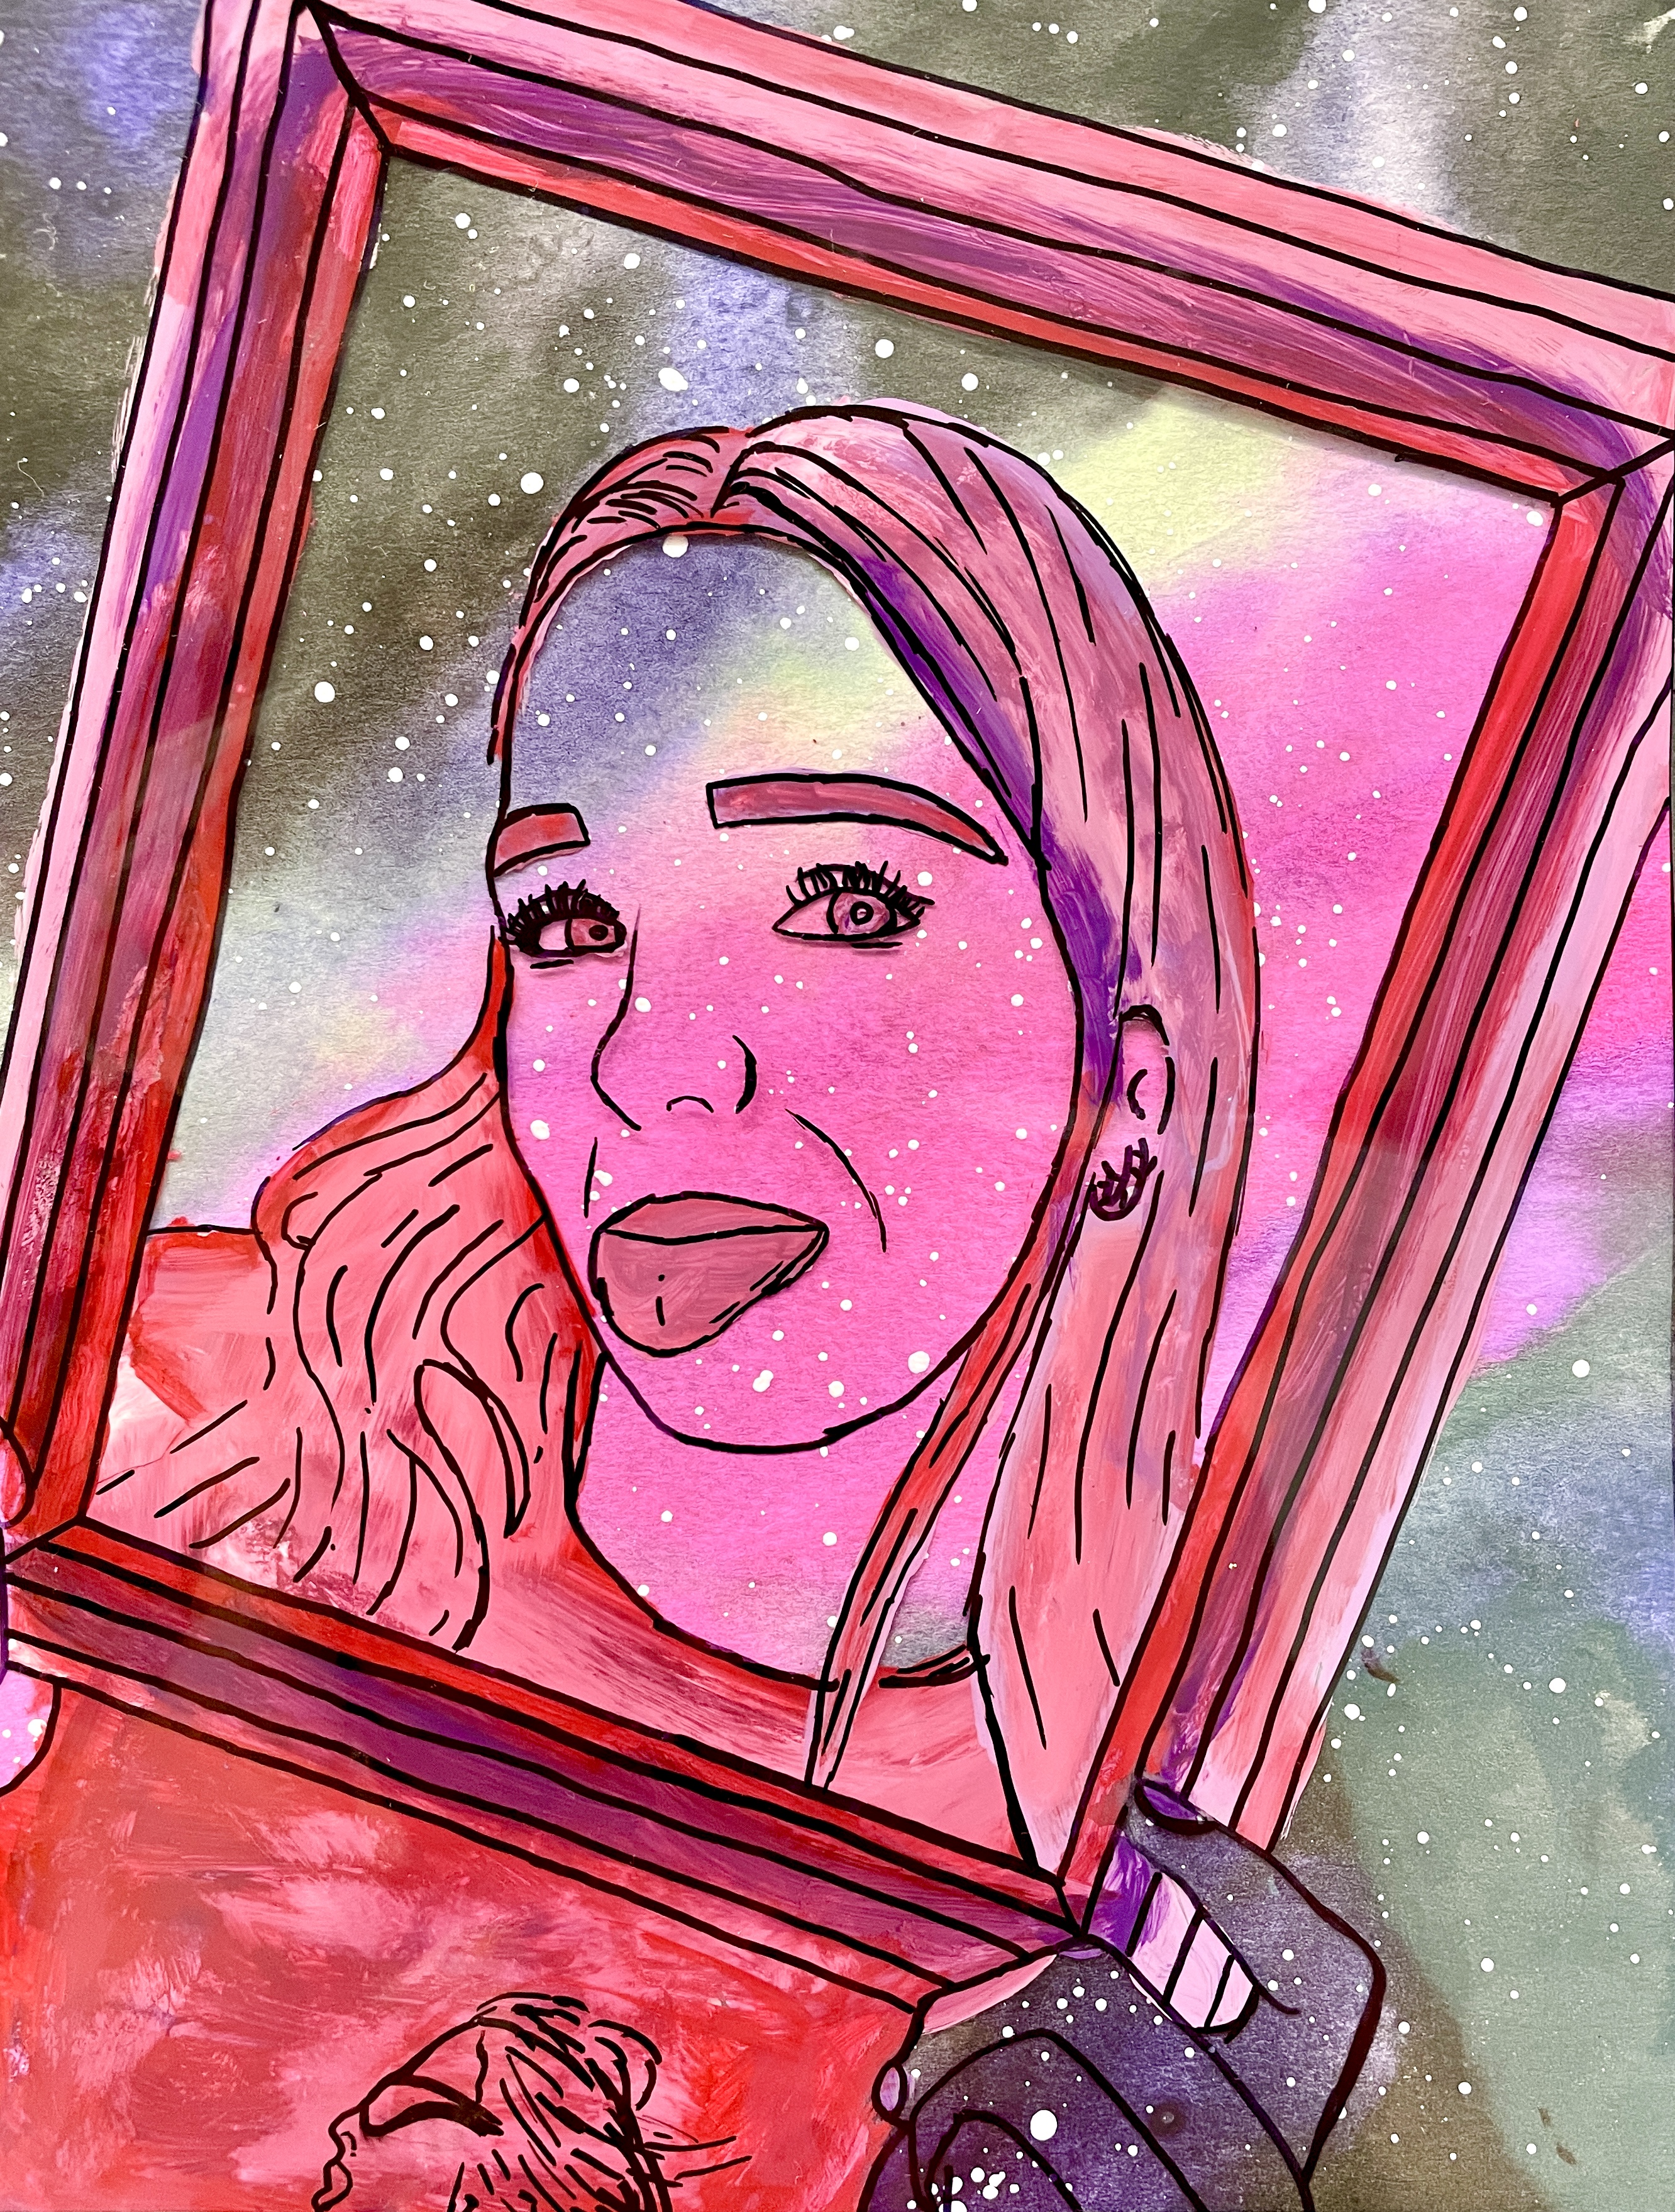
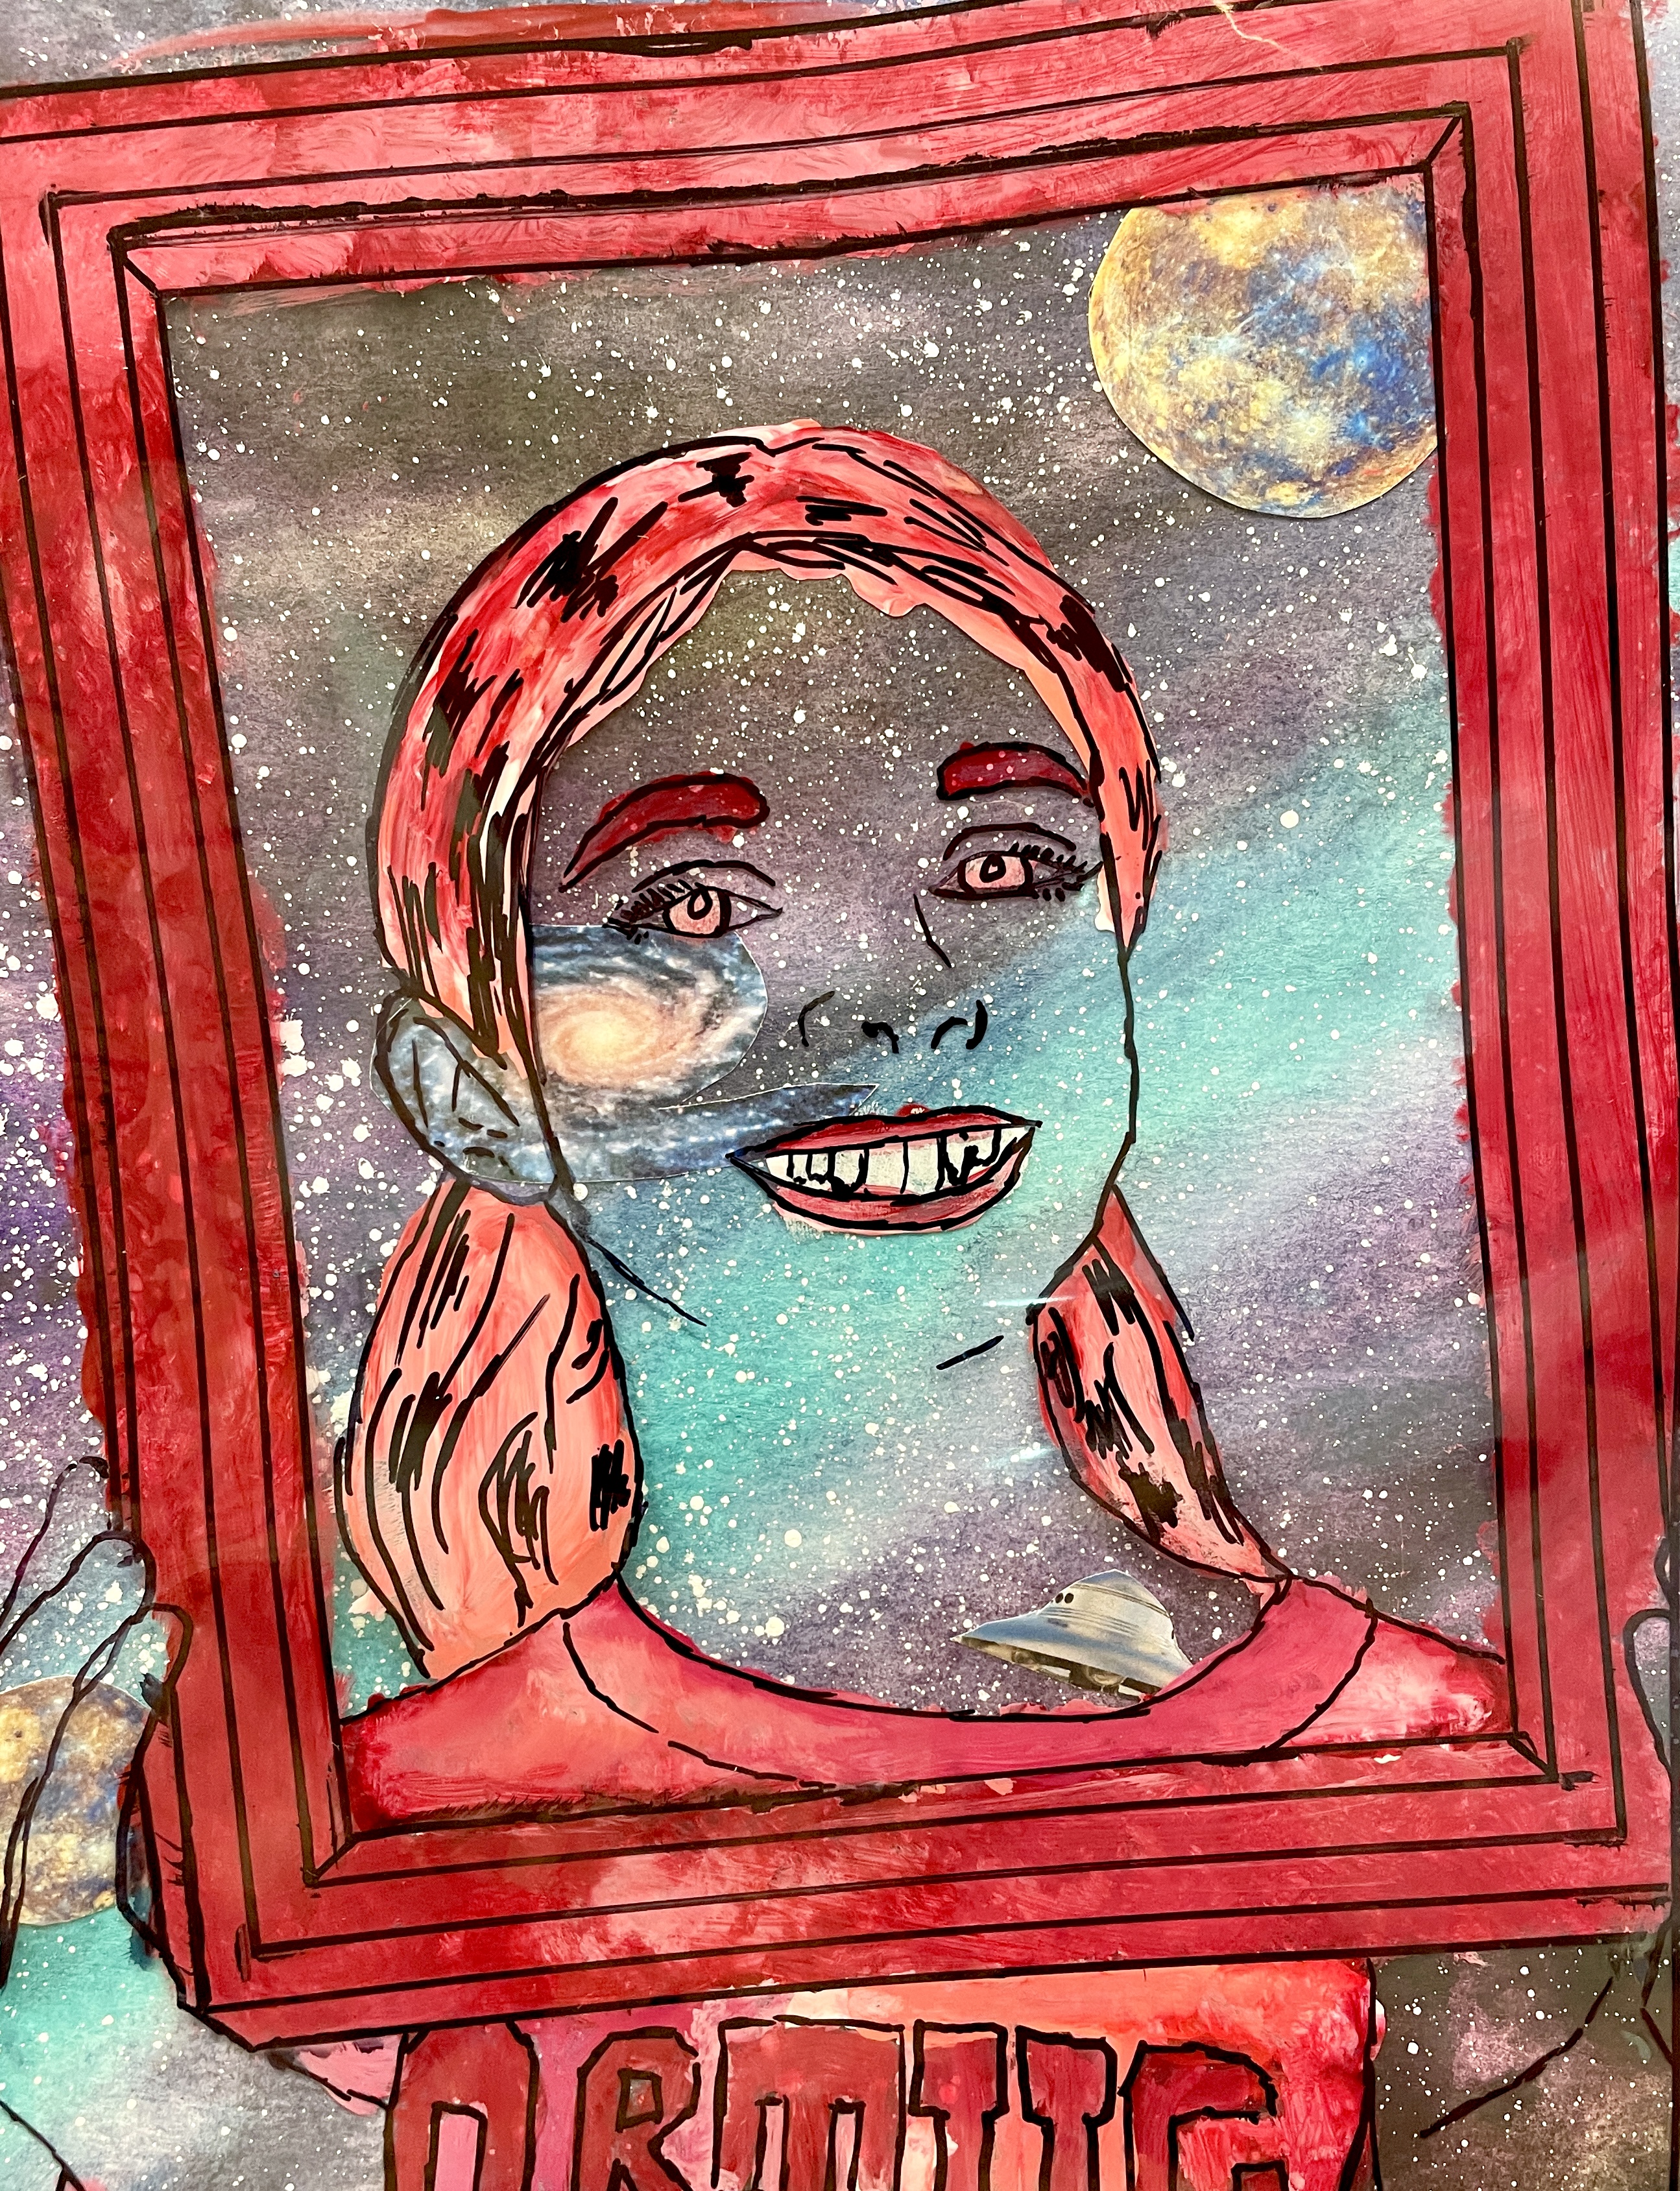
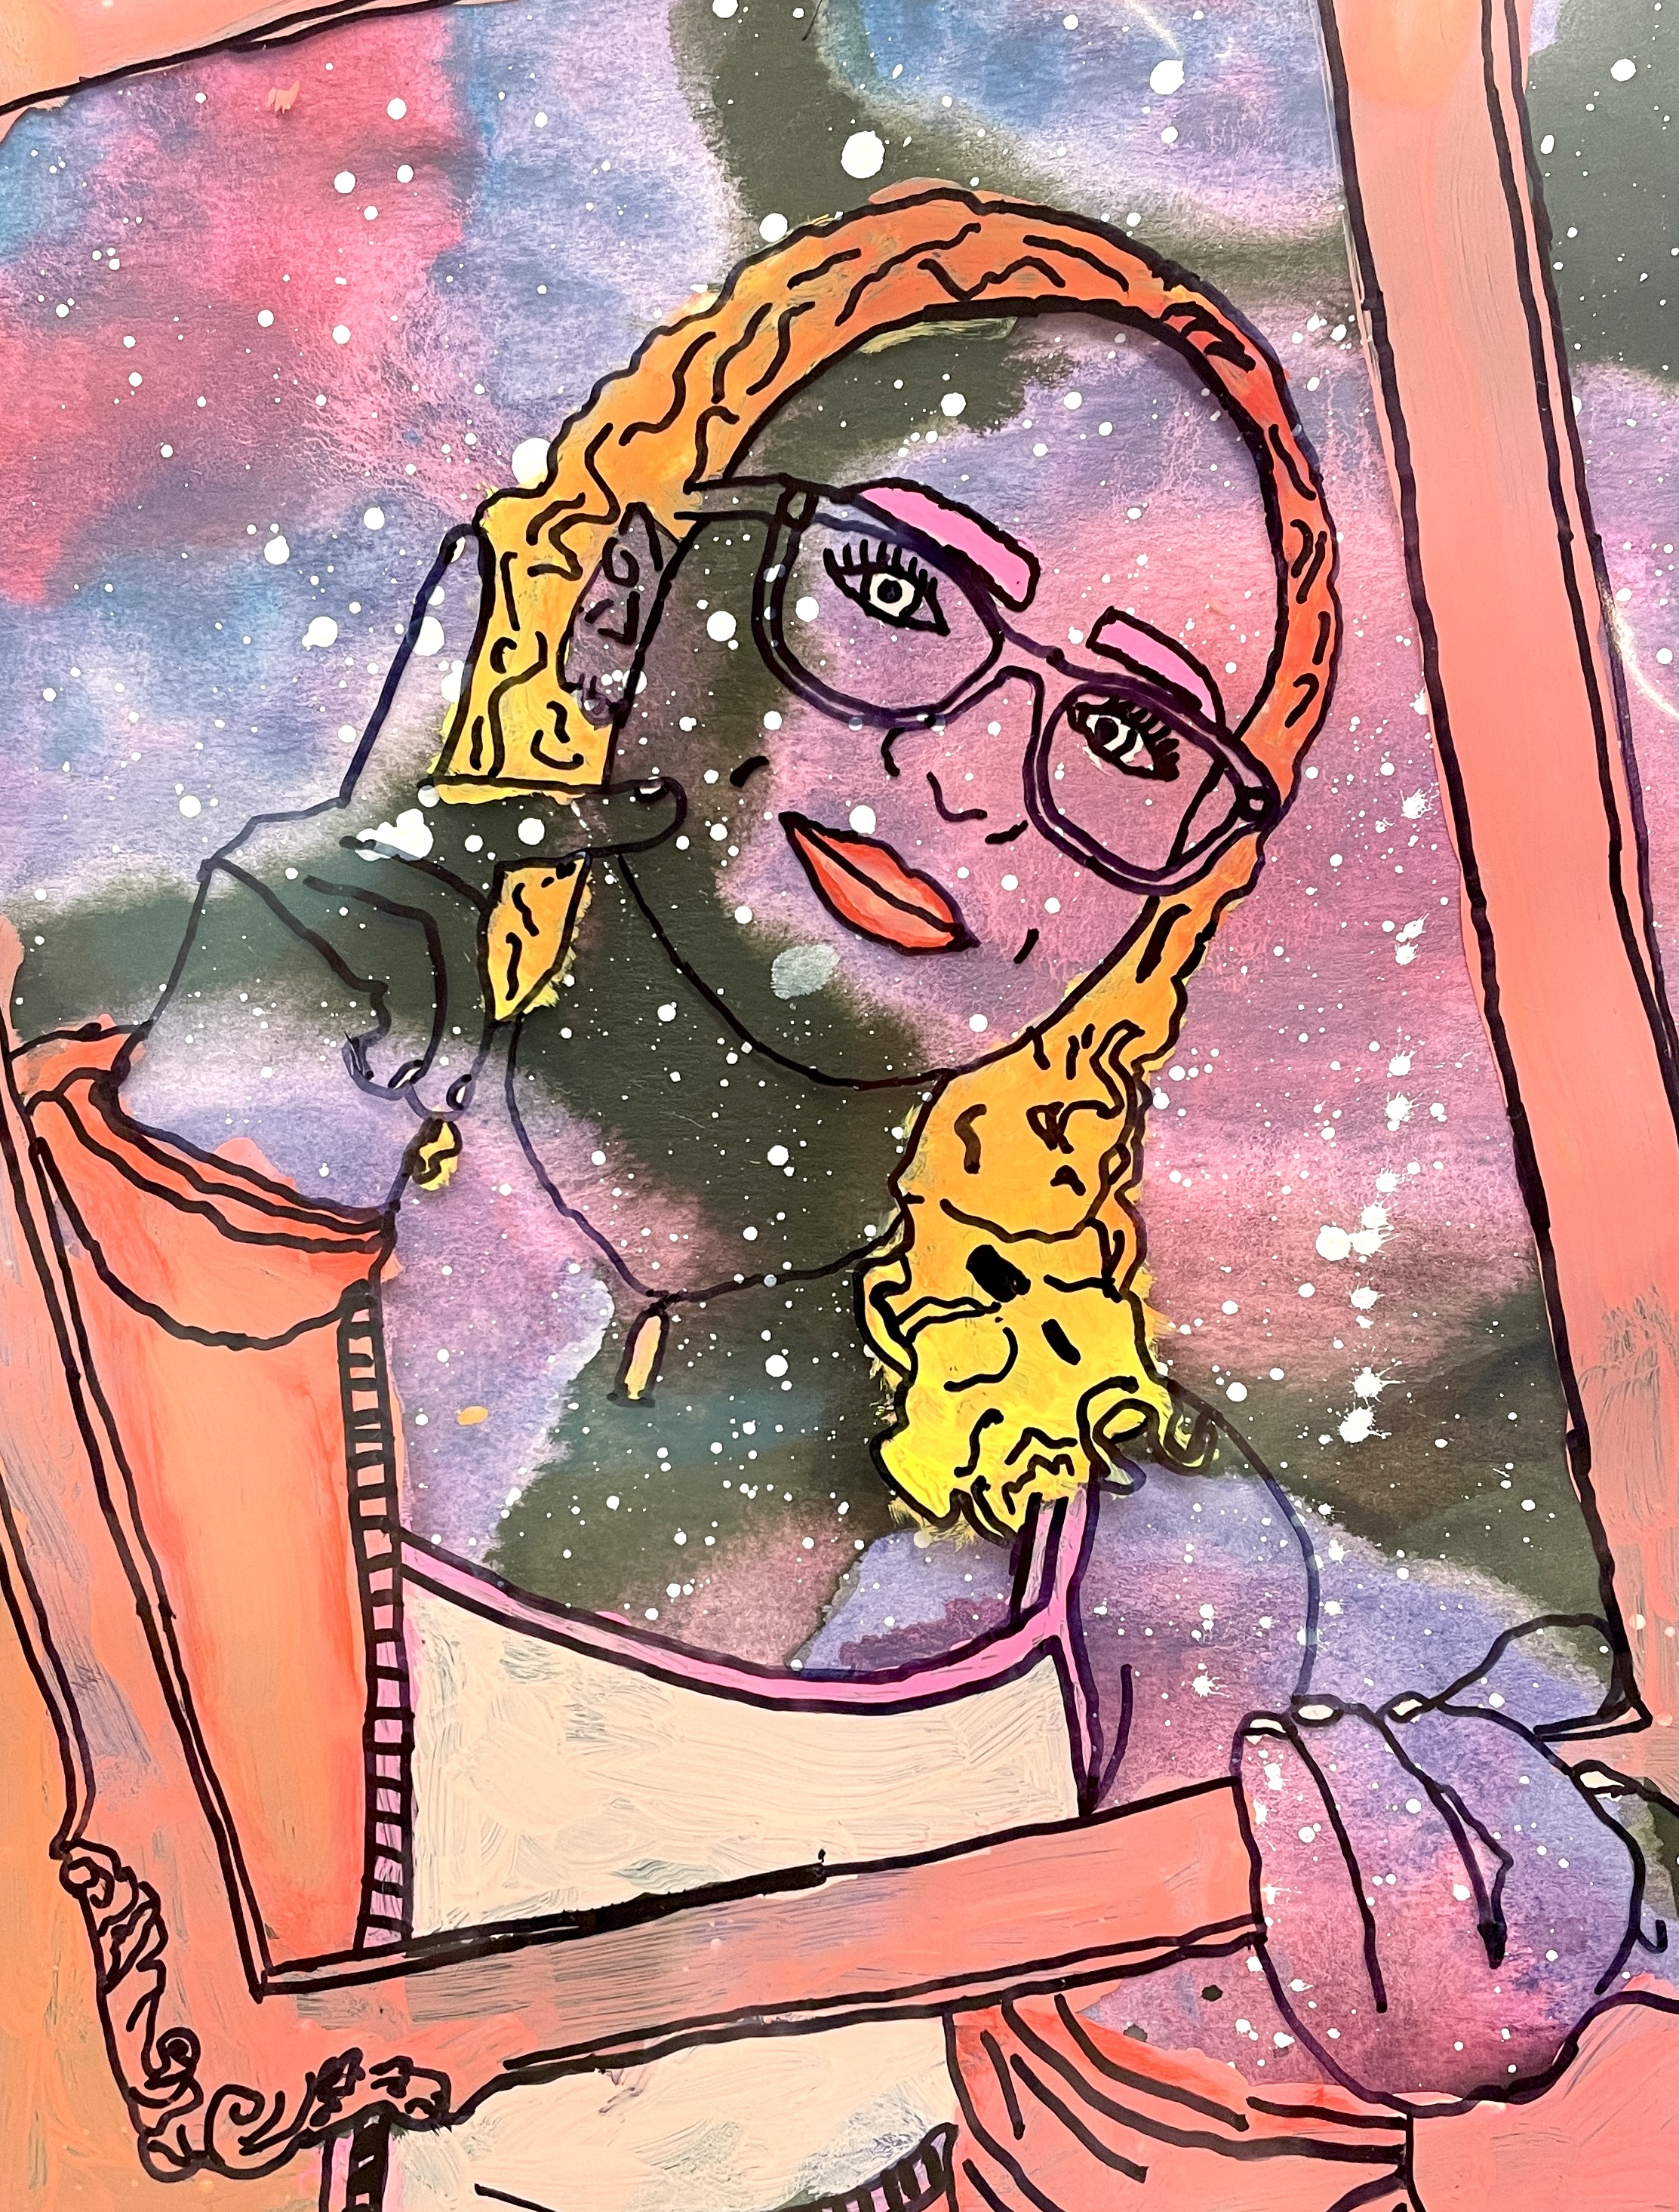
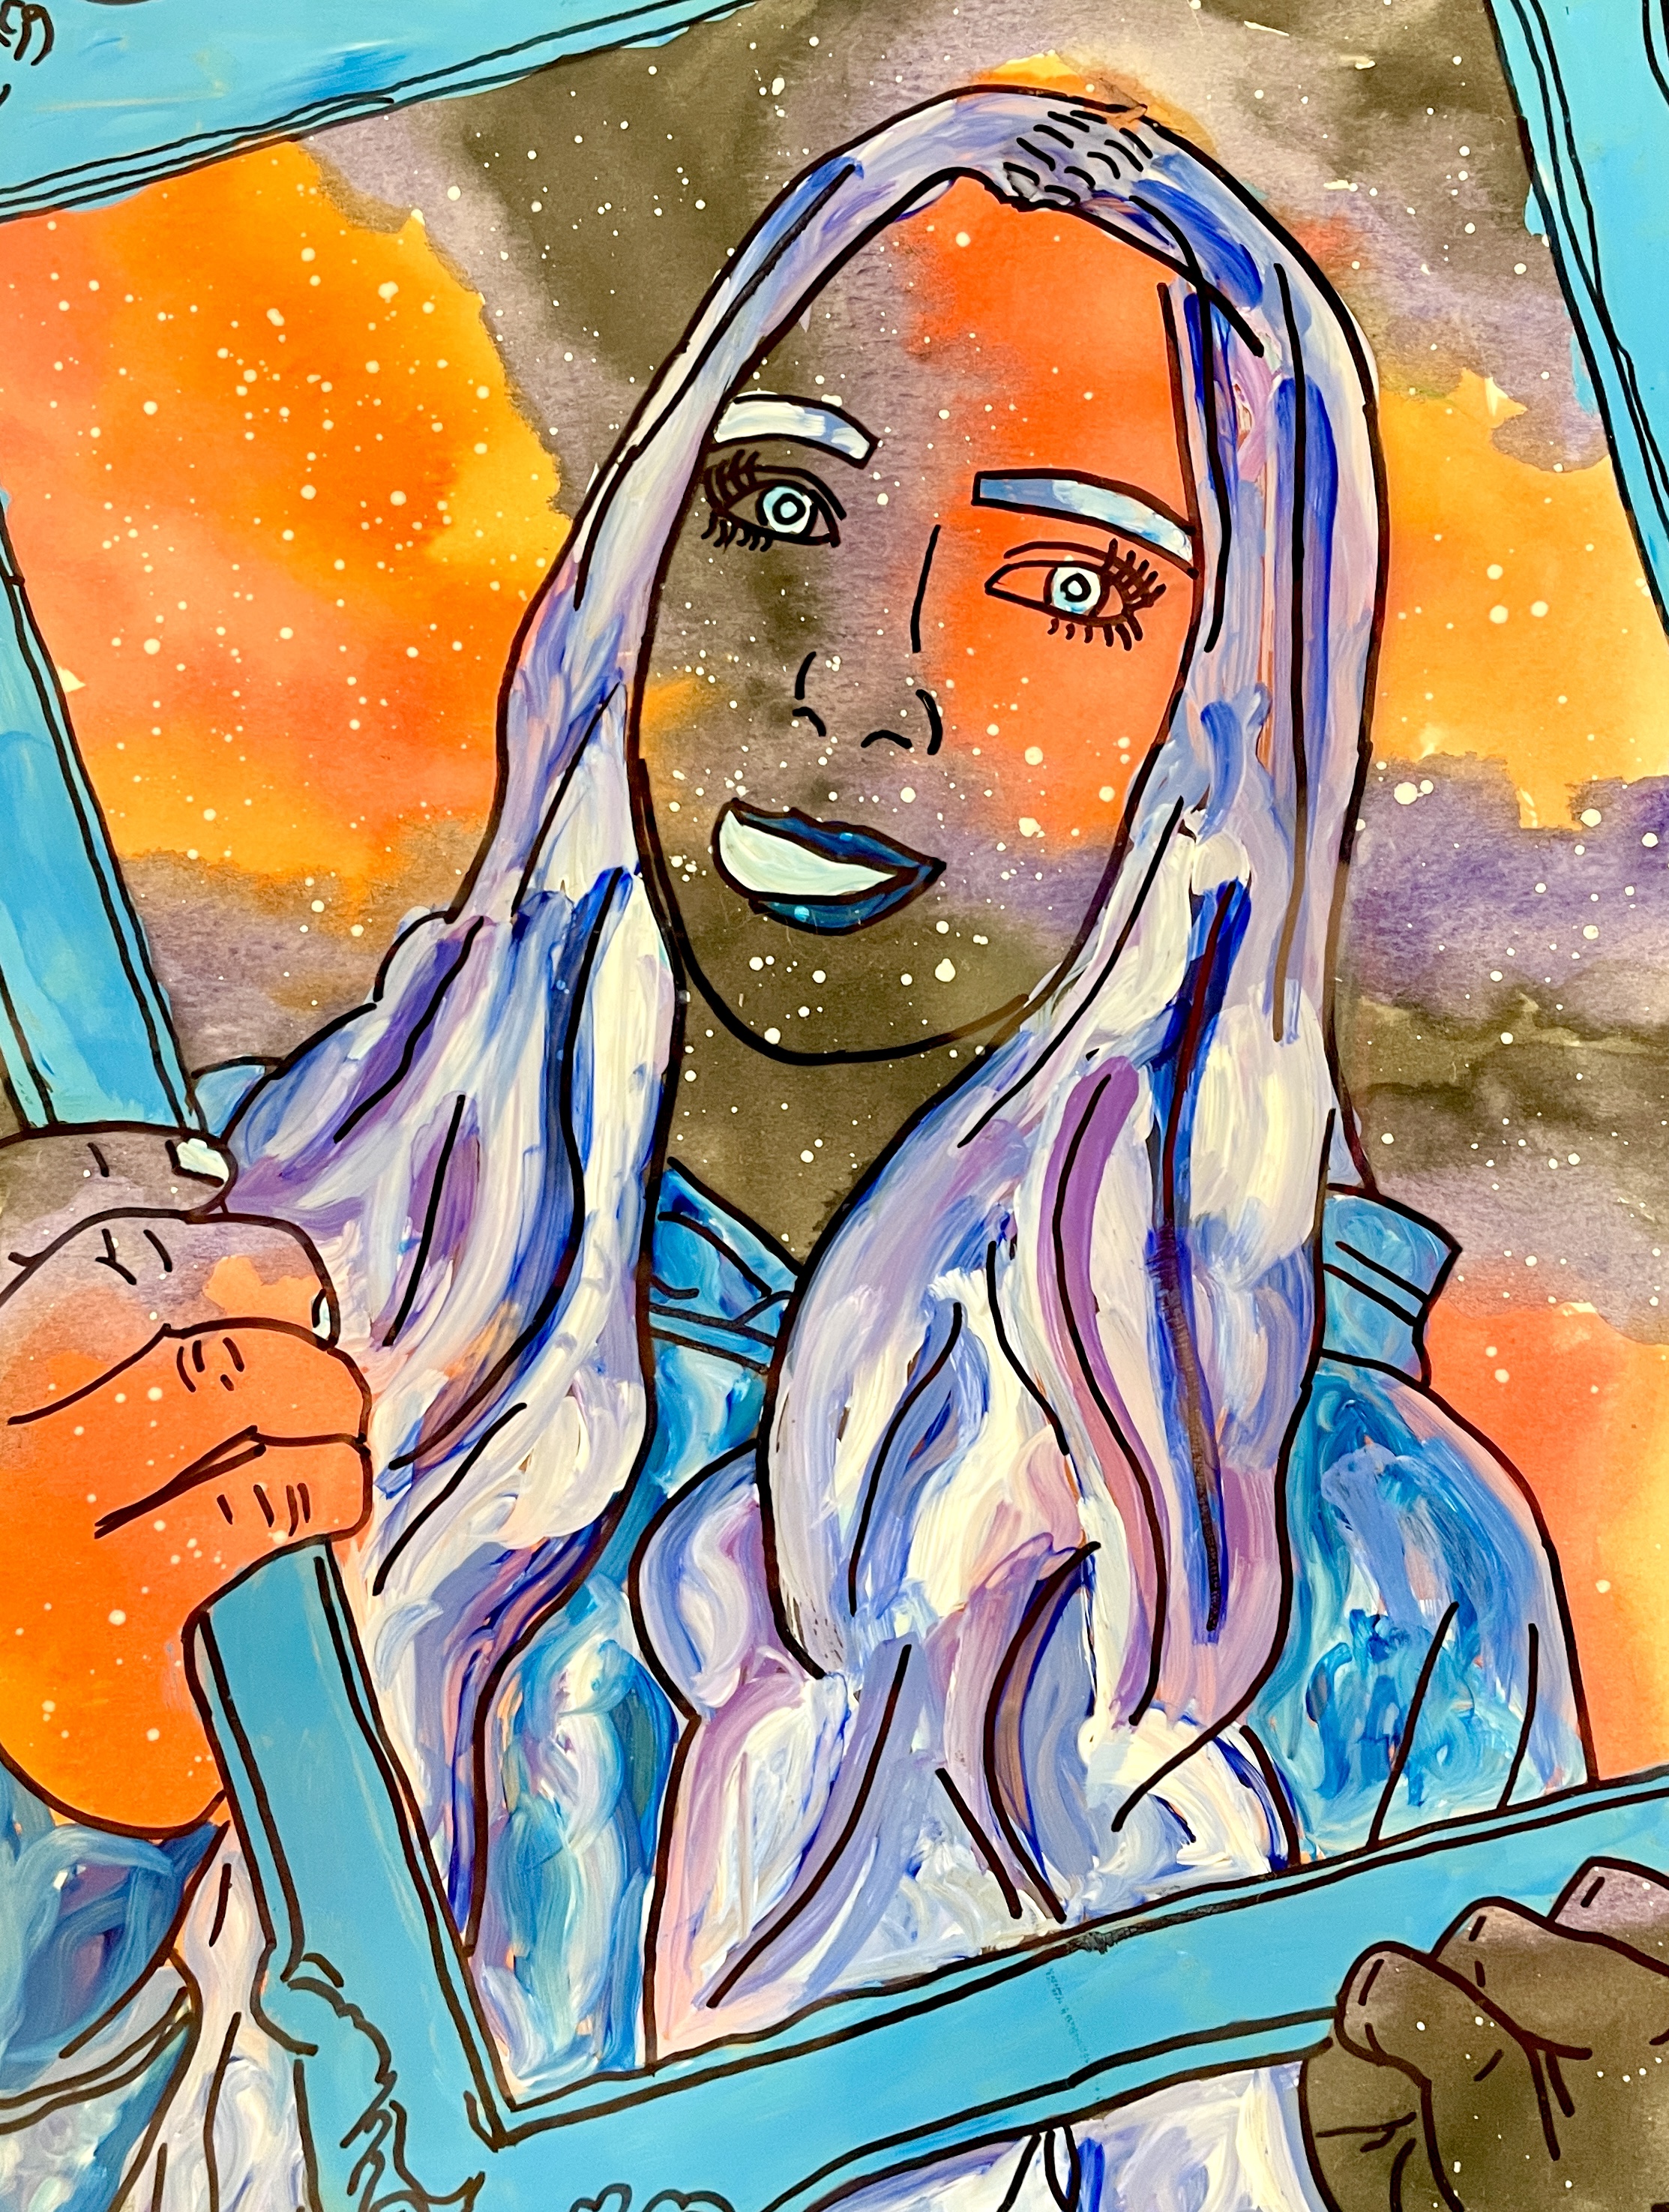
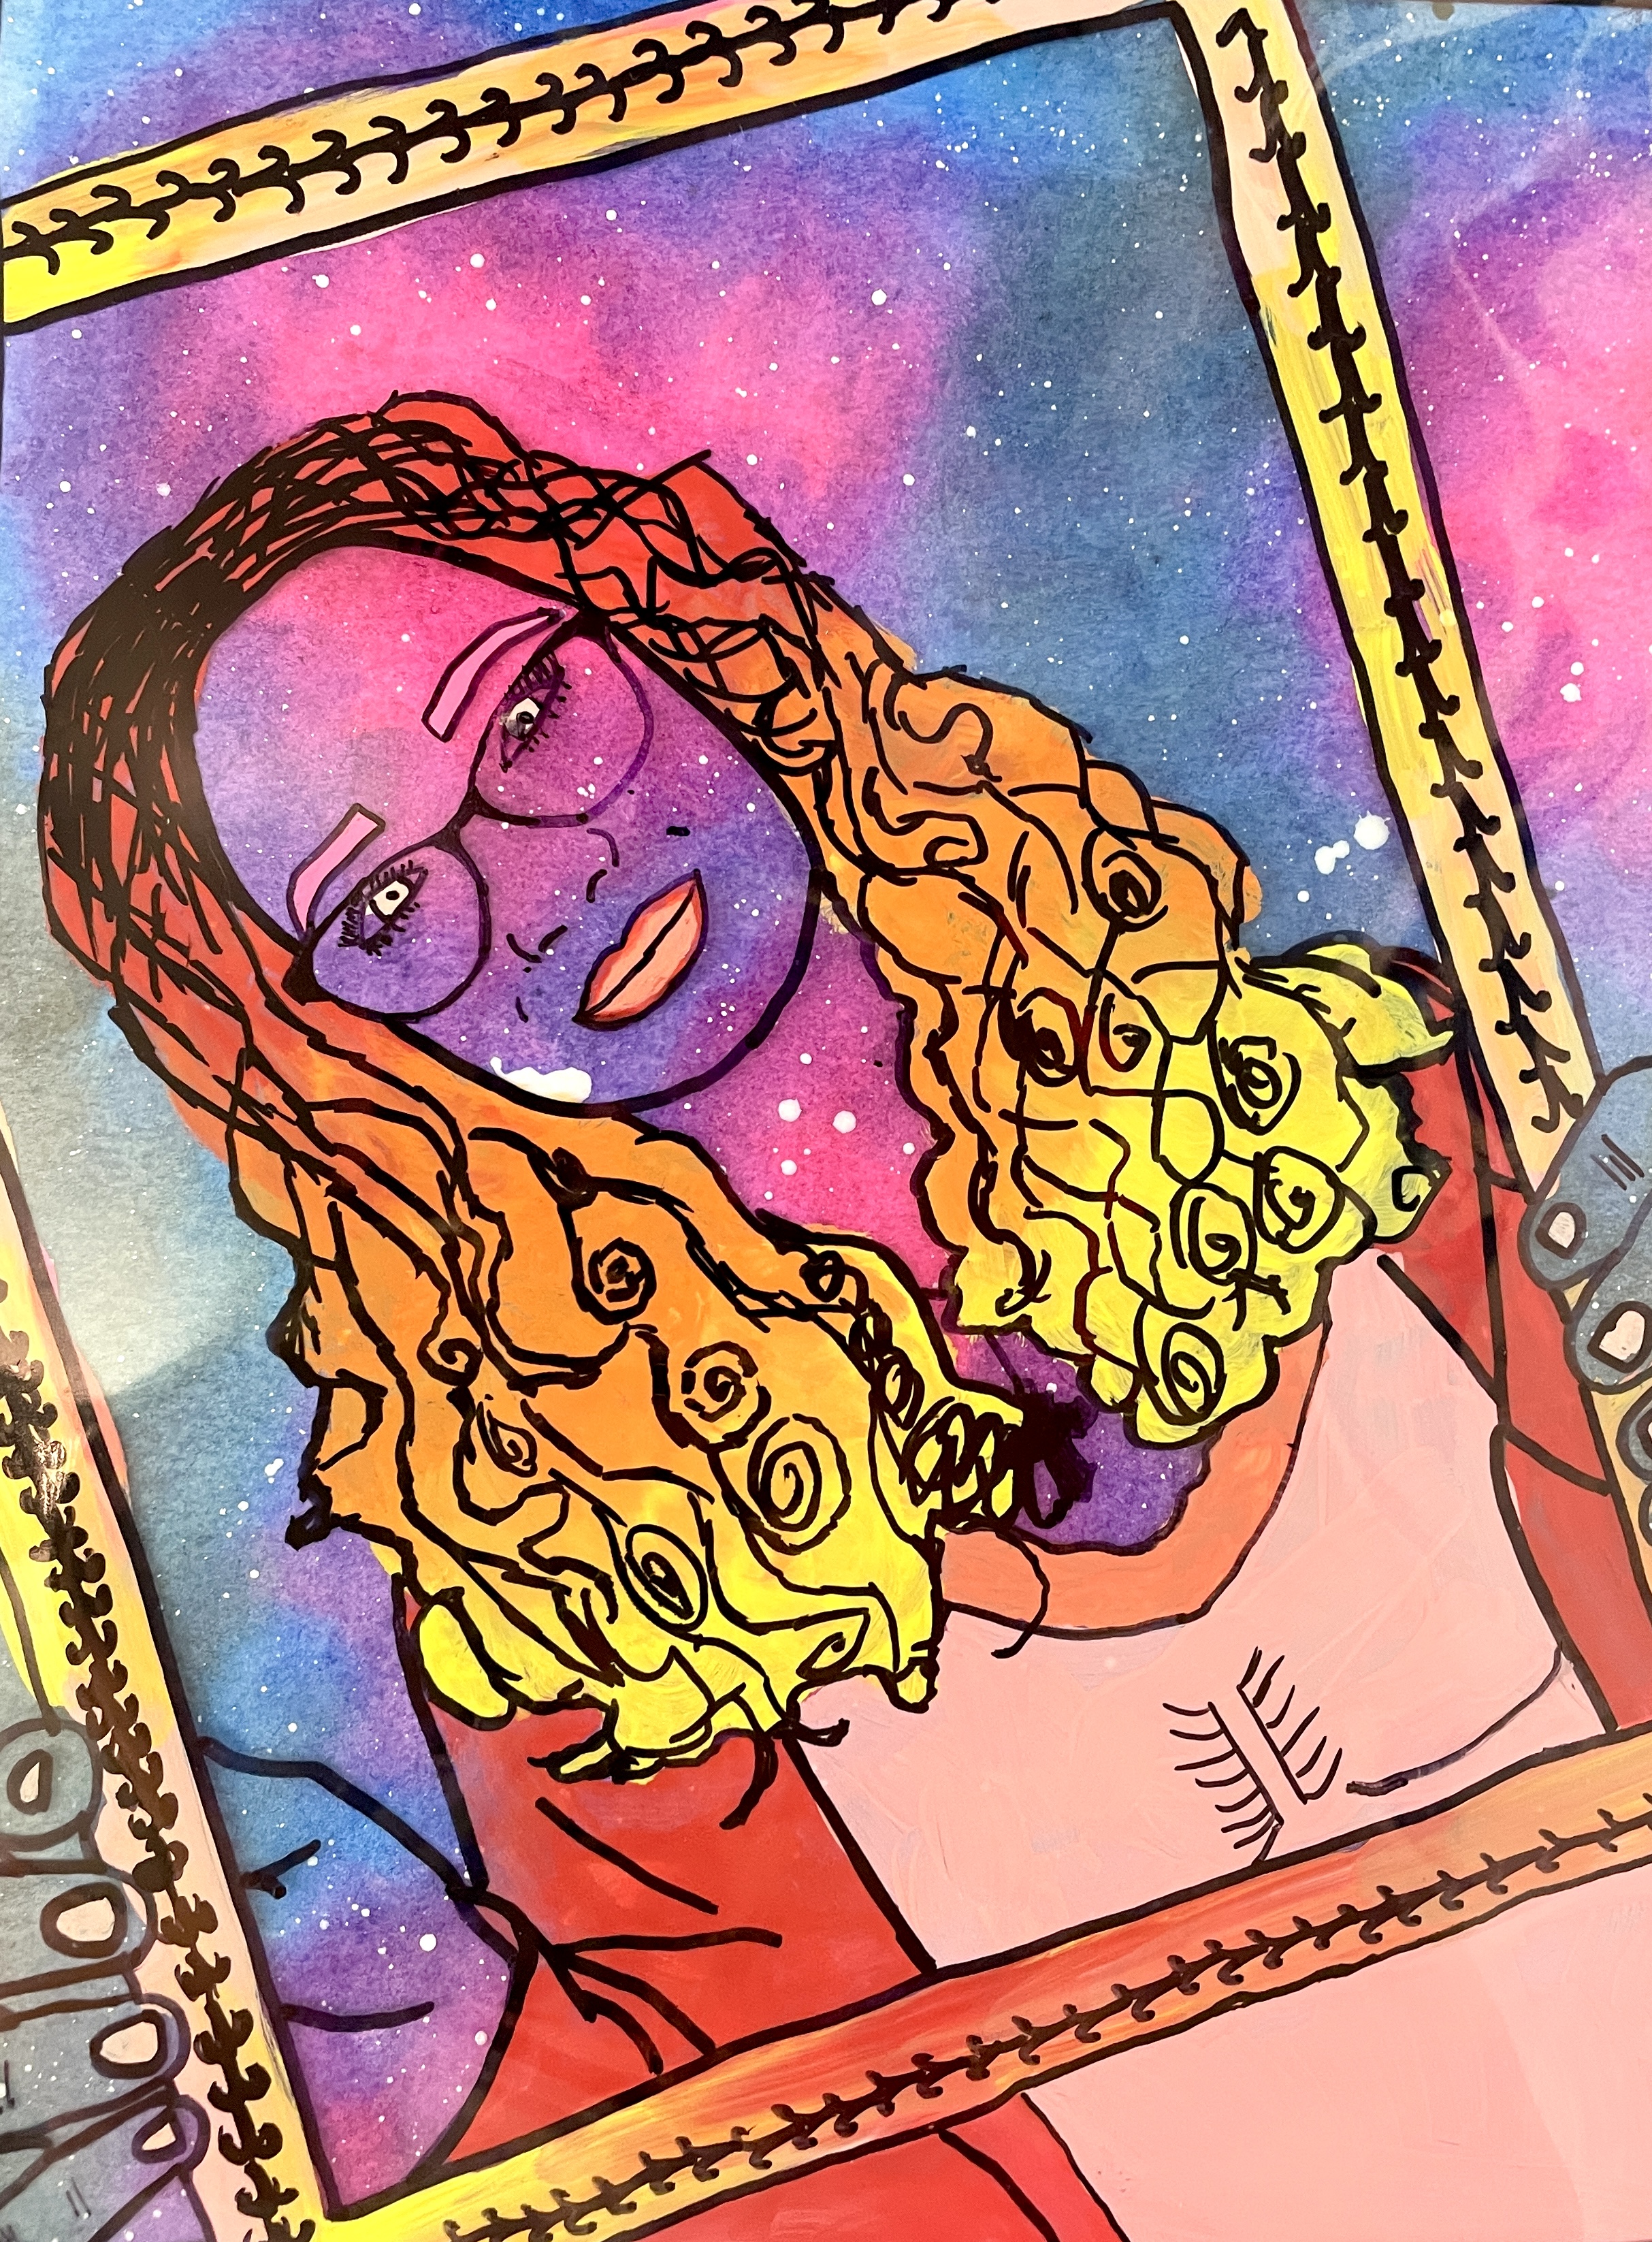
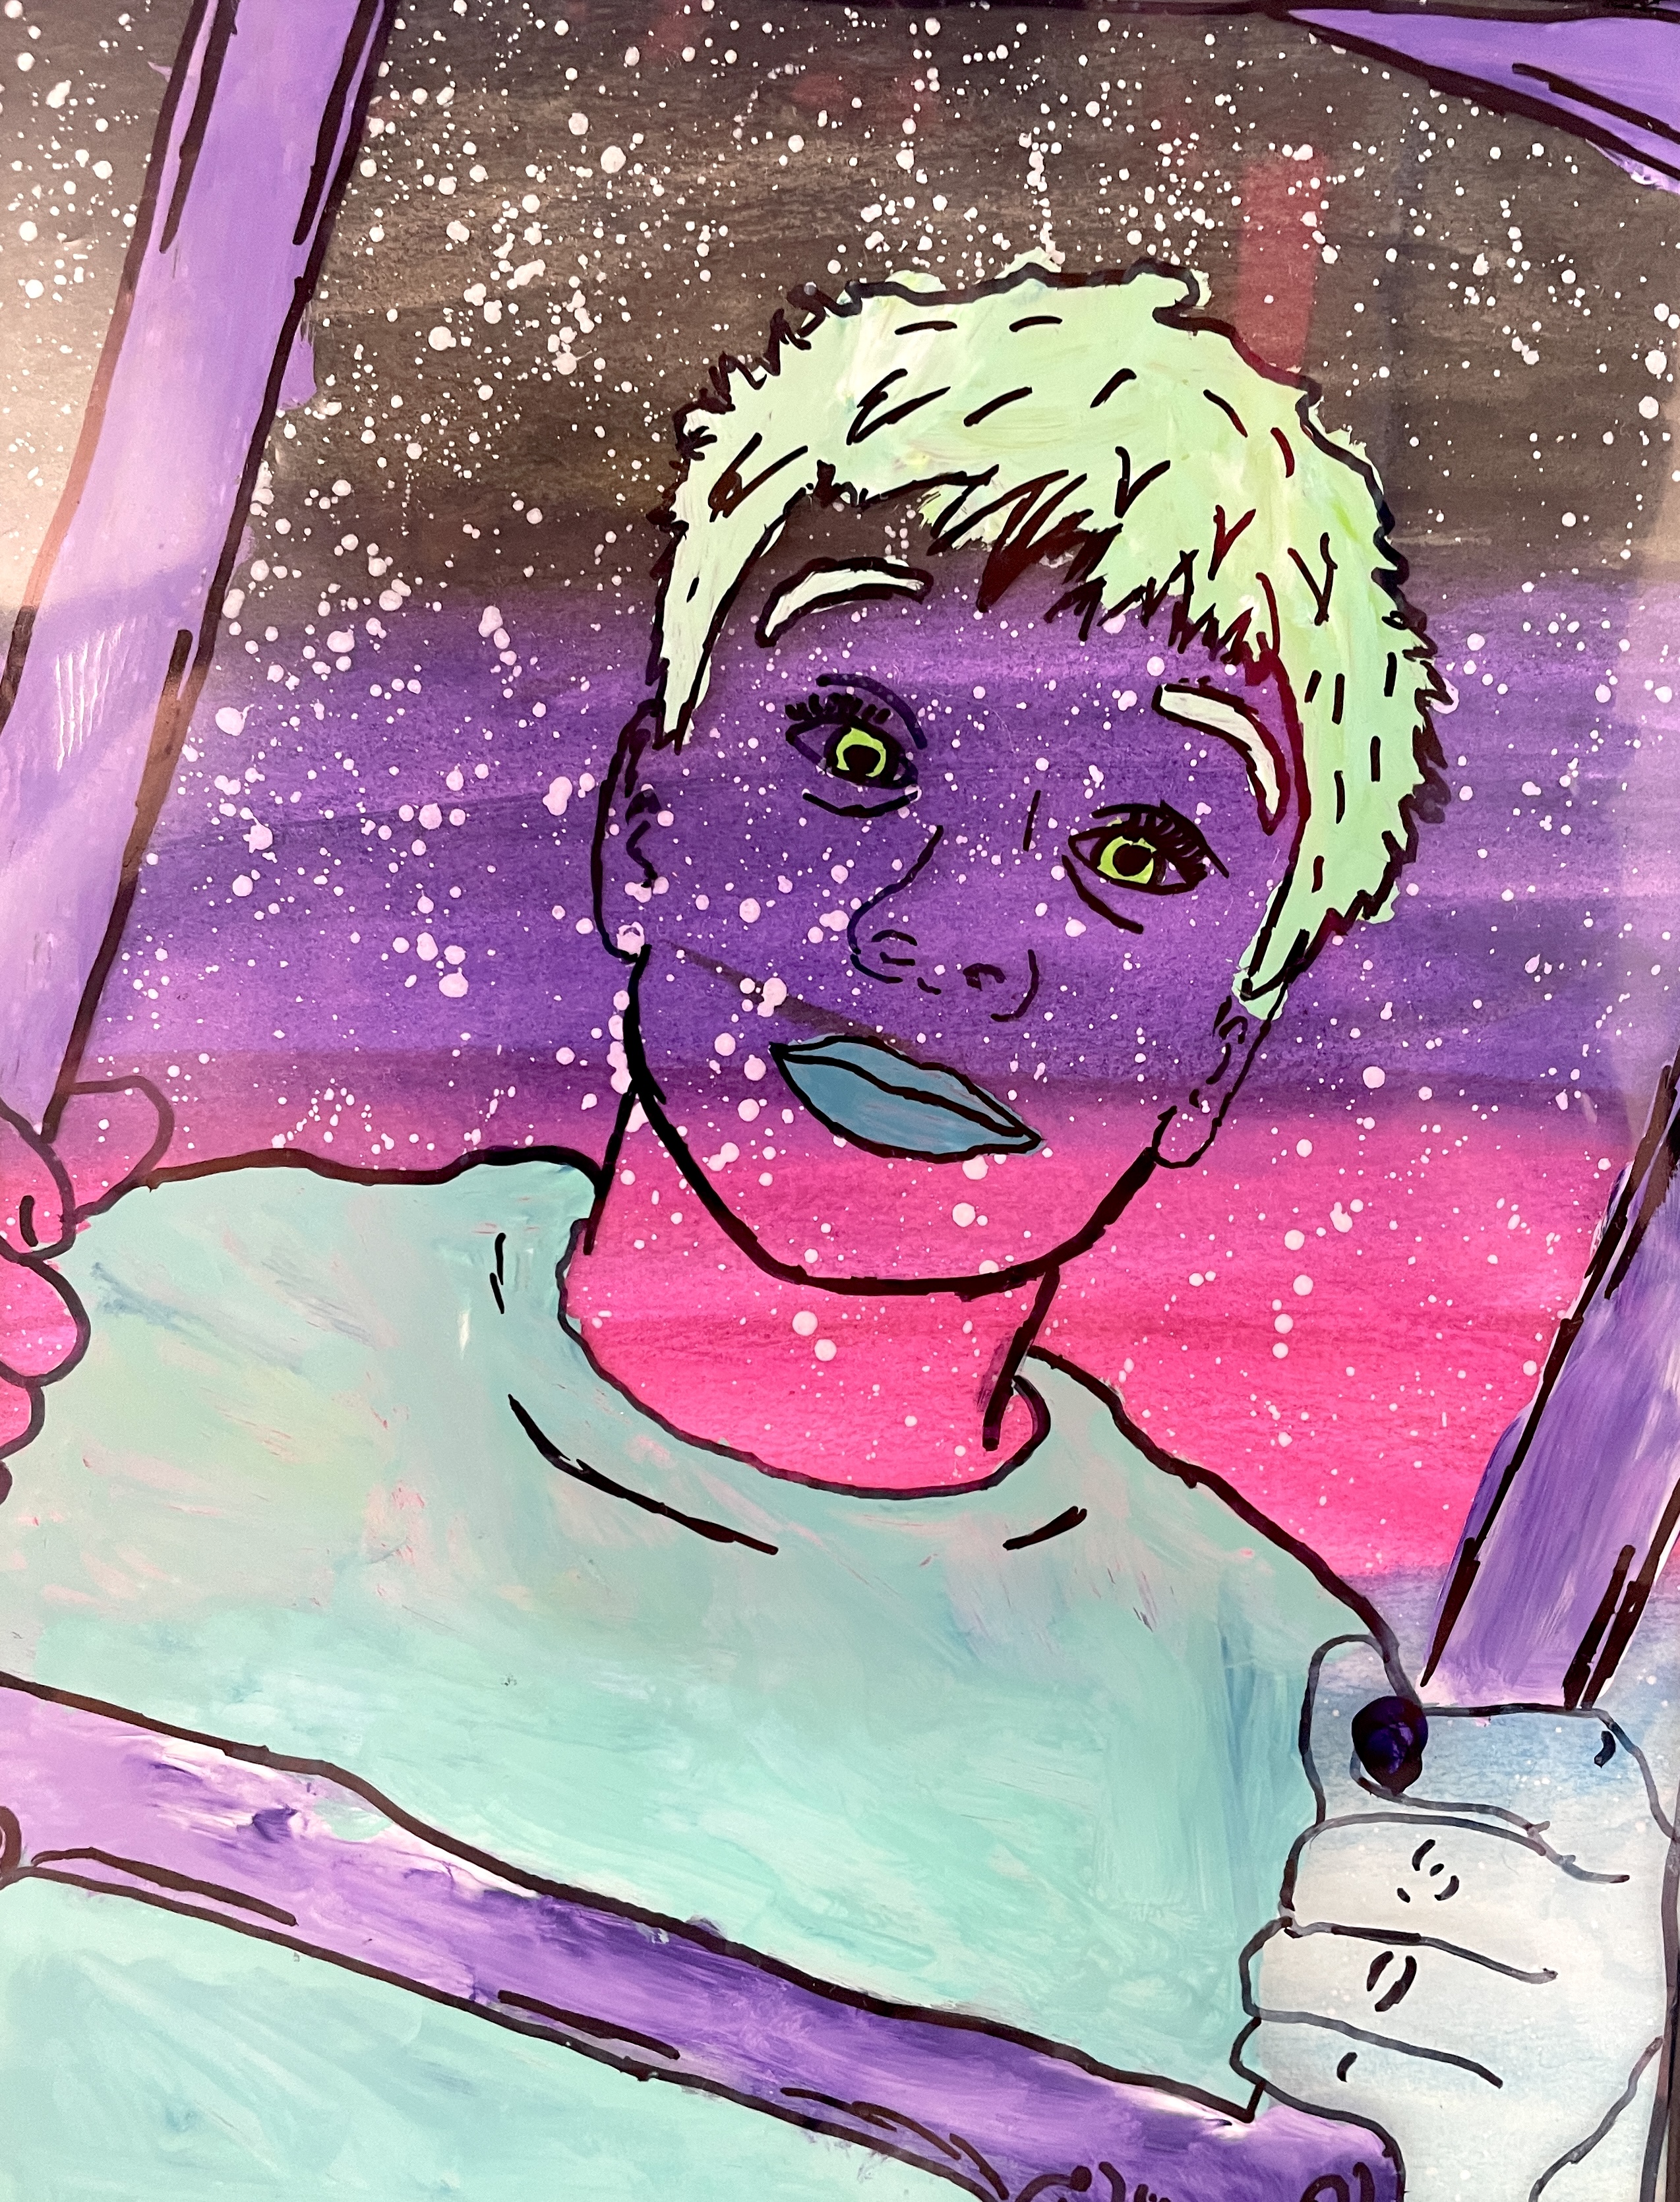
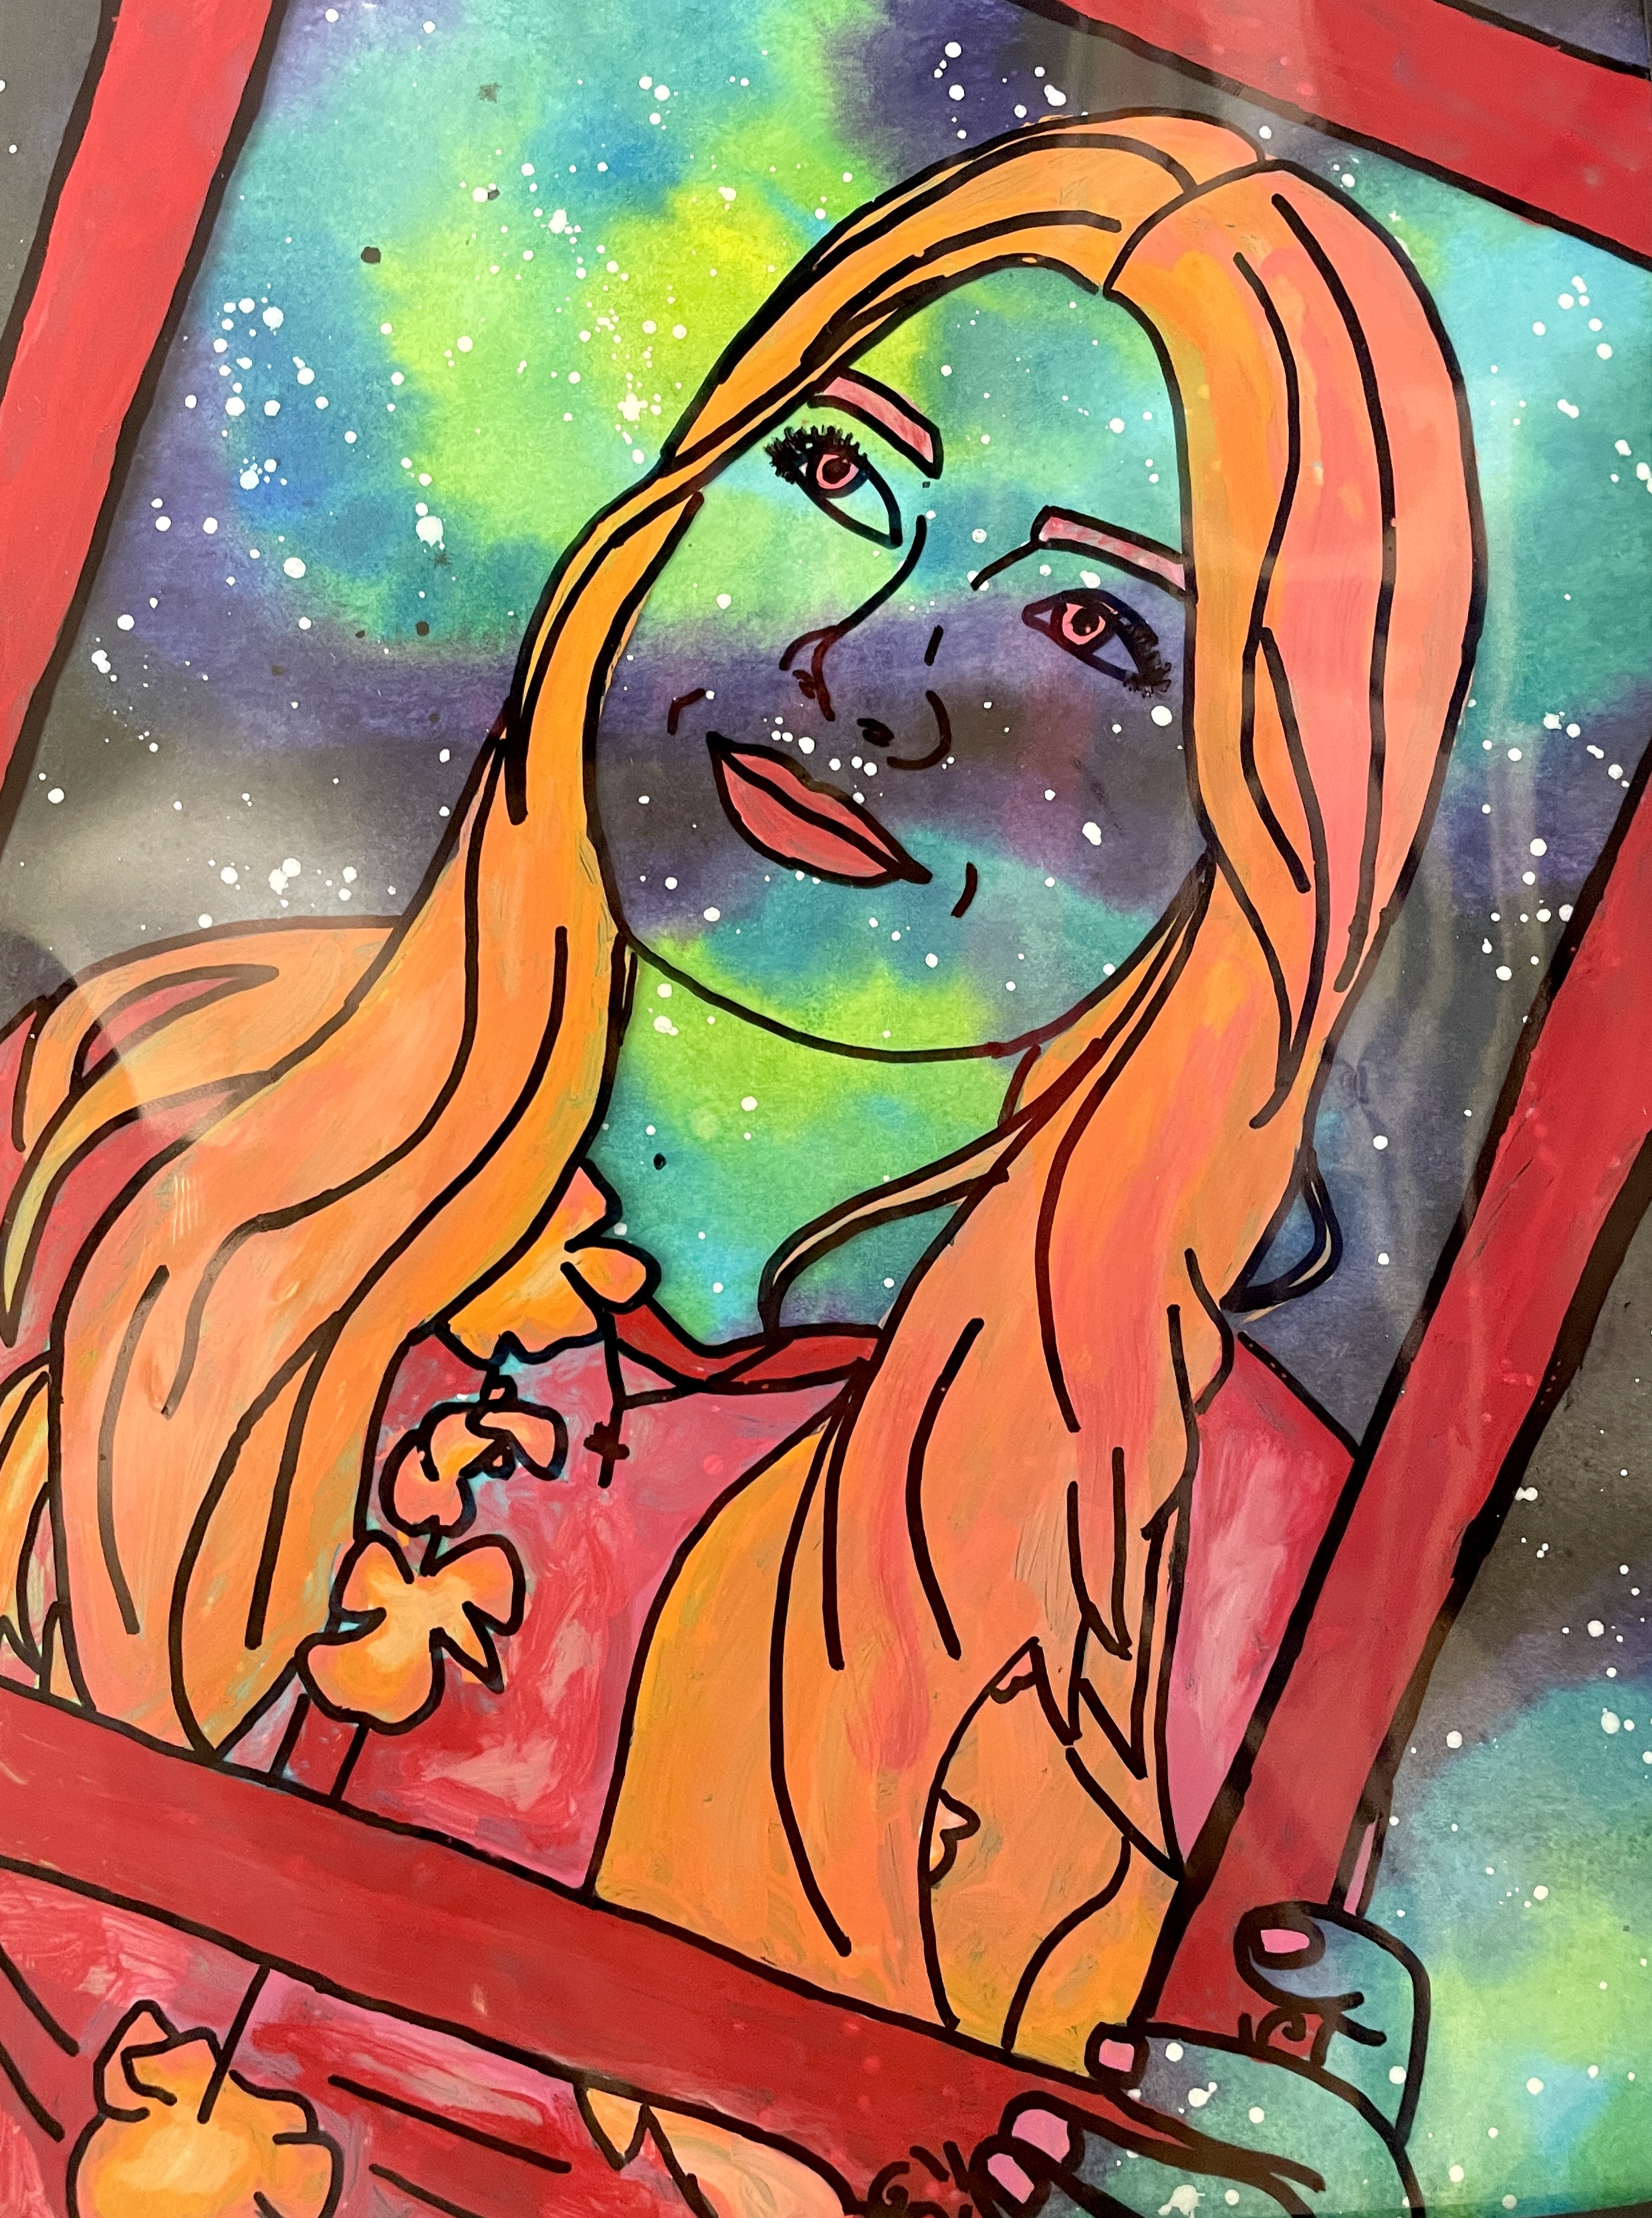
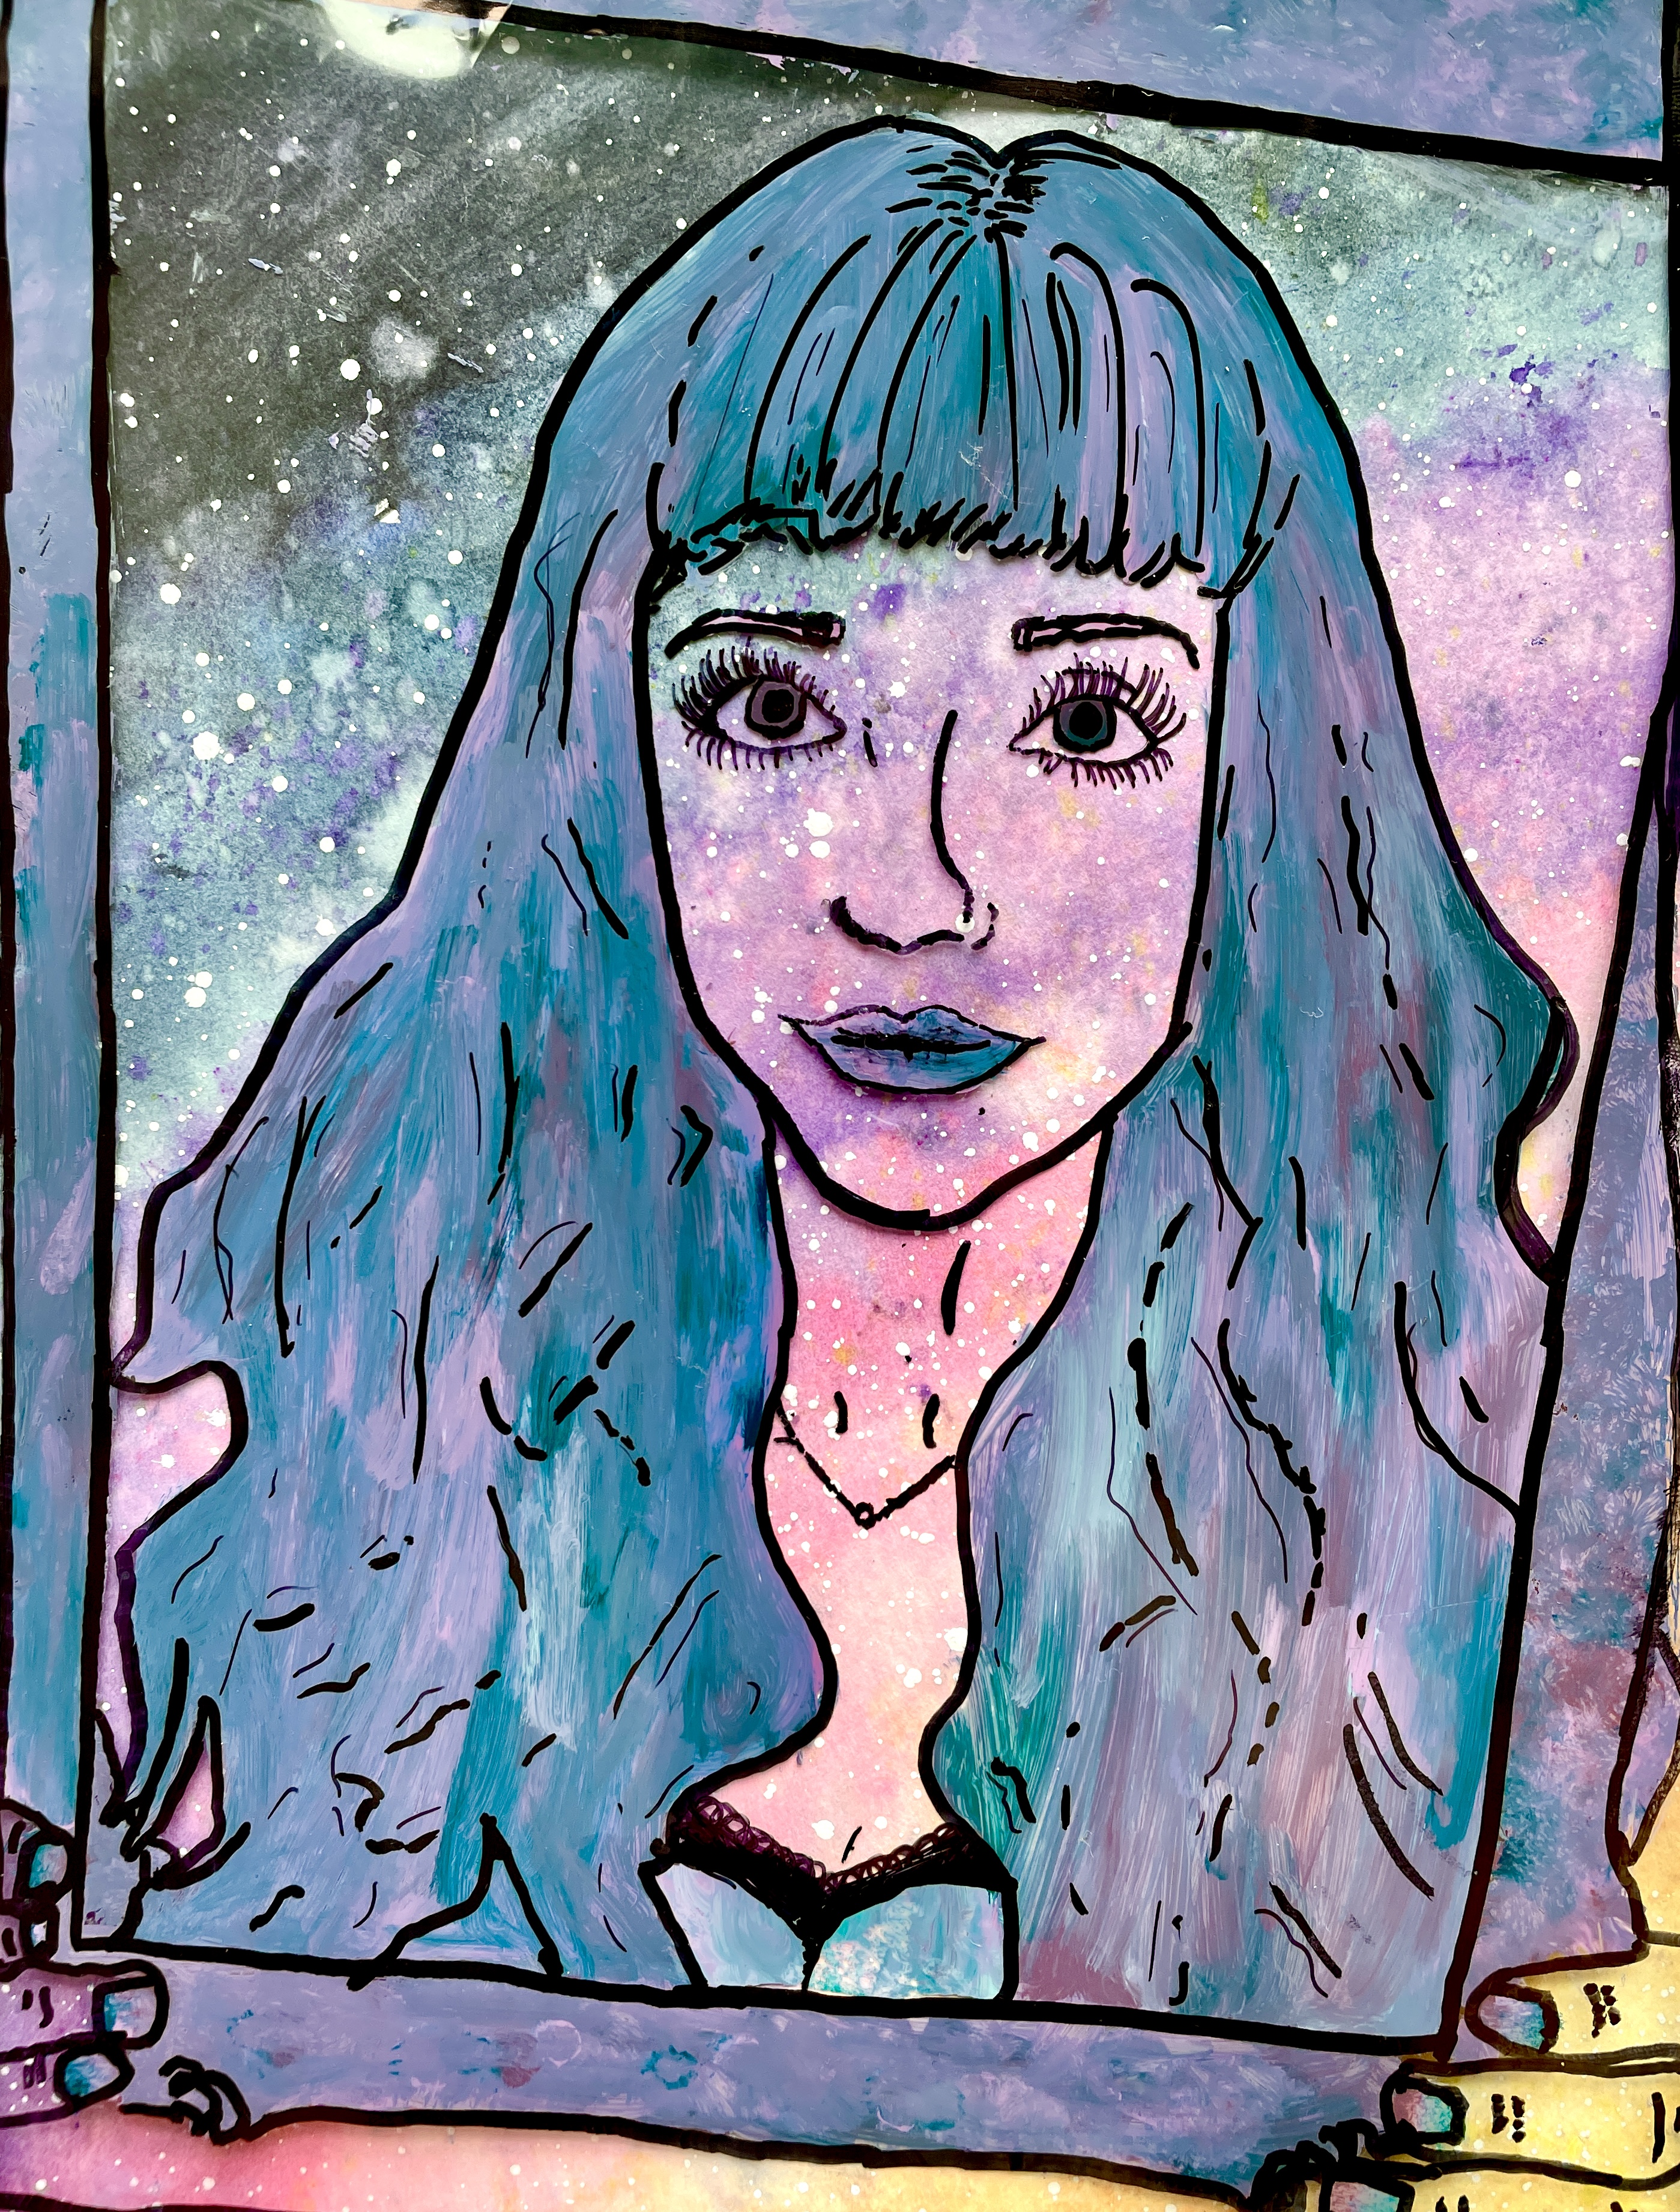
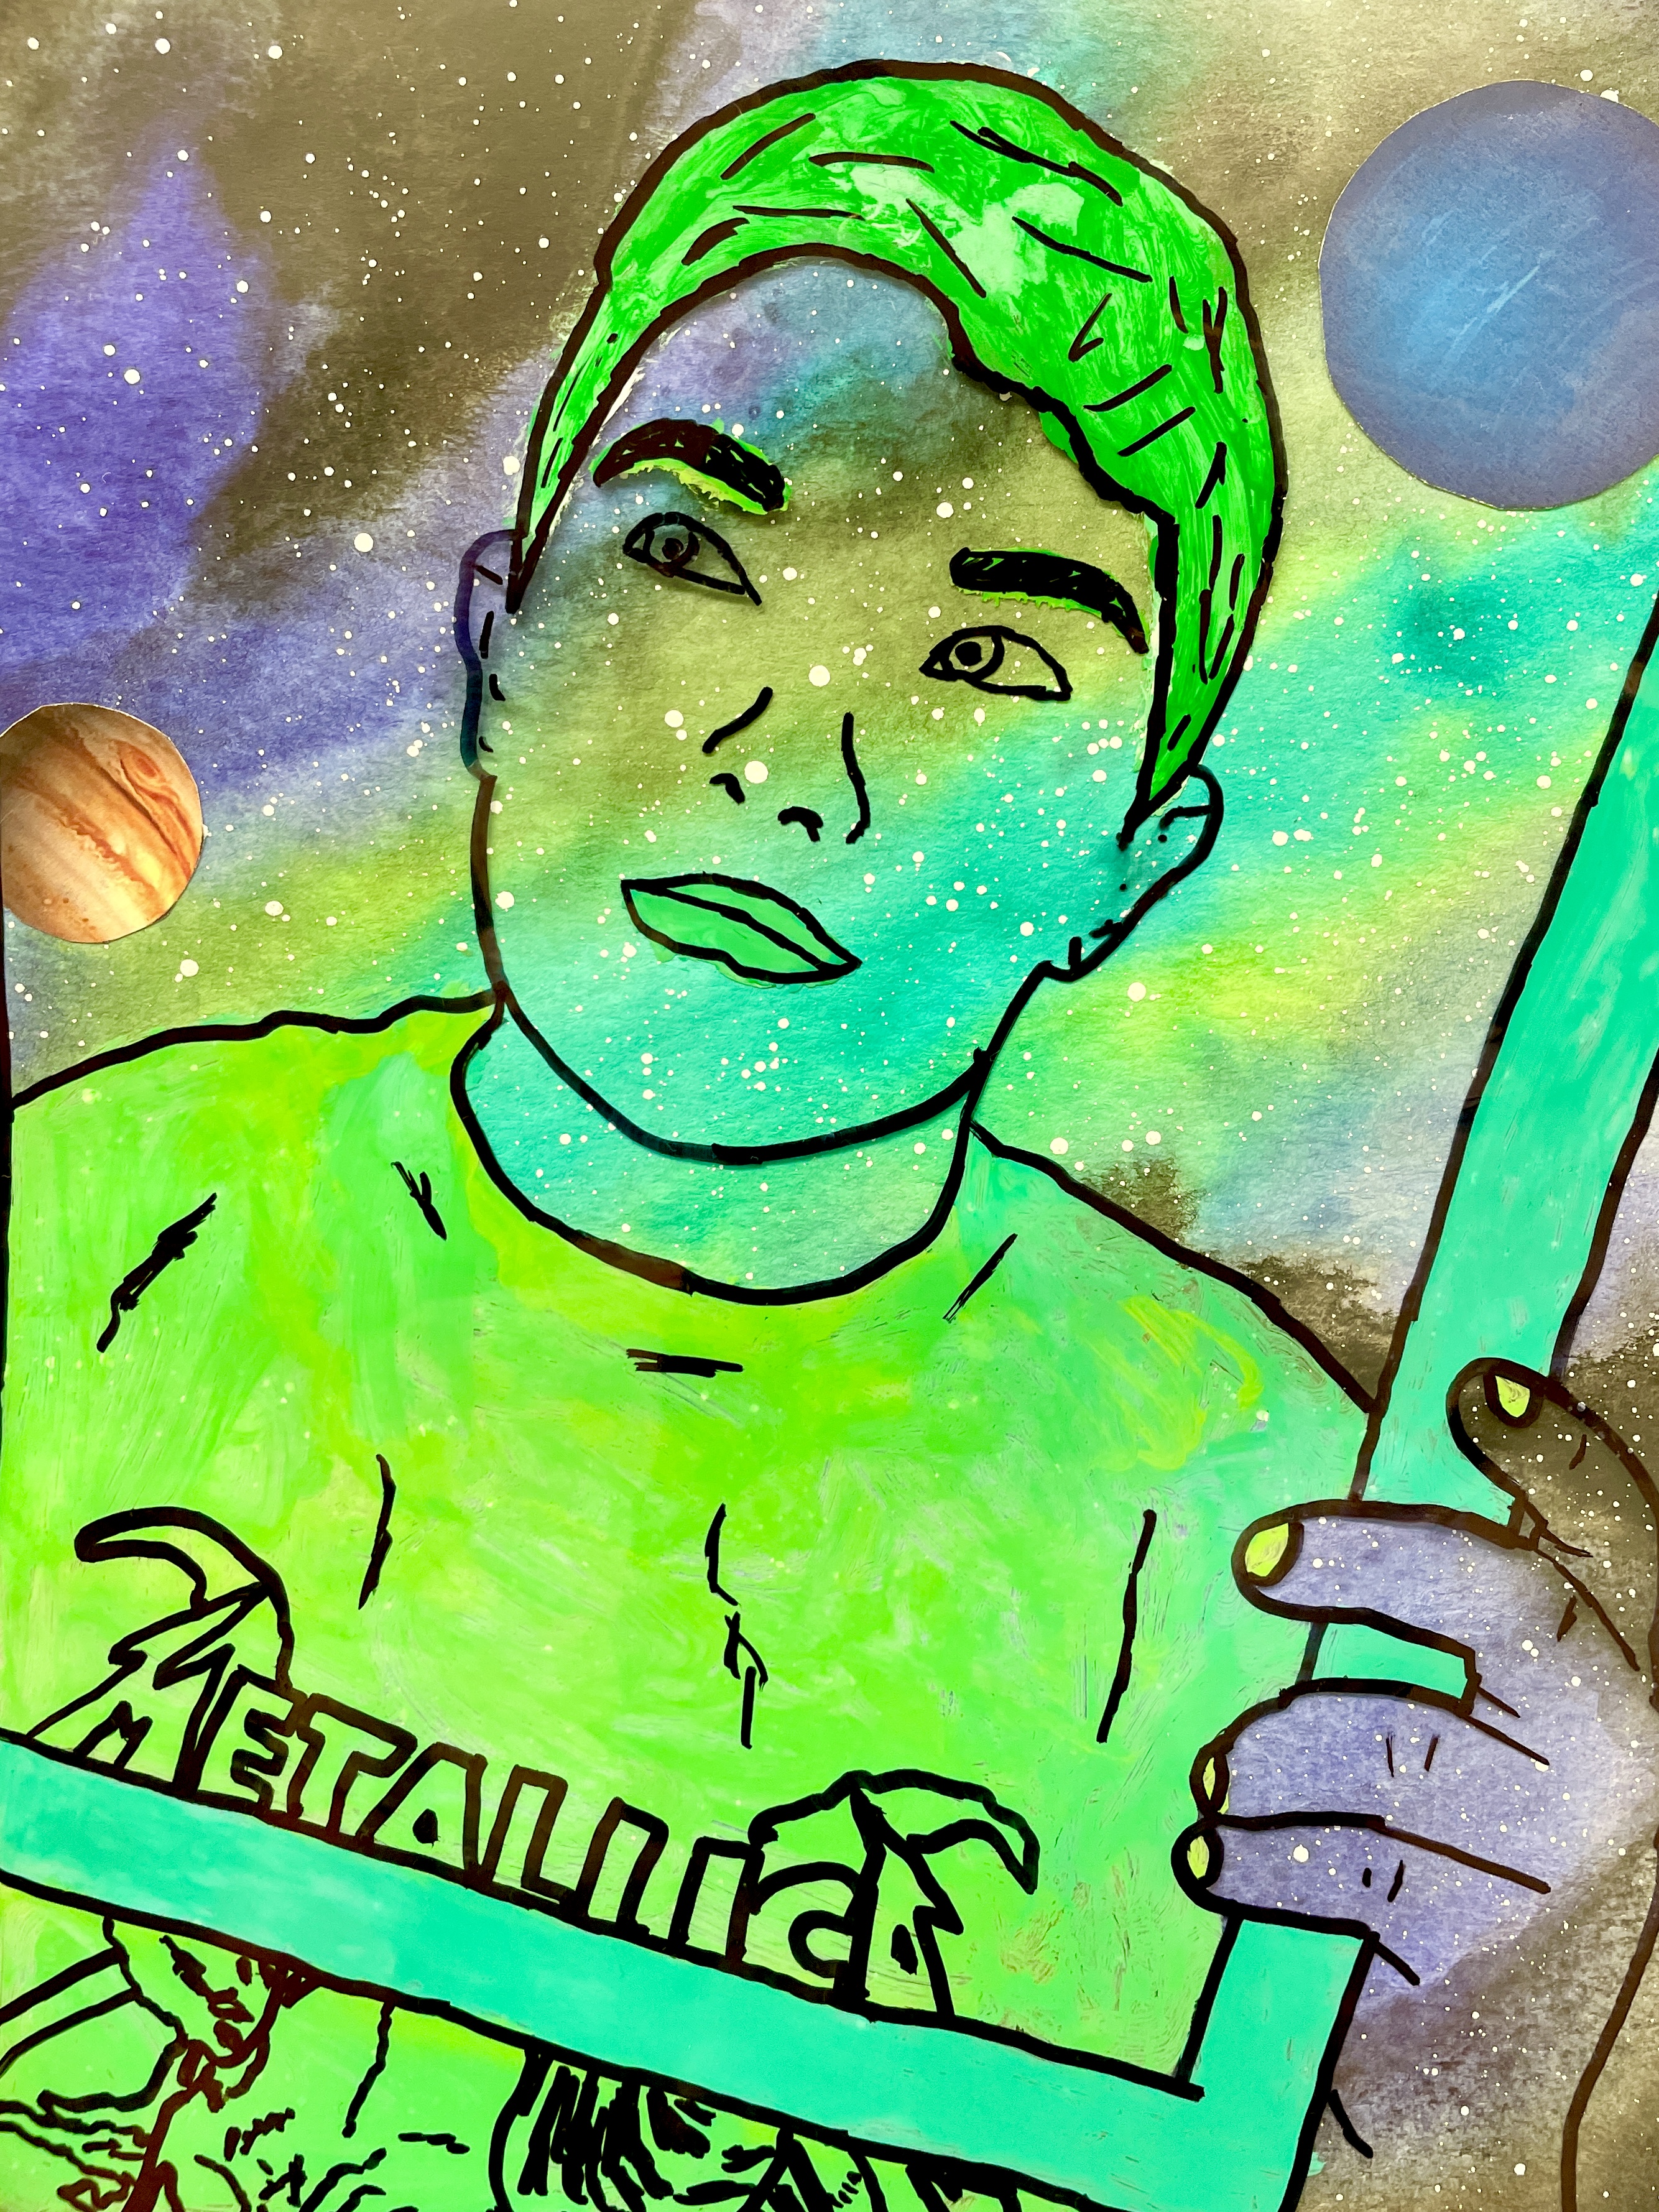
Aaaaand, just to always keep this interesting, I recently used galaxy watercolor paintings as a background for a recent batch of Acetate Self Portraits! Click HERE to learn how we did the galaxy paintings for these out-of-this-world masterpieces!


– – –
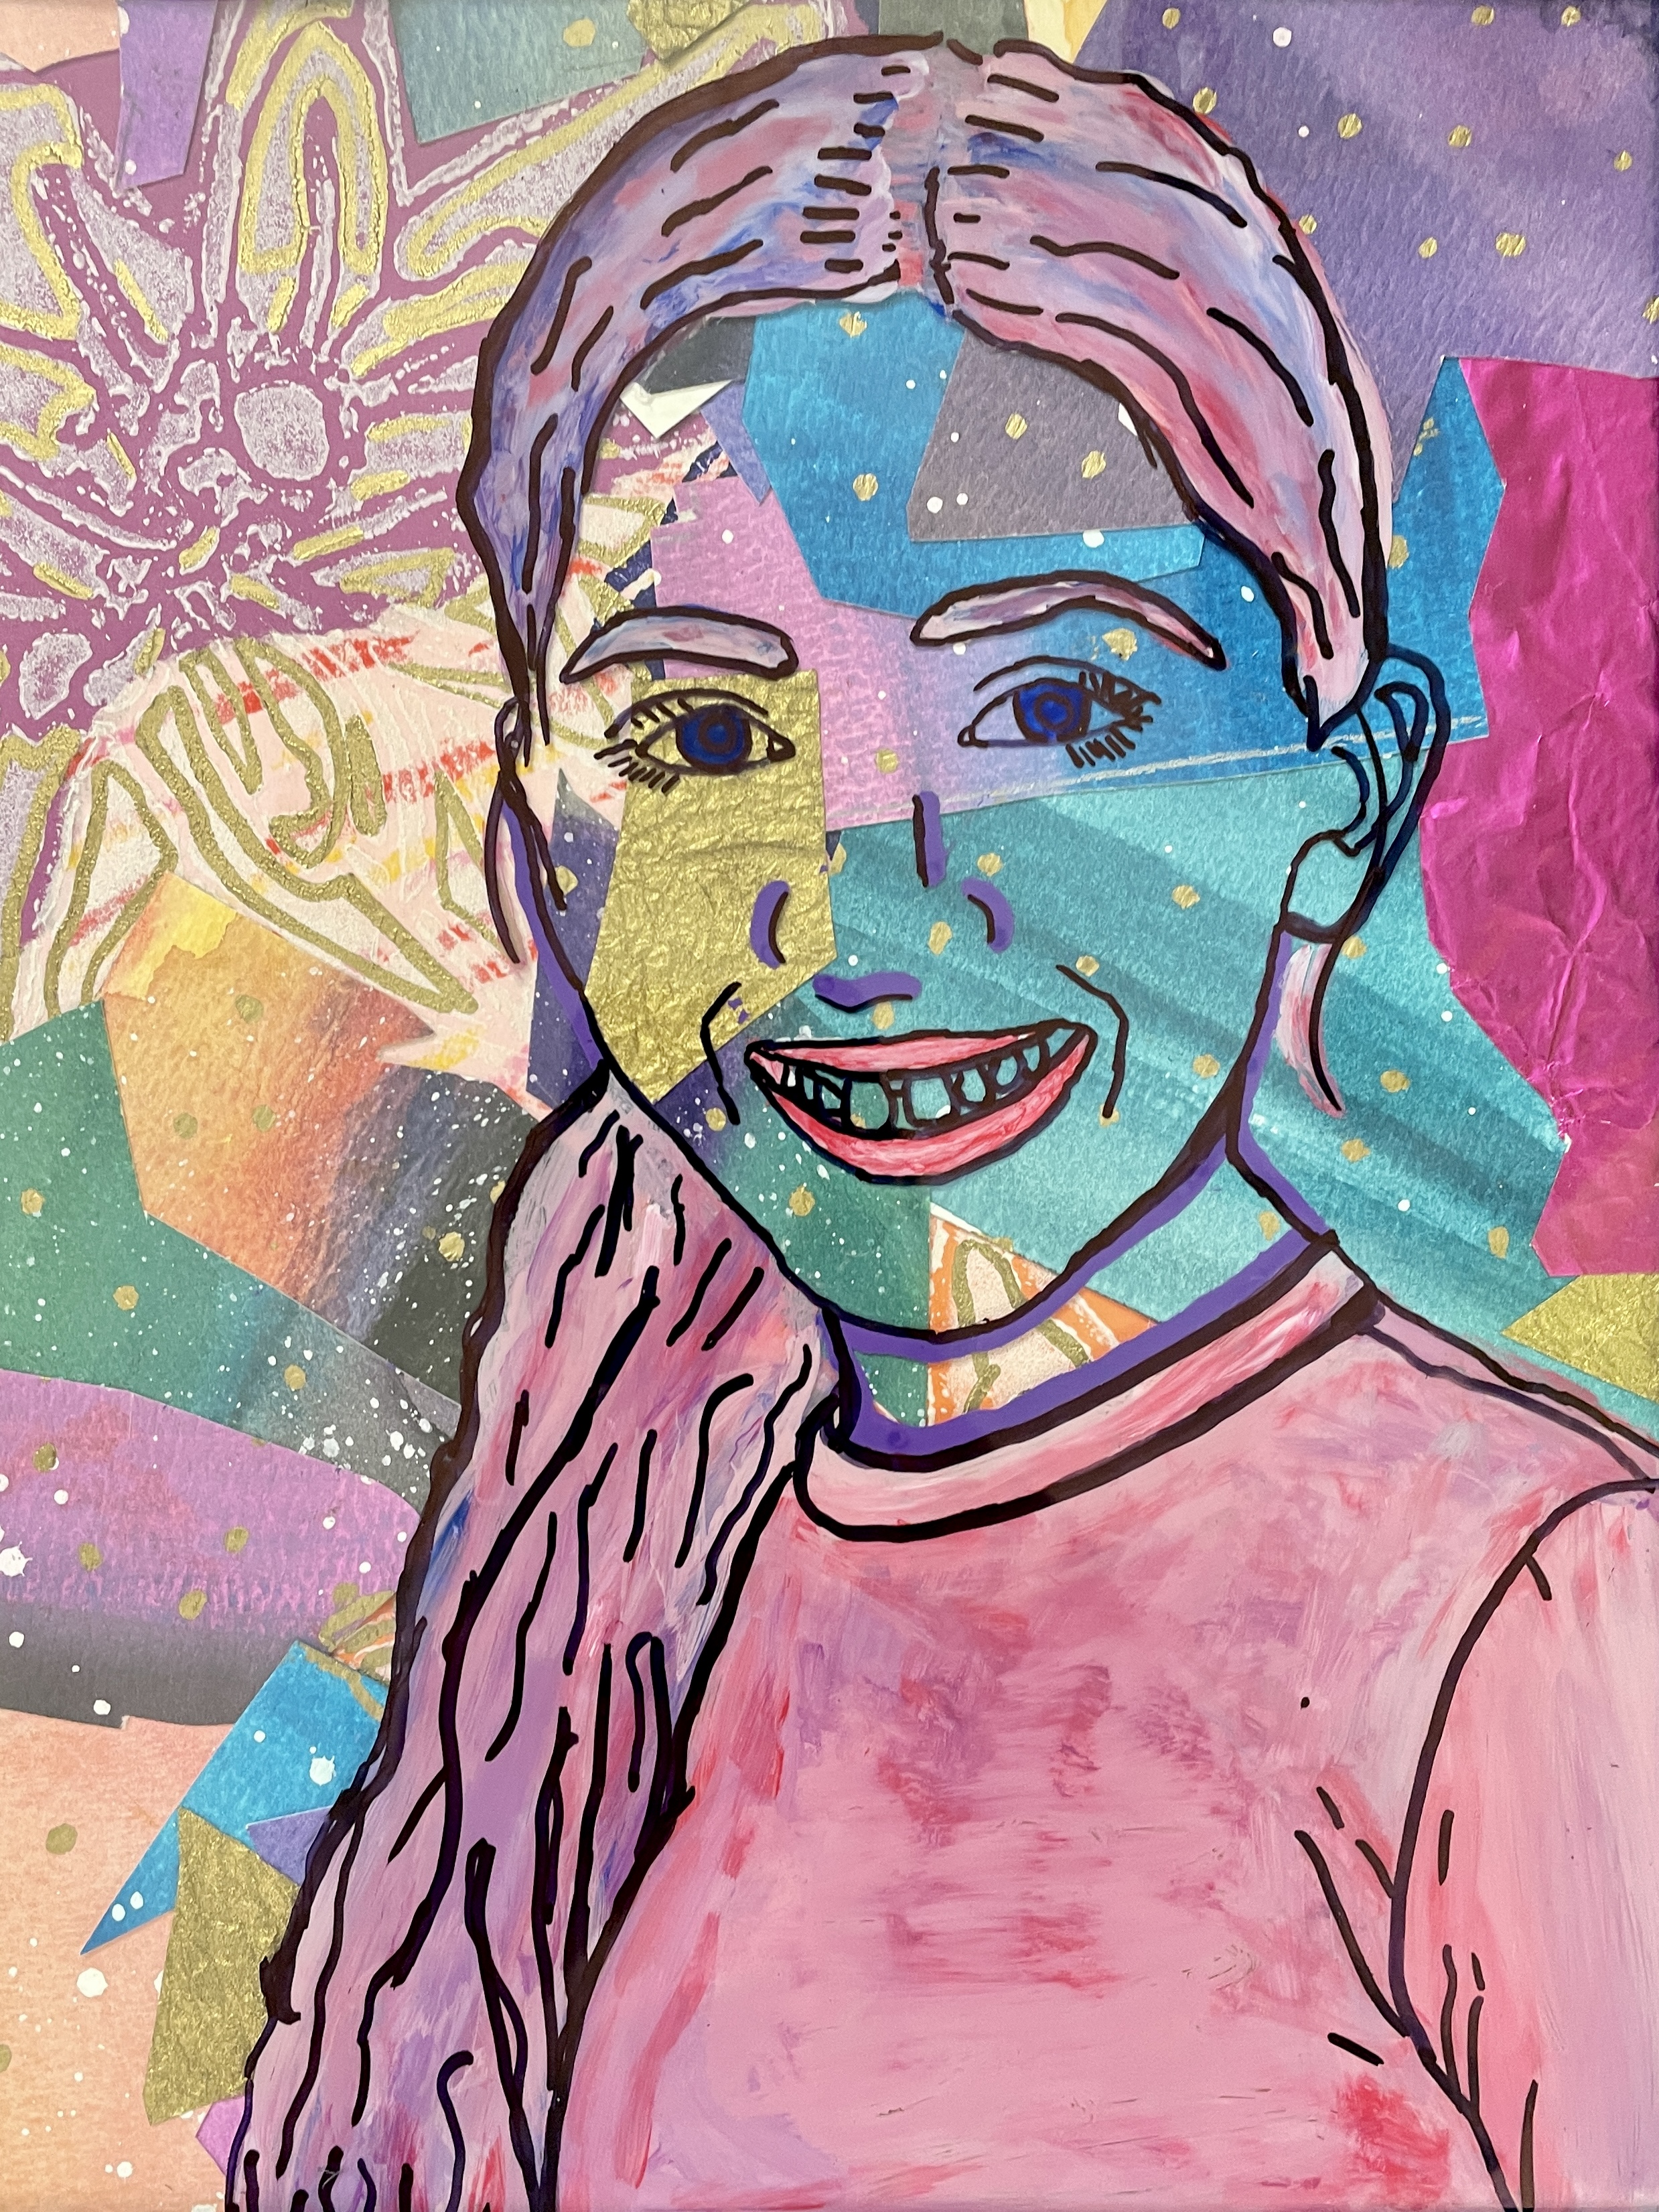
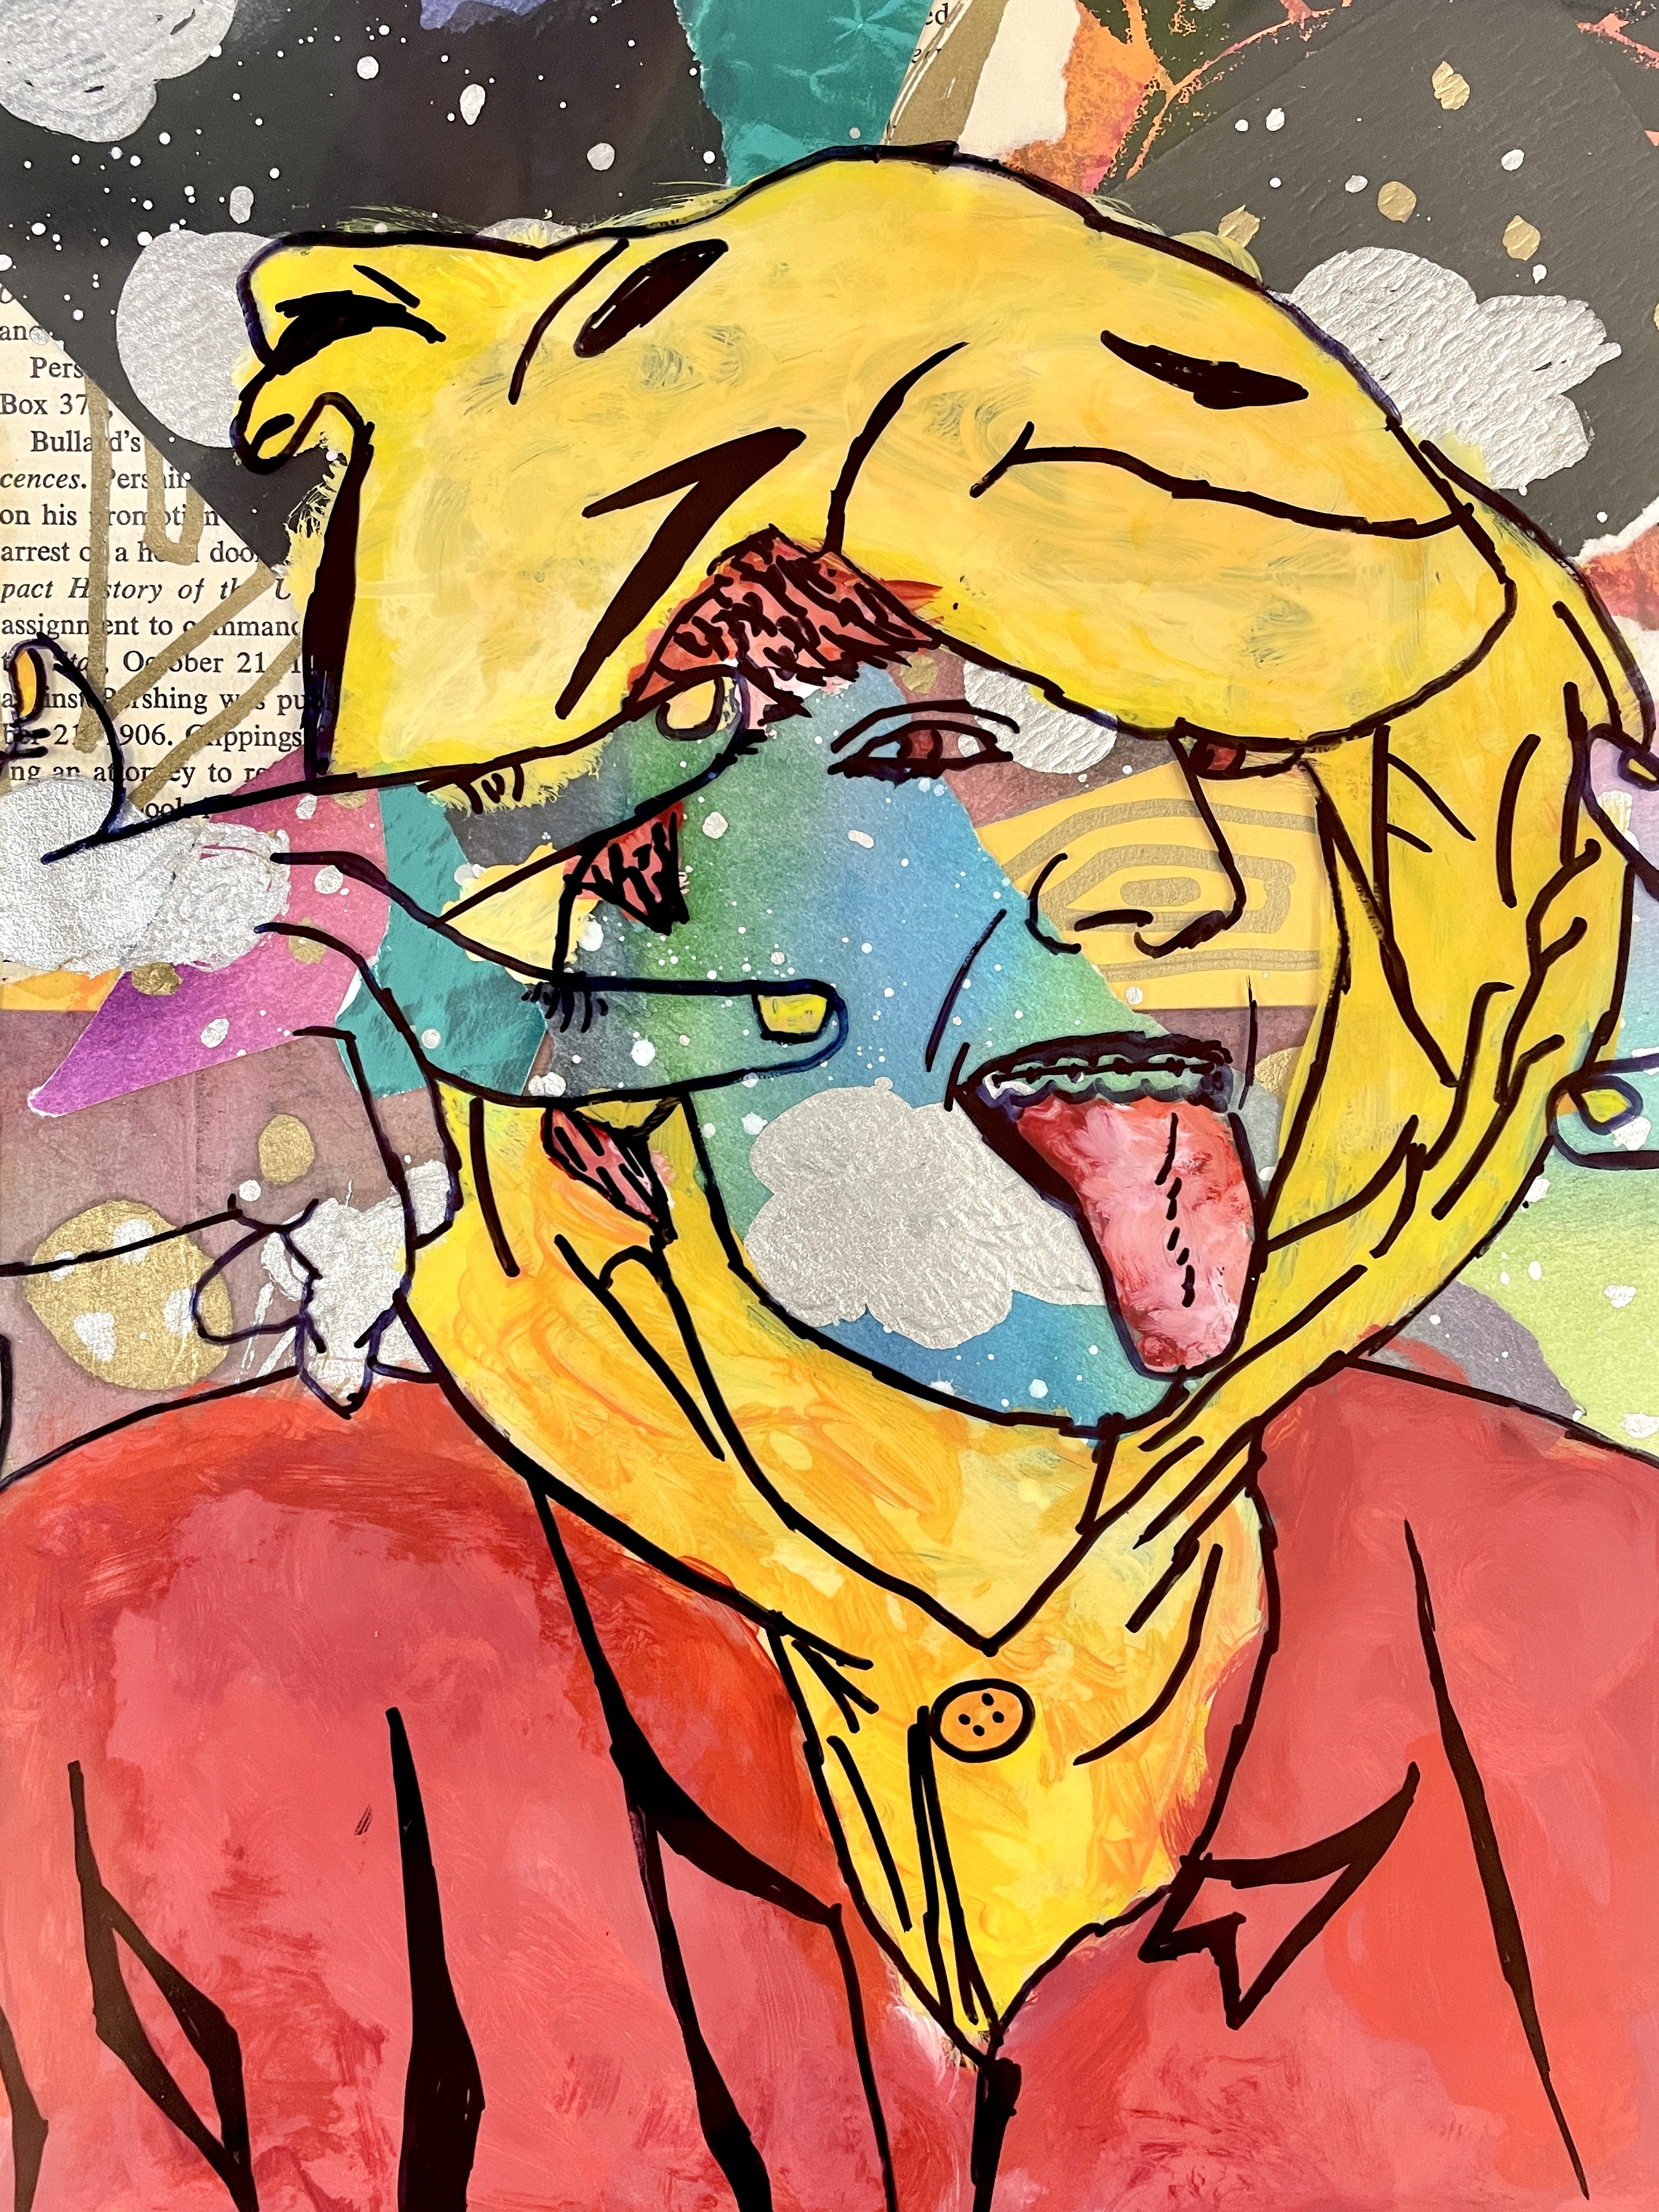
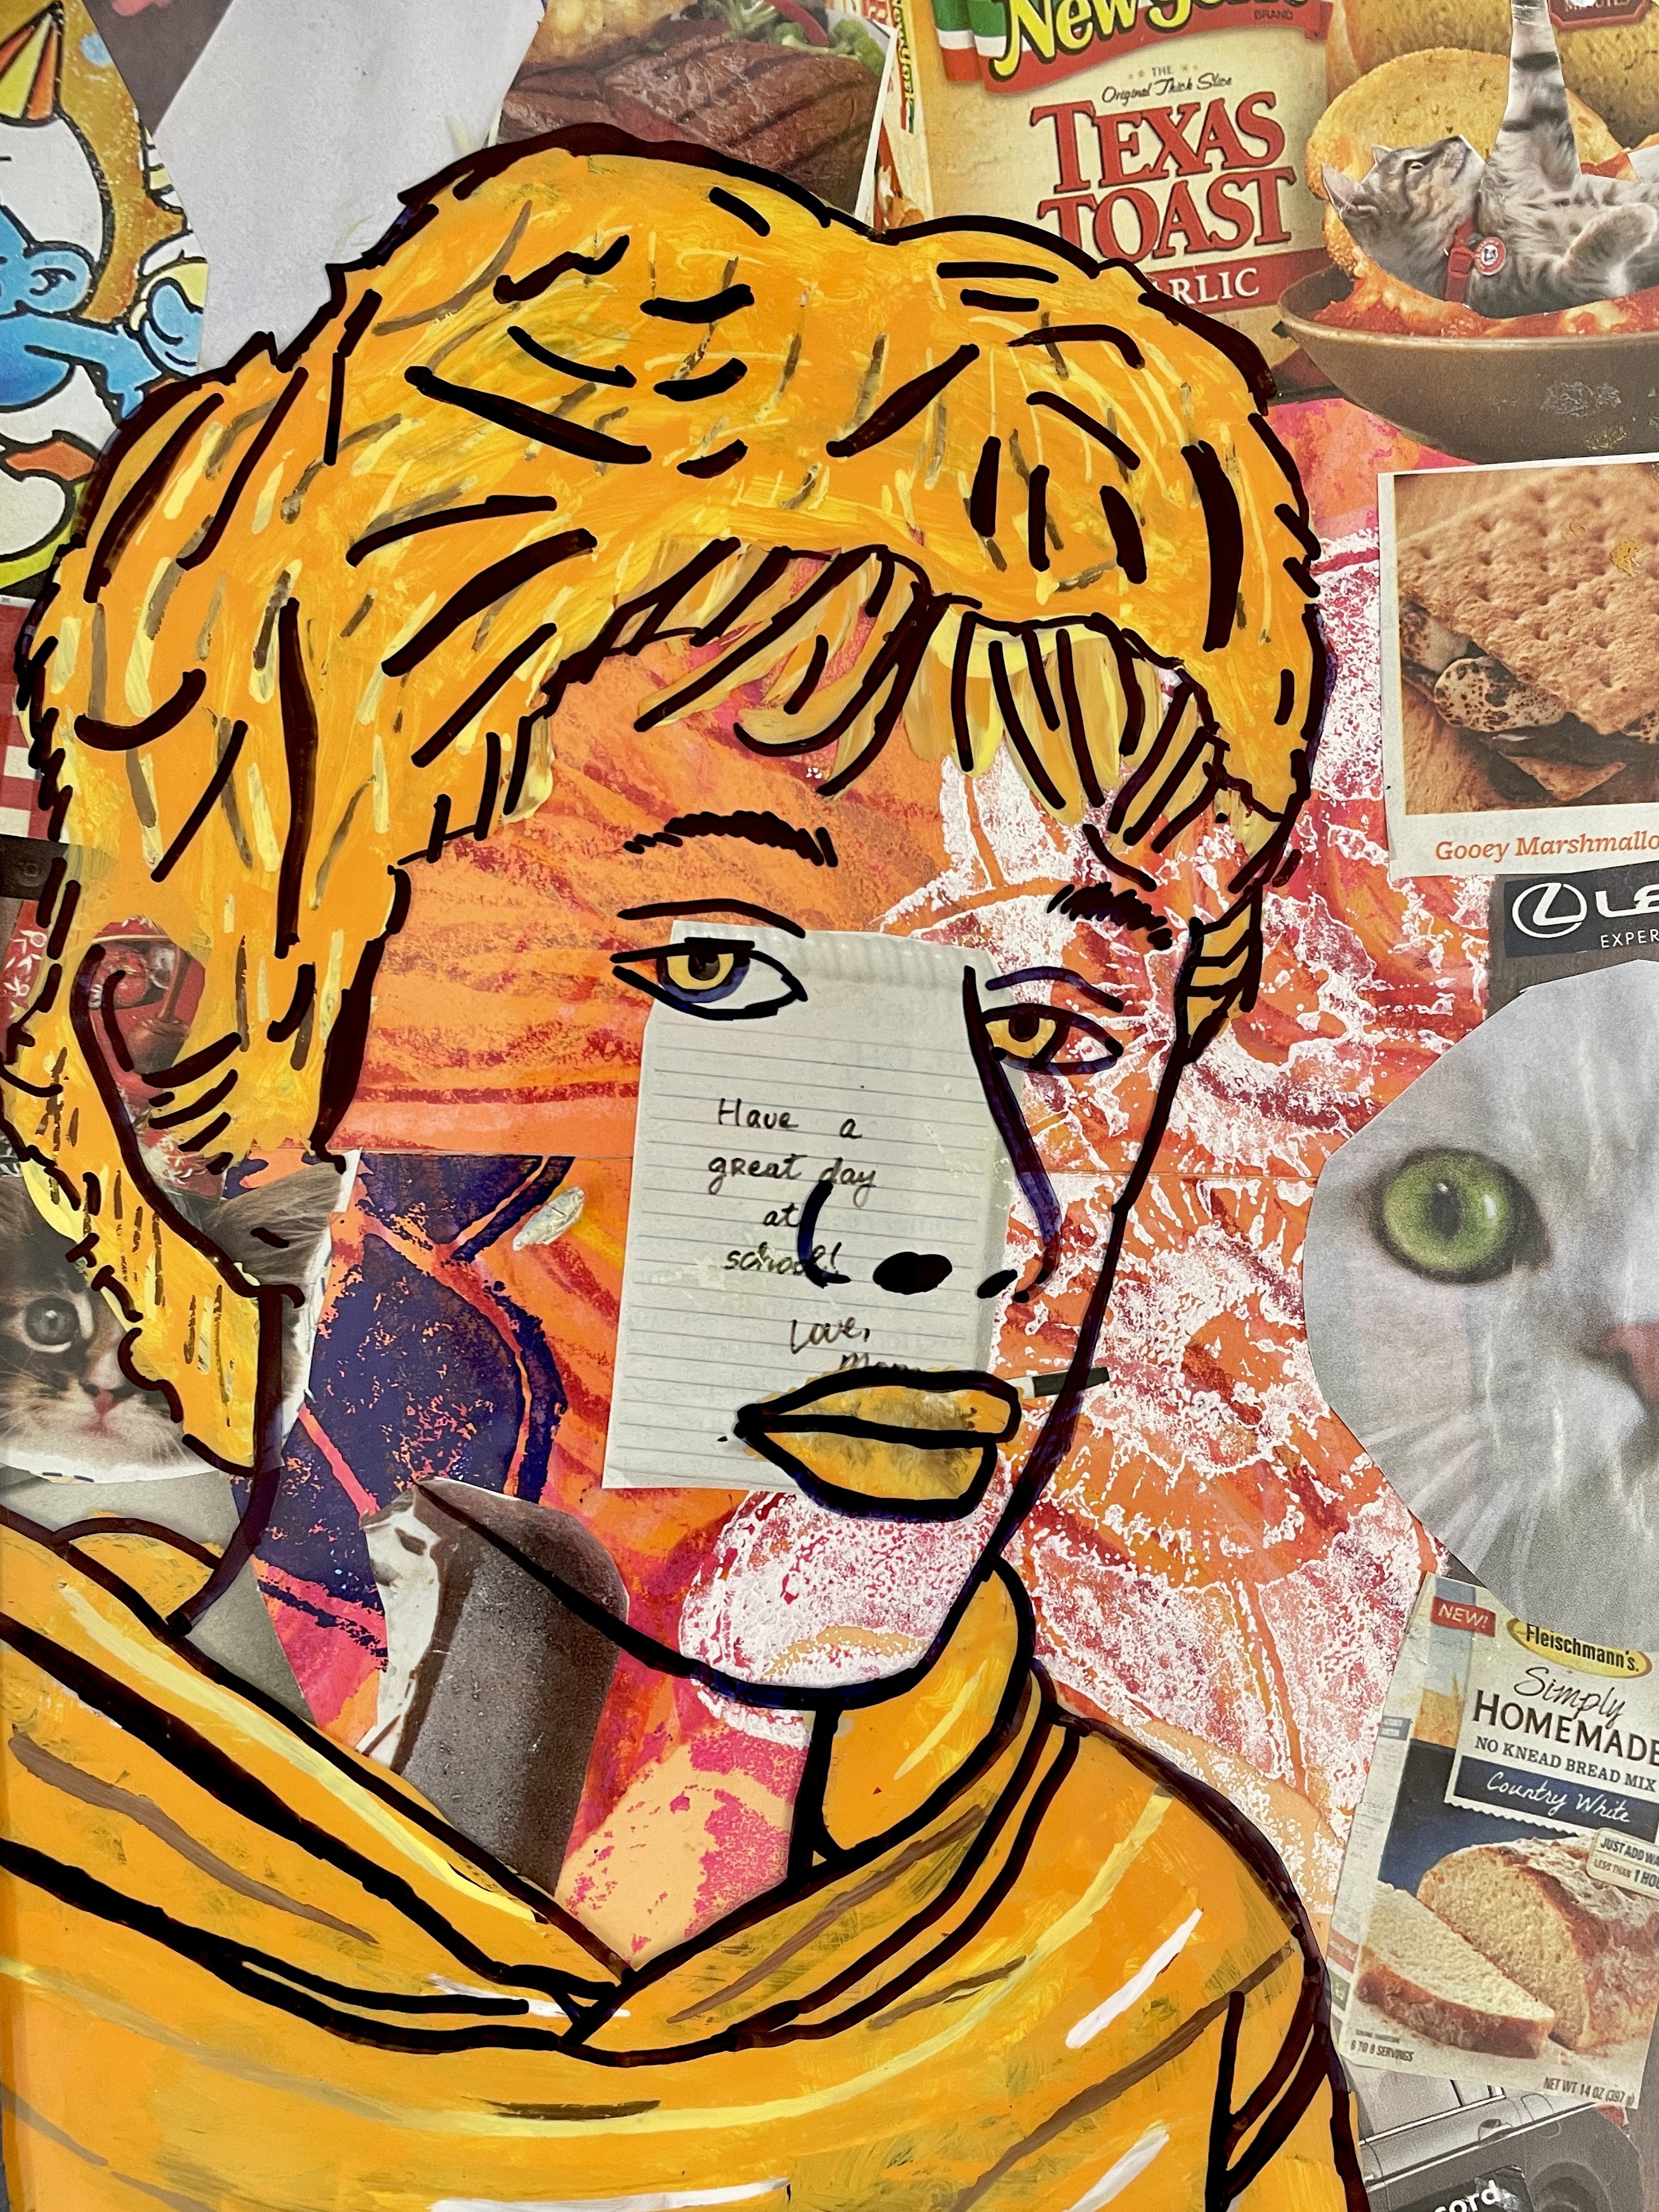
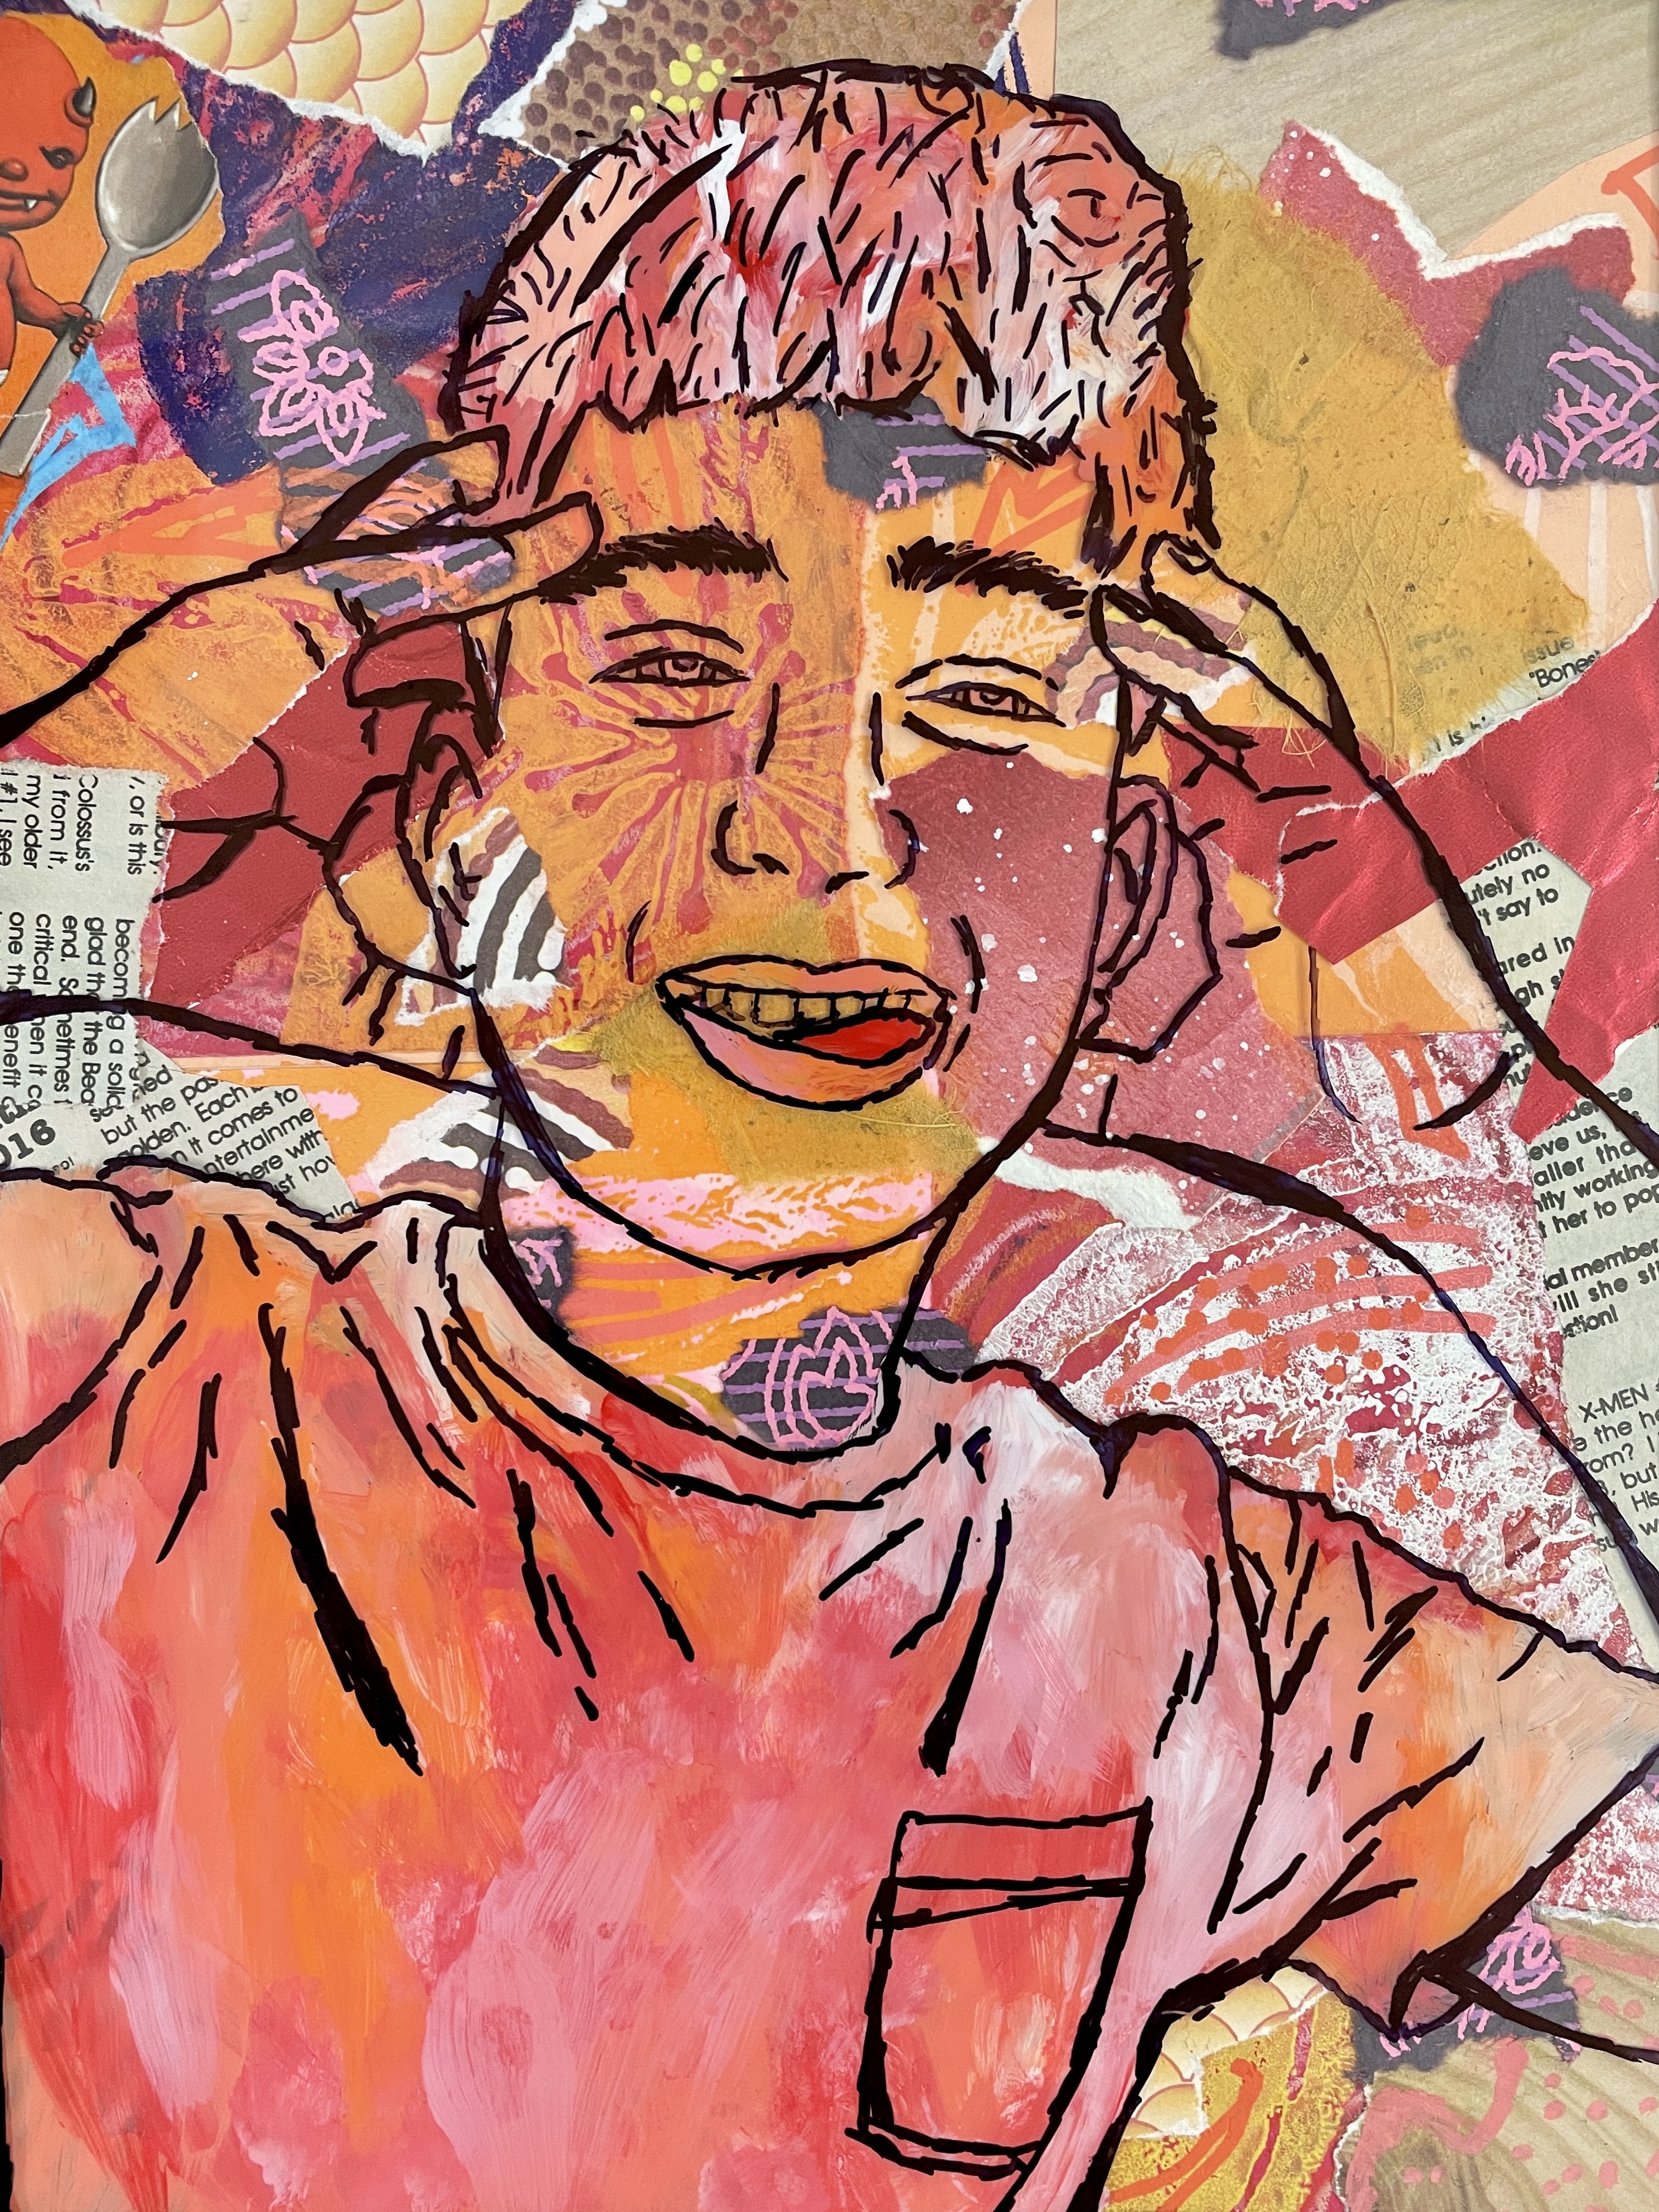
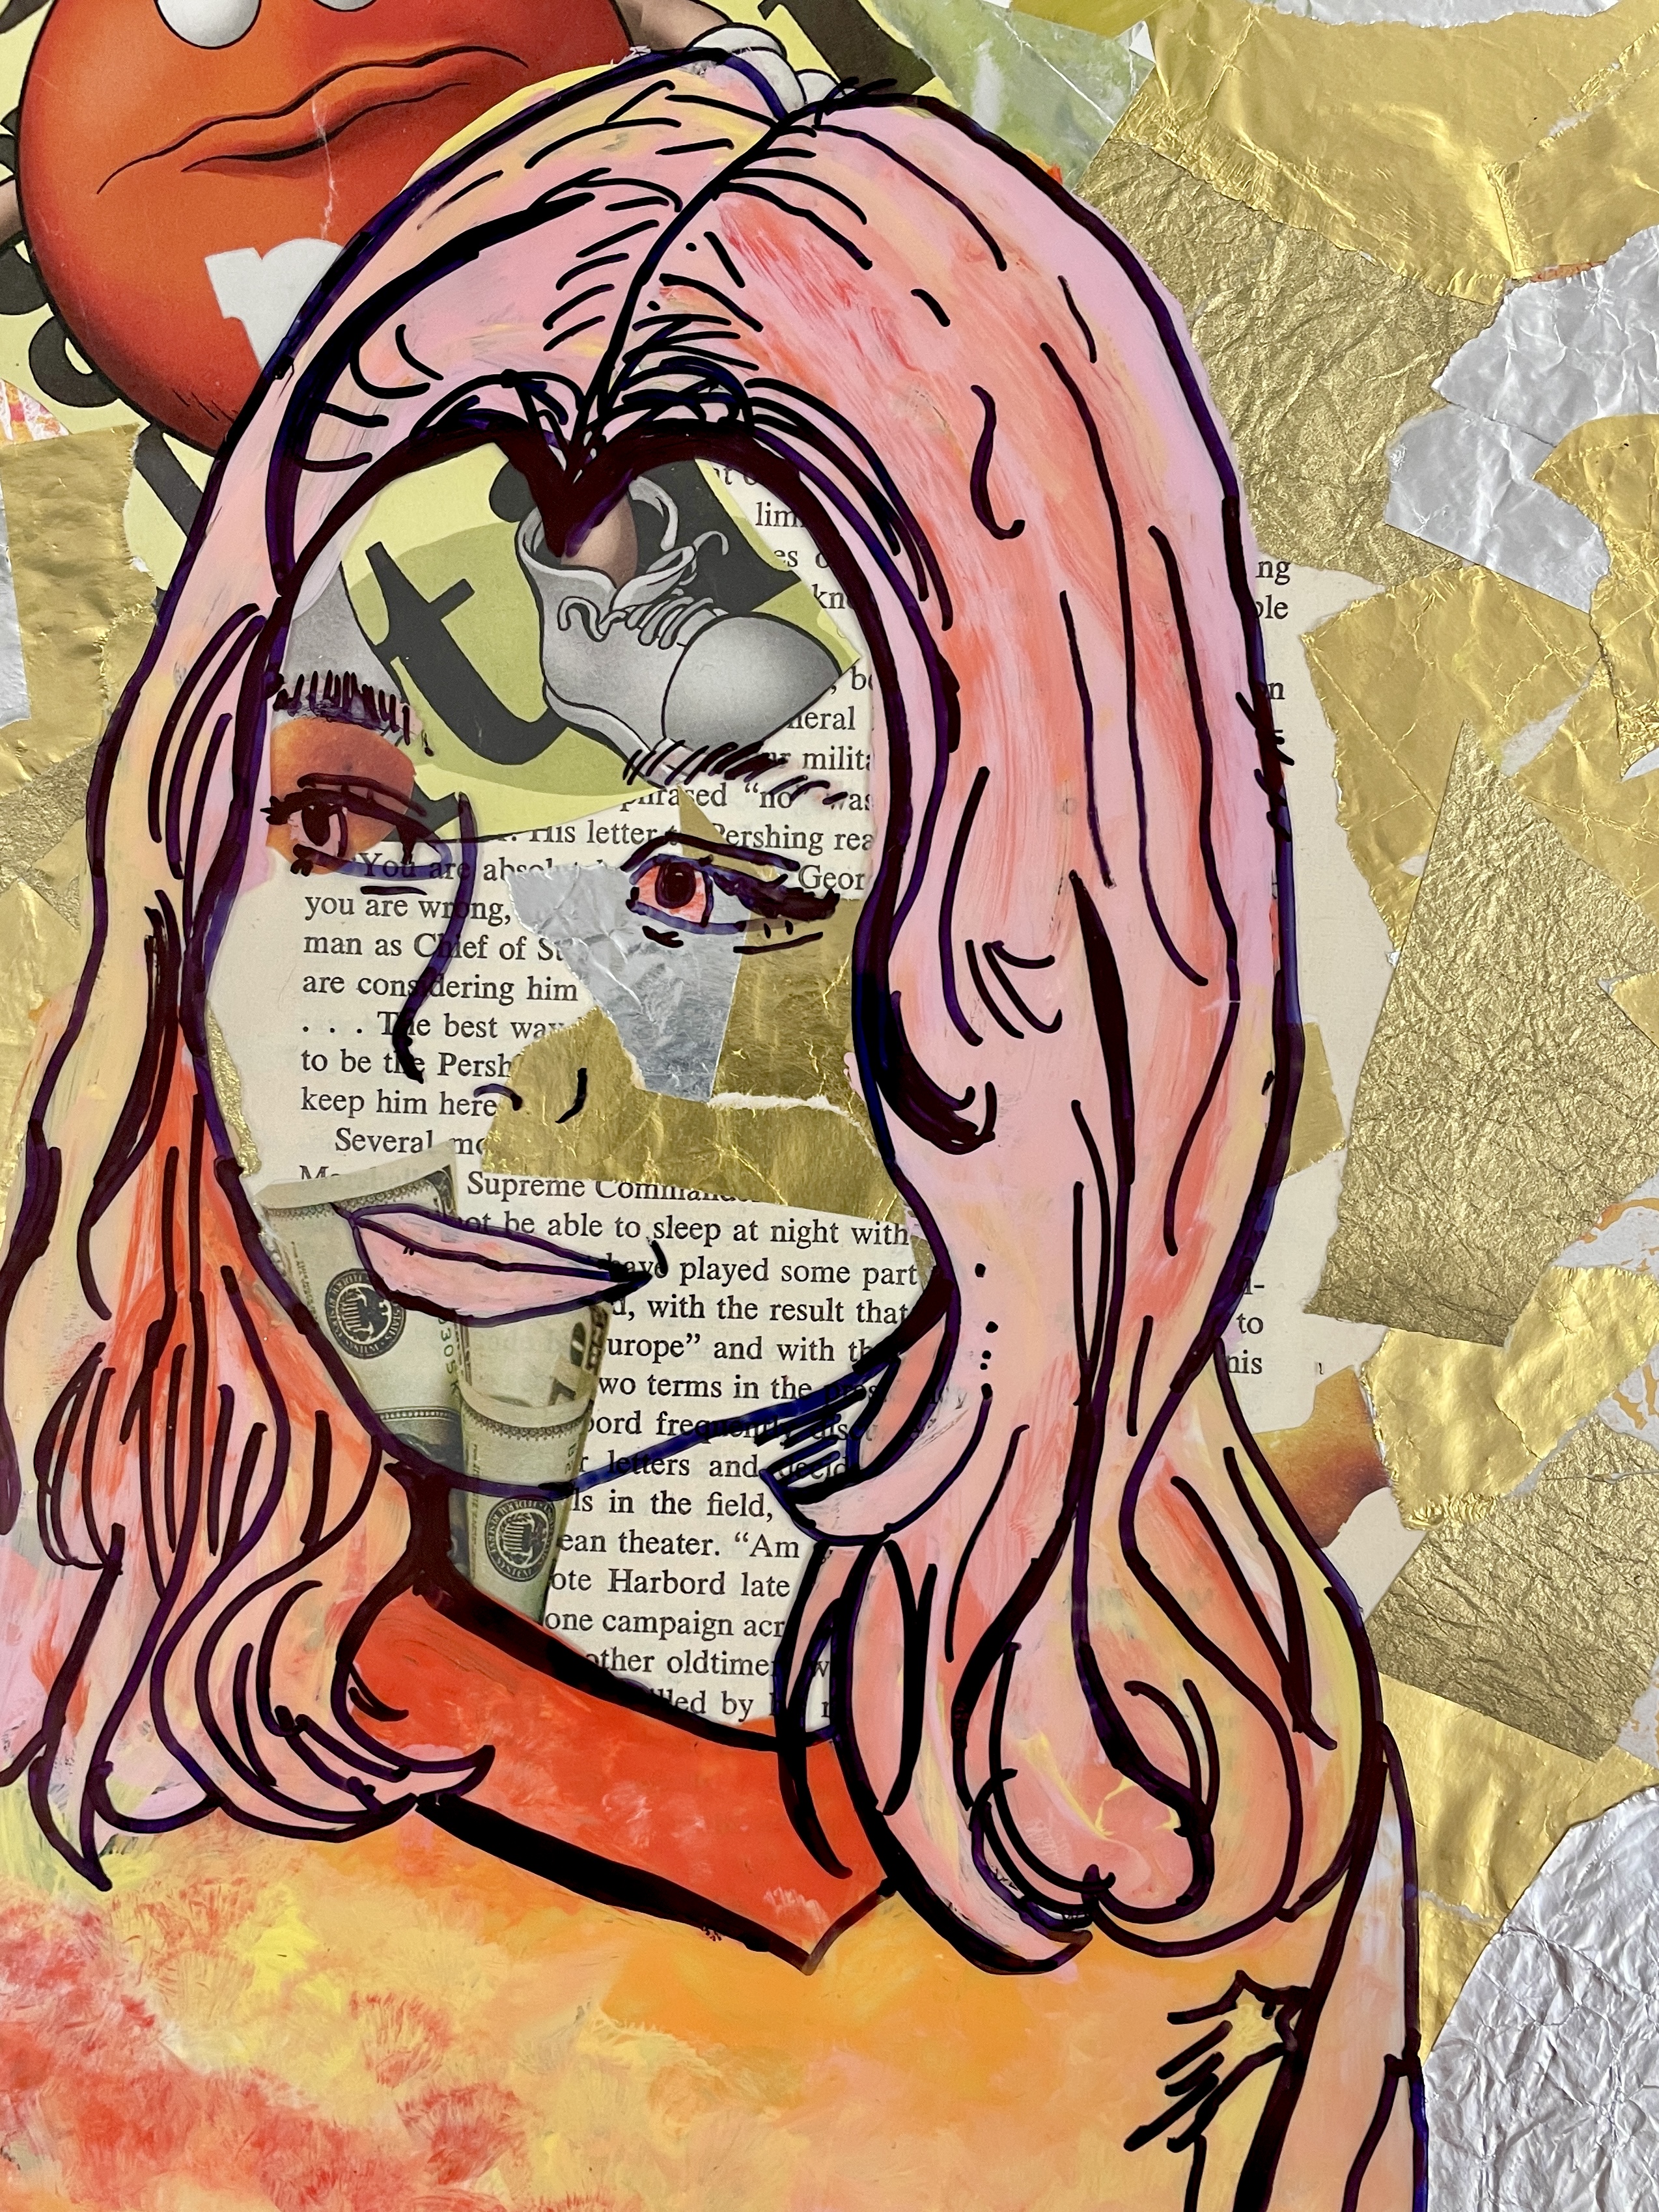
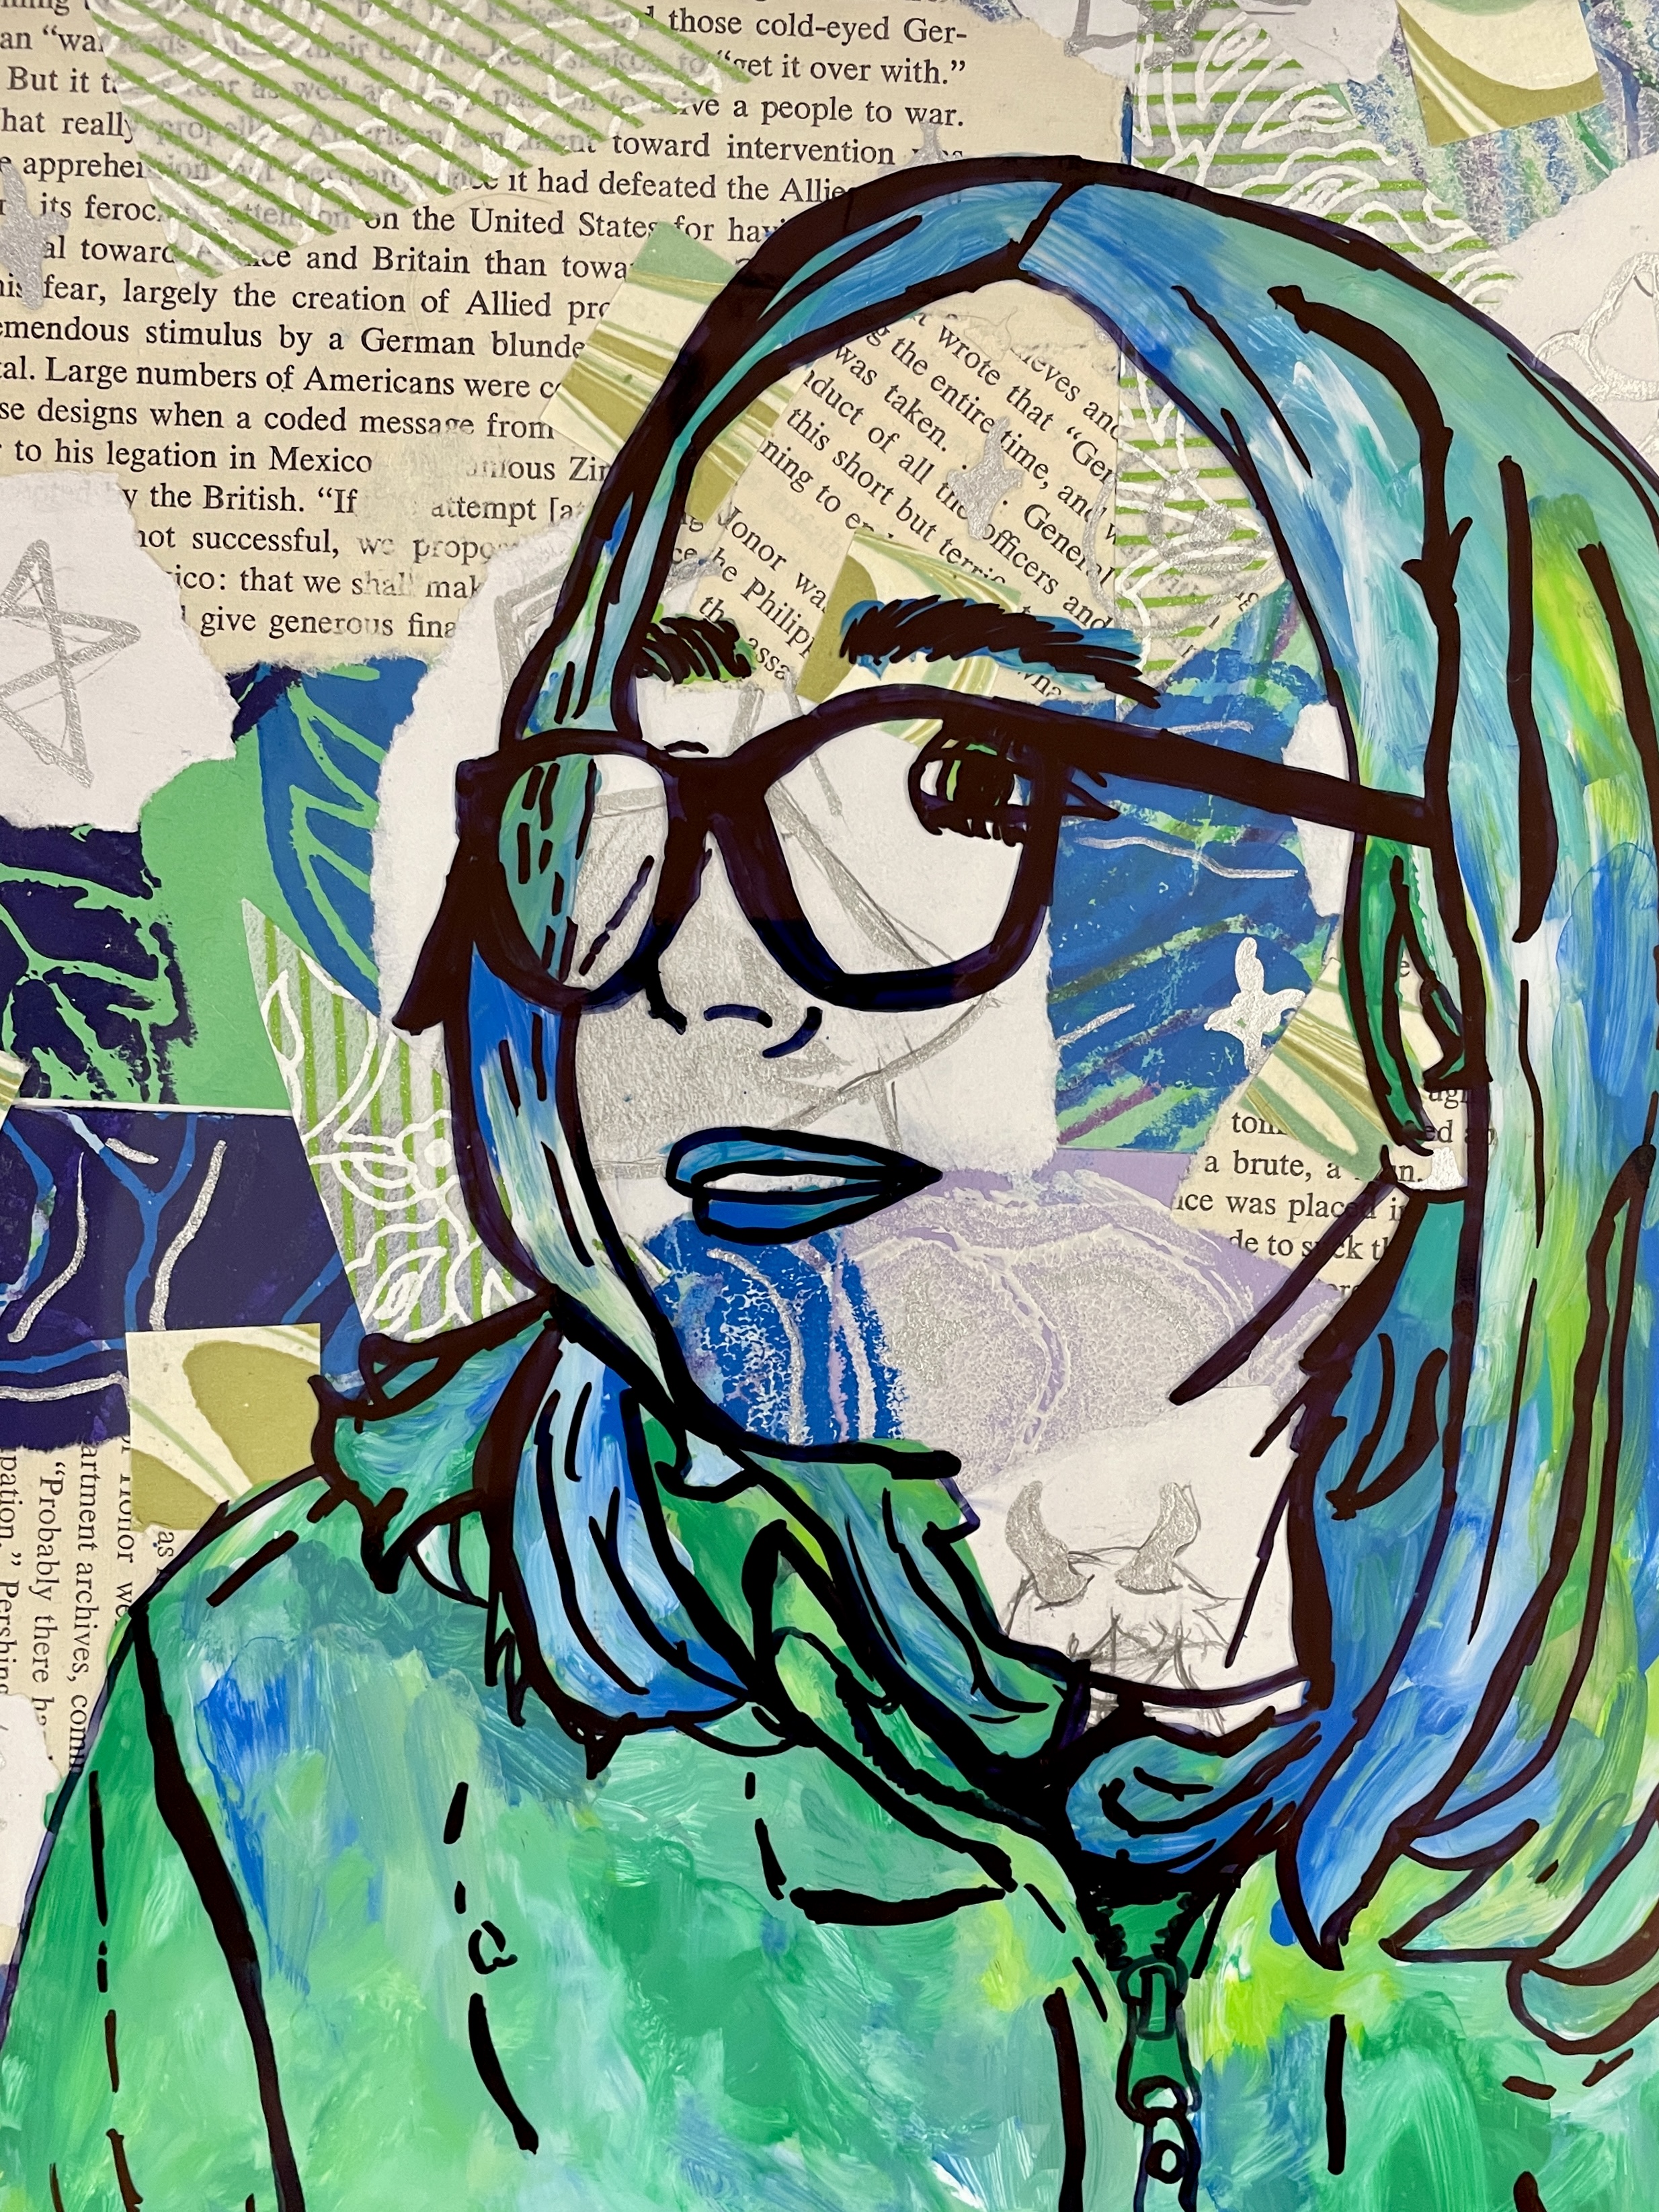
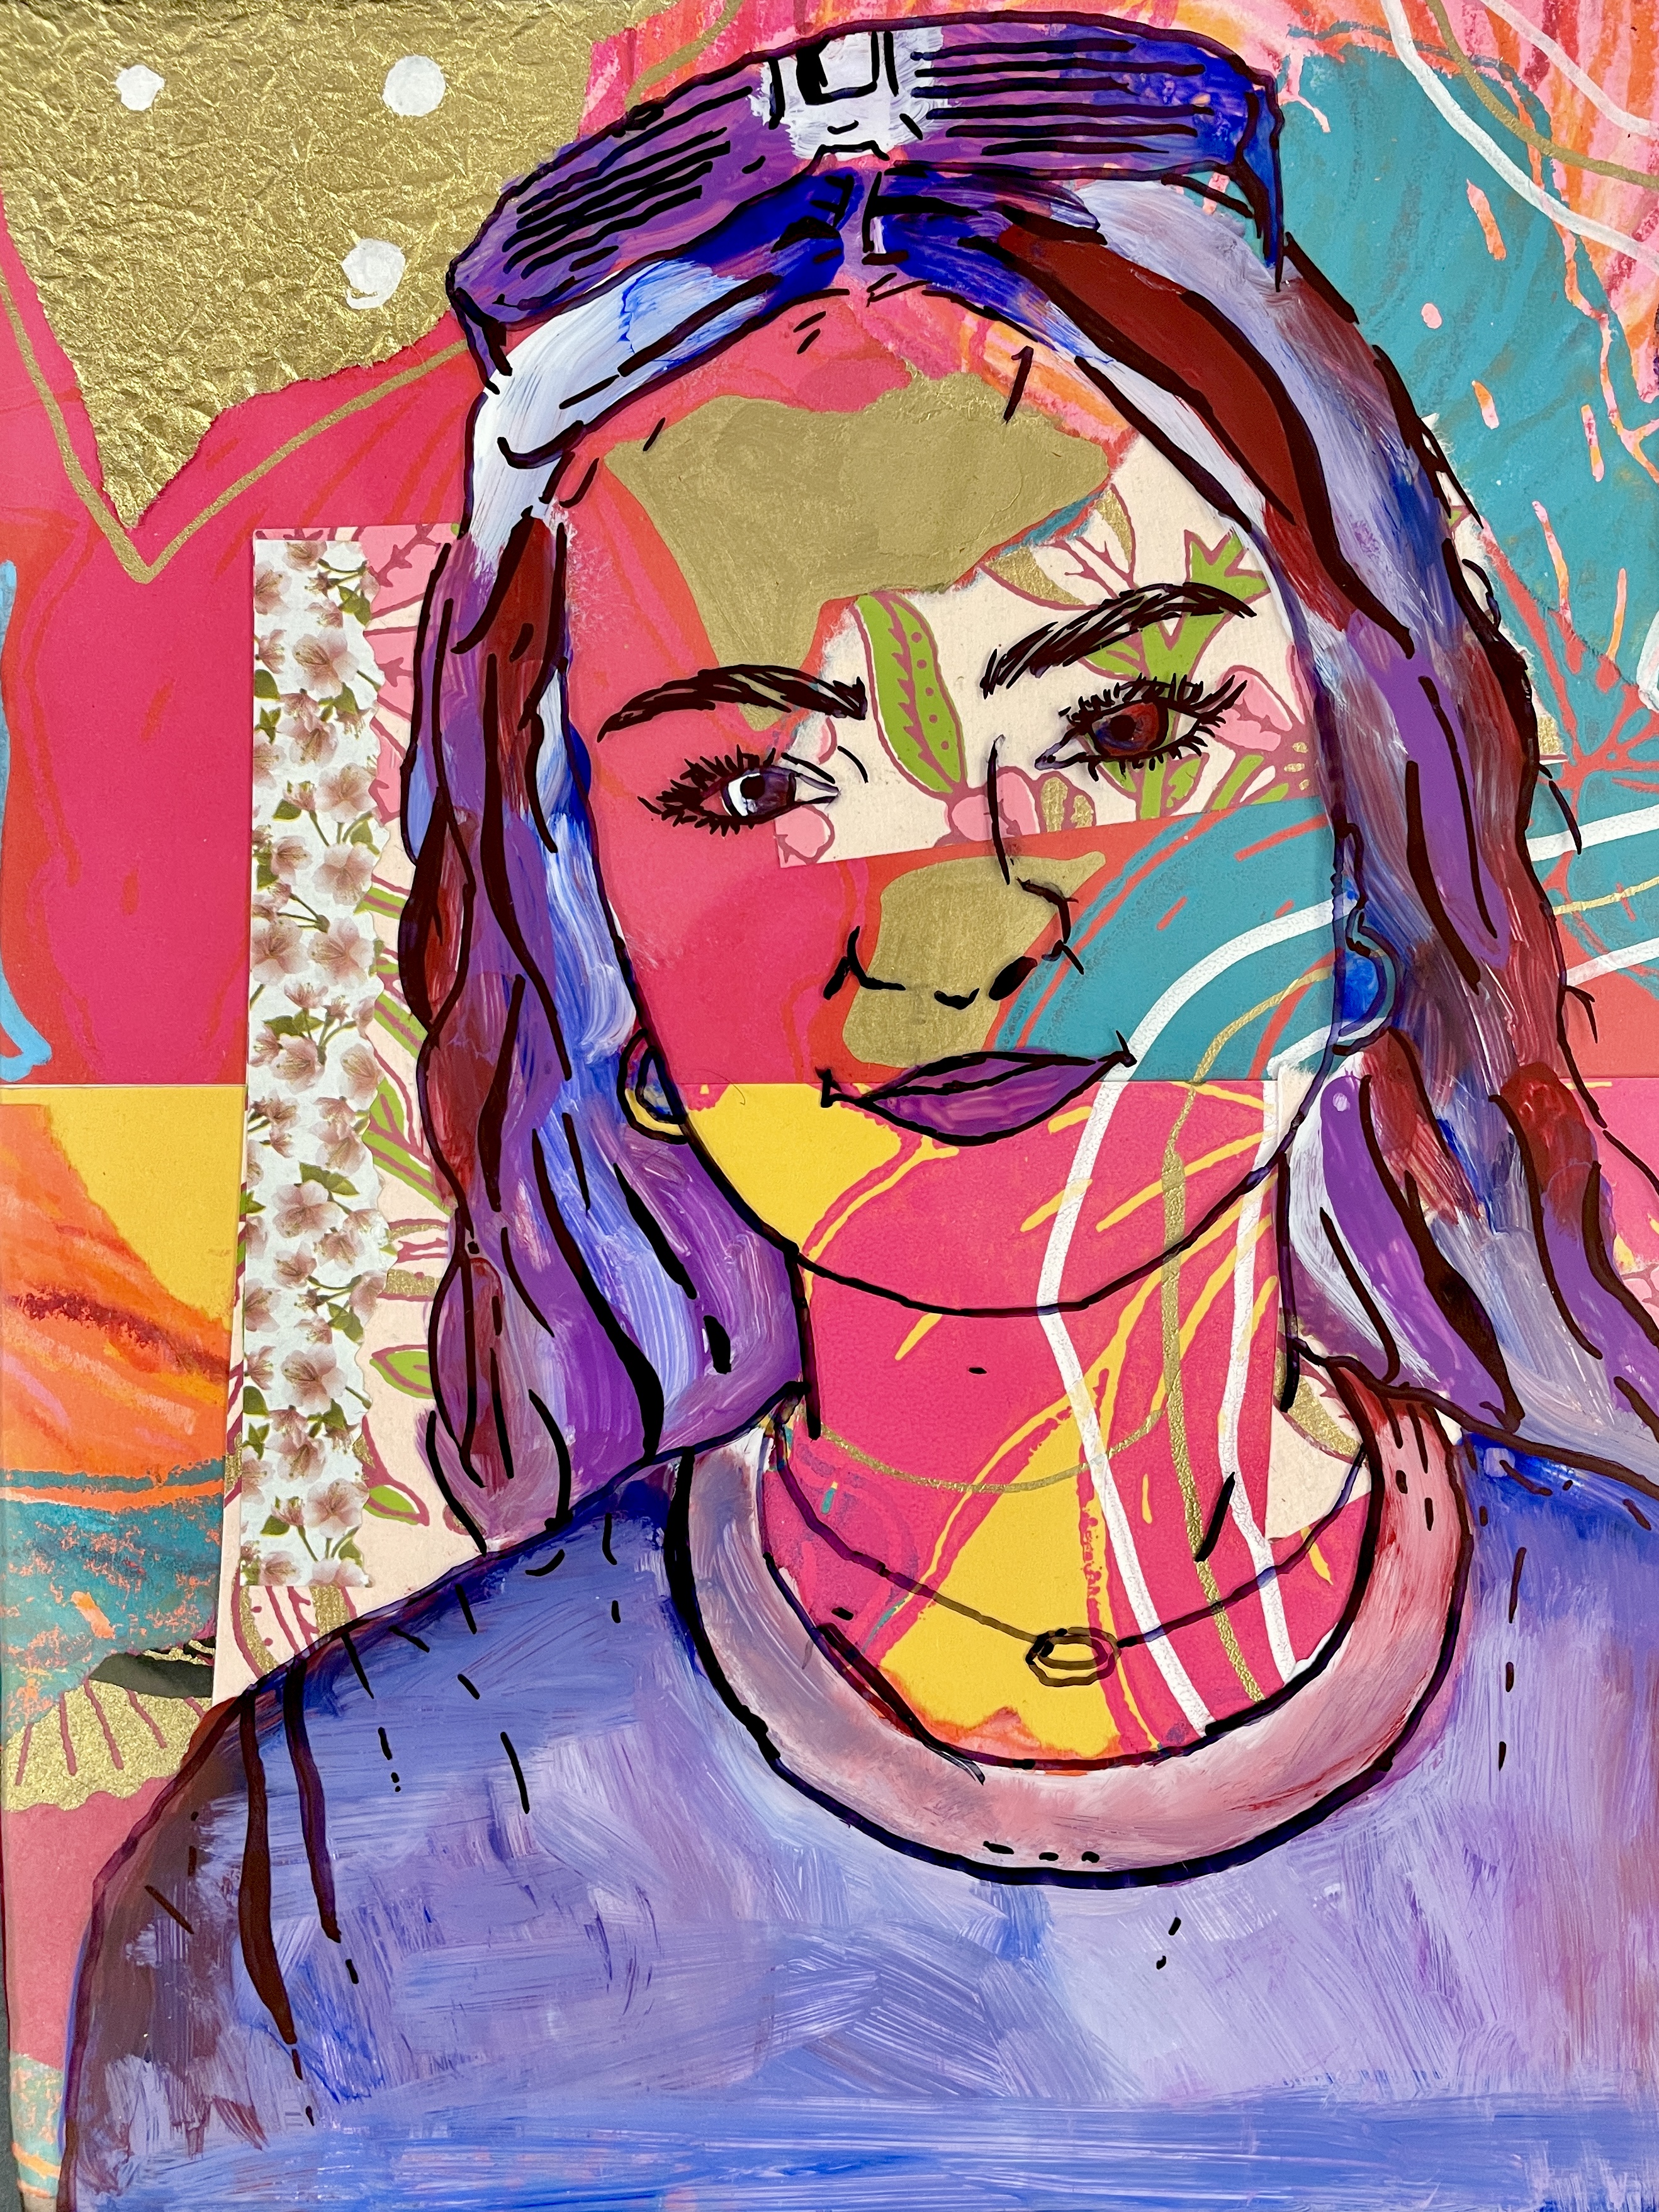
Whew! Not done yet! Just did this lesson again, this time using original collages as the background! Students had recently completed an extensive printmaking project and used leftover prints as the basis for their collage. In some cases, they completely covered their original prints, and in others, allowed portions of the prints to be visible. I provided various patterned and textured papers as fodder for these collages, as well as old comic books, magazines, and books. I Love the layered look on these!