Radial Symmetry Prints on Oil Pastel


Radial Symmetry is a uniquely satisfying project theme for middle schoolers. Even the most basic of designs gets repeated in a way that yields eye-catching results. Here is my take on a printed version using foam printing plates— very easily incised with a ball point pen— and a blended oil pastel background. To increase the “Wow” factor, I also gave my students the option of cutting away elements of their printing plate, which allowed more of the colored paper base to show. We printed with Speedball Brand water-based printing ink, which cleans easily with just warm water.
You can access my INSTRUCTION PACKET if you’d like to try this with your own students, or read on to see some in-process pictures of all the steps of this lesson. Make sure to check out the Bonus Project options at the bottom of this post— great for your early finishers or your super stars!
– – –
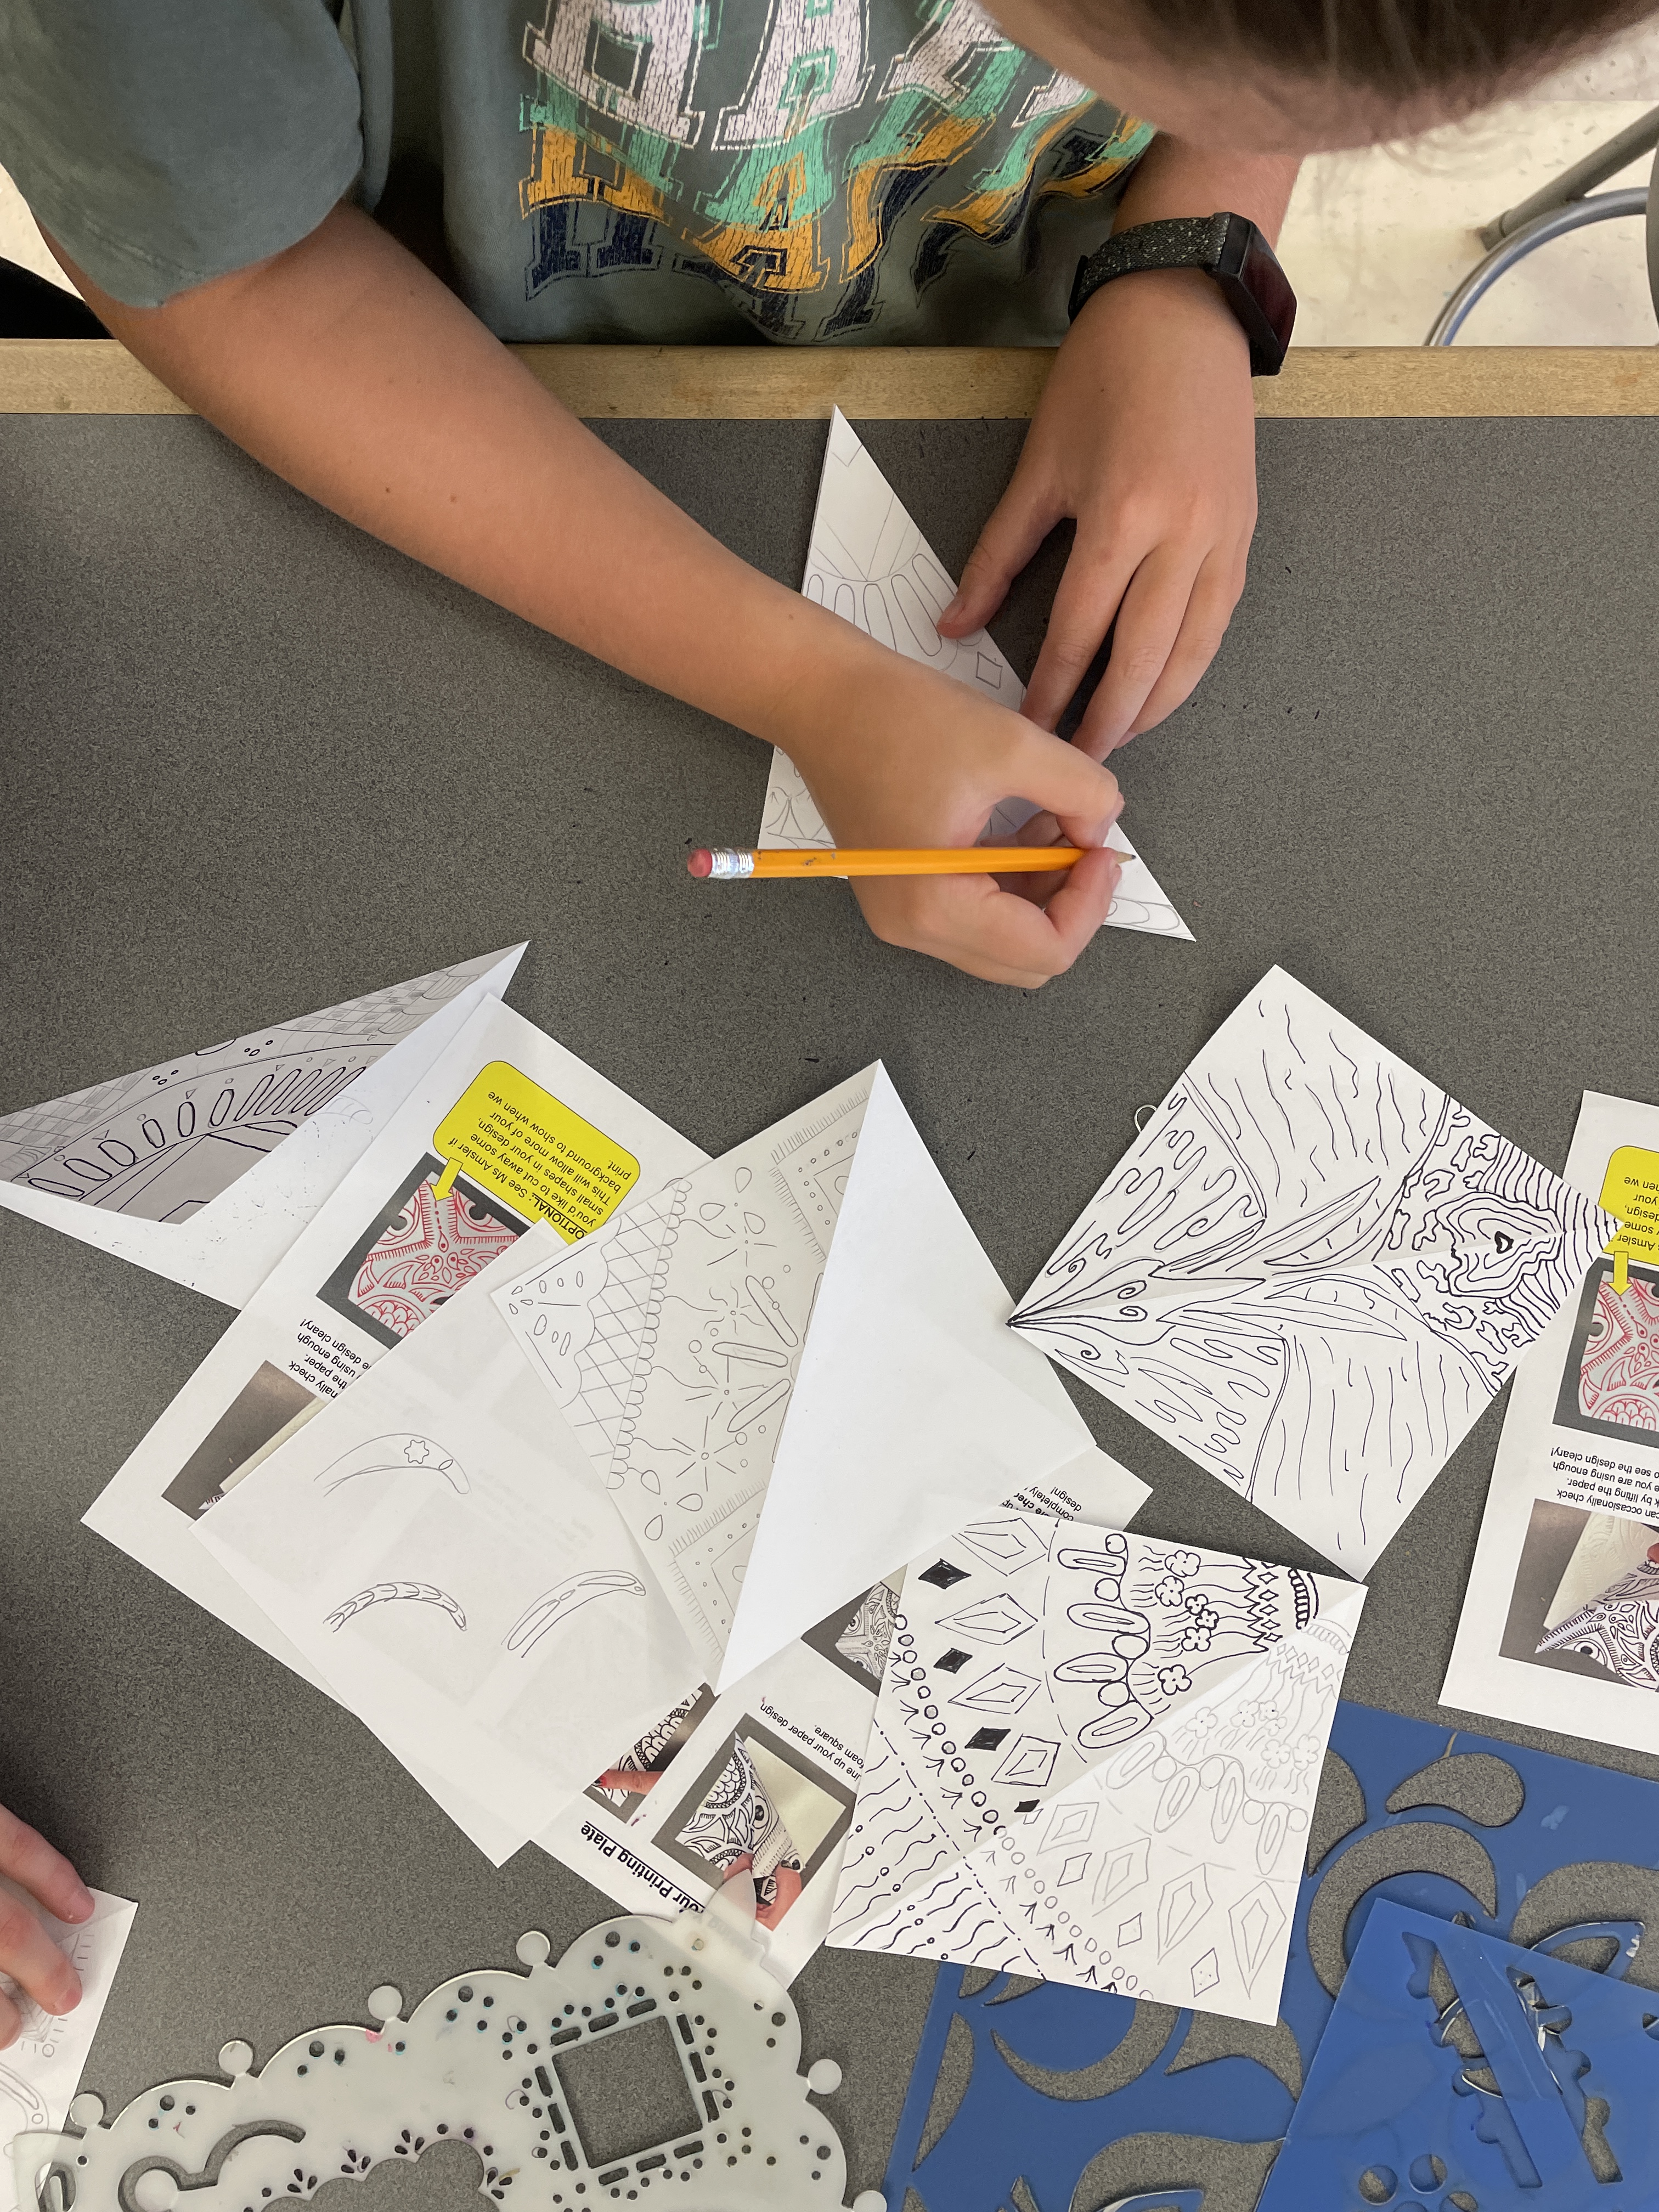
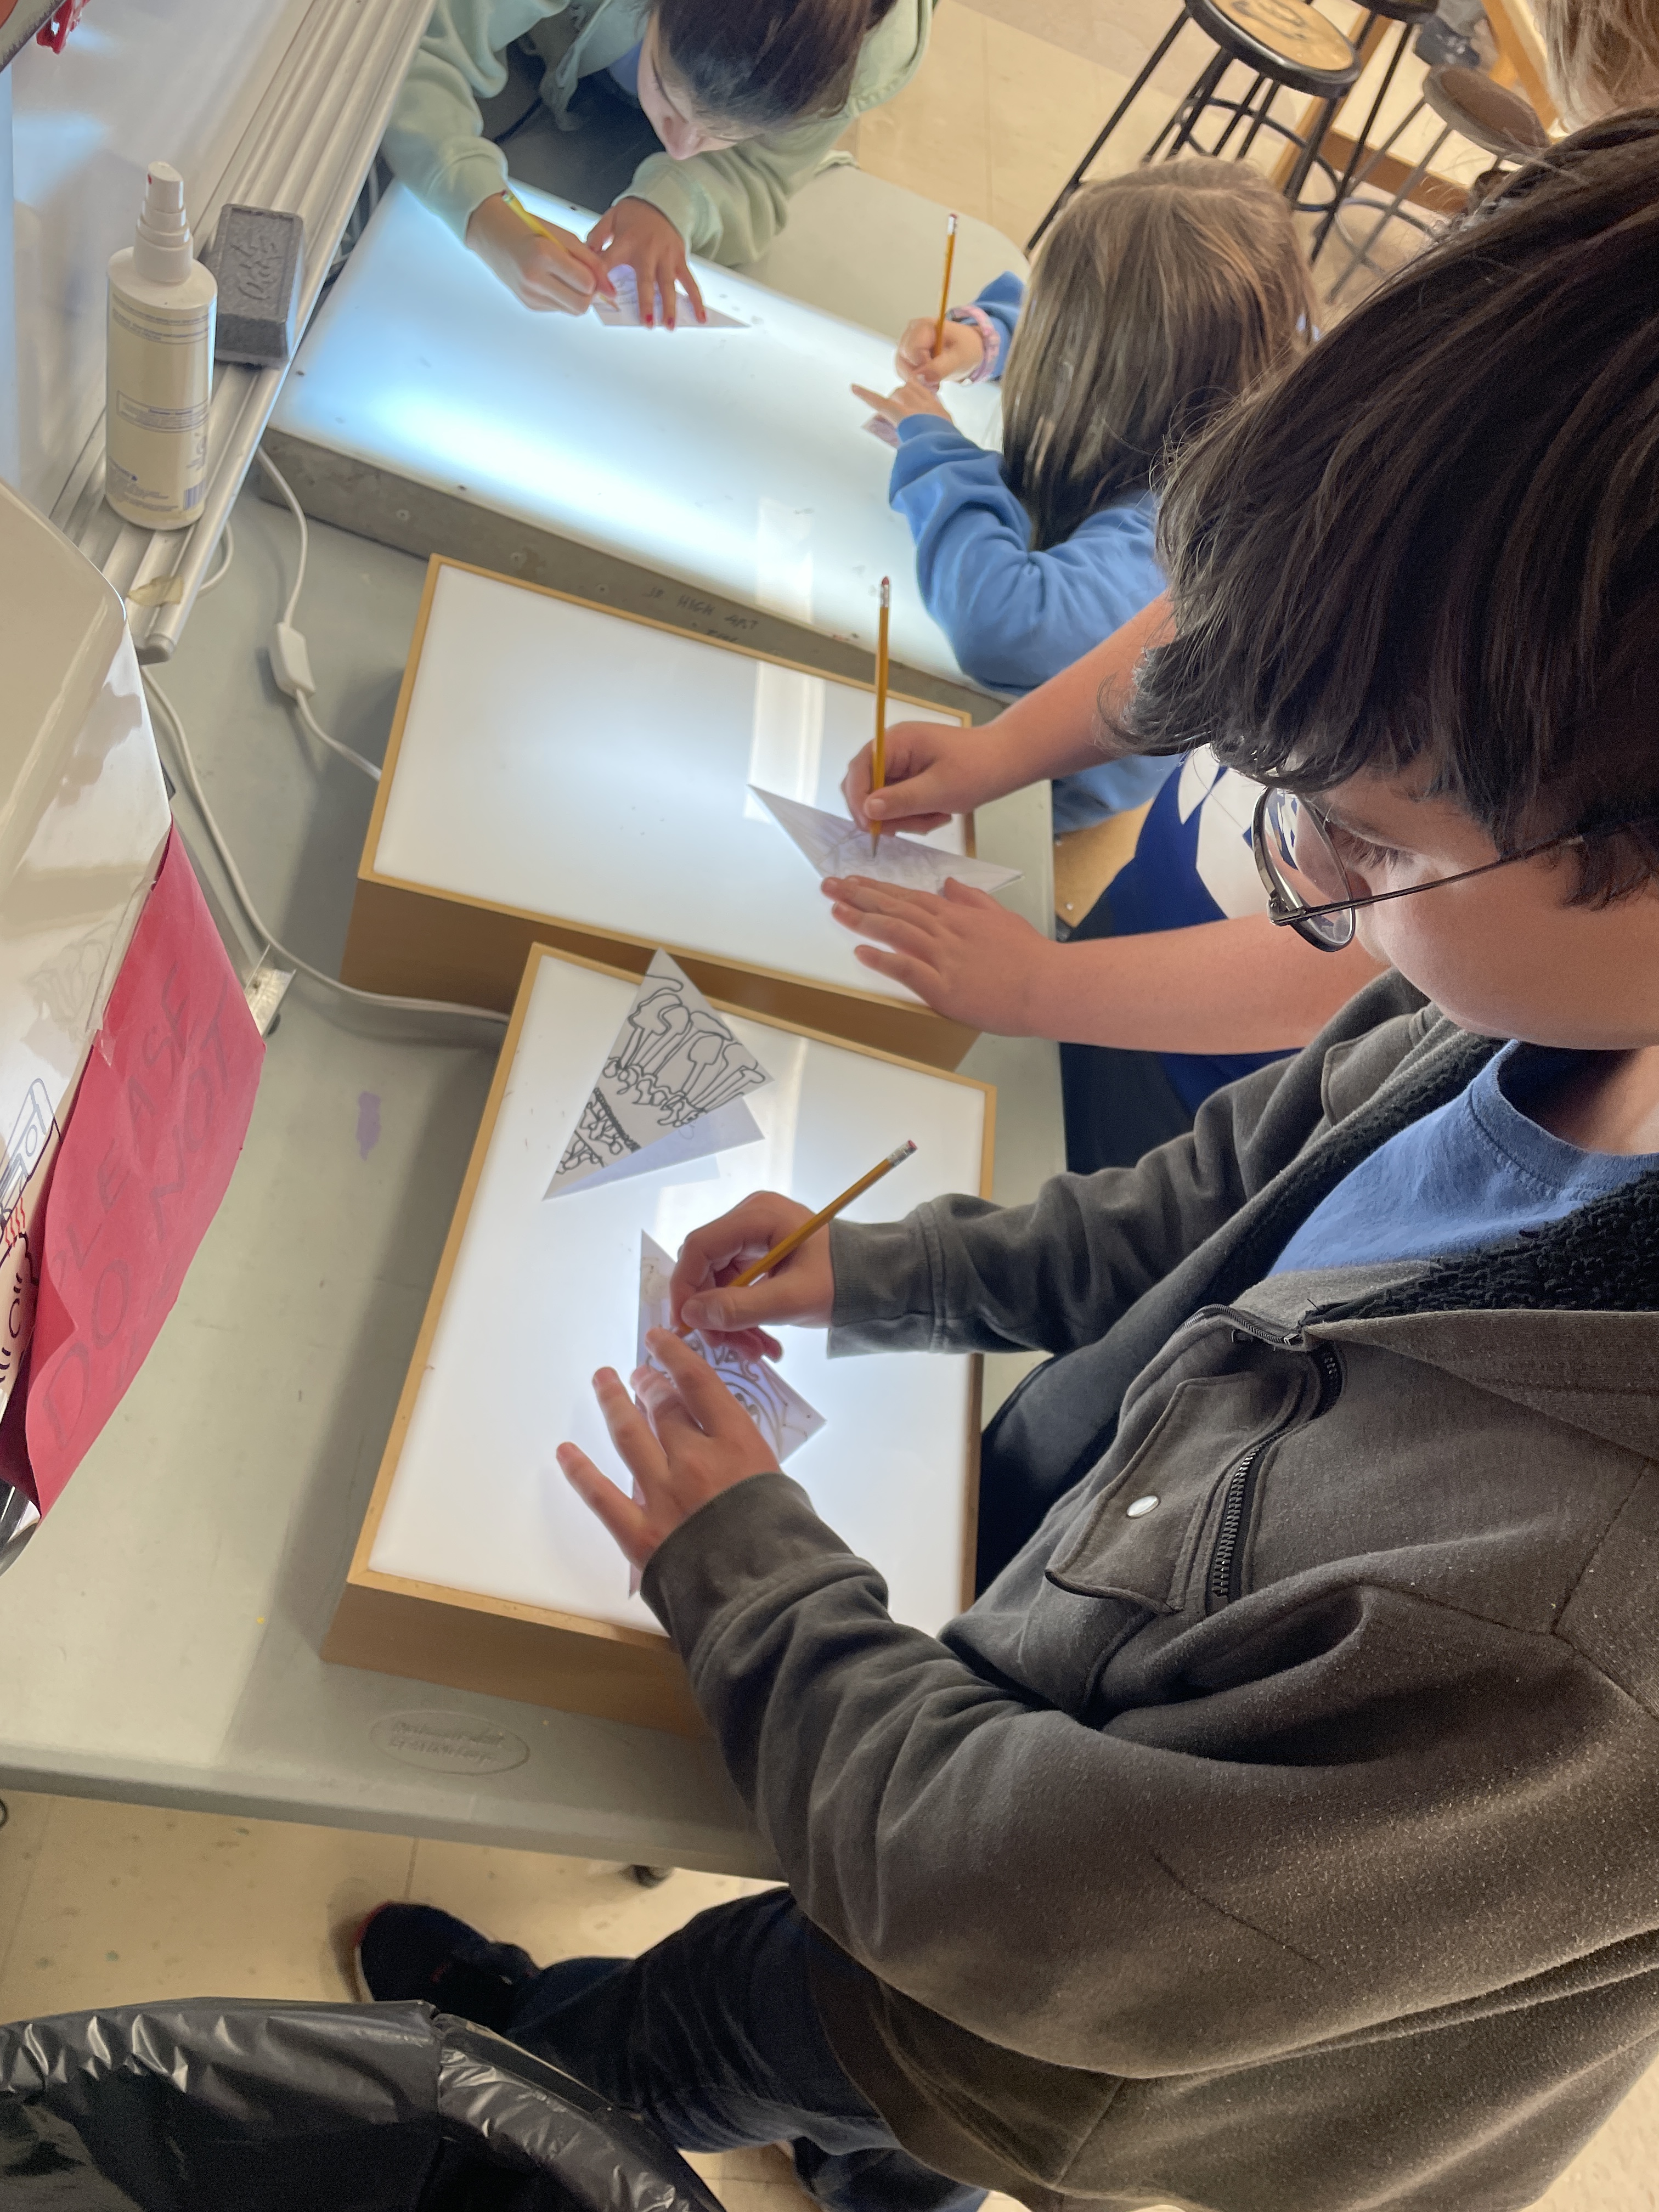
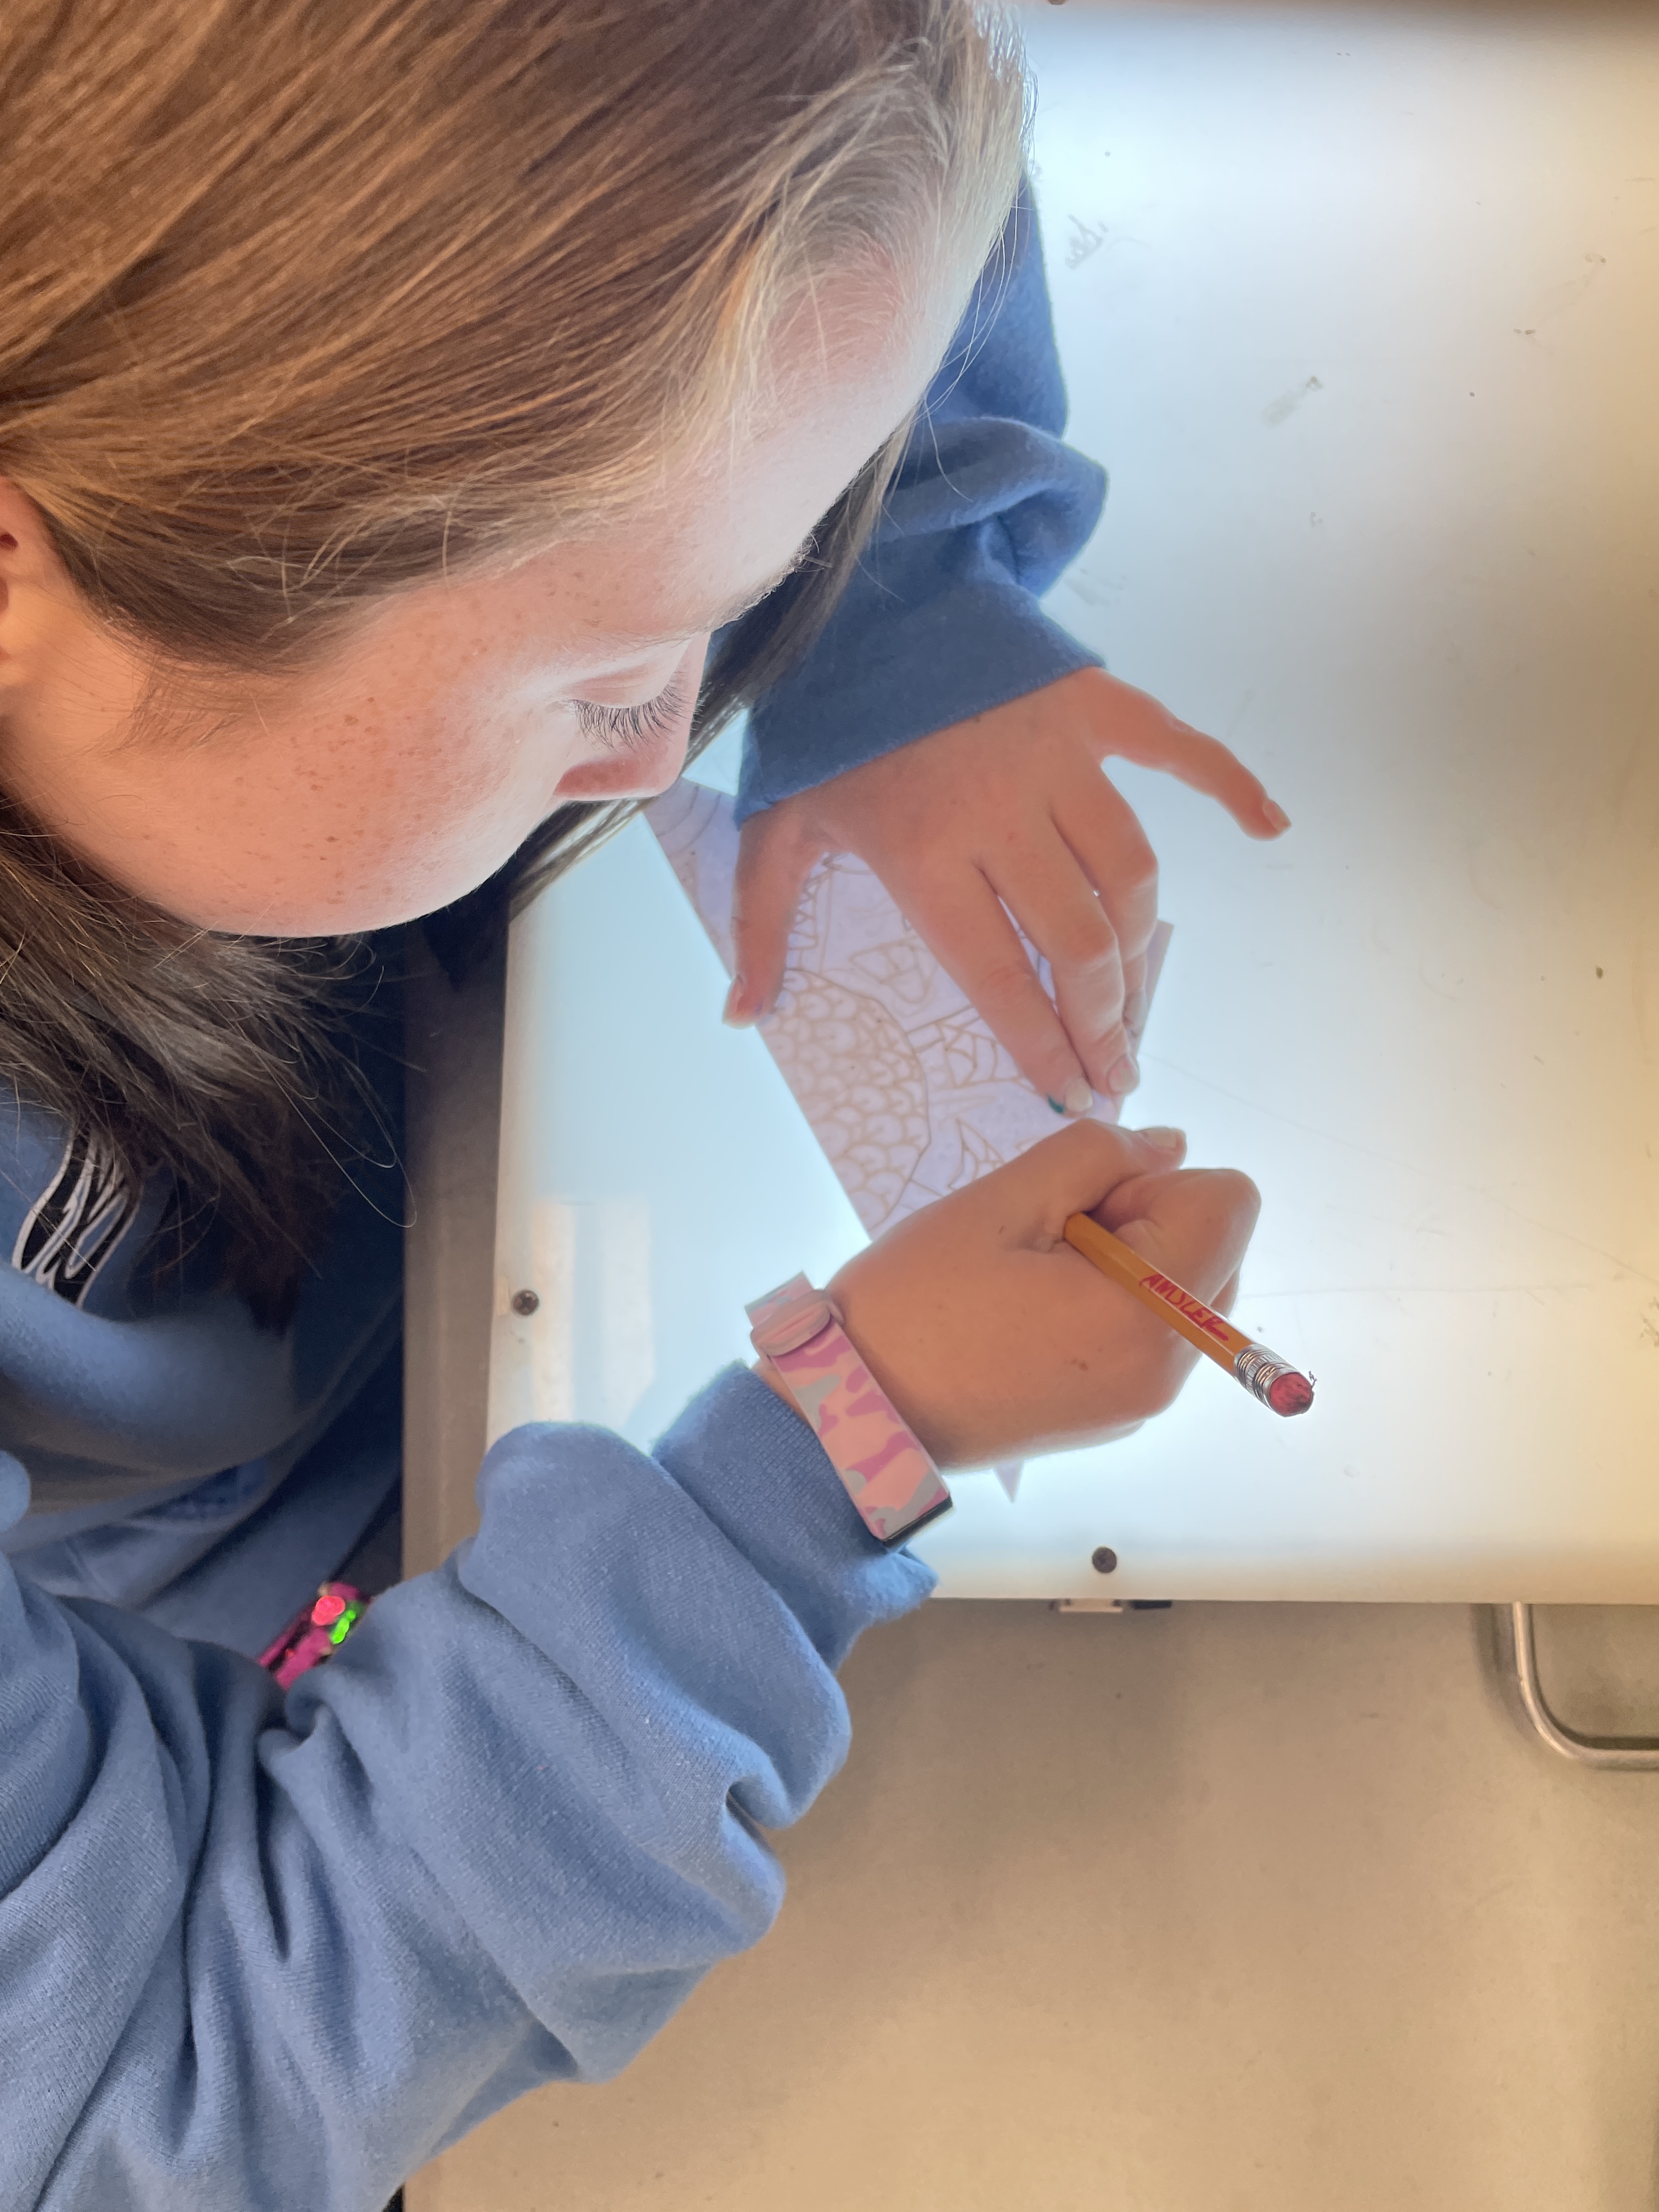
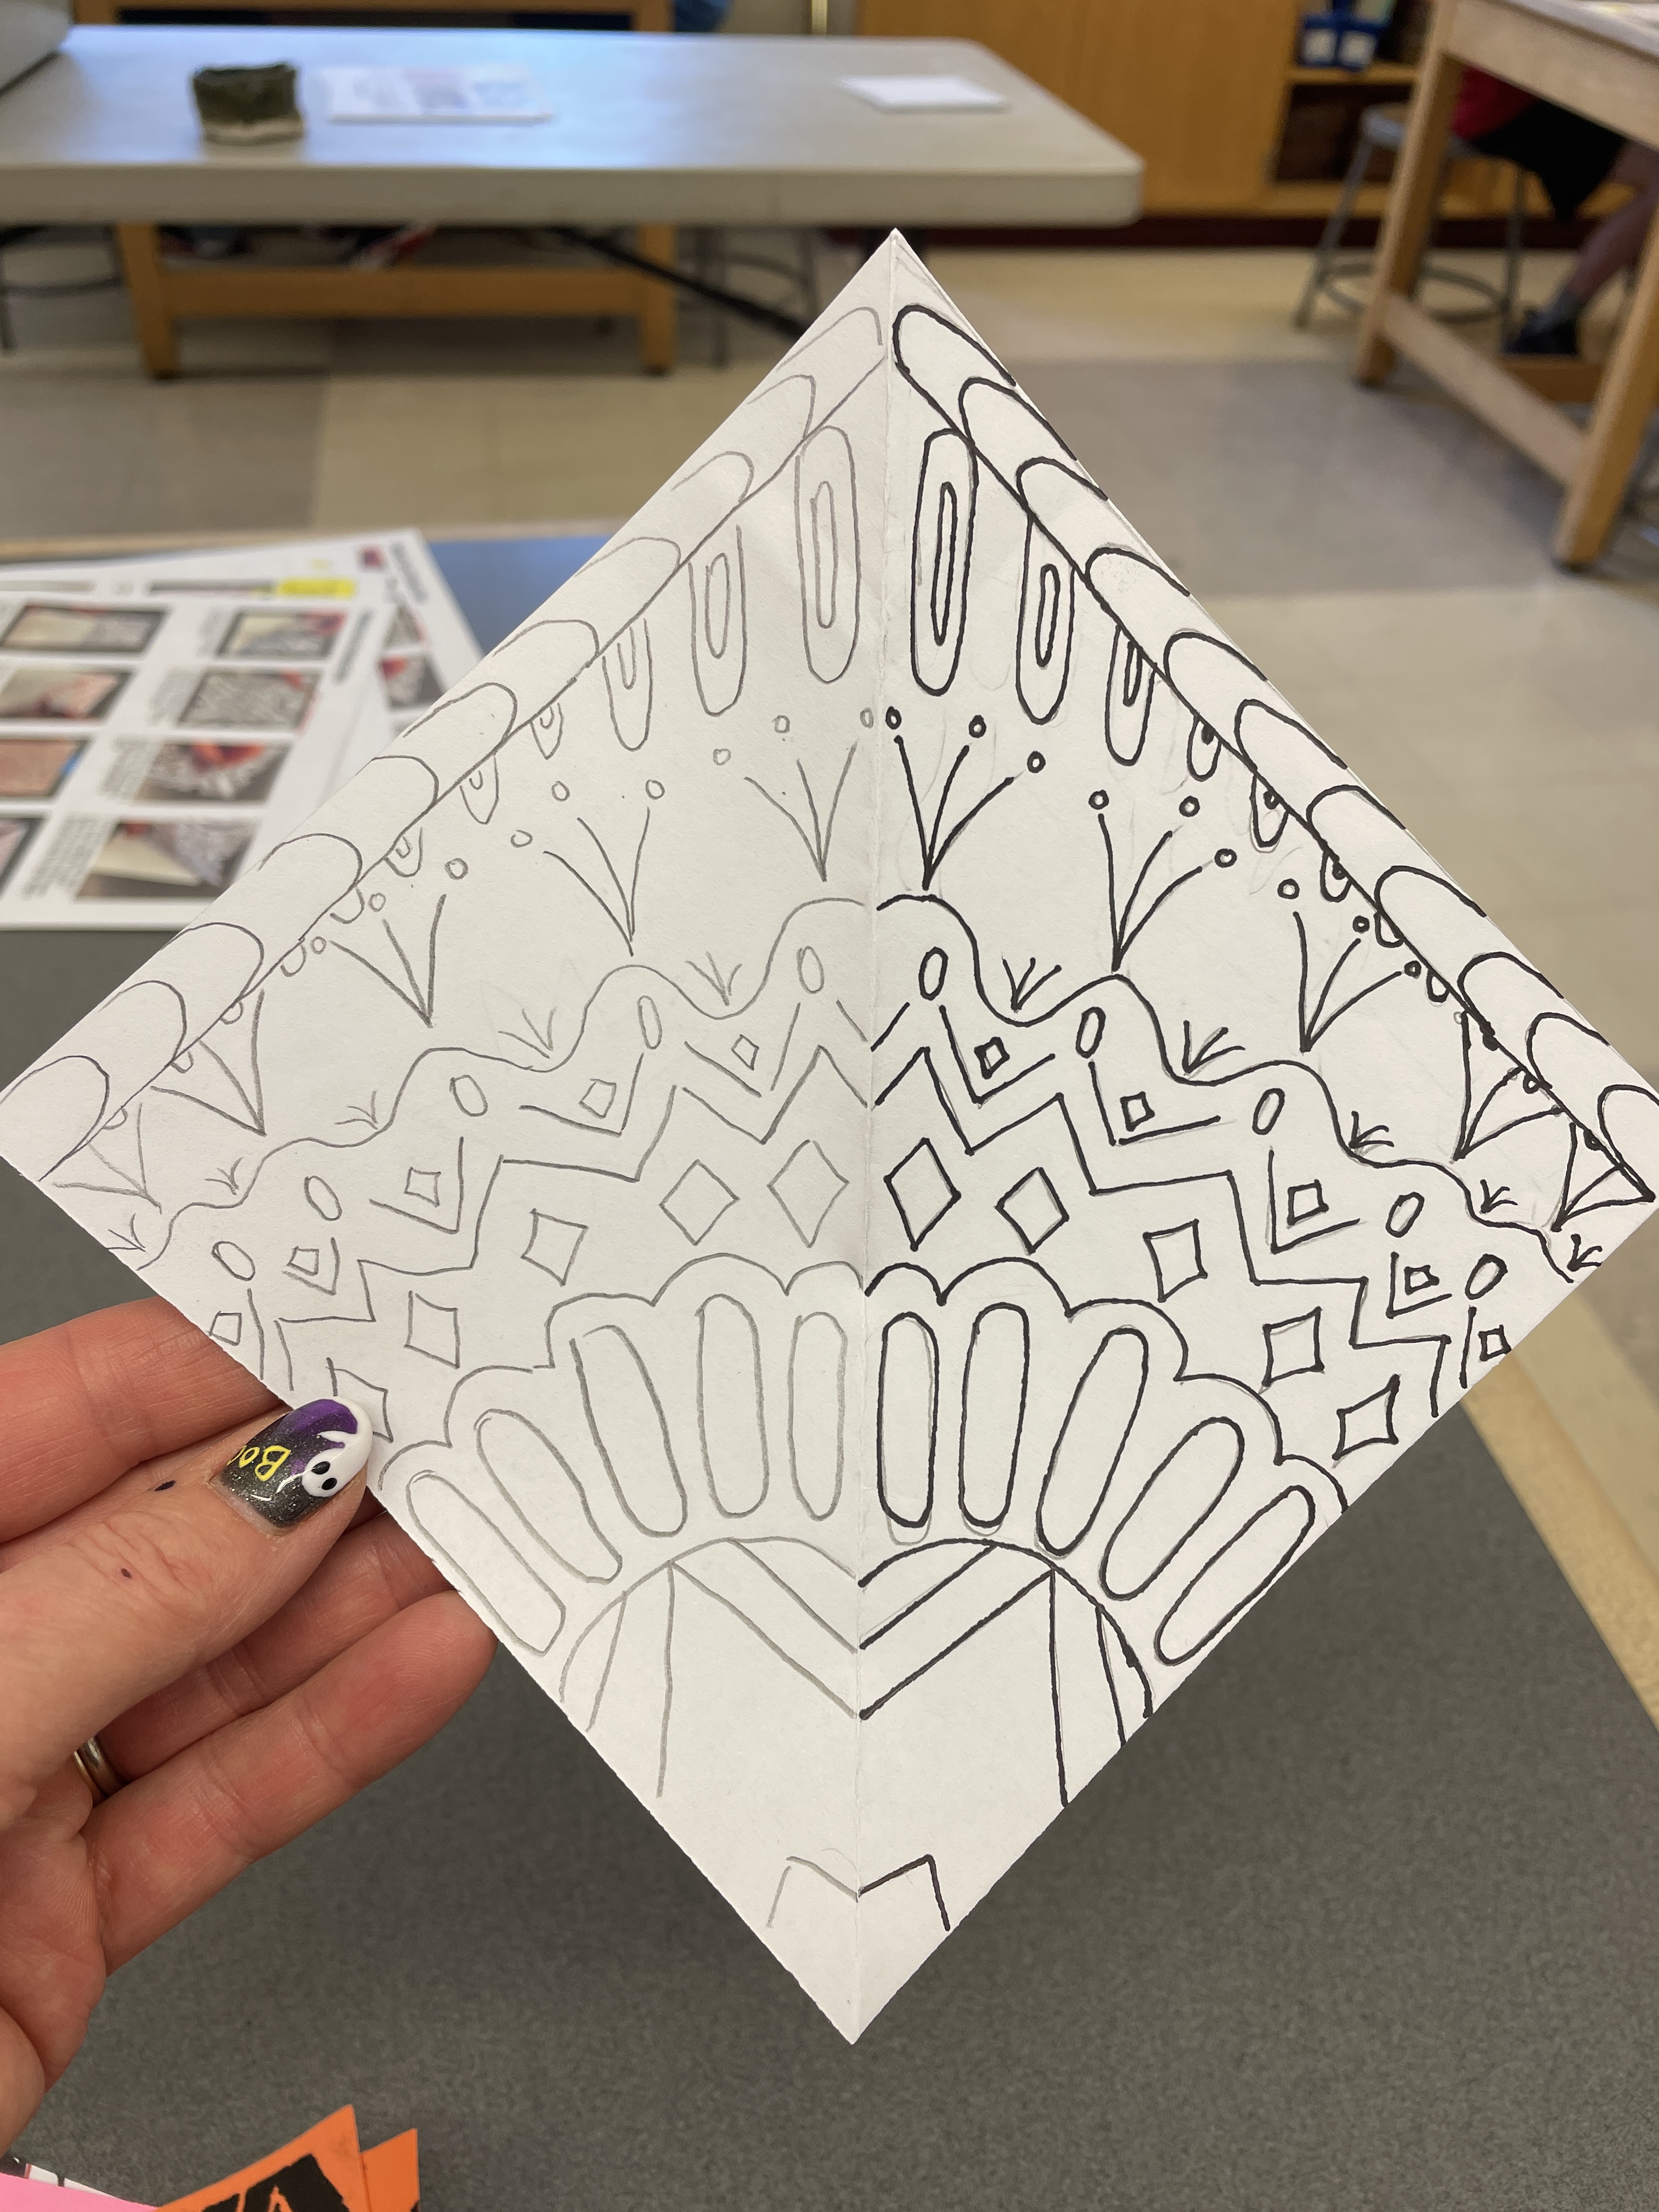
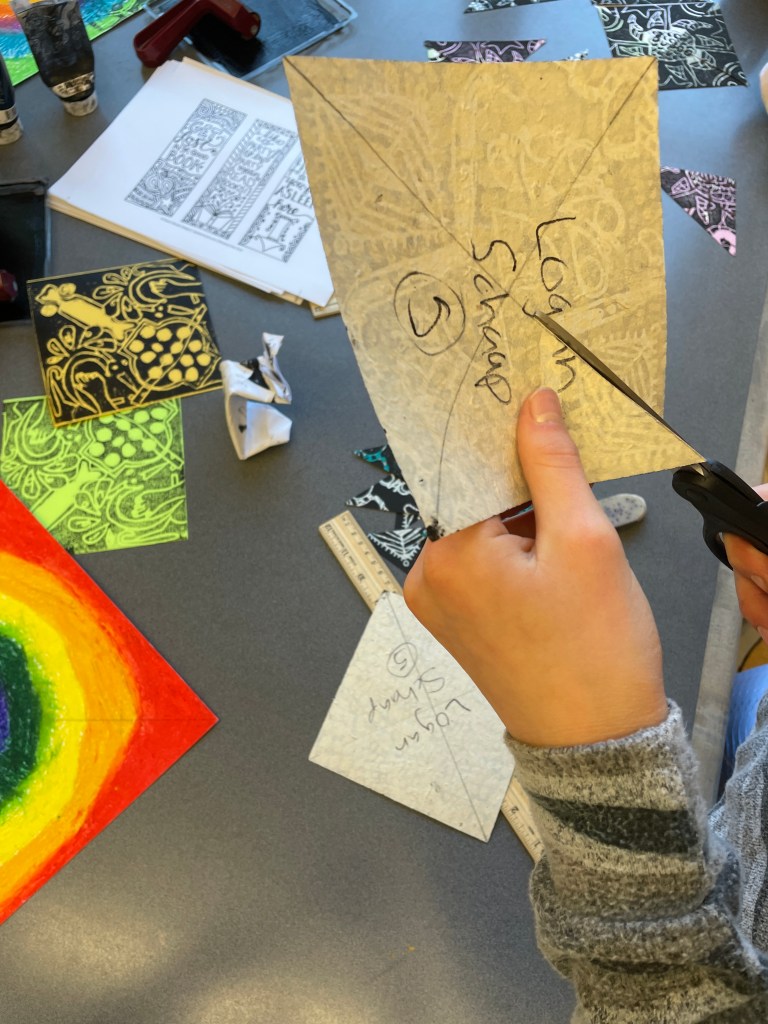
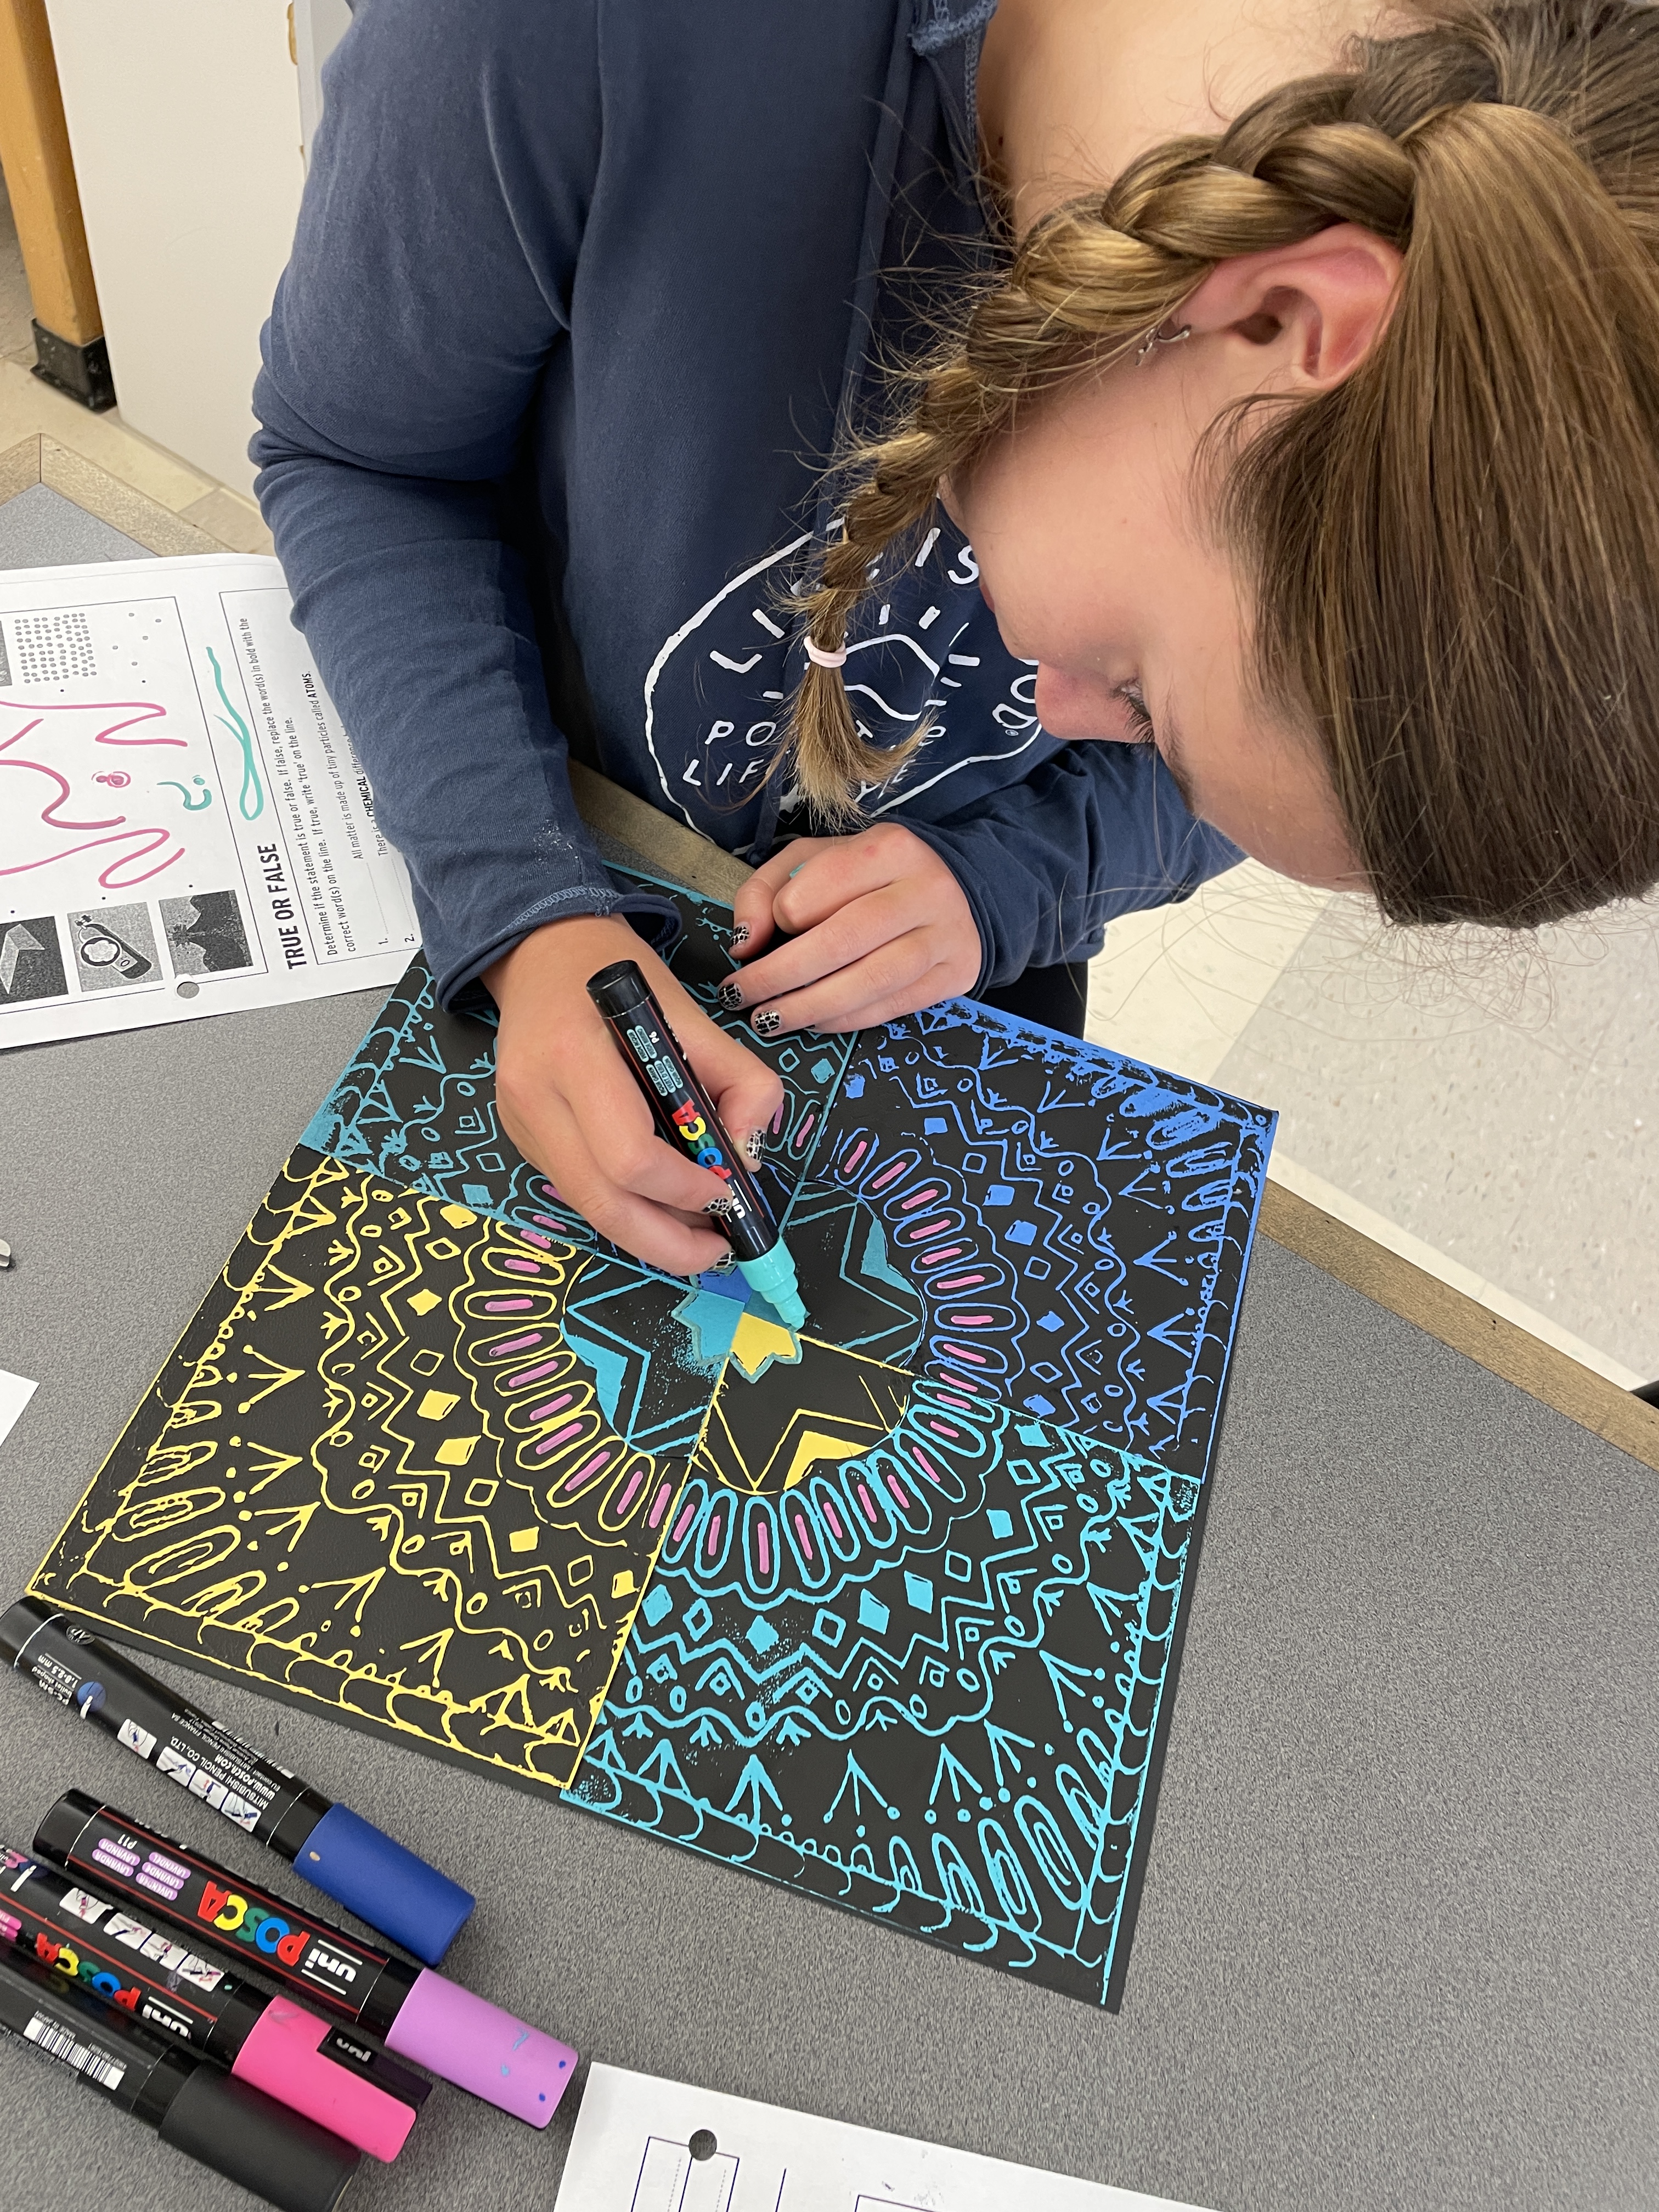
TO BEGIN: Students began by creating a symmetrical design on a folded 6” square of paper. By folding the paper in half diagonally, and drawing on only one side, they completed the image by tracing on the blank half of the folded unit, using a light table to assist. Instant symmetry!


– – –
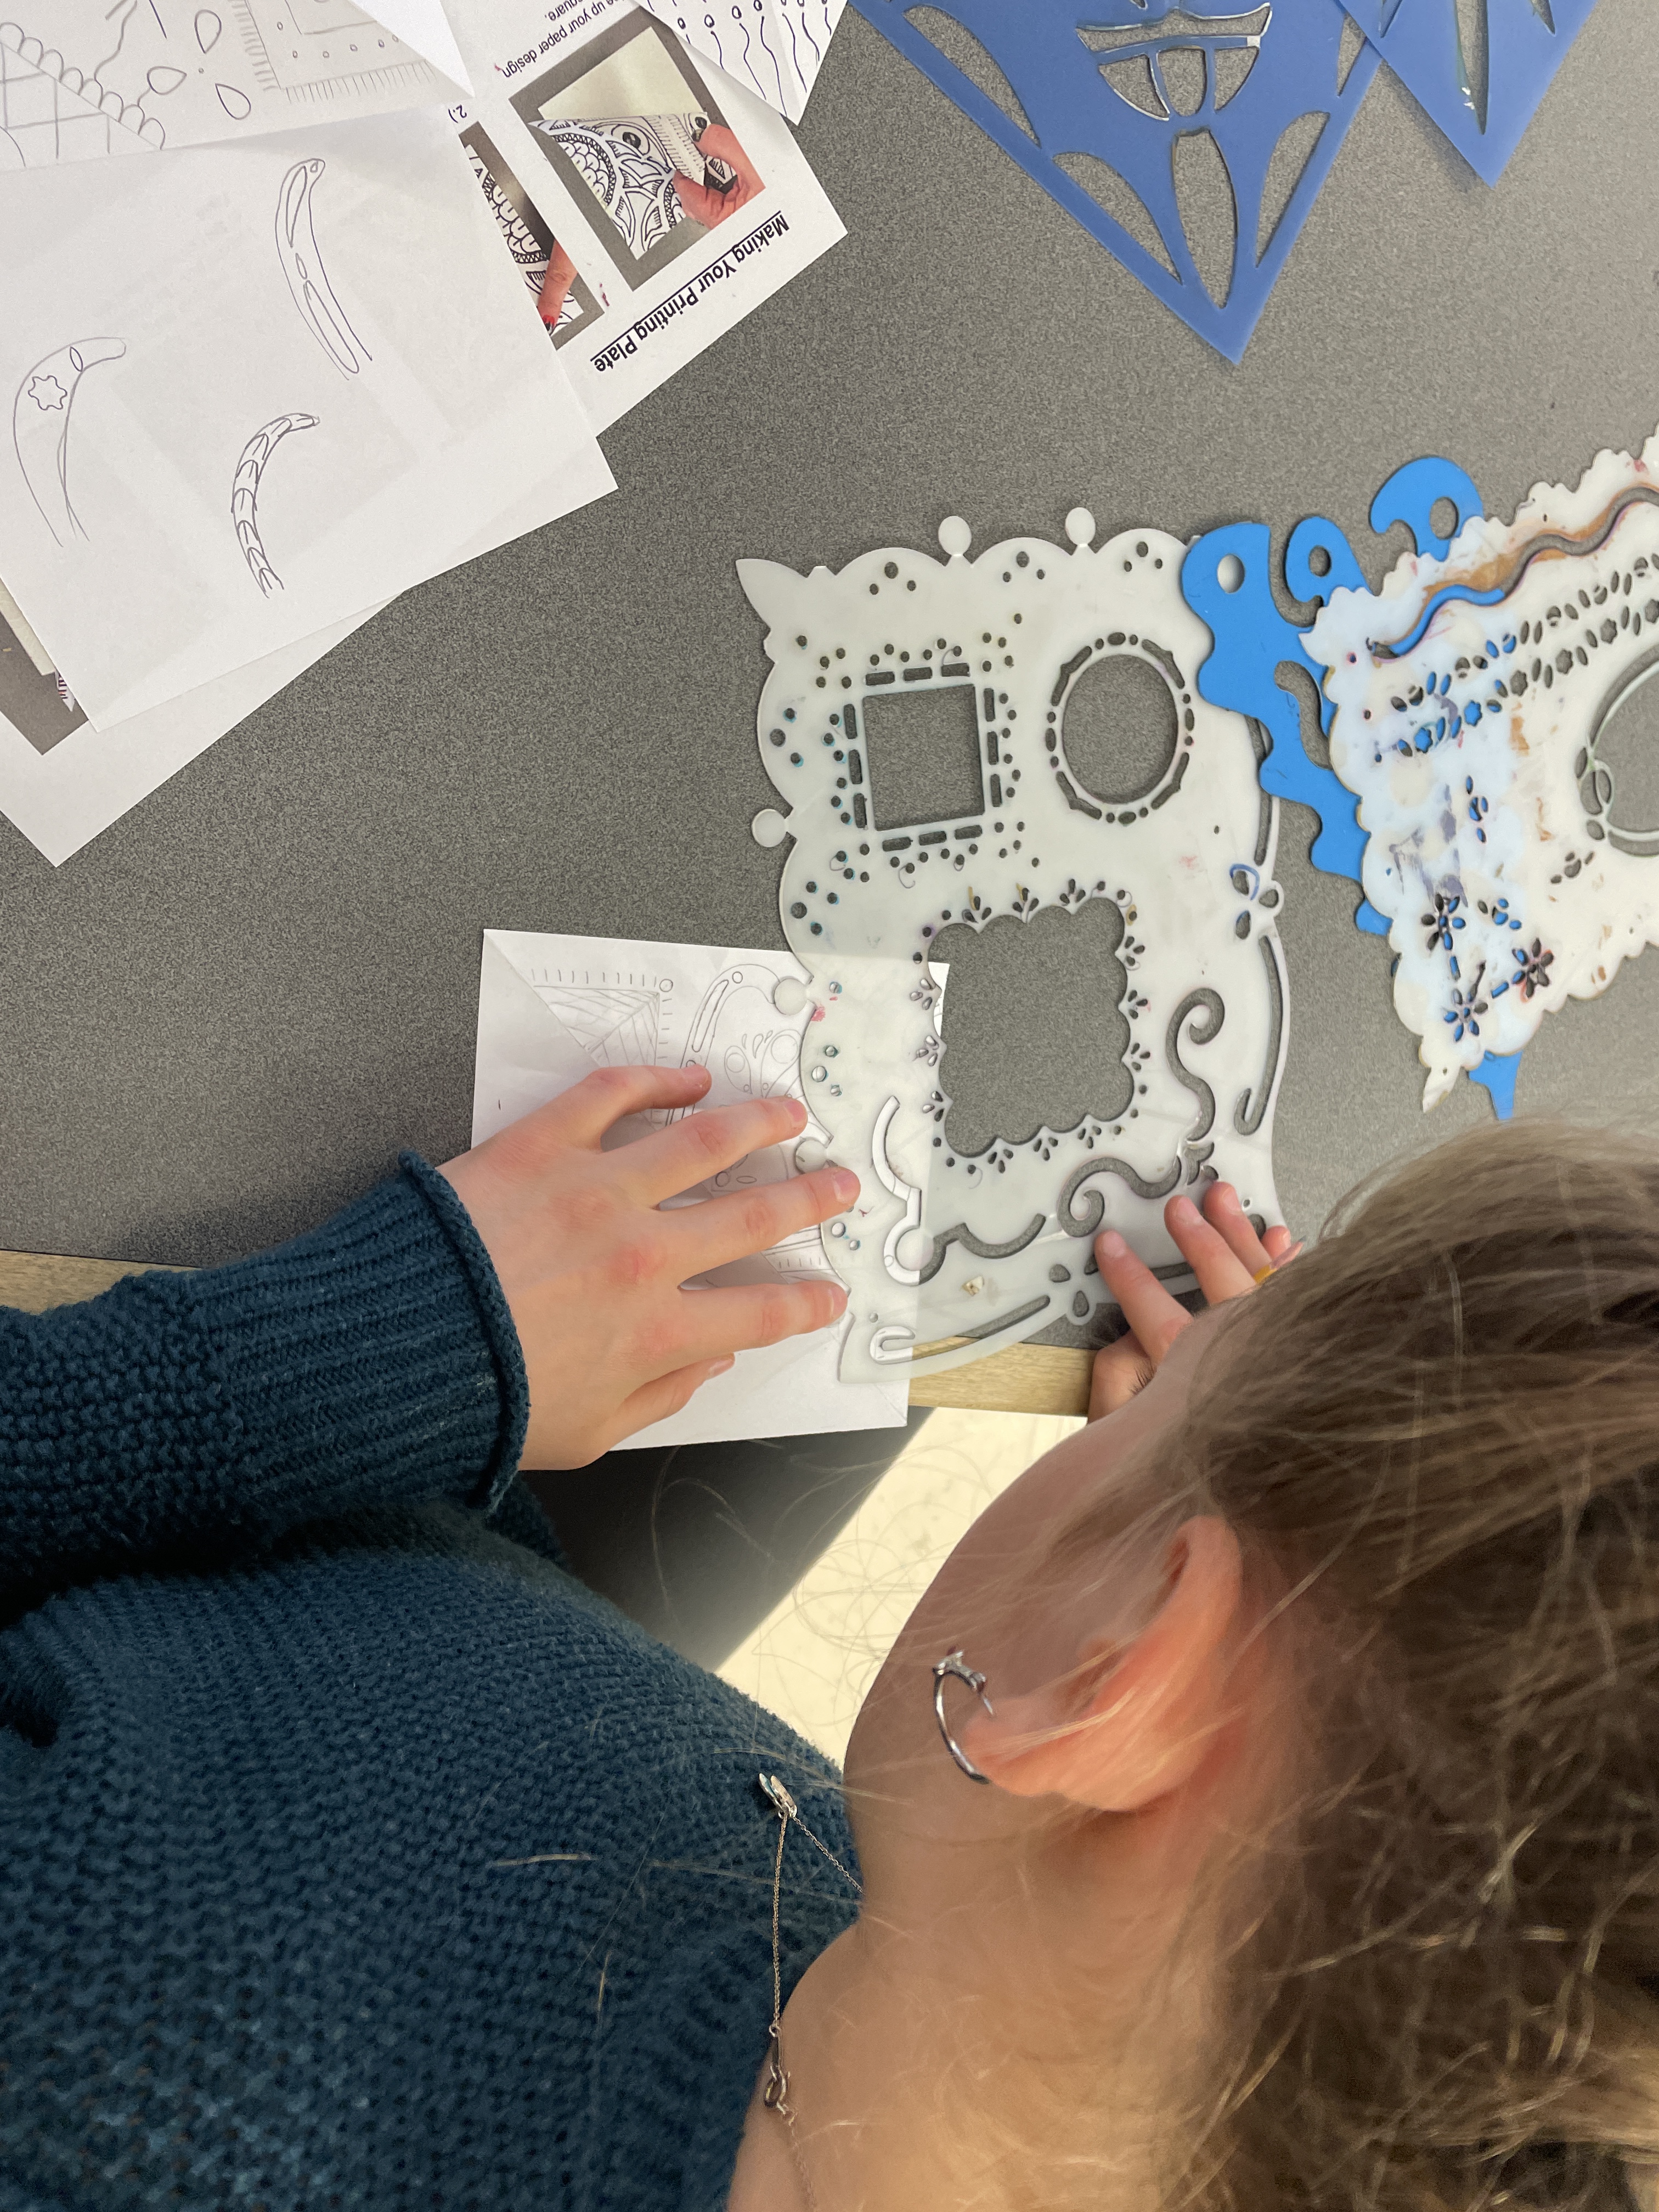
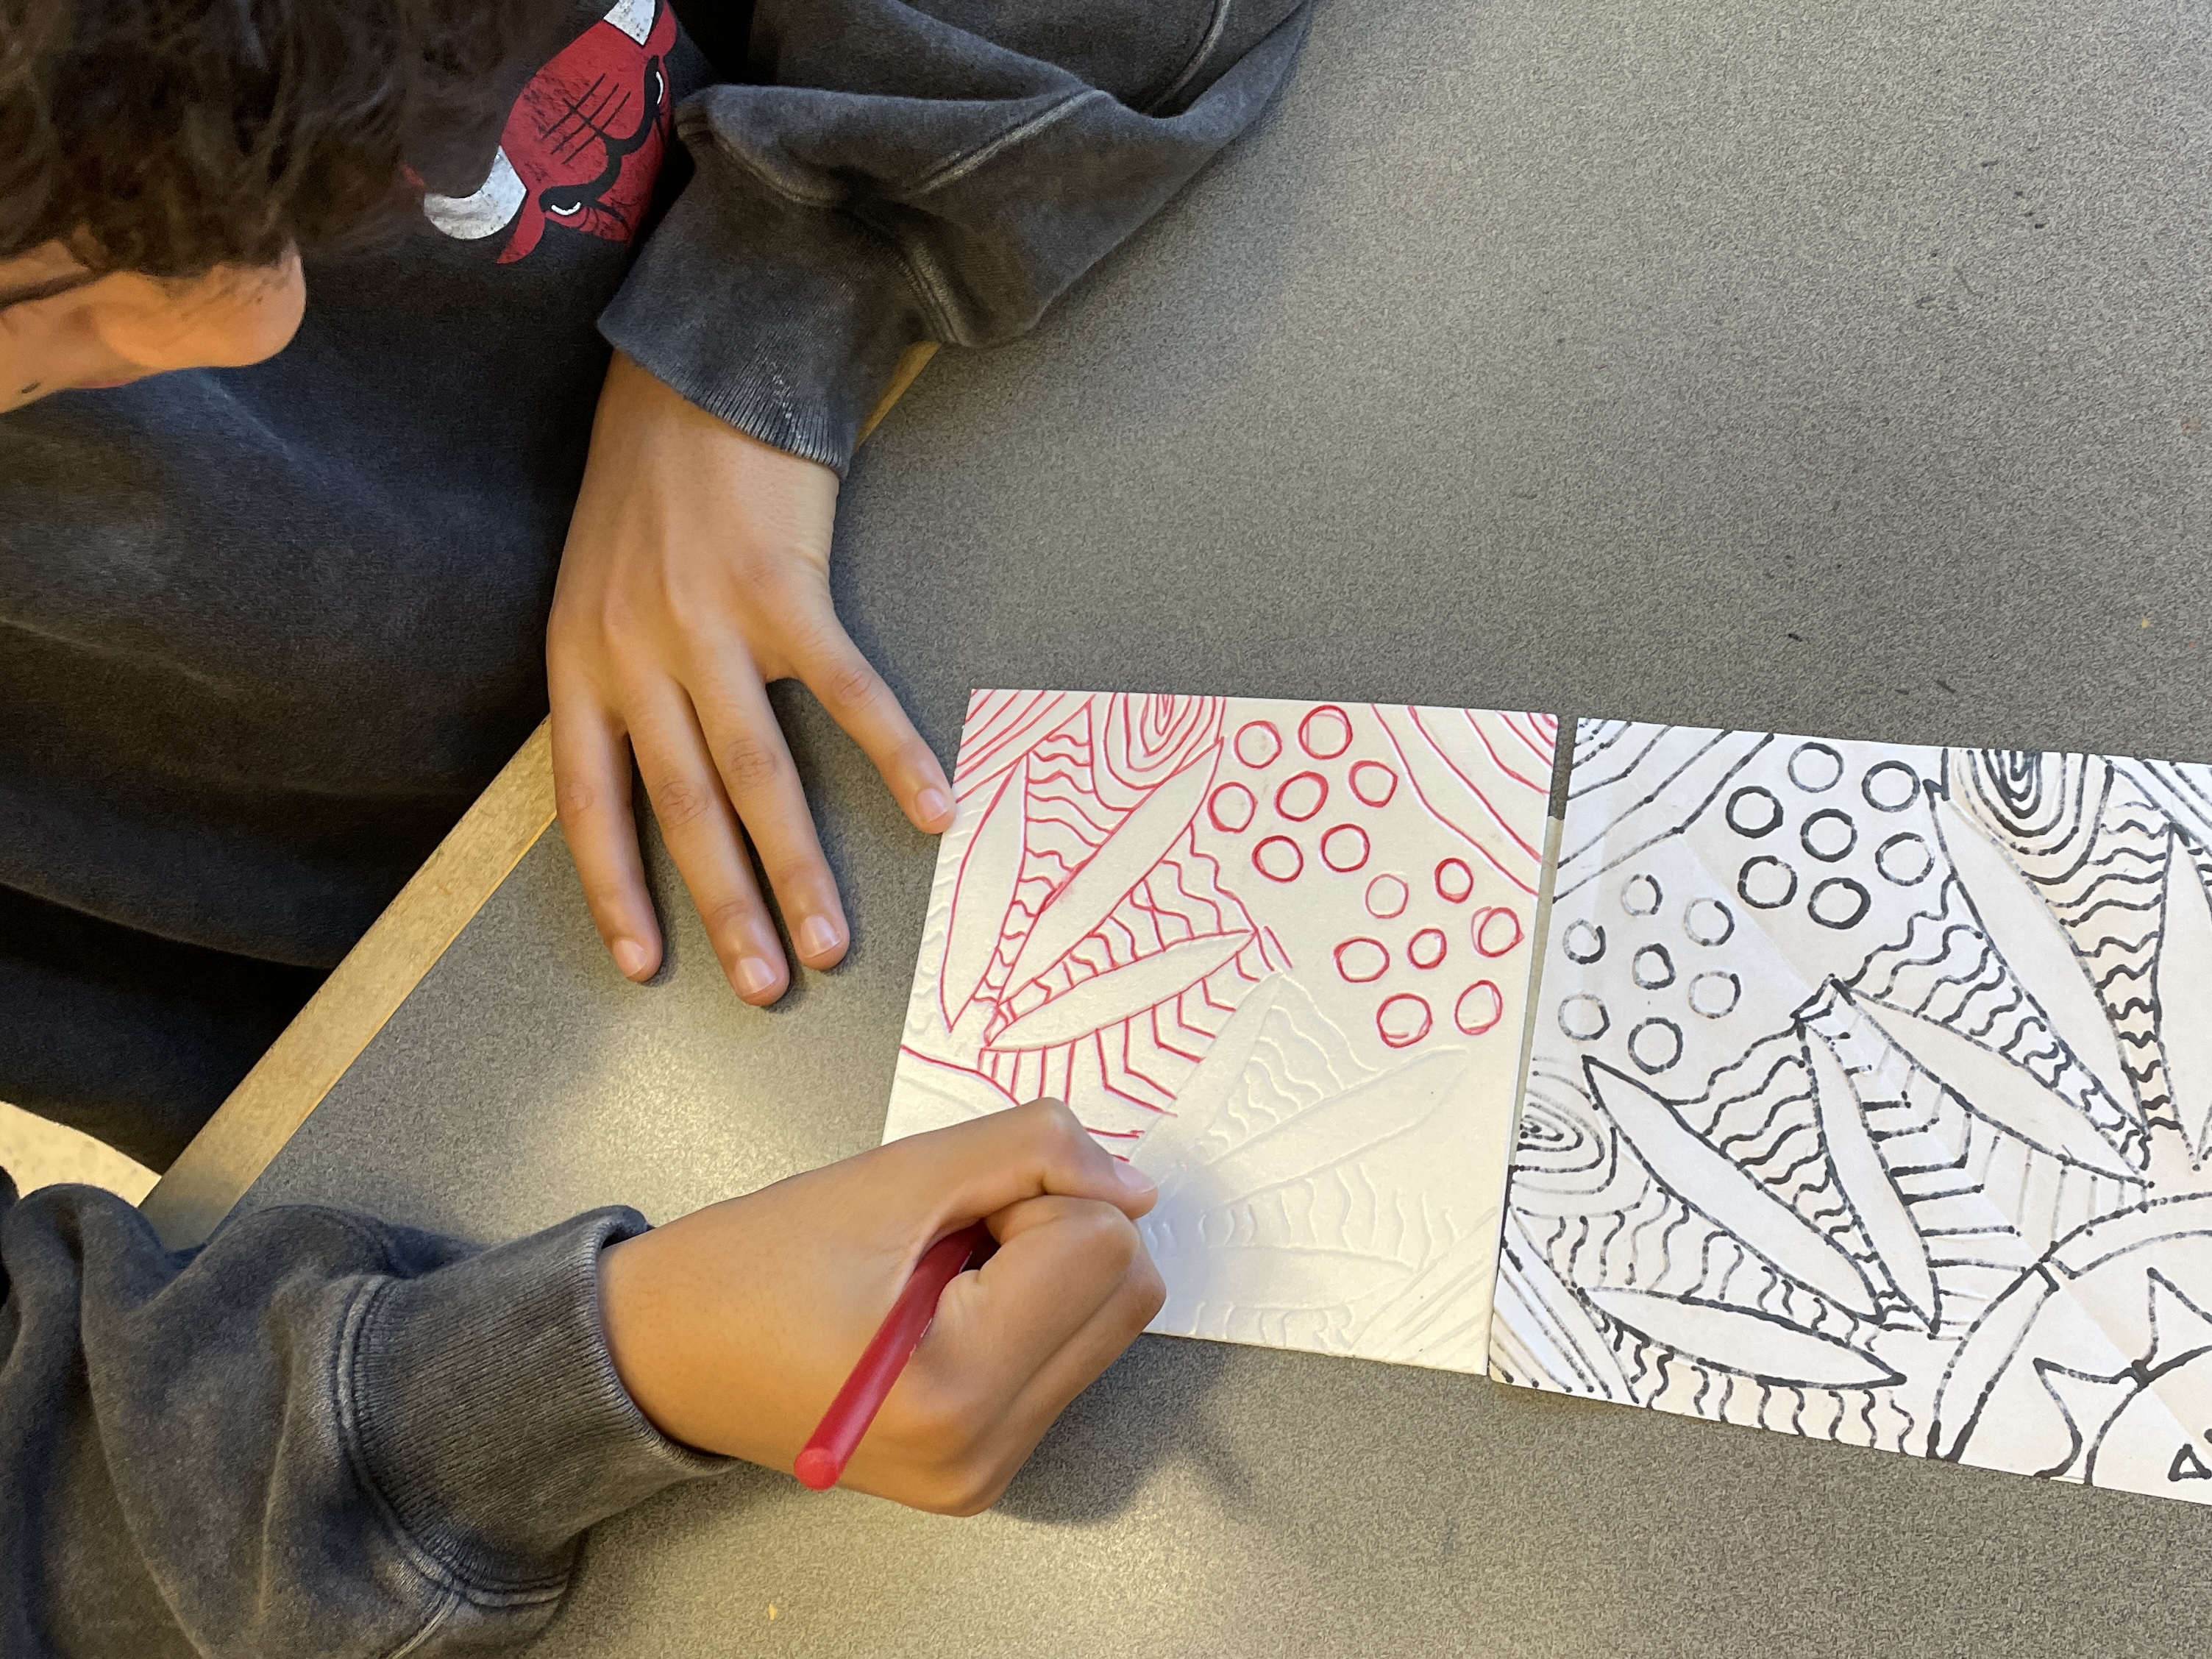
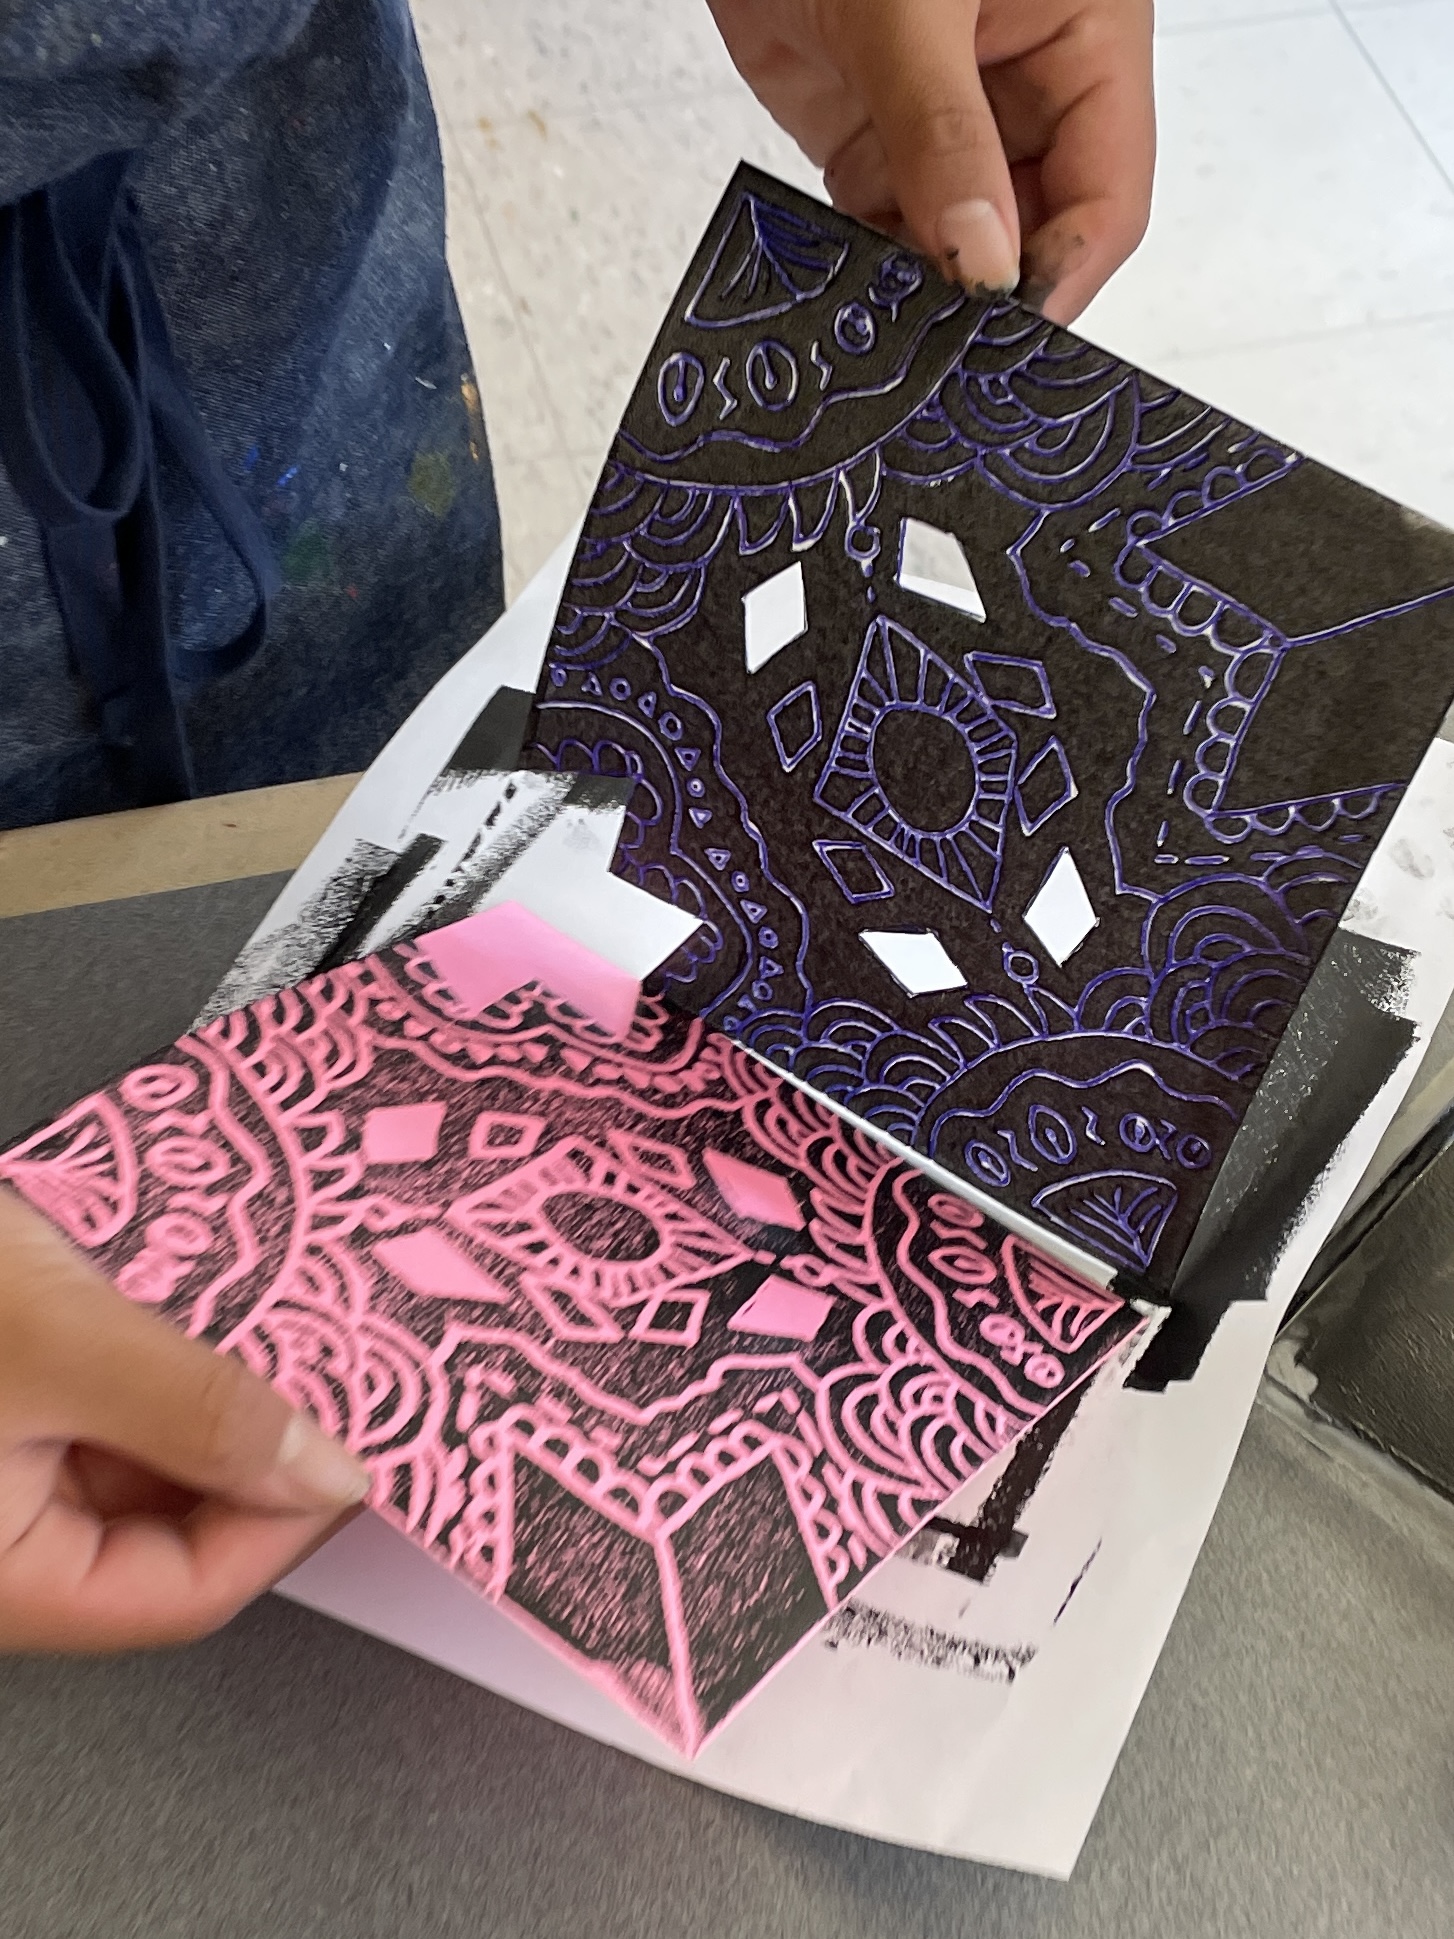
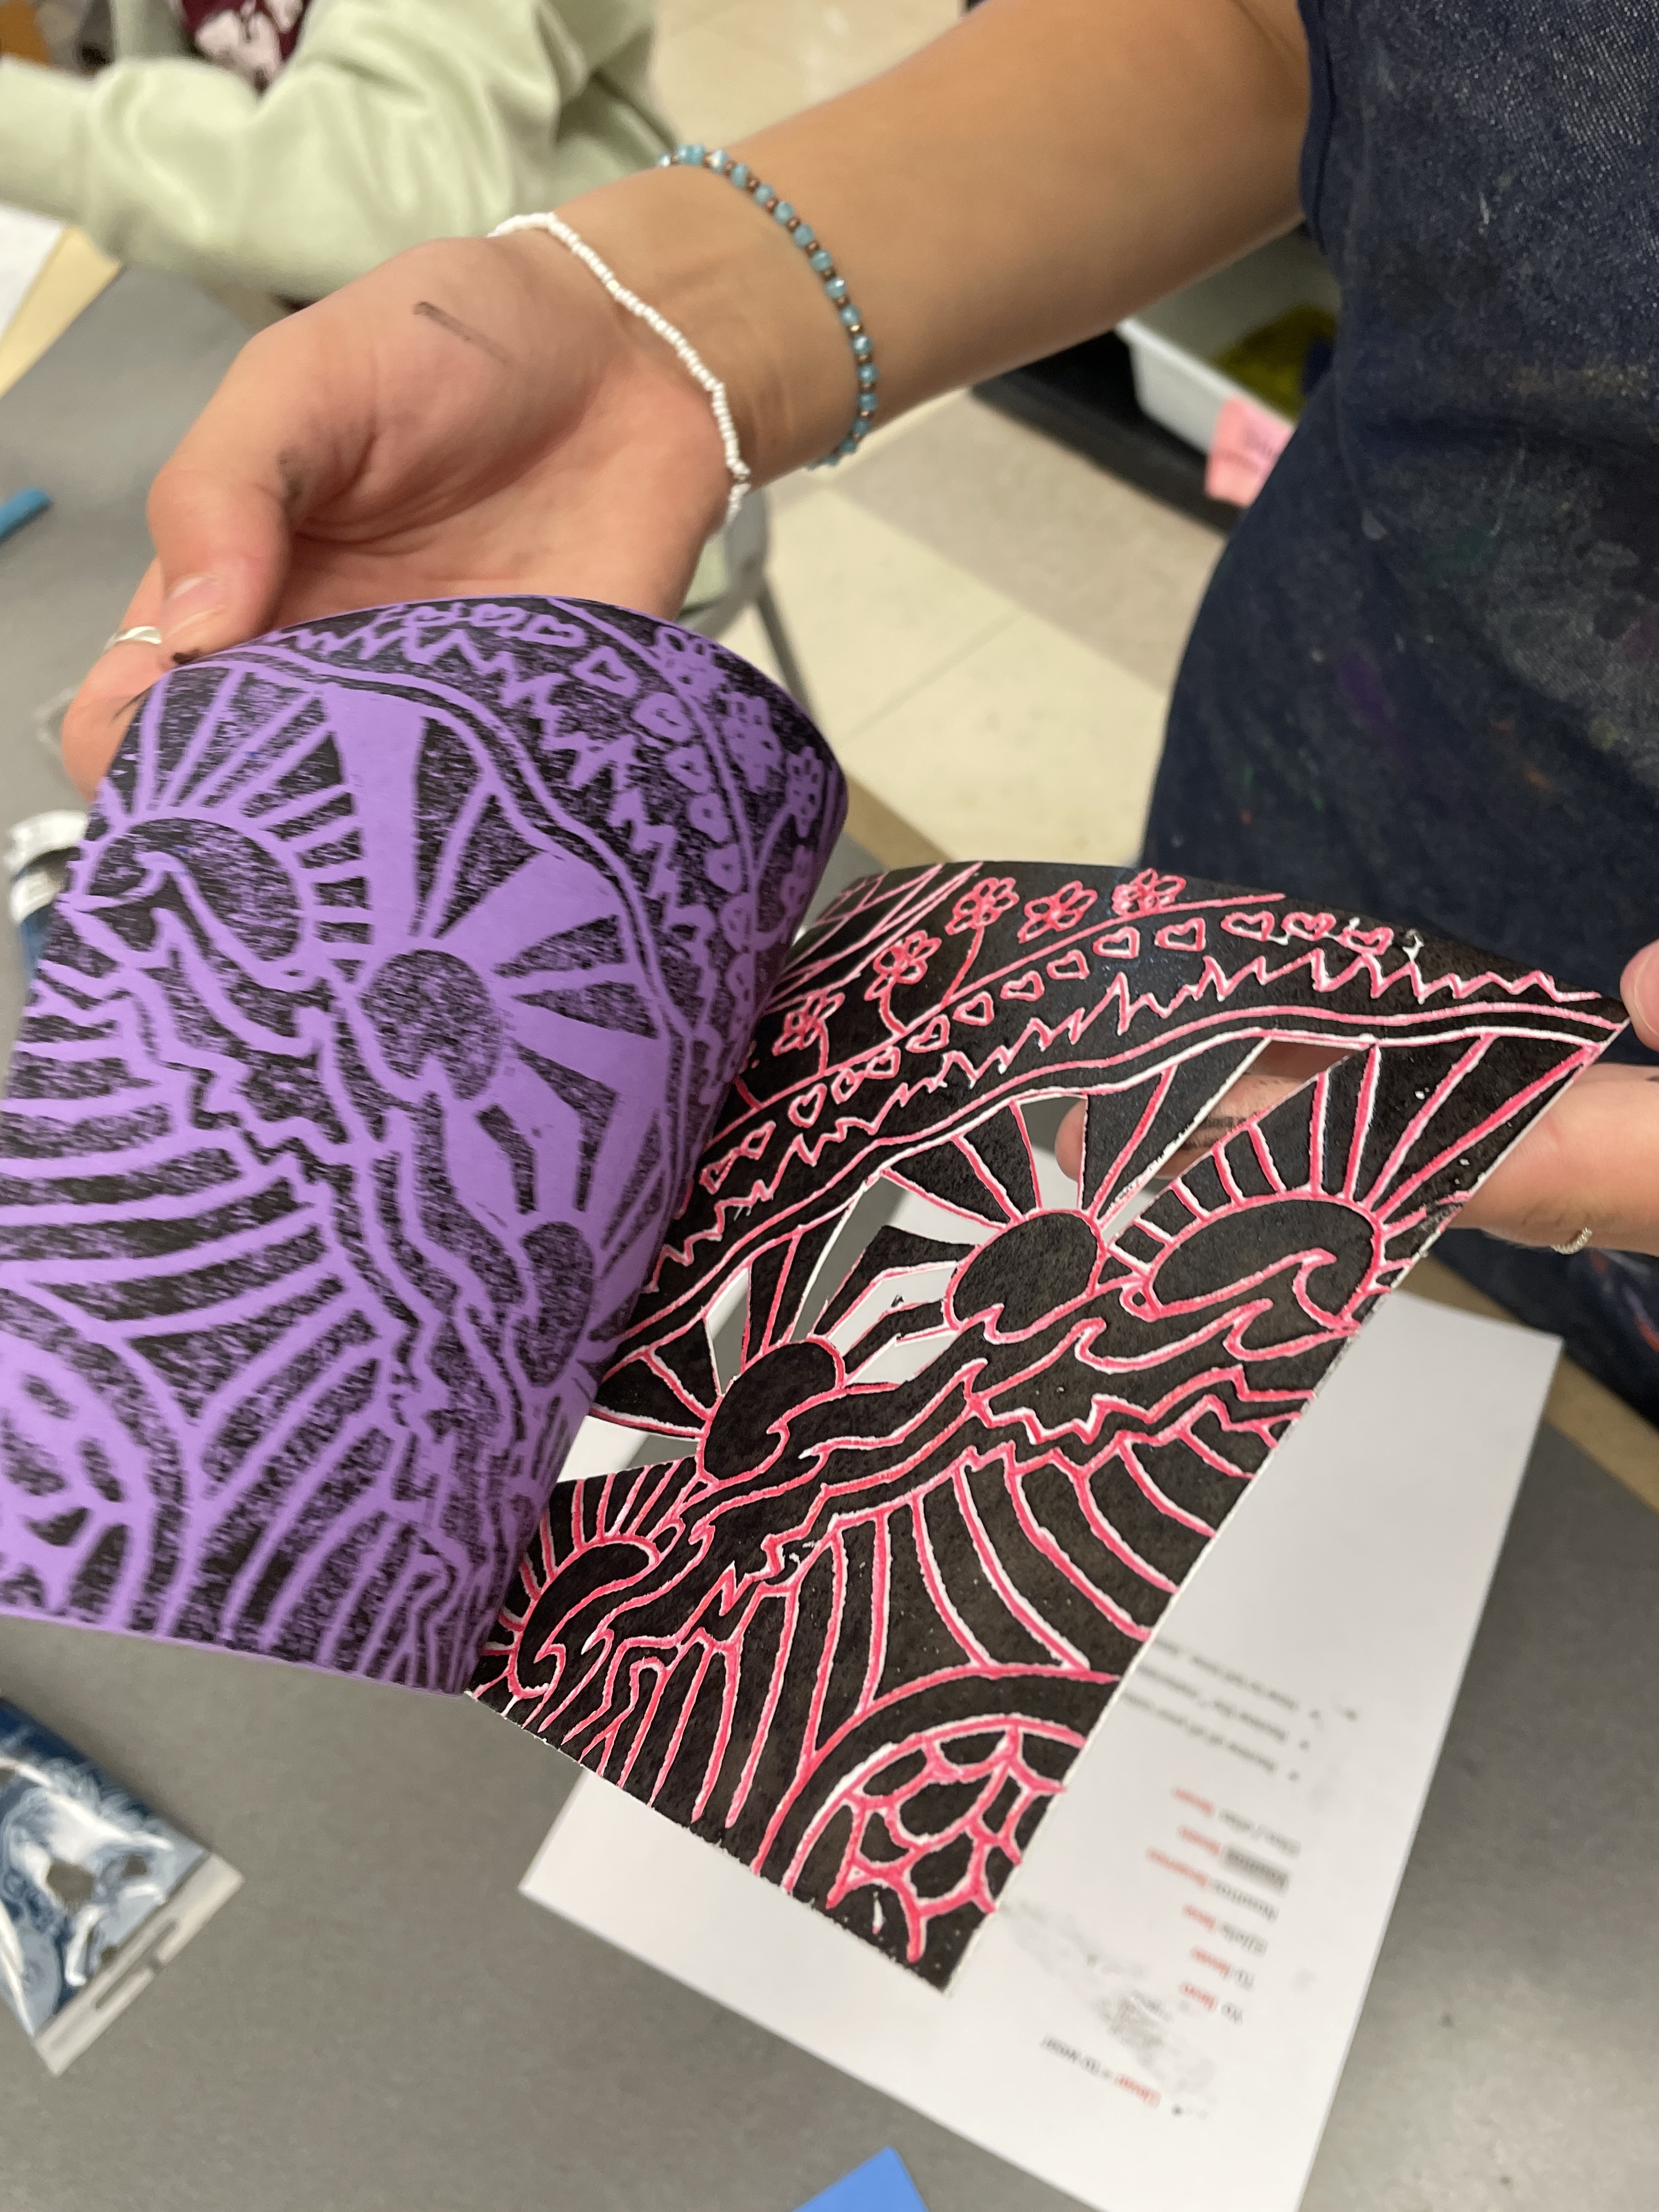
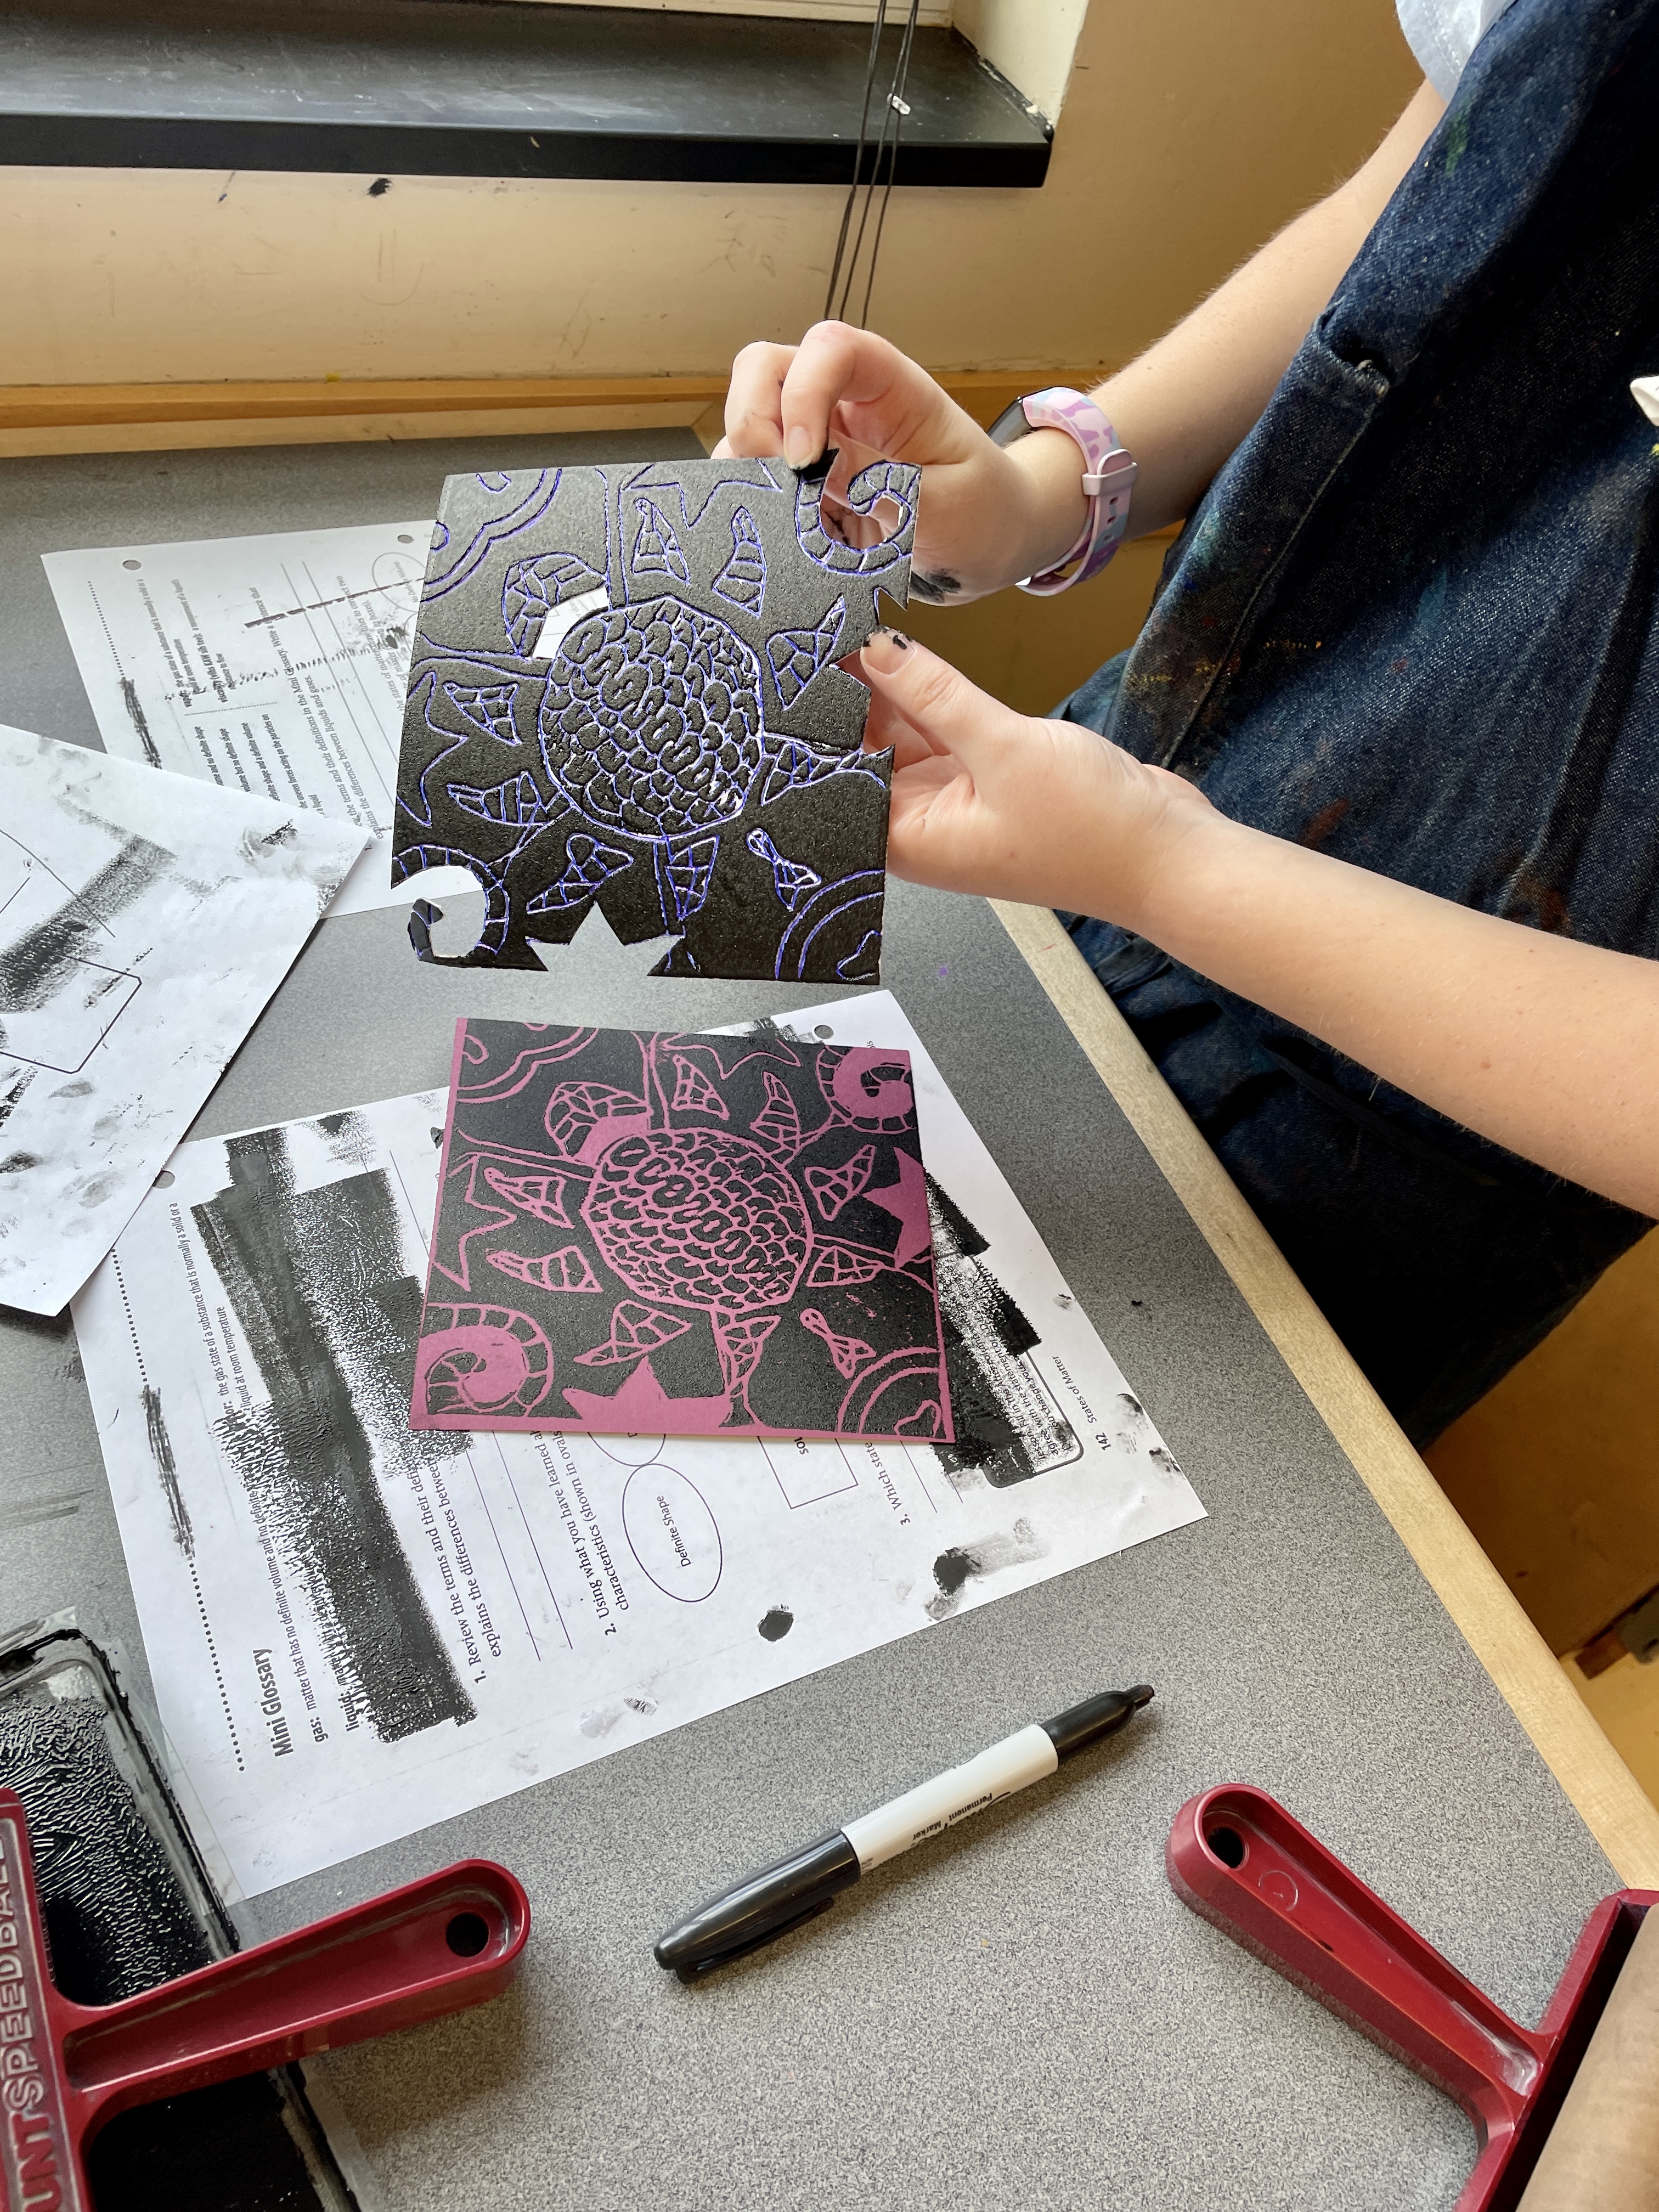
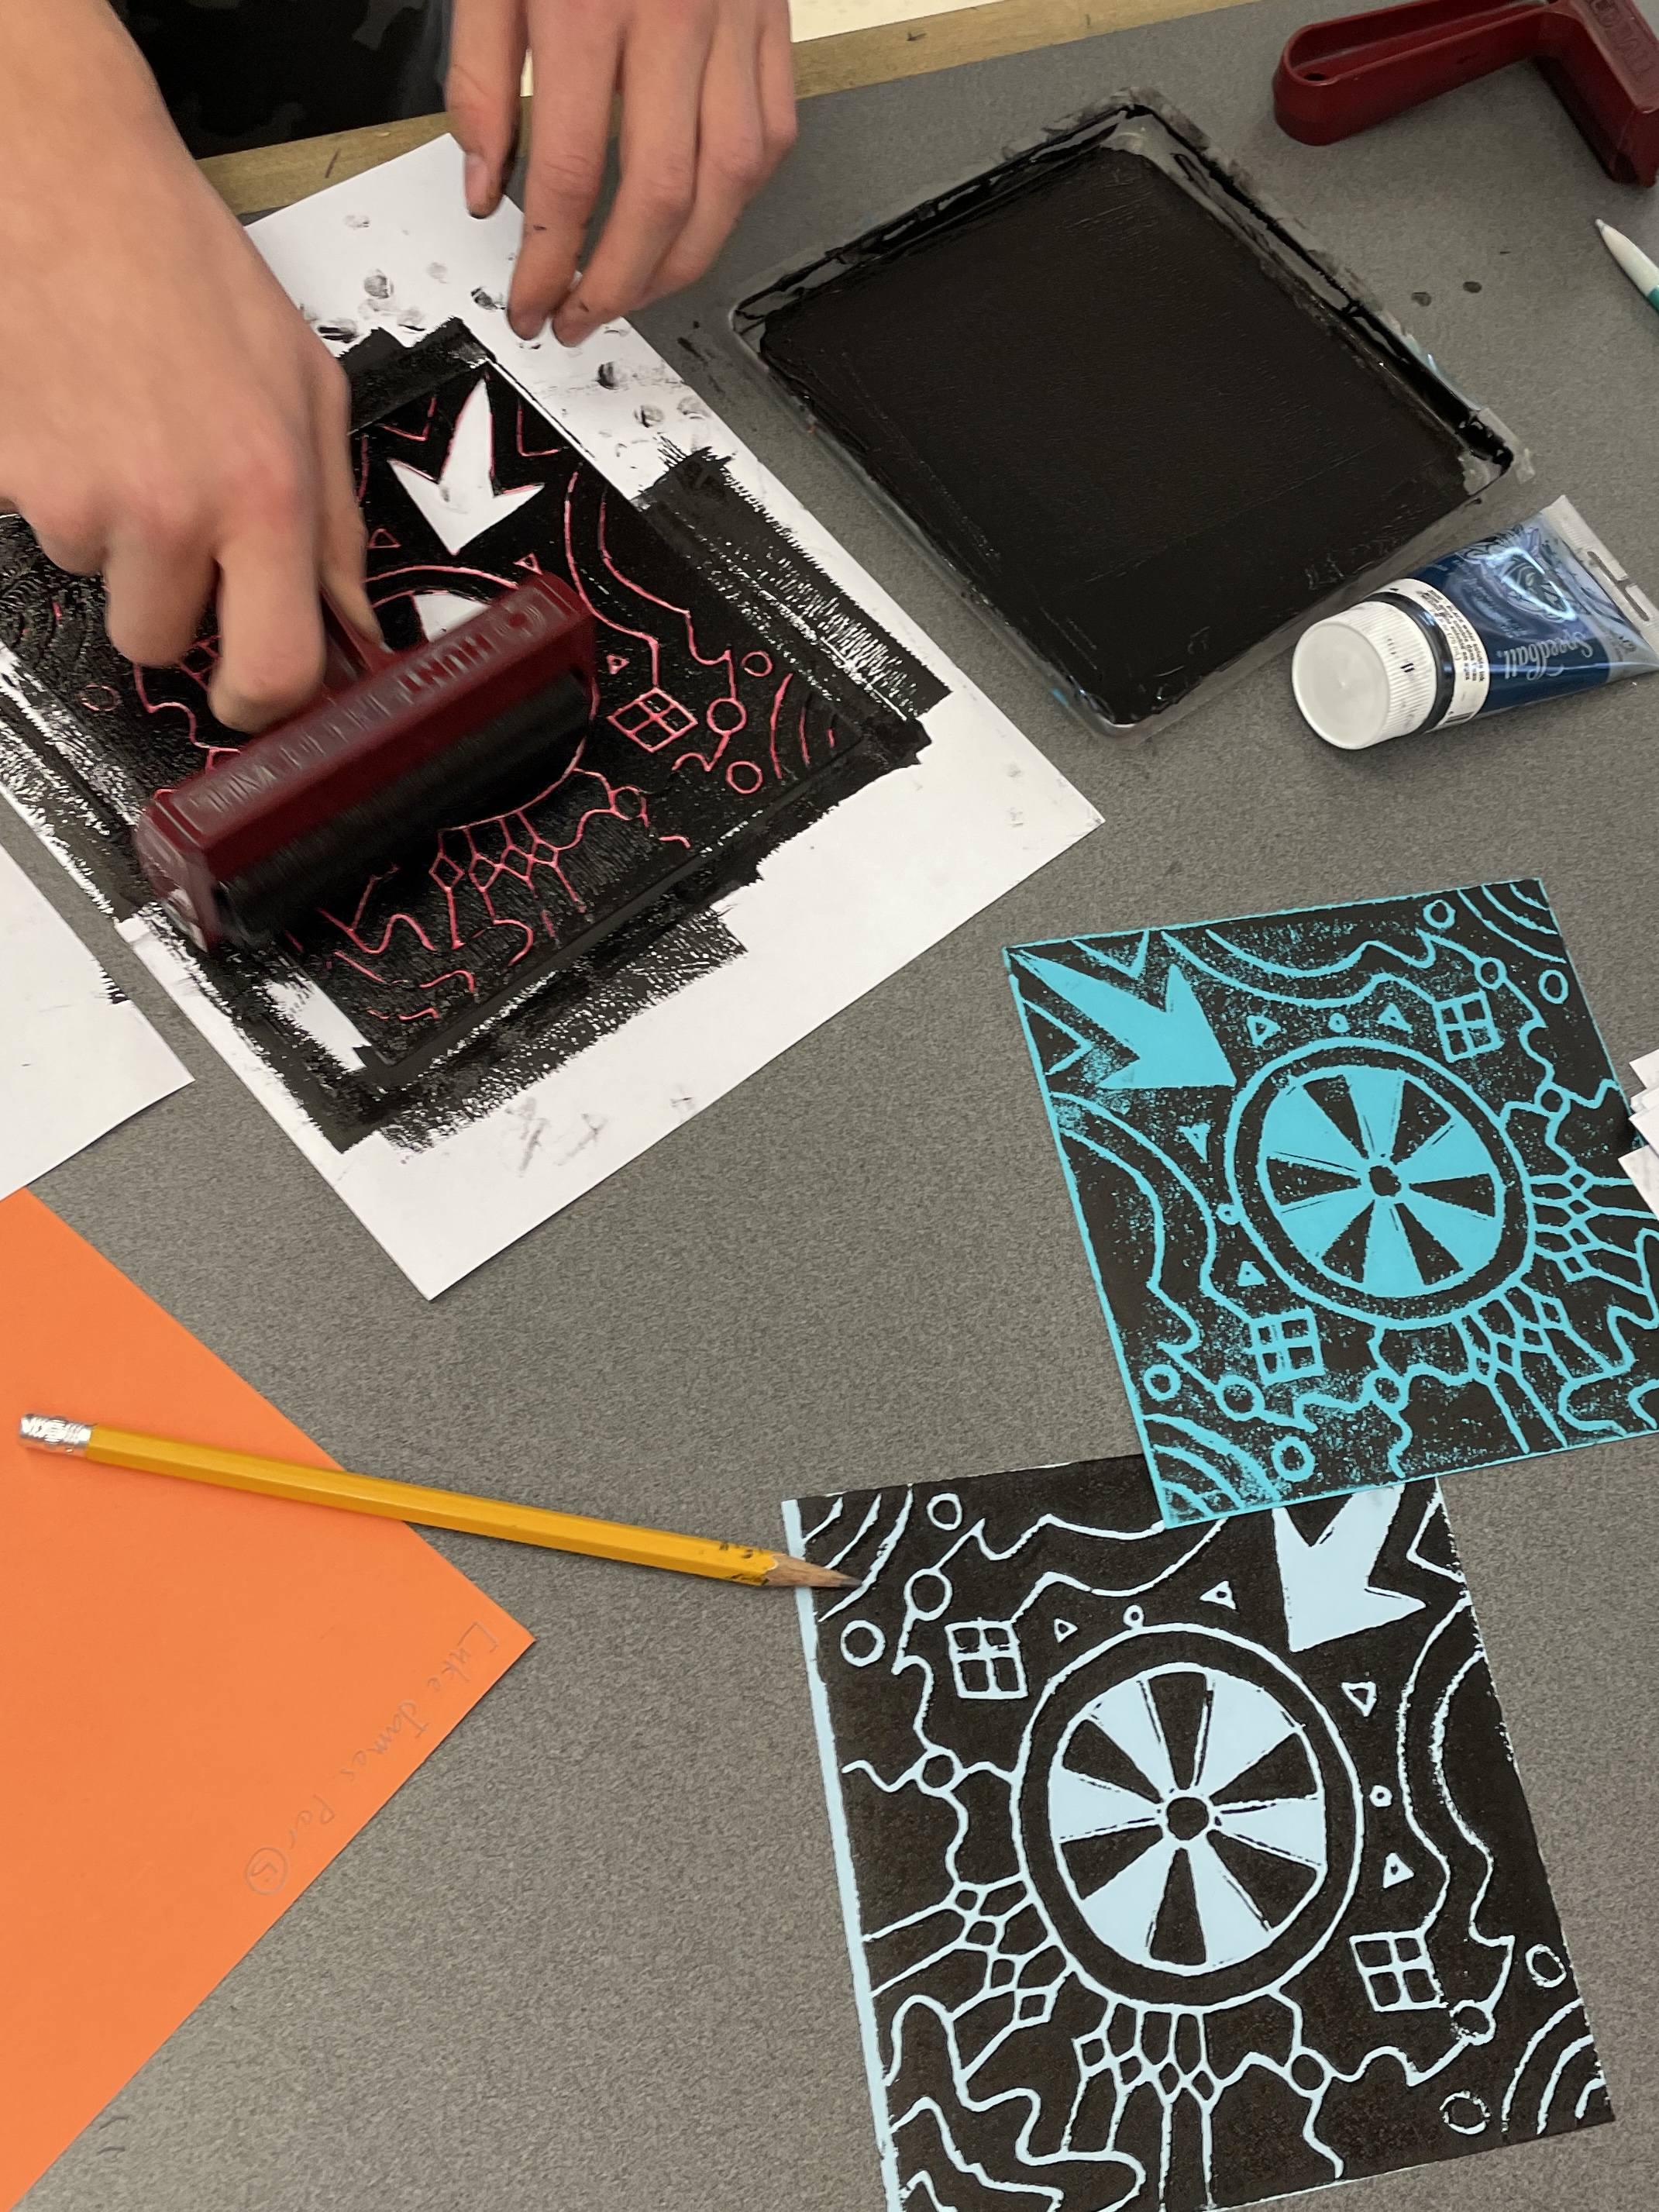
Next, students transferred their image on to a foam printing plate. This is a multi-step process that requires patience and precision! See the instruction packet linked above for more details on doing this successfully. When the printing plate was complete, each student and I consulted which elements of their design they wanted cut away, and I completed this task with an Xacto Knife.

– – –
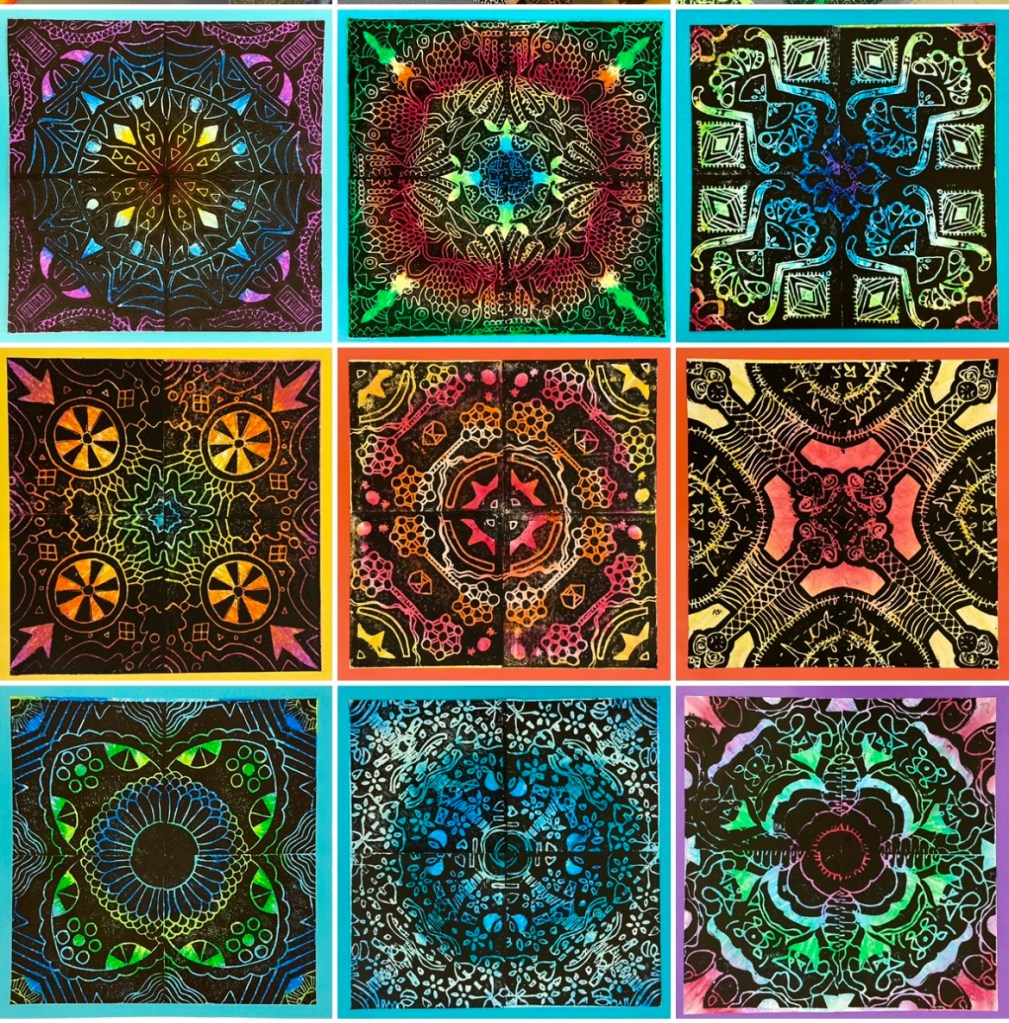
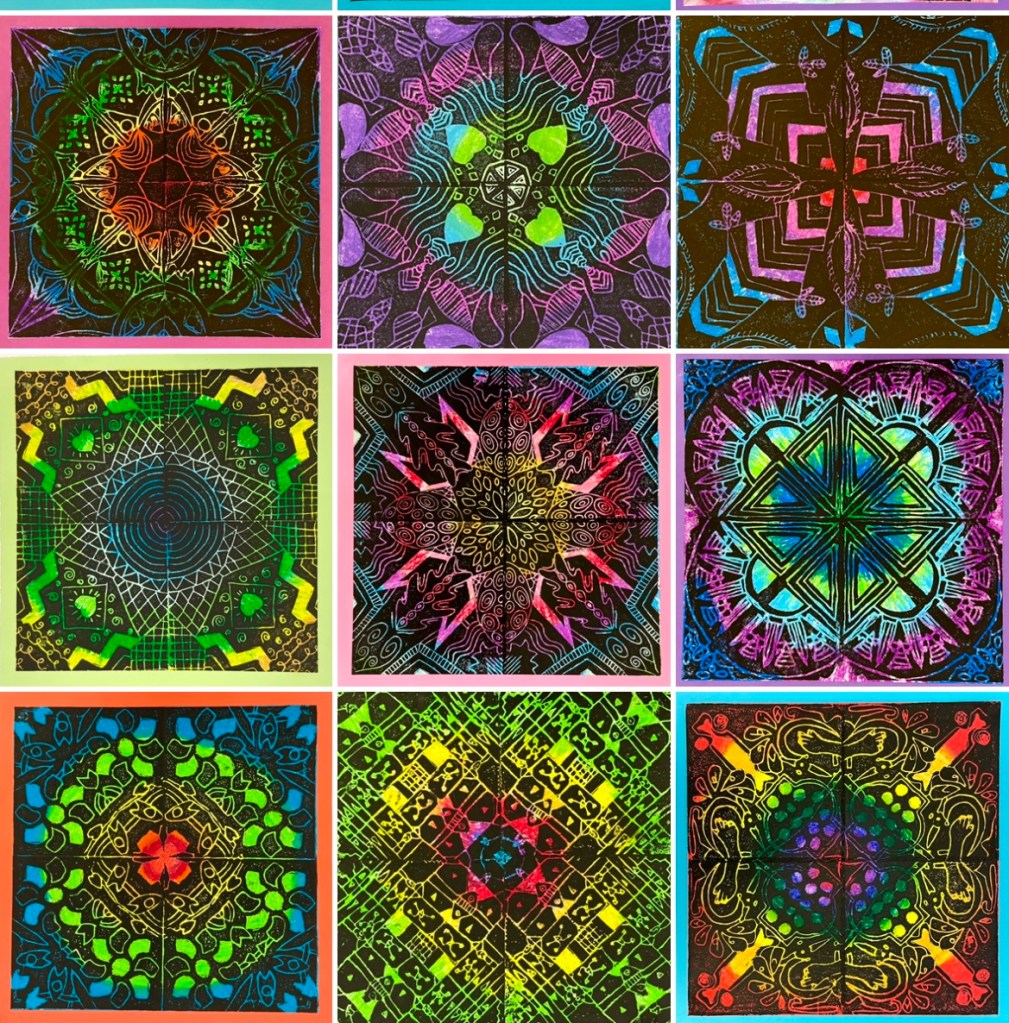
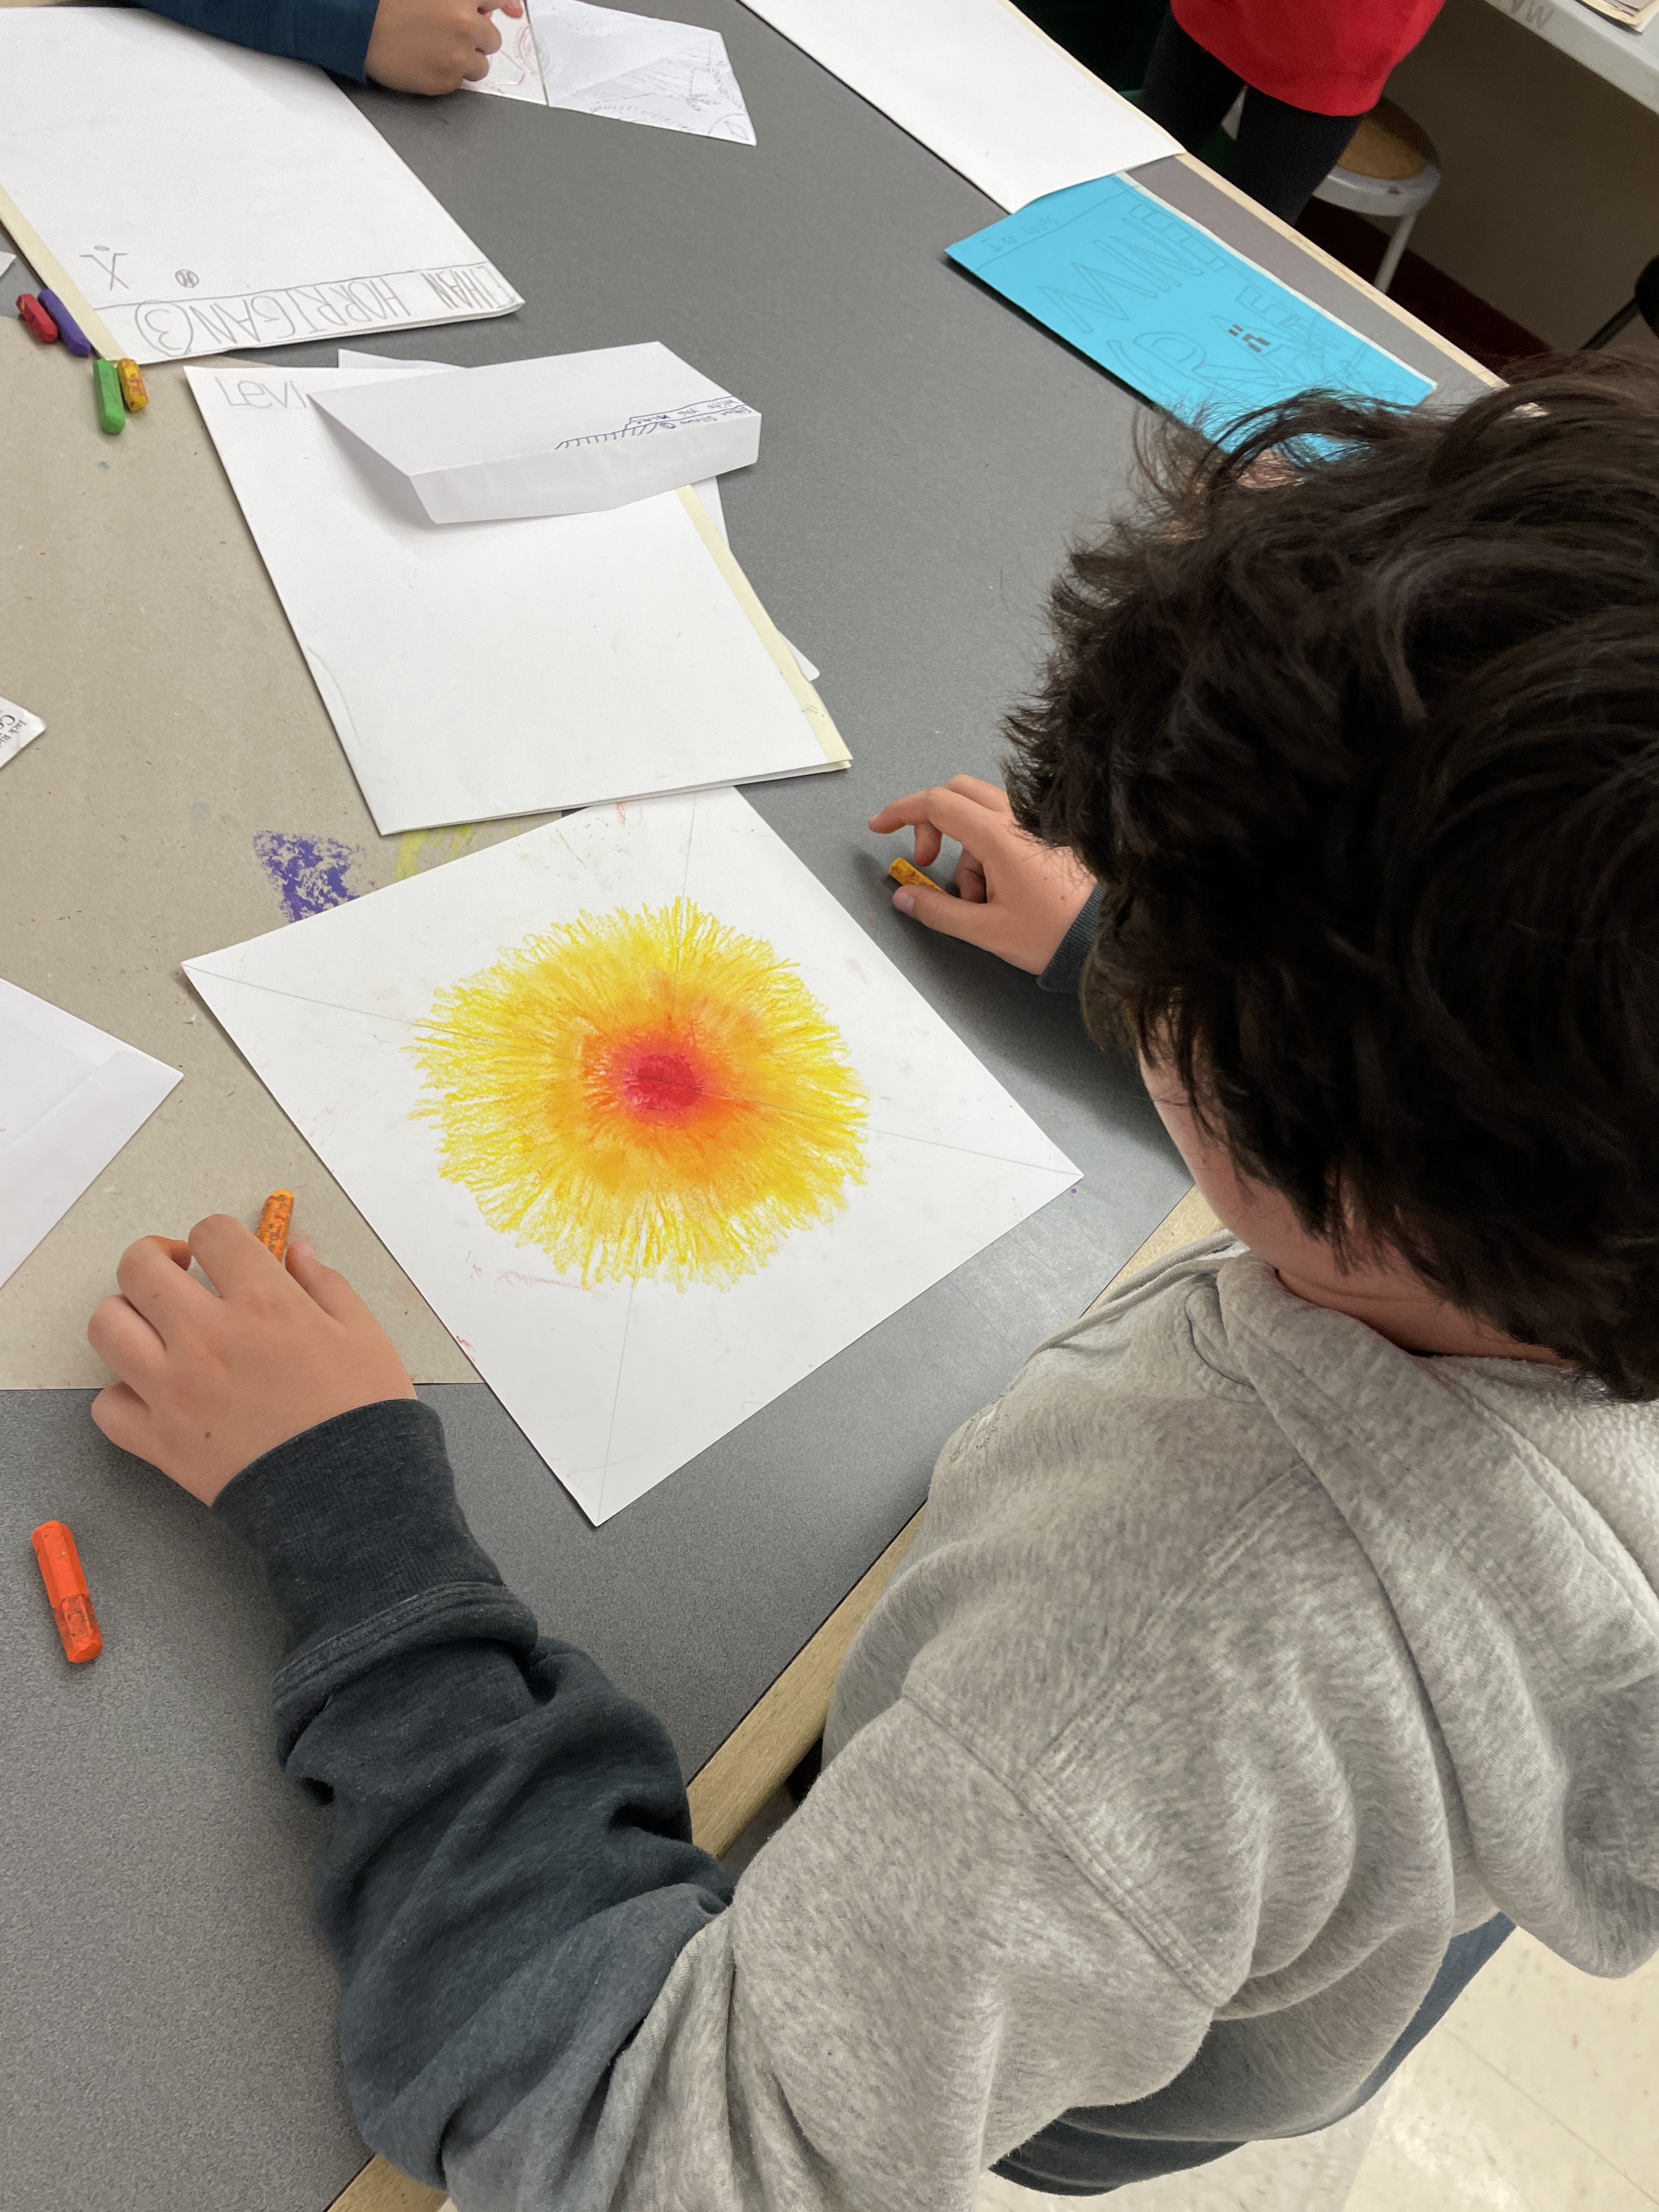
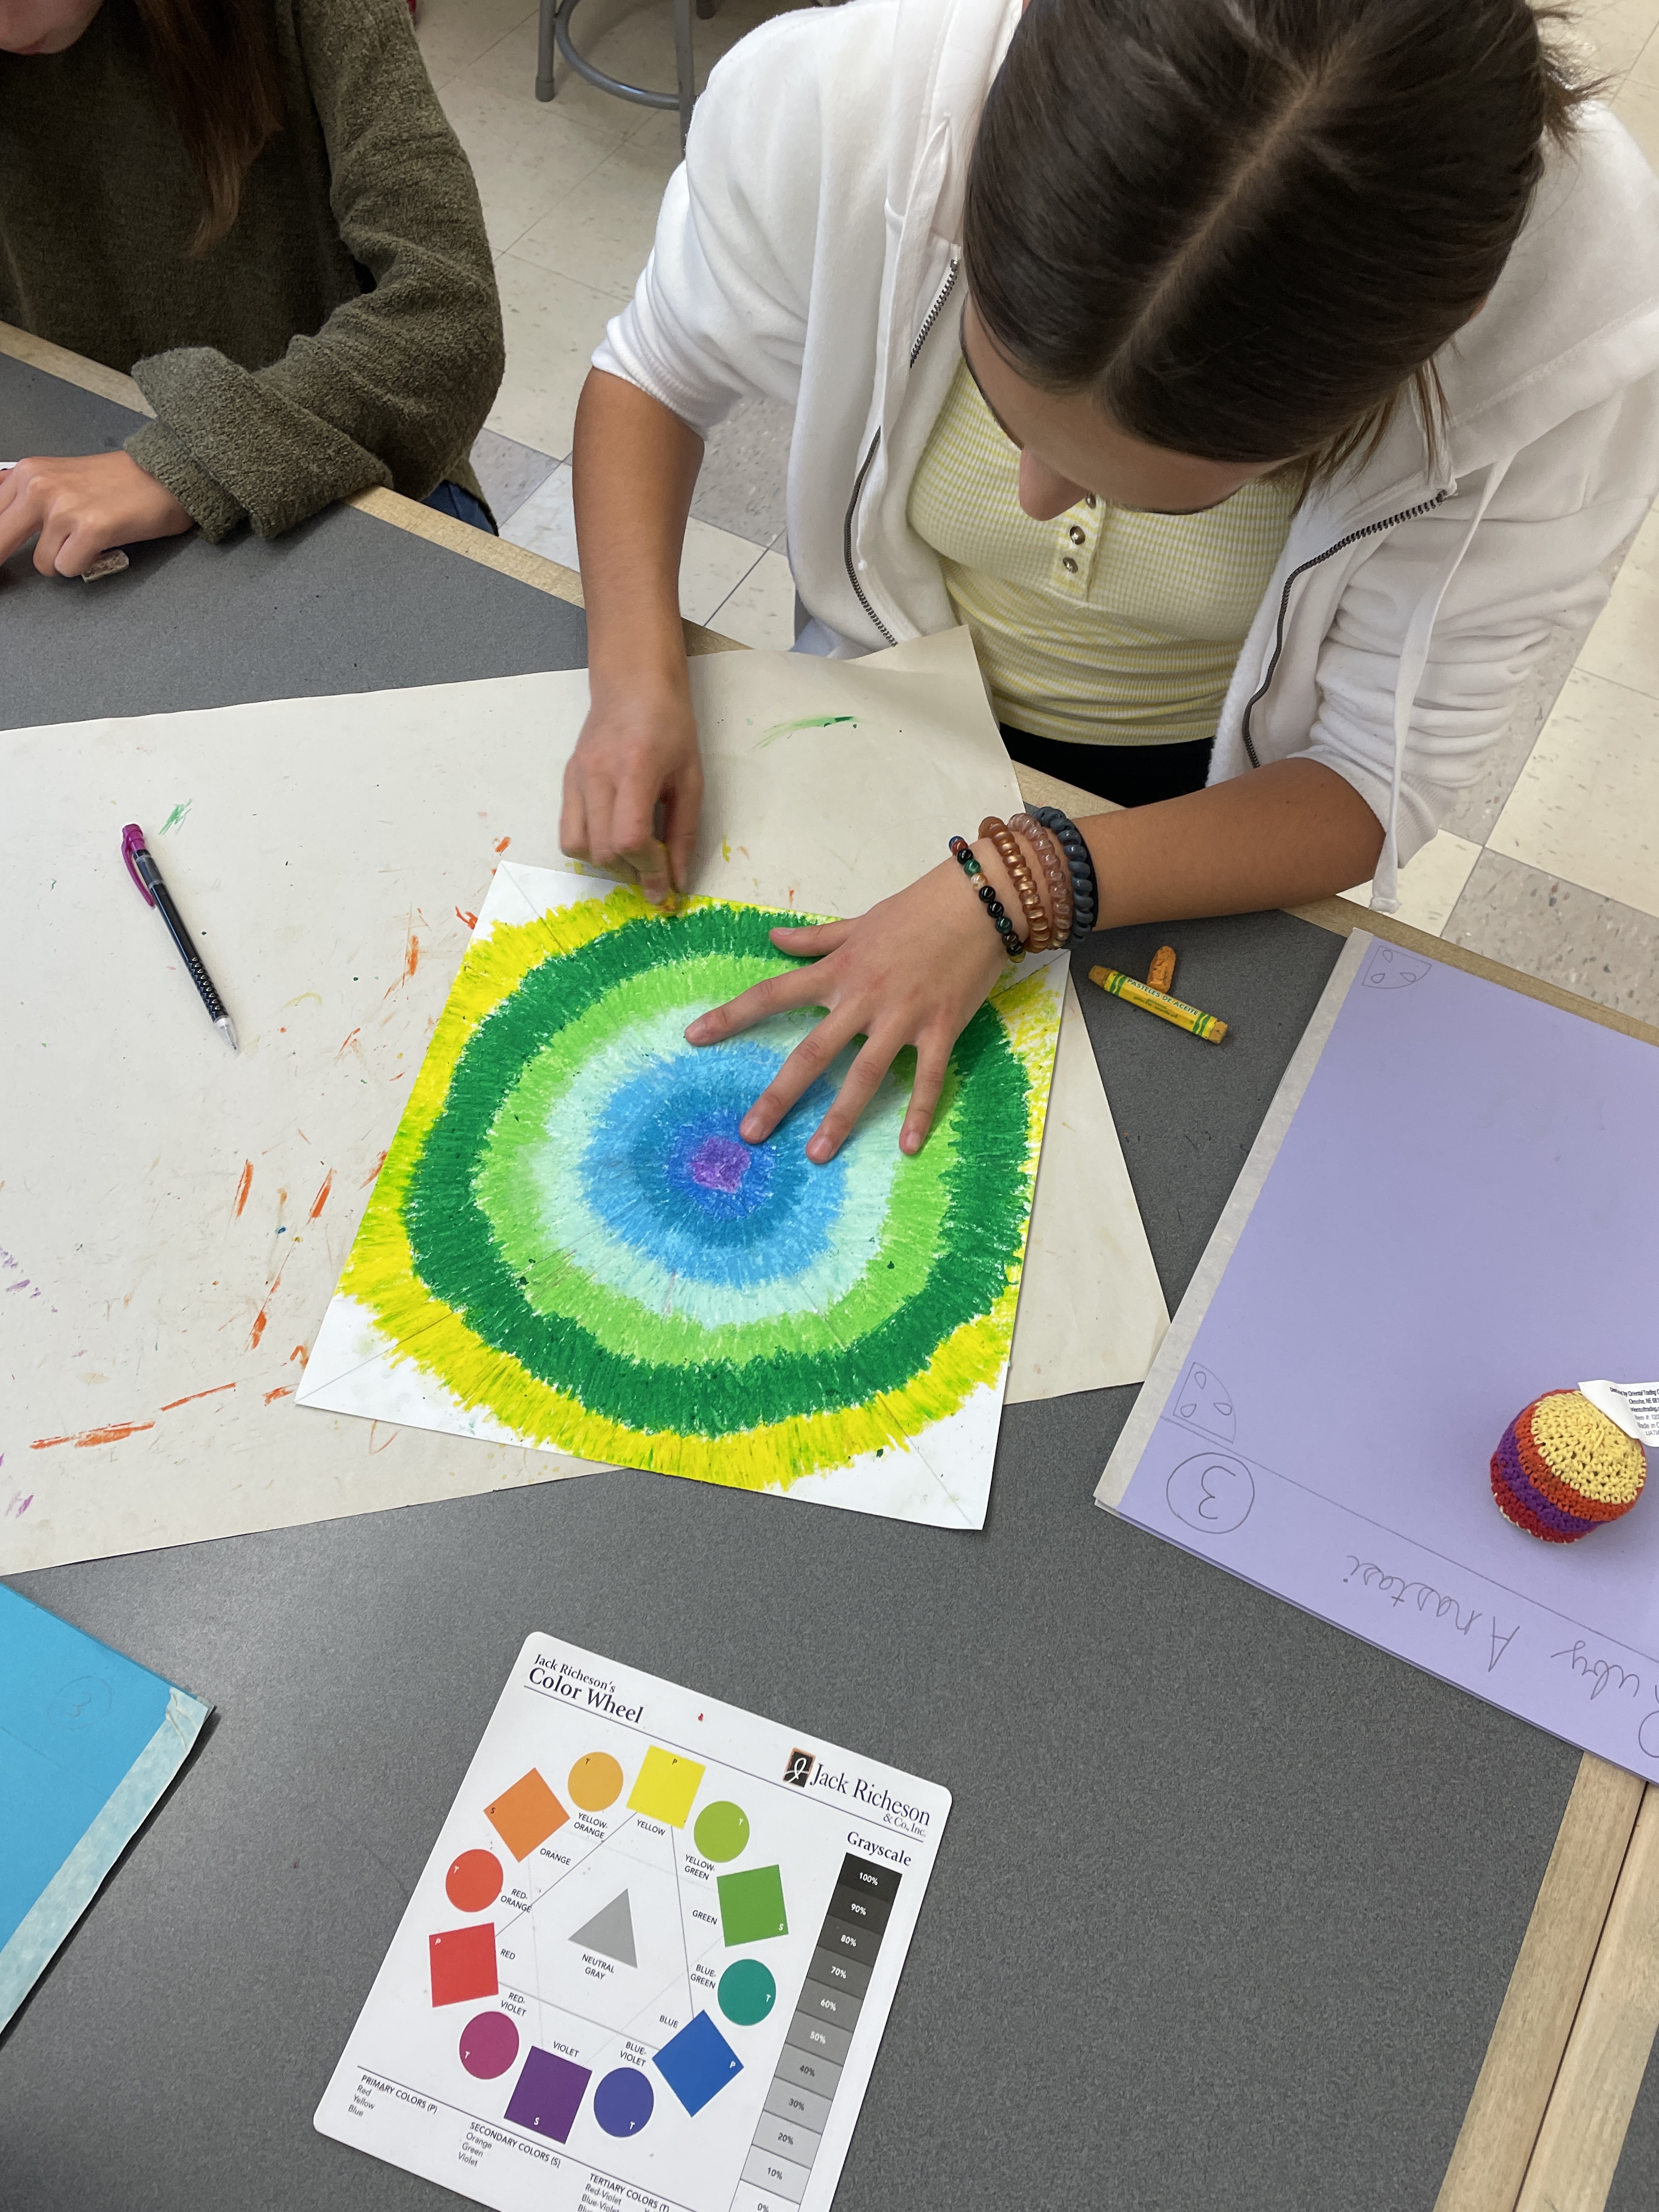
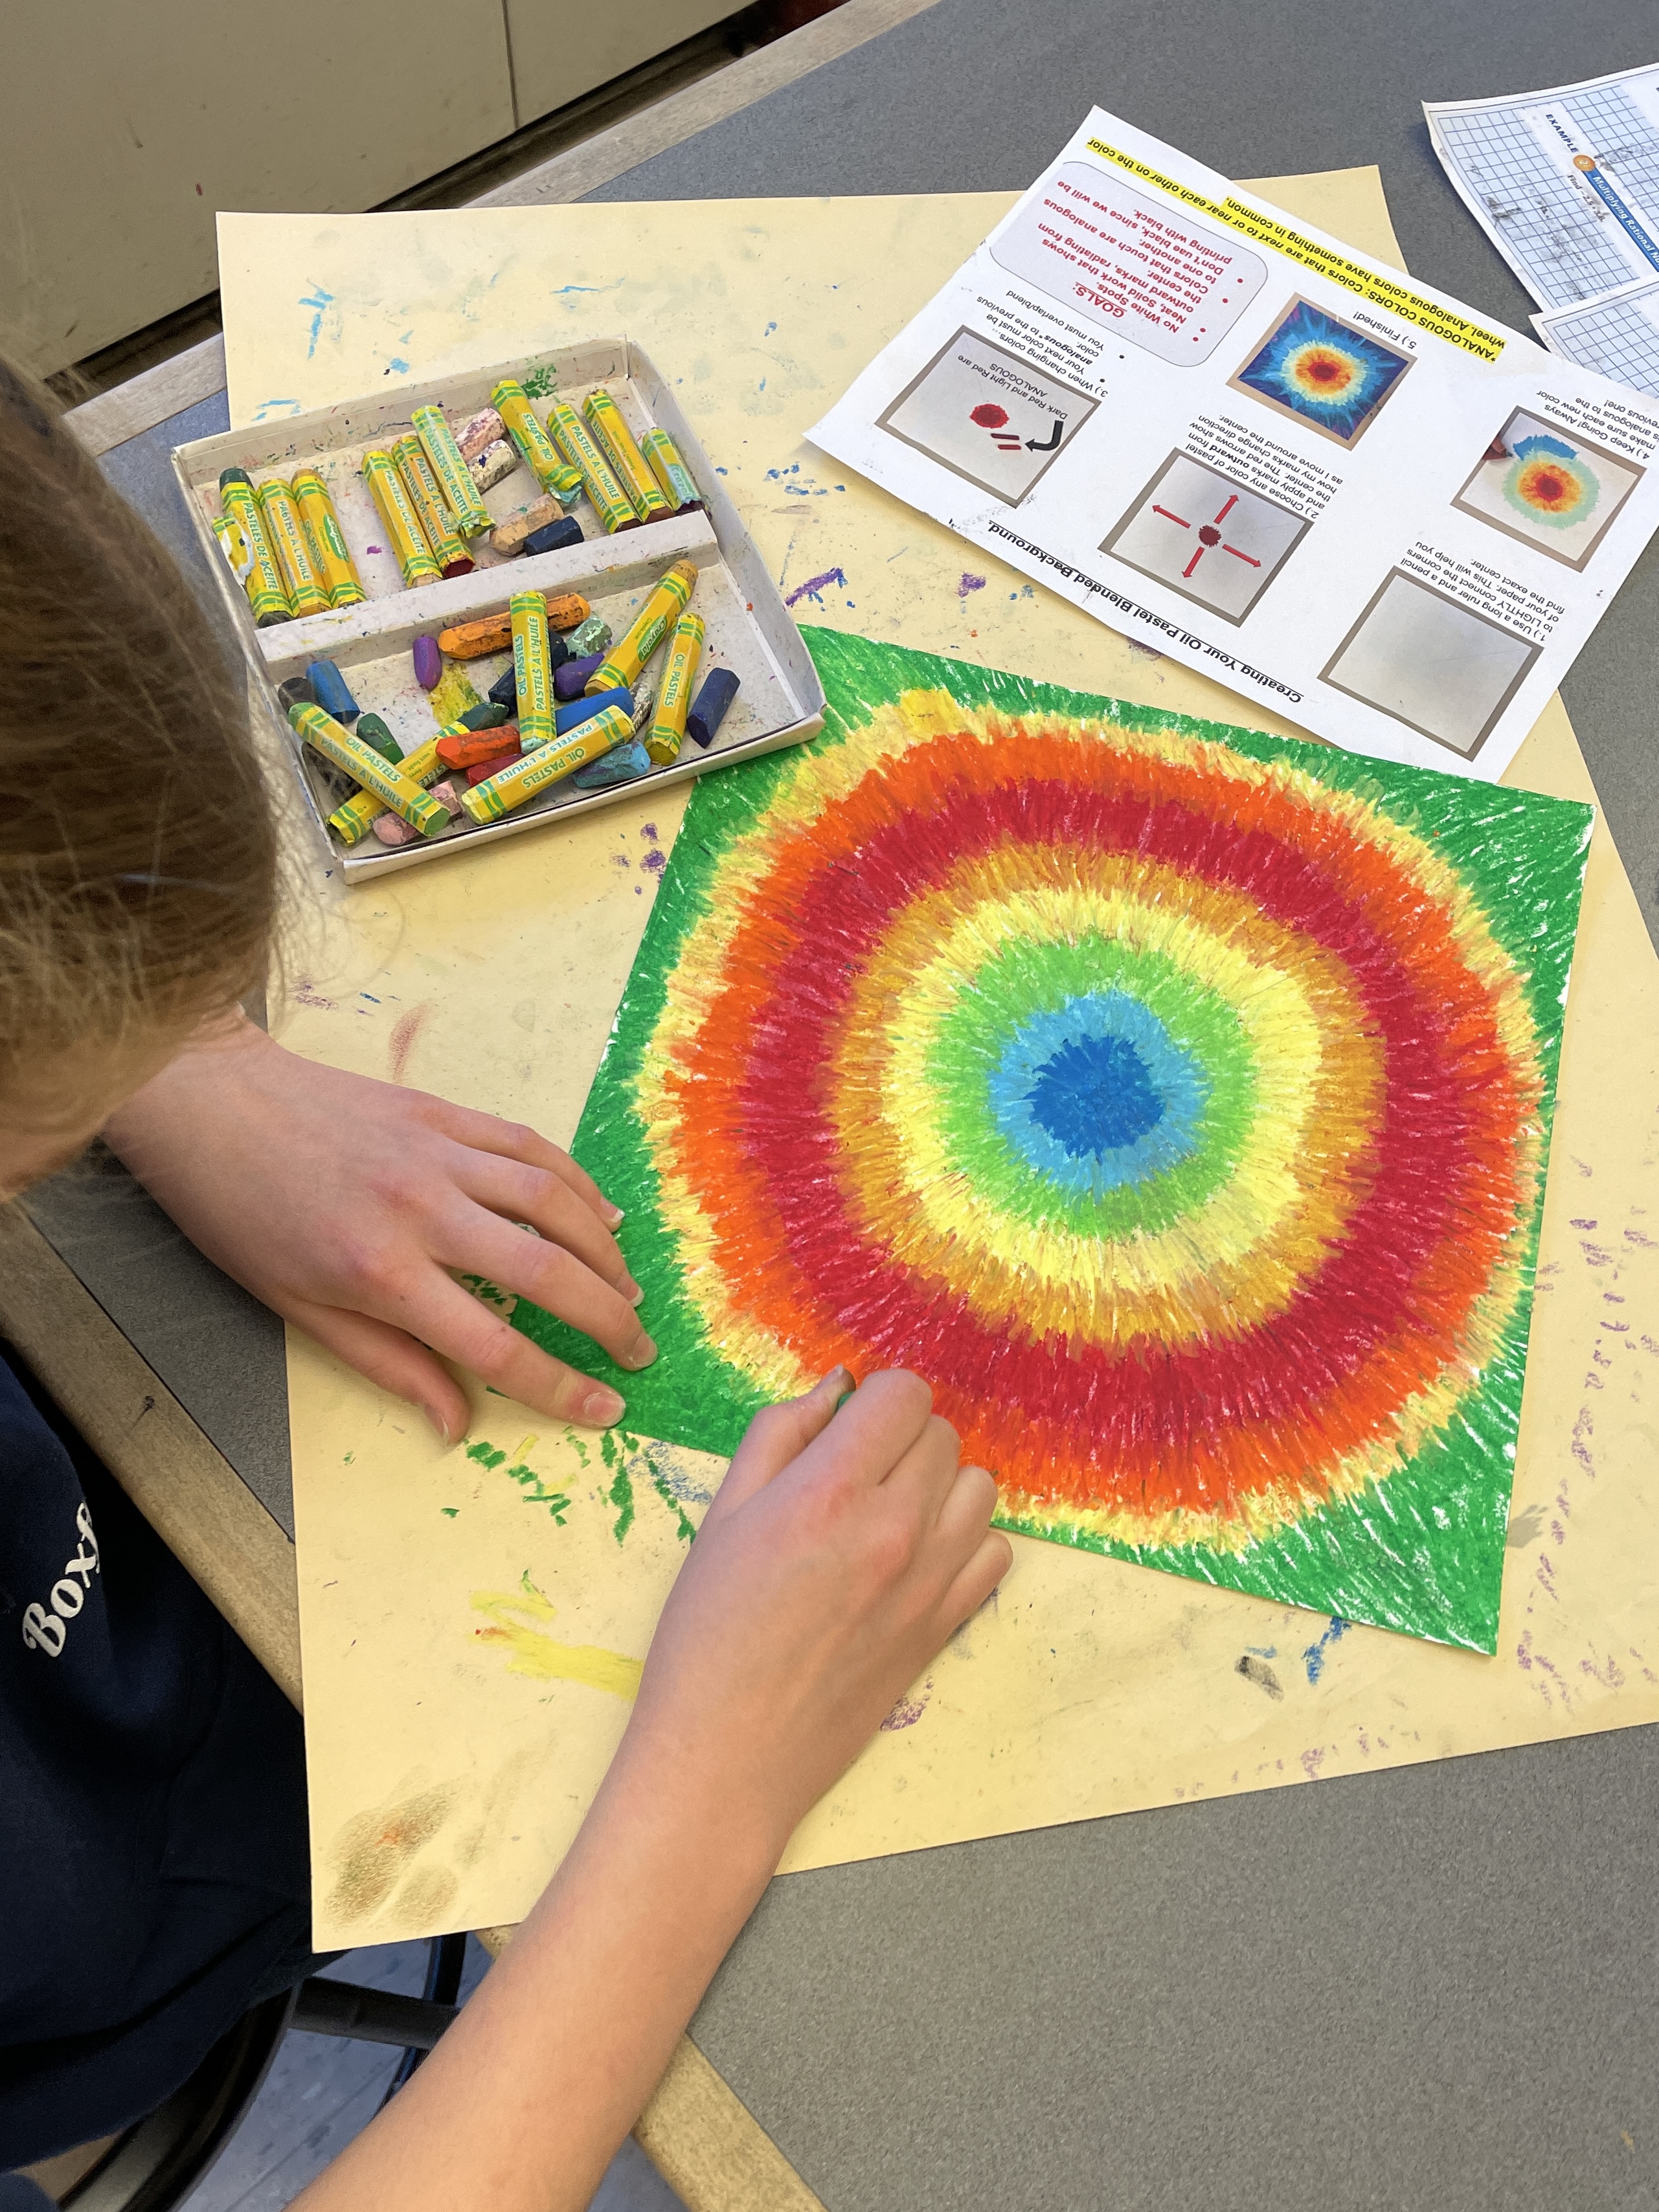
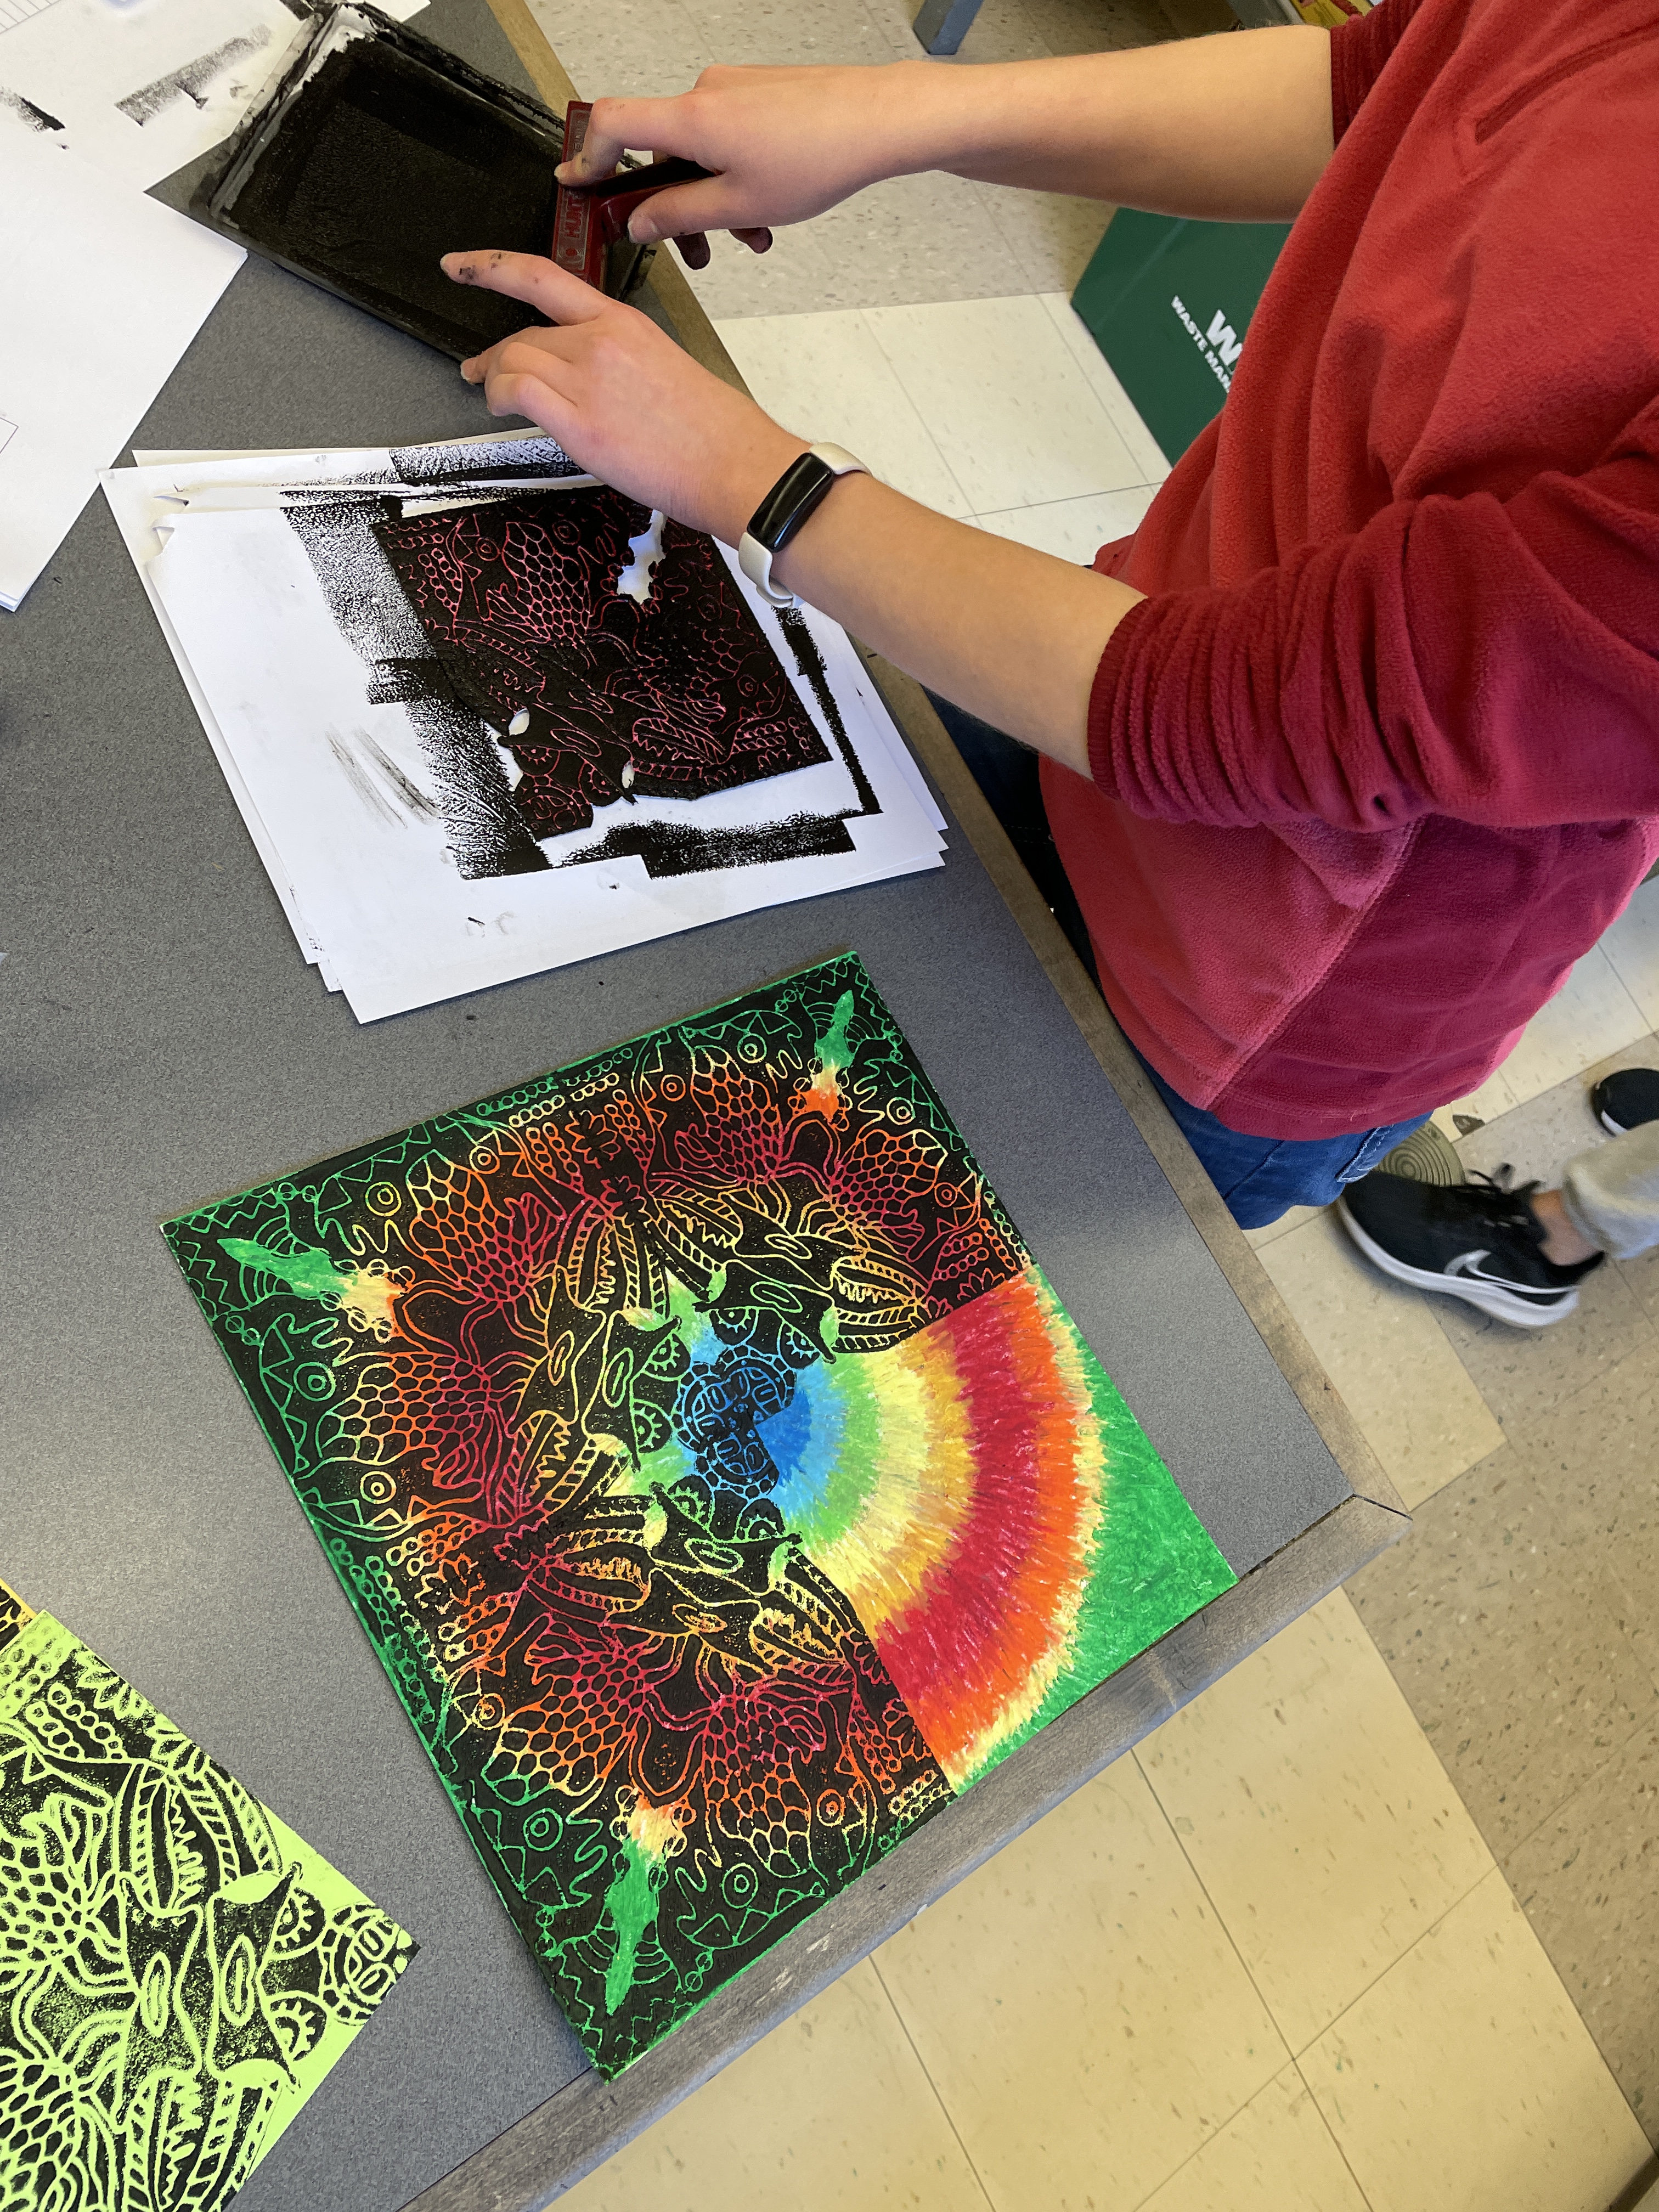
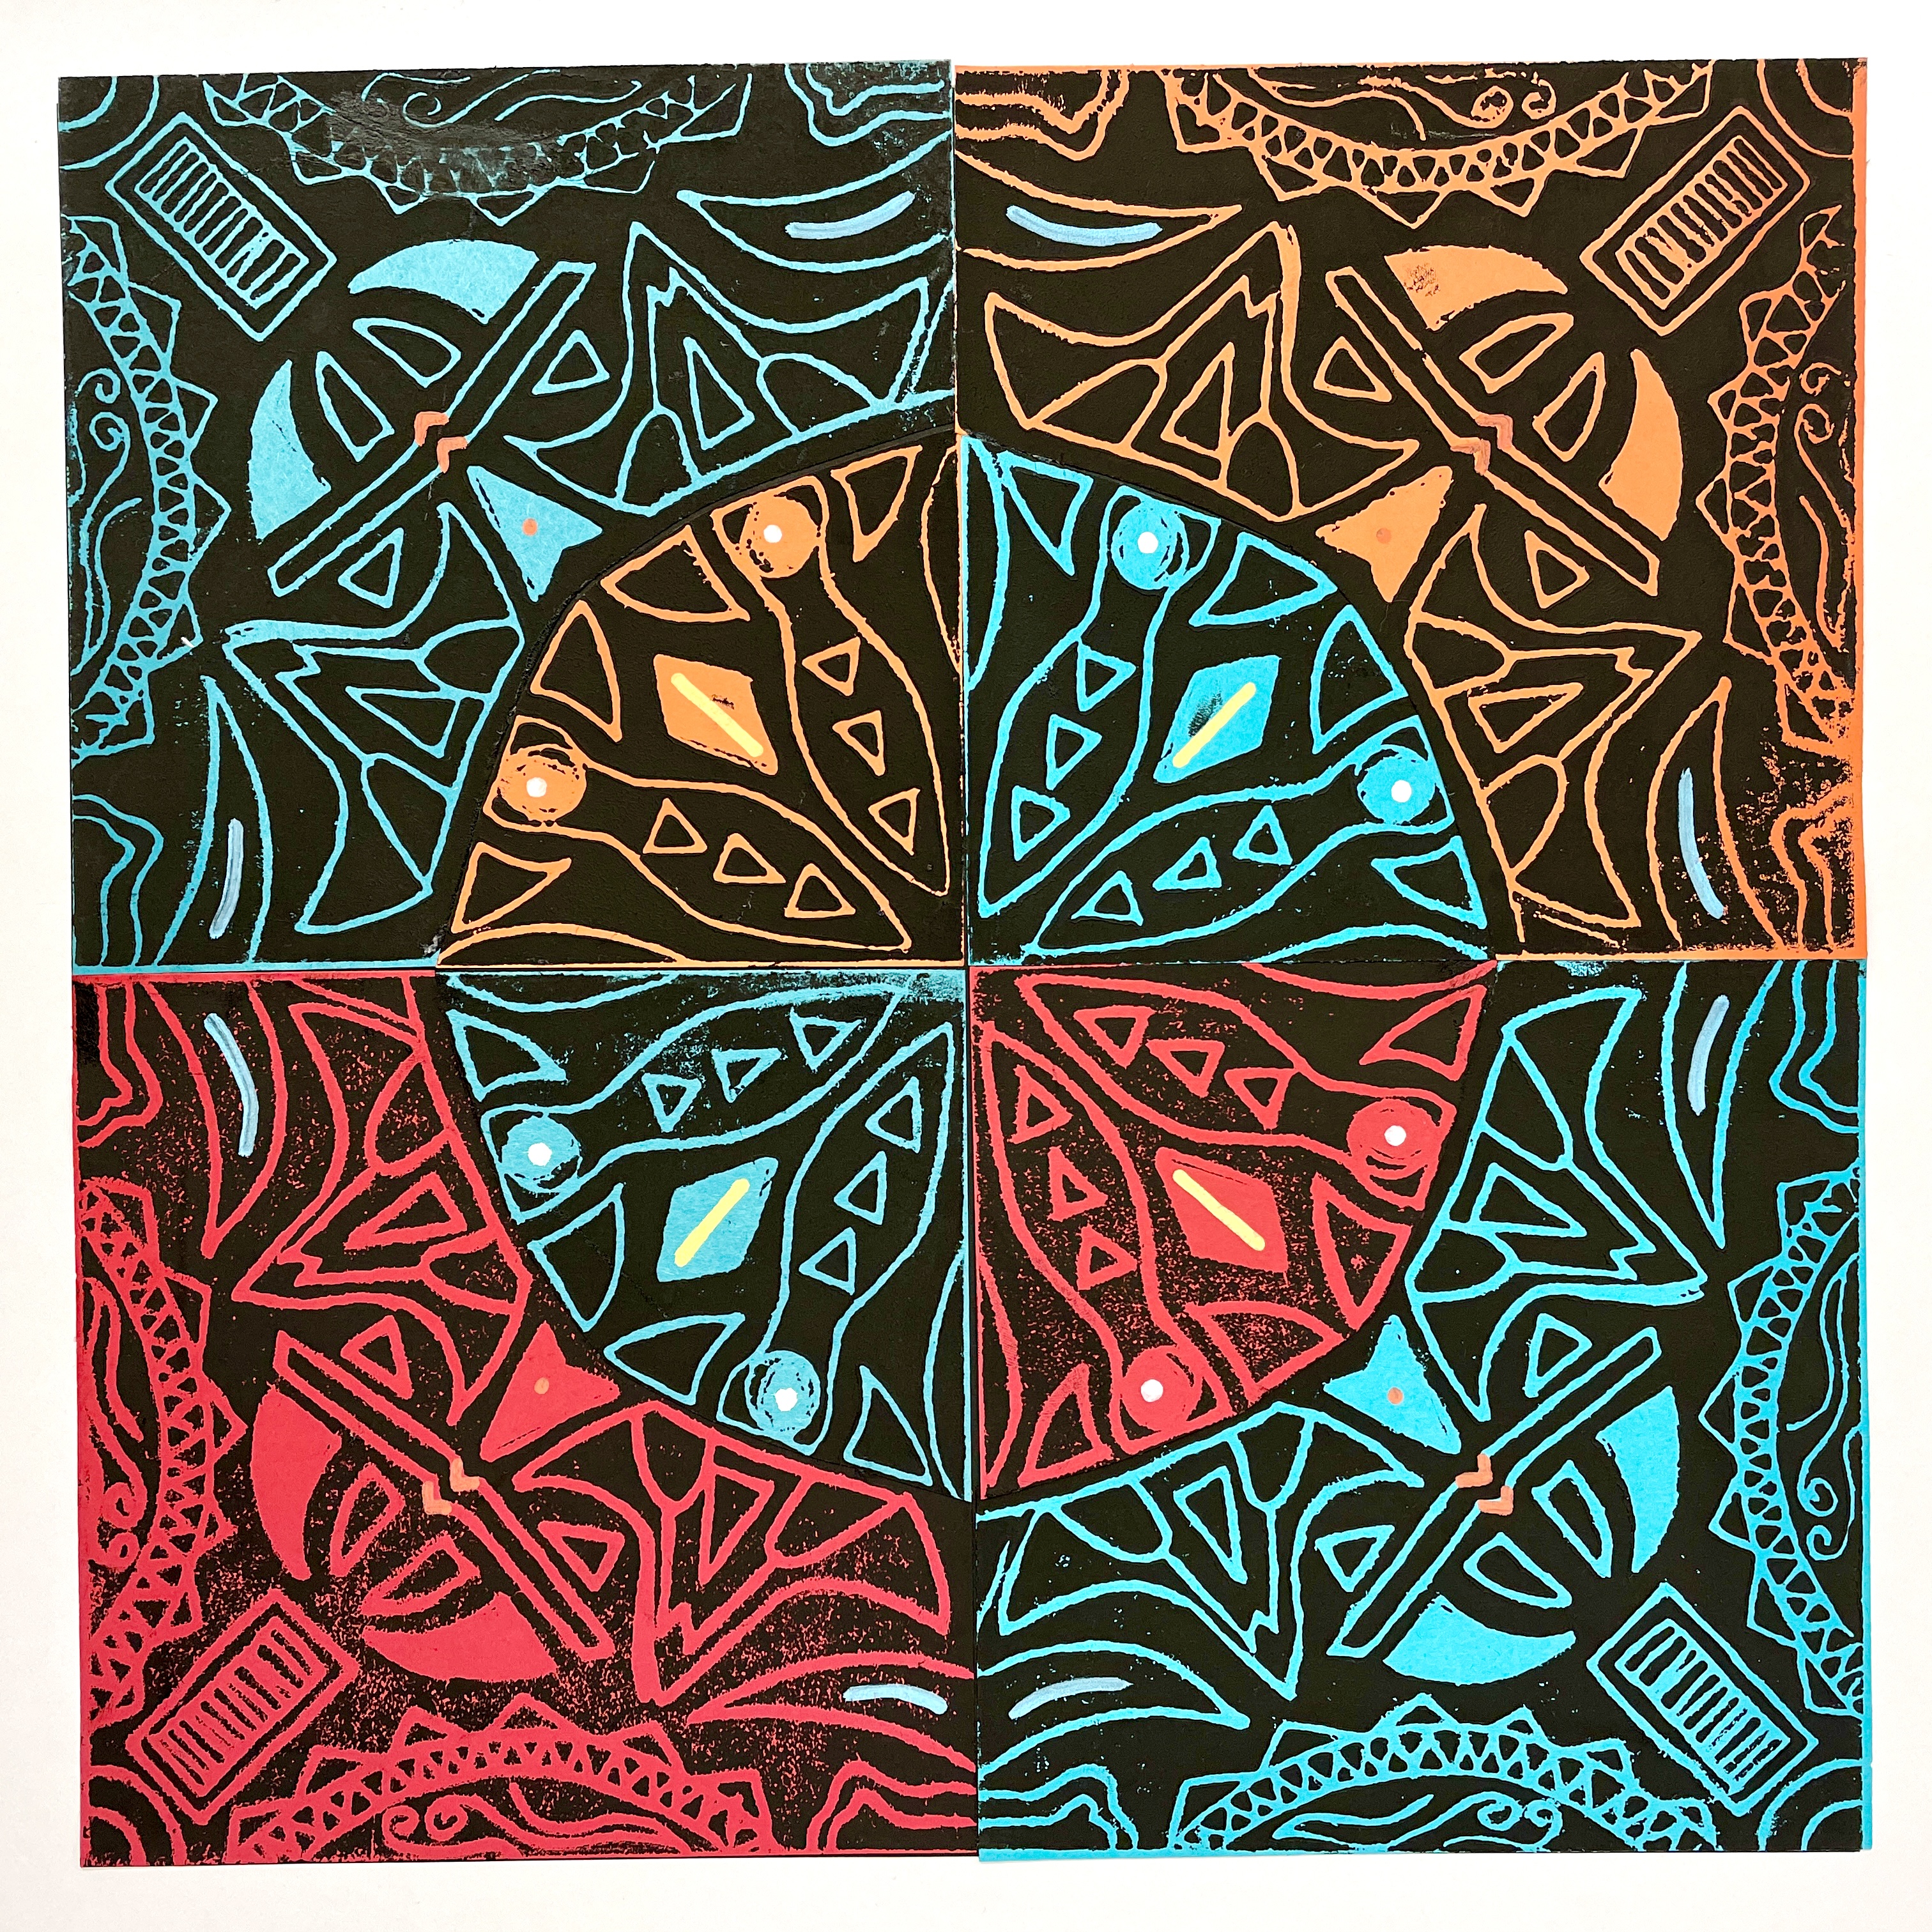
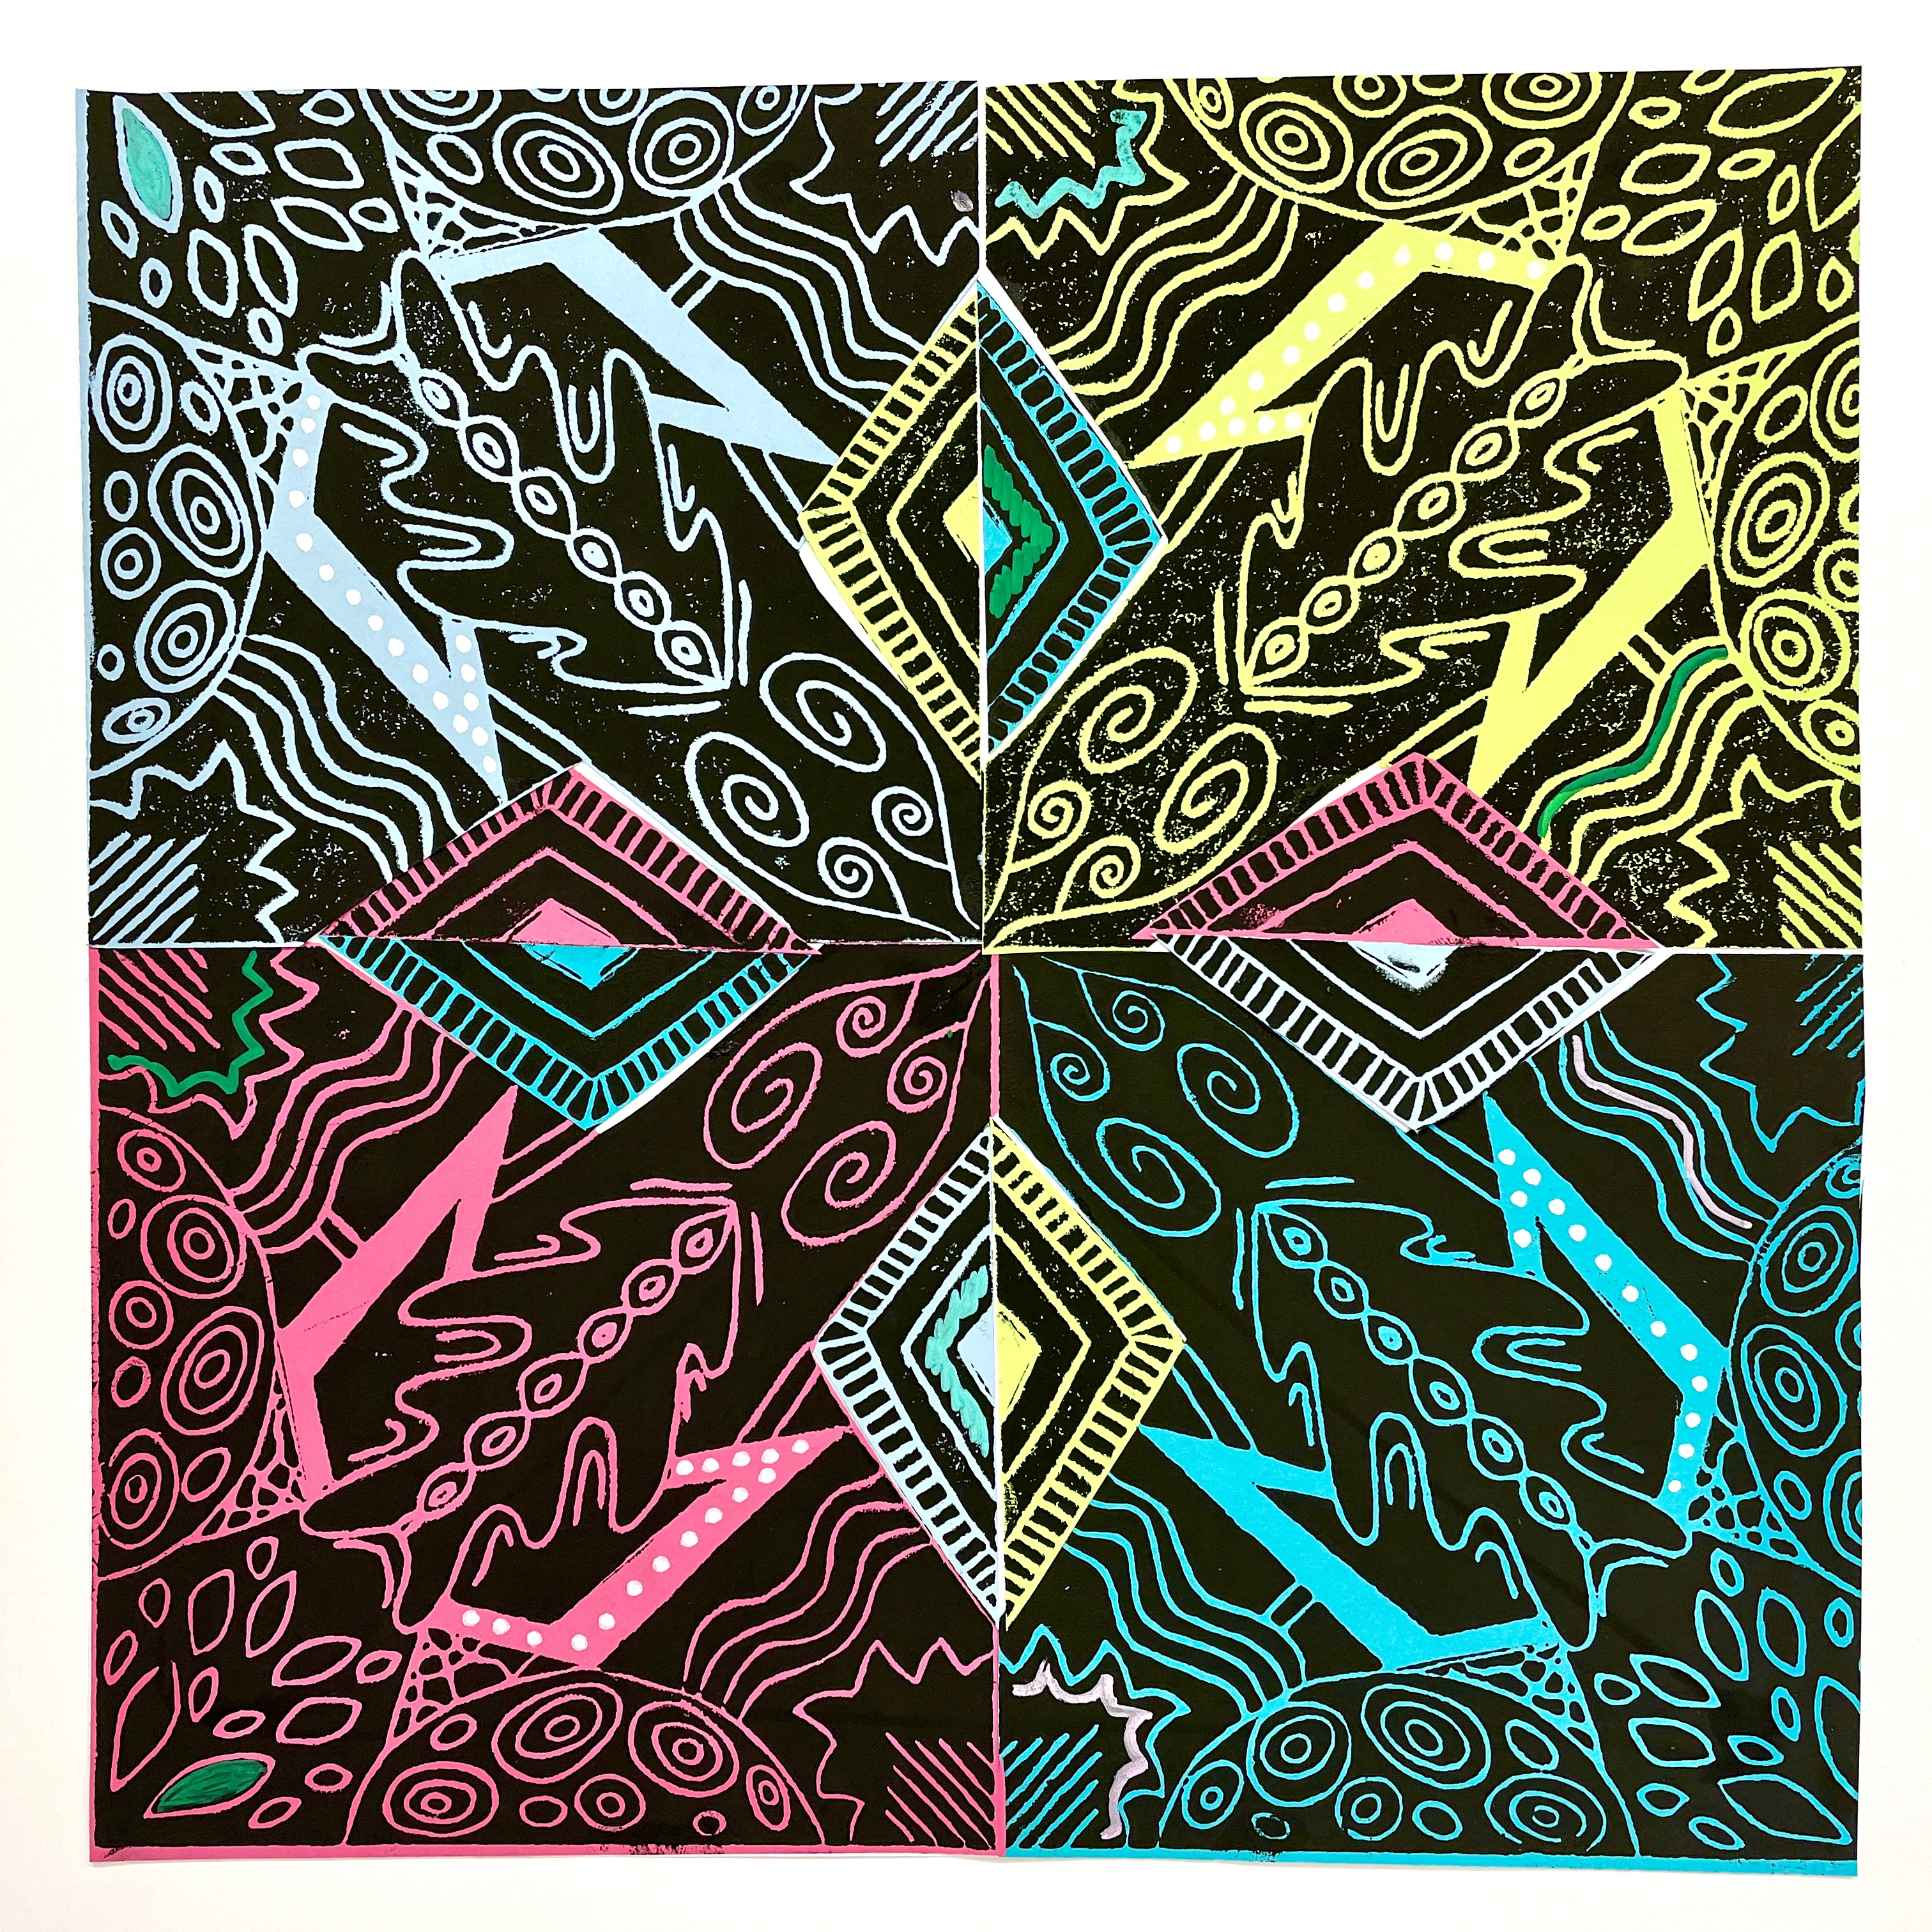
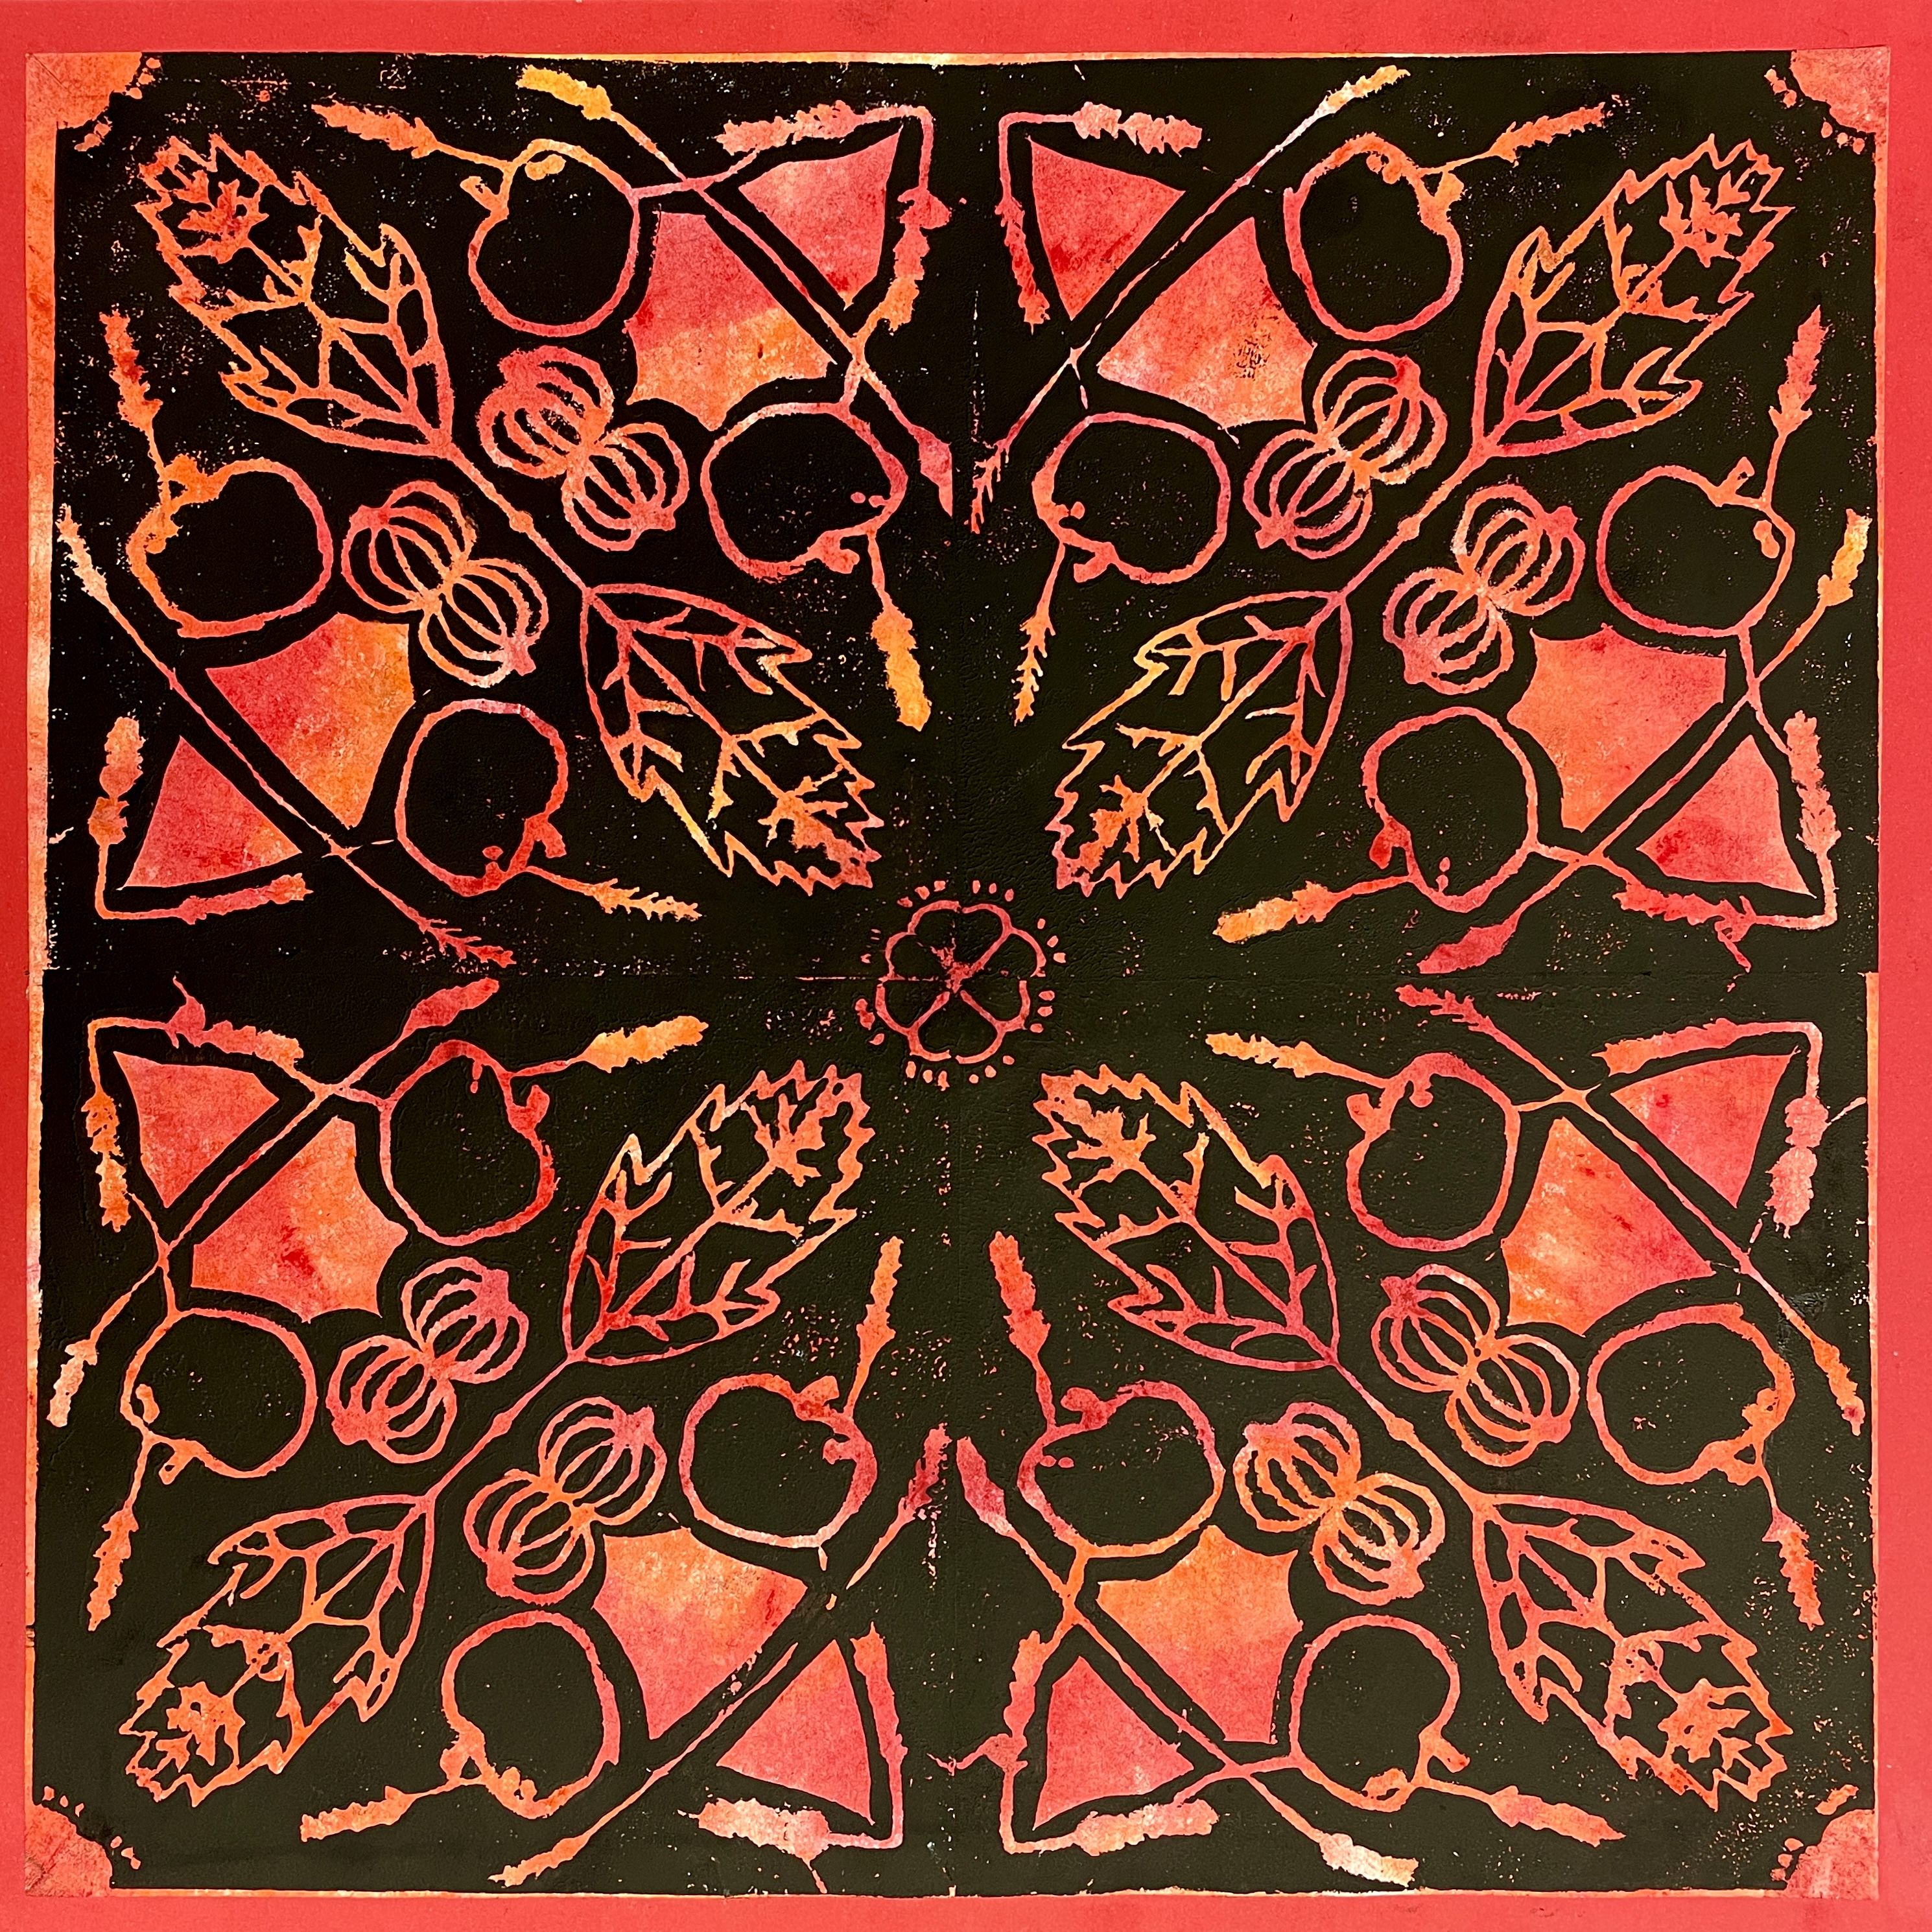
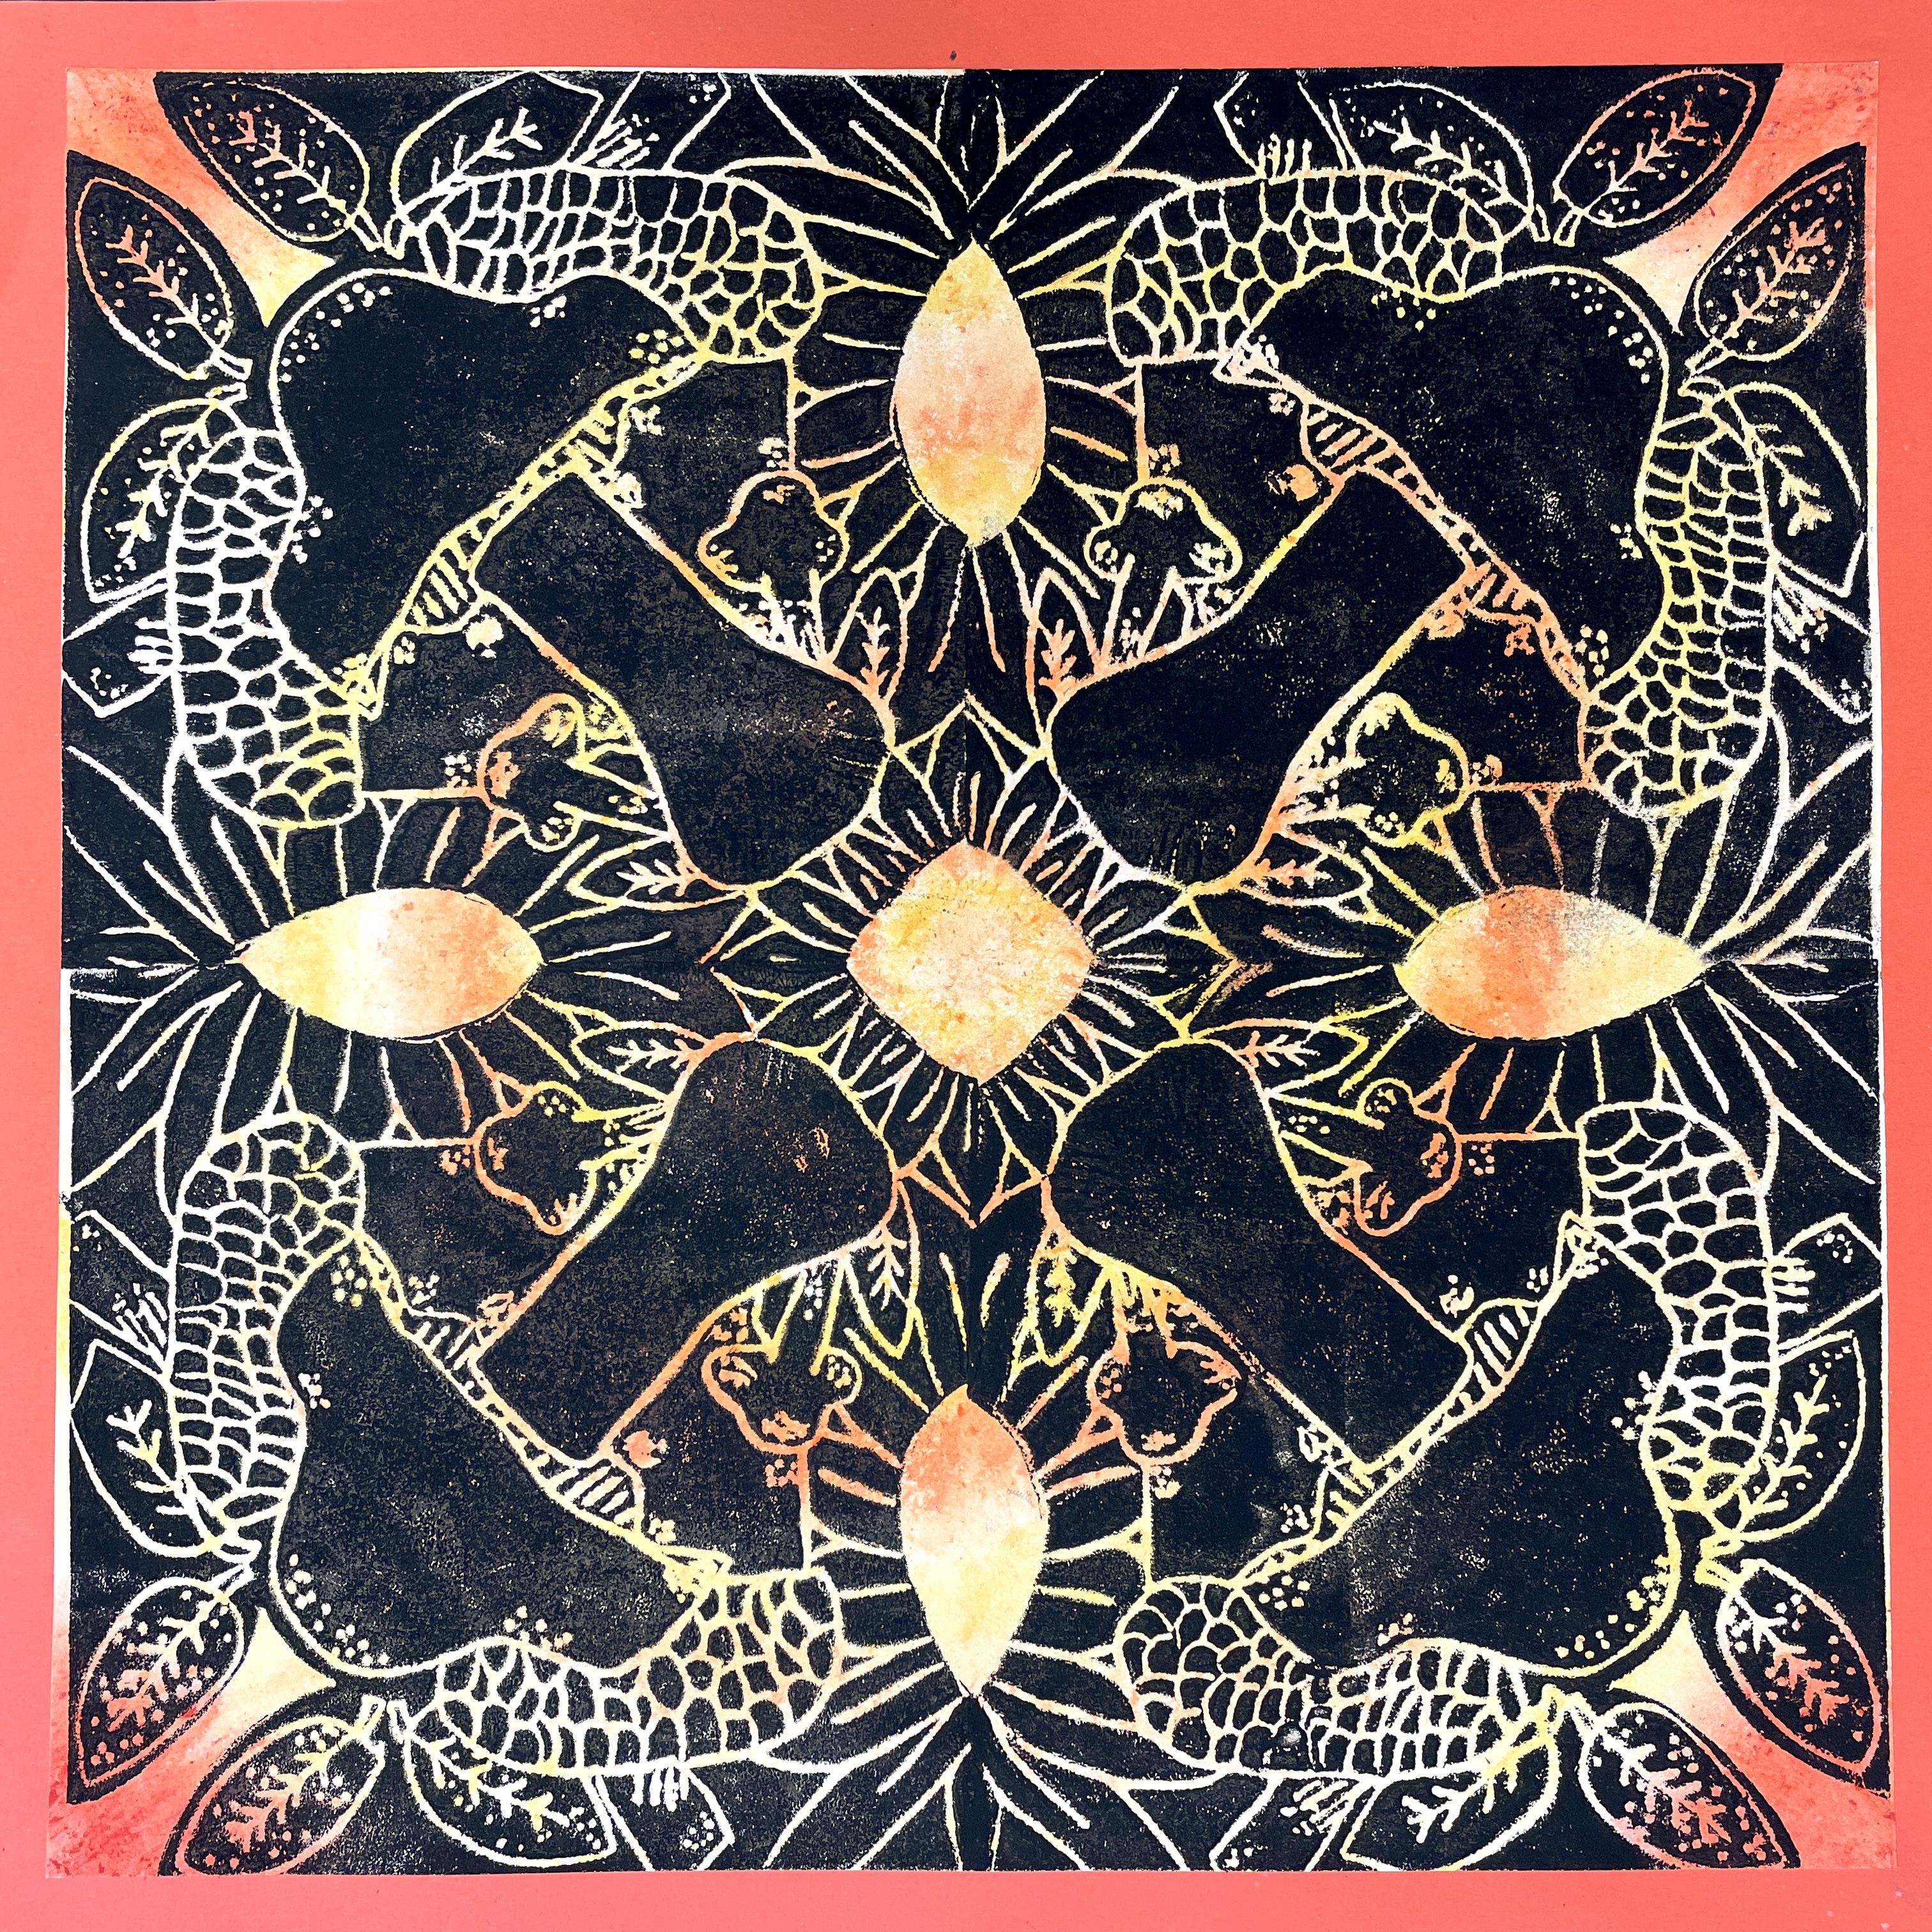
Once the printing plate was complete, students worked on creating a brightly colored oil pastel blended background. (This paper was sized 12” by 12” in order to fit a total of four prints.) We worked out from the center, blending analogous colors and applying very solid layers. Since we knew we would be printing with Black ink, we stayed away from black pastel, or other very dark colors.


– – –
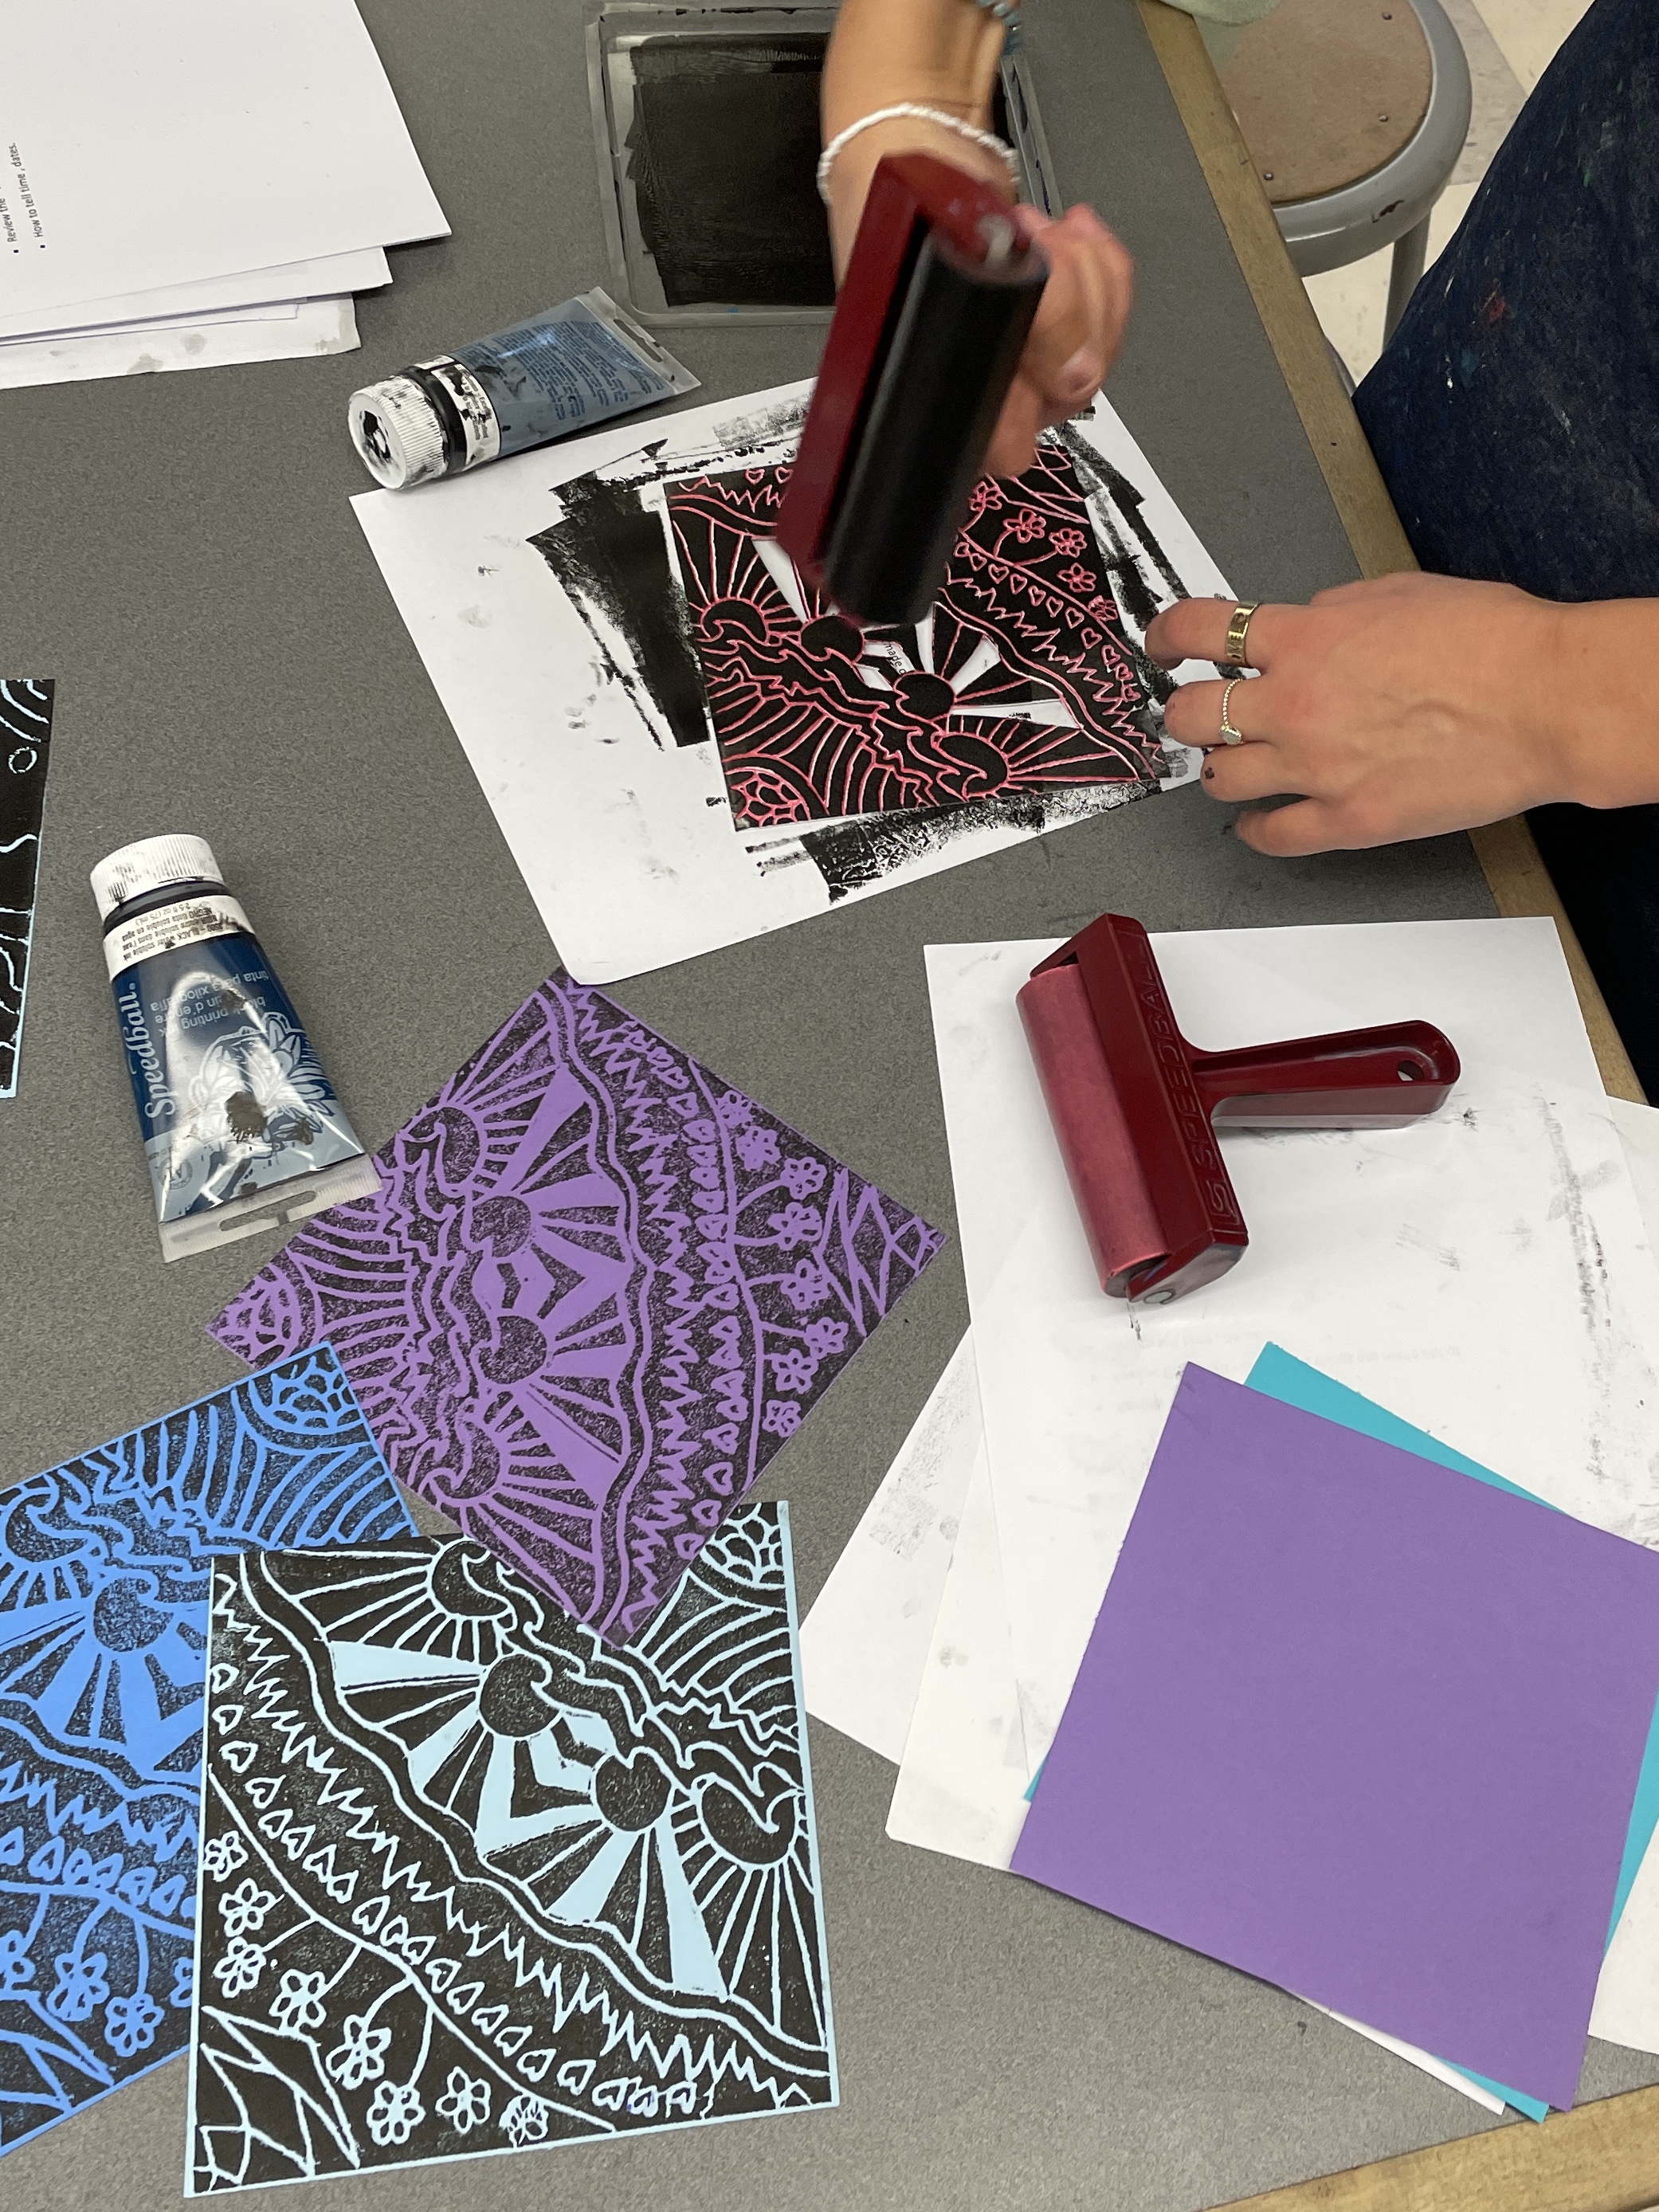
Once done with their 12” by 12” oil pastel base paper, students had to create a minimum of three successful practice prints. We did these on 6” colored construction paper squares. Printing has so many variables— it is imperative to allow your students the chance to master this technique before moving on to printing their oil pastel background paper. I demonstrate how to print properly in THIS SHORT VIDEO which is also linked in the instruction packet!
– – –
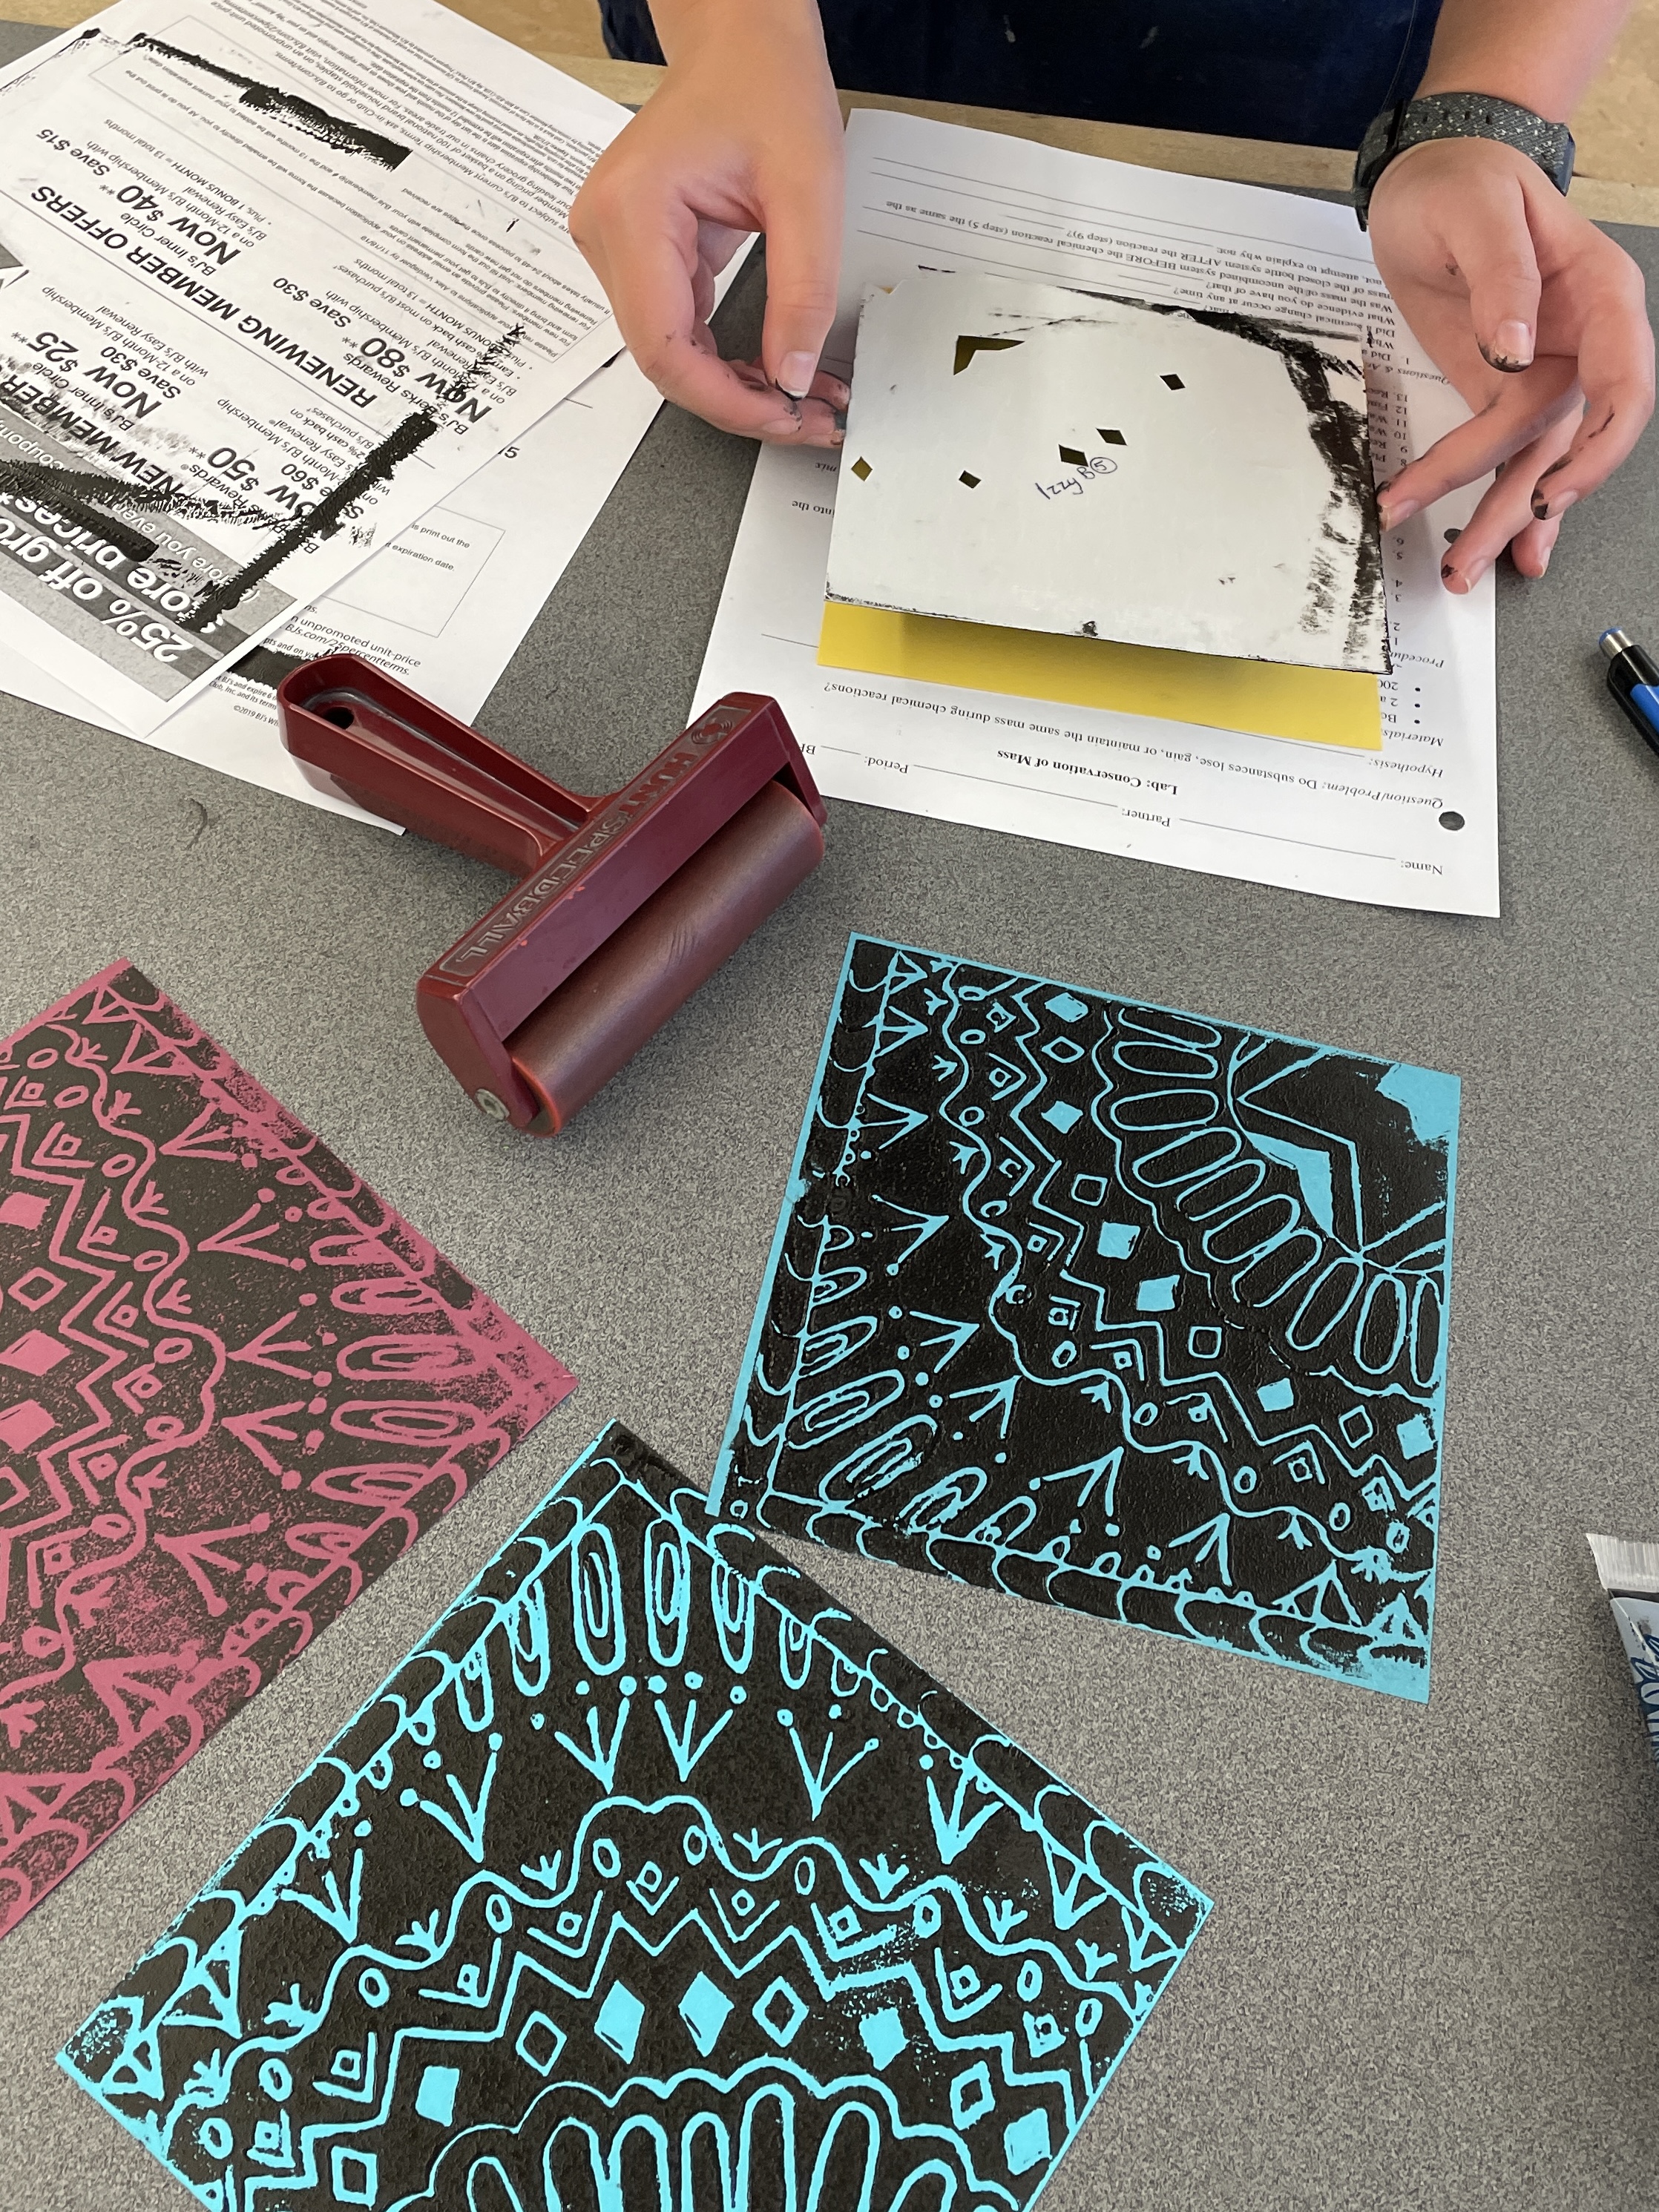
When students felt they had mastered how to print successfully on practice squares, they were ready to move on to printing on their oil pastel backgrounds. VERY IMPORTANT: The bilateral symmetry of their 6” square design will only translate successfully as radial symmetry if they designate one corner of their plate to always face outward. In other words, the plate will be rotated 90 degrees each time they print. Students marked one corner of the back of their plate with an arrow to help them place their foam plate correctly each time.

– – –
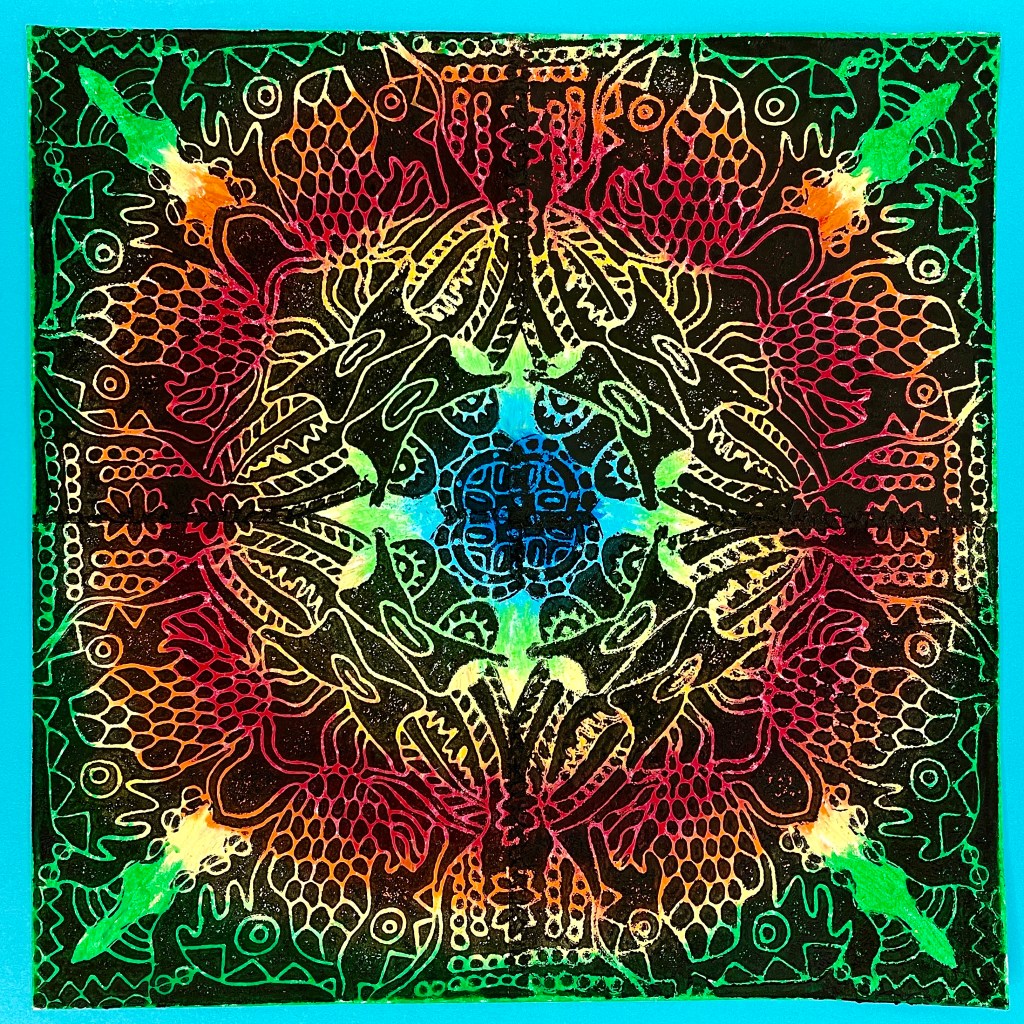
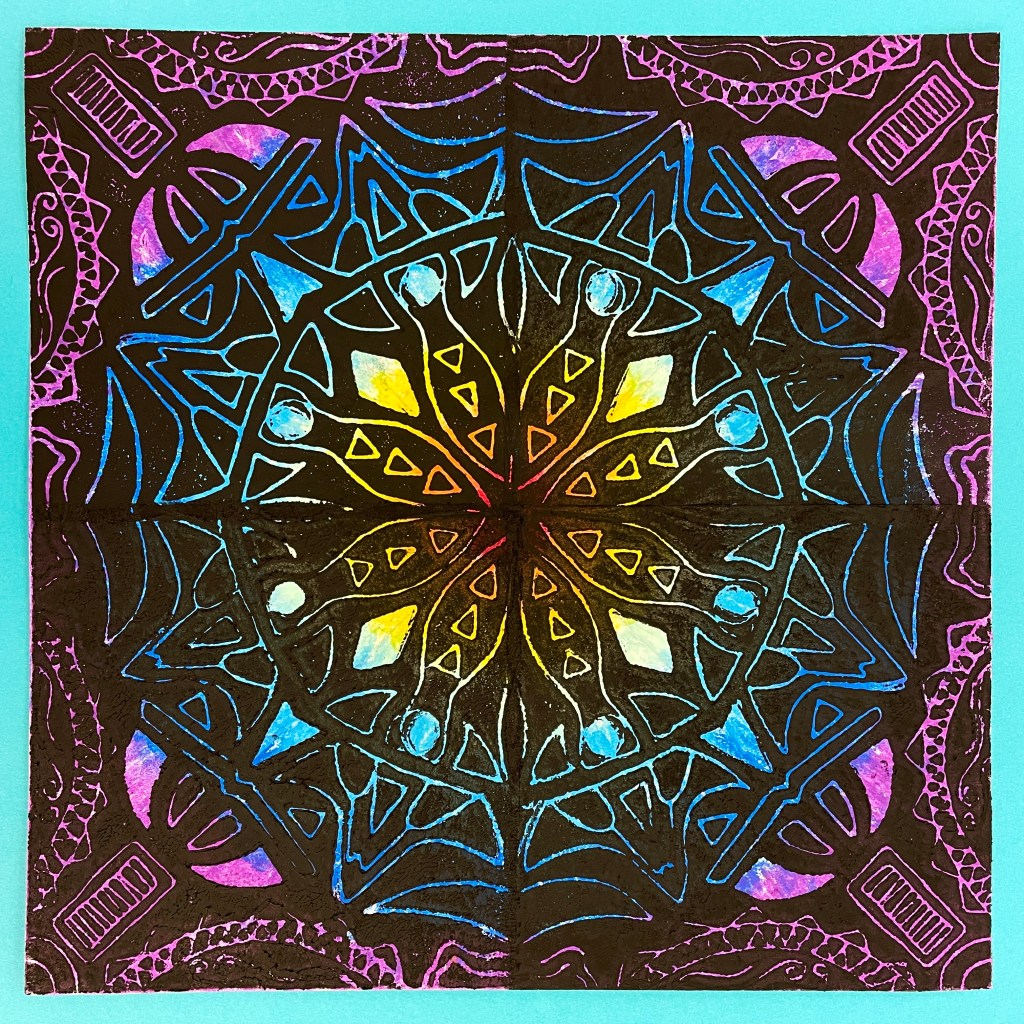
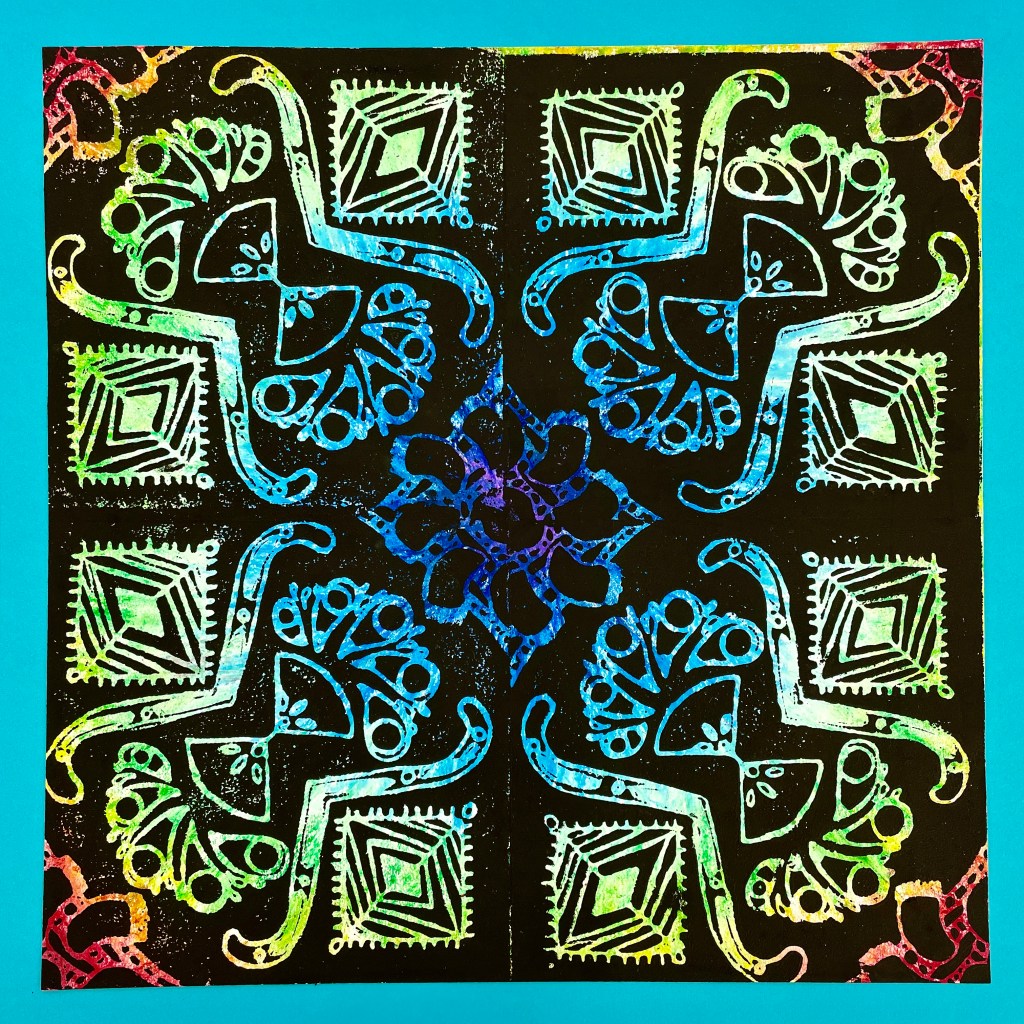
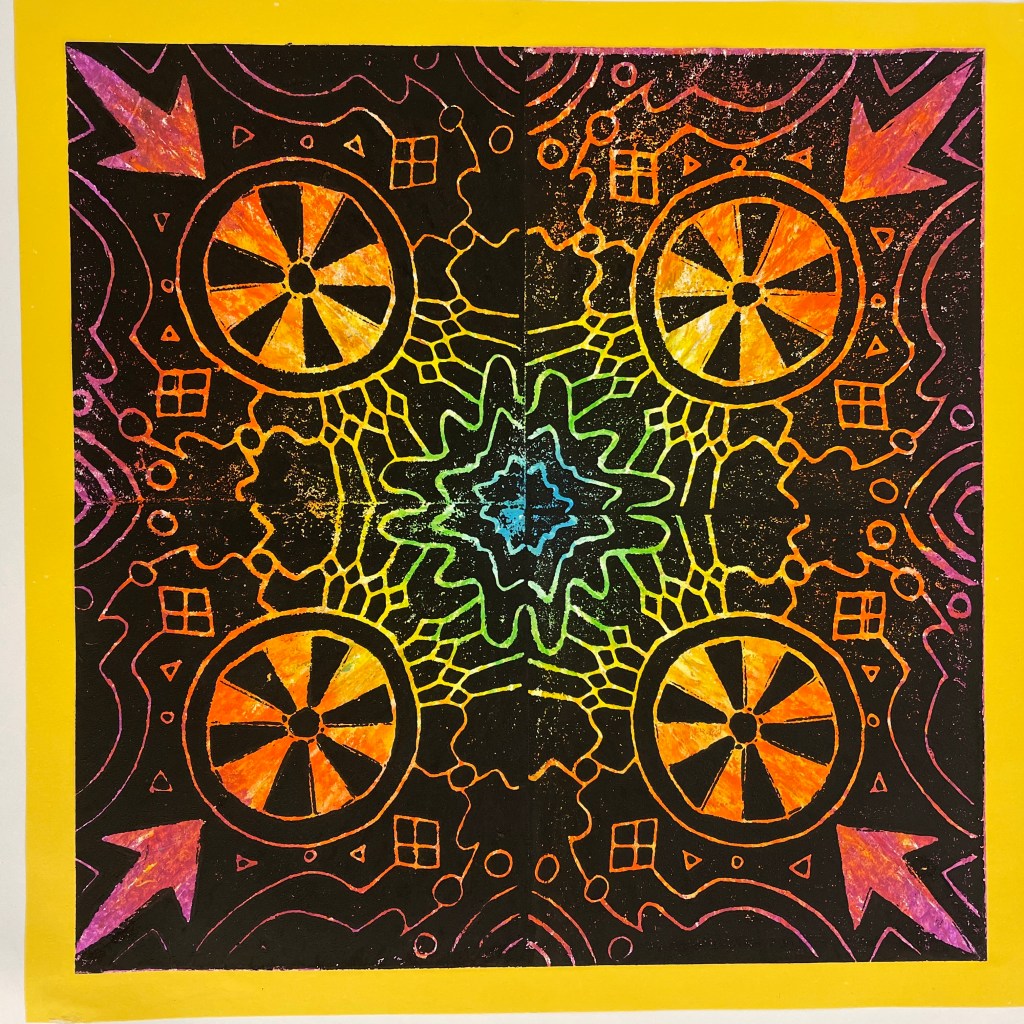
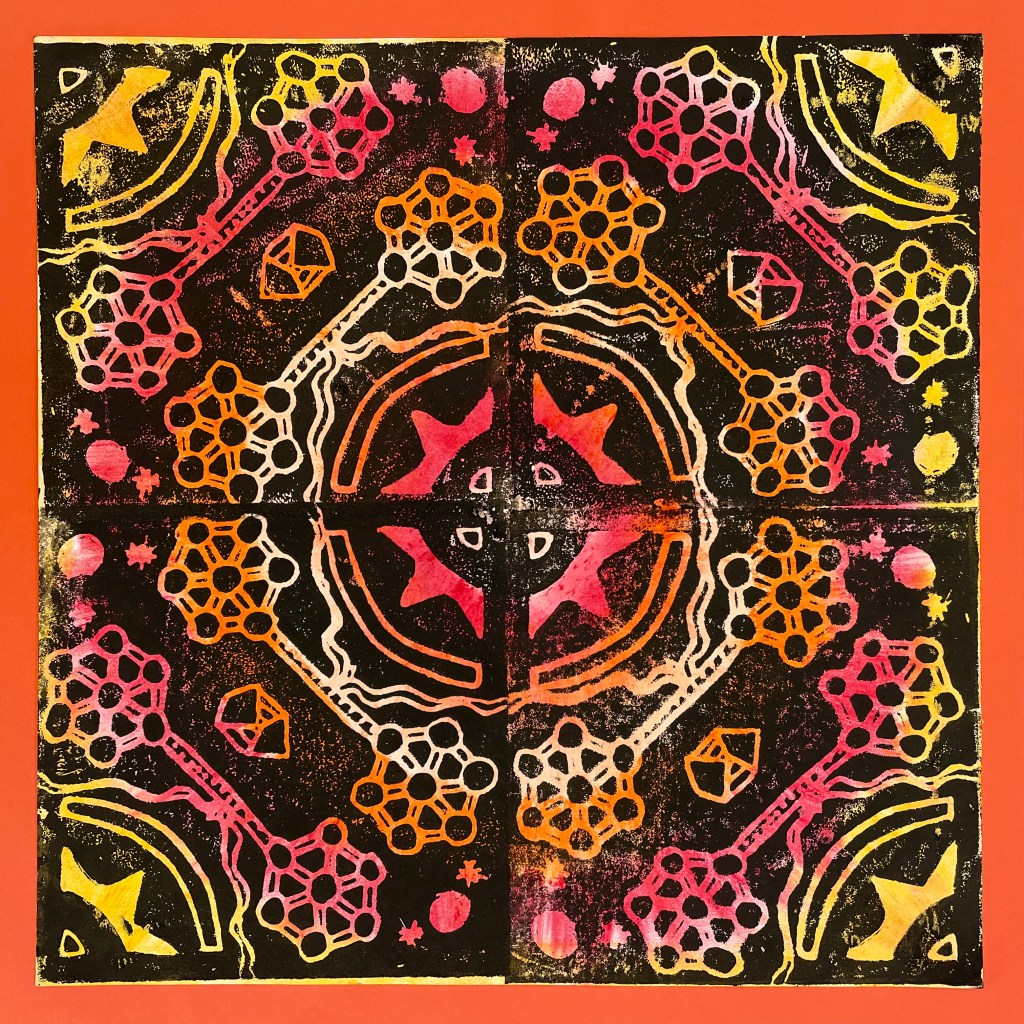
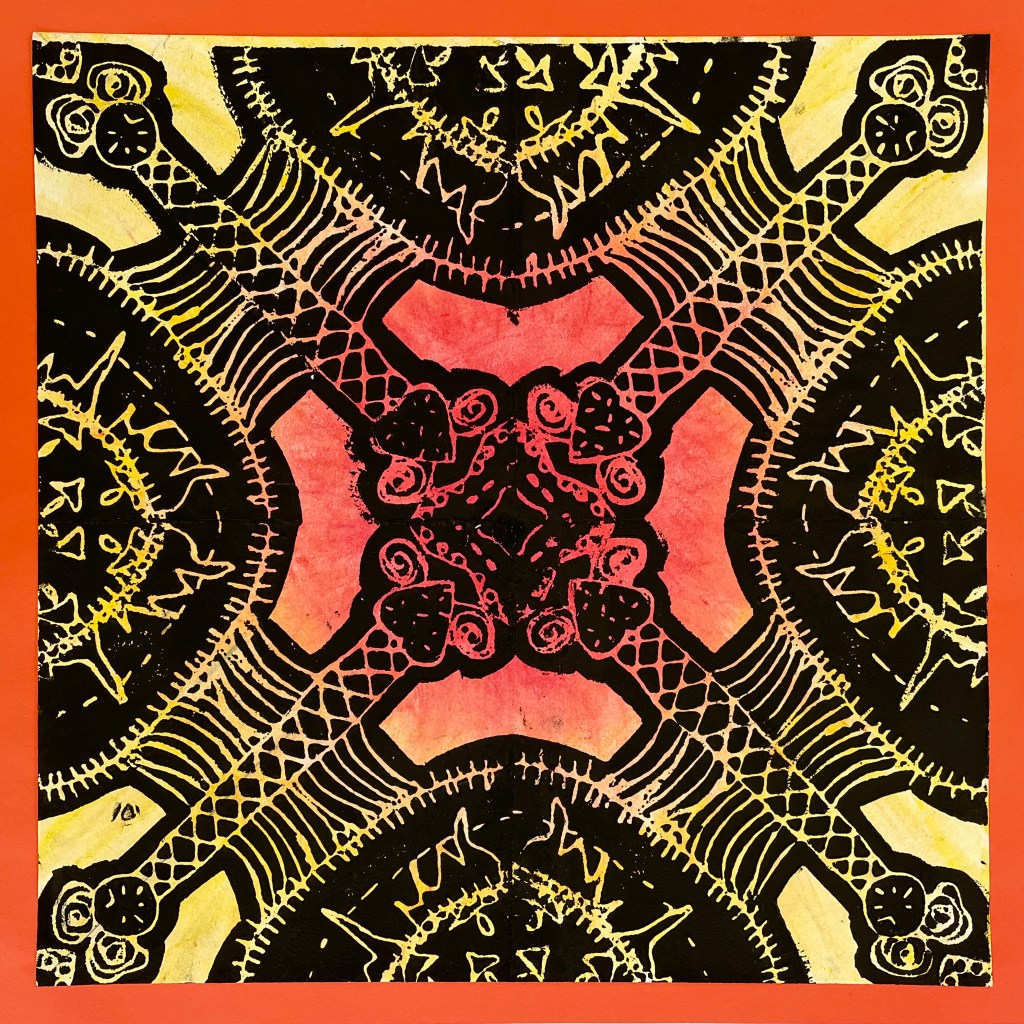
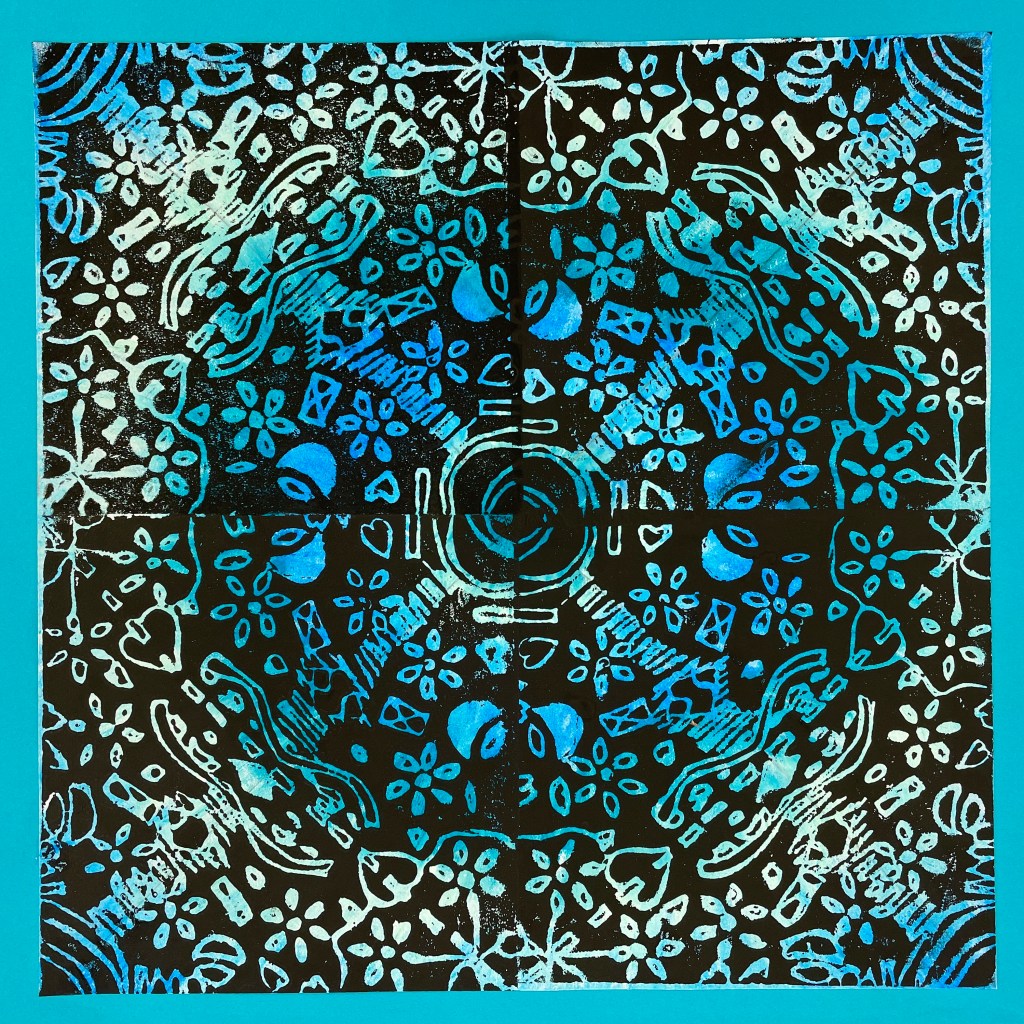
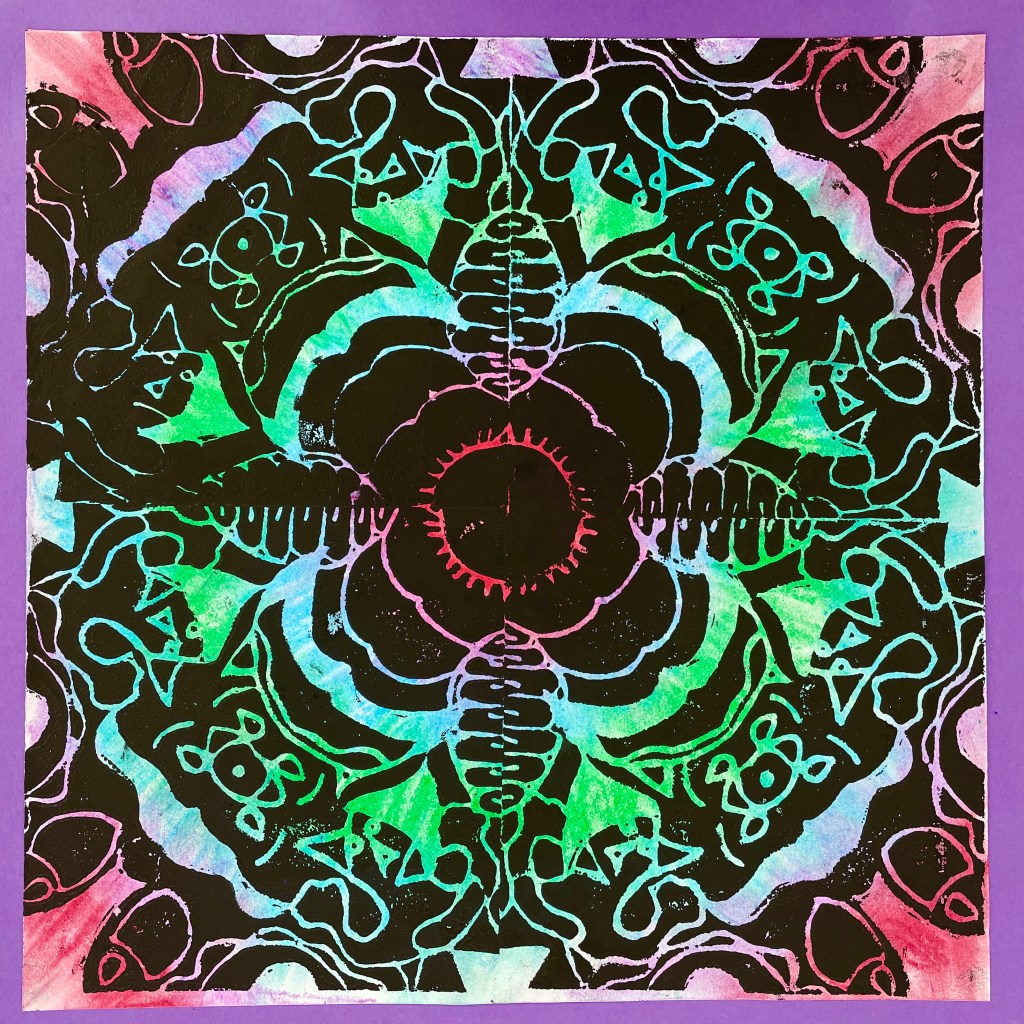
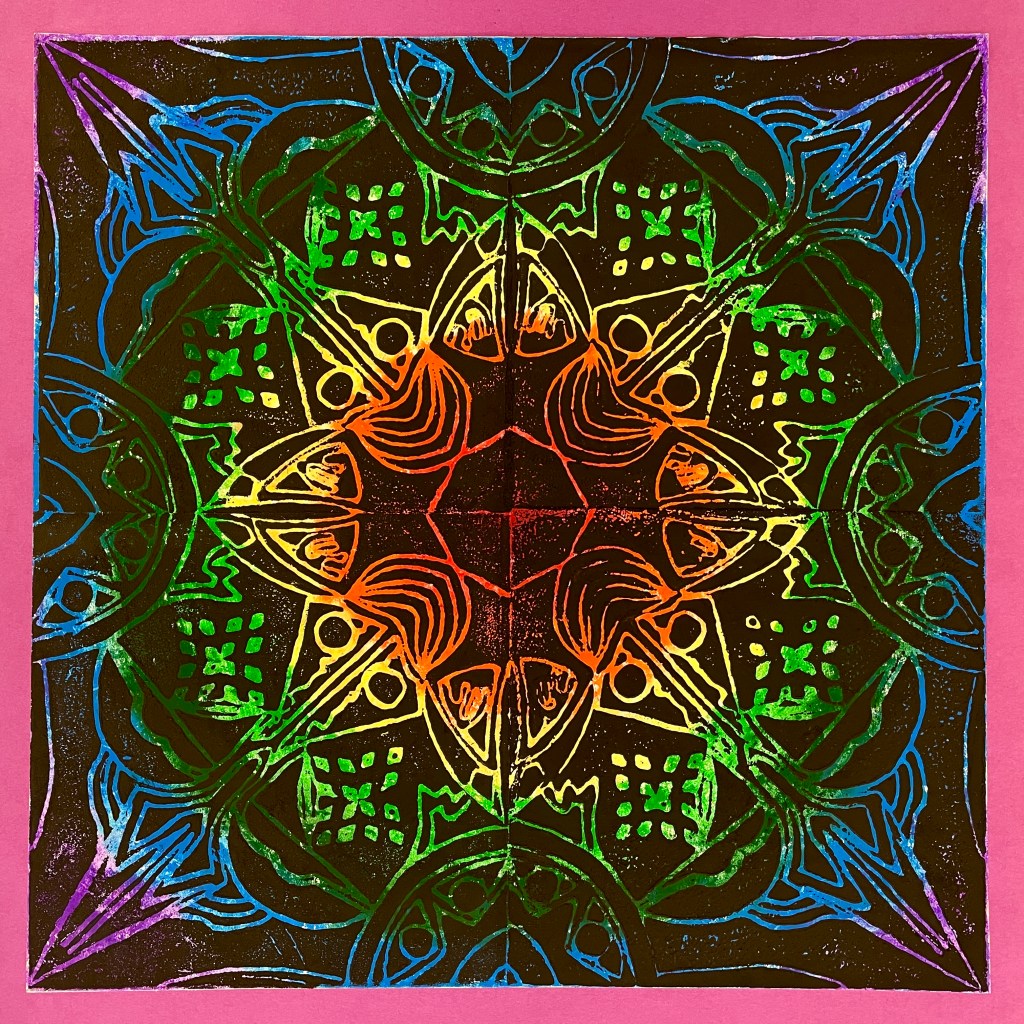
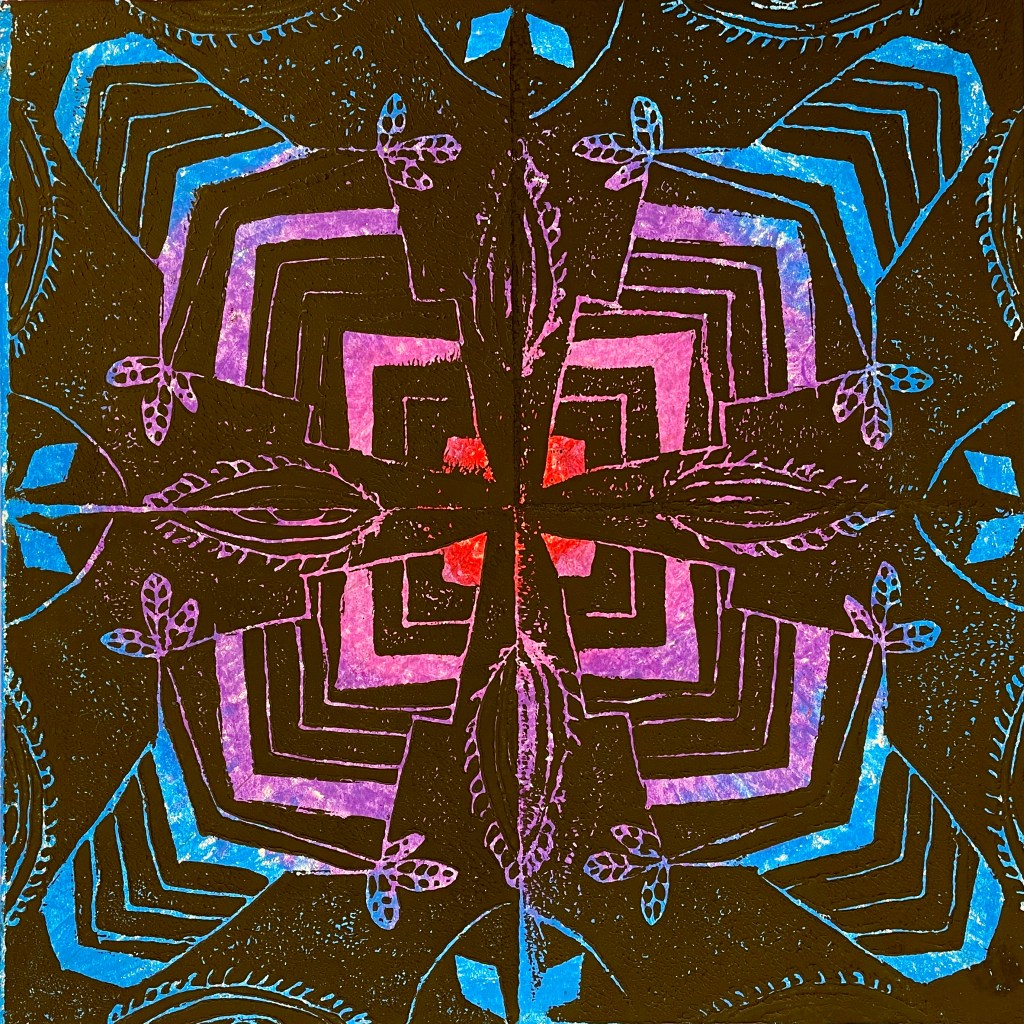
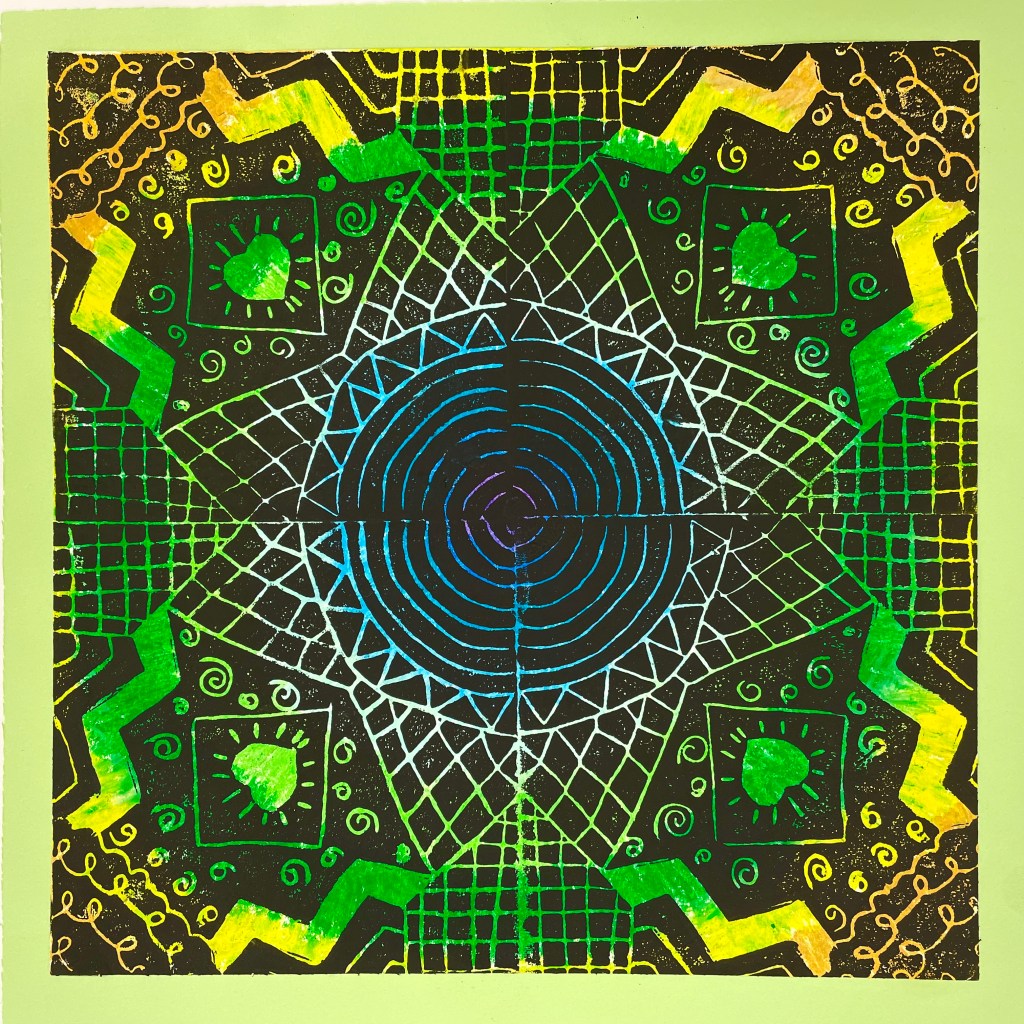
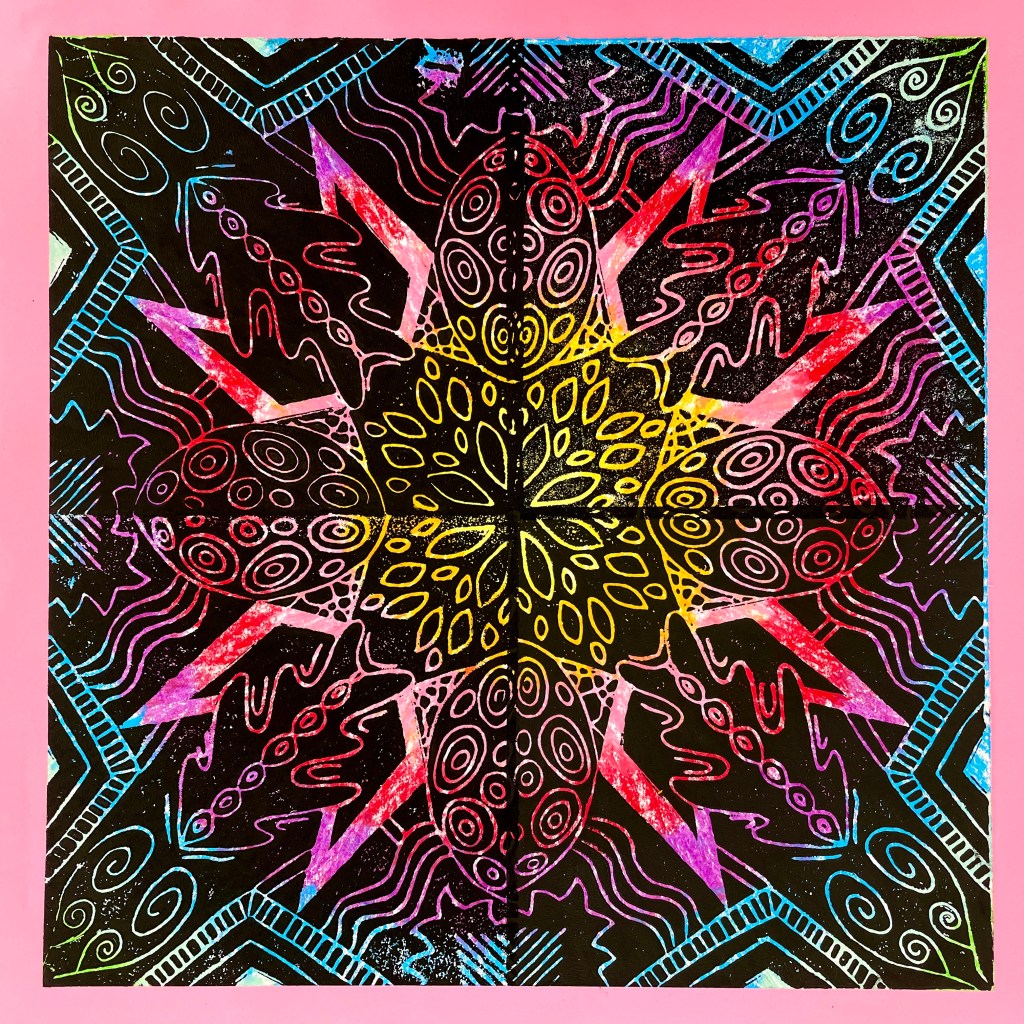
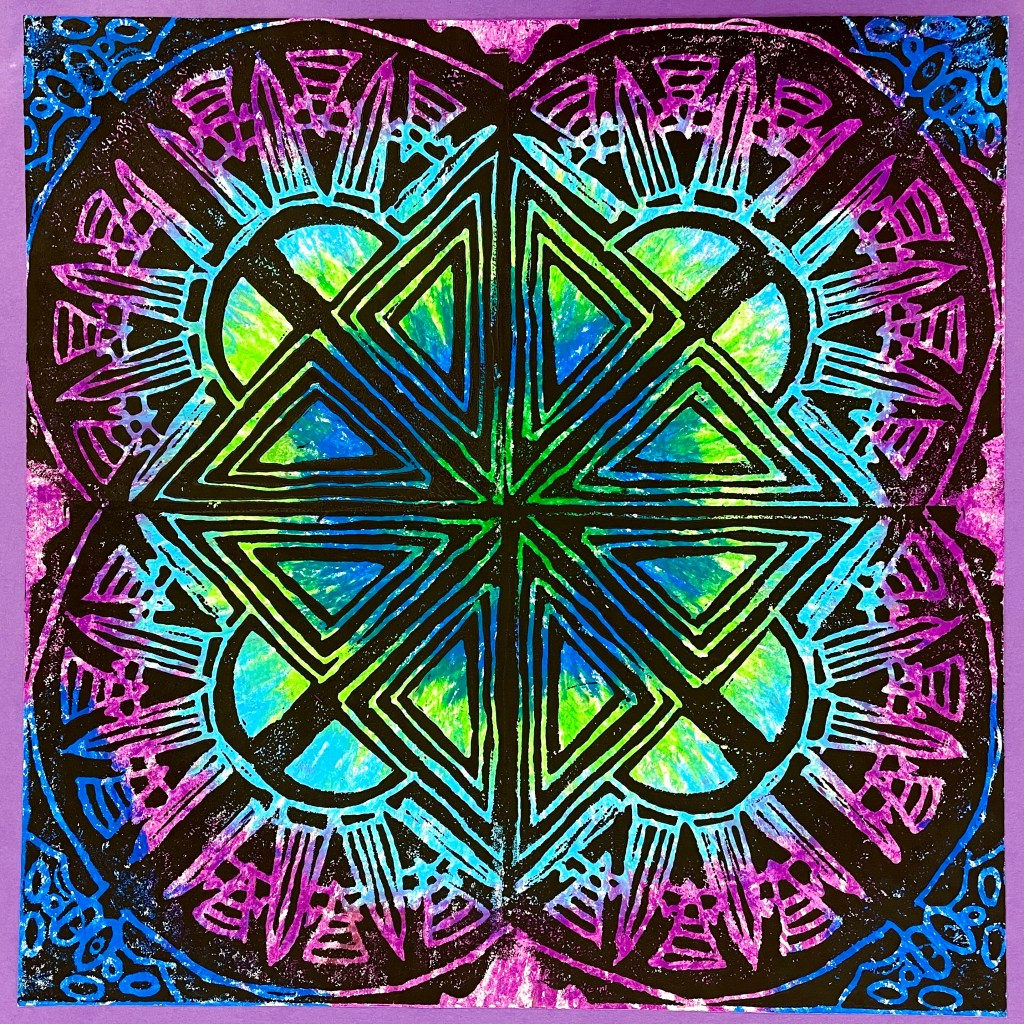
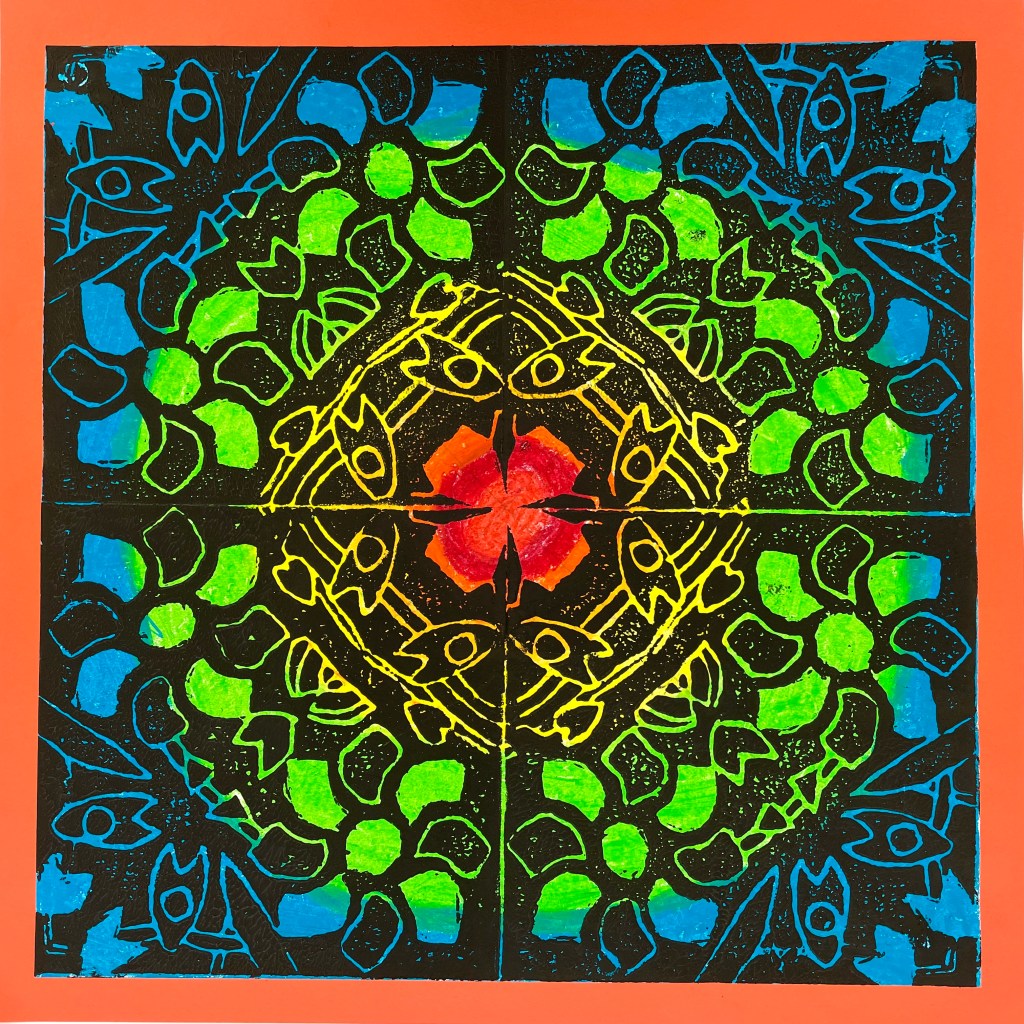
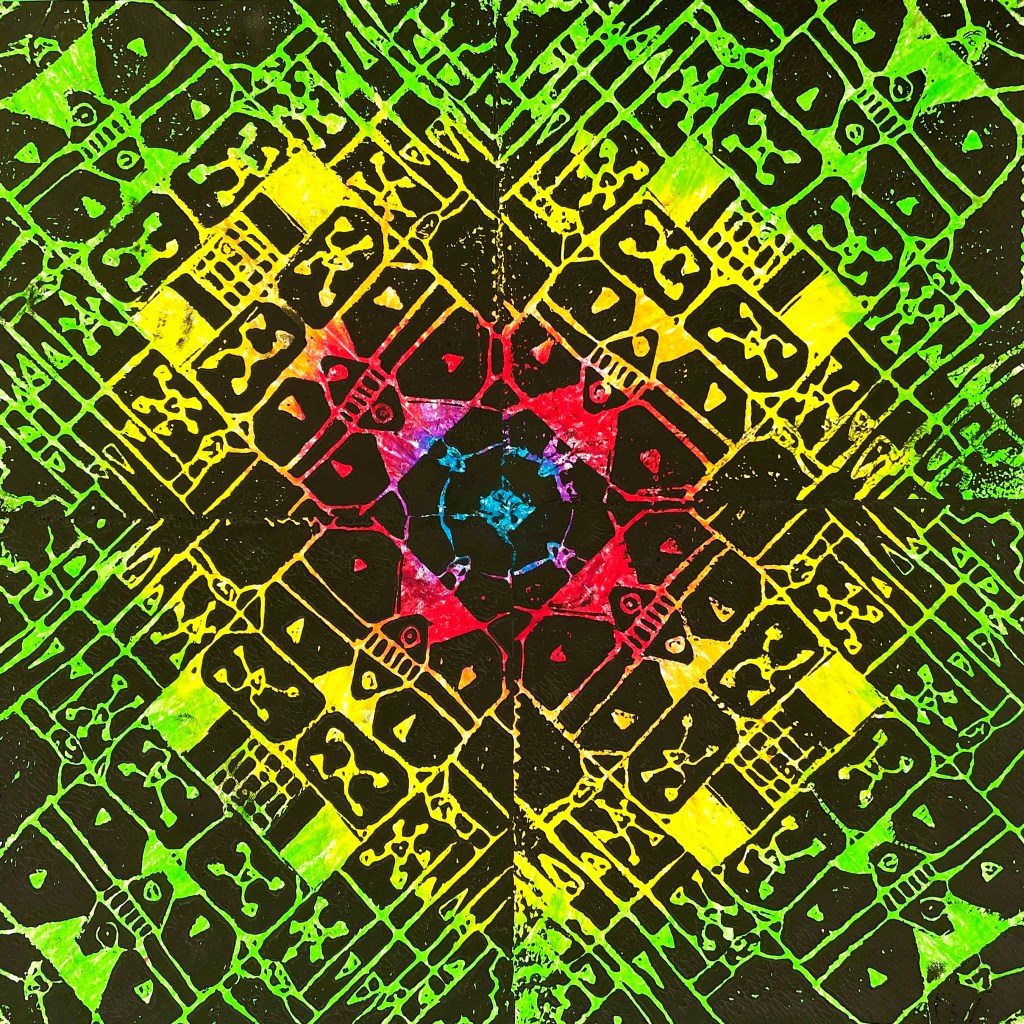
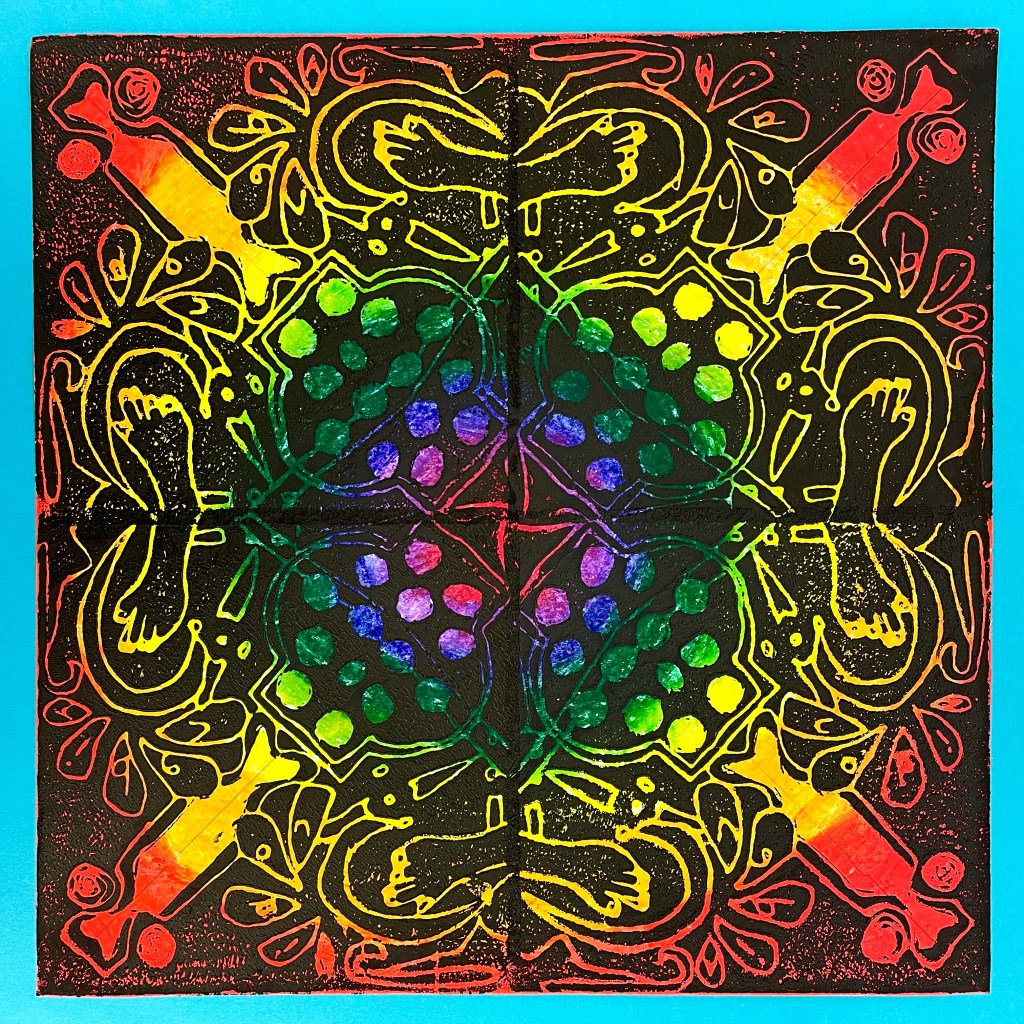
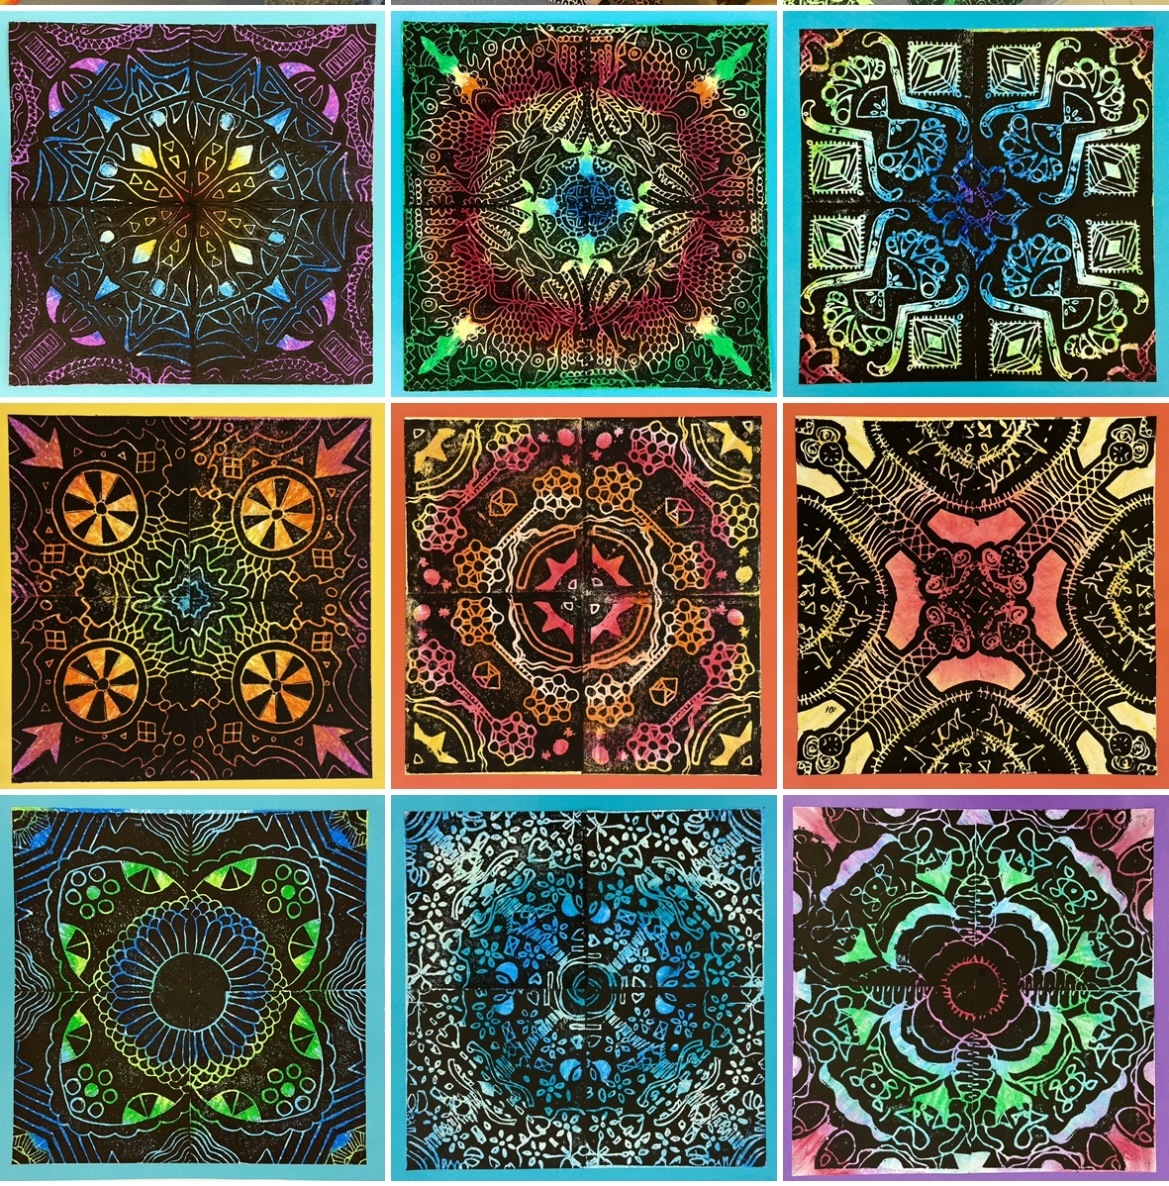
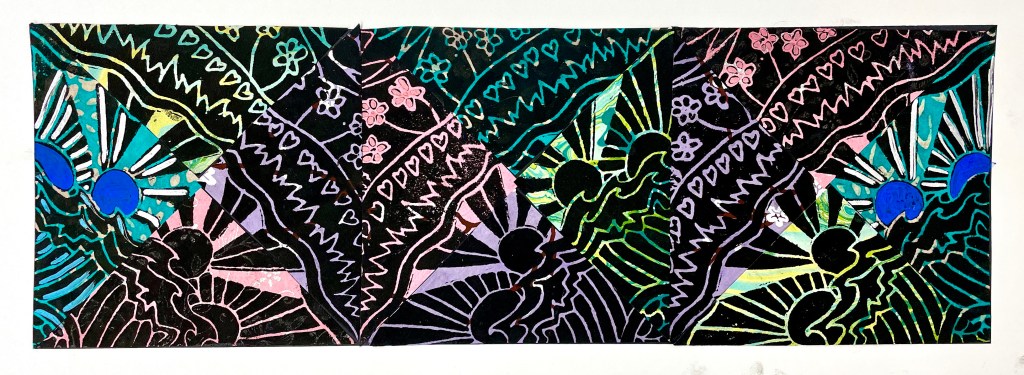
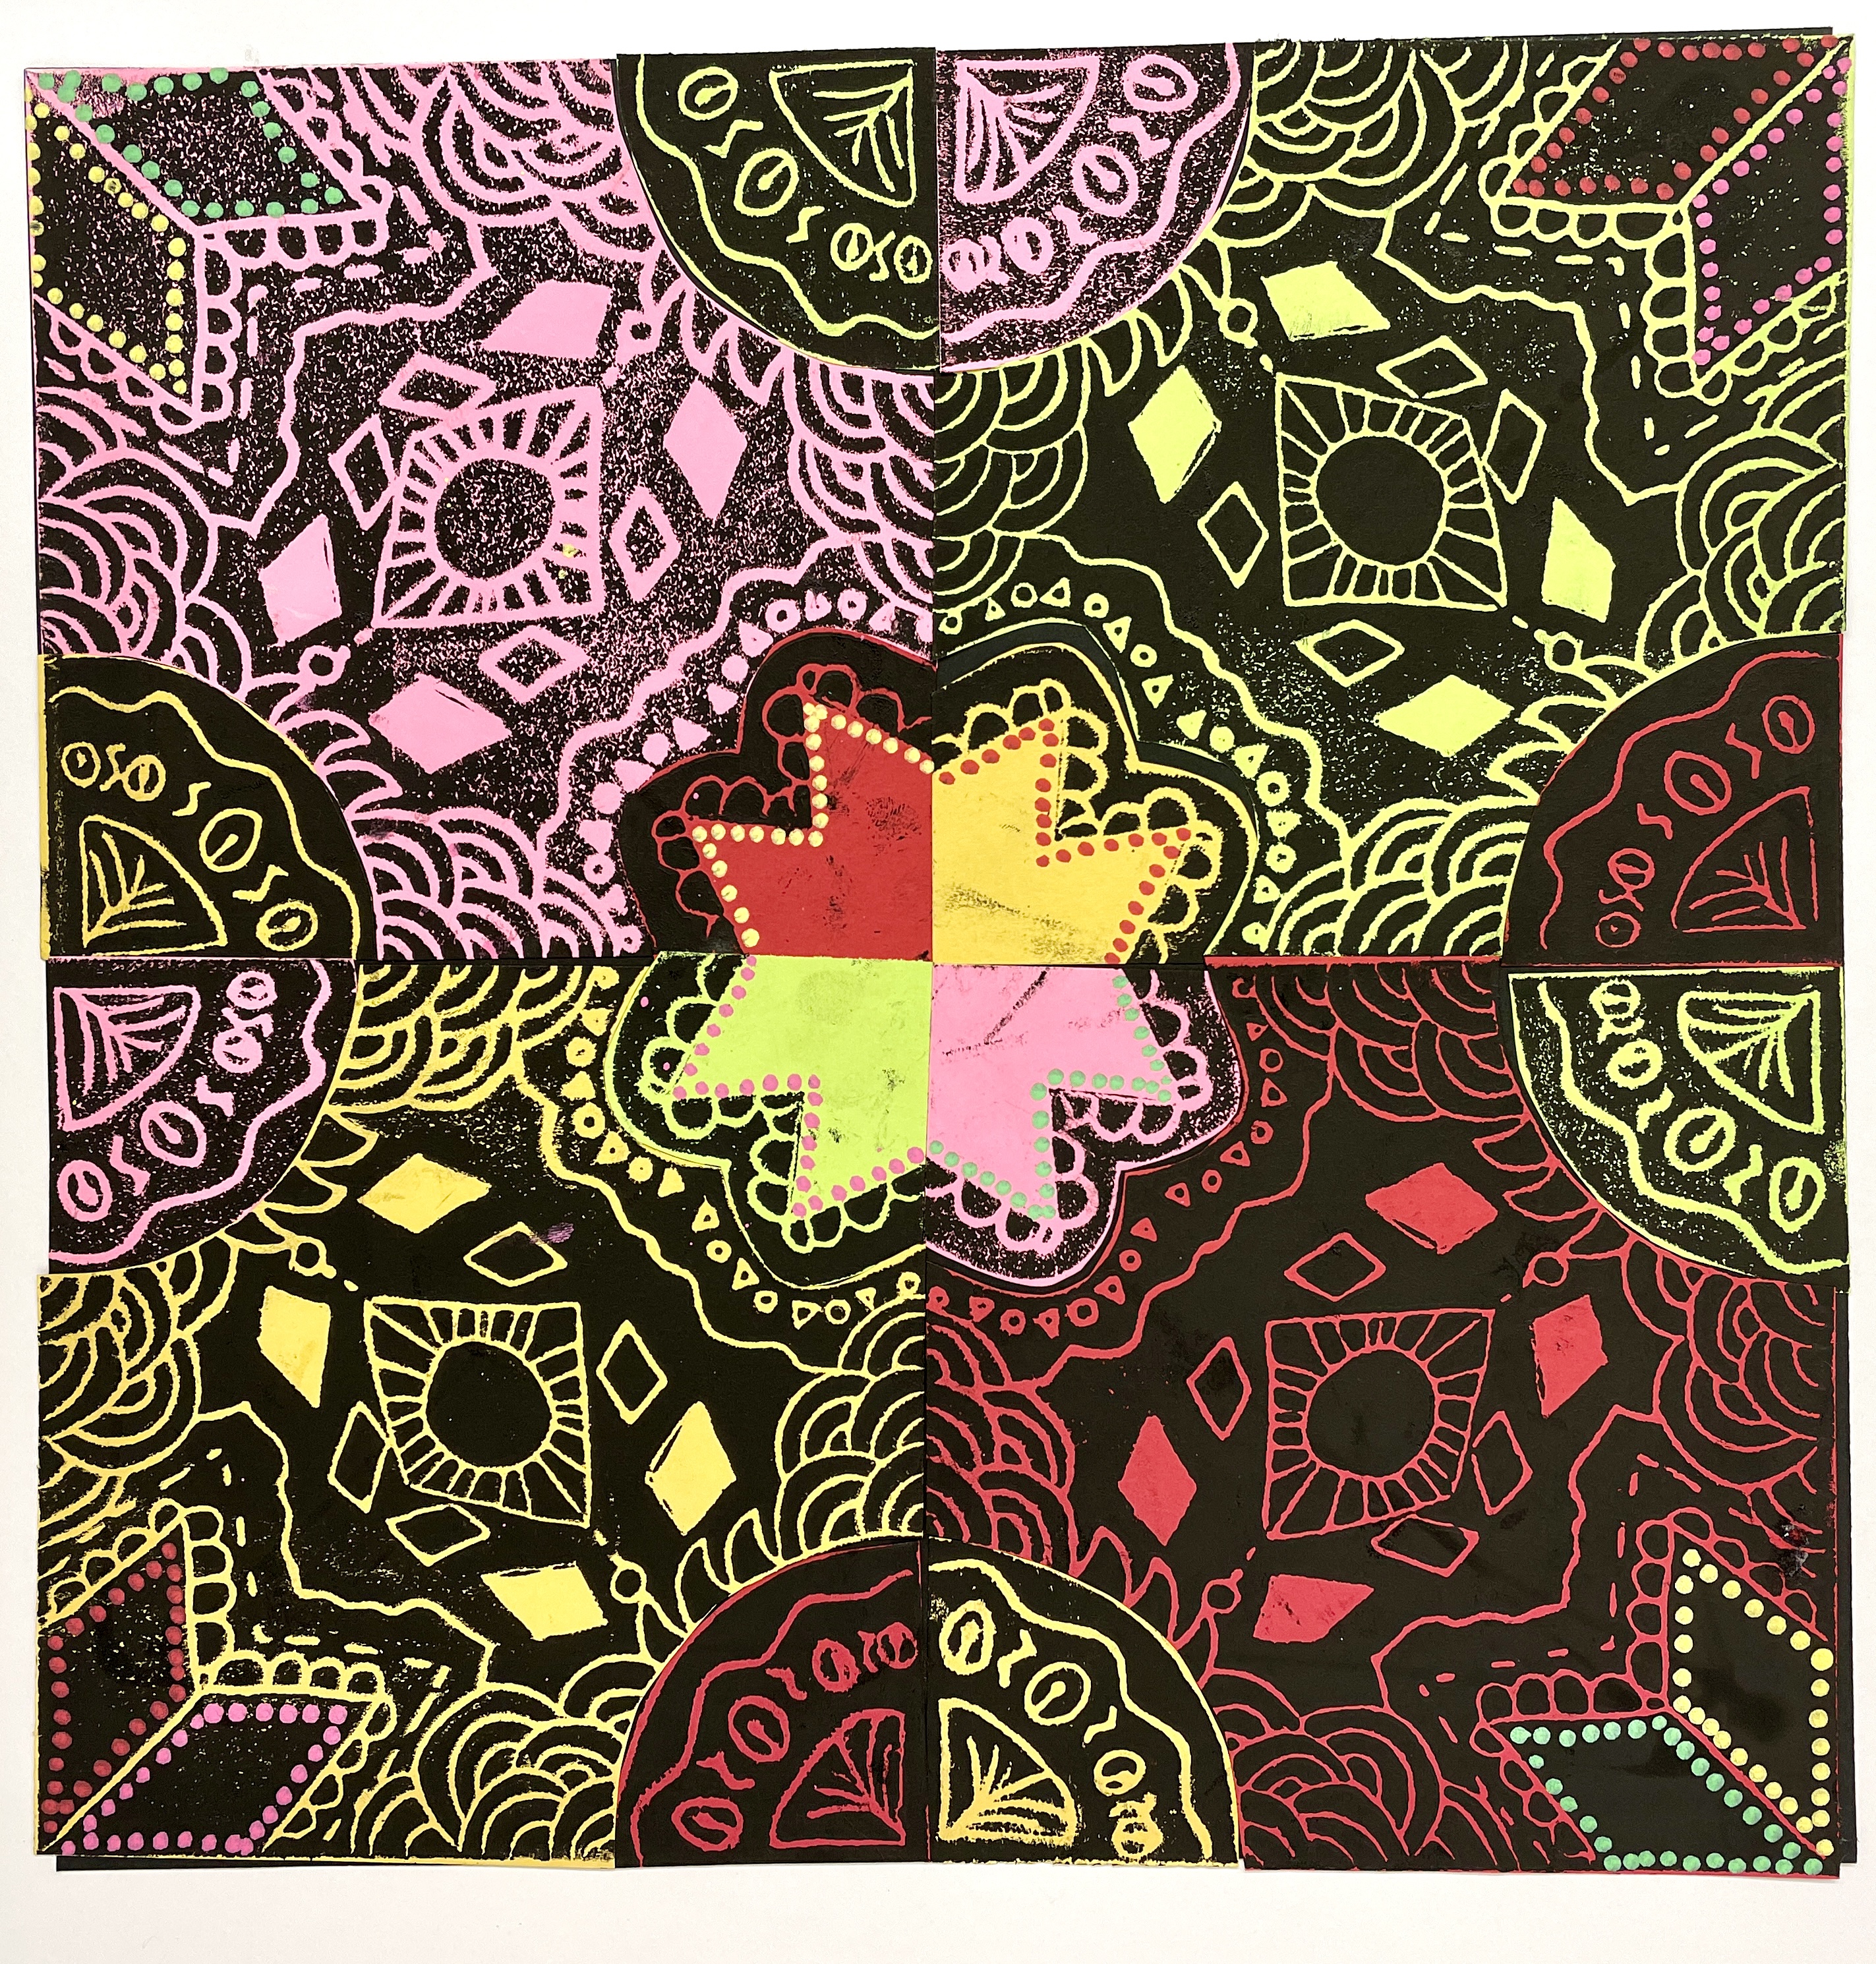
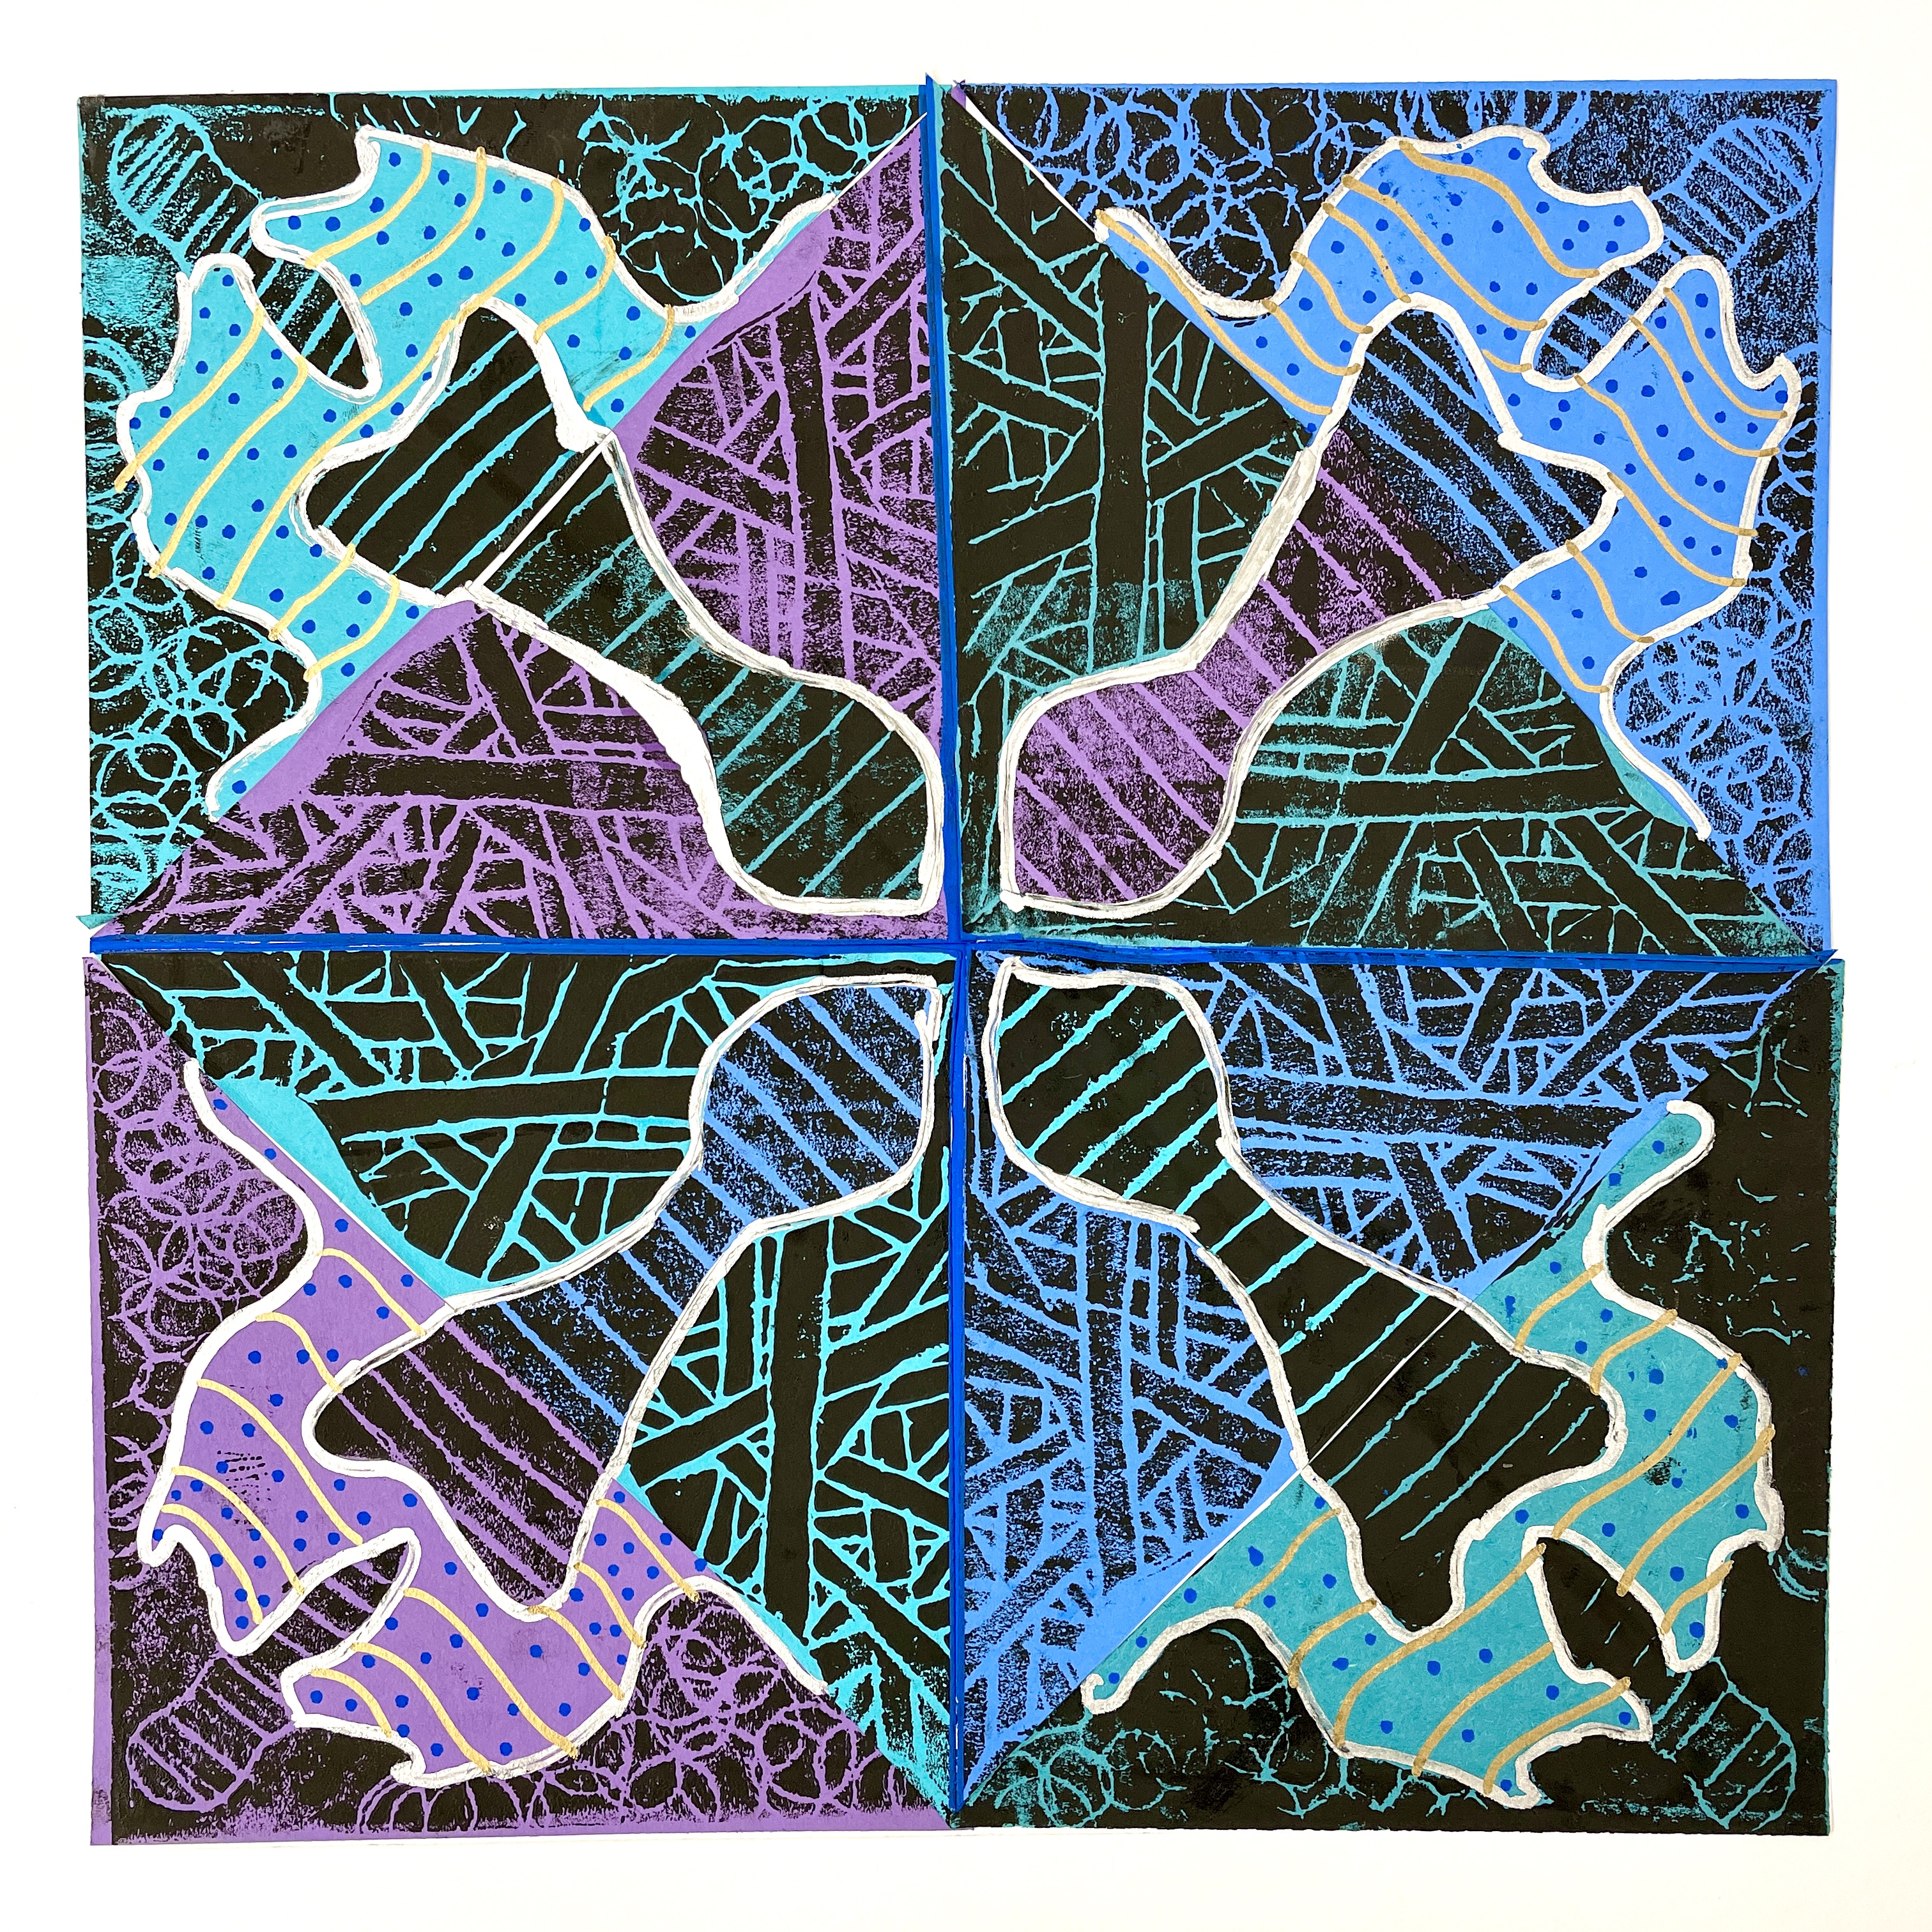
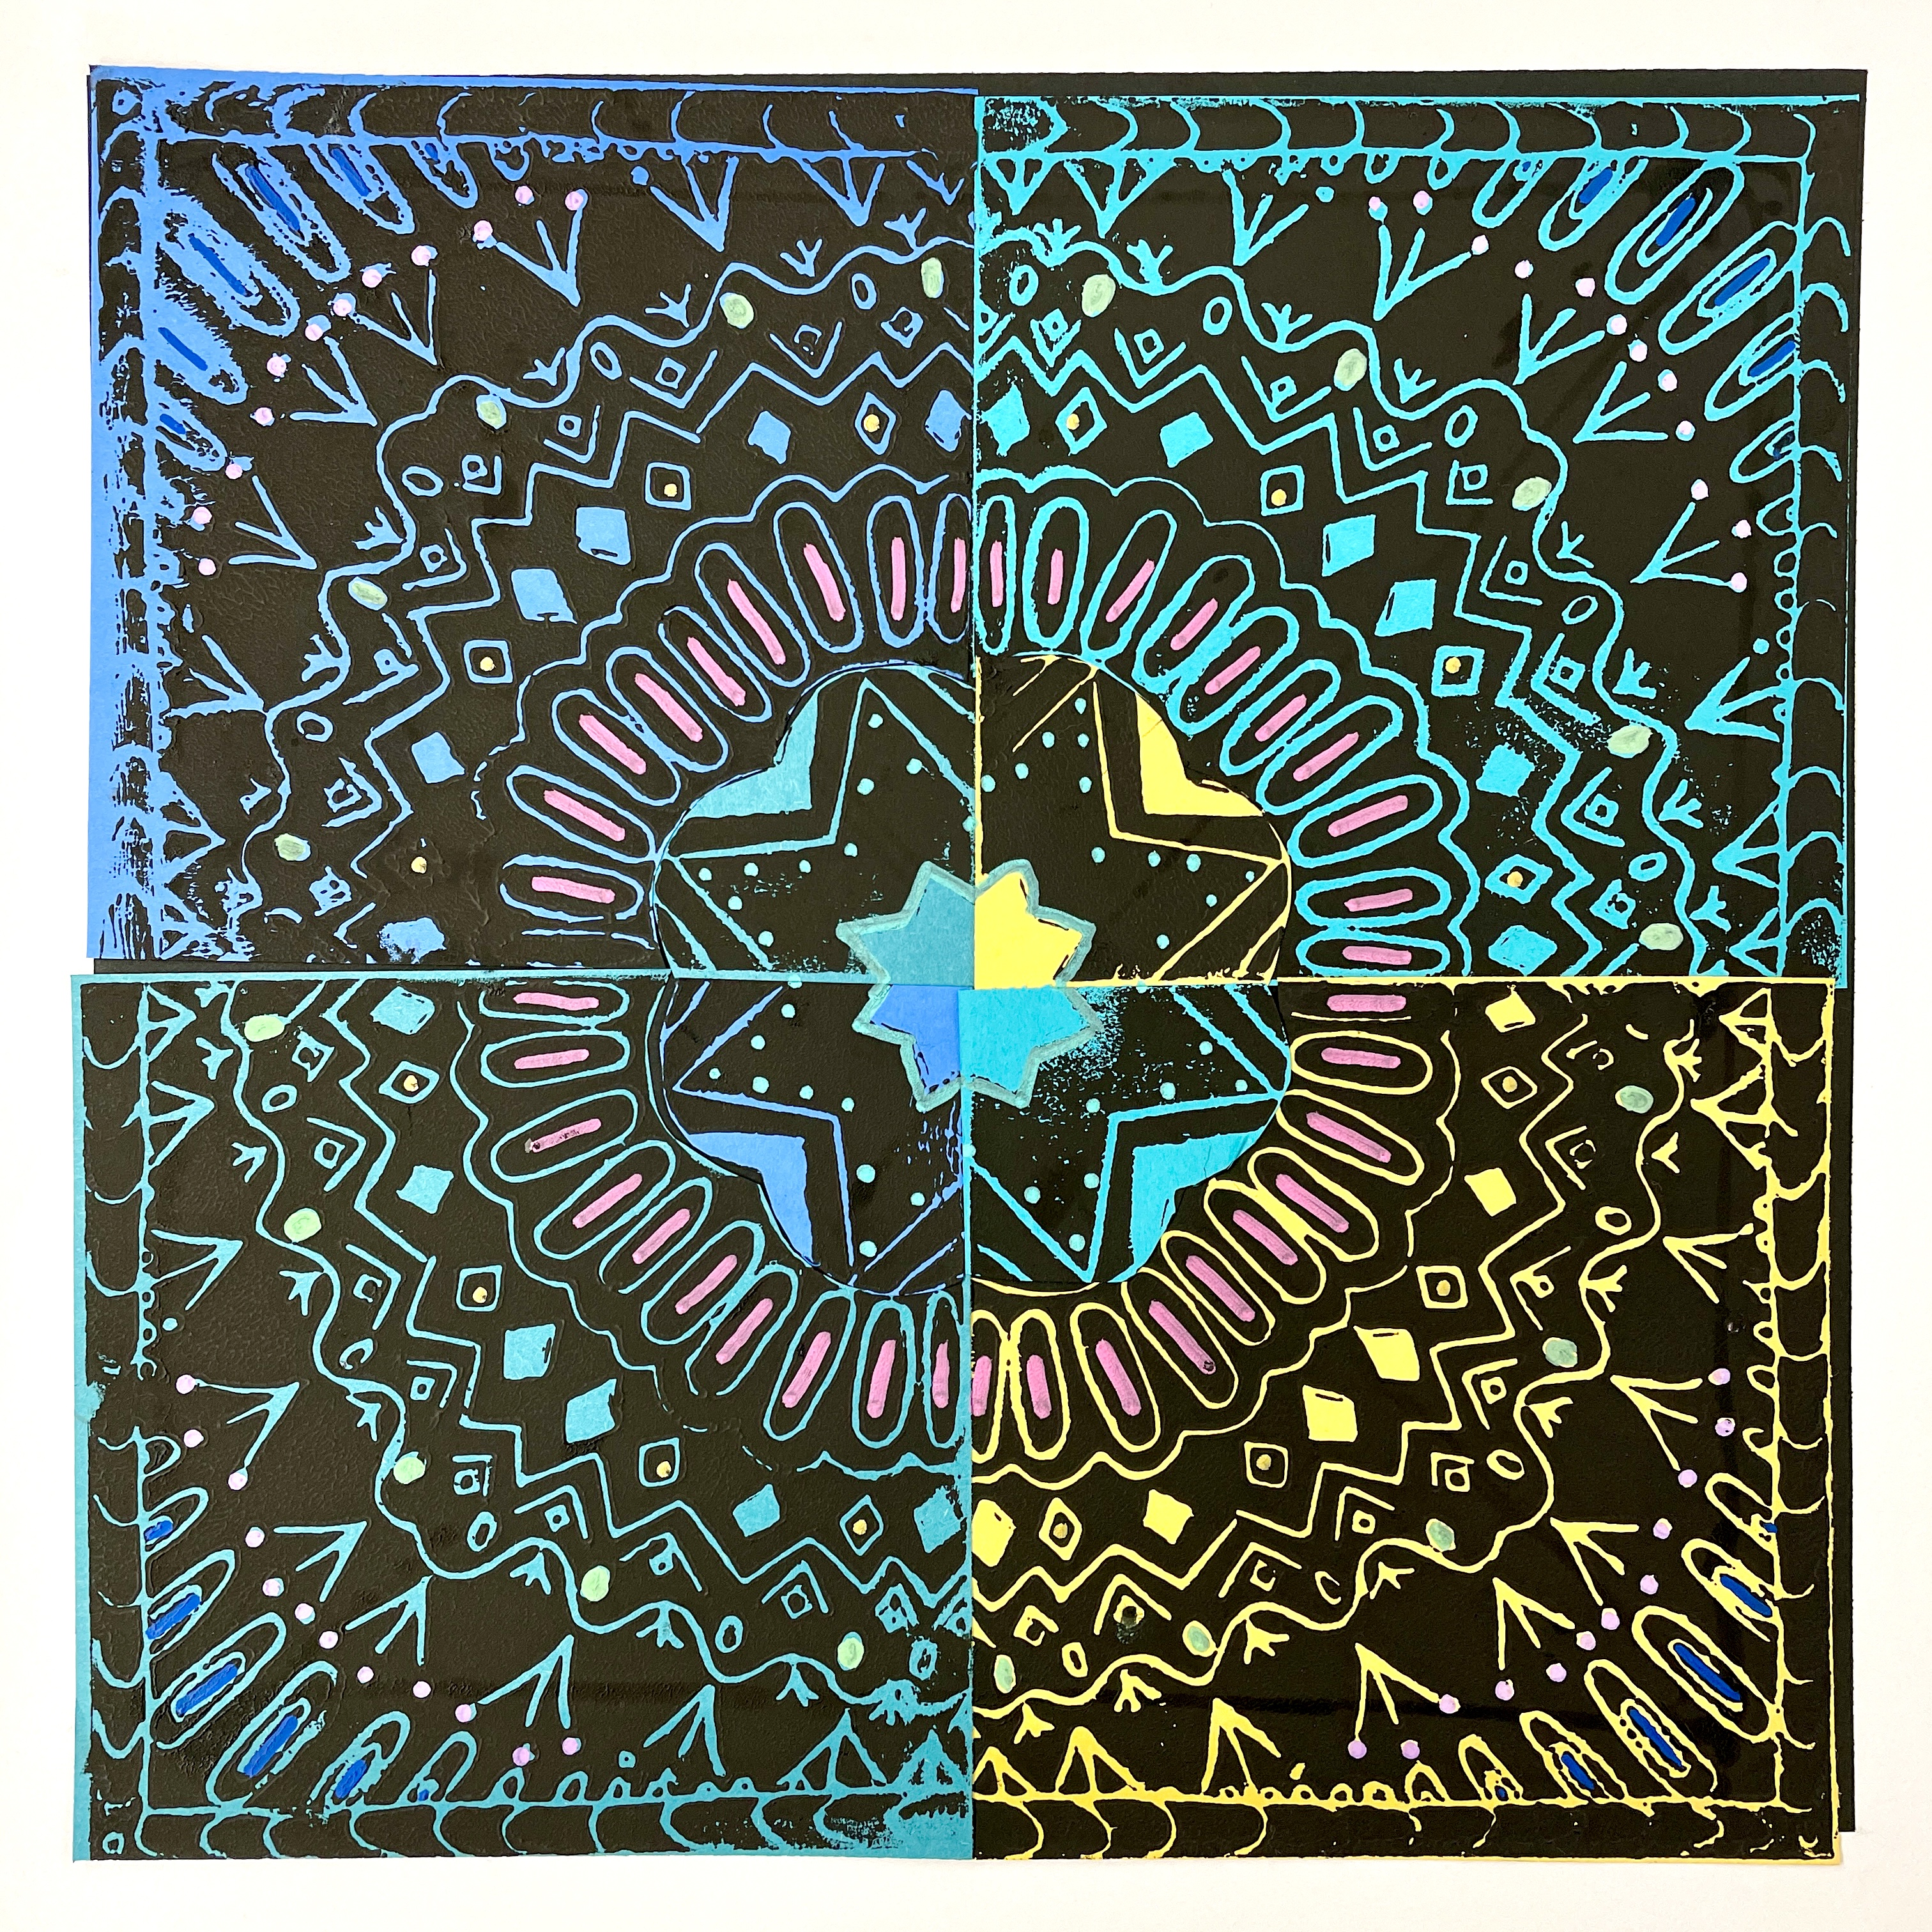
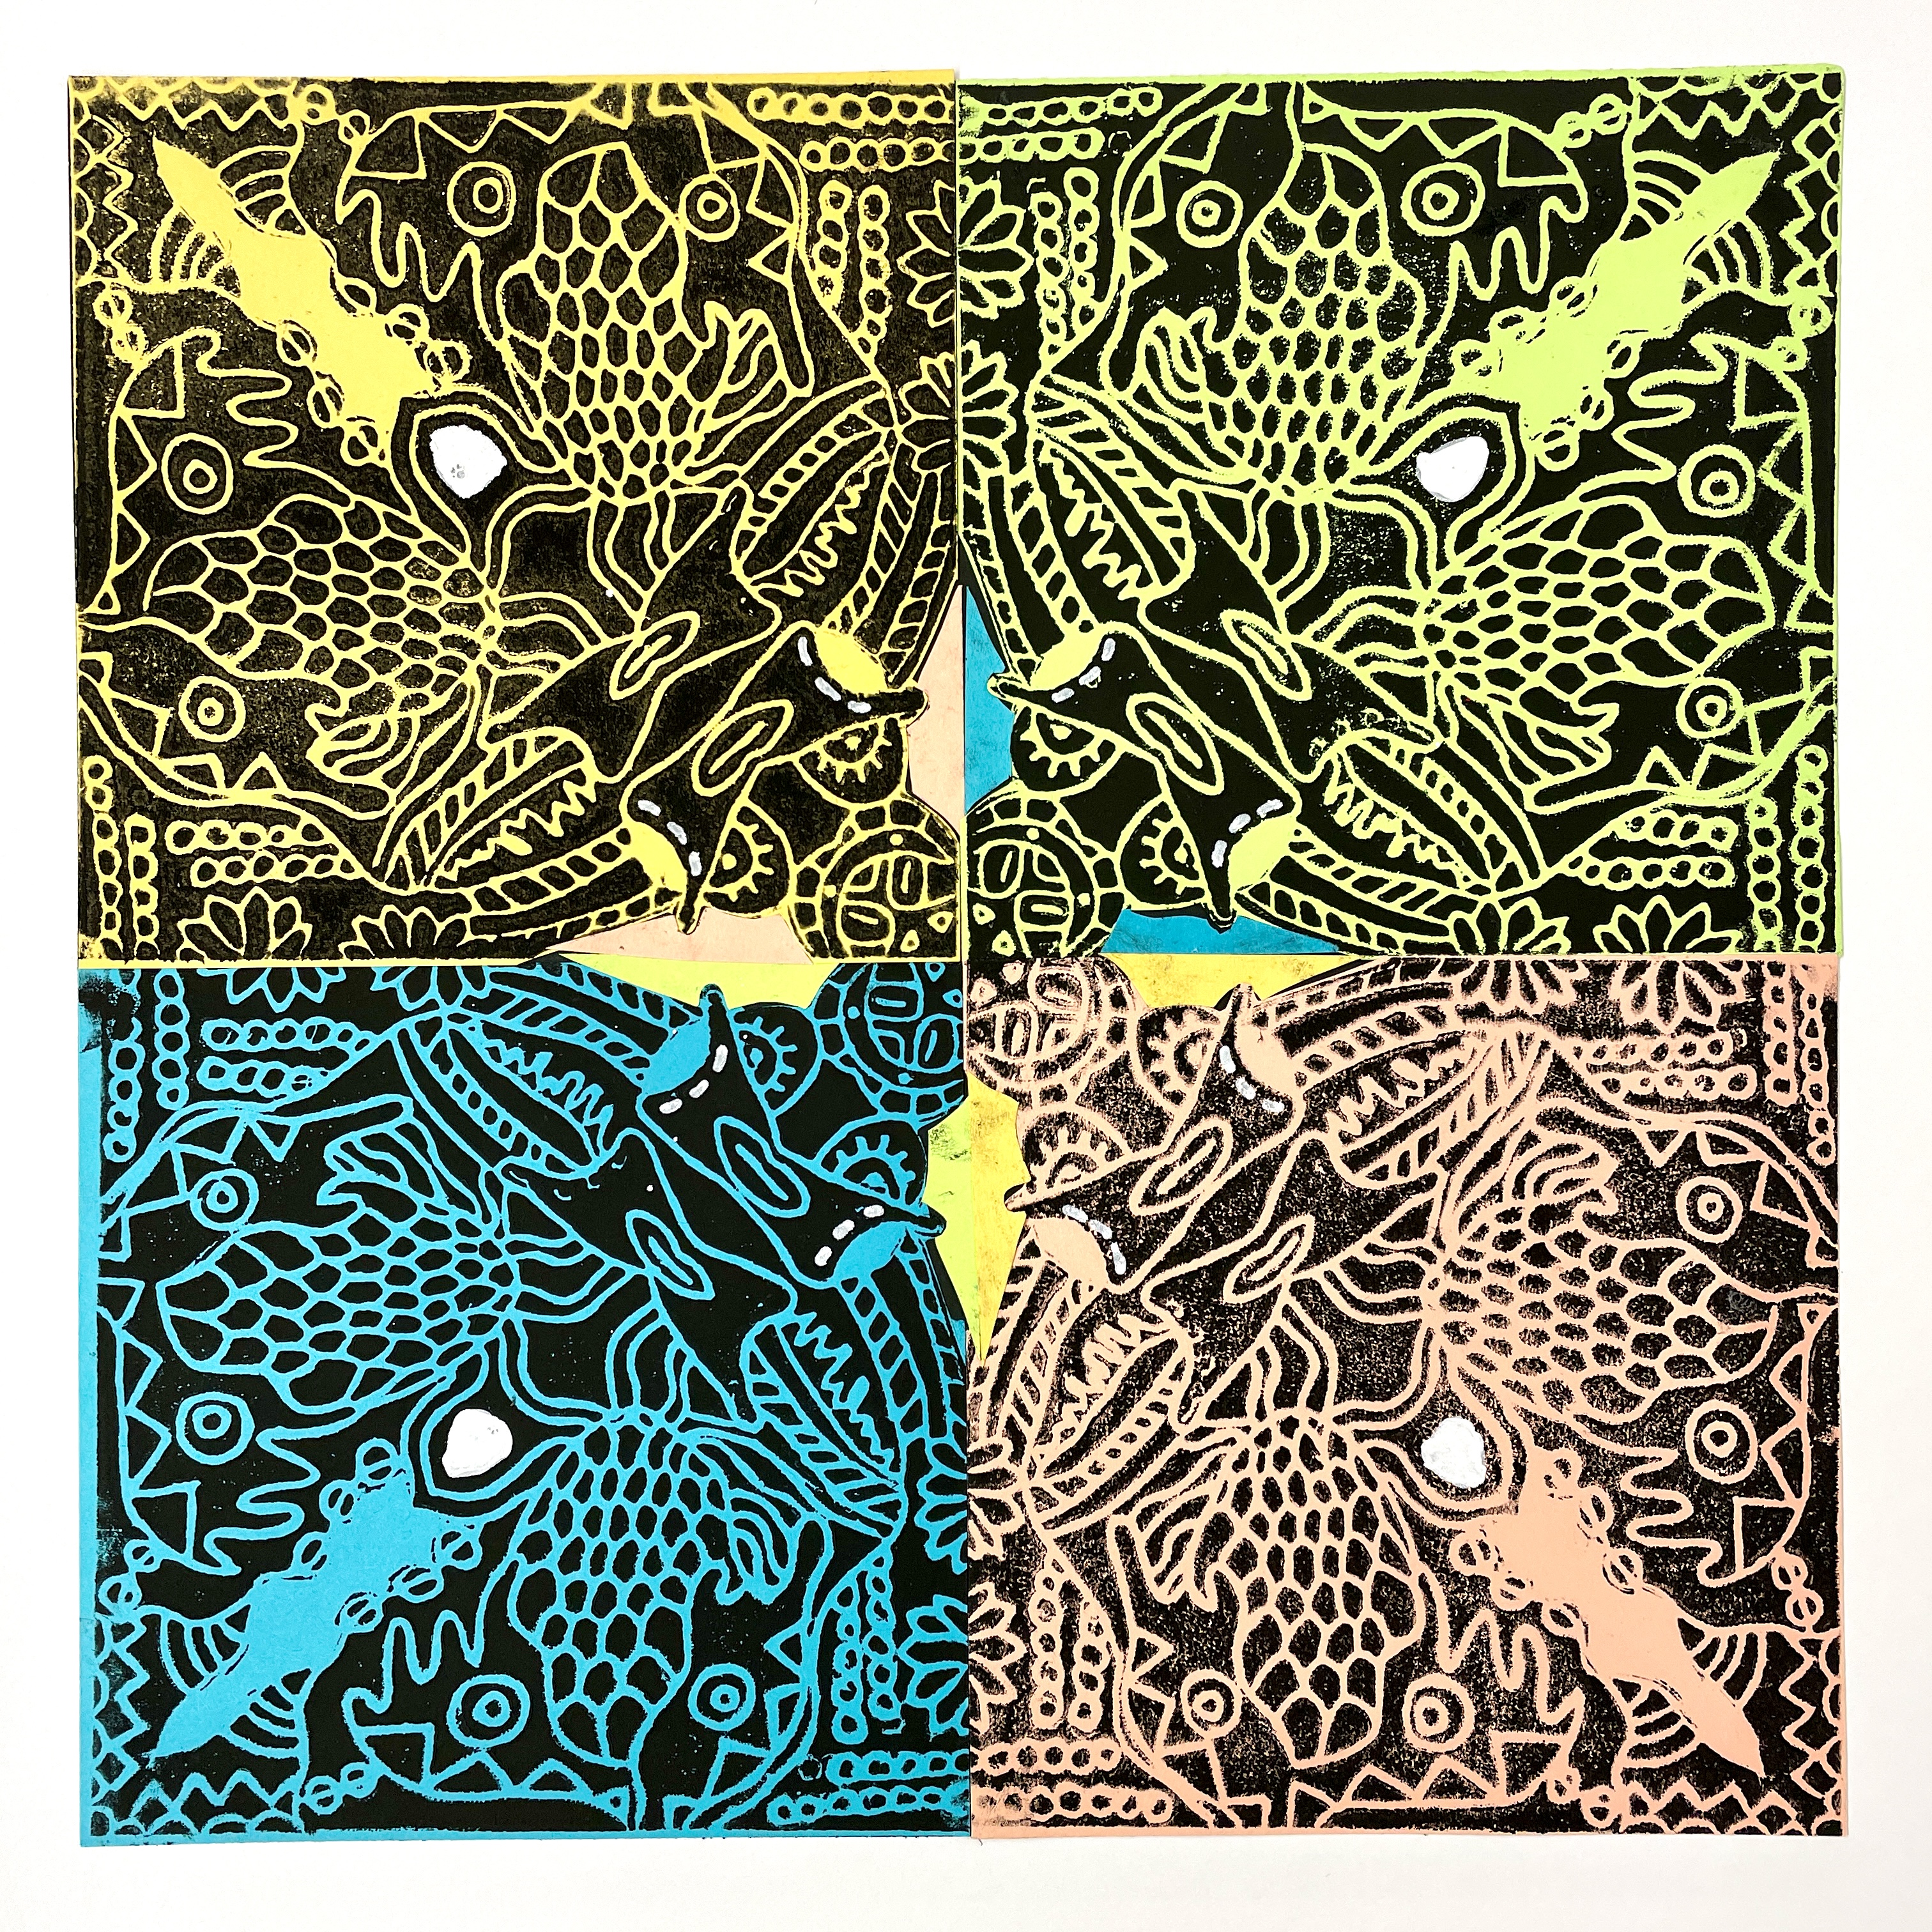
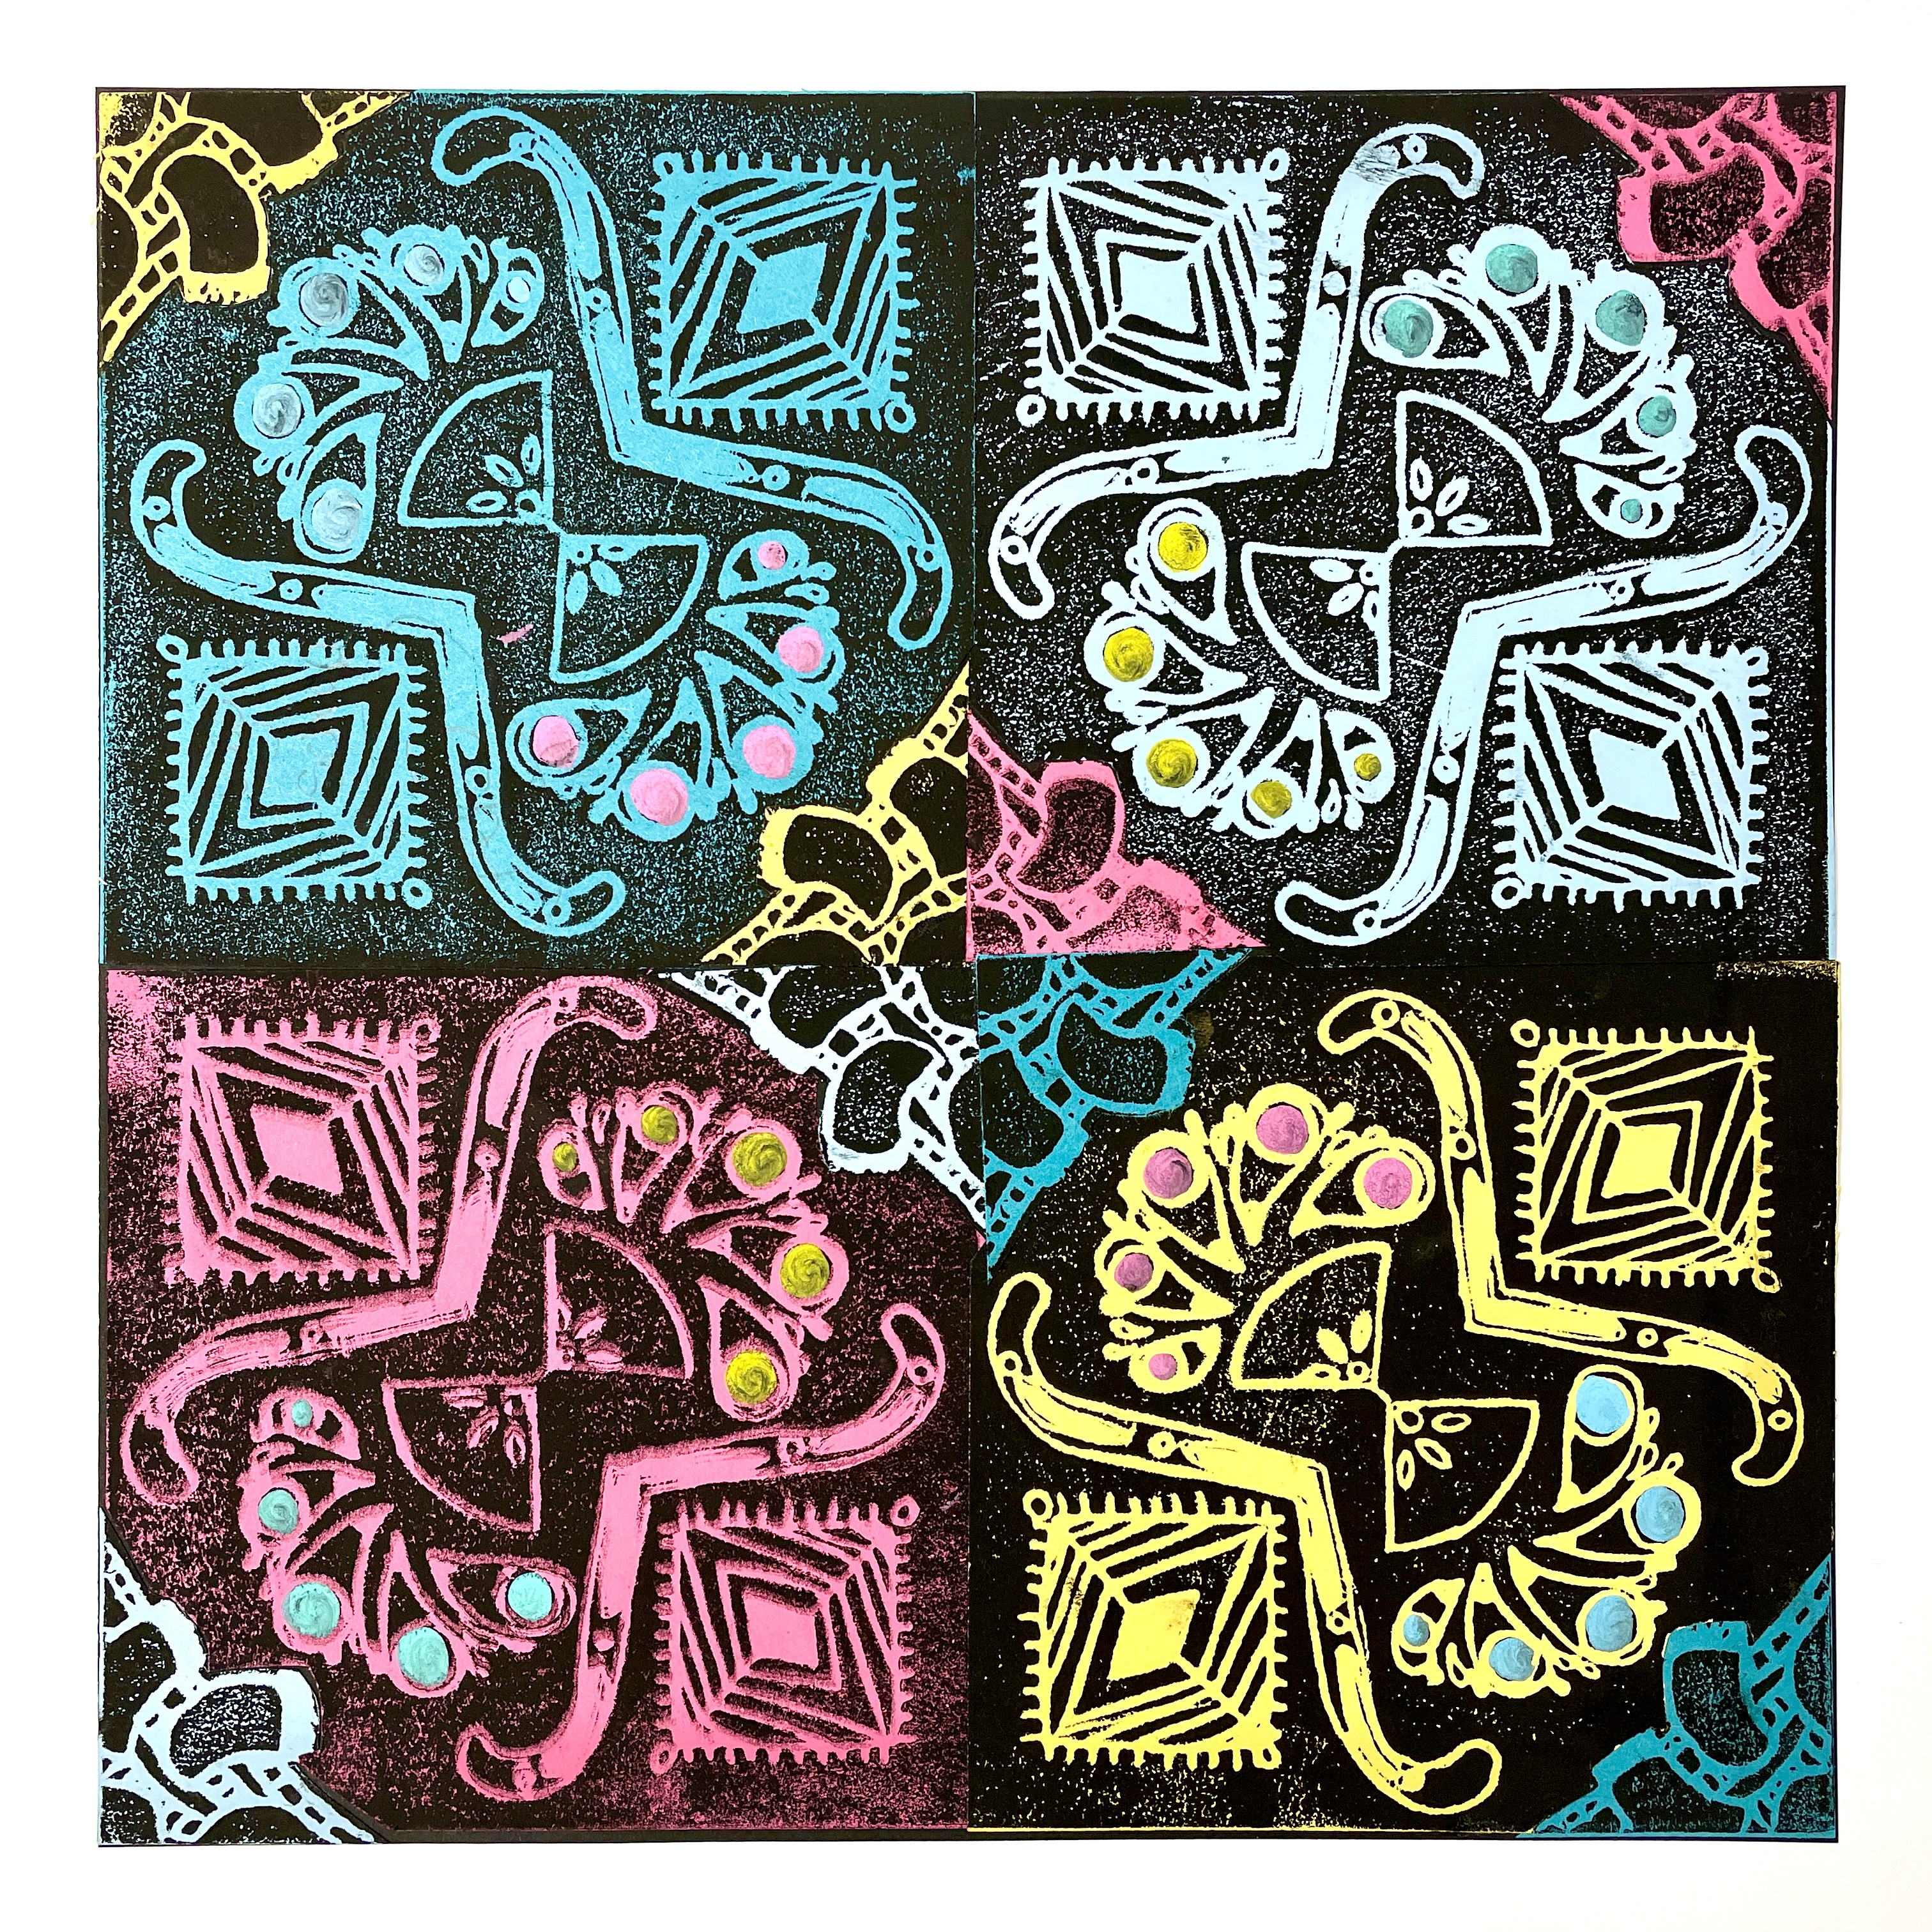
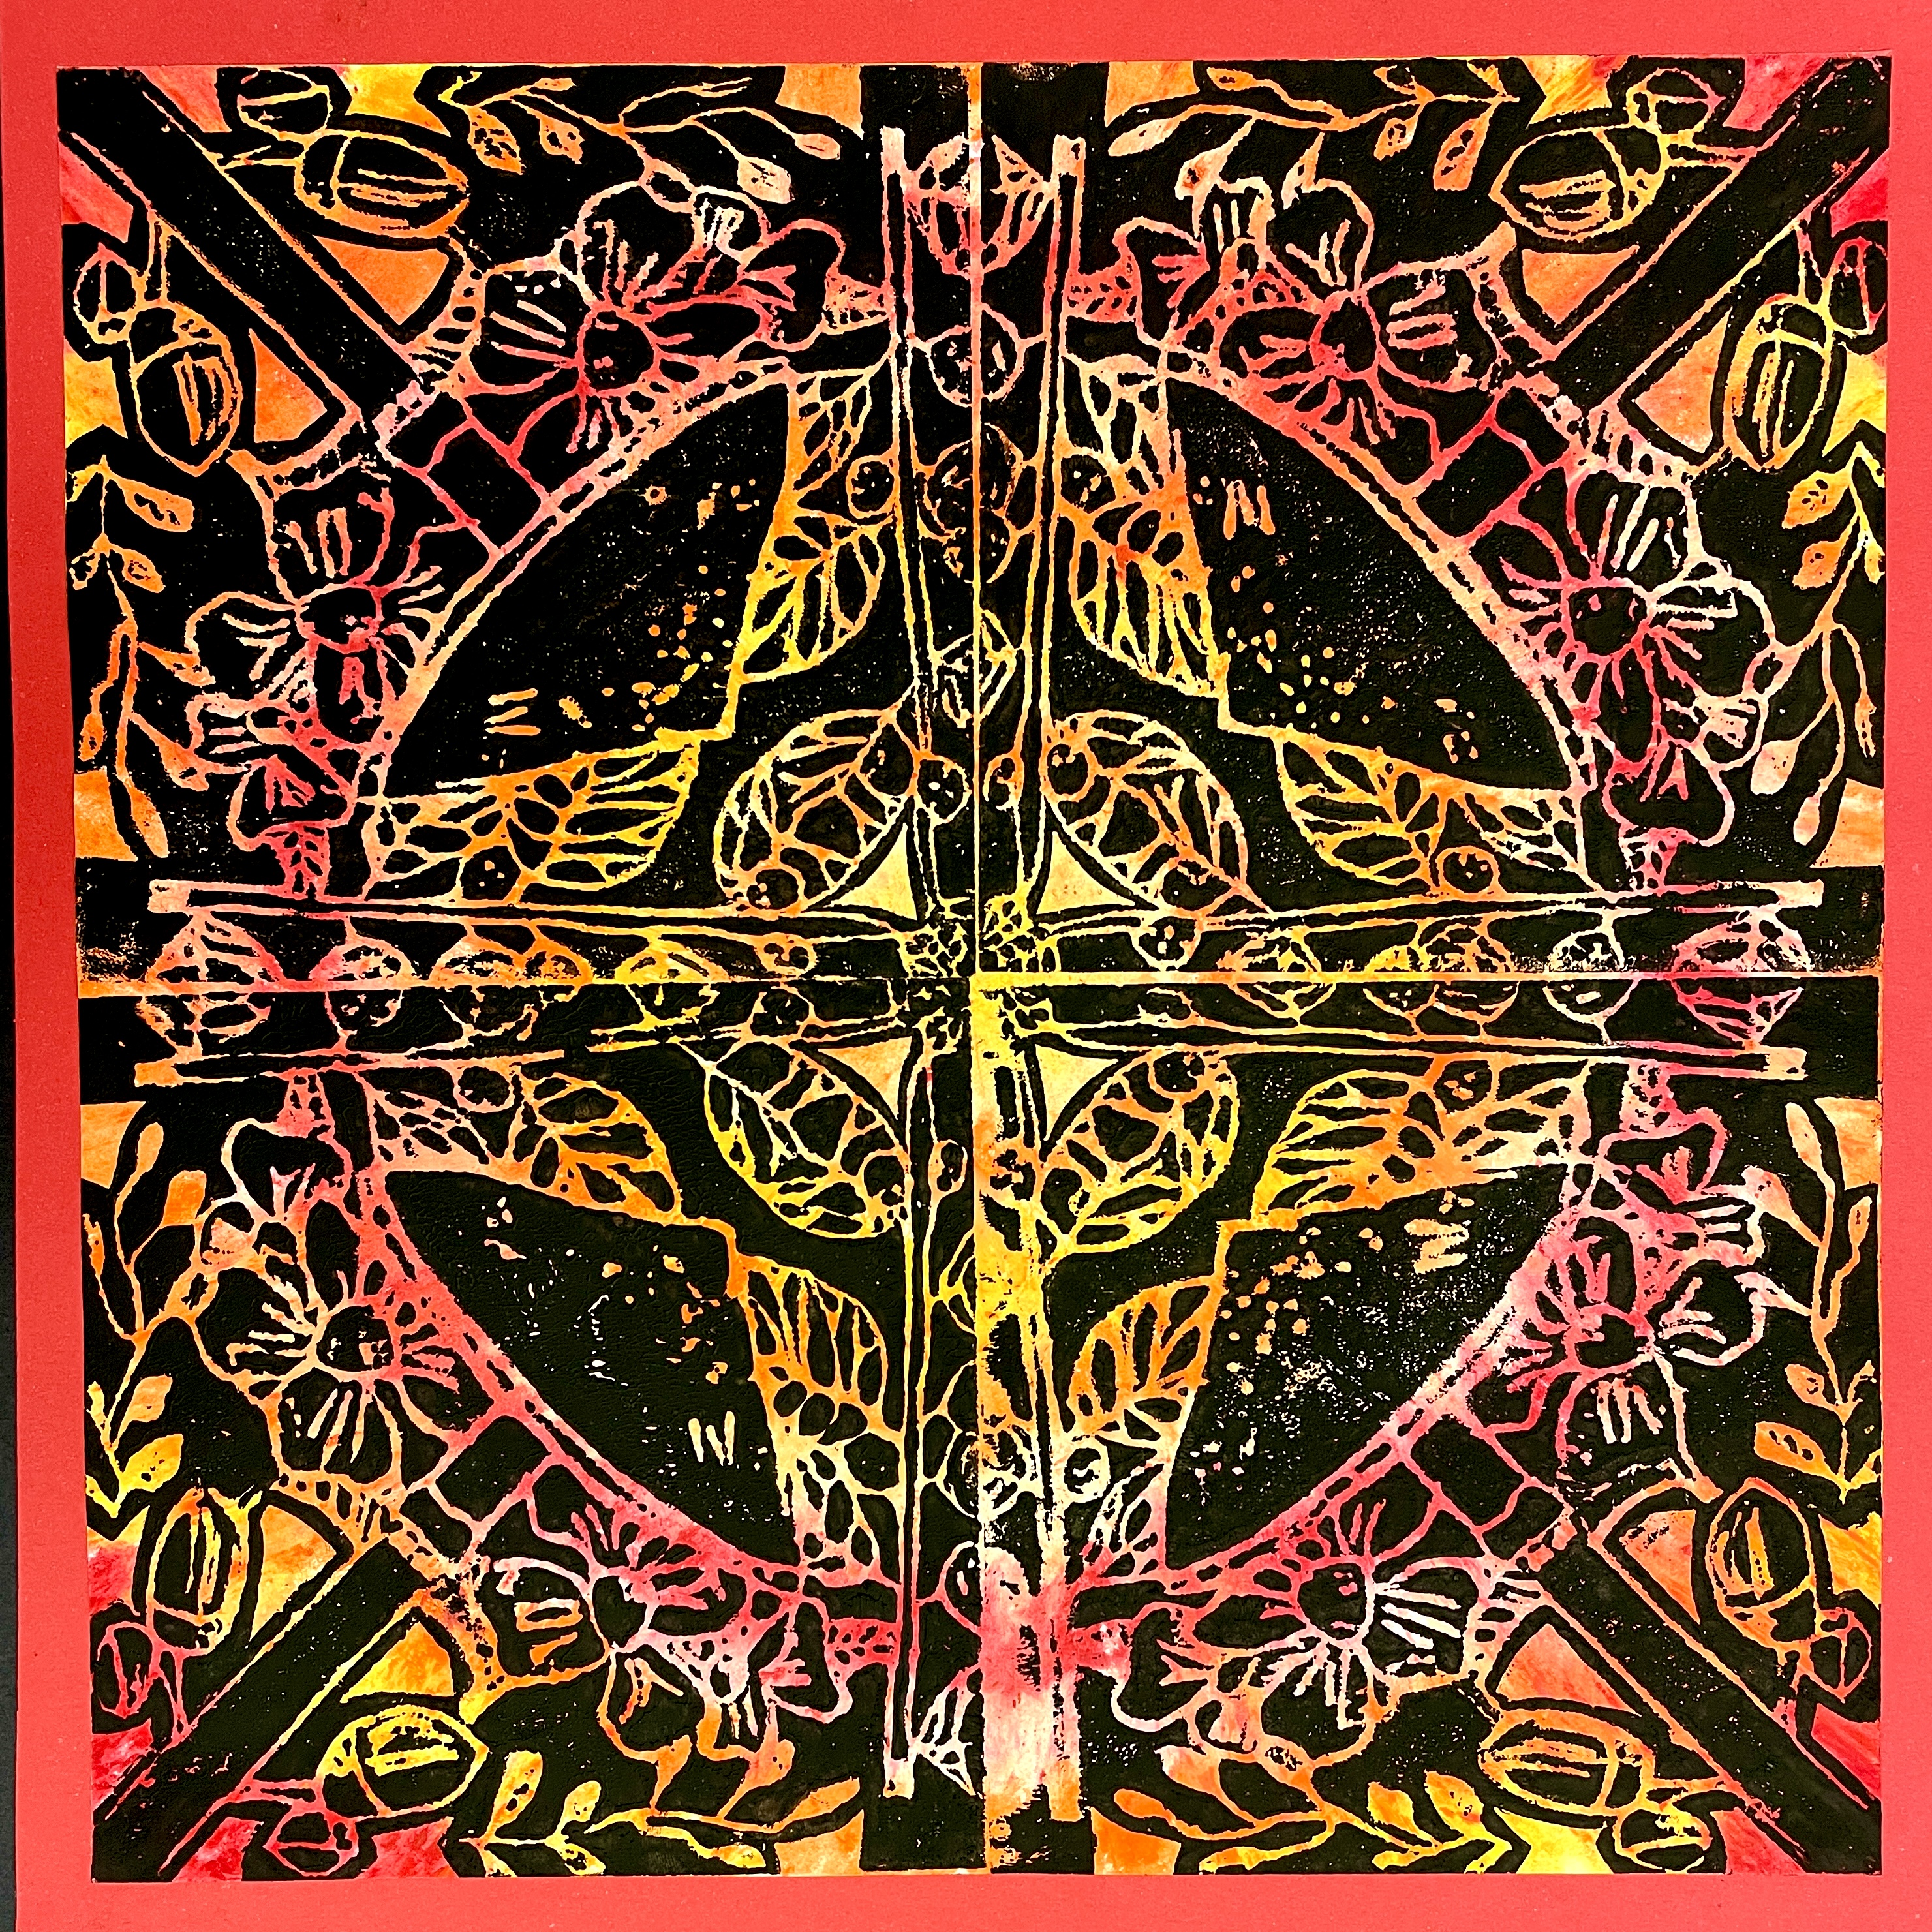
Wow! The results of this project are stunning!

BONUS OPTIONS! If you have early finishers who are really in the groove of printing, suggest these fun bonus projects:
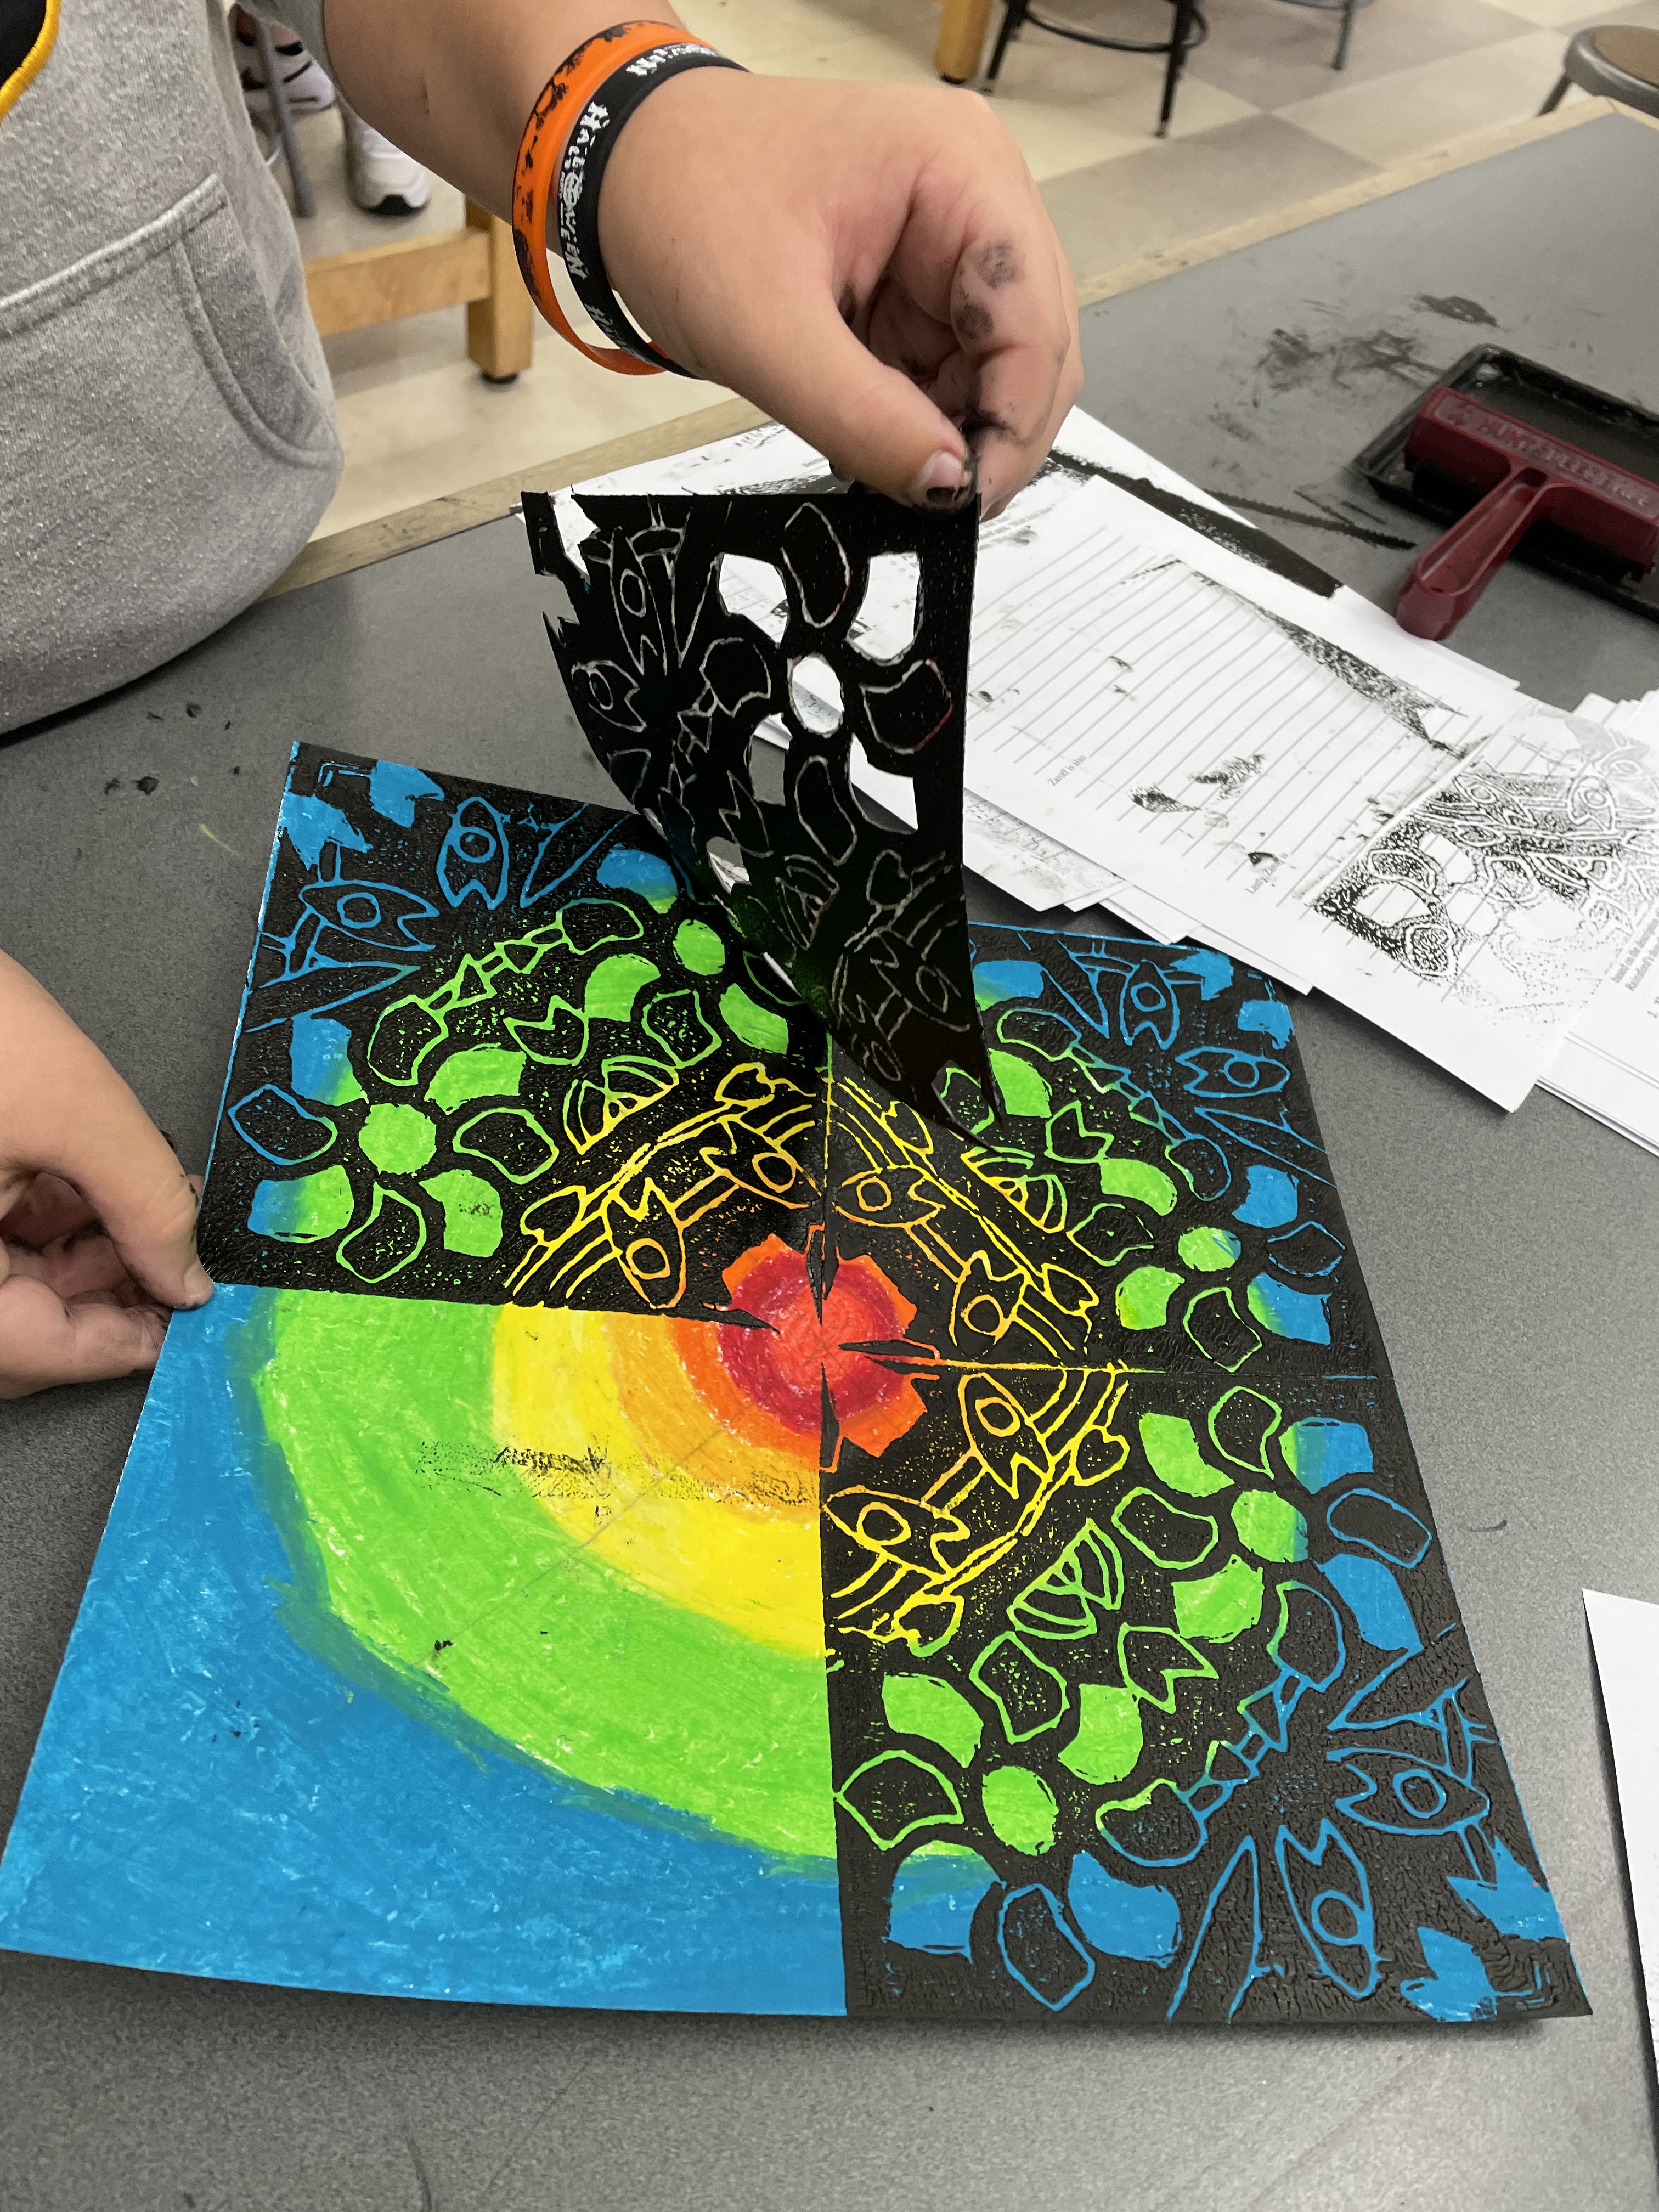
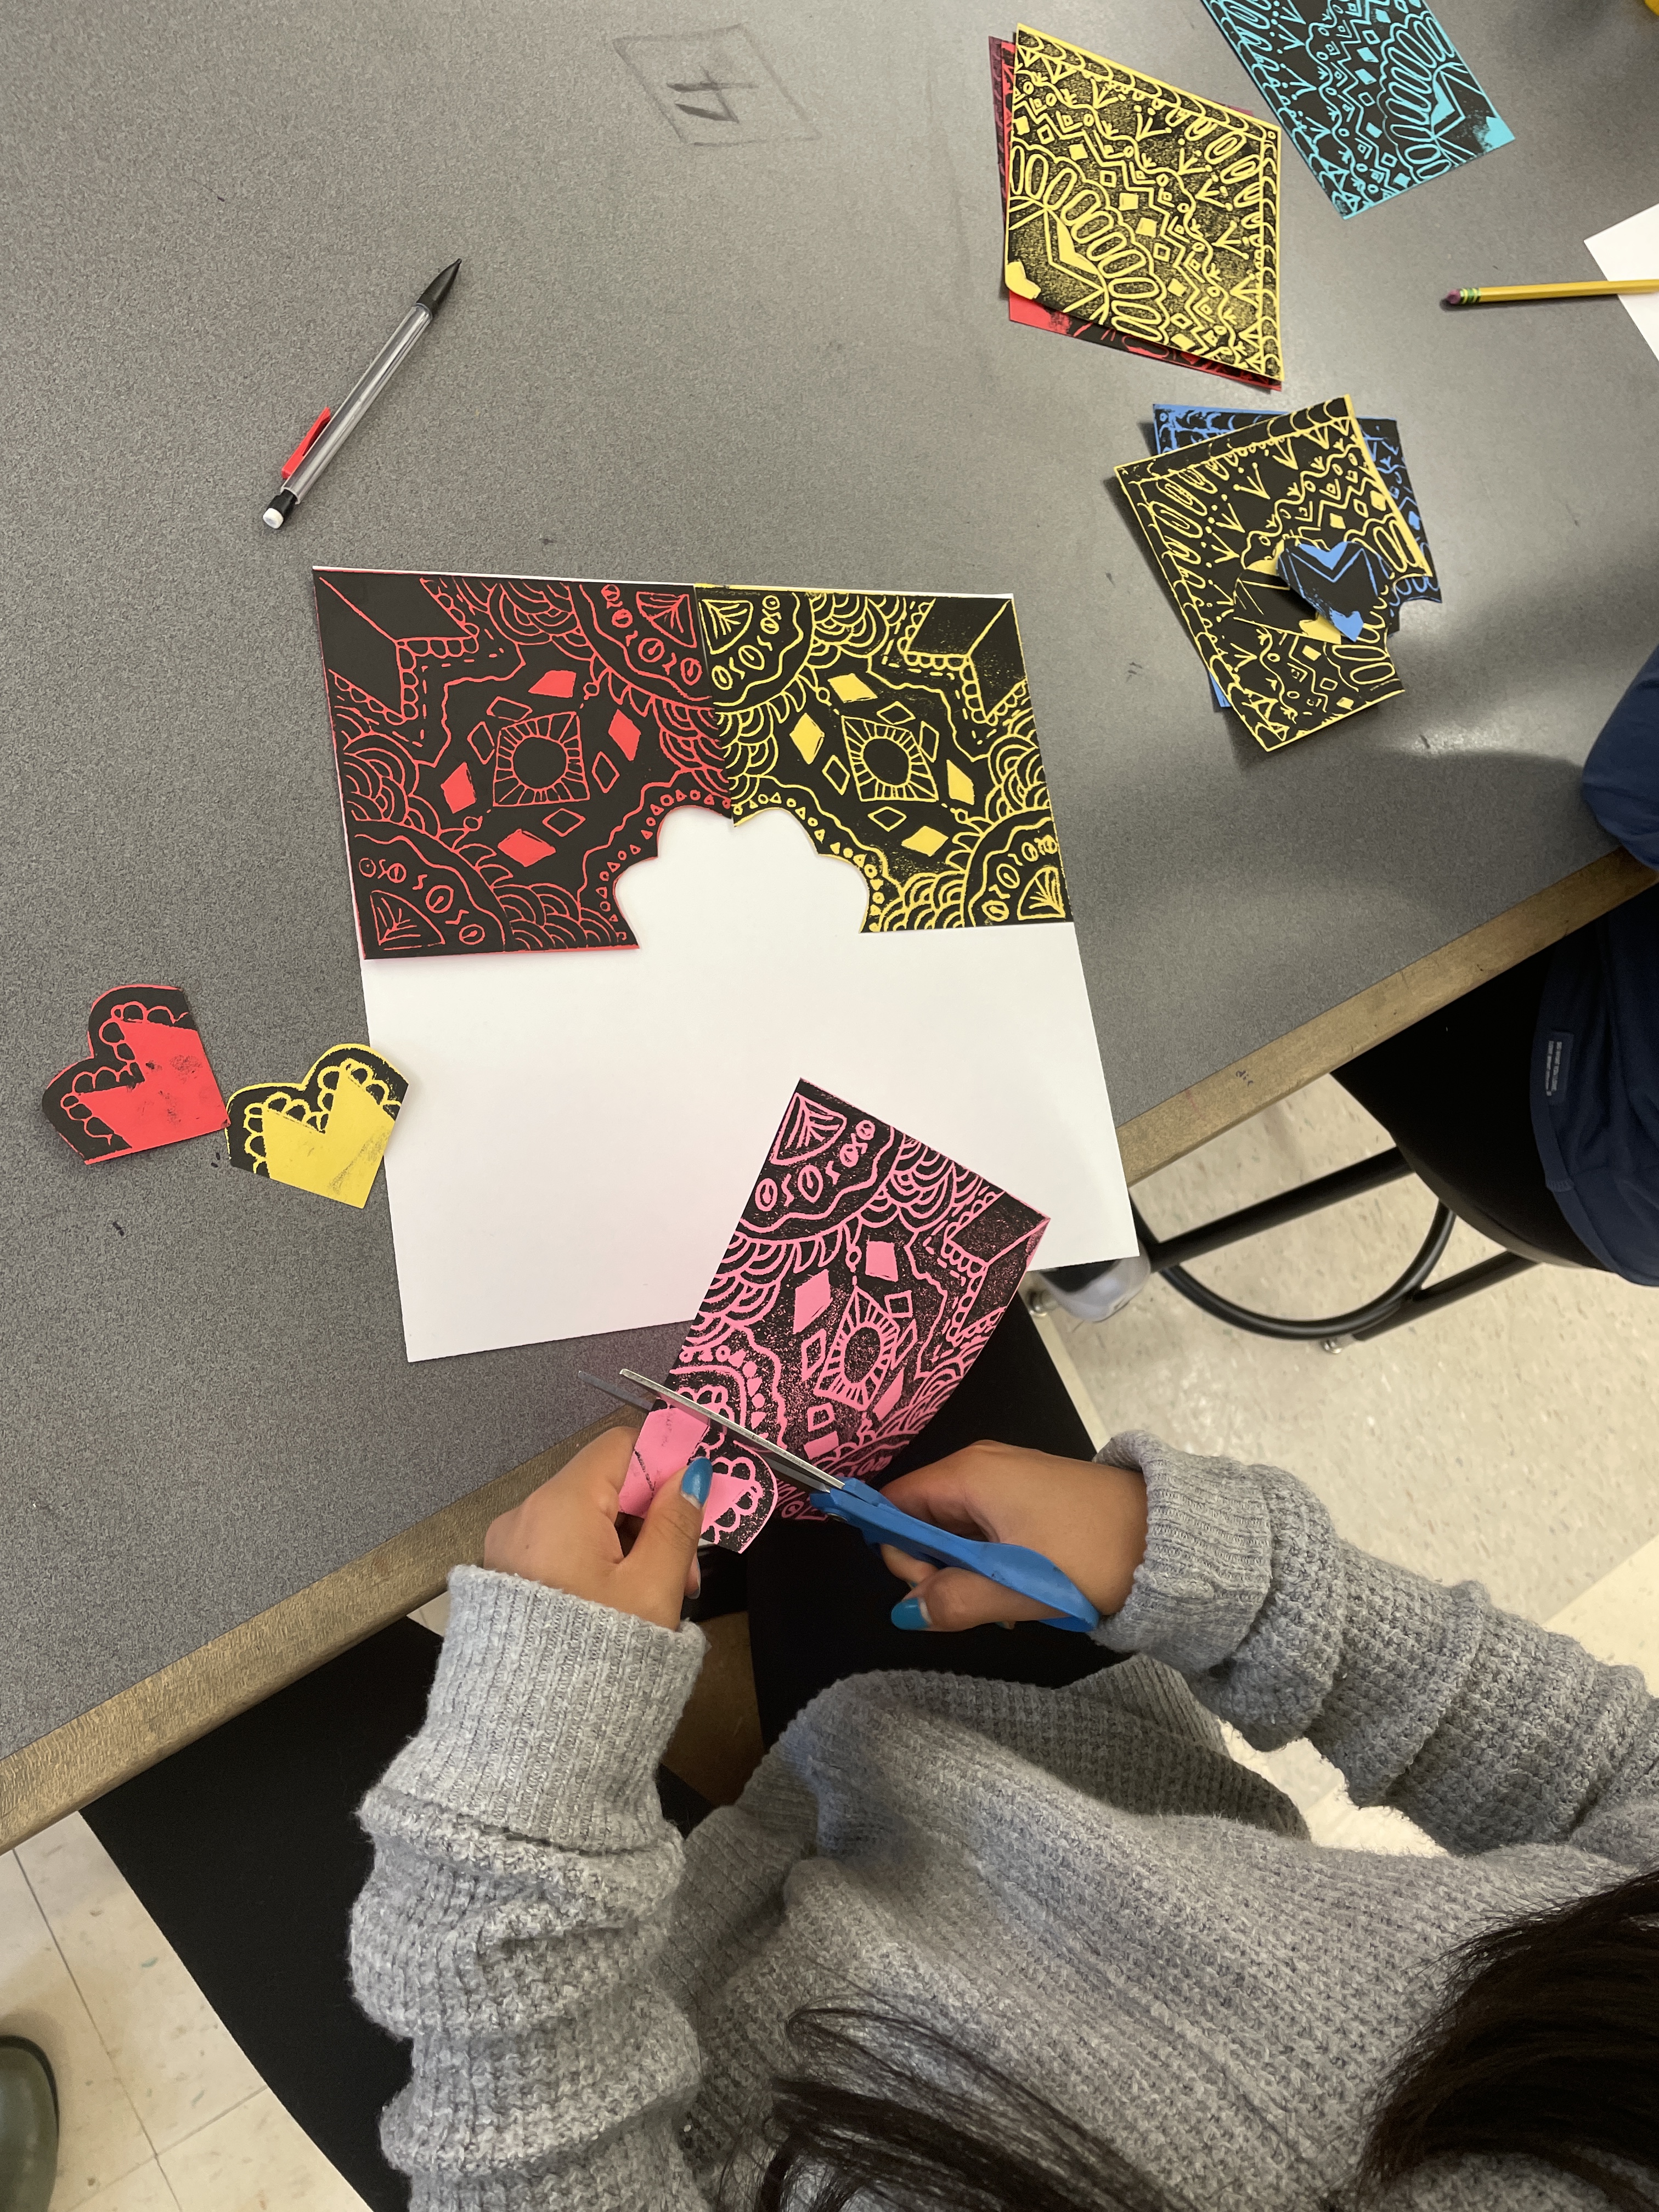
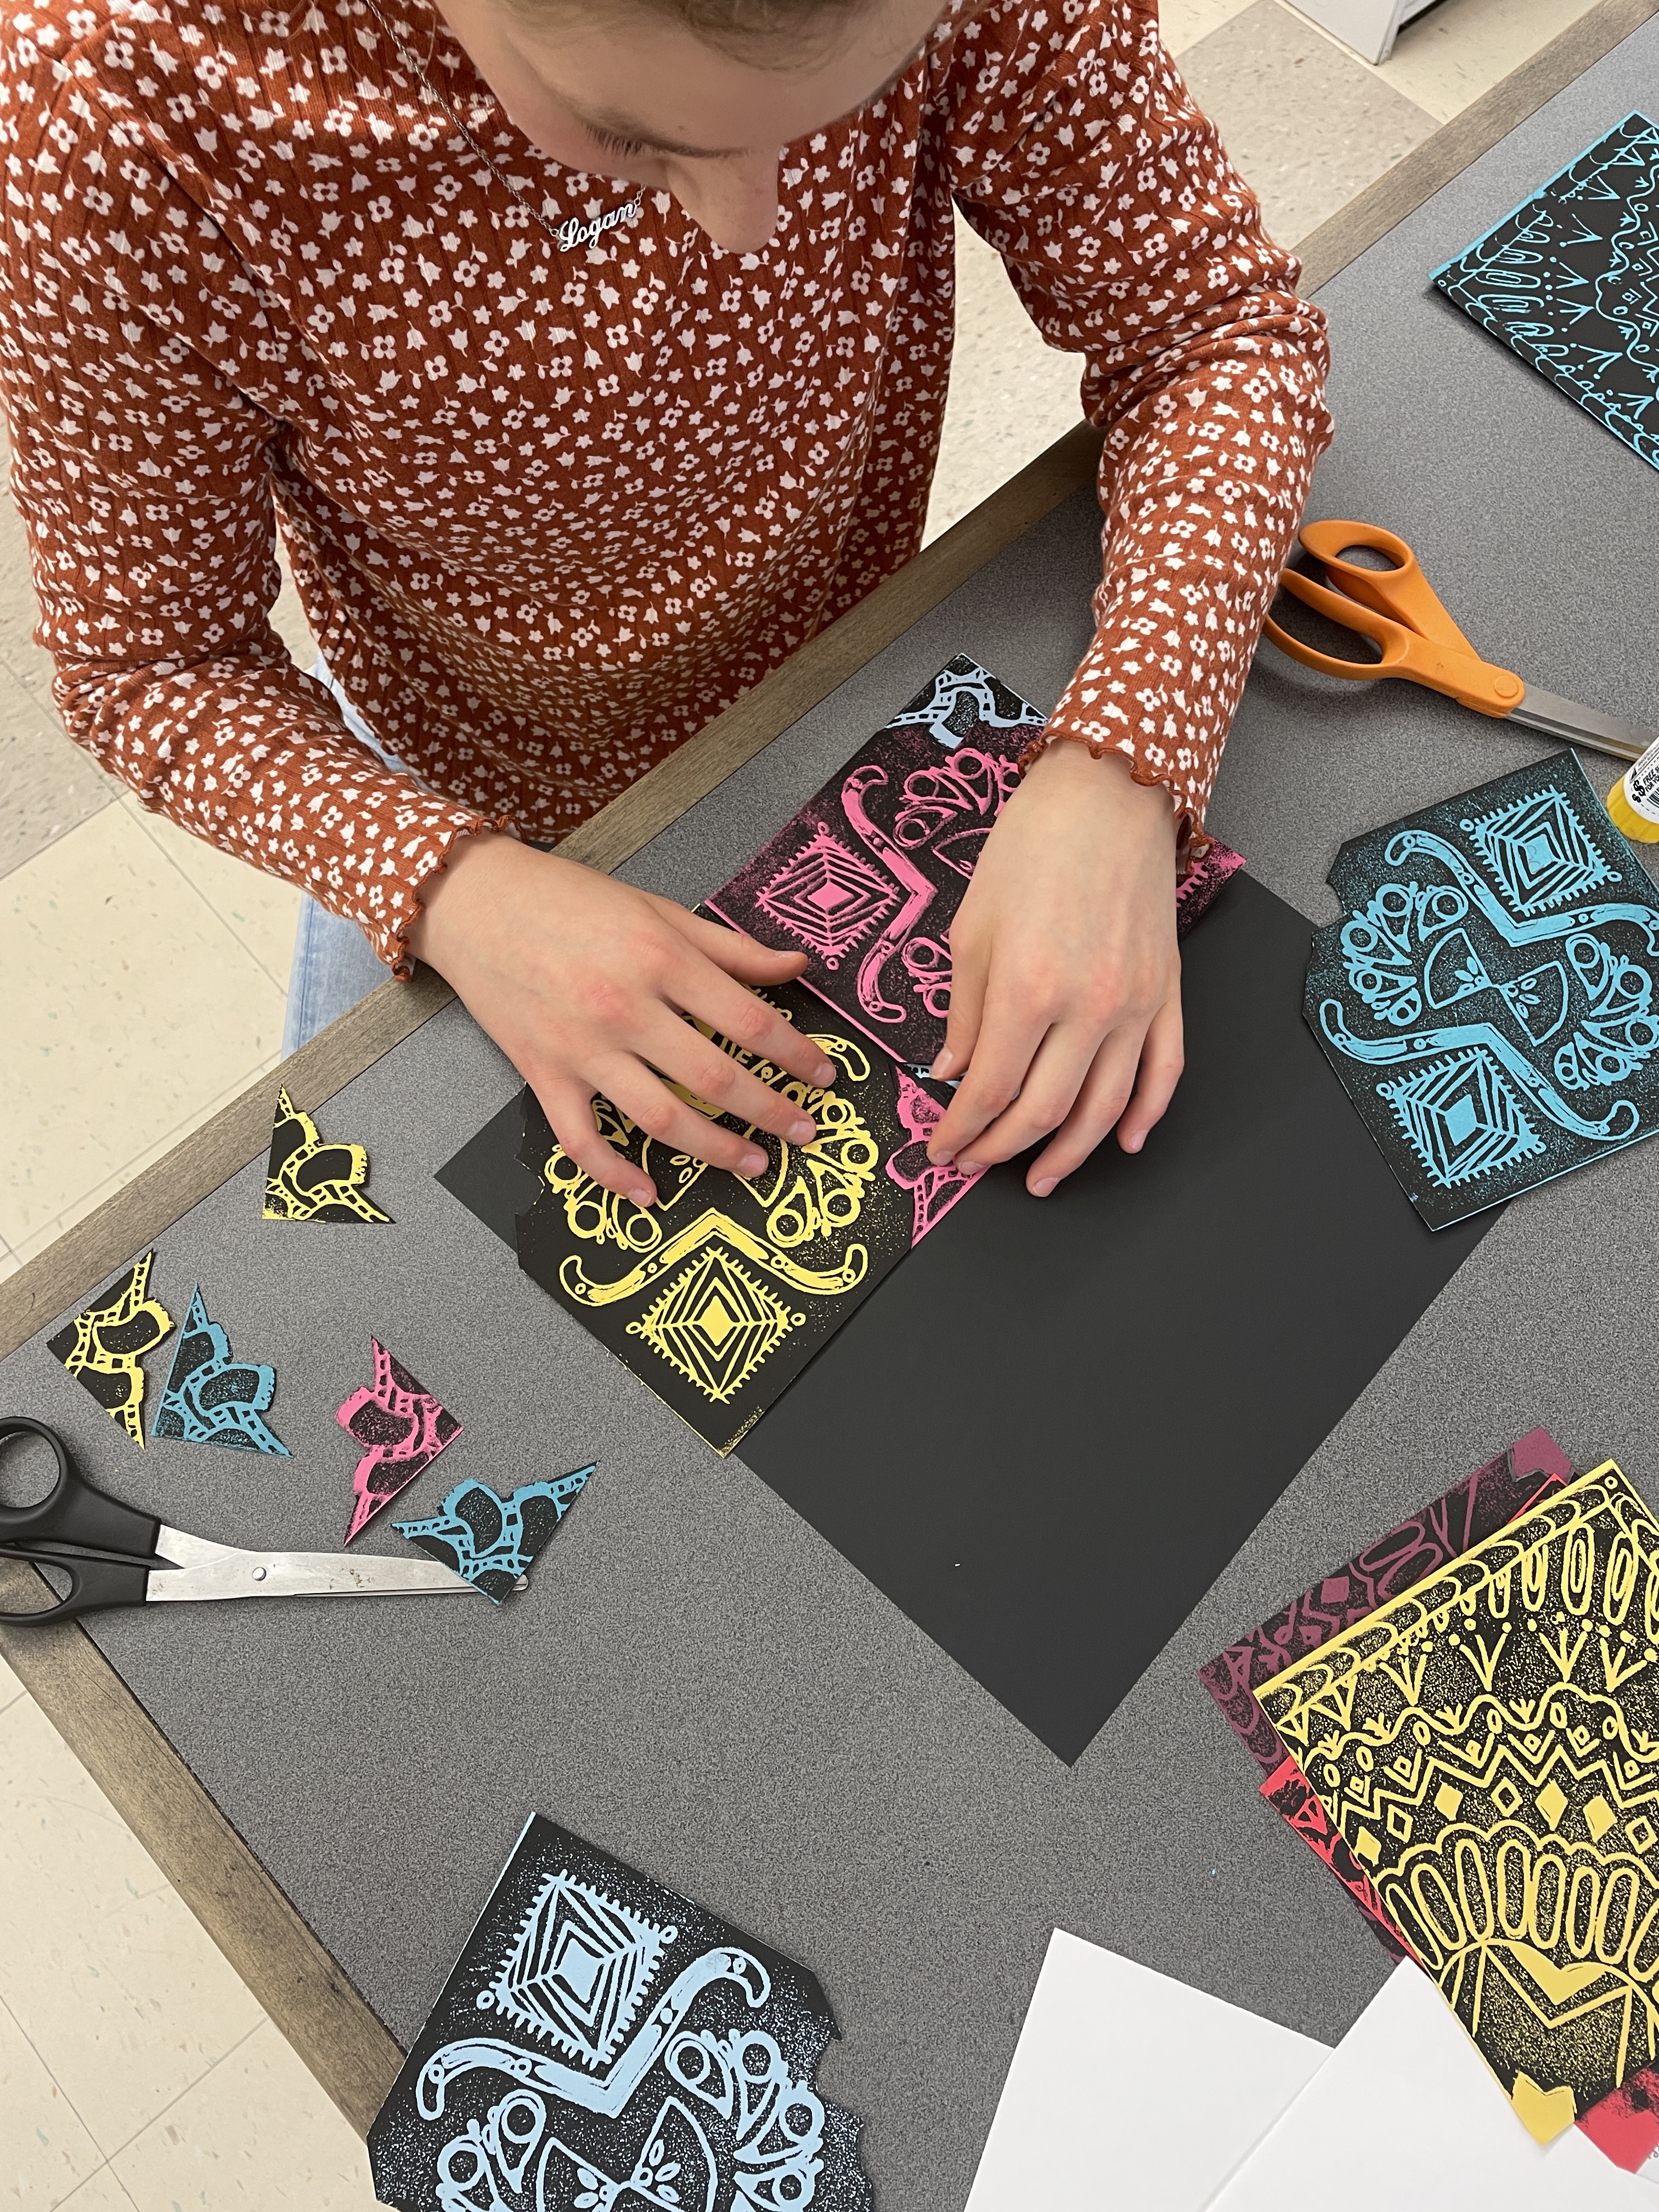
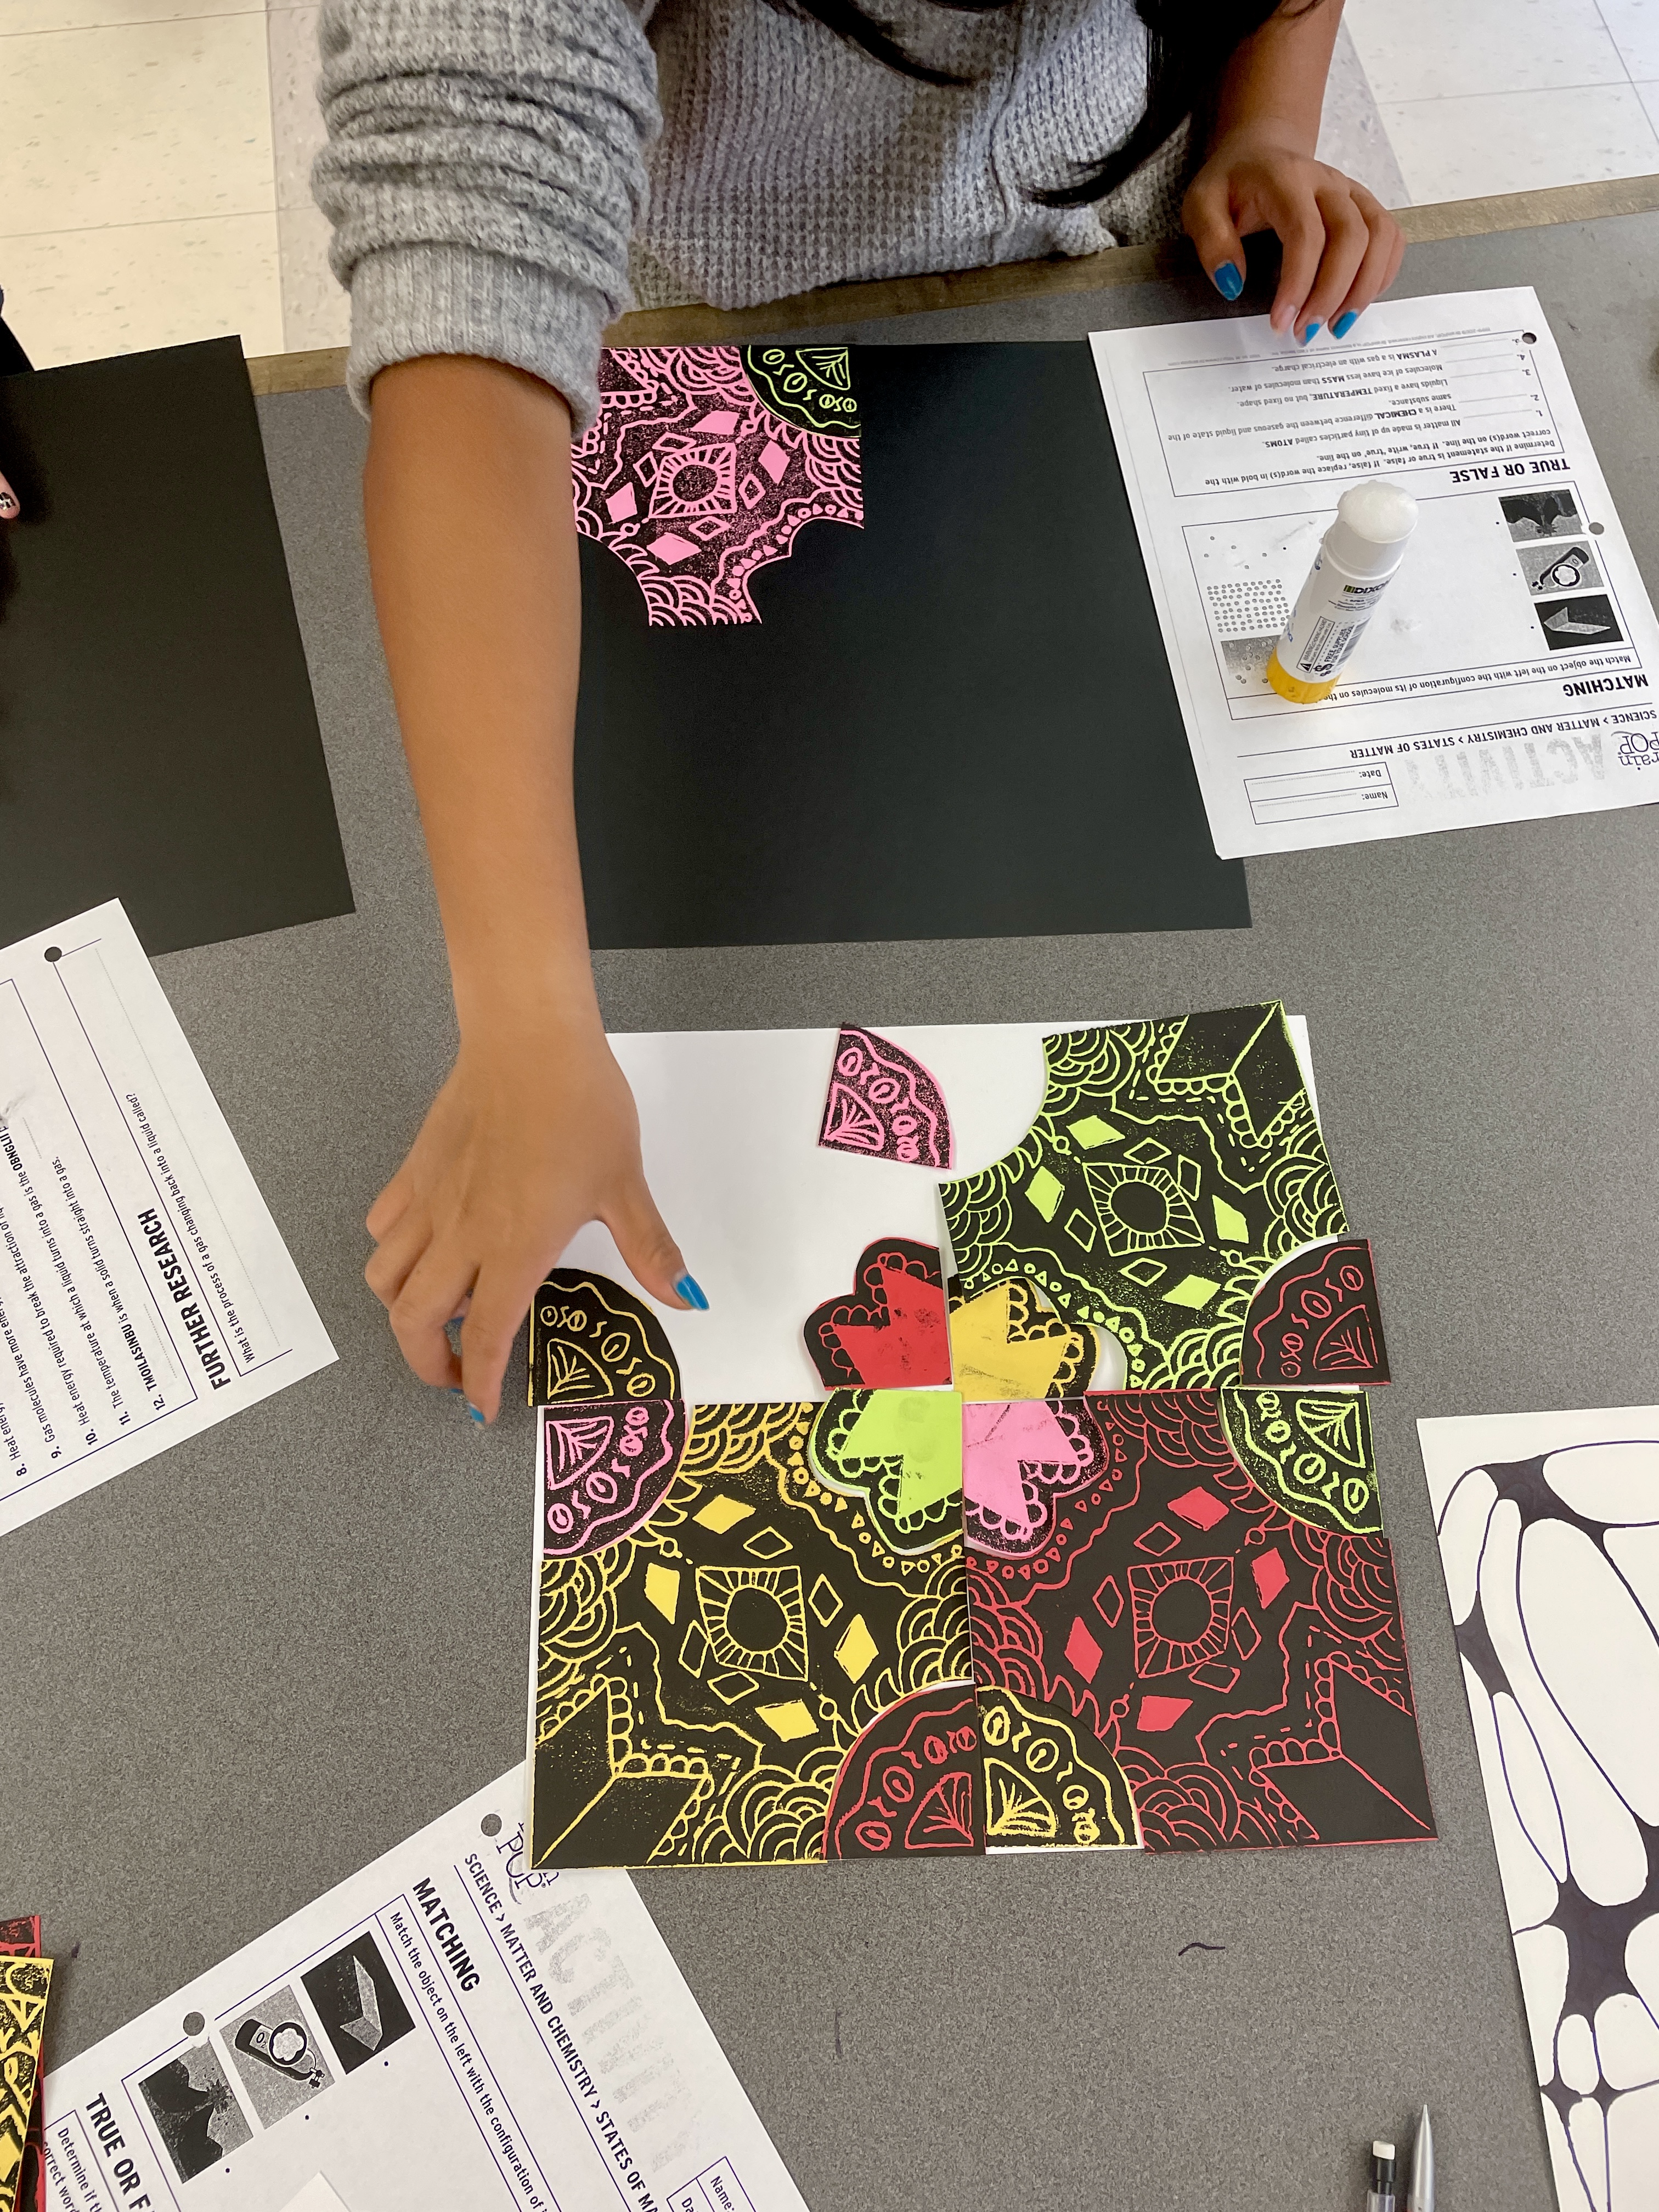
Bonus Project #1: Create additional prints on patterned papers. (I provide a variety of scrapbooking and colorful handmade paper squares.) Divide and cut the dried prints and reassemble—perhaps NOT in the original way, but finding some new unique pattern or design. Embellish with Metallic or POSCA paint pens. (optional).

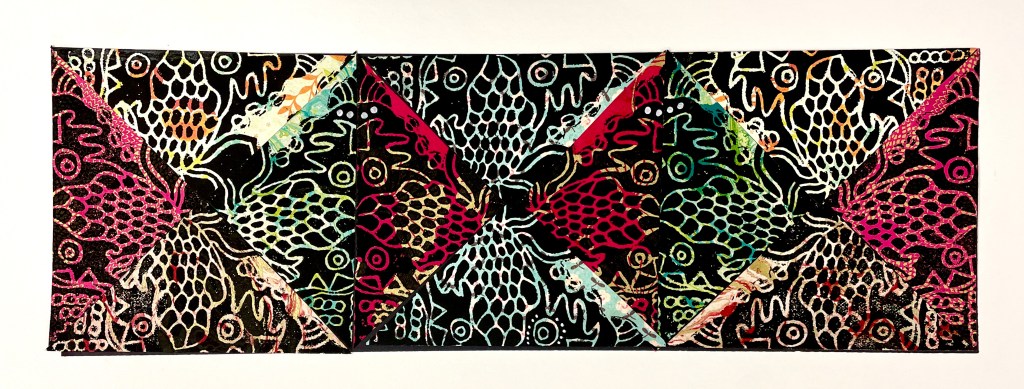
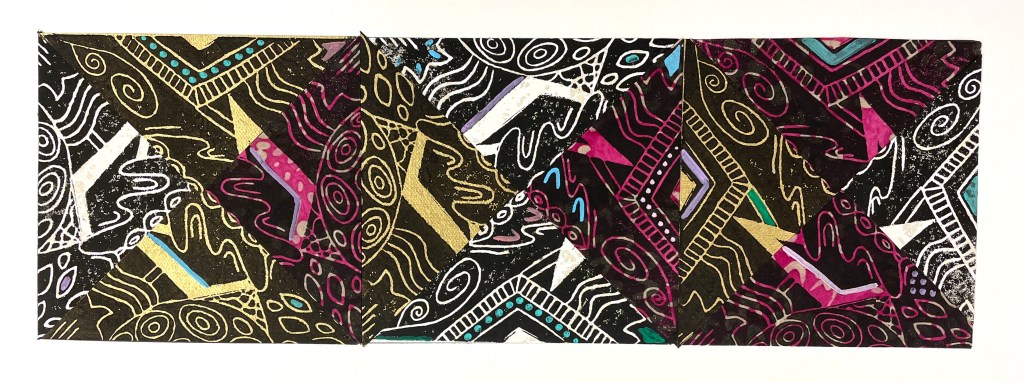
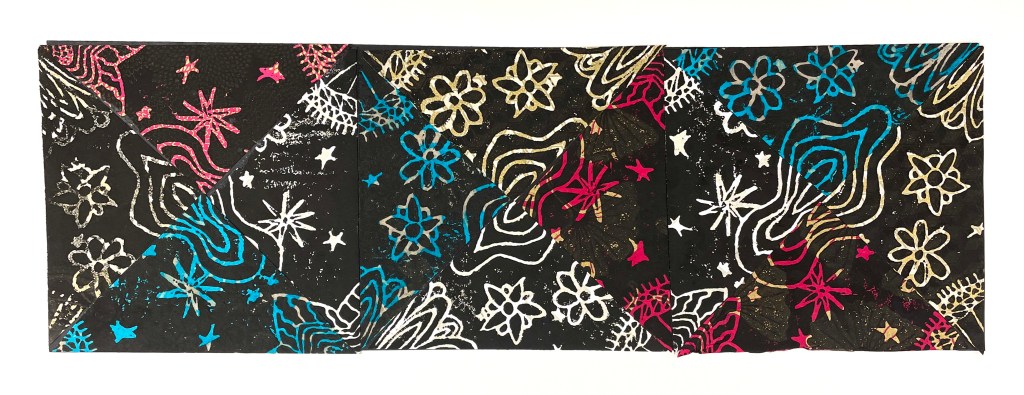
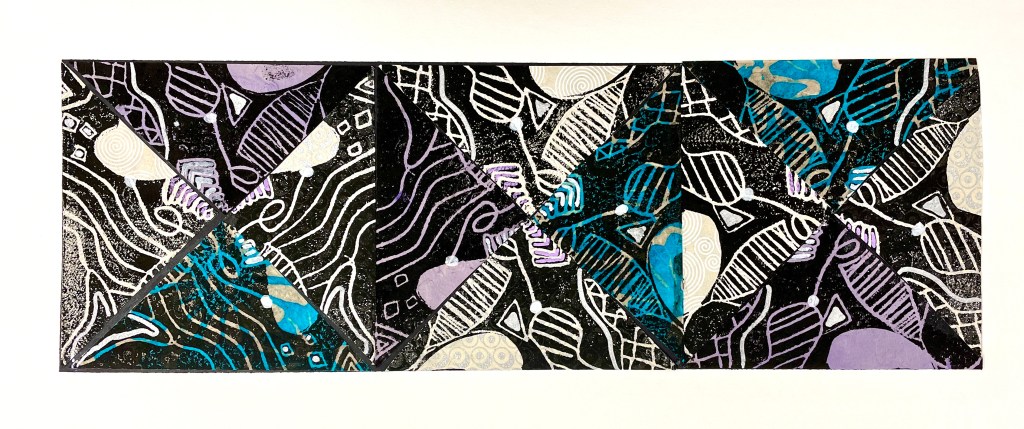
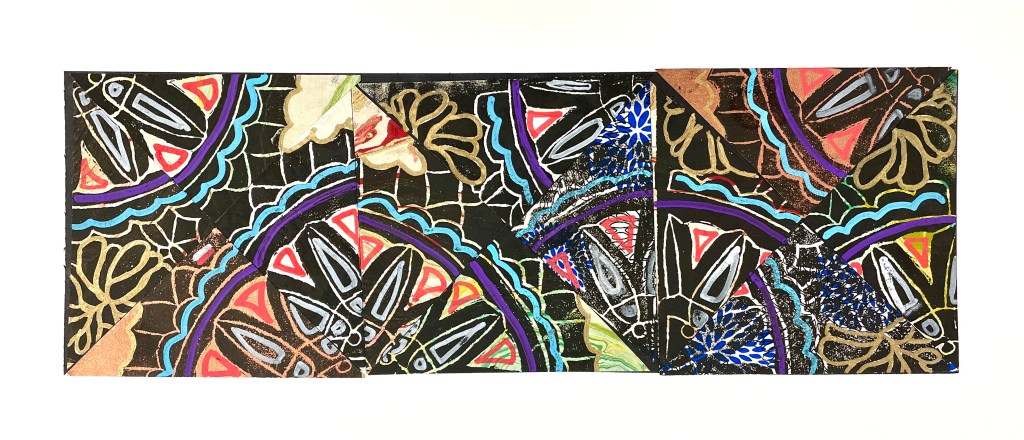
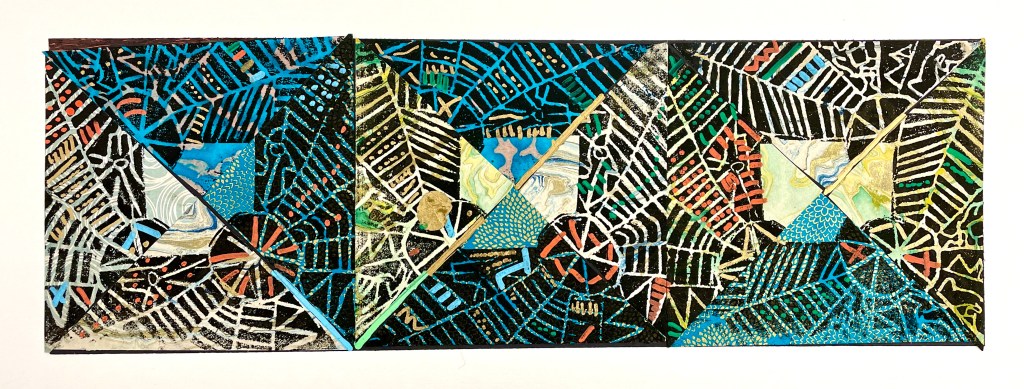
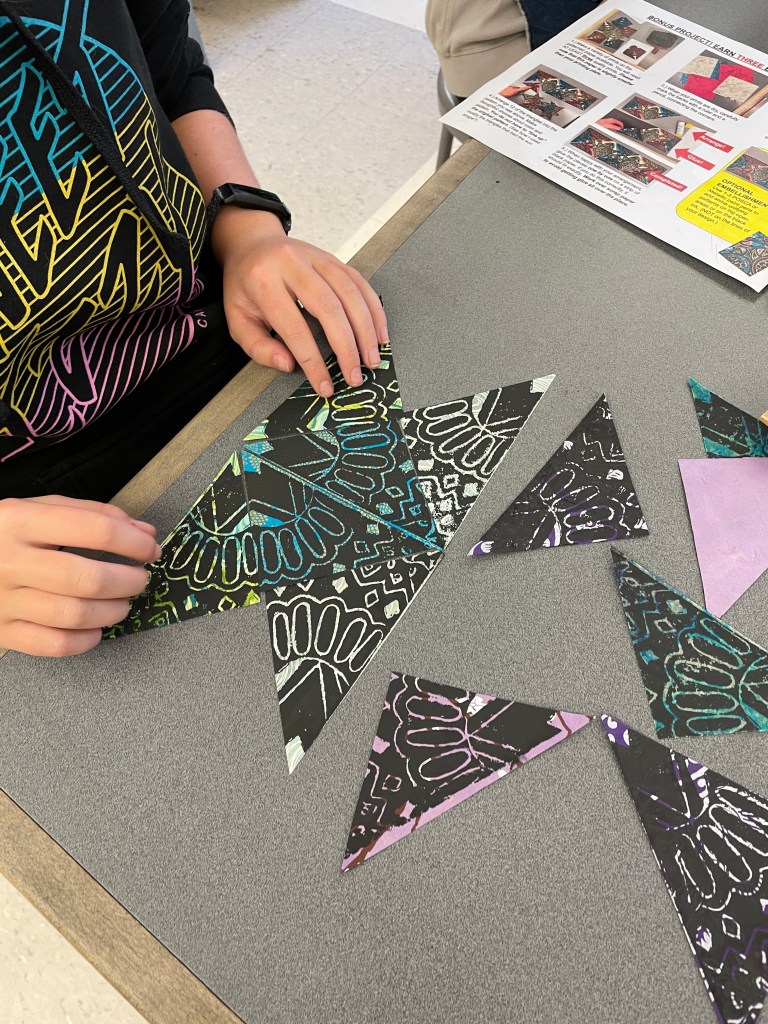
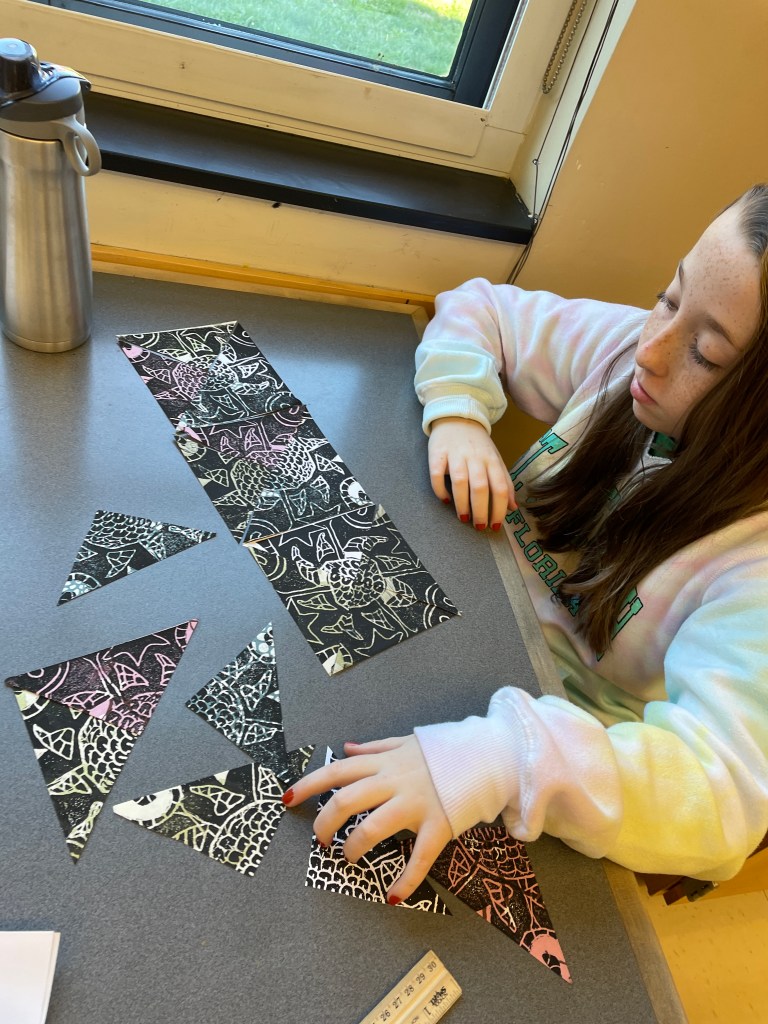
Bonus Project #2: If you have at least four quality practice prints, find a way to cut and swap elements of the prints, in a puzzle-like way, to create a new radial symmetry design. Glue on a square of 12” by 12” black paper, (which helps disguise any gaps between cut pieces!) Embellish with Metallic or POSCA paint pens. (optional).


_ _ _
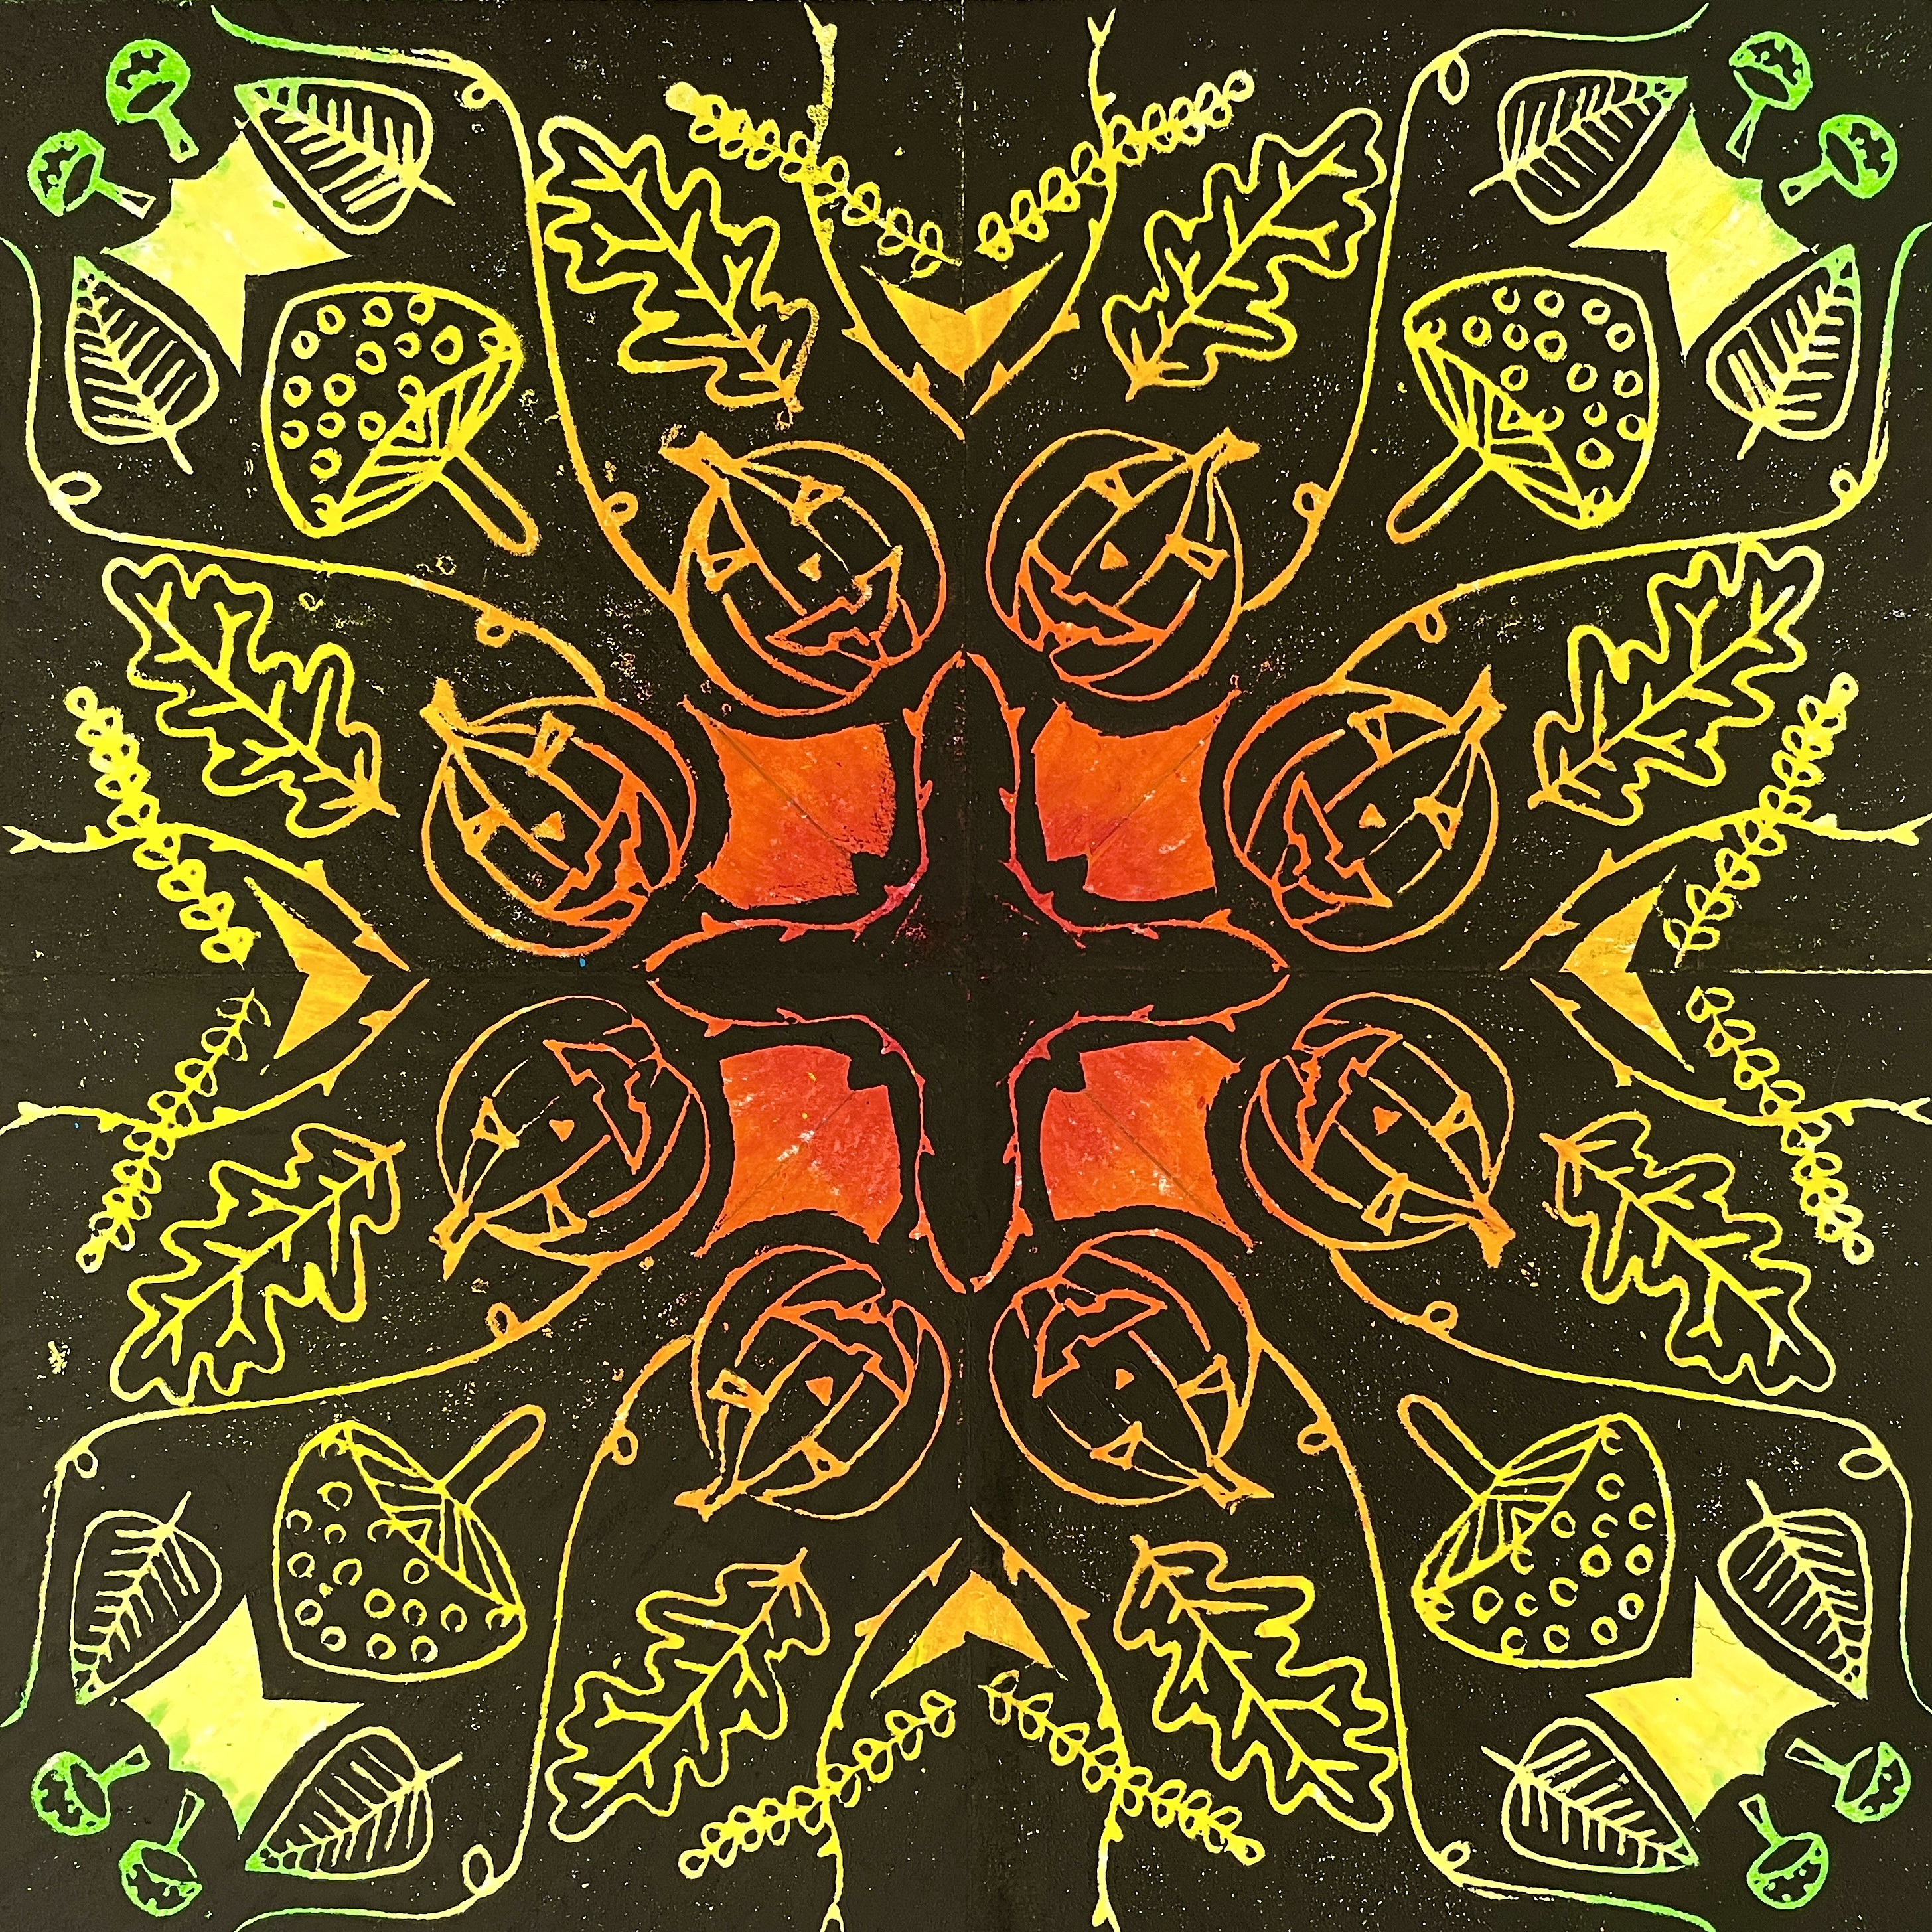
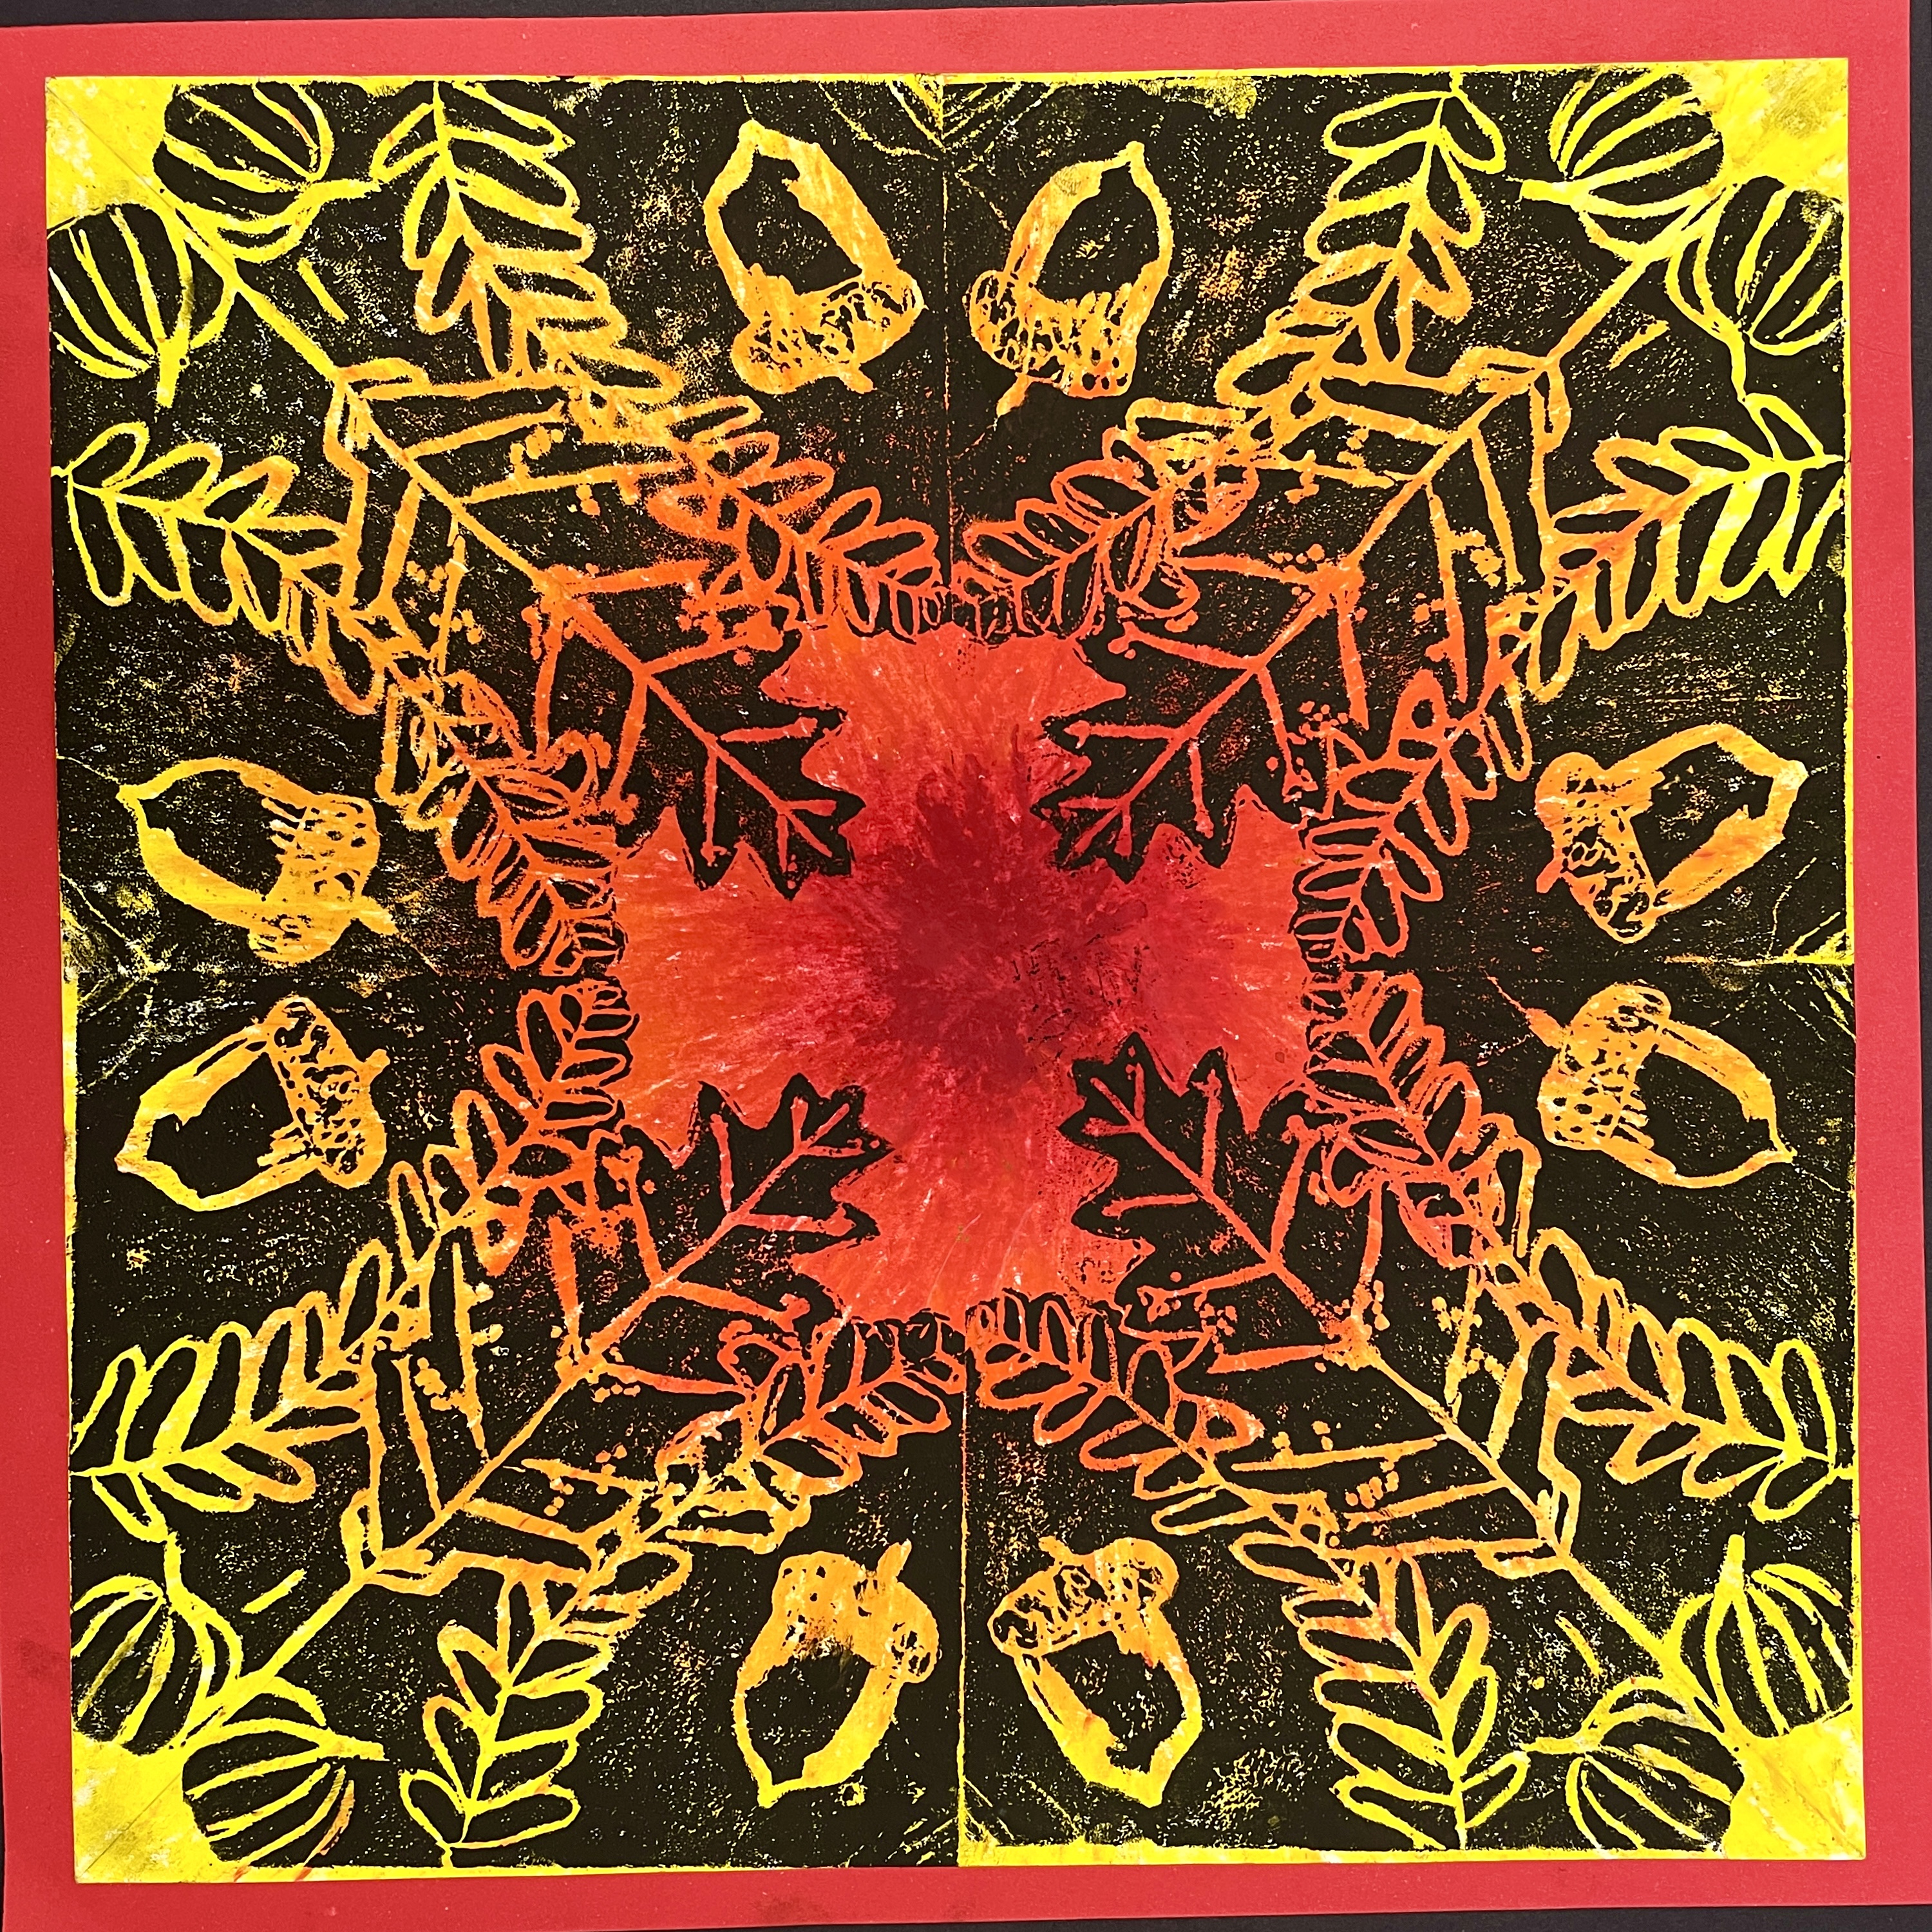
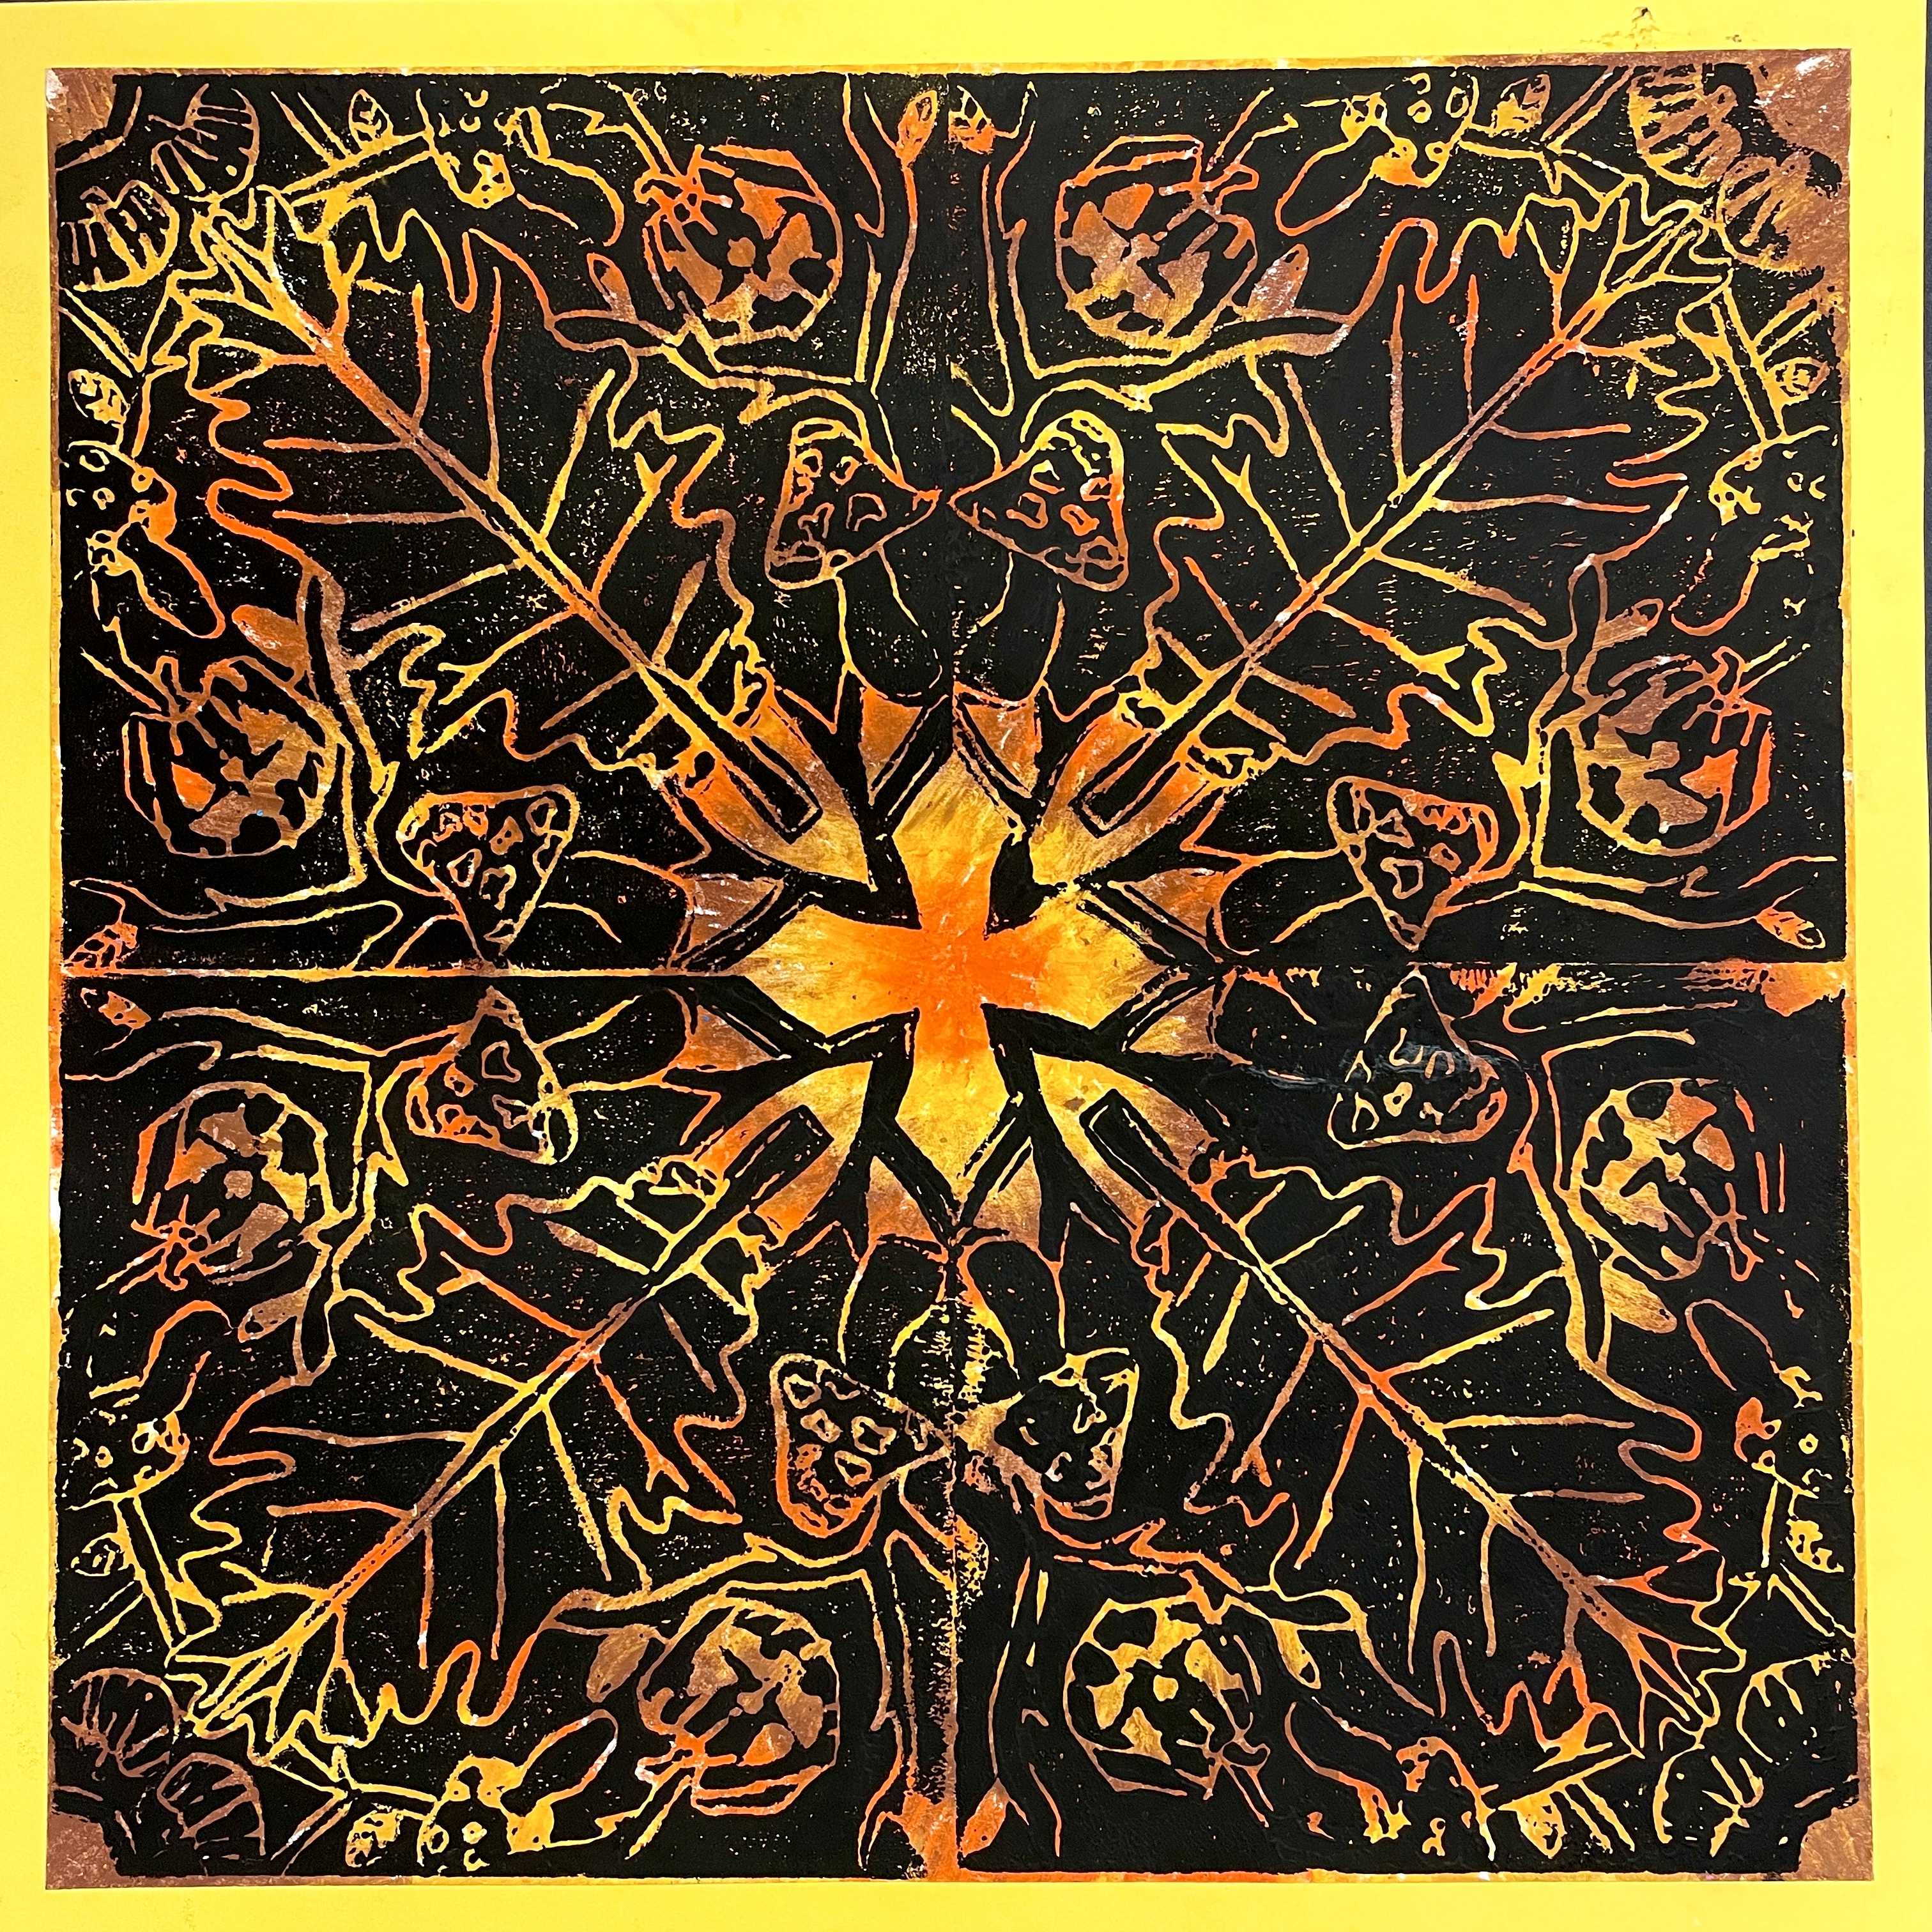
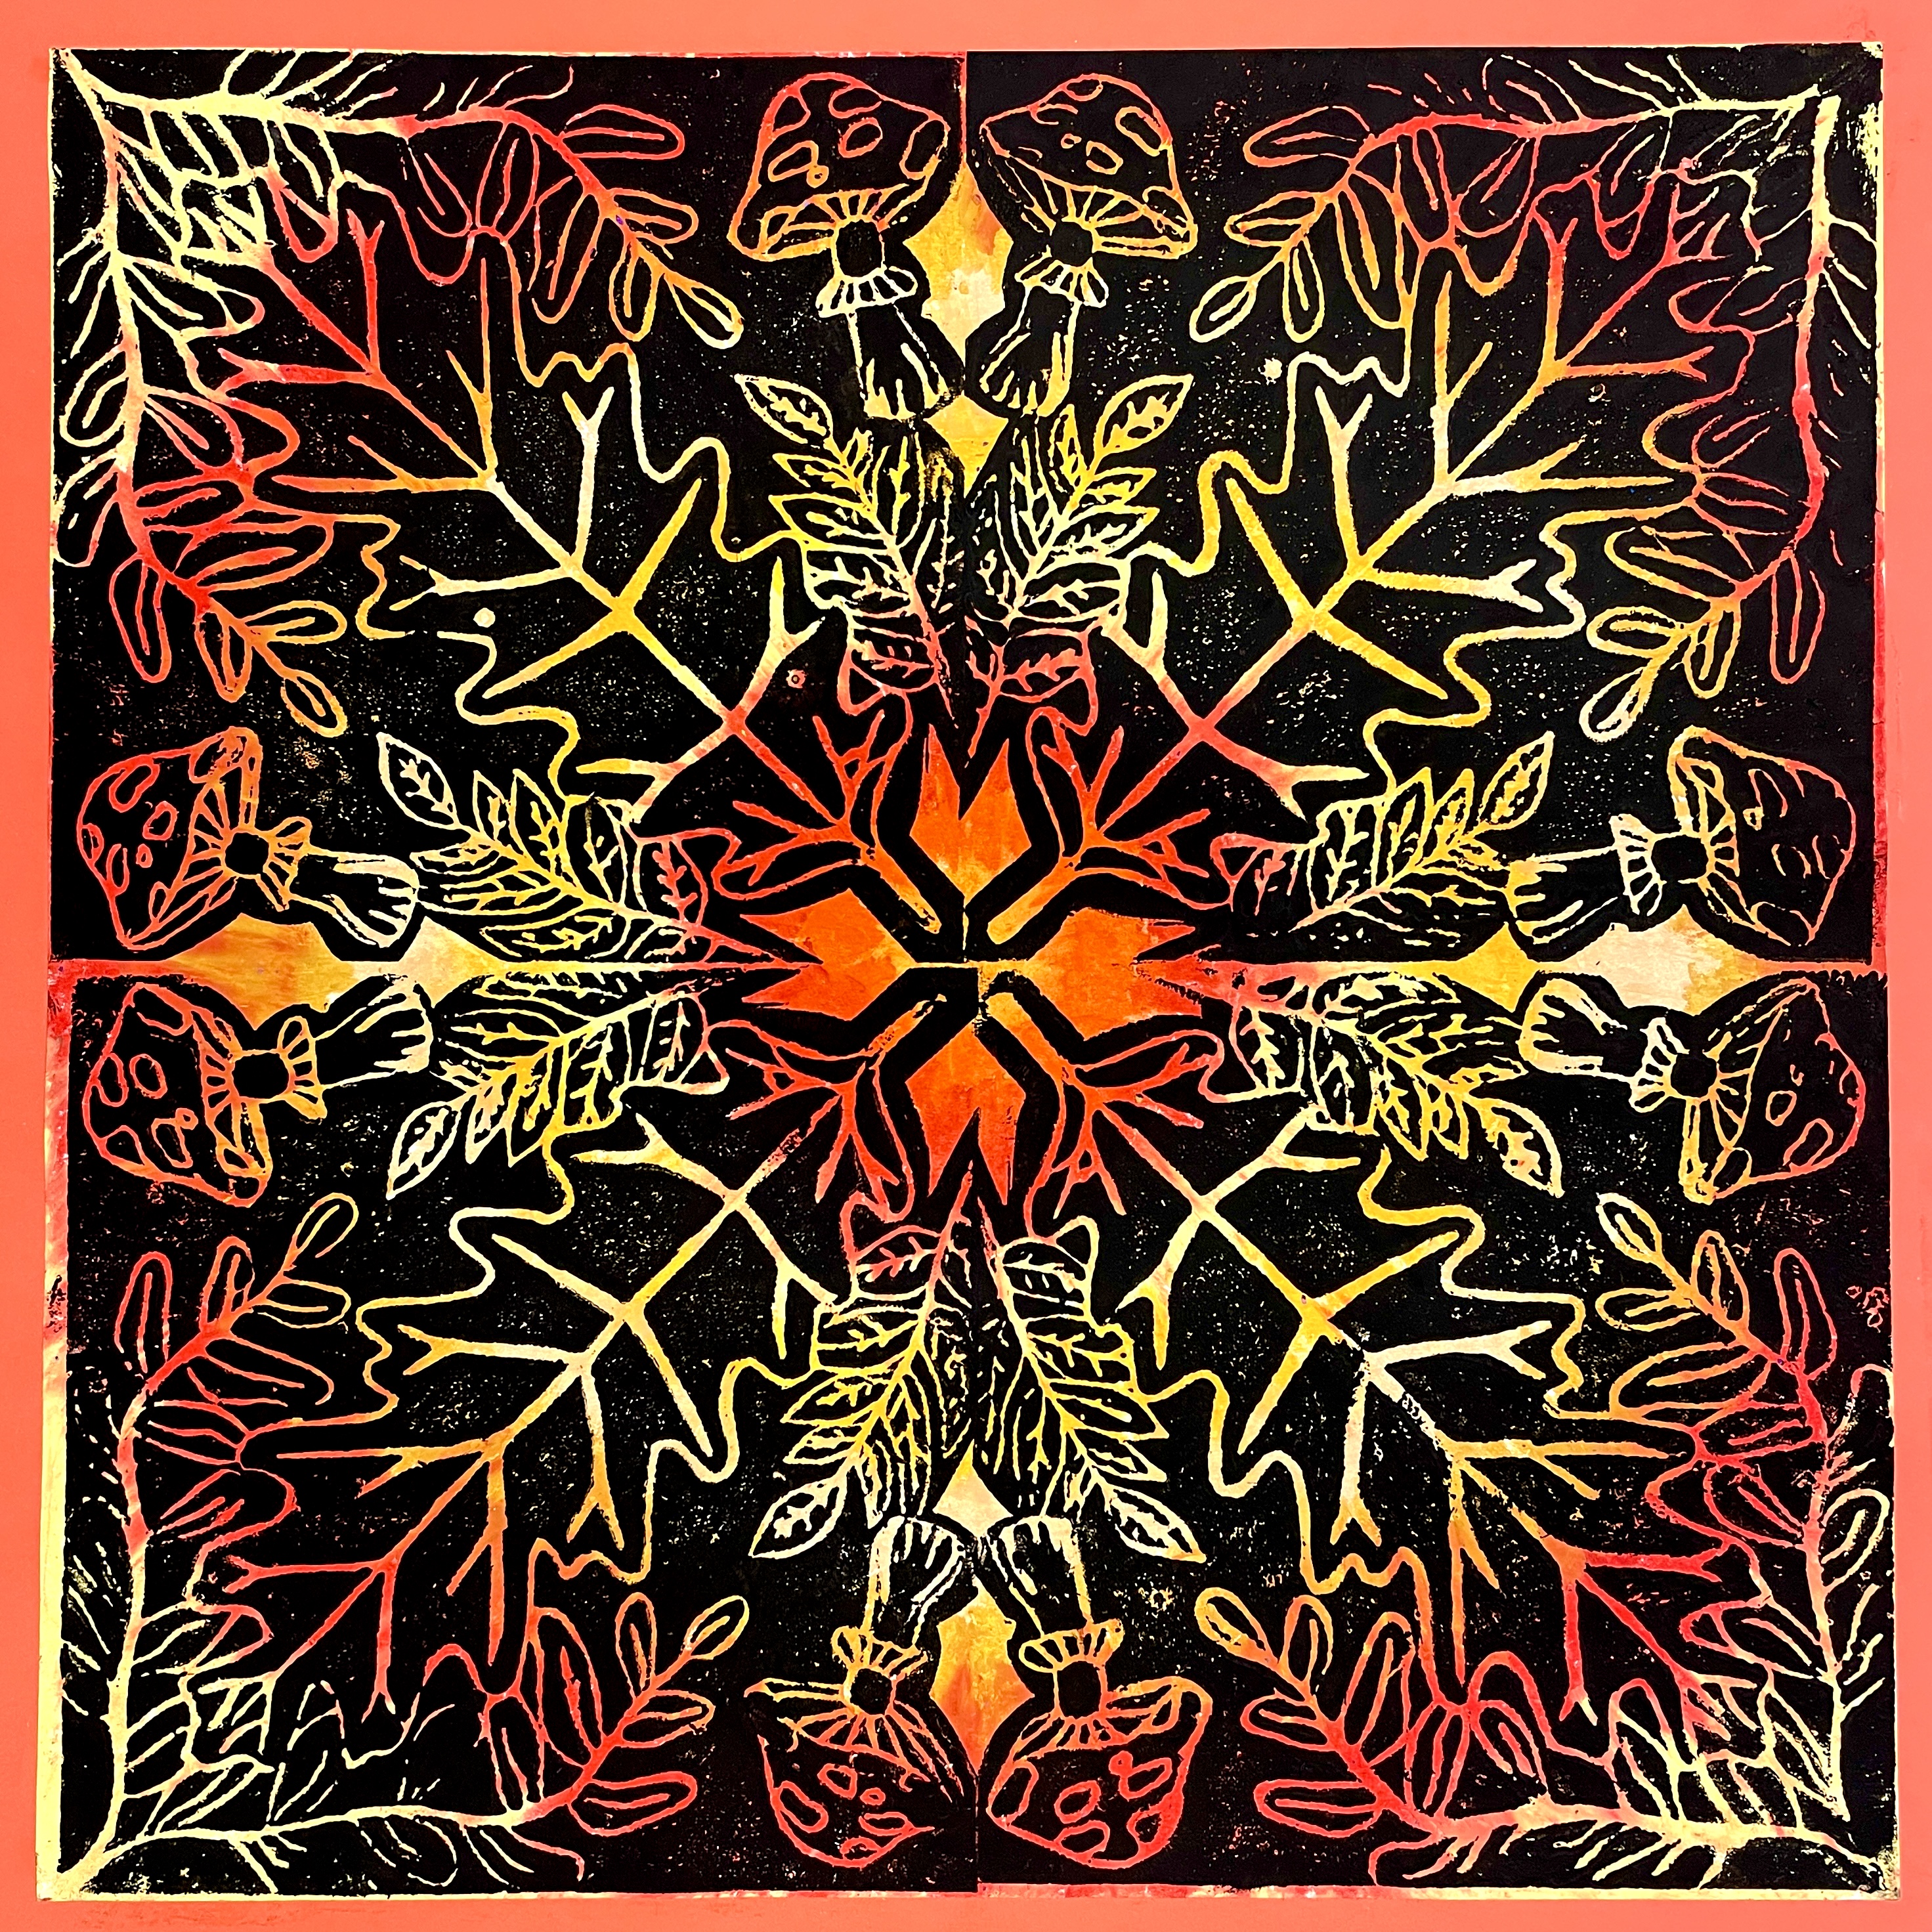
2024 NATURE VARIATION!!!!
I have also modified this lesson to incorporate a Fall/Nature theme. The basic steps are the same, but we had reference pictures on hand with pumpkins, leaves, mushrooms, etc. when designing our printing plate.
Here is an INSTRUCTION PACKET reflecting the Nature theme modifications!
Here are some samples of this lesson with the Modified Nature/Fall theme:


Have Fun trying this with your students! Let me know how it goes!

Mar 20, 2023 @ 06:53:12
I just want you to know how incredibly helpful your posts are. I am teaching 6-8th Art for the first time after being a full-time artist for many years, and to use your resources- especially to learn from you what steps I should be spelling out and how to give the students step by step instructions has been a lifesaver for me. I am going to try this this week with my 8th grade students and I am scared but excited to step into printmaking with them! I am very thankful that you share this freely.
Mar 22, 2023 @ 16:31:56
Happy to hear my posts have been helpful! Good luck with the printmaking. Expect chaos at first, ha ha! It gets smoother as they learn the variables of printmaking. Check out my video on Printmaking with Middle Schoolers (under the Video Tutorials tab).
Apr 25, 2023 @ 15:53:30
Wow! These look fabulous and I’m sure your students were really pleased with their results. Thanks for sharing your fab ideas!
Aug 30, 2023 @ 00:42:51
Where do you get the 6″x6″ foam plates? I can only find 4″6″ or 6″x9″. Thank you!
Aug 30, 2023 @ 06:09:47
Cut them to size on a paper cutter. That’s what I do!
Sep 28, 2024 @ 09:21:26
I love this is there a special ink you use….does it smear easy due to oil Pastel?
Sep 29, 2024 @ 18:42:39
Speedball waterbased printing ink. No smudging other than the regular delicateness of the pastels. Actually, when the ink dries, it almost “seals” in the smudginess!
Oct 18, 2024 @ 19:52:42
Thank you for your extremely helpful/informative posts! Question: I need a drying rack like yours for my art room – do you know the brand/make? Thank you
Oct 19, 2024 @ 17:27:16
Hmm, I don’t. It’s 20+ years old, but the spring-tension shelves are the best! check out schoolspecialty.com
Nov 08, 2024 @ 09:04:23
Thank you for sharing!
I’m looking for foam right now, what thickness have you been using?
Nov 08, 2024 @ 17:29:56
I buy the scratch art brand or Innovart foam. It only comes in one thickness that I have seen, about 1/16″. https://www.dickblick.com/products/inovart-printfoam-for-block-printing/?fromSearch=%2Fsearch%2F%3Fsearchword%3Dprinting%20foam