Radial Symmetry Name Designs


I first used this dynamic lesson during the pandemic period of remote learning, as it requires only simple materials: a square piece of paper, a pencil, and your choice of coloring media such as markers and colored pencils. Students fold a square of paper into 1/8ths, then write their name in one triangular section. Using a window or a light table they fold and trace the name design repeatedly until all triangles were filled. This sometimes takes creative folding along the diagonal or the vertical and horizontal folds to make sure all spaces get filled! For these examples, we used 9” by 9” white sulphite drawing paper, 80lb weight. (It needs to be a paper thin enough to fold and refold easily.)
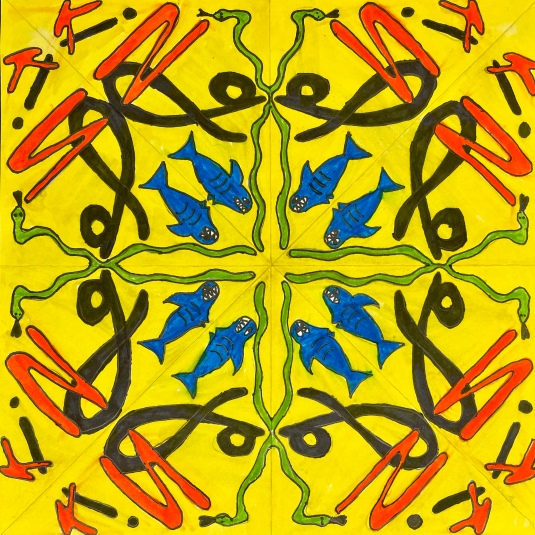
Some of the sections will be “mirror image” tracings which will create unpredictable and lovely abstractions as students fill their page. THIS INSTRUCTION PACKET has step-by-step instructions that will make this clear!
In the classroom, this project serves as a great first lesson each trimester when I get a new team of seventh graders. —Seeing those name repeated in their artwork over these first few days of class is a great way learn them!
I require the students to demonstrate two different versions of a name design on a practice triangle which is formatted to be the exact size and shape of 1/8th of their folded square. These versions can differ in lettering style, and or that a student might use their first name for one and their last name for another. In addition, I strongly recommend that they have some areas of overlap: Letters can overlap other letters, or simple background designs or shapes are used to go behind their design and off the edge. In addition, the finished piece will be more cohesive if some of the letters touch the edges of the triangle. This will result in letter shapes connecting to themselves in a way which will somewhat obscure the fact that the main element of the design is a name! Once their practice design is refined and improved, they trace it onto their first triangular section of their “Final” square. From that point on, they will only fold and trace from their “Final” paper.
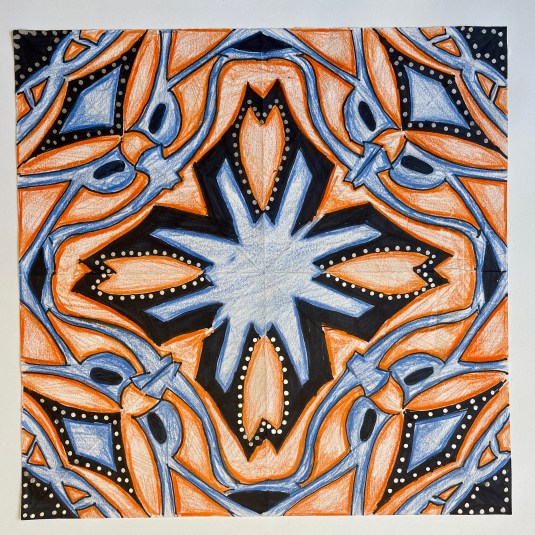
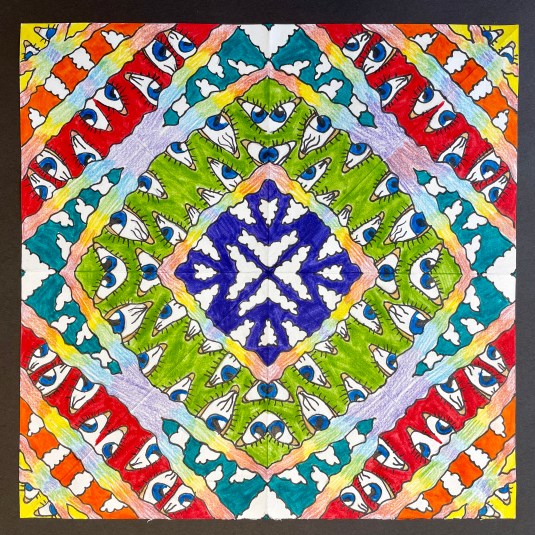
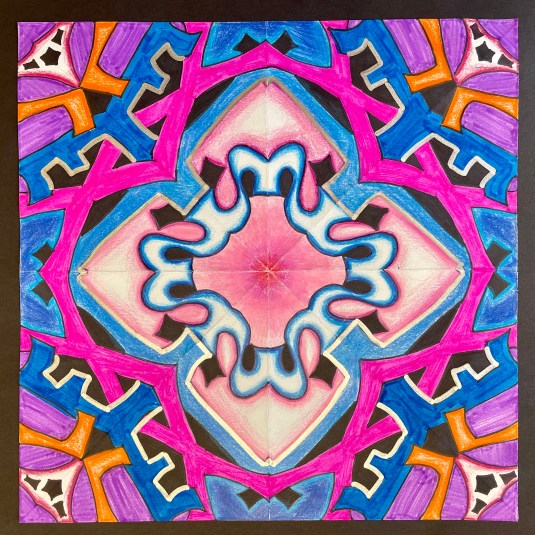
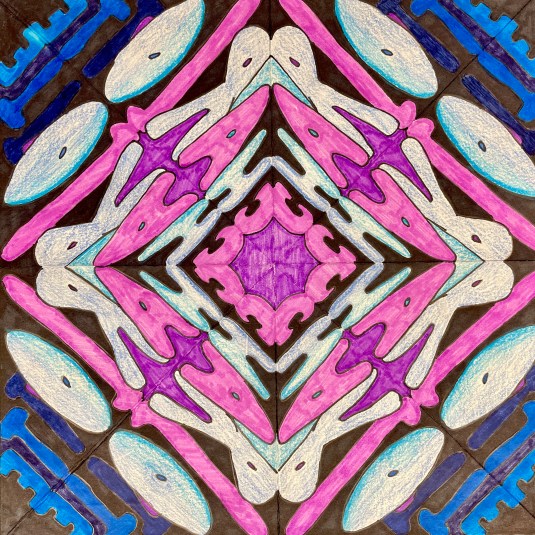
Below are some examples of finished pieces alongside their original design— It’s easier to see the evolution of the radial symmetry pattern when viewing the original single name!

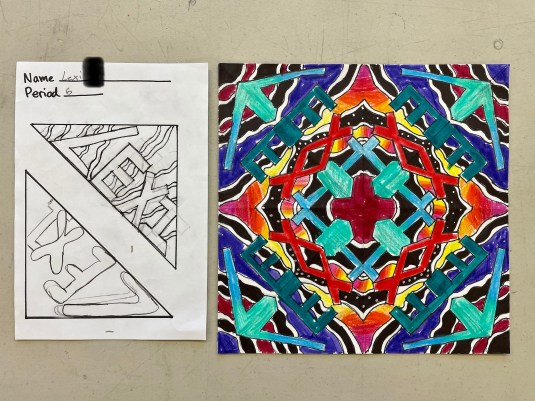

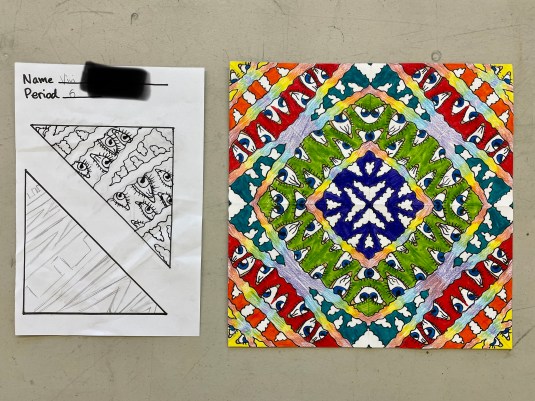


Coloring is done with the student’s choice of colored pencil and/or marker. In addition, I highly recommend they first find some shapes to color solid black with Sharpie, (while still preserving the radial symmetry pattern!) I find the black elements add a pleasing level of bold contrast and seem to create an increased “Wow” factor as opposed to only using color.
I also give the option of embellishing small areas with gold or silver metallic paint pens. I emphasize that these accents should be minimal and should enhance their design, not overwhelm it. Metallic pens can be tricky and unpredictable, so we always test the marker on scrap paper and learn to use light pressure so as to not create unwanted blobs of ink. The metallics really pop on black or darkly colored areas, but students are free to embellish as they wish!
If you try this lesson with your students, comment below and let me know how it goes!


Mar 31, 2023 @ 20:05:38
Great project and thanks for the instruction!! I’m an “old” new teacher and I’m learning so much from experienced teachers. Thank you!!
Ps: What did you use to make your website???
Mar 31, 2023 @ 20:21:24
I use WordPress! It’s a great service and fairly user-friendly! There are a lot of DIY website platforms out there.
Mar 29, 2024 @ 04:33:29
Awesome, do you have students use colored pencils or markers? Thanks!
Mar 29, 2024 @ 16:50:36
Both. Pros and cons of each described in the linked packet!
Jan 30, 2025 @ 19:59:30
Trying this with my drawing 1 high school students as a first project ice breaker to get them started. So far they are all looking outstanding. Students seem to also be having fun with it which makes it even better.