Graffiti Fence Name Designs
Middle School Students enjoy doing creative interpretations of their name, and exploring the art of graffiti lettering is always a hit. When I saw a lesson in one of my art teacher Facebook groups that incorporated a “fence” made from popsicle sticks as the surface for student graffiti art, I knew it would be a winner in my classroom. Thanks to Brian White, Middle School Teacher in Davenport, Iowa for the inspiration!
I am going to explain the process in detail below, but click here to see my entire Google Slide Presentation that I use in my classroom!
We began this lesson by watching a video on street artists and having a discussion about the movement. It’s important to stress that Graffiti is vandalism, and we were sure to accentuate the difference between exploring the style of graffiti art on paper versus on private property without permission. Many communities now designate areas where graffiti is tolerated or allowed, and urban art murals allow many street artists to showcase their talents in a legal way… and get paid! There is a lot to explore on the internet on this subject. One video I found concise and informative was this segment from CBS nightly news. It is succinct and makes for good class discussion.
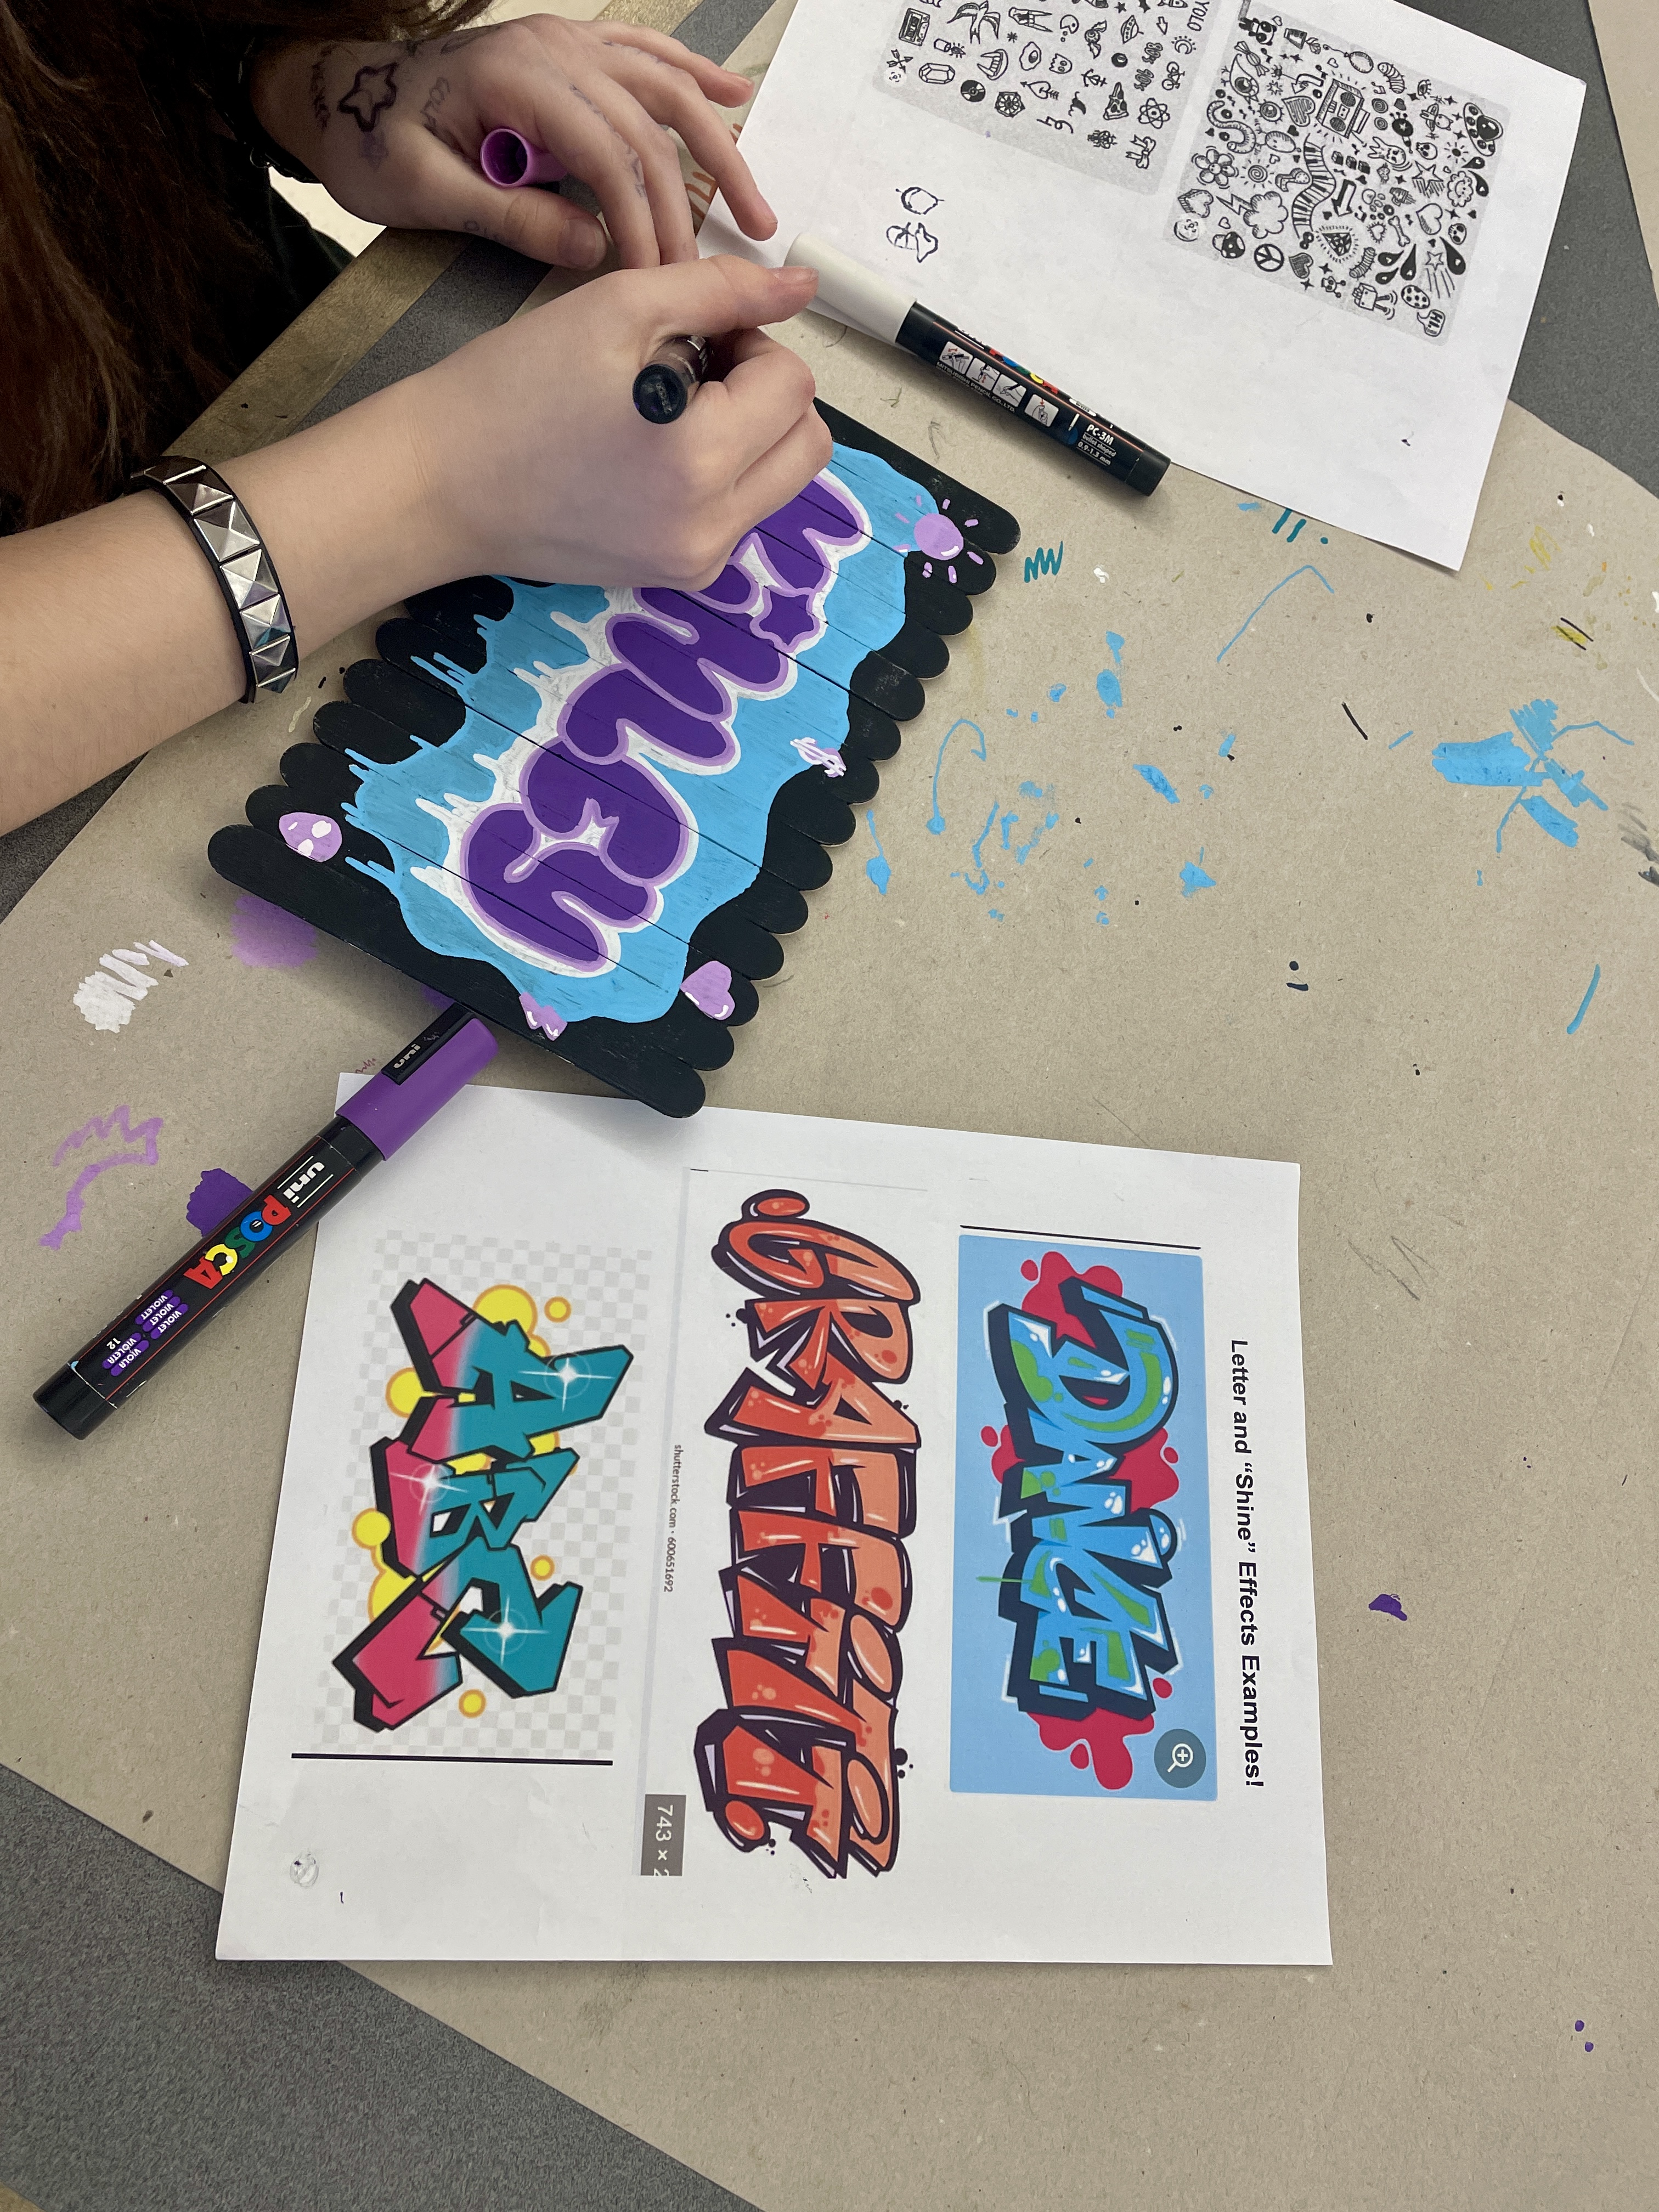
I’ve done this lesson where students free-hand their own Graffiti style, but honestly, we got more “authentic” results using this Online Graffiti Generator. Students can choose from a variety of pre-styled fonts and even play with the spacing and background effects. When satisfied with their Name design, we zoomed in and traced right from the Chromebook screen.
Important Pre-Planning Tip: Know how big your fences will be, and make sure the tracing paper is sized appropriately!
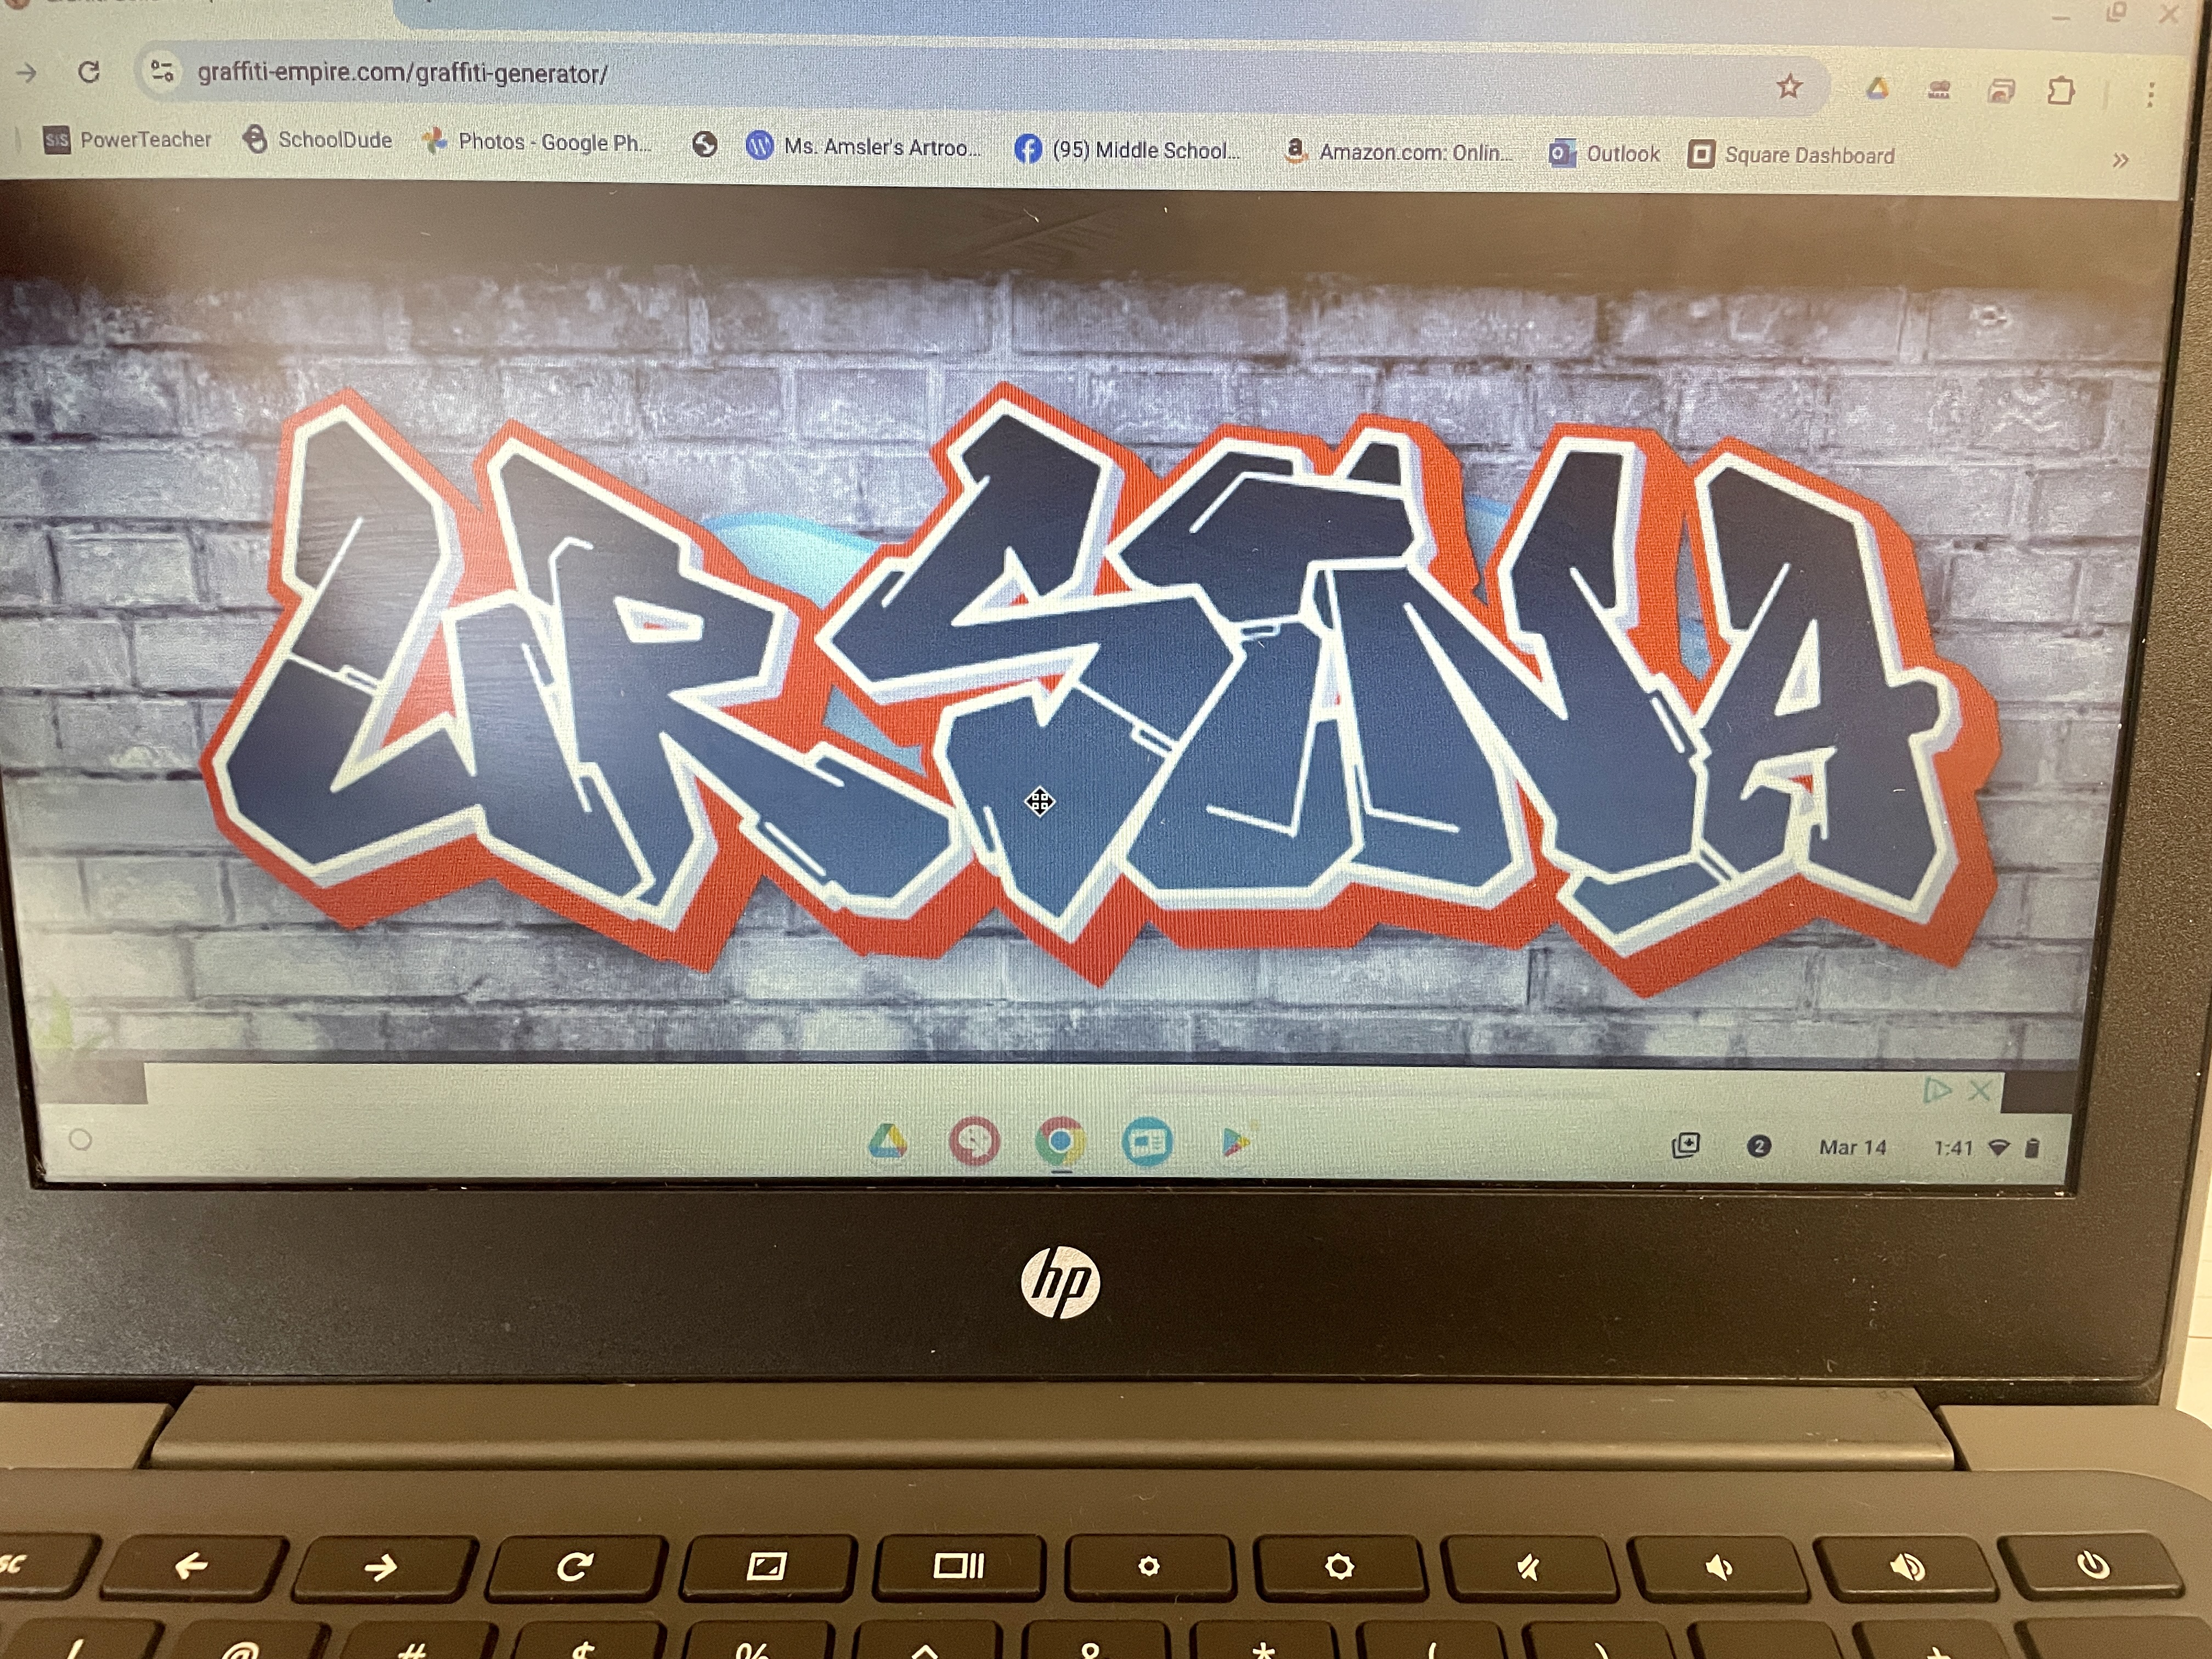

My generated Graffiti Name and Tracing on 5″ by 9″ Tracing Paper

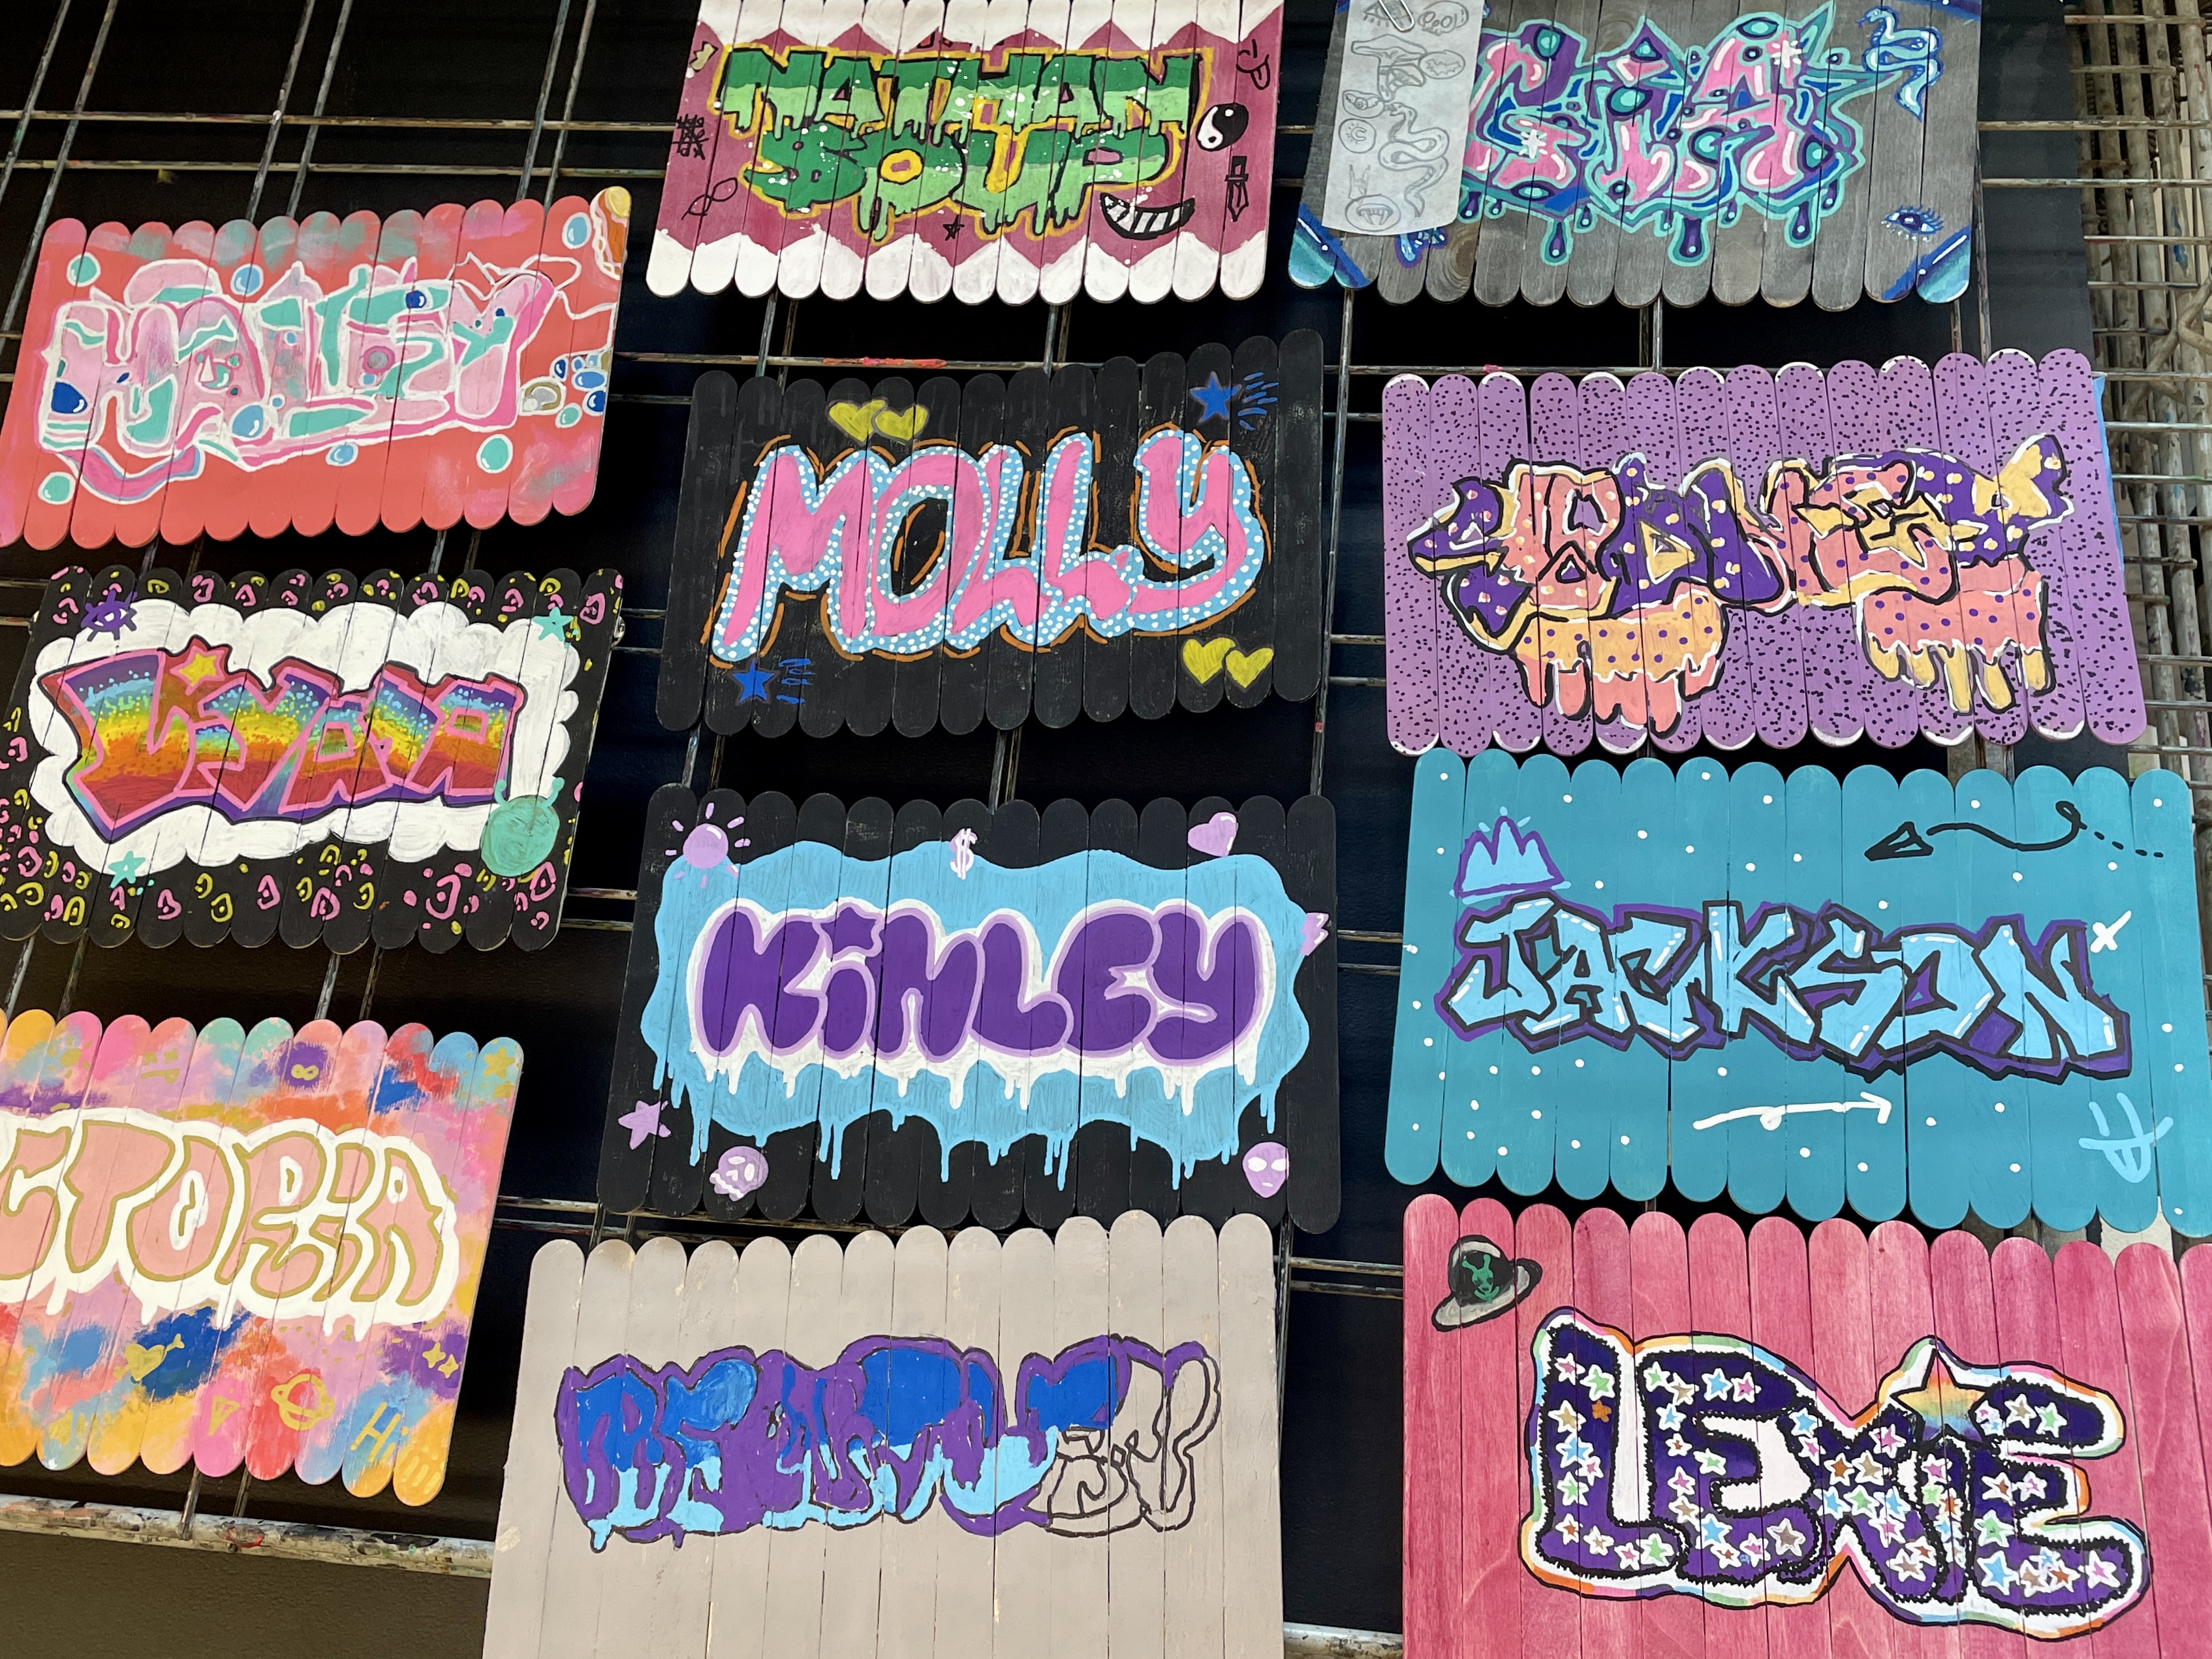
Student Name Tracings
If you want to insist on having your students free-hand their name, This video by art teacher Rebecca Speech breaks down how to turn ordinary writing into Graffiti inspired letters! Although her lesson is a drawing lesson based on a “positive word” versus a name, the concept is clear and her instructions on how to create graffiti style letters are easy to follow! Watch all the way through adding a fun drip effect around your word: 30 seconds in to approximately 3:40 is what is relevant.
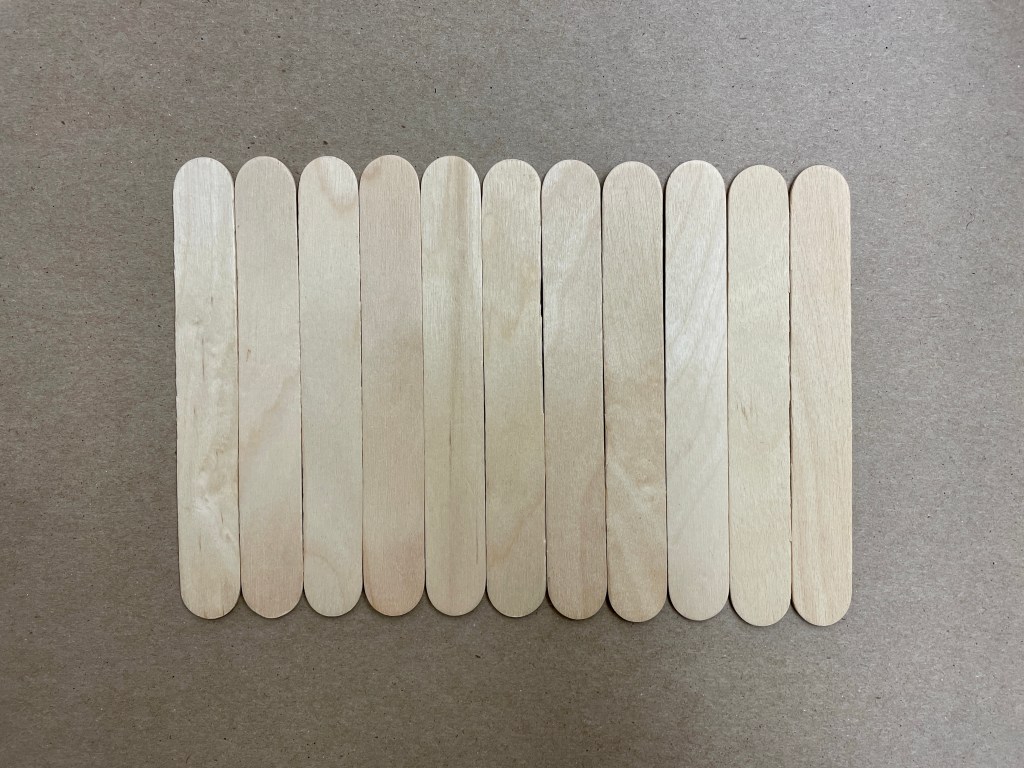
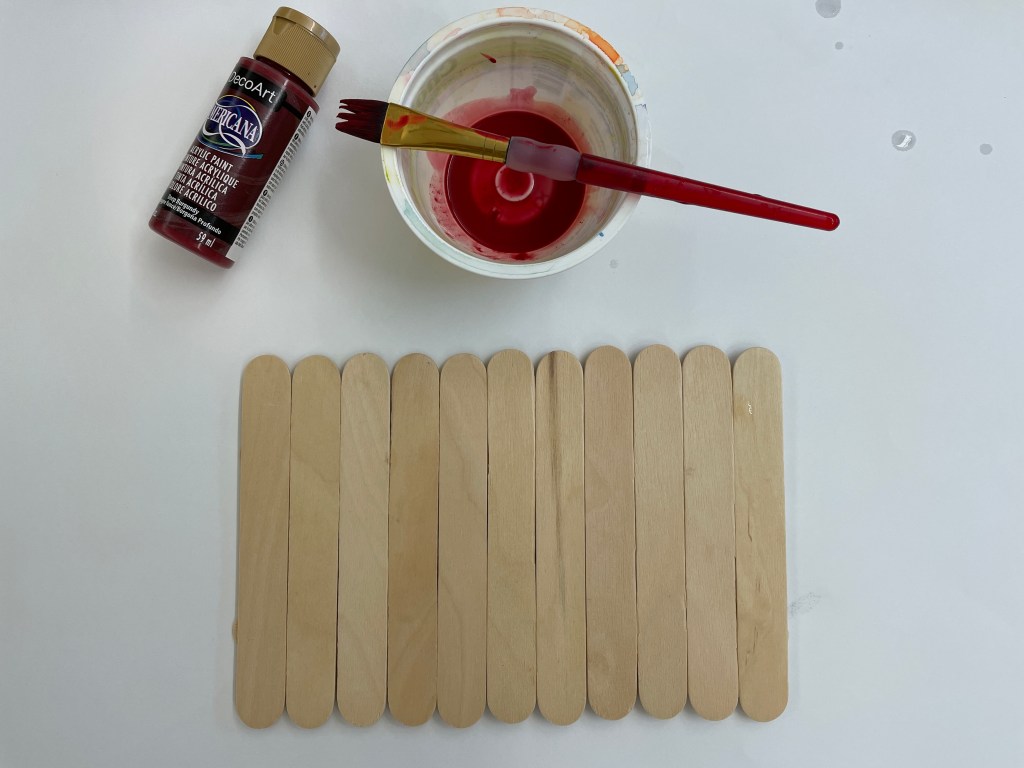
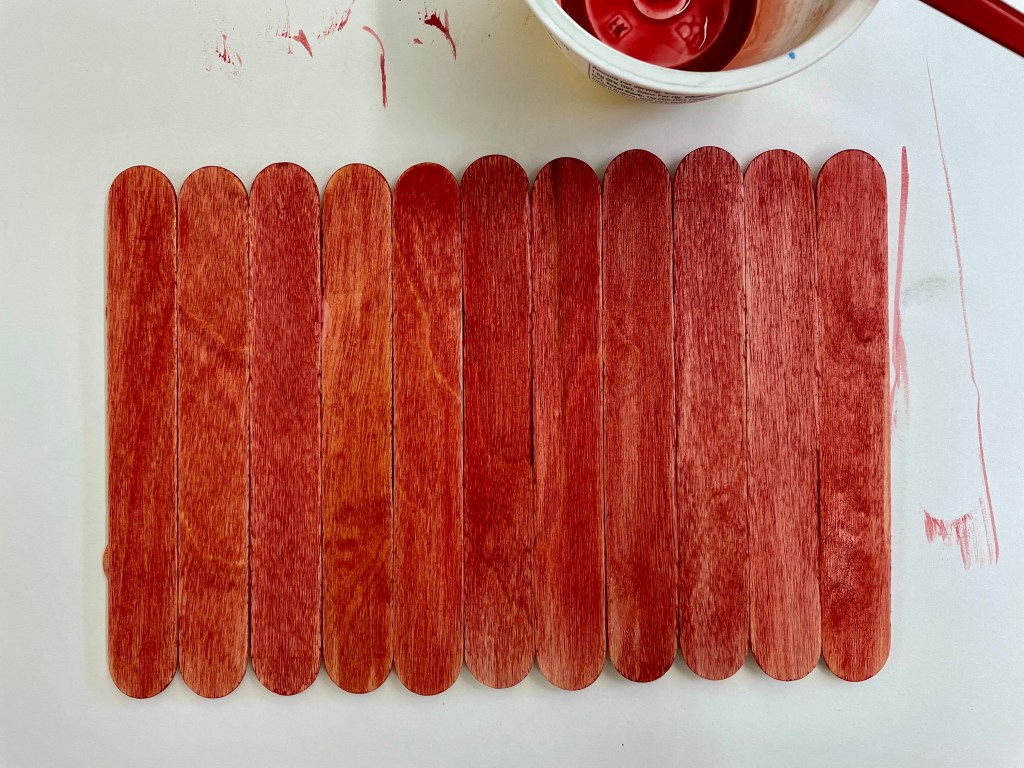
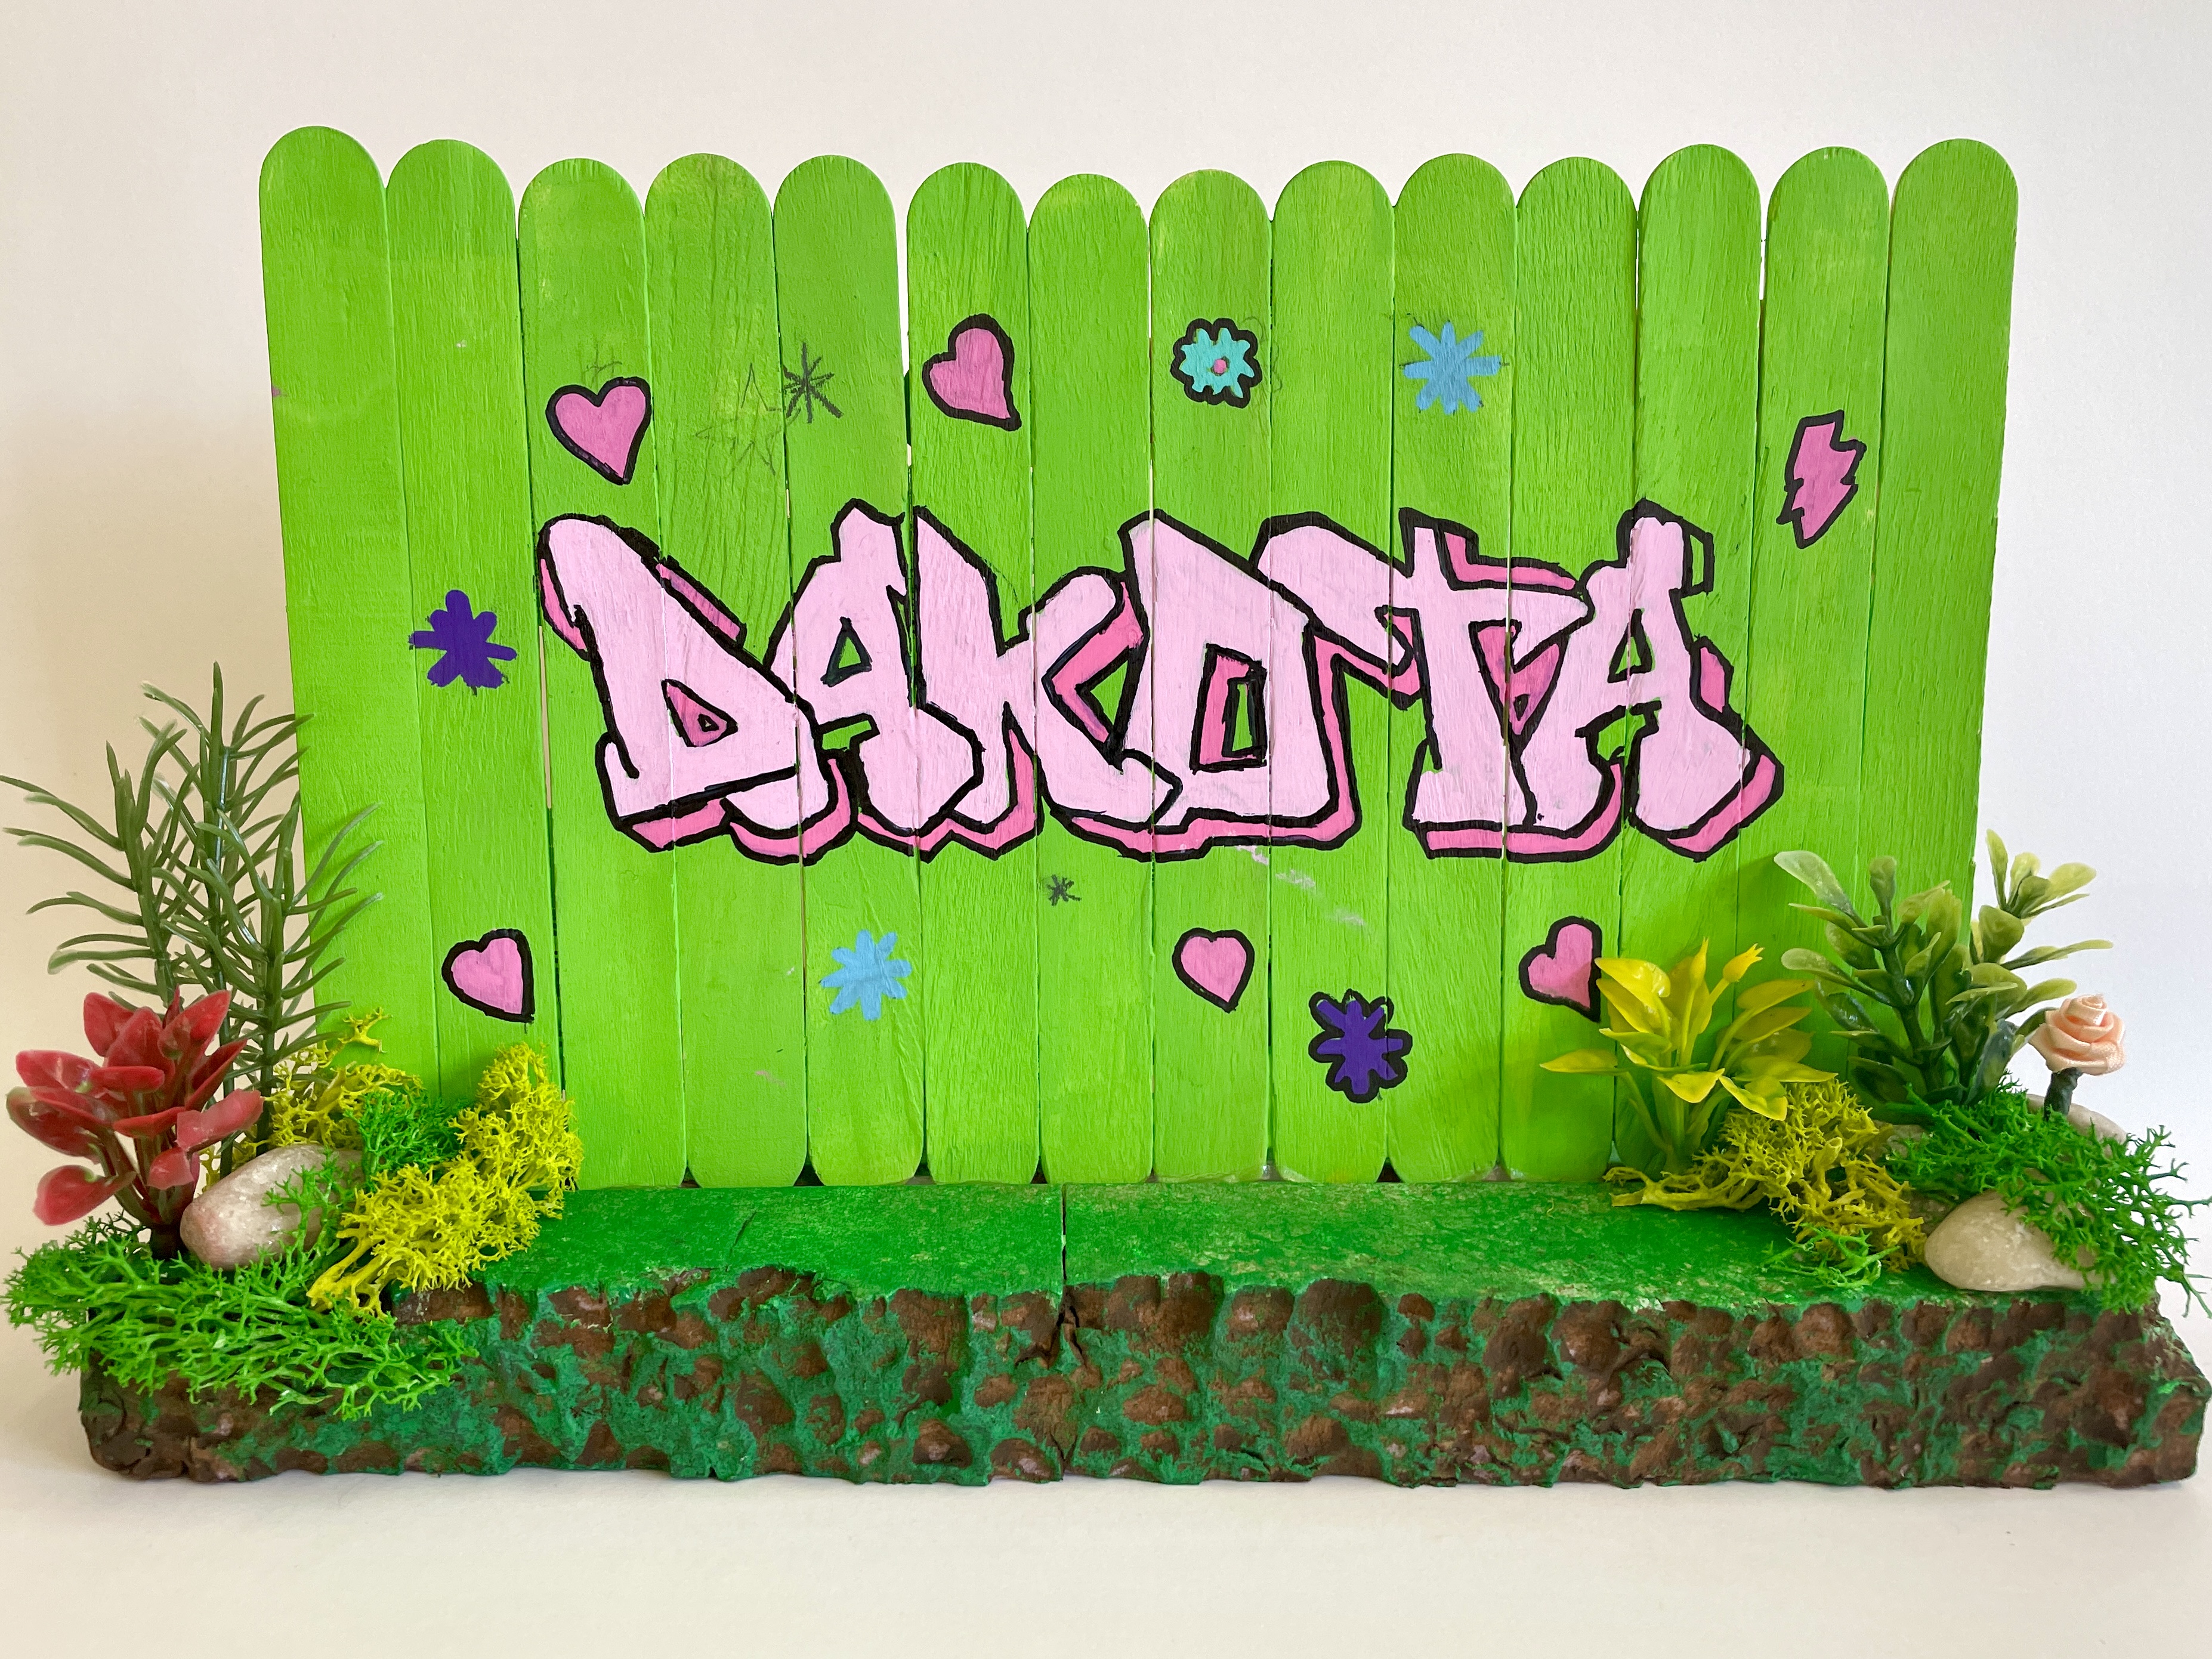
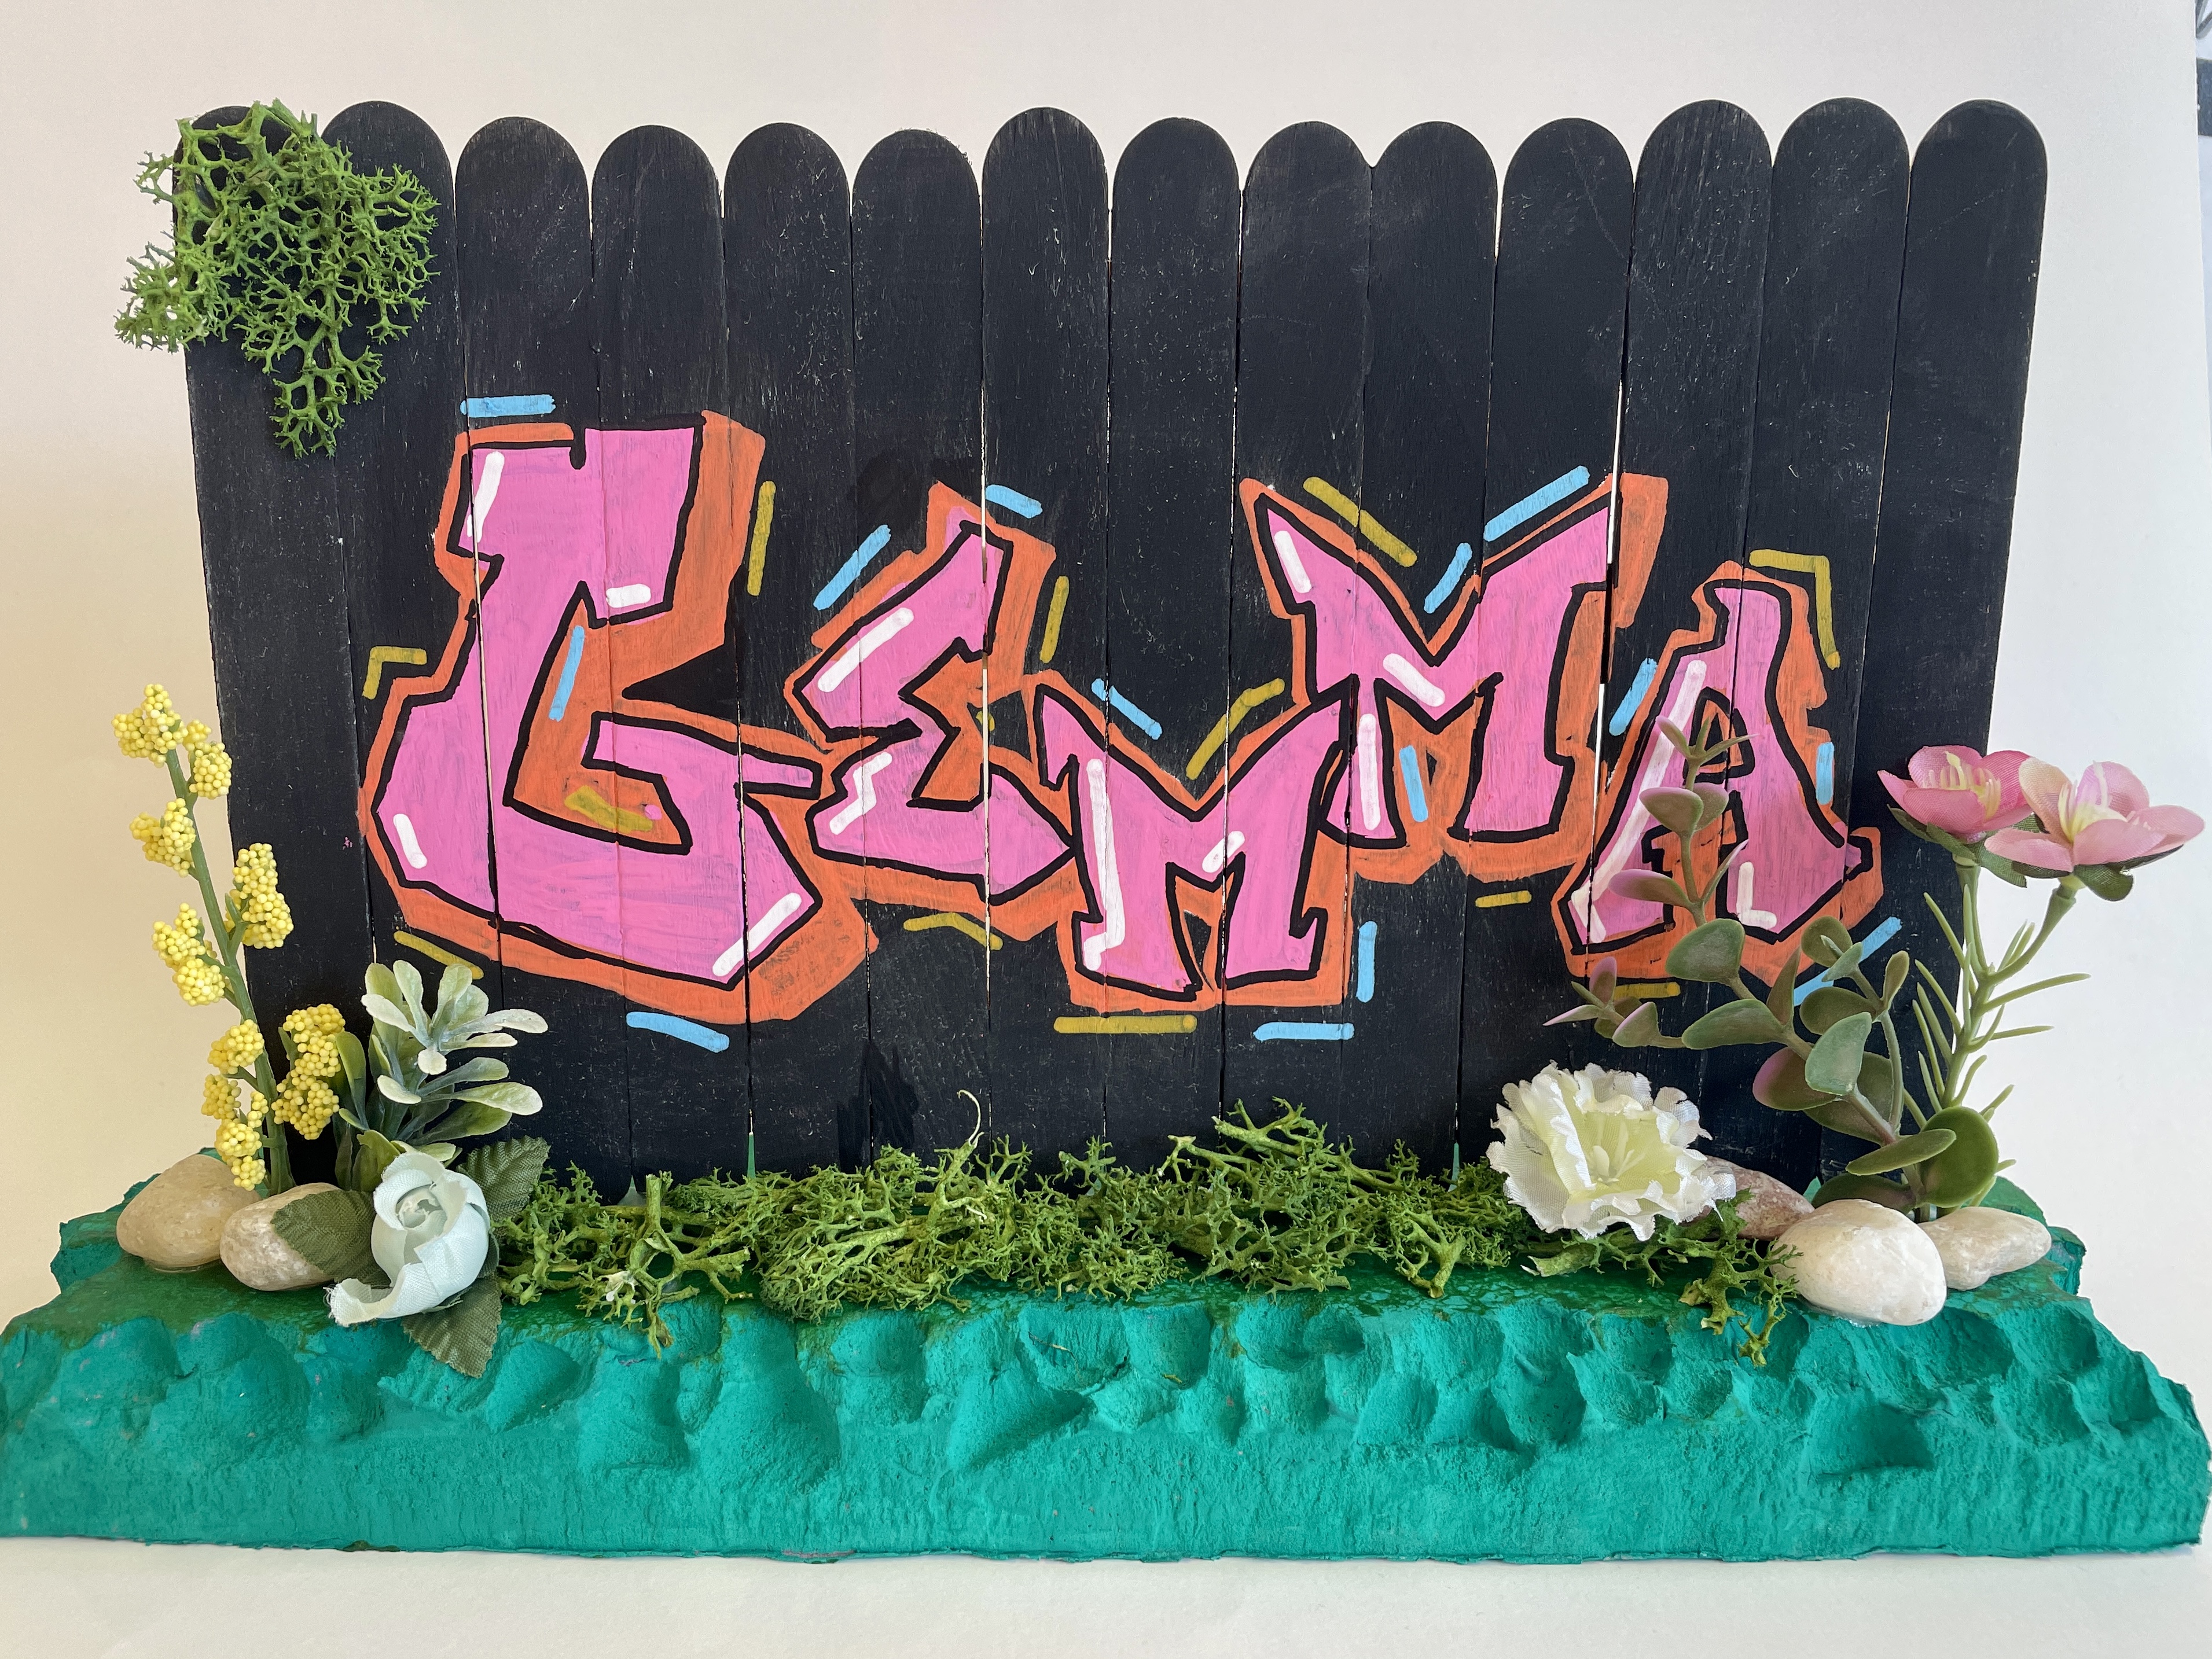
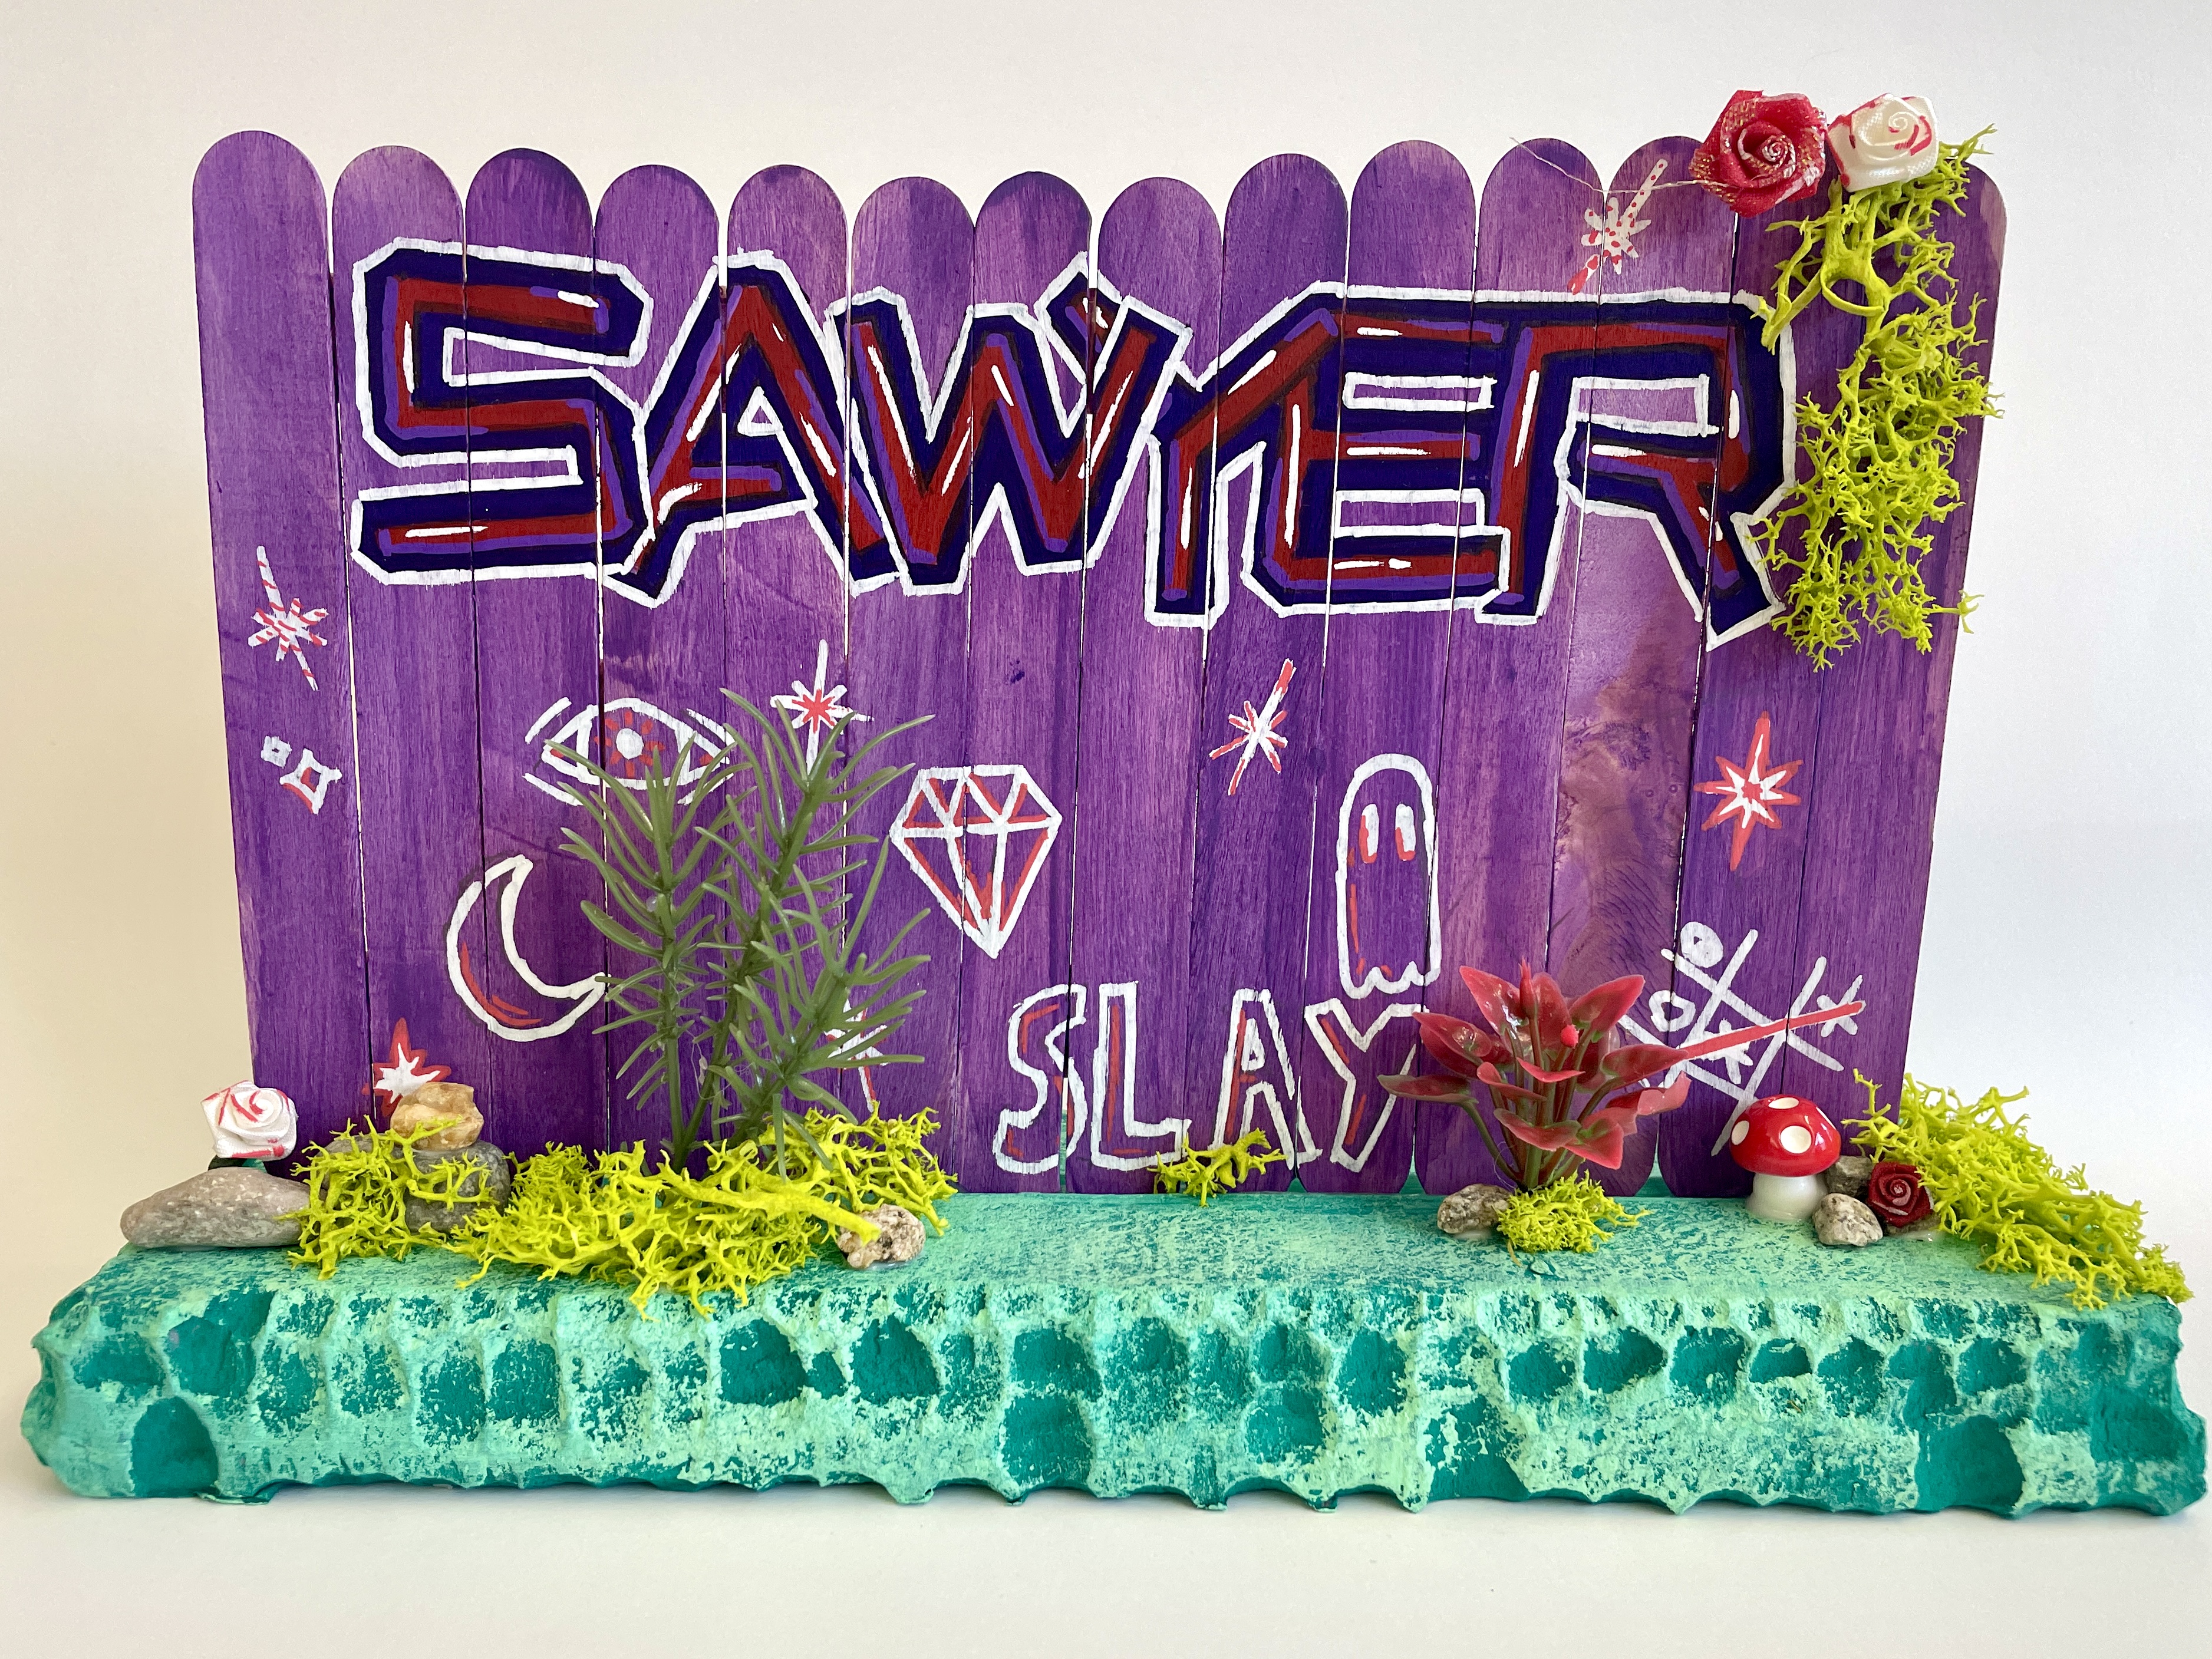
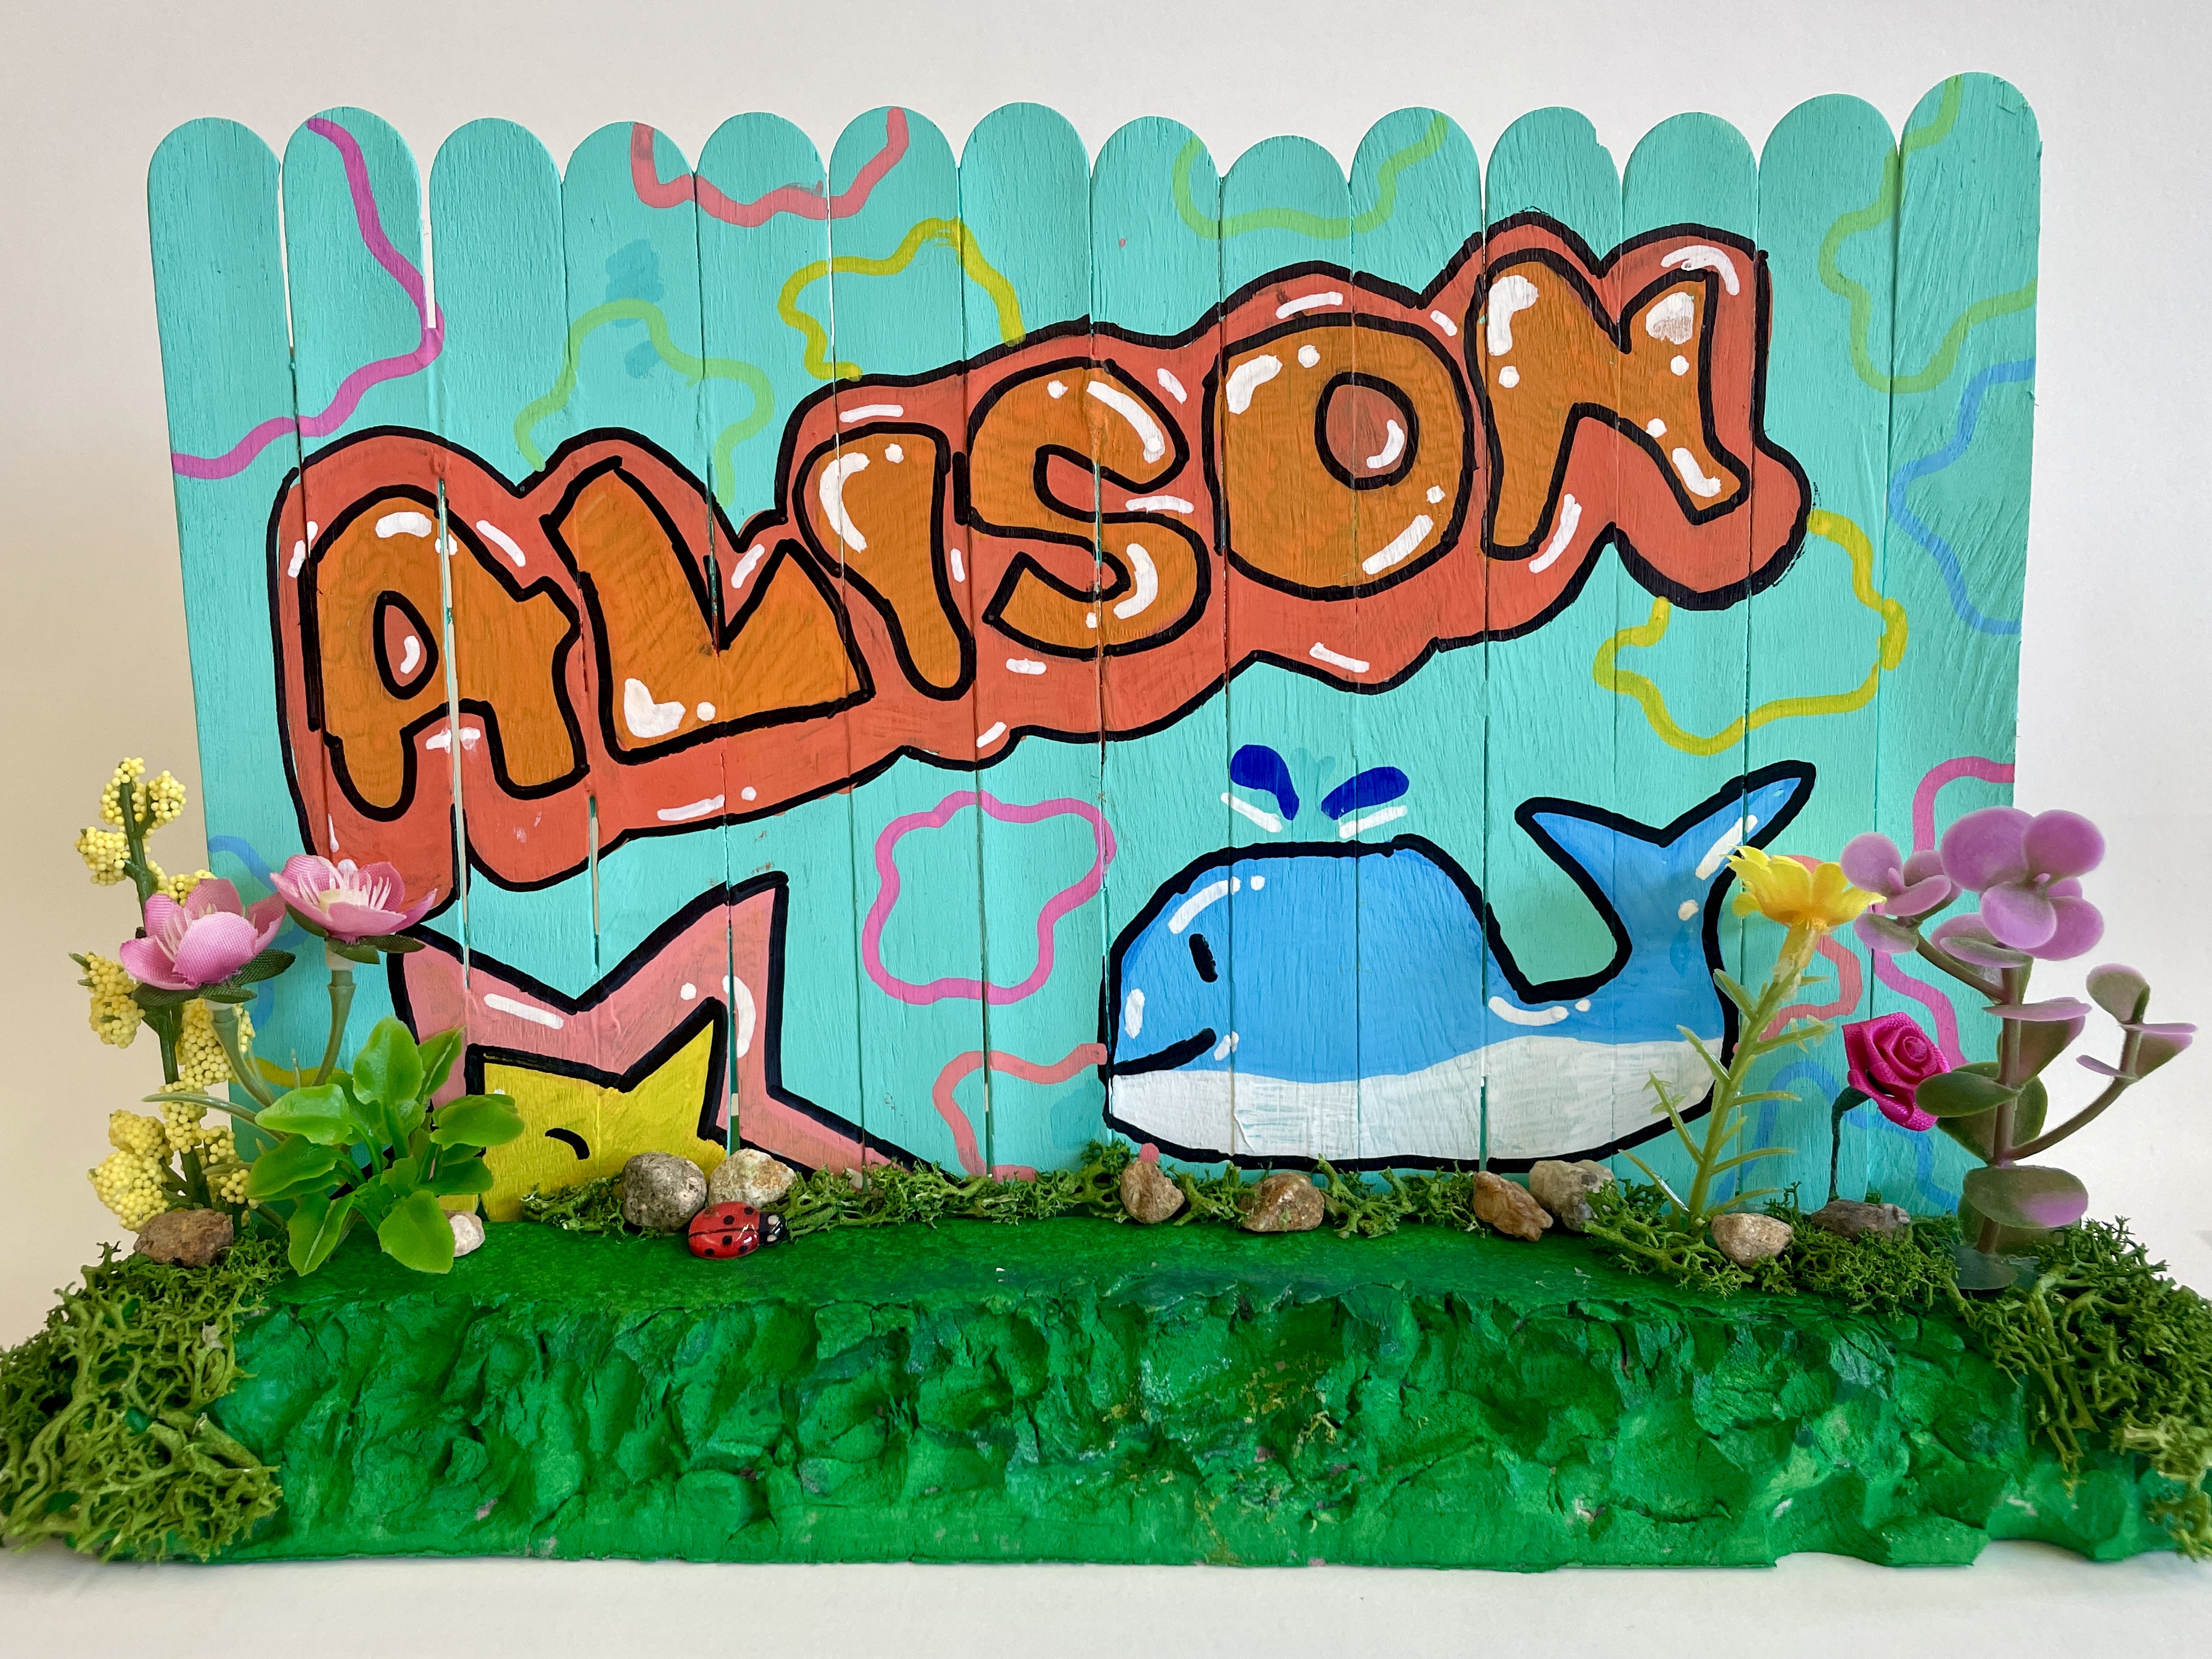
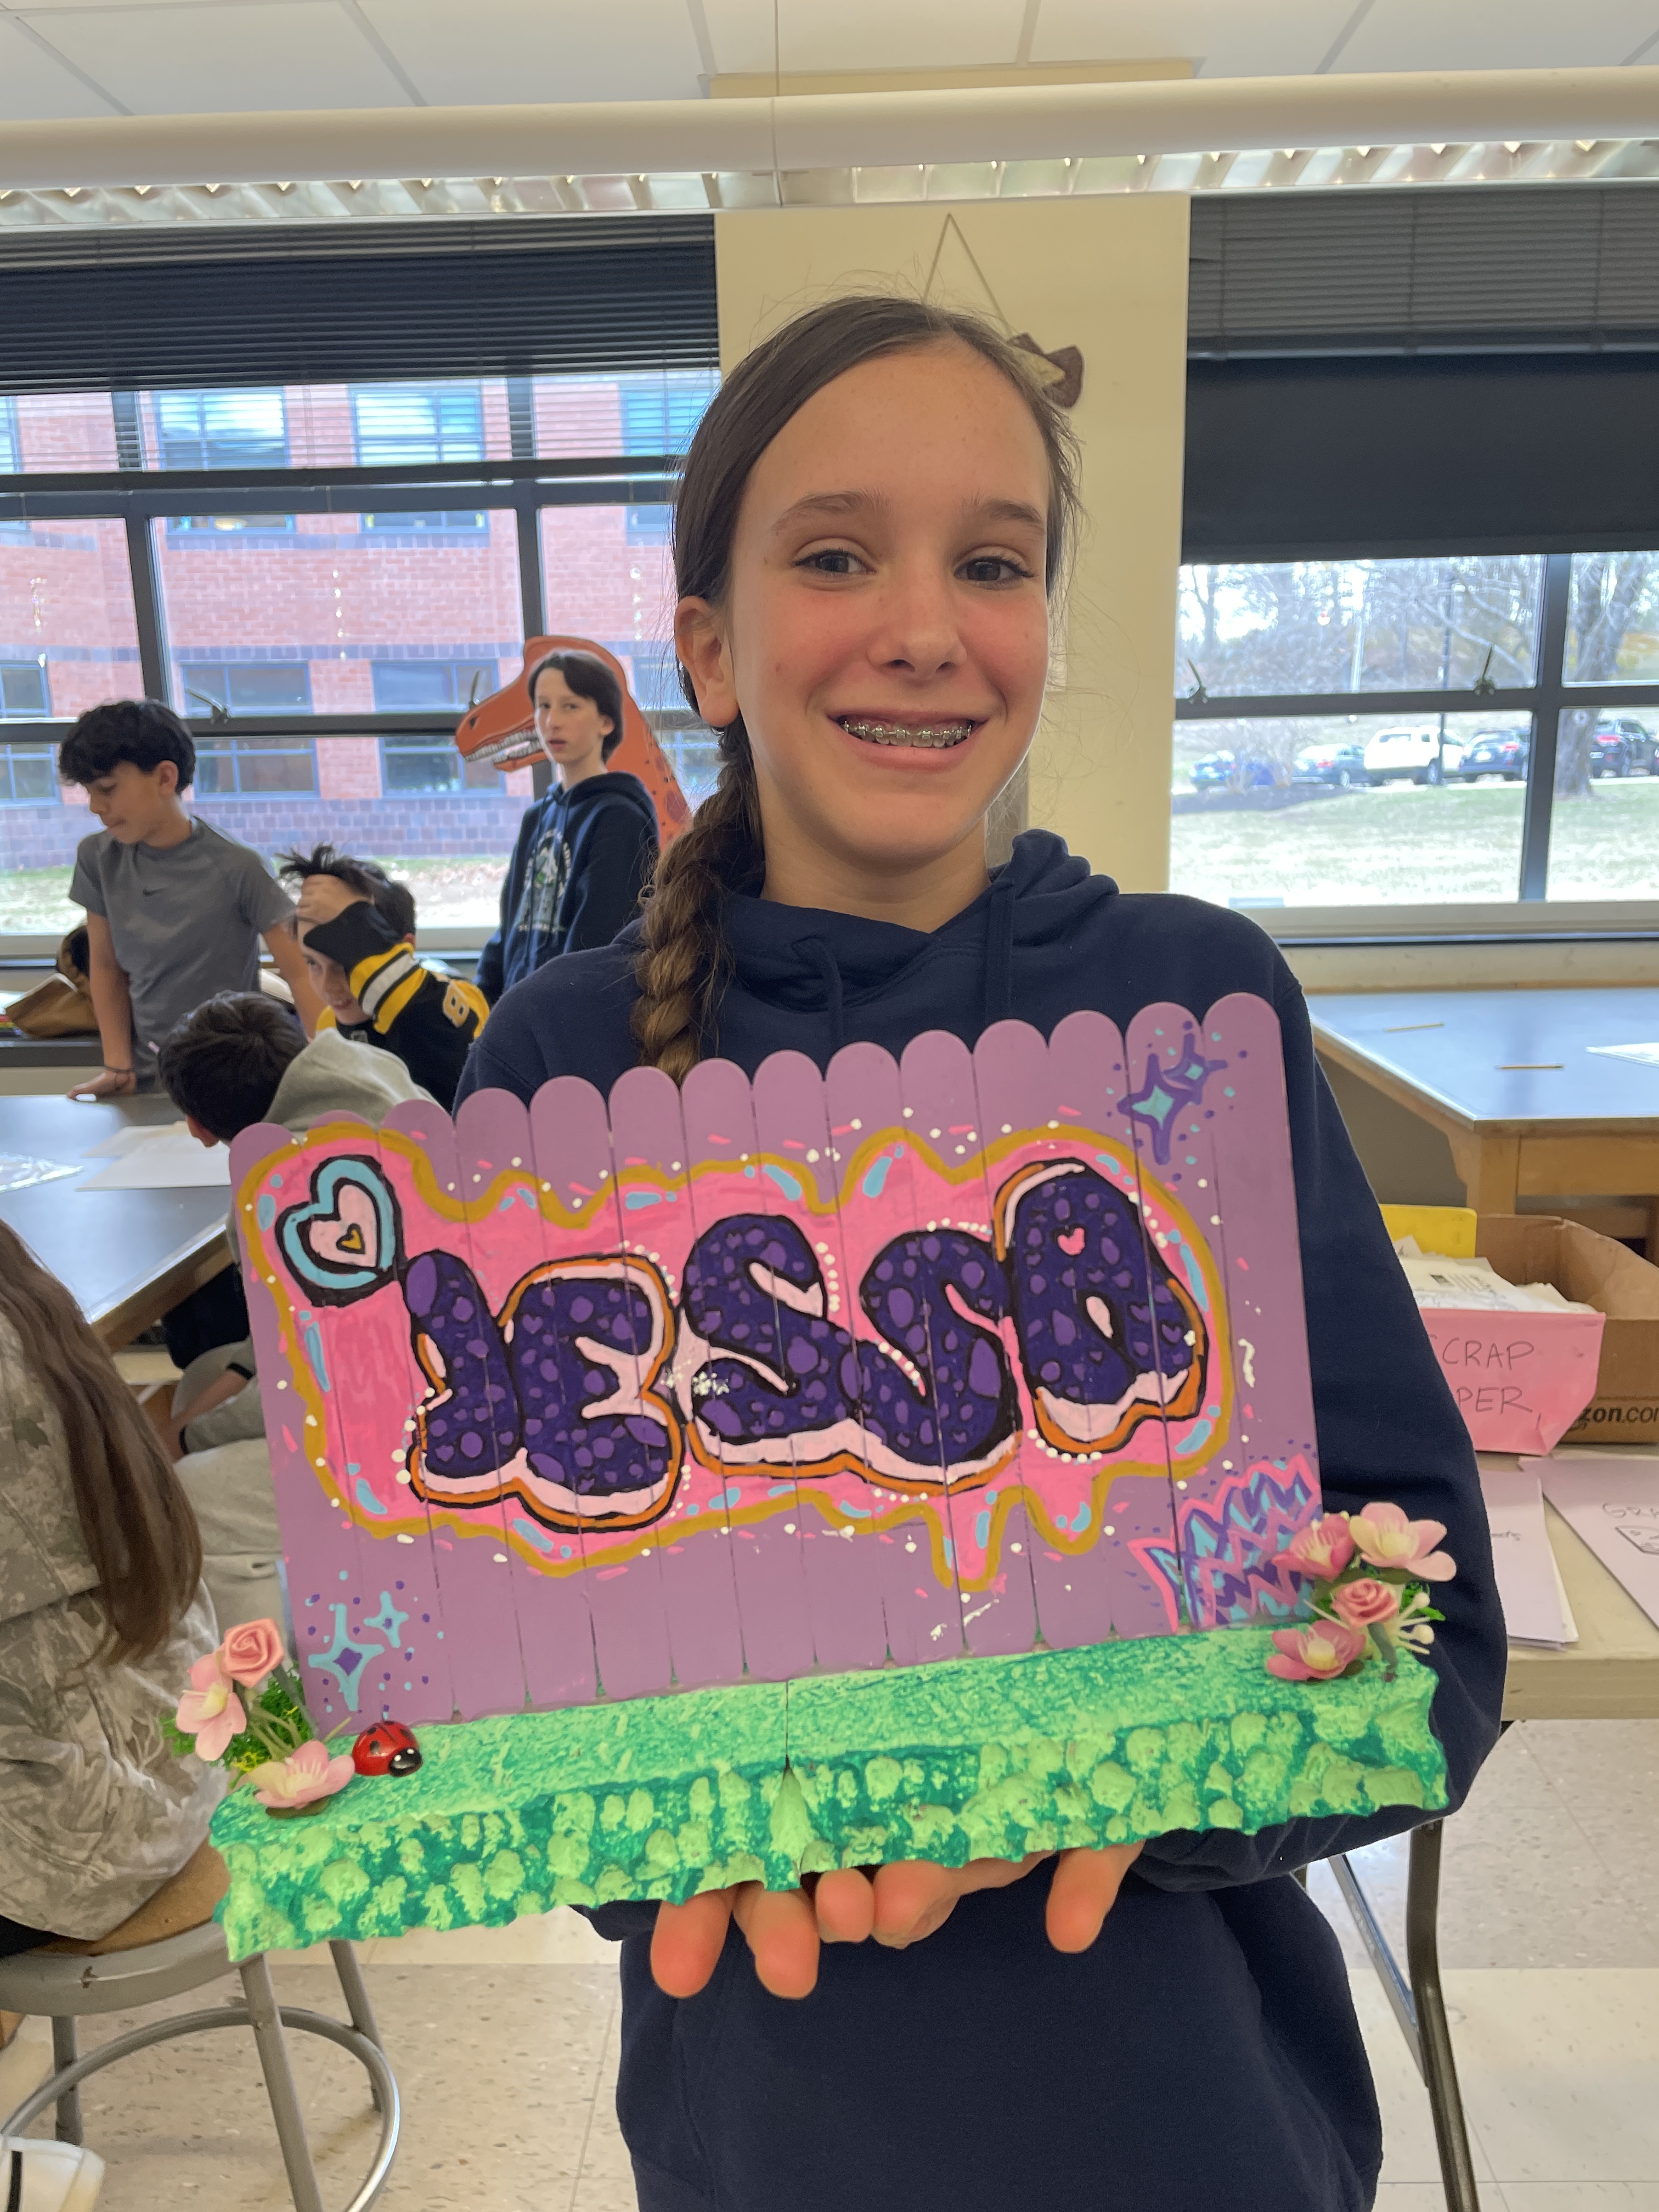
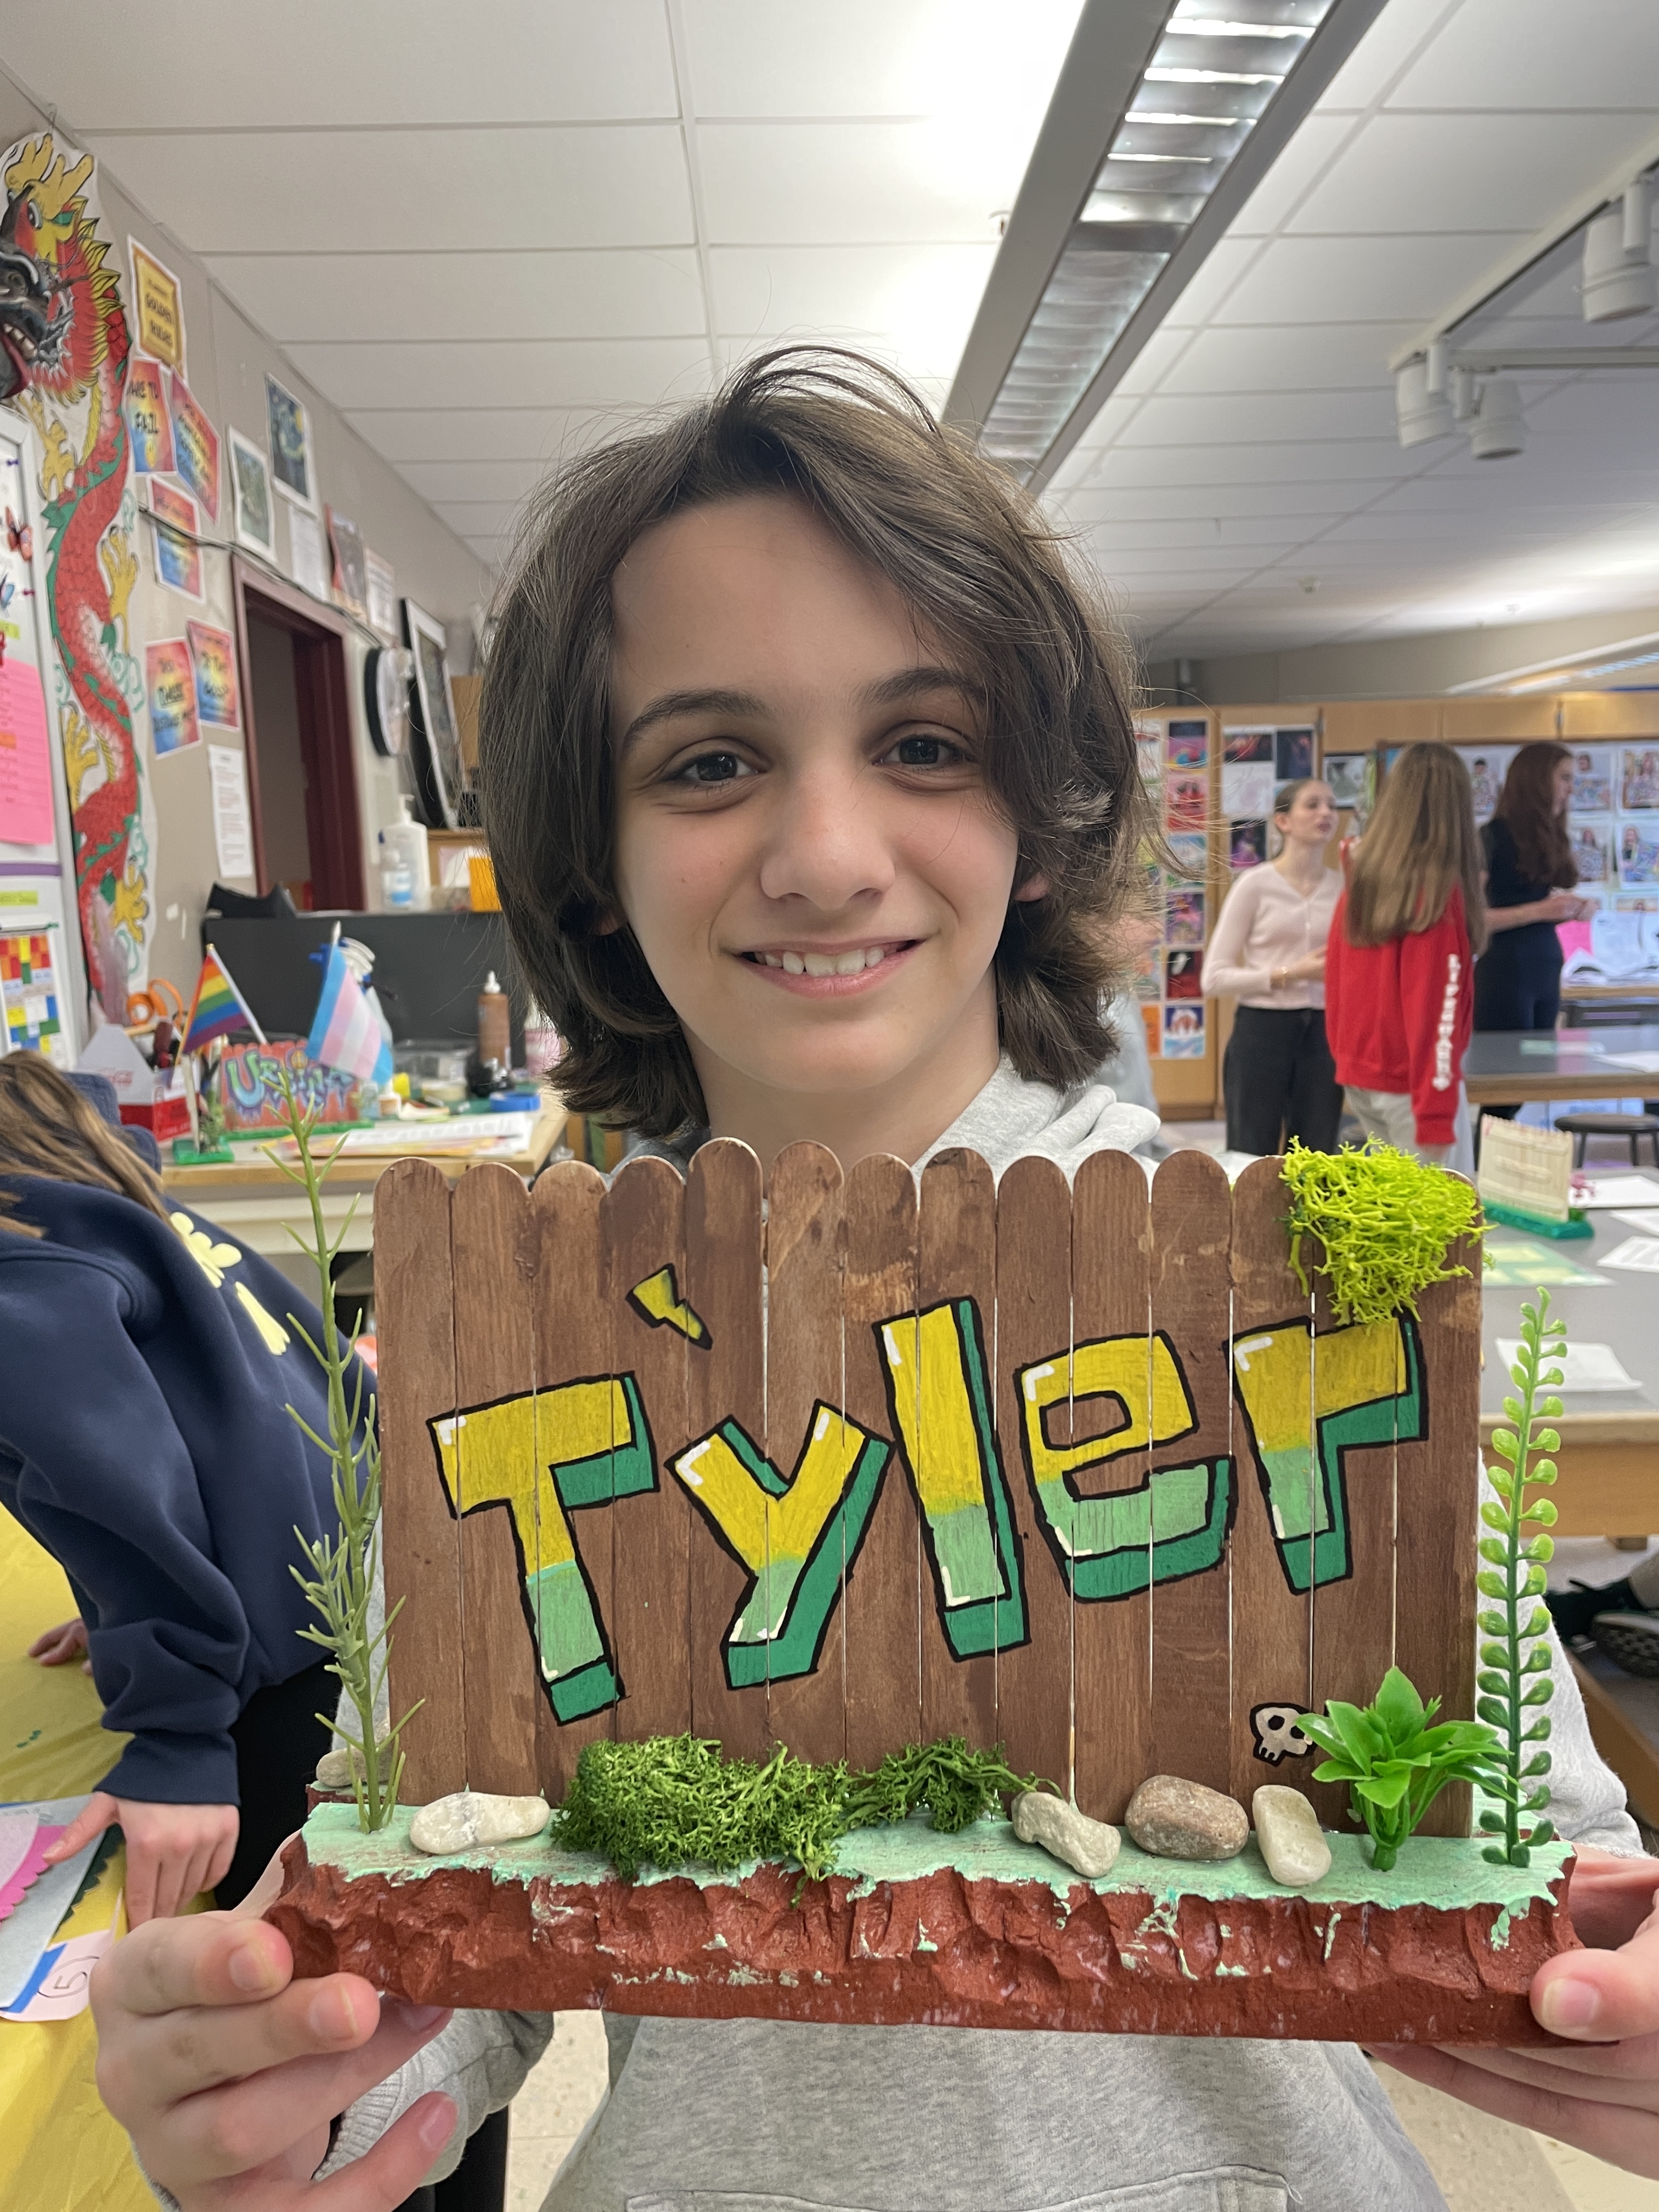
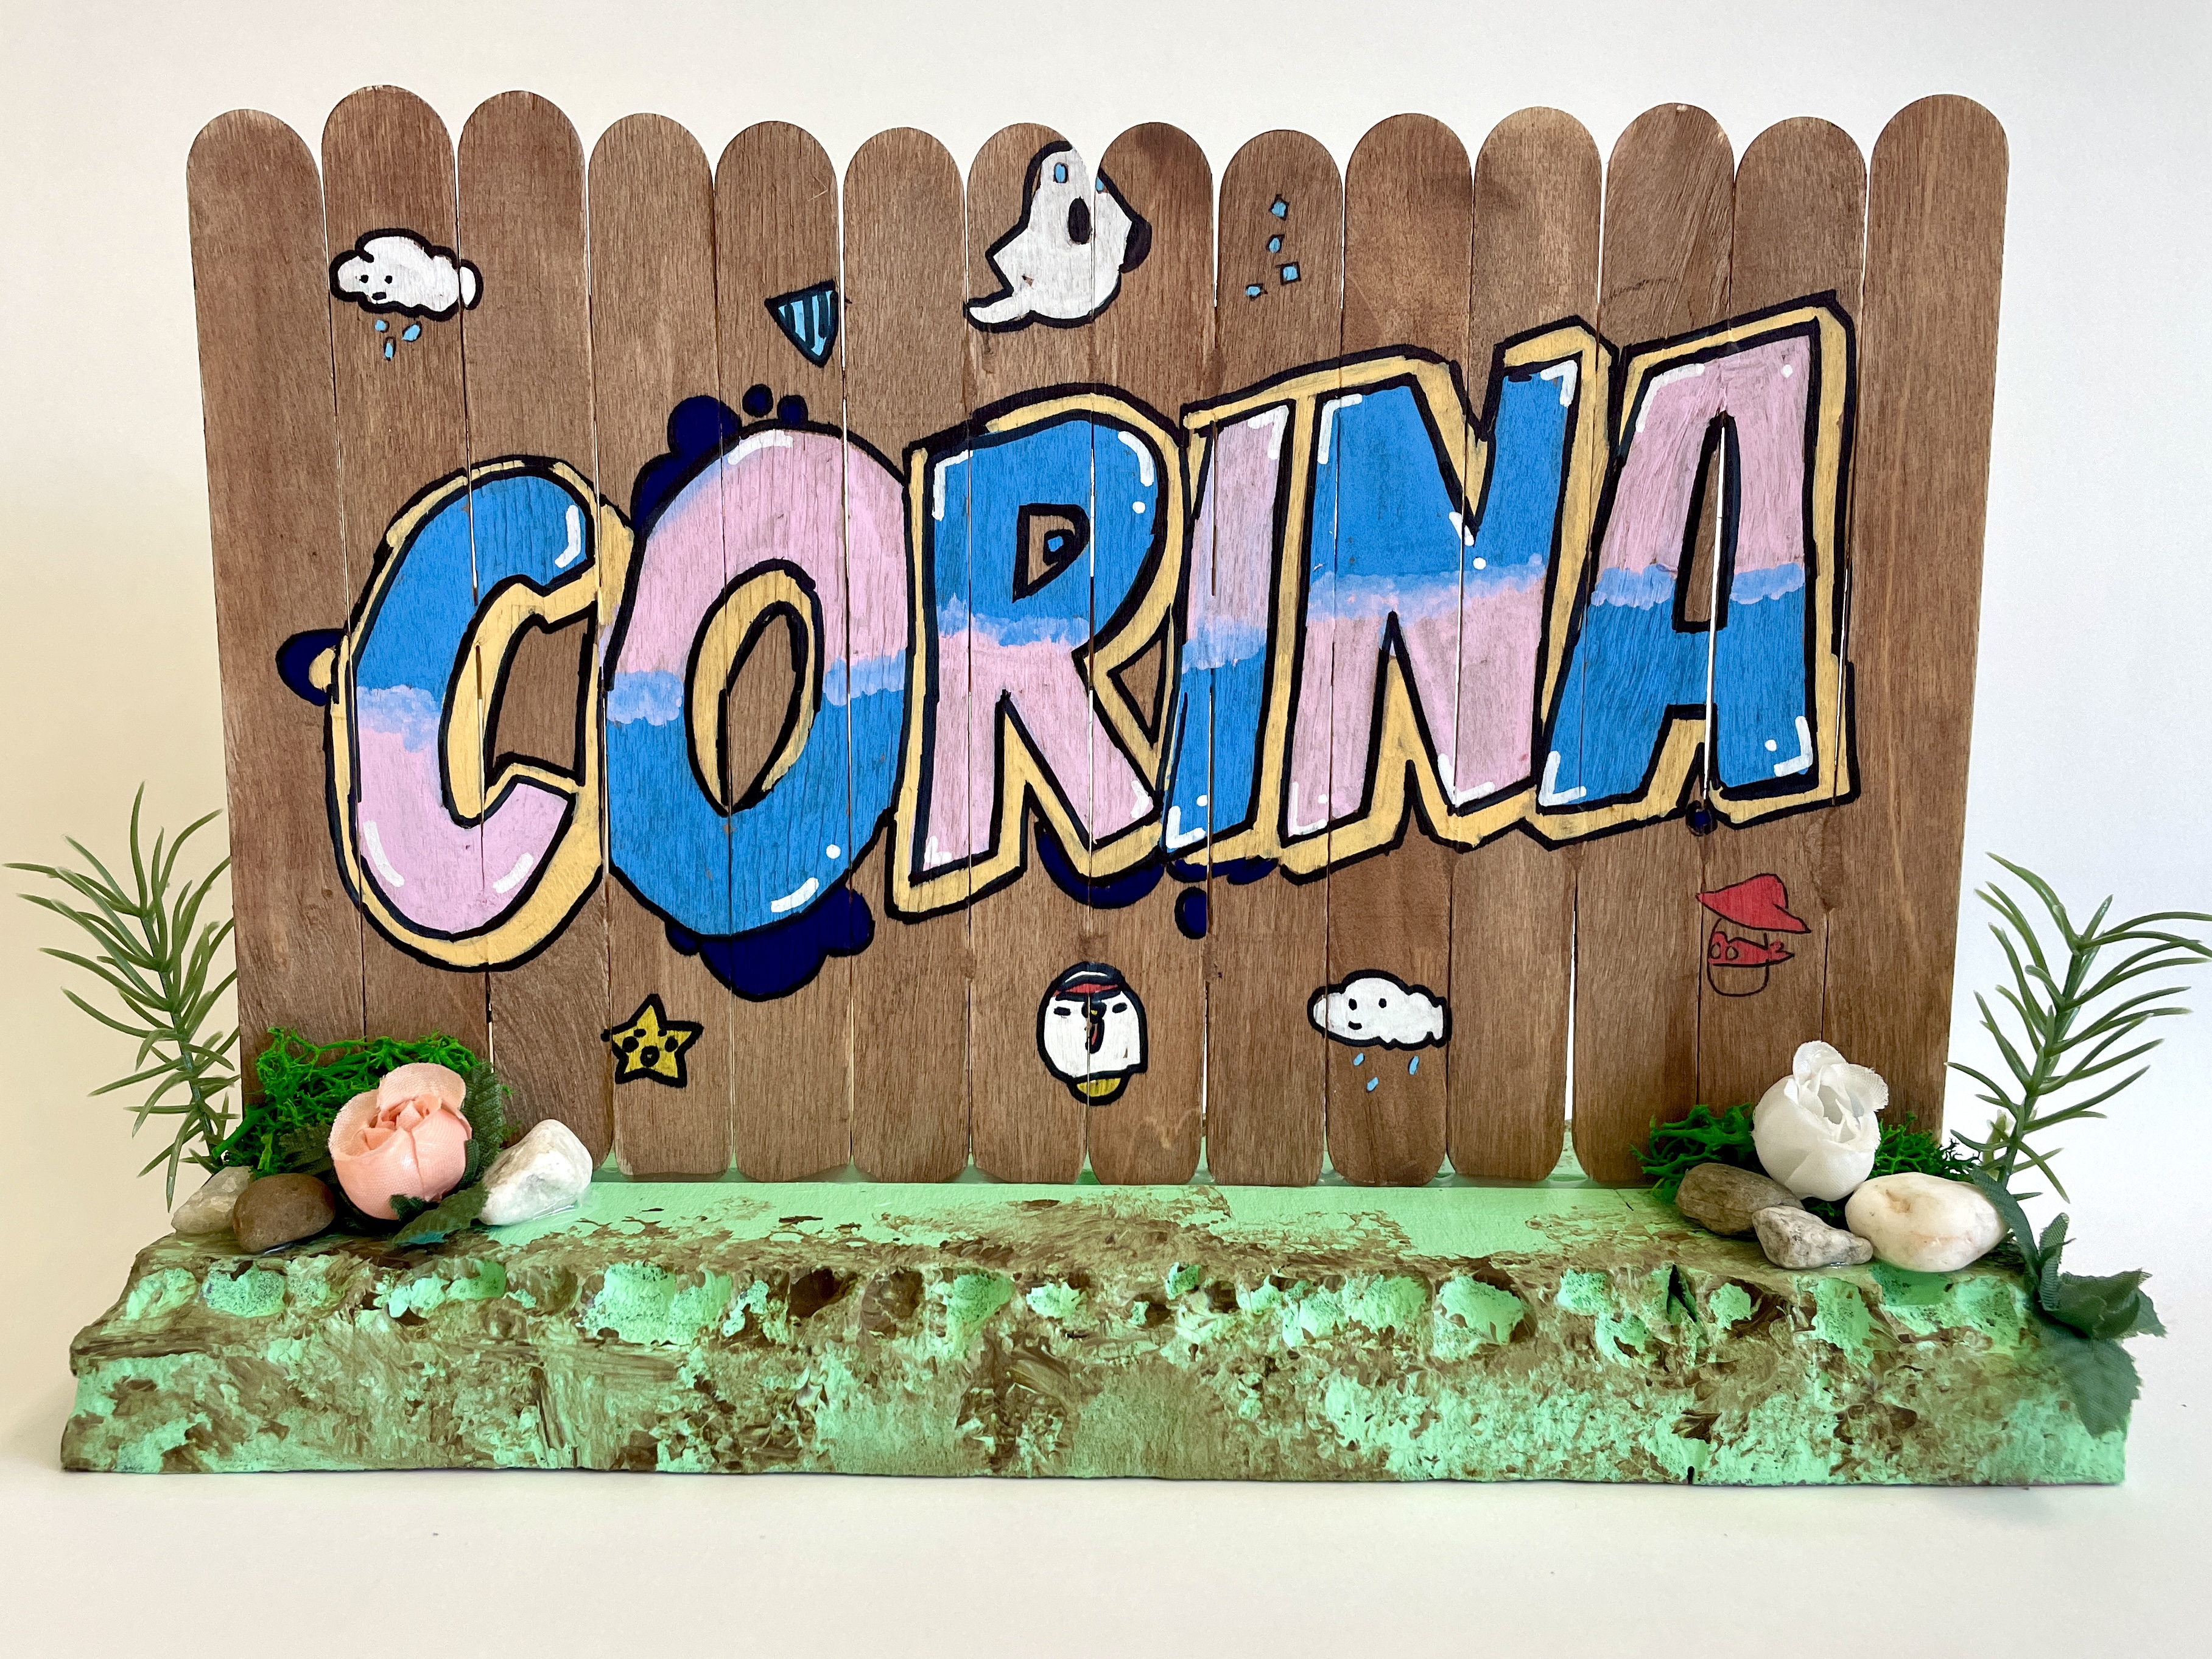
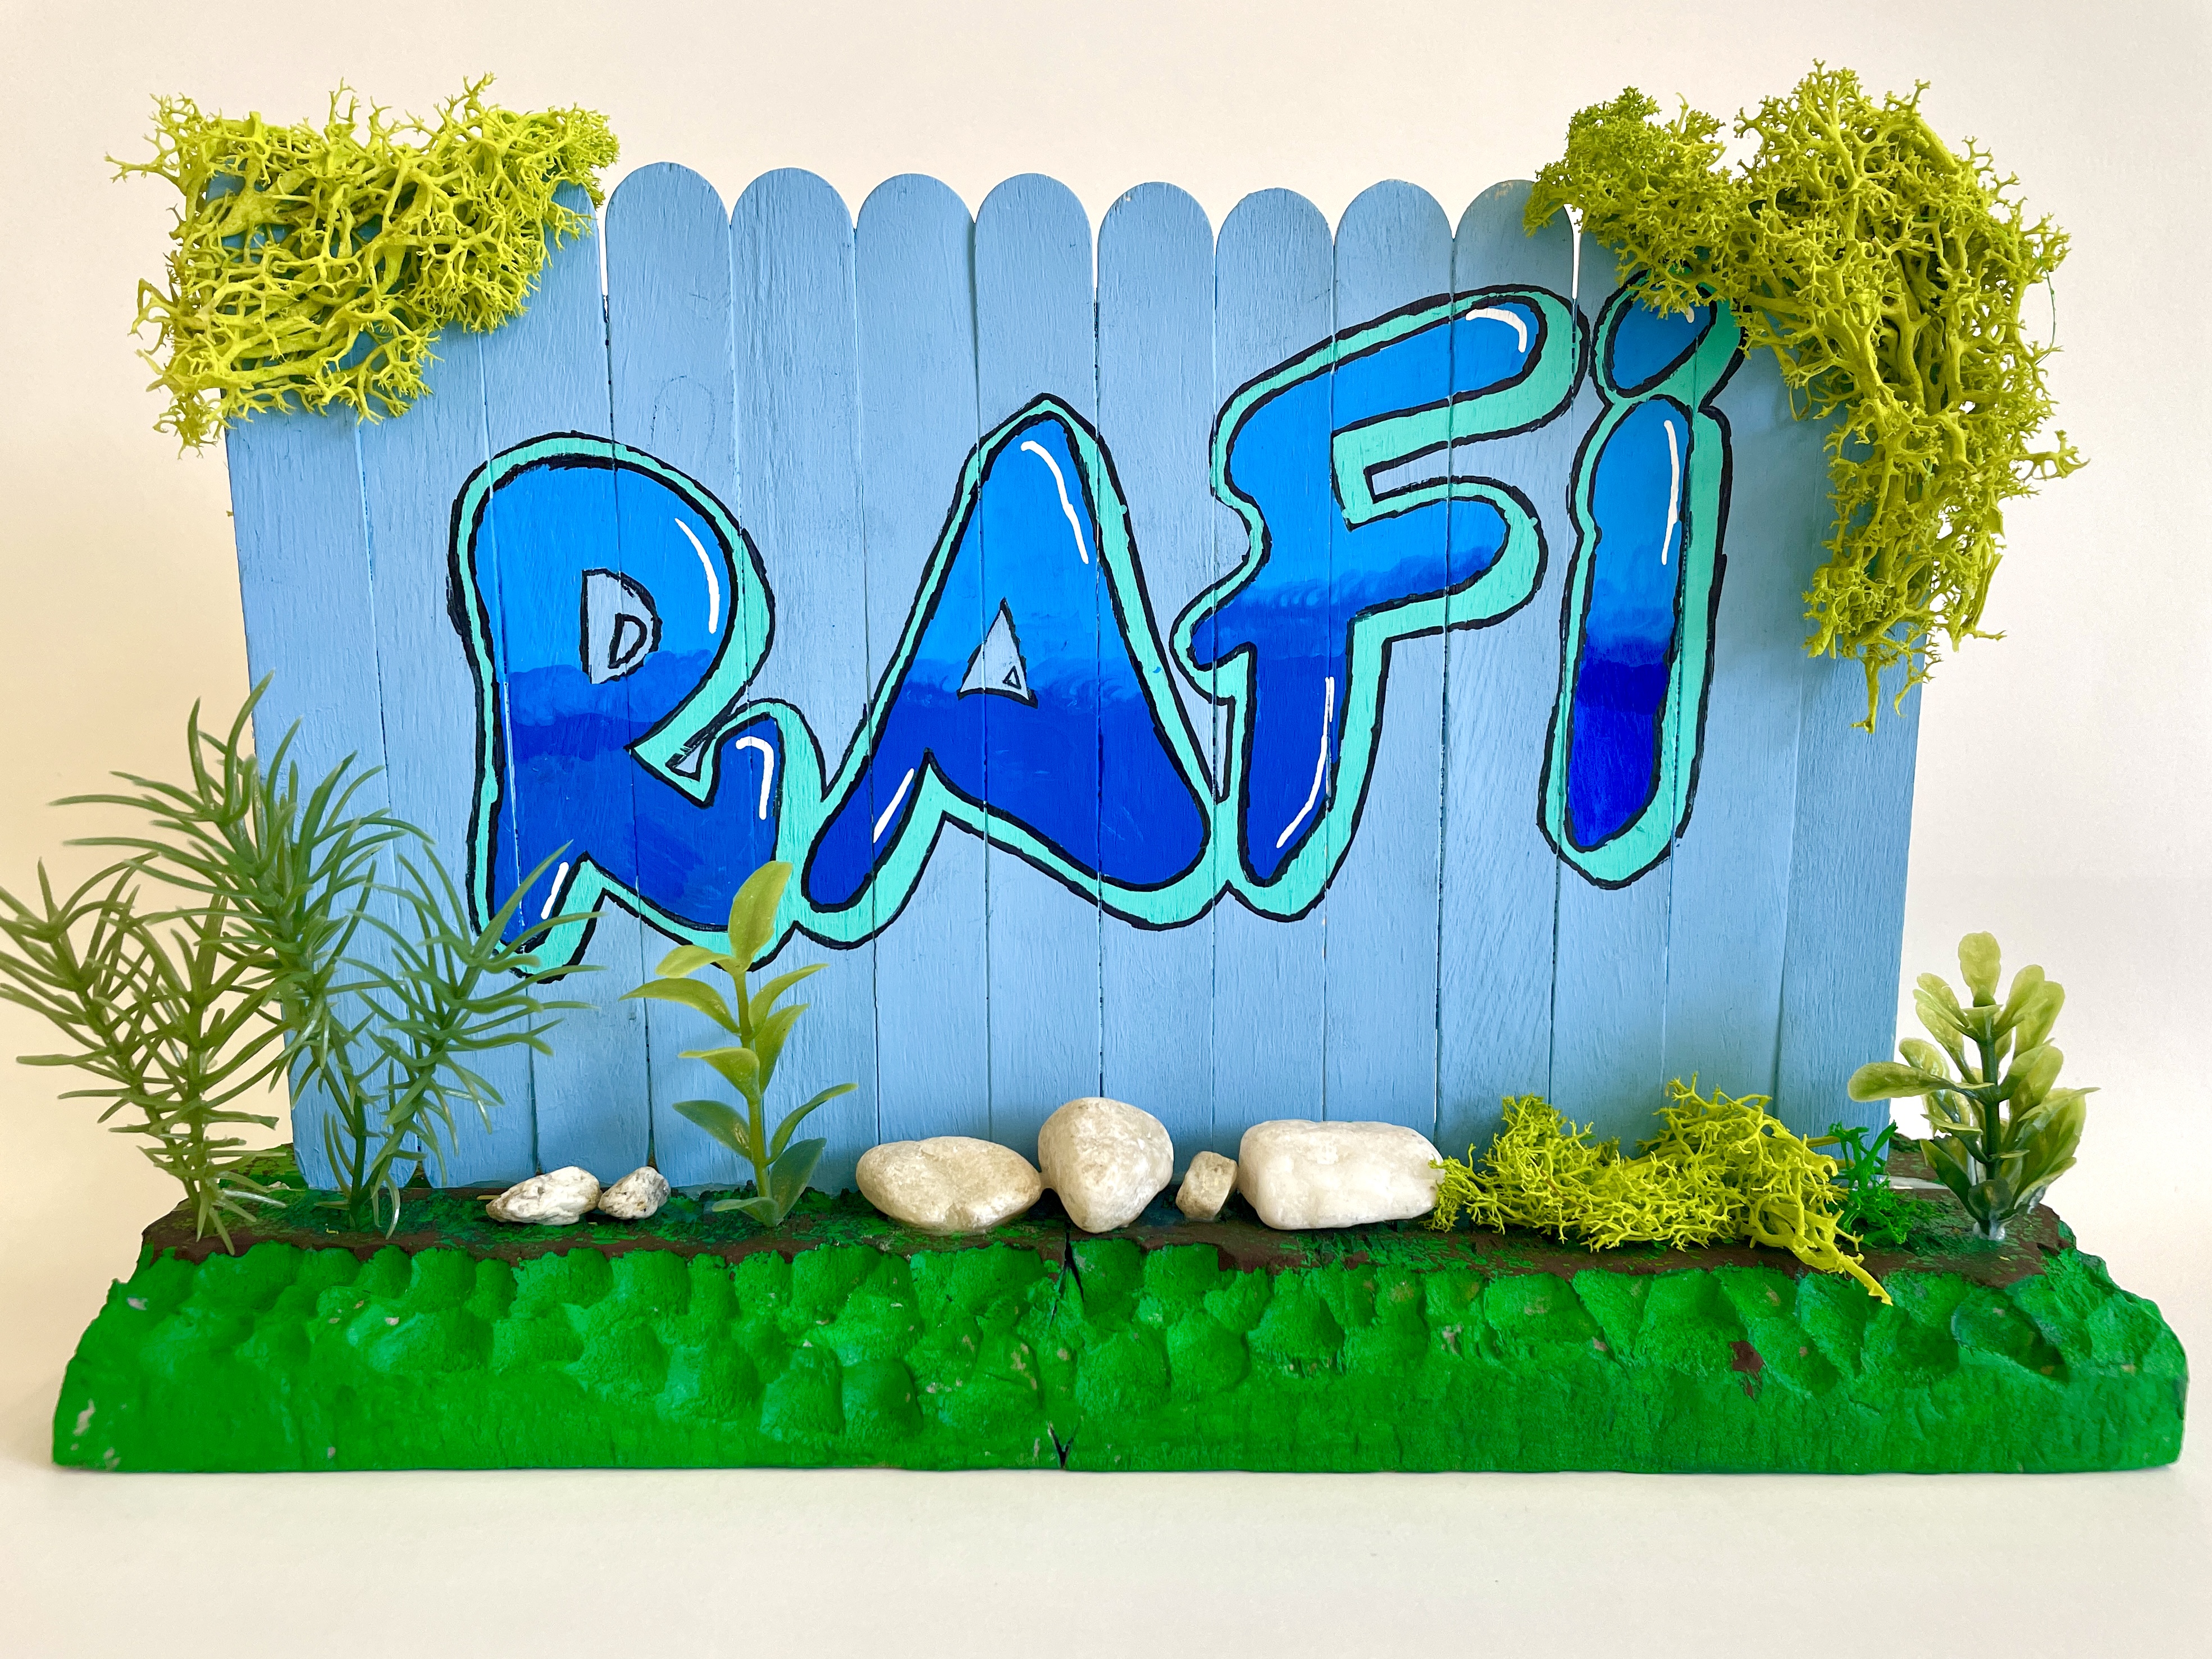
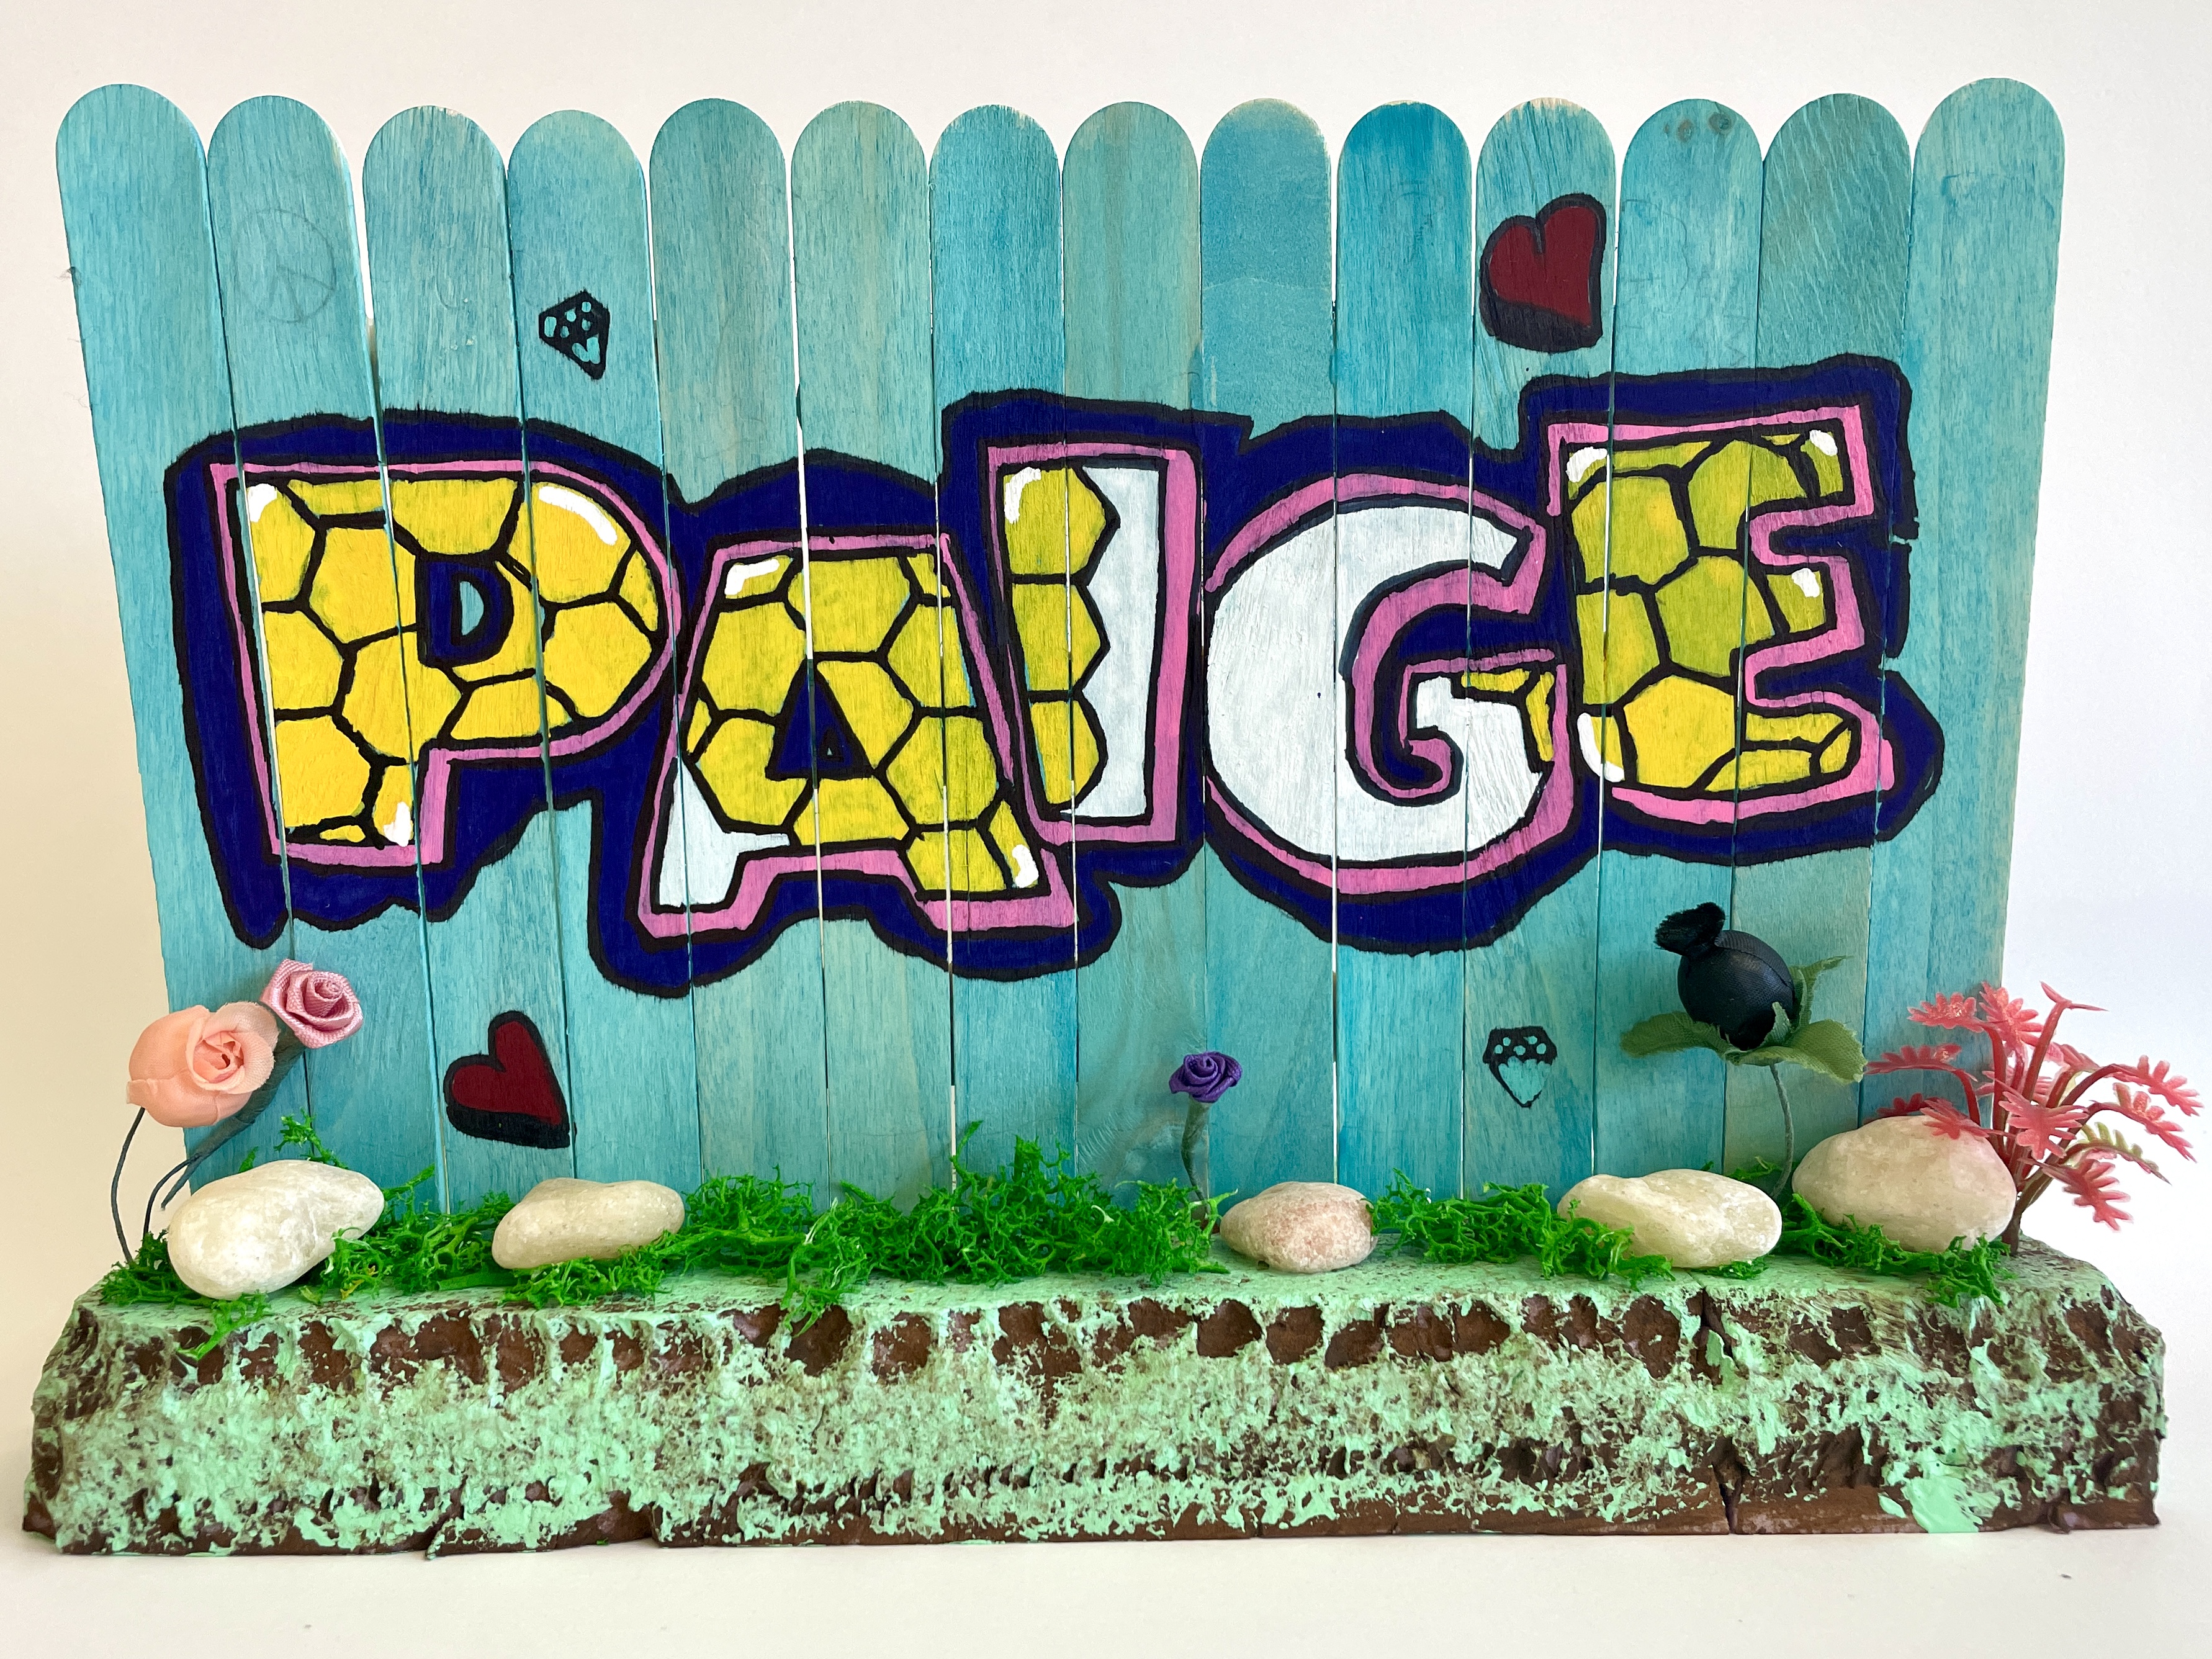
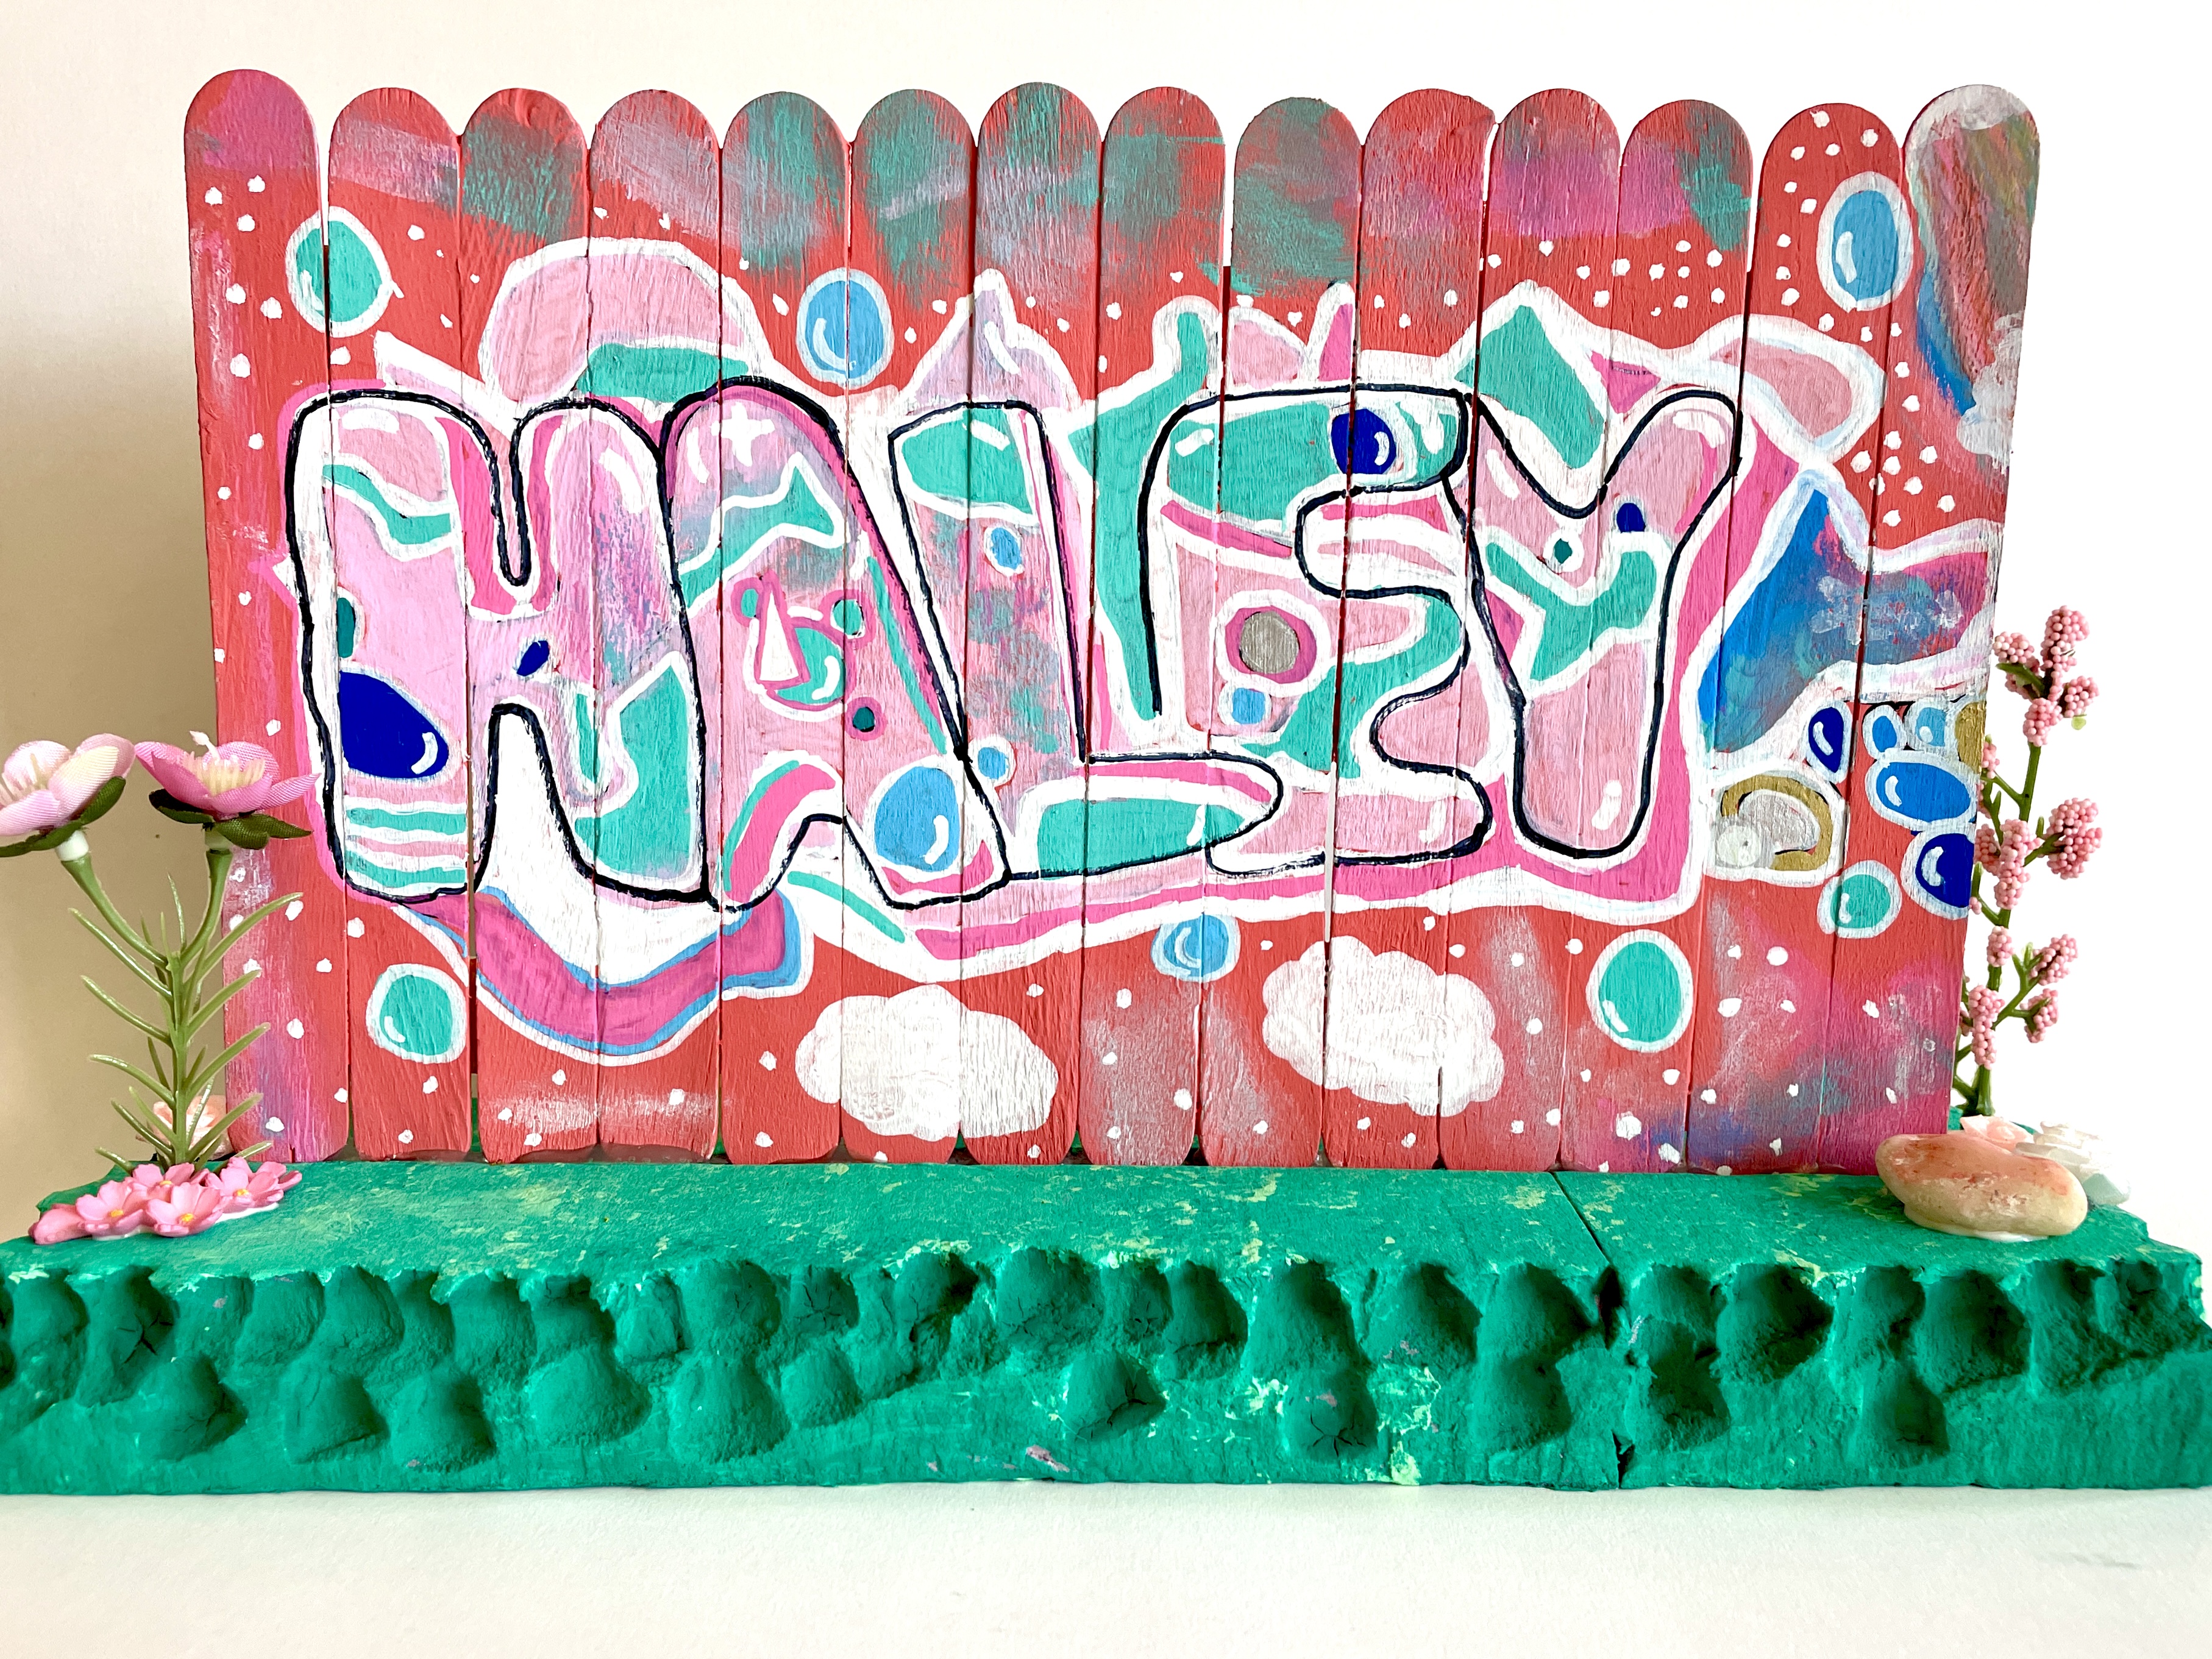
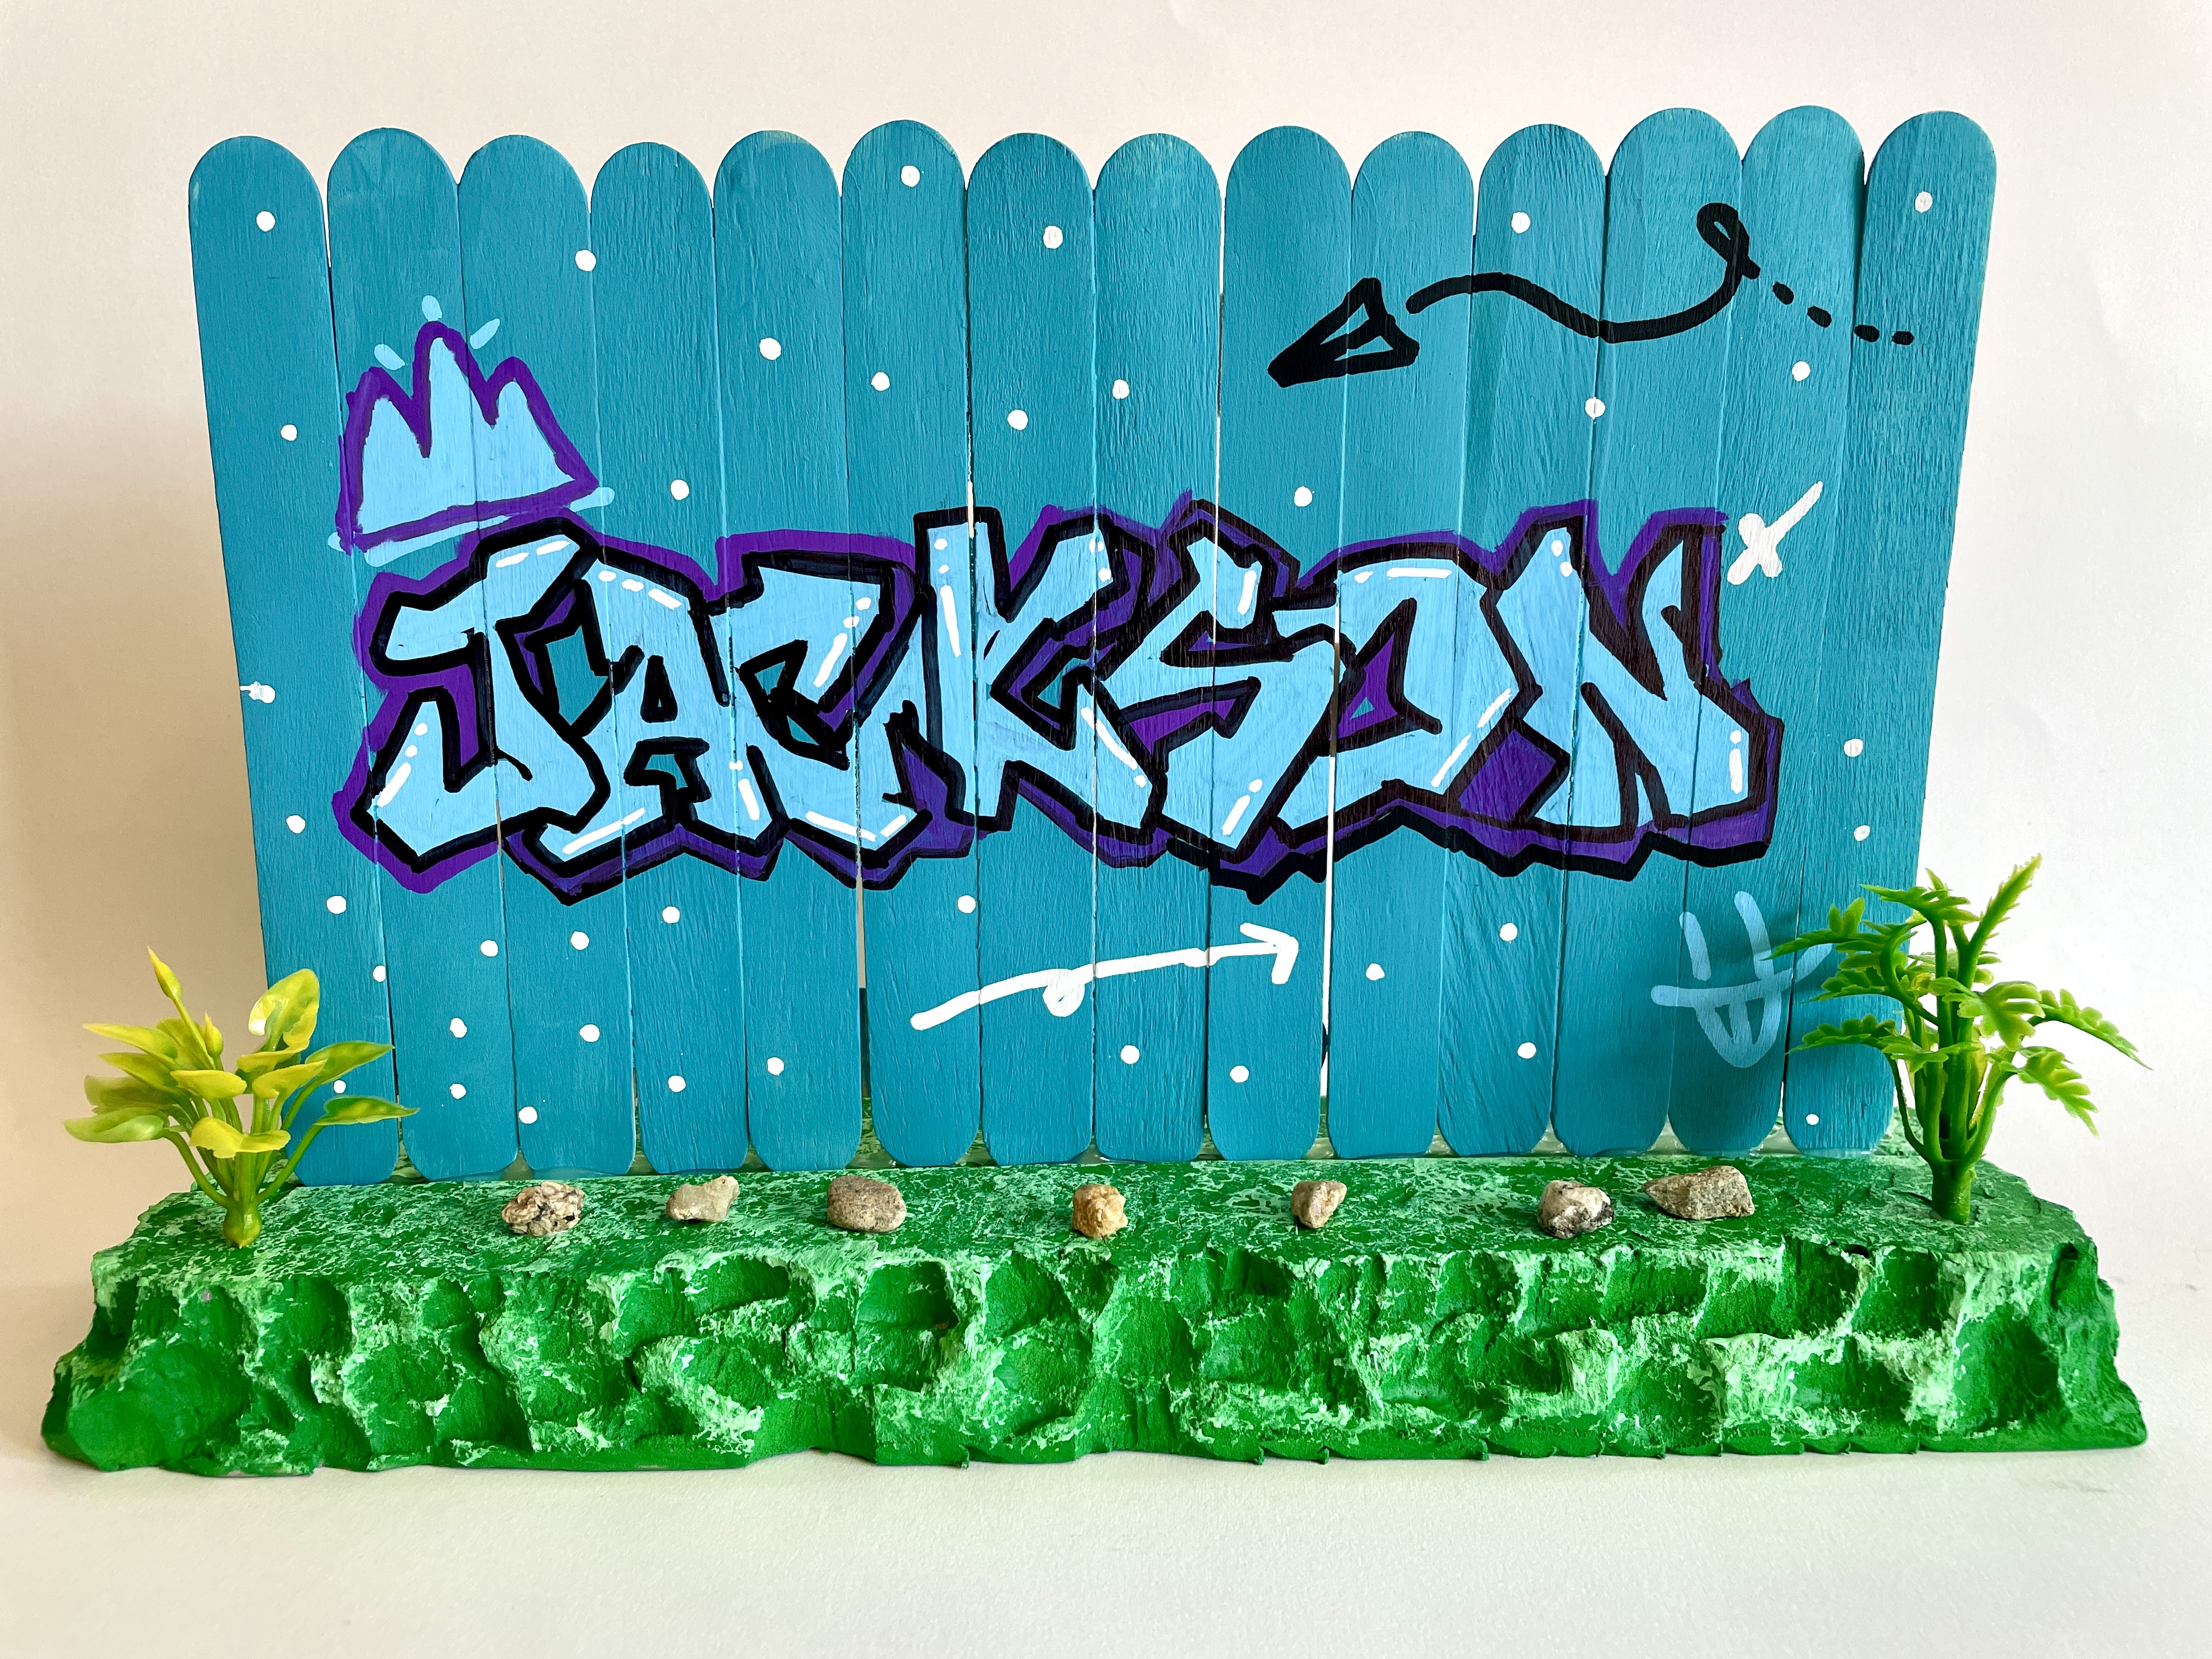
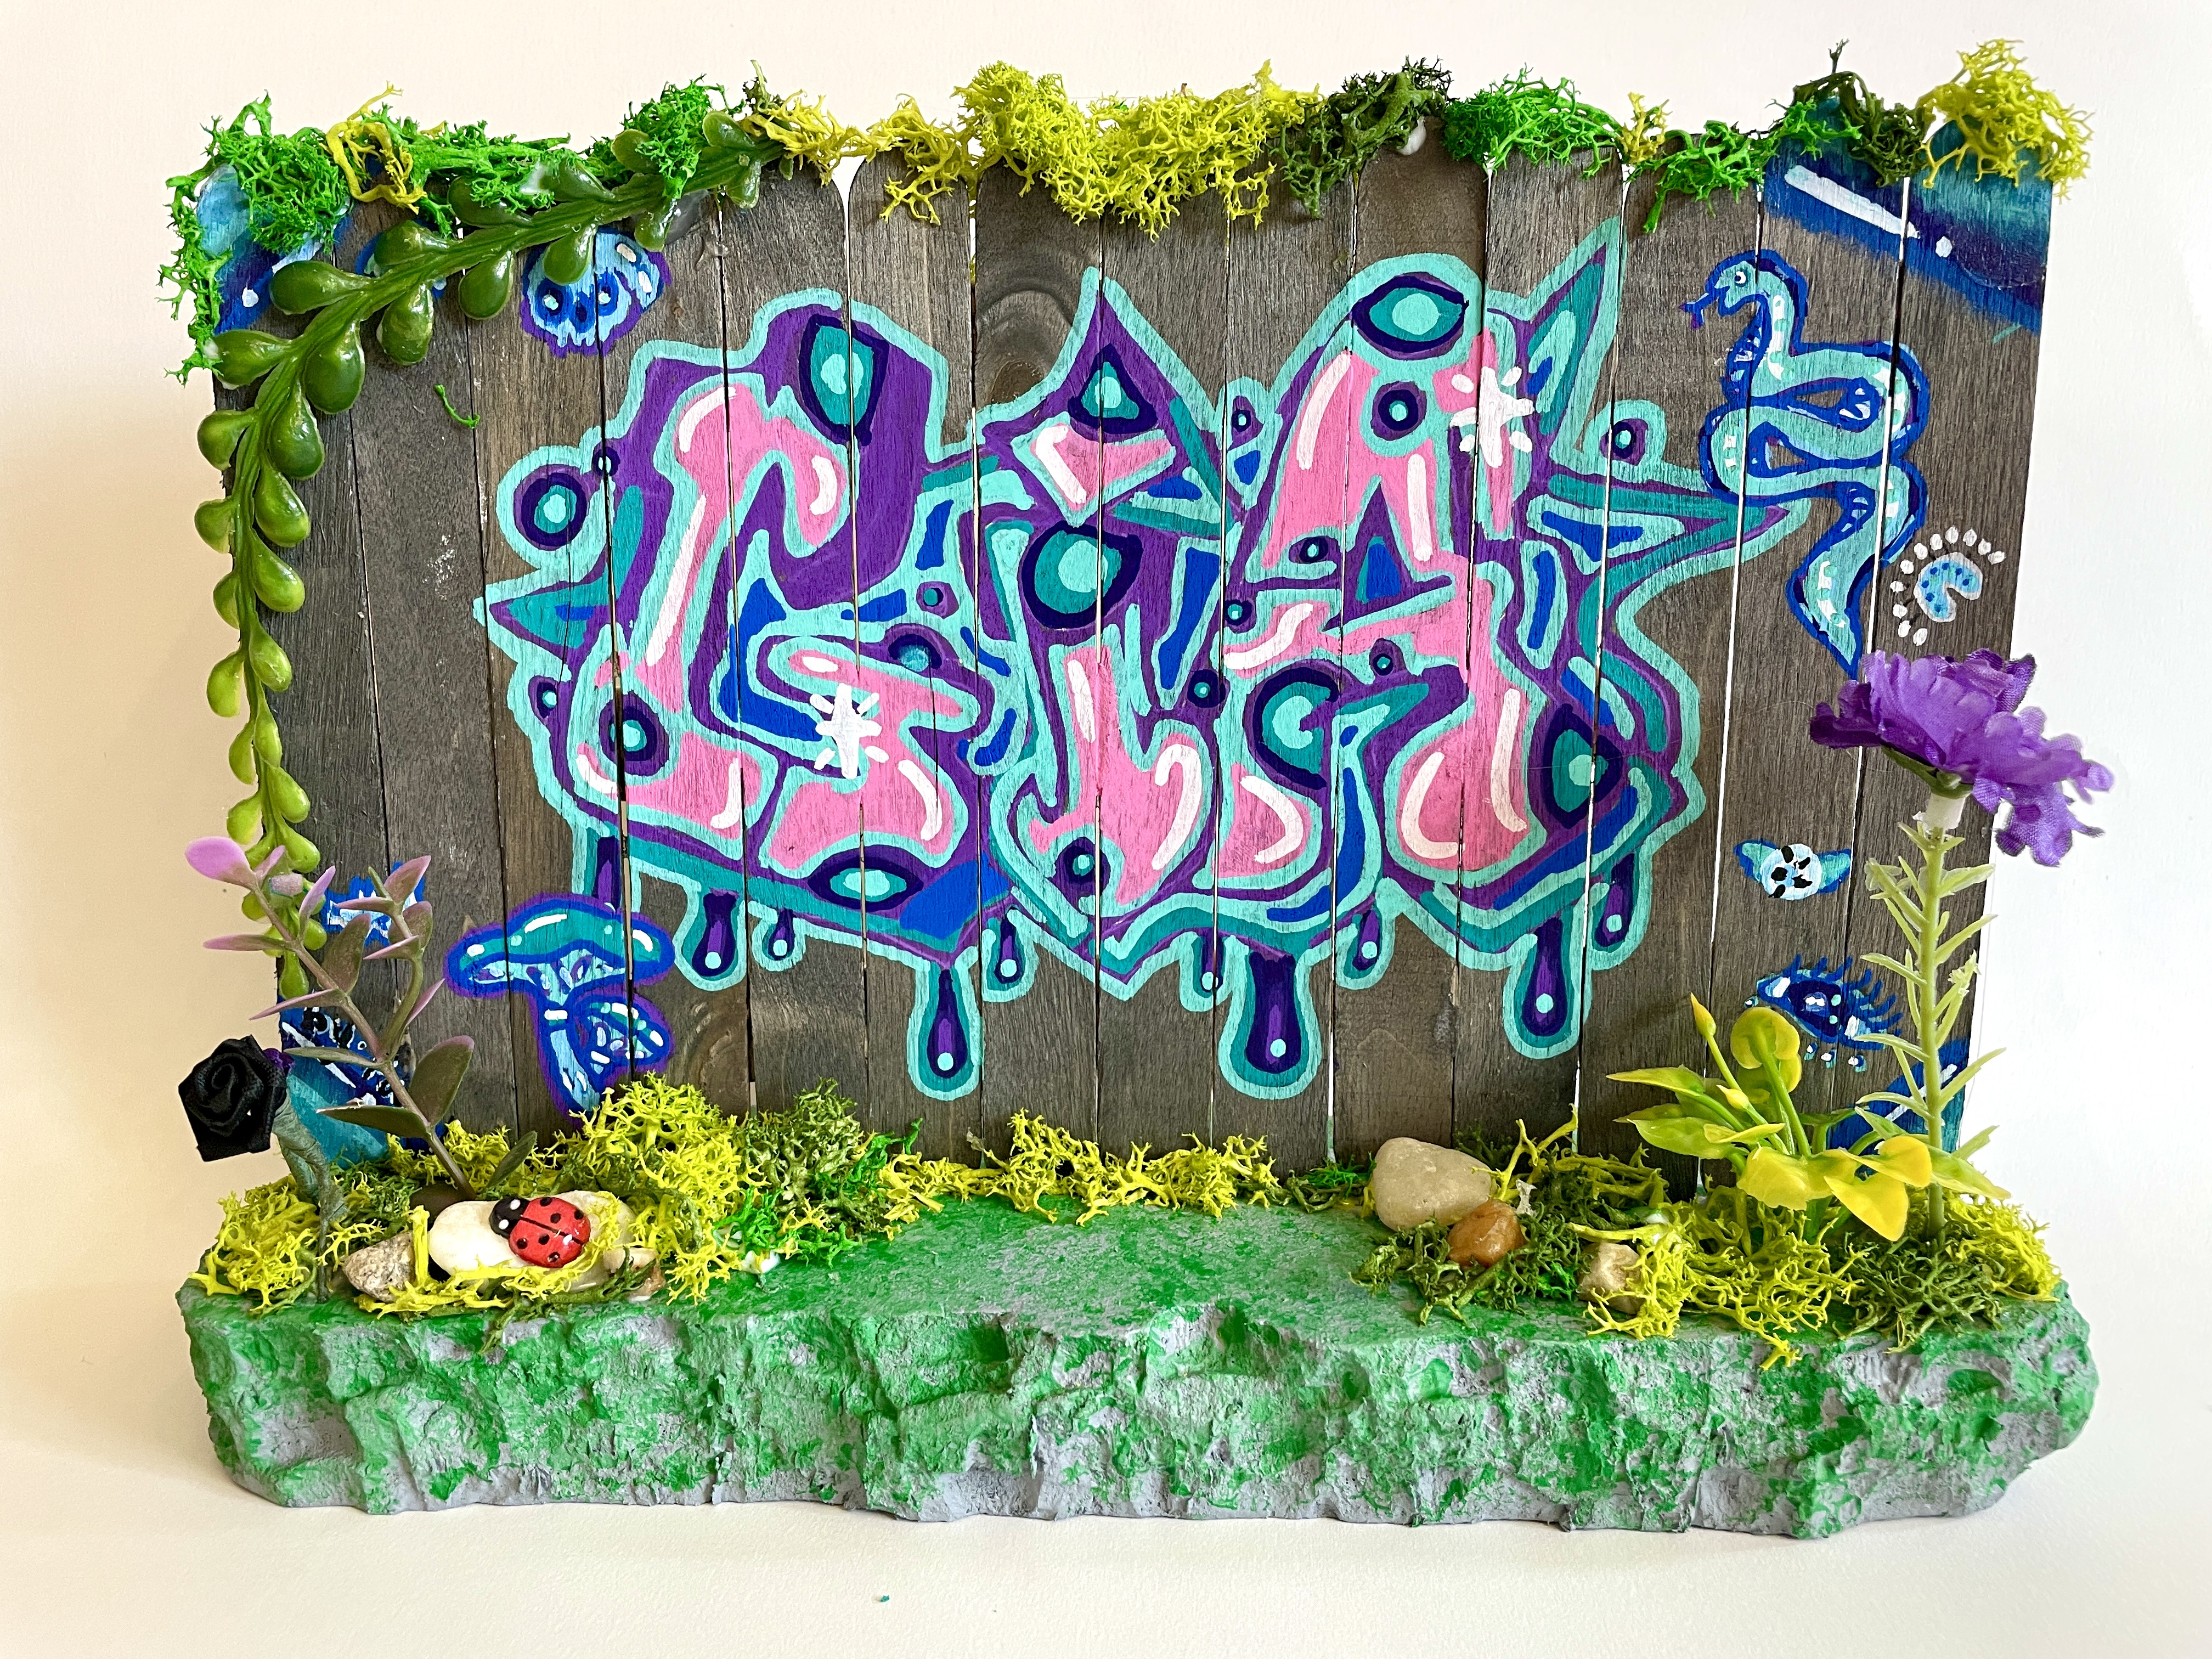
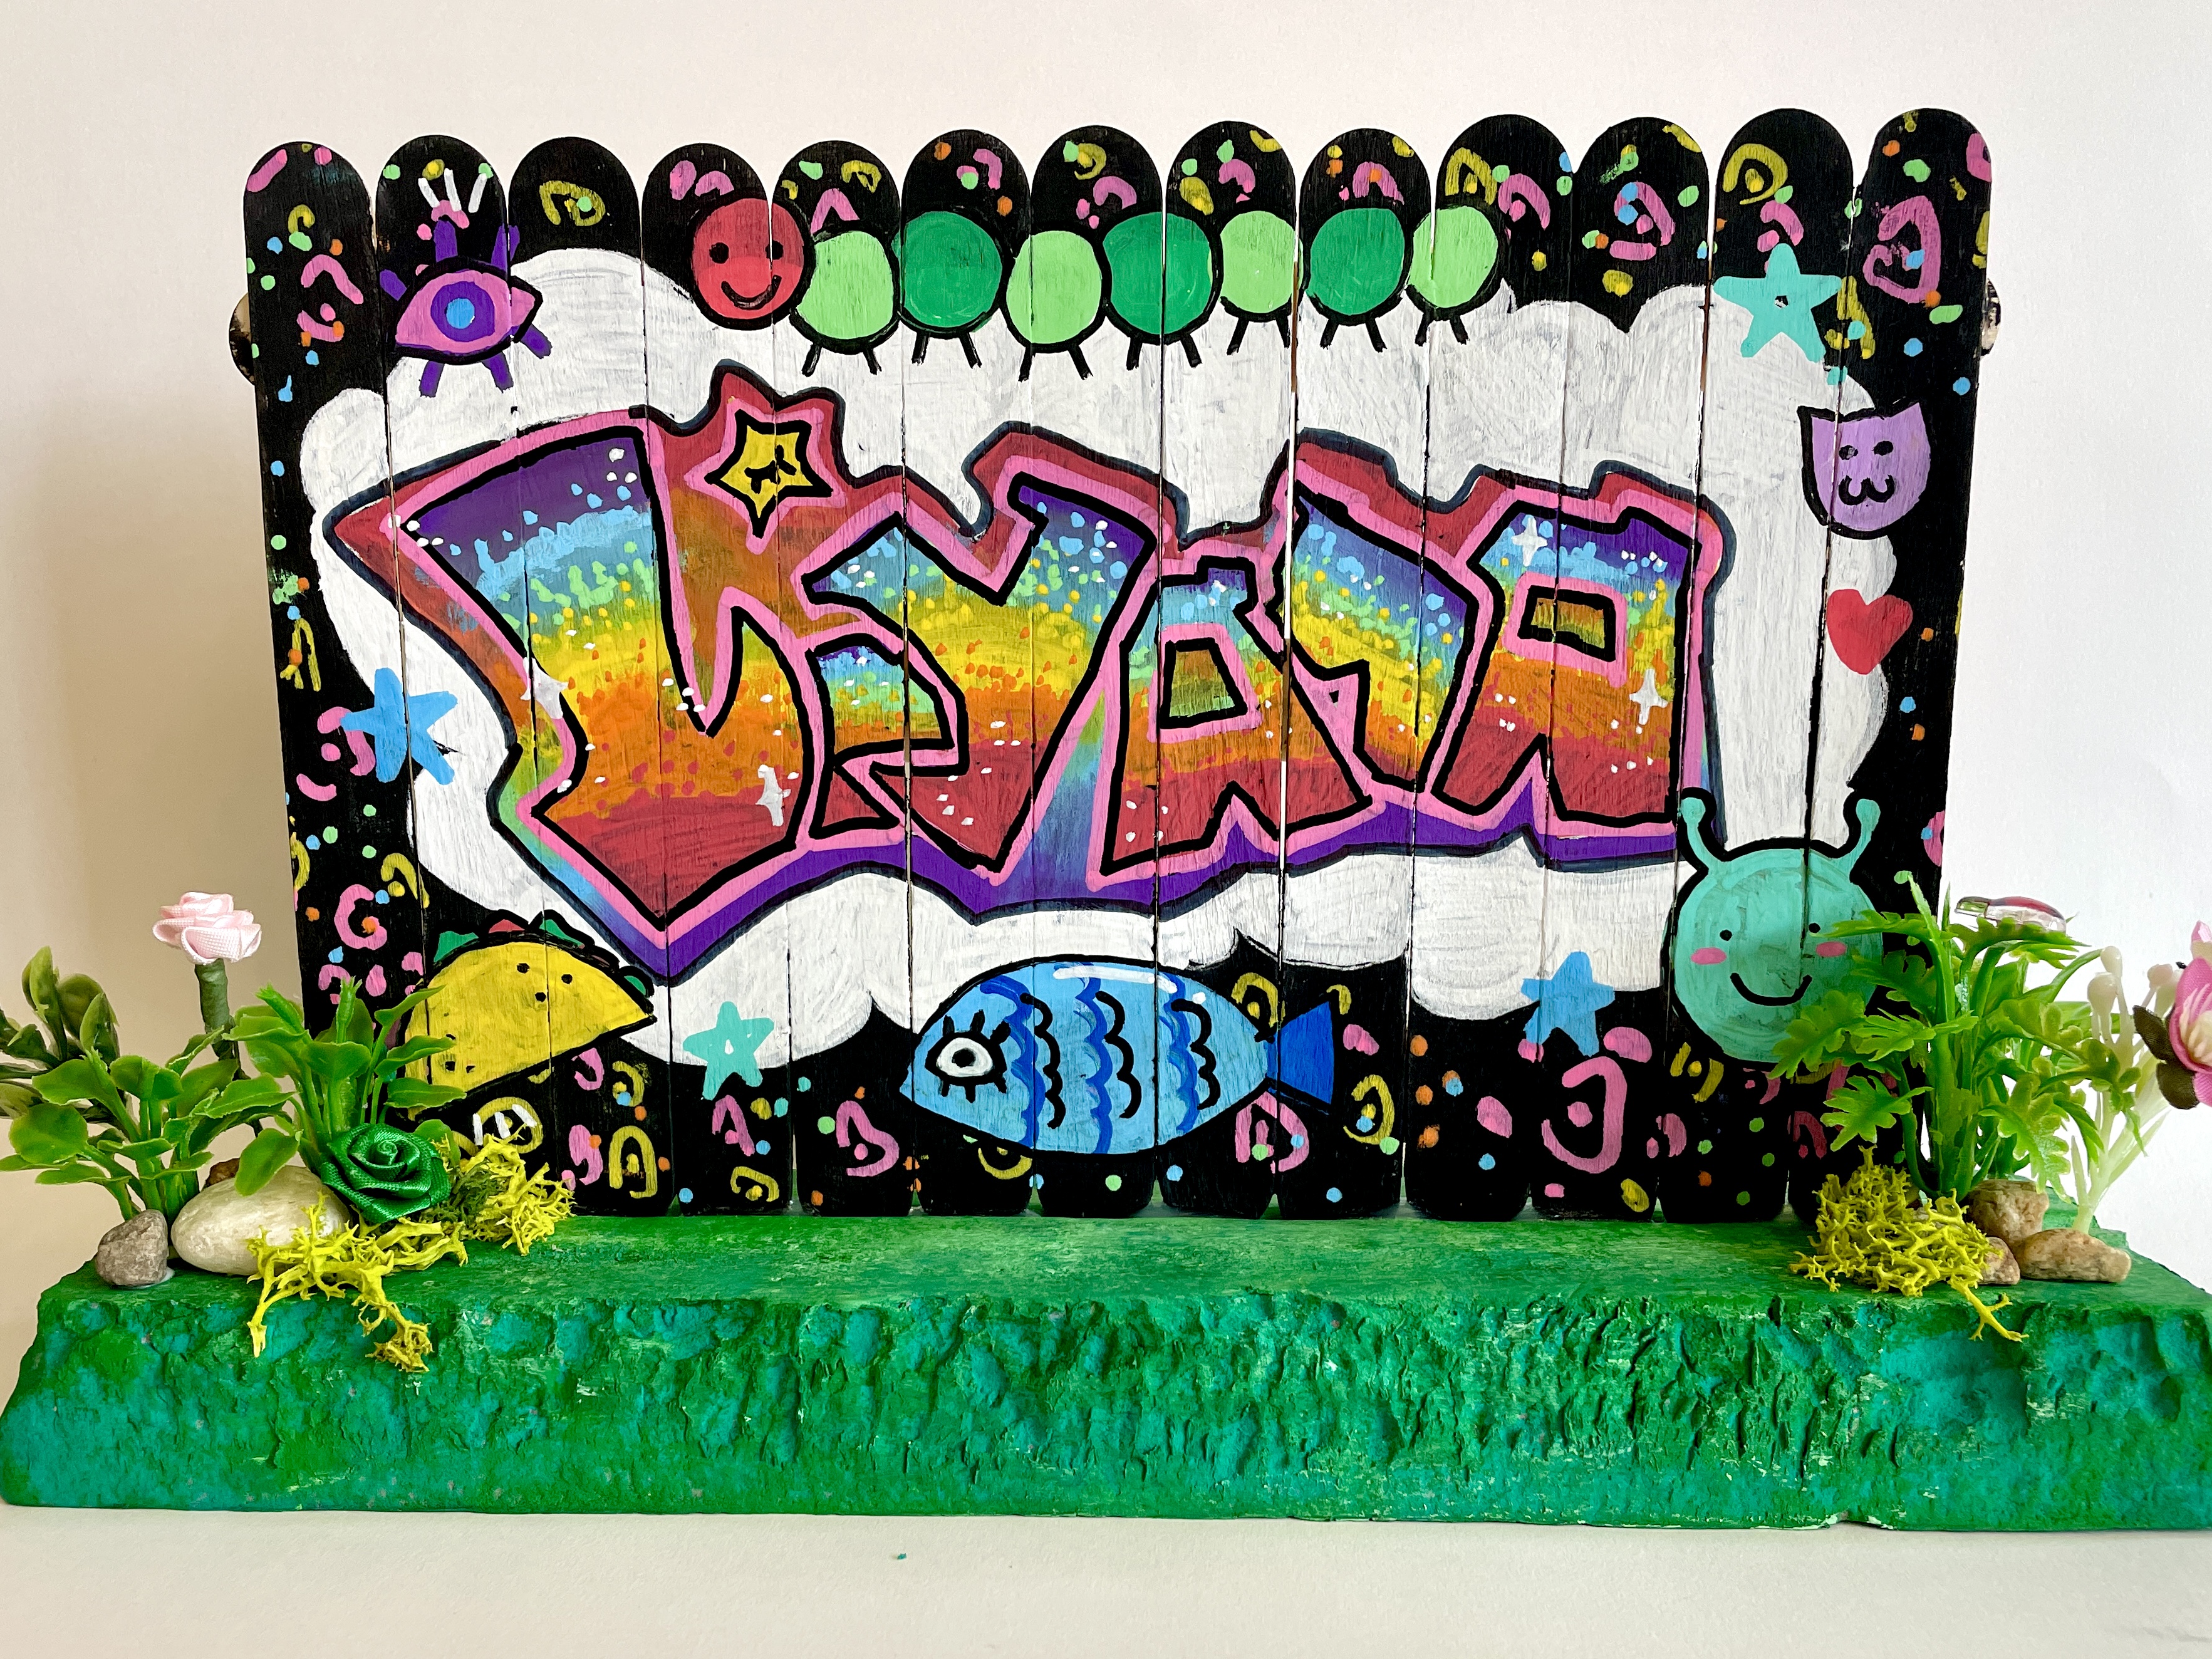
Next, we made our fences! Lay the desired amount of sticks vertically, with enough cross-pieces on the back to support the structure. Heavy Duty snips can be used to cut the sticks if necessary. I used Alene’s Tacky glue, set out in cups and applied with swabs, to assemble the fence. (This prevents students from “over-gluing”). The next day, students painted their fence with full strength or watered-down acrylic paint, based on whether they wanted a wood grain showing or an opaque, solid appearance


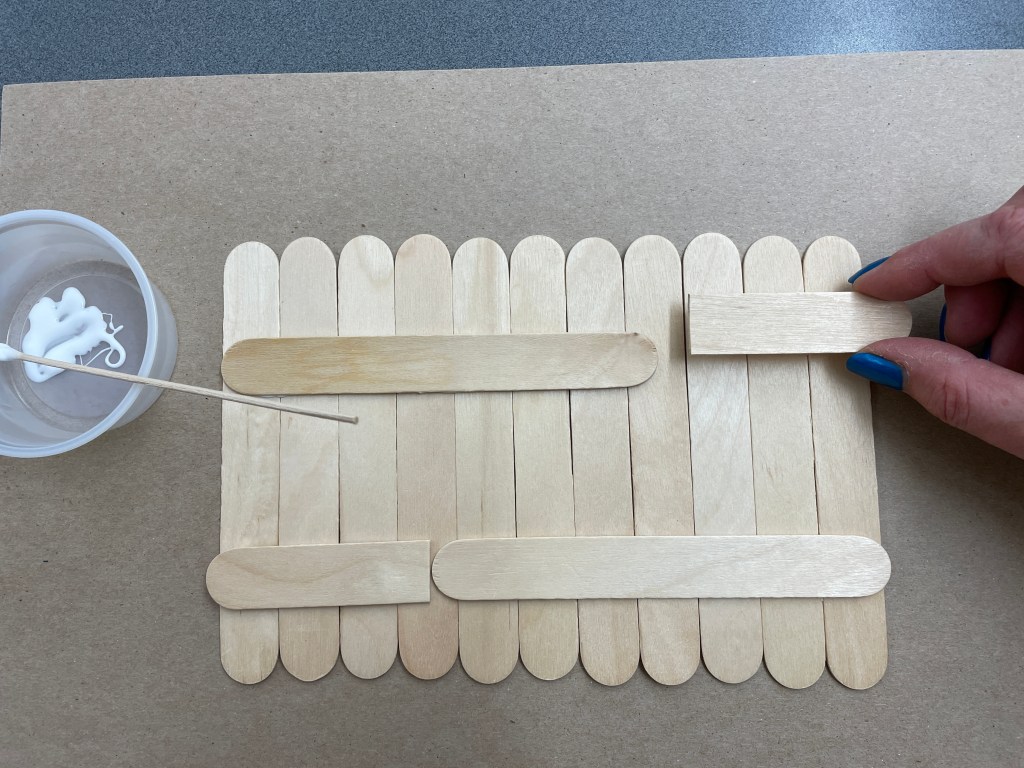
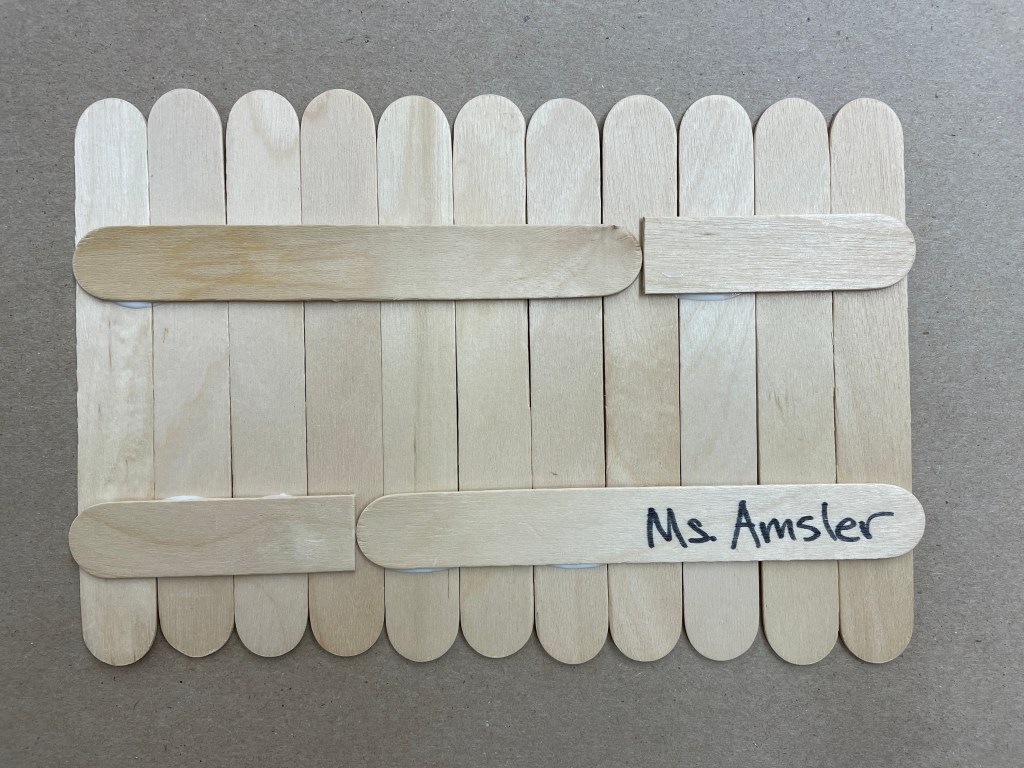
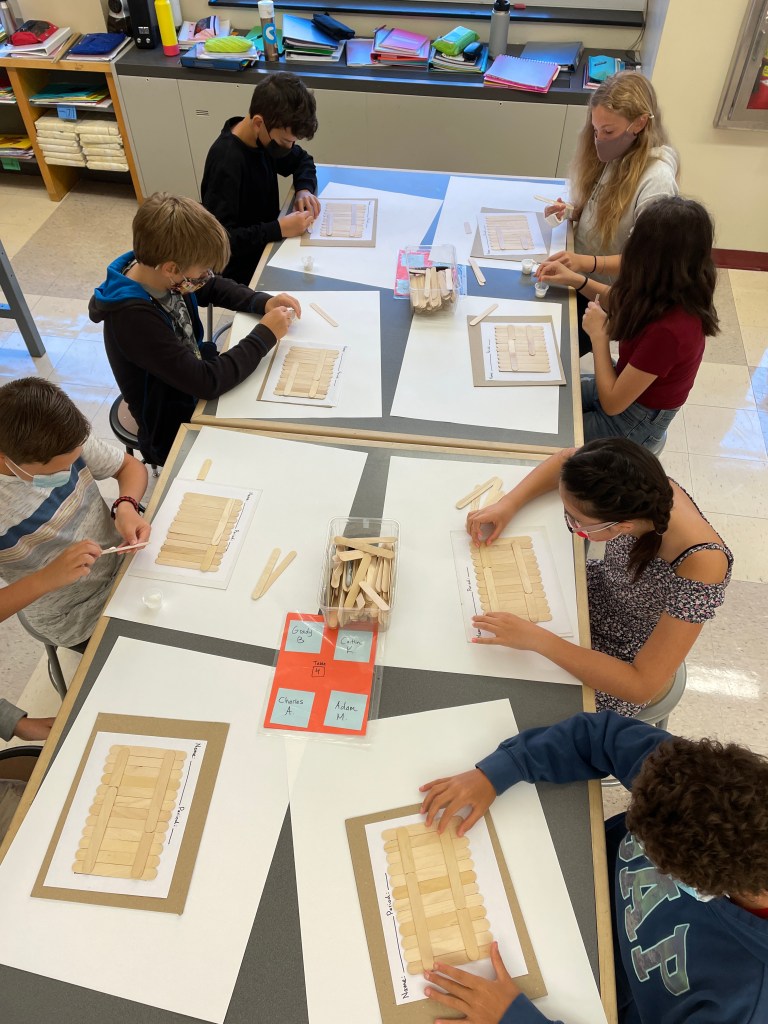

Toggle through the pictures above to see Fence Building step by step!
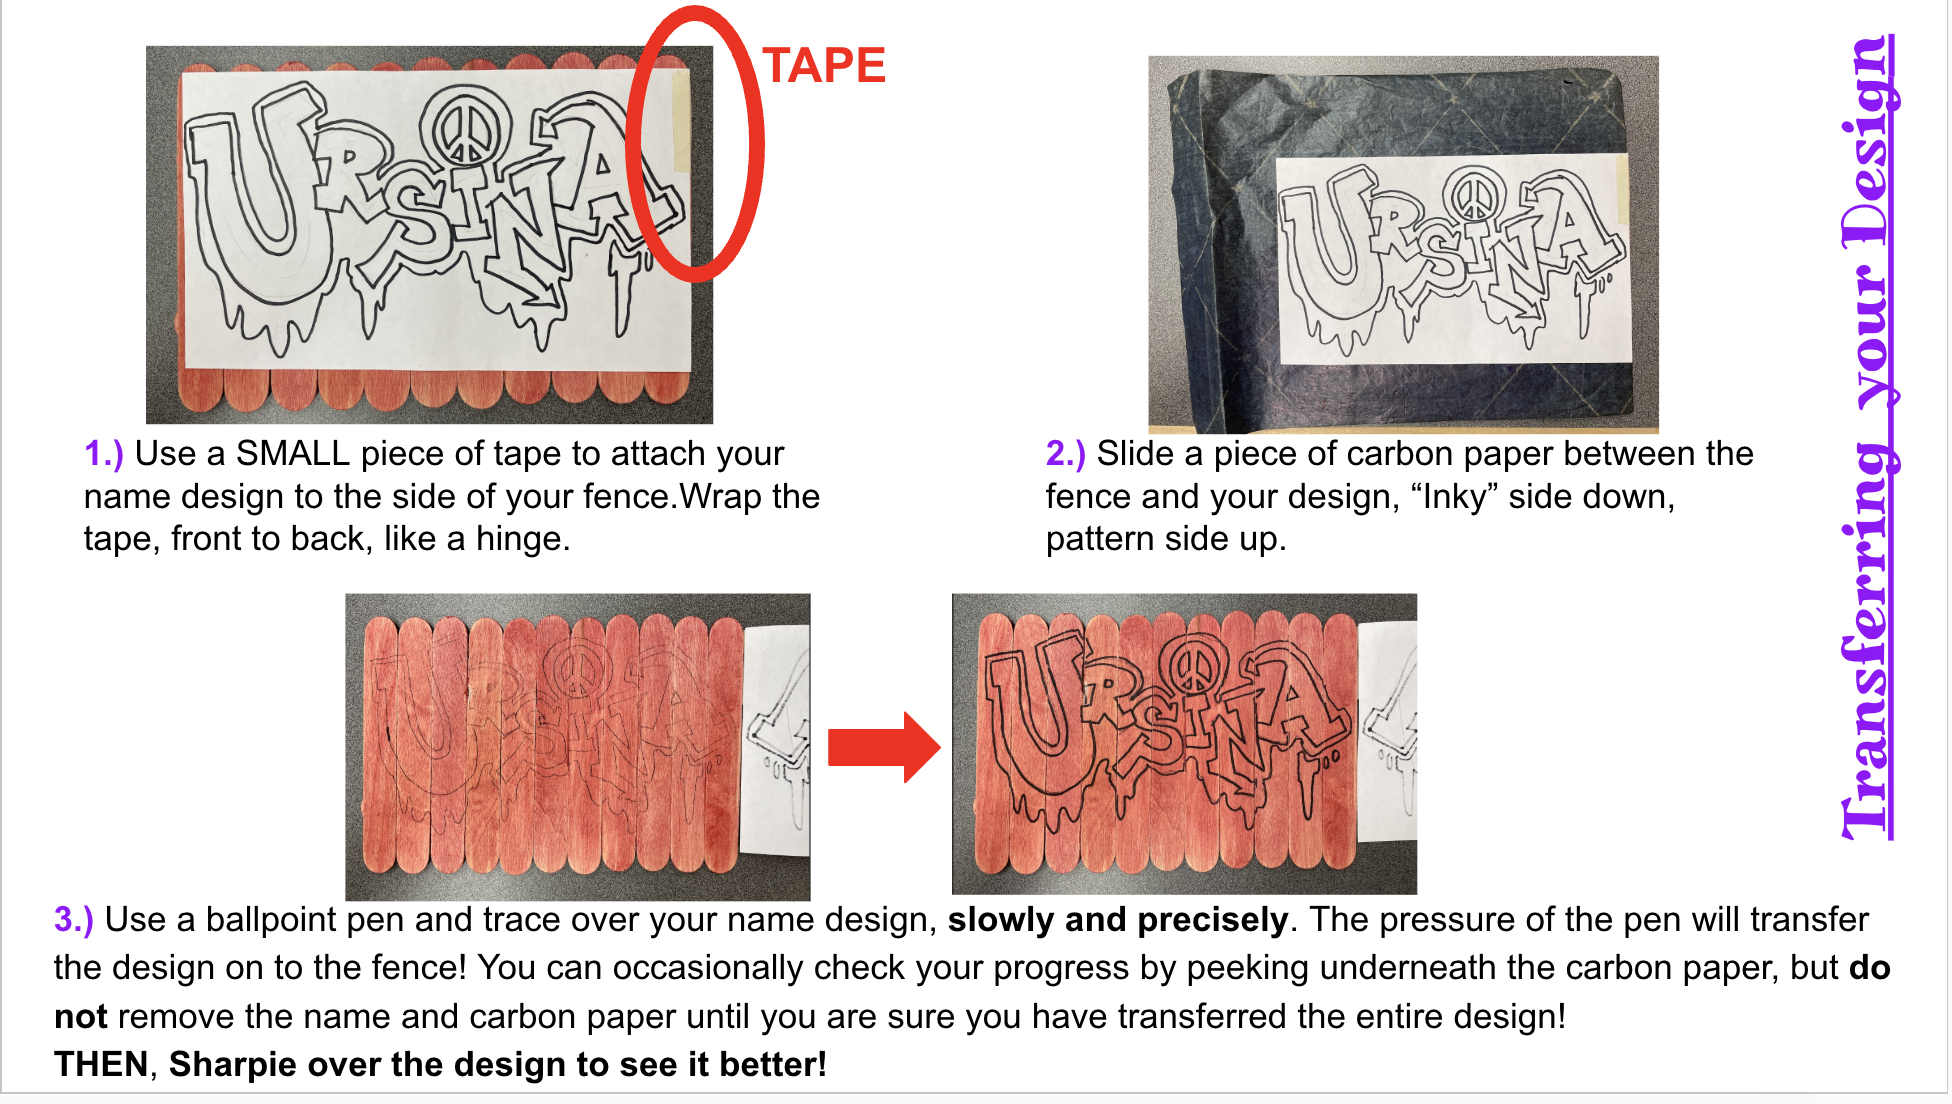
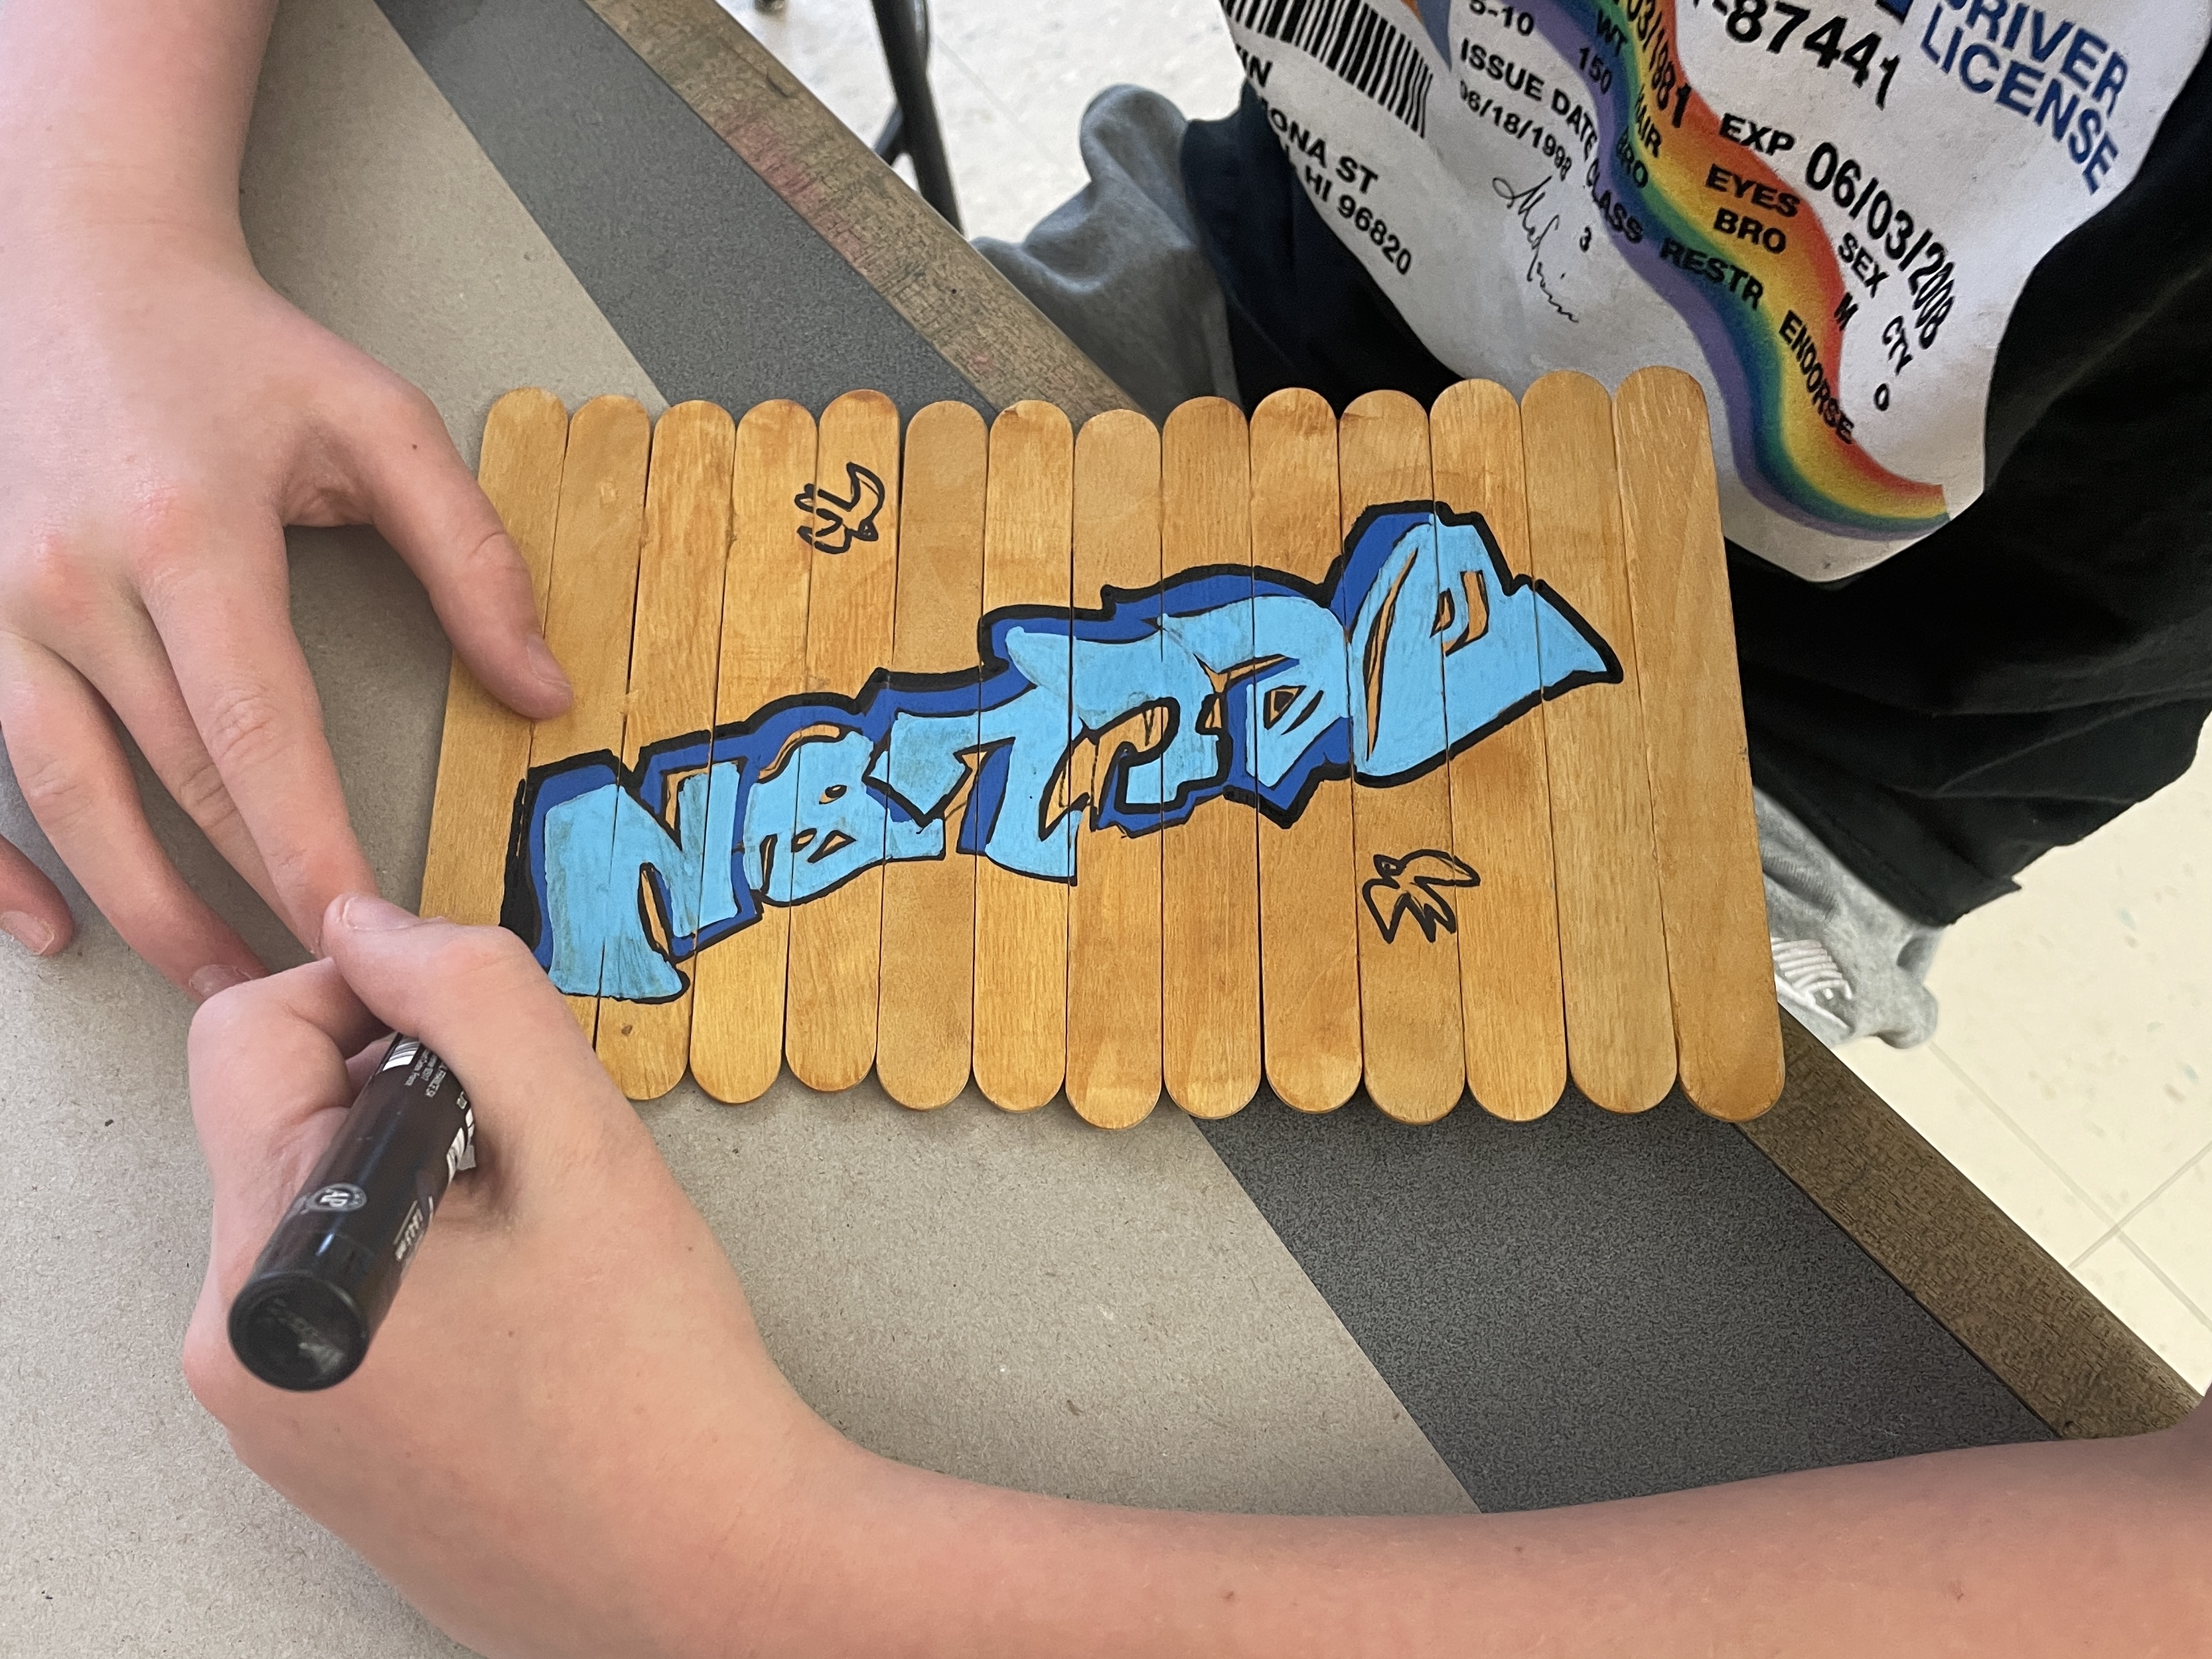
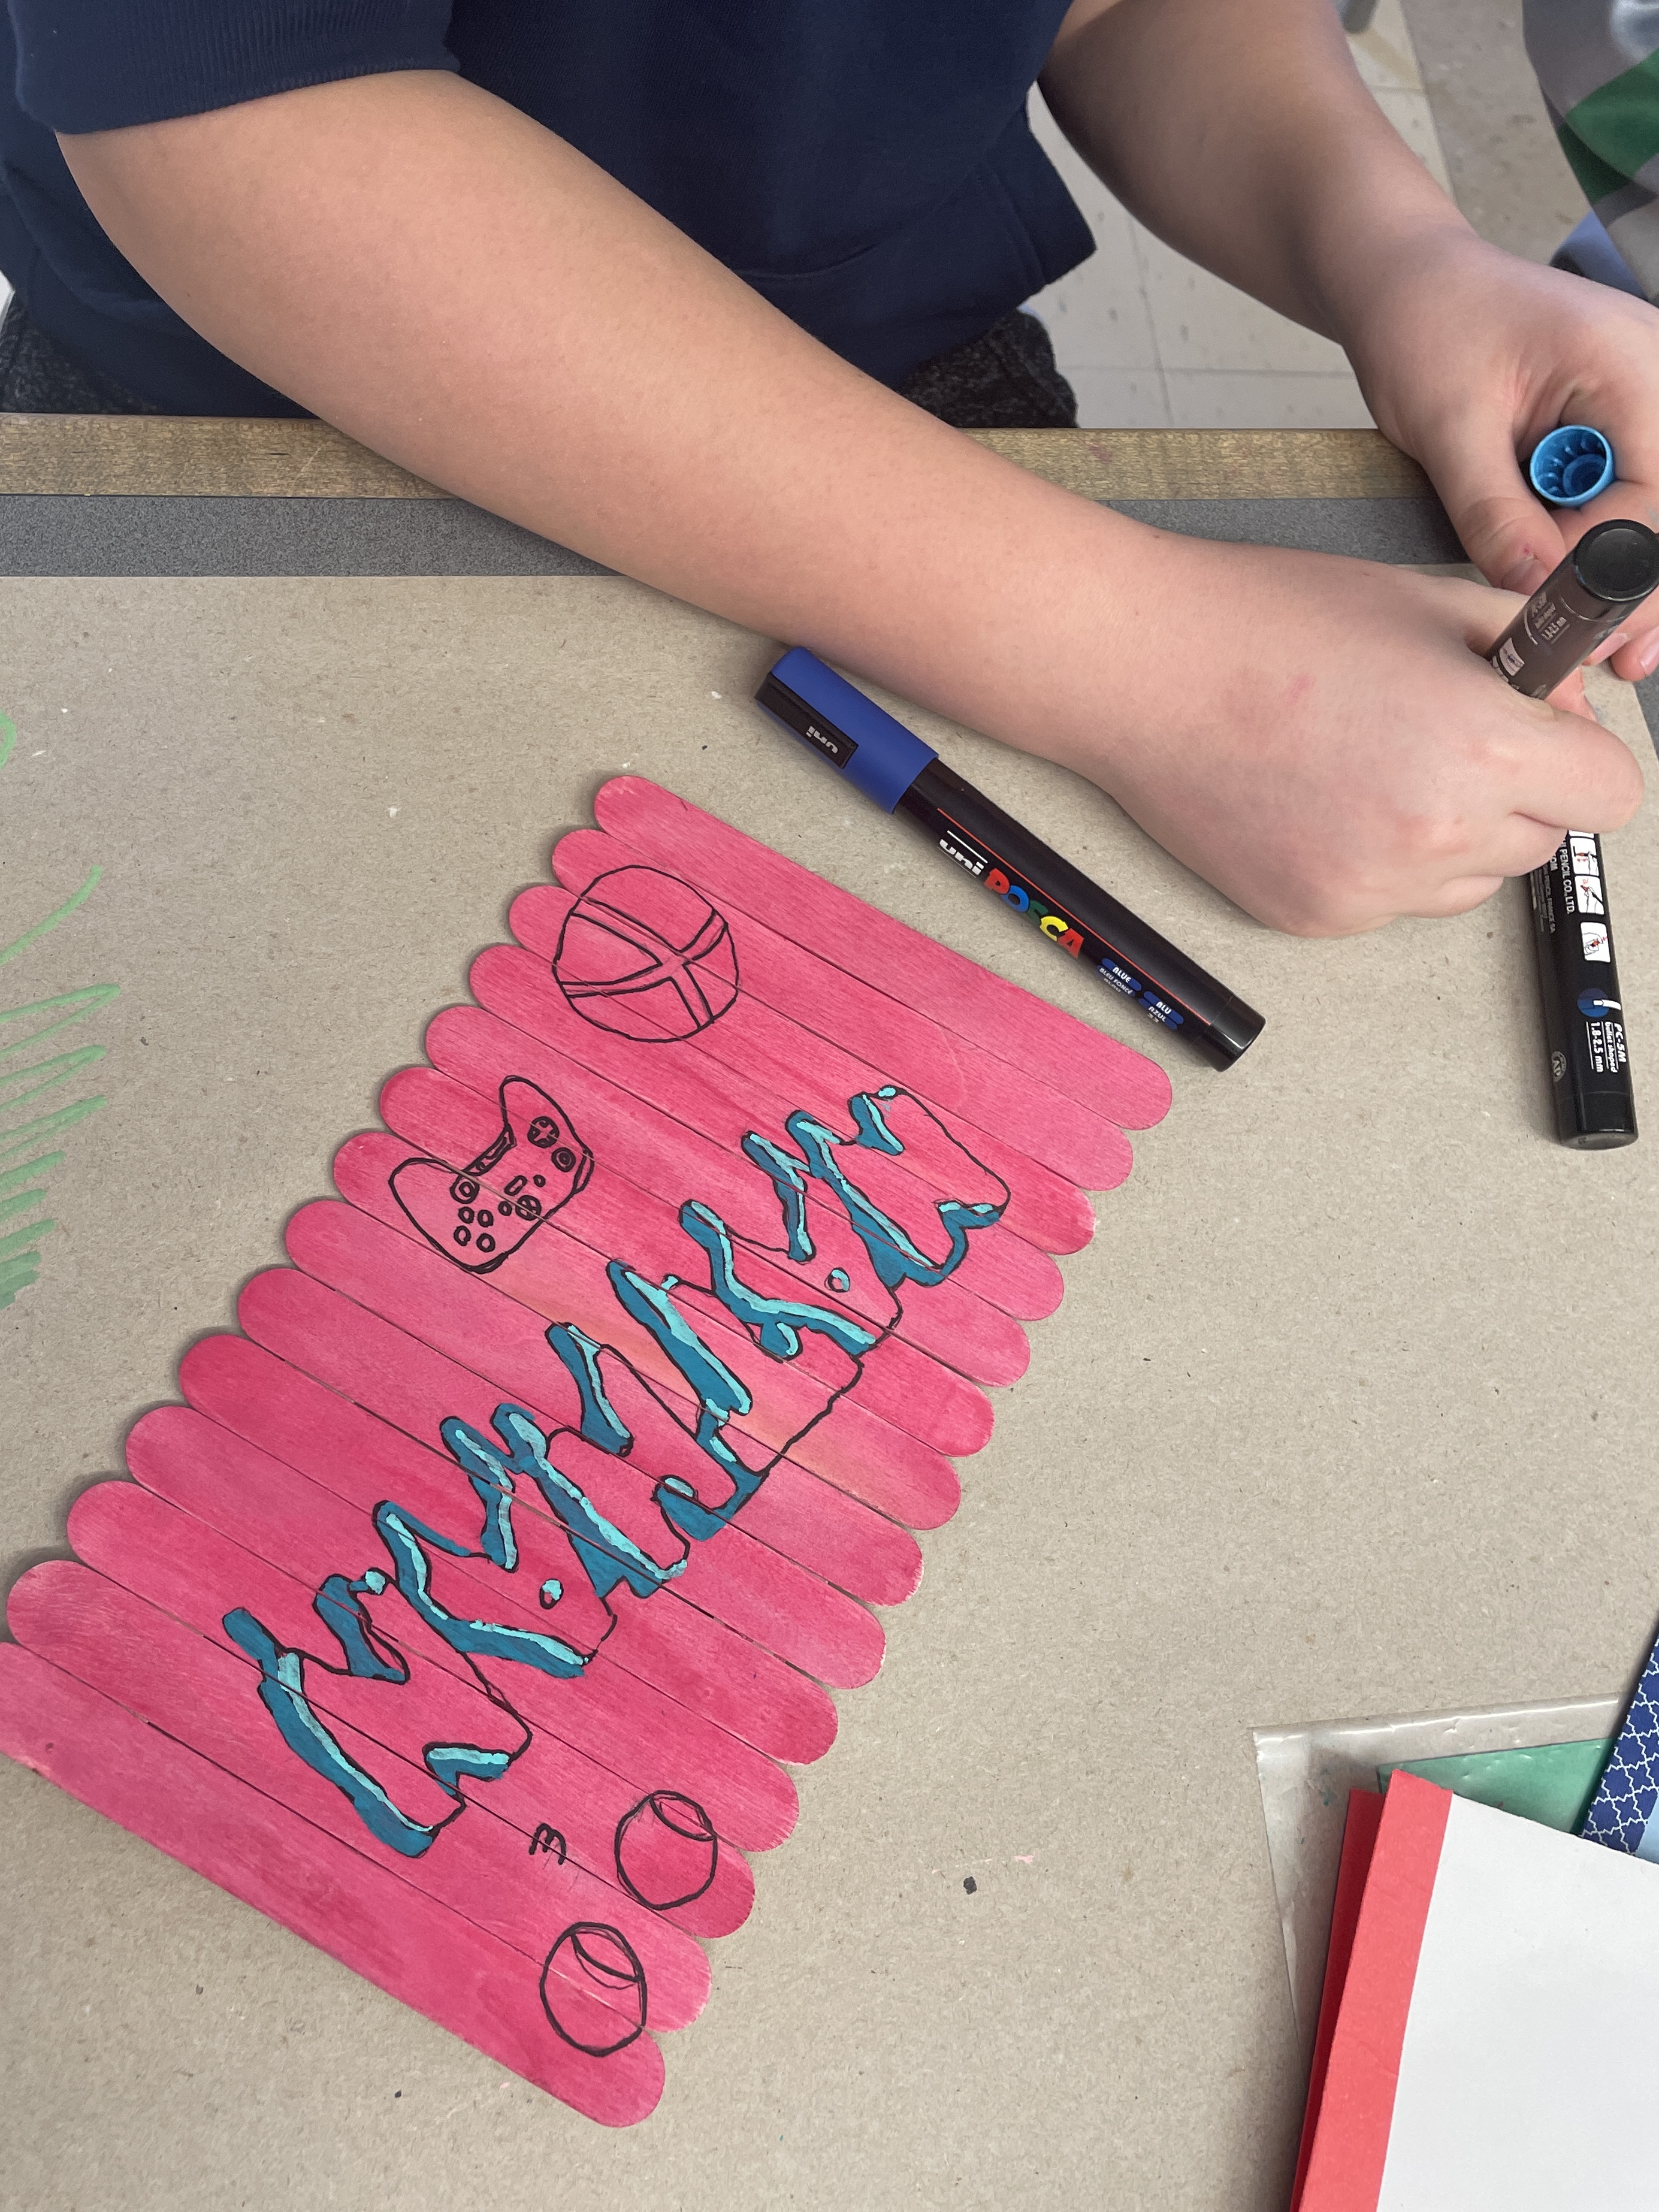
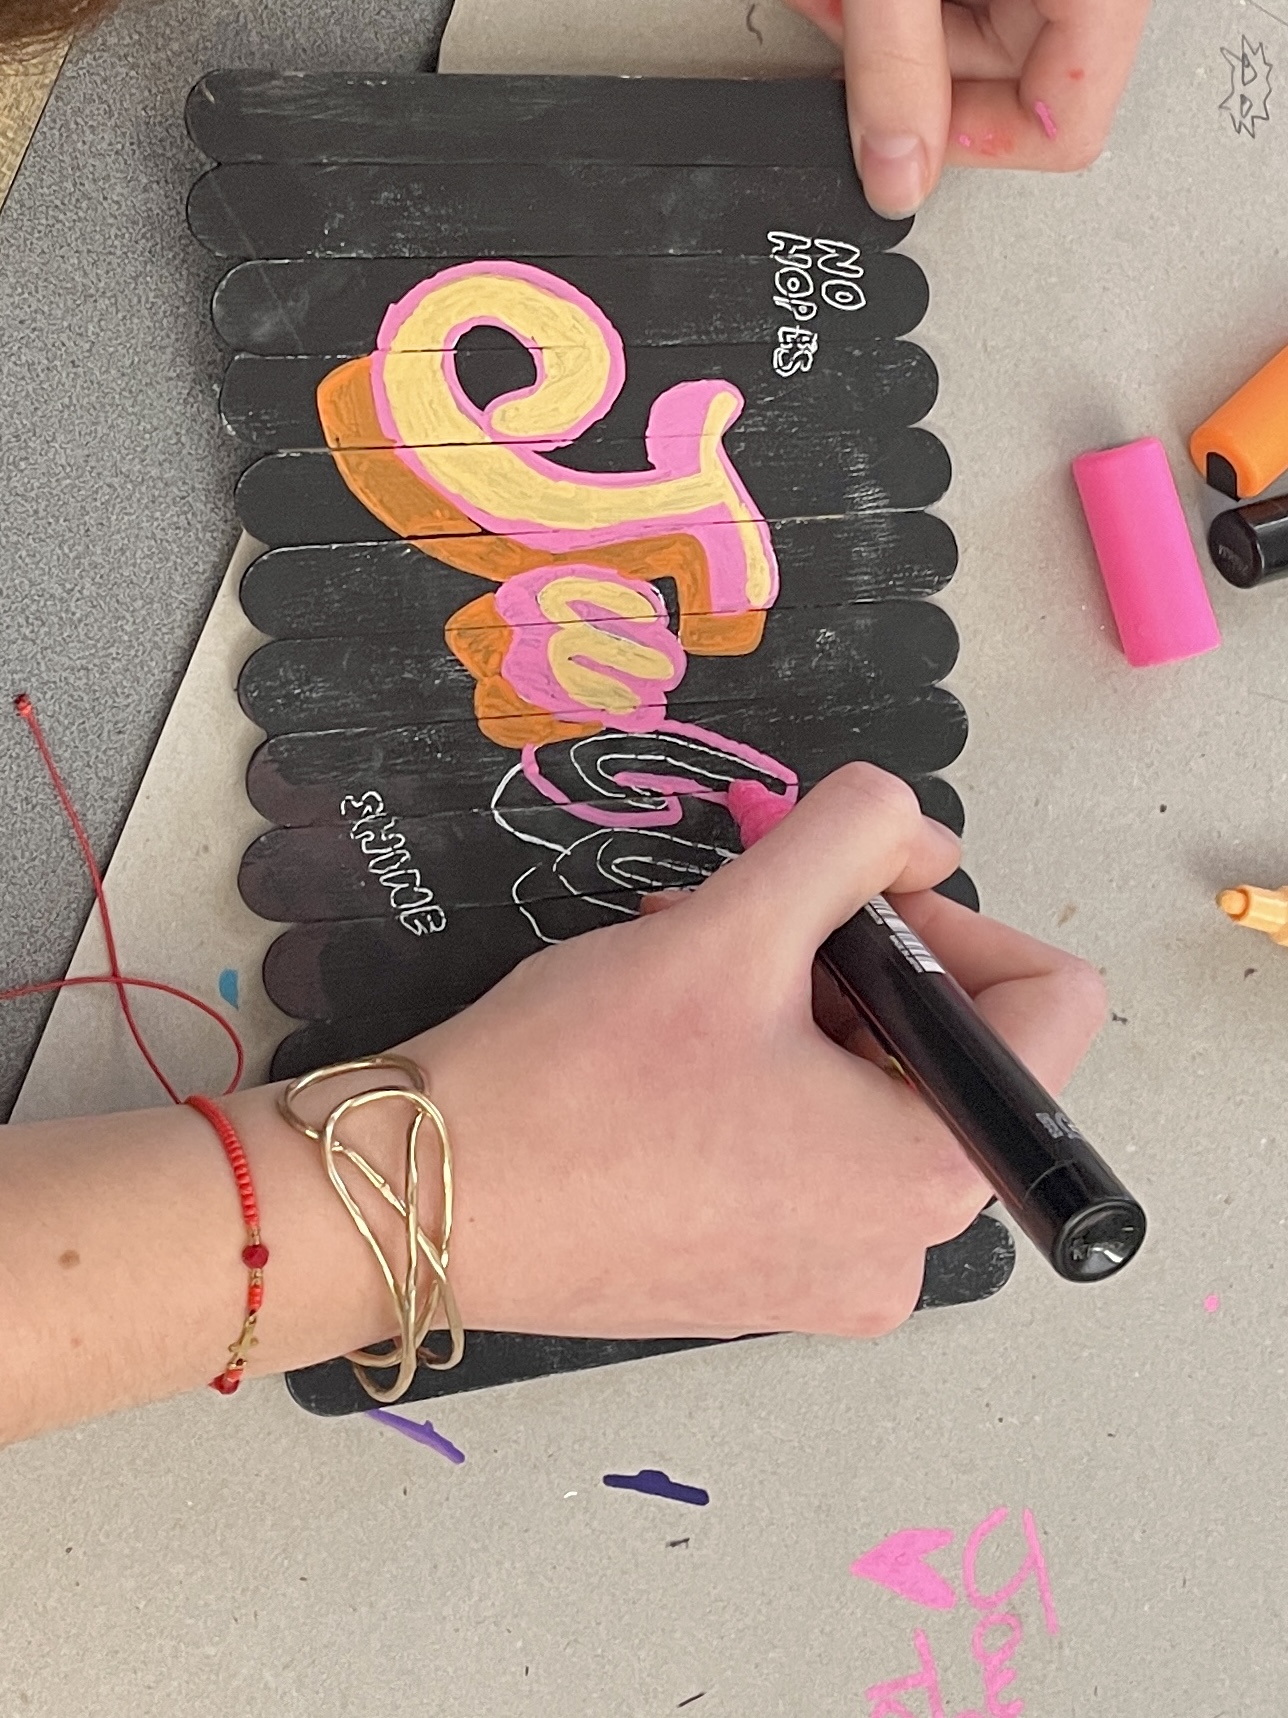
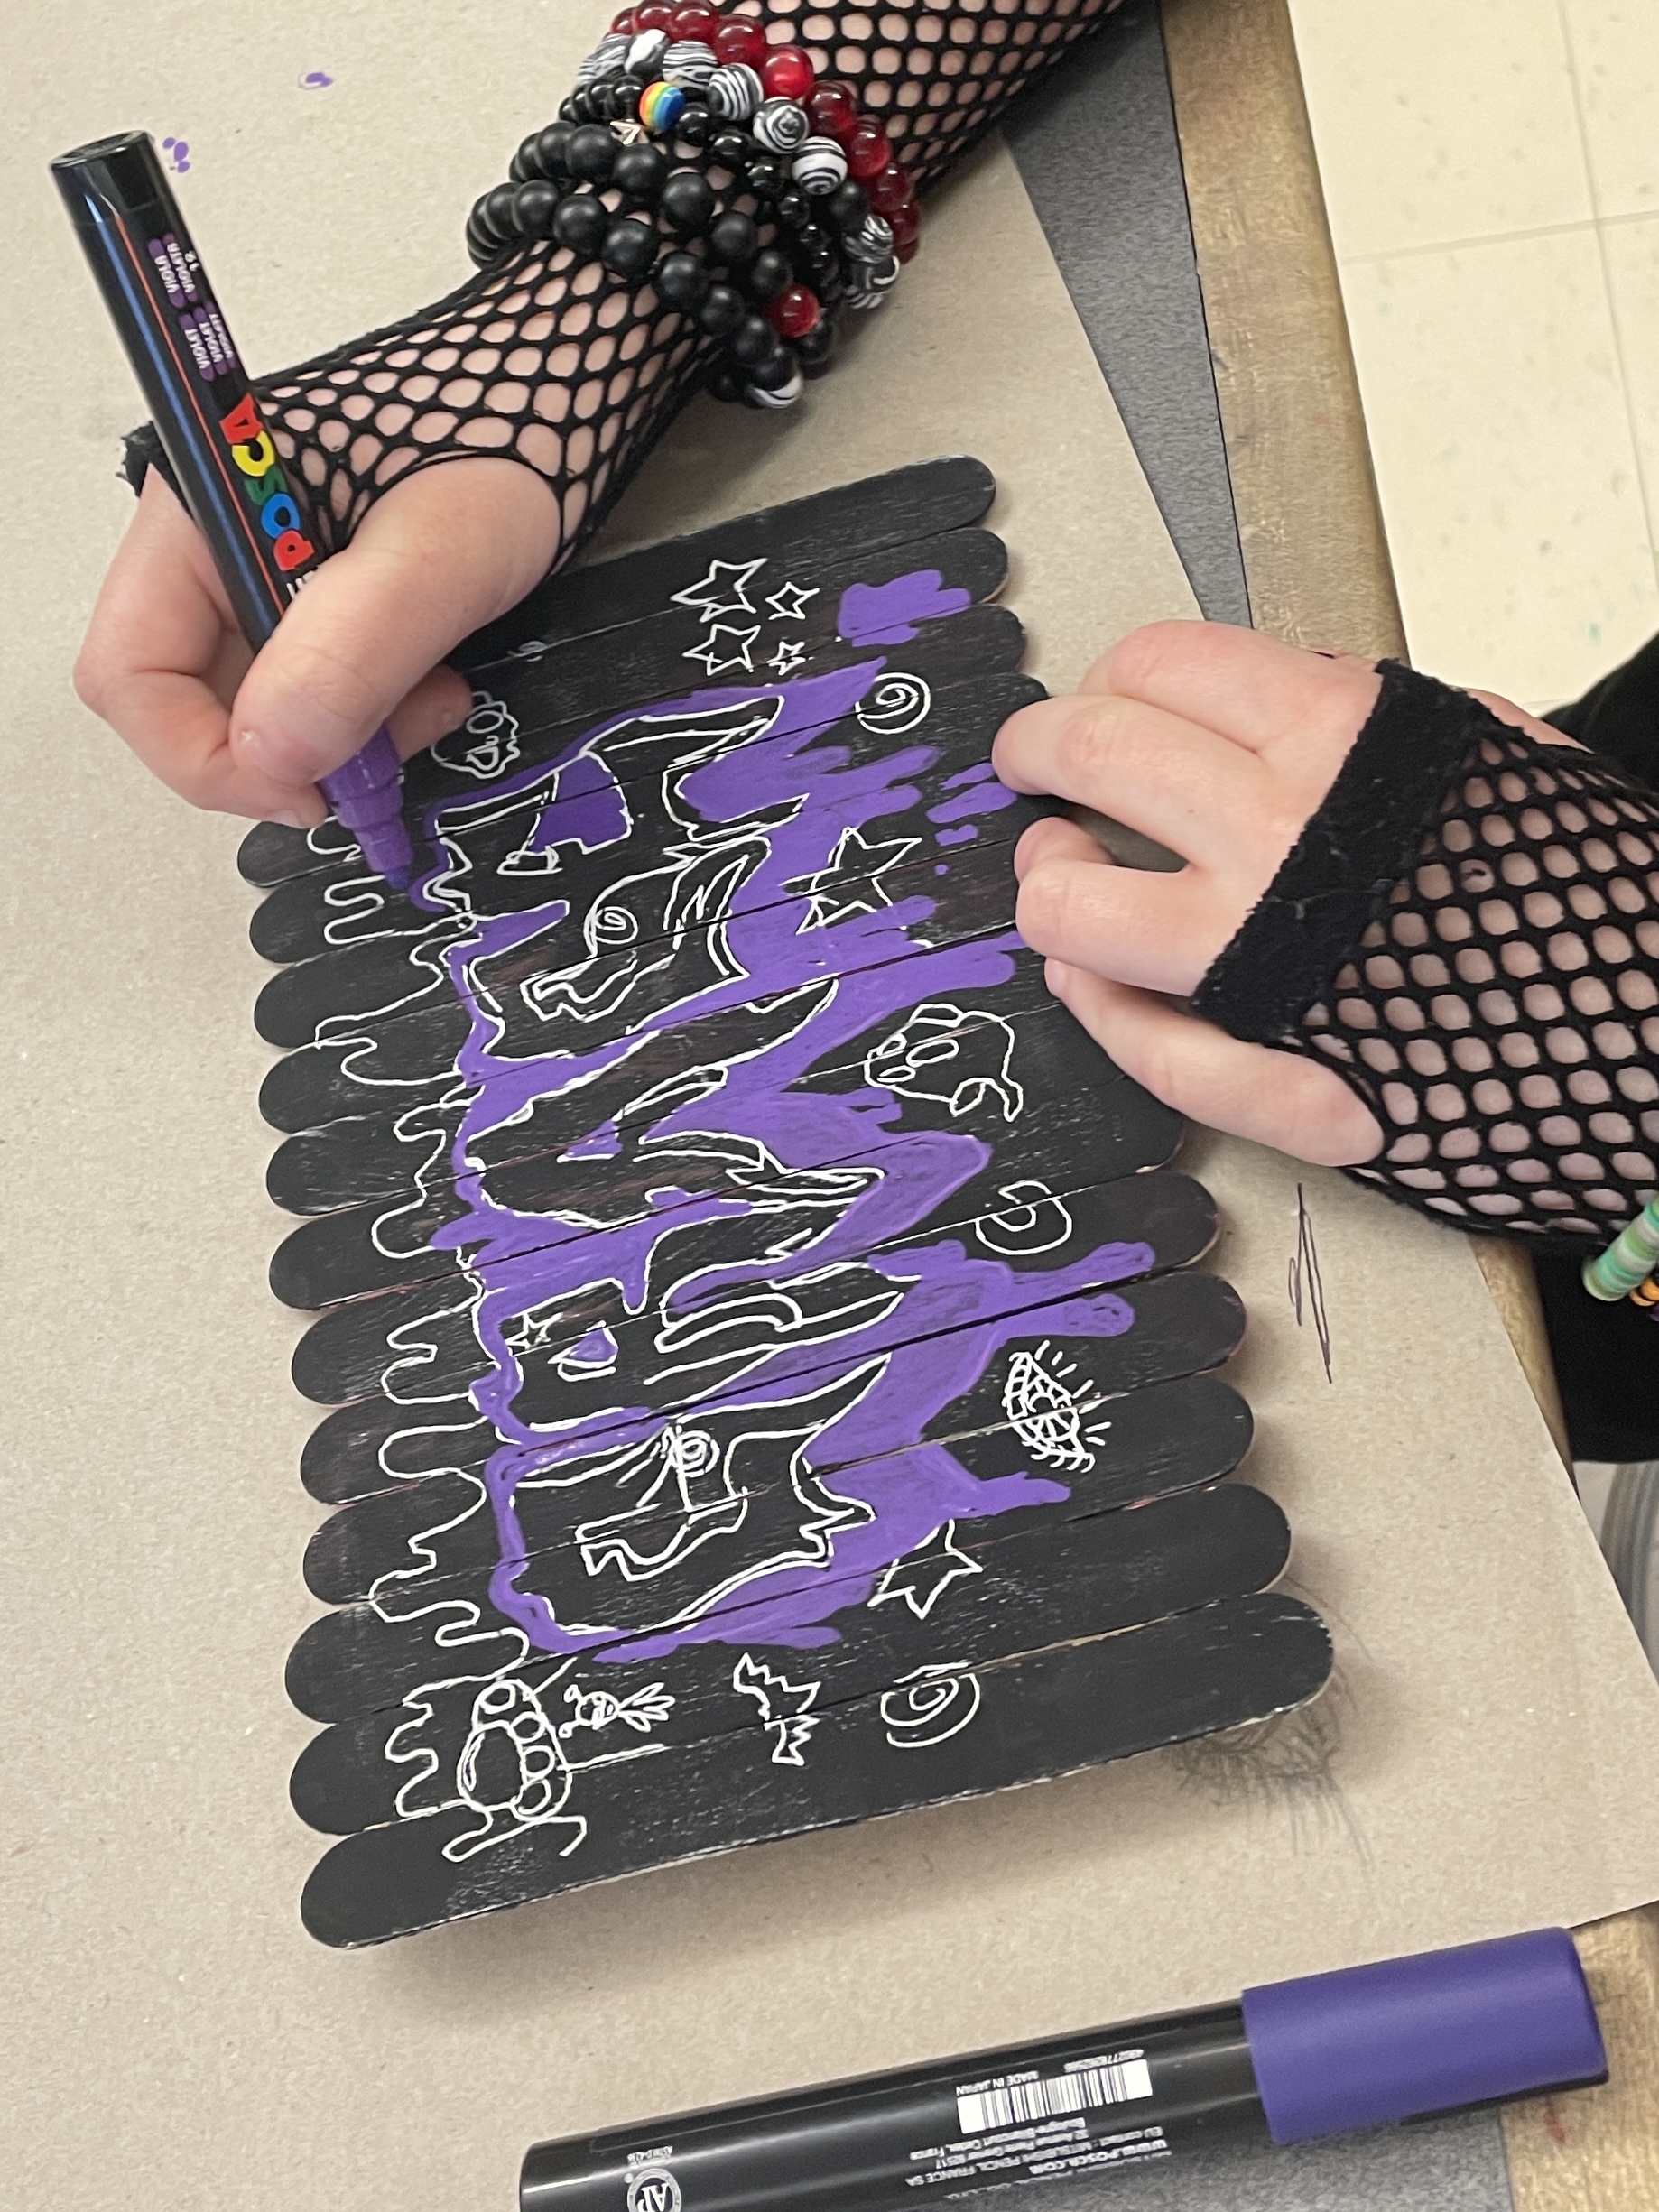
When the fence was assembled and dry, and the name design was complete on paper, we used good old fashioned carbon paper to transfer the Graffiti image to the fence! The kids were amazed that the simple pressure of a pen traced over their name could be enough to imprint the image on the fence. I inherited some packs of carbon paper when I started at my school 20 years ago, and it still works great! Gotta Love that old school “technology”— though trying to explain how carbon paper functioned with a typewriter to this generation of students produces a lot of blank stares… 🙂
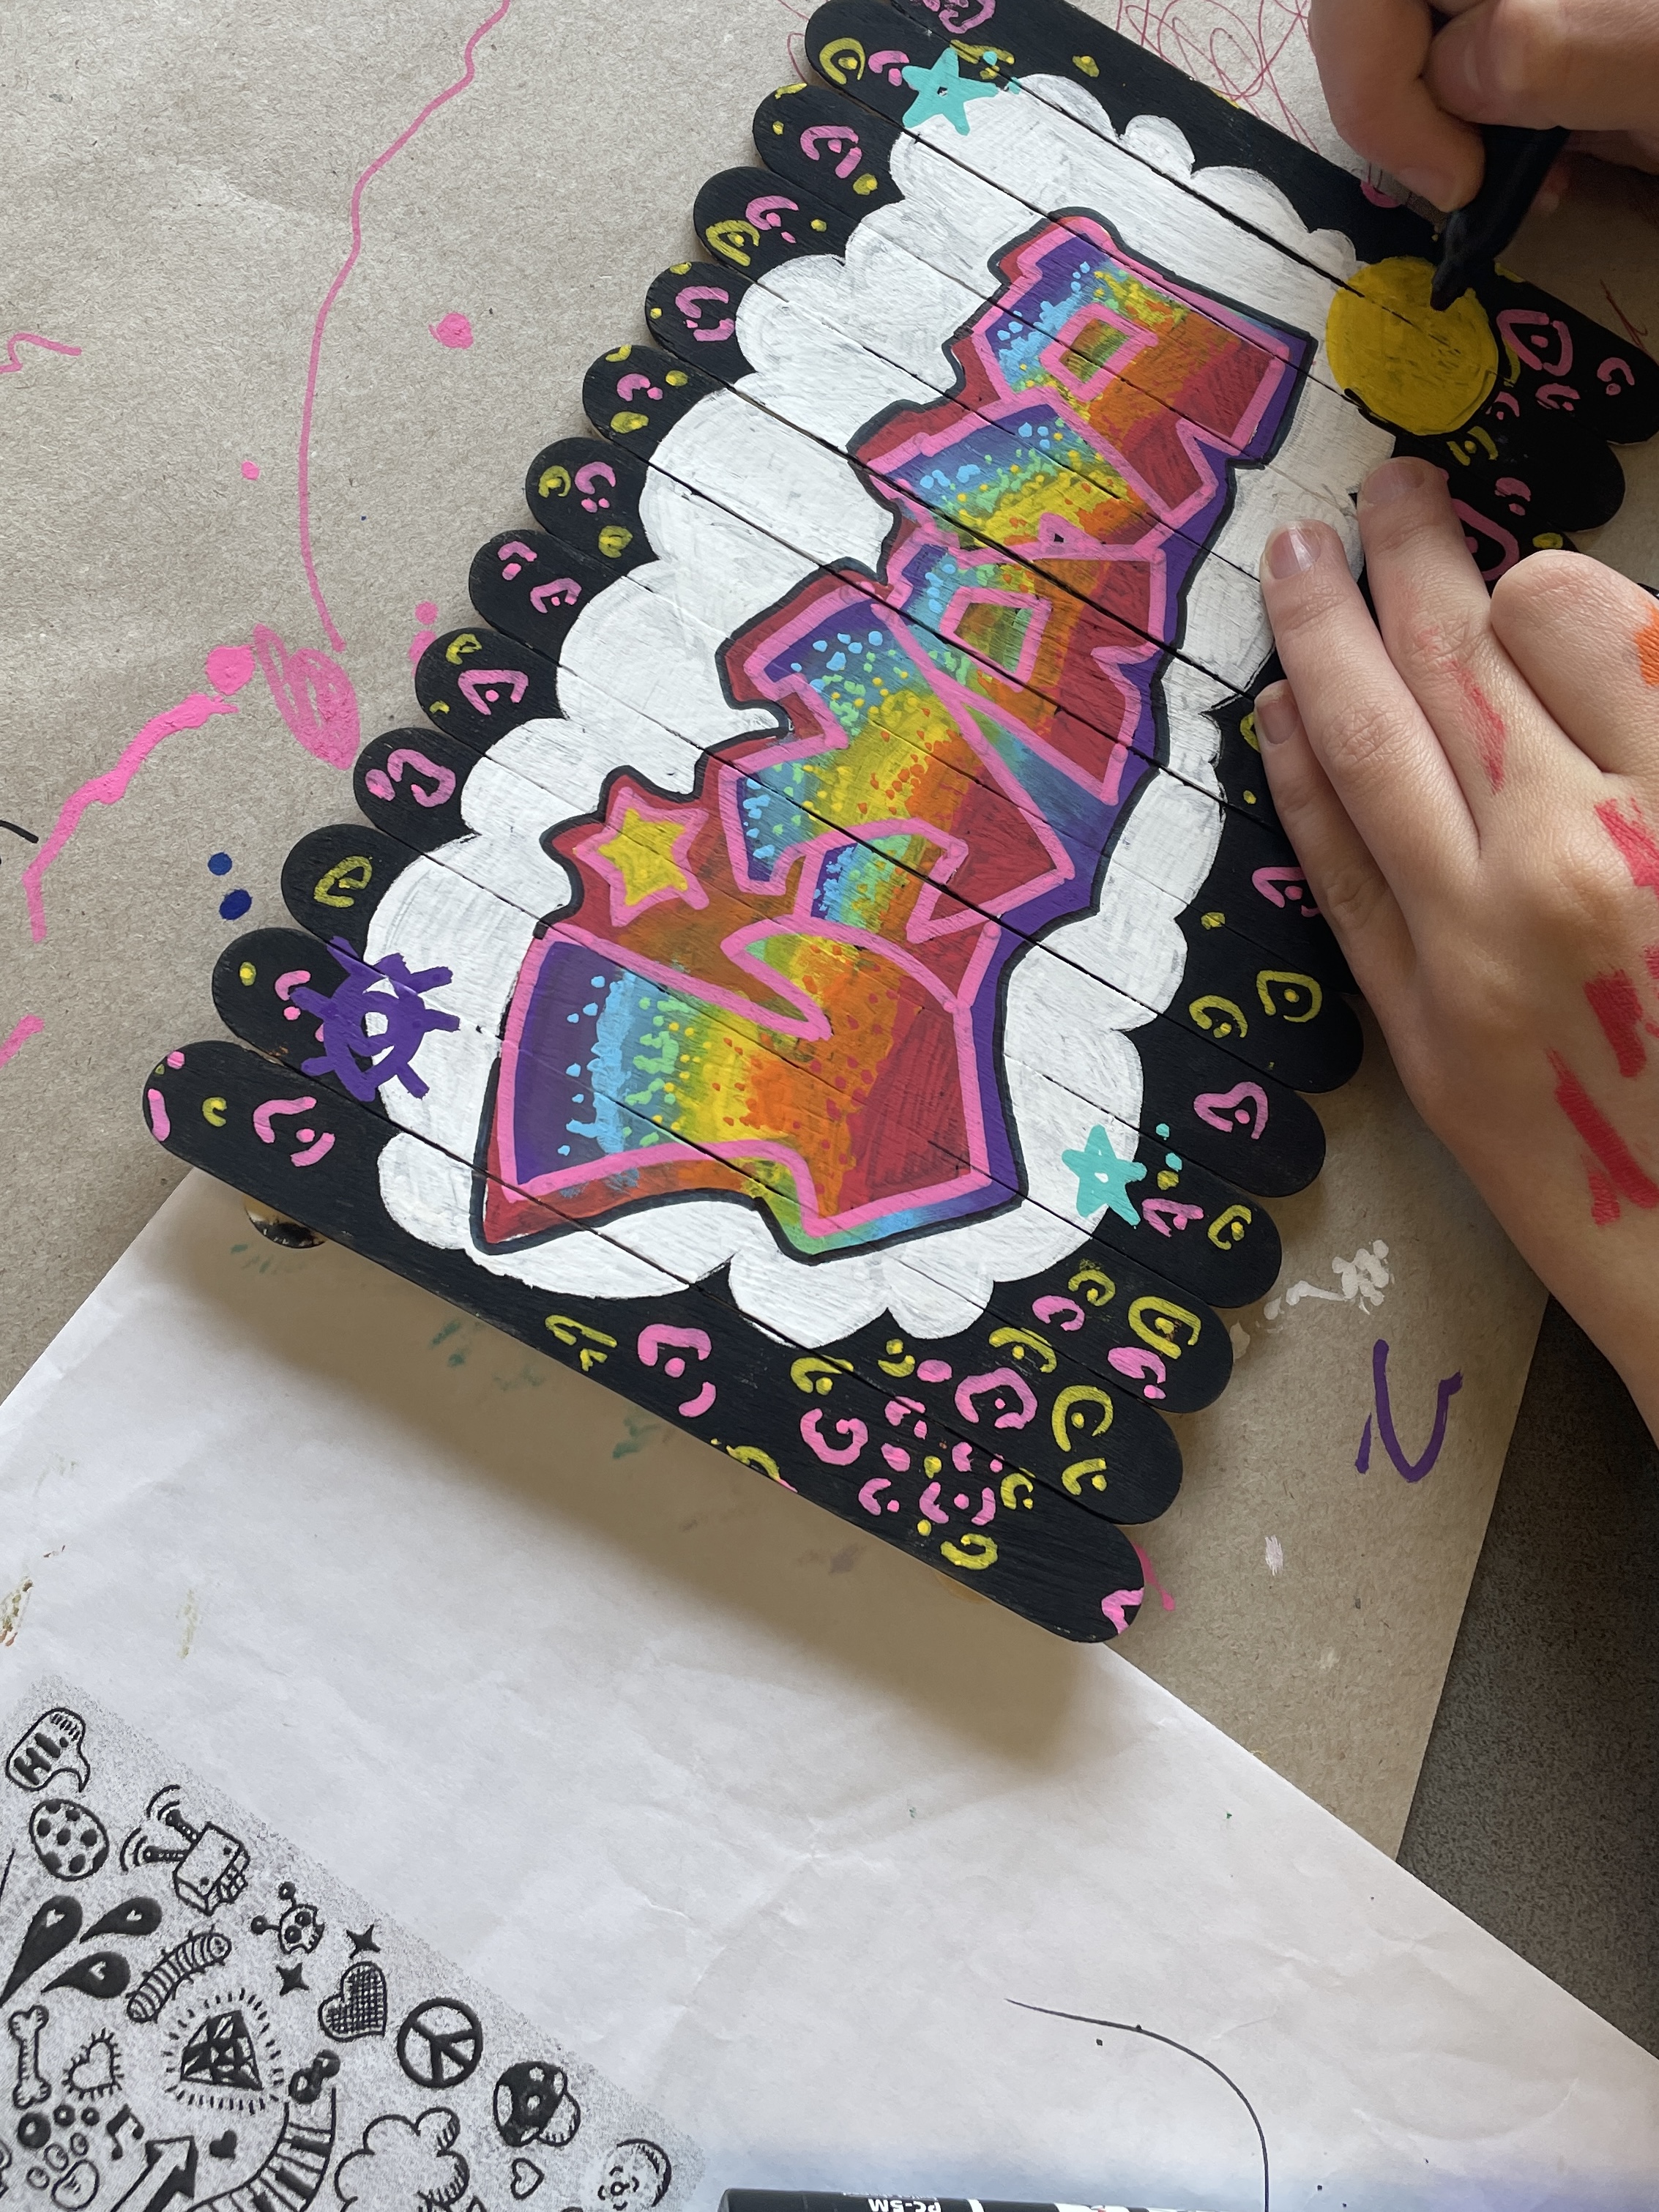
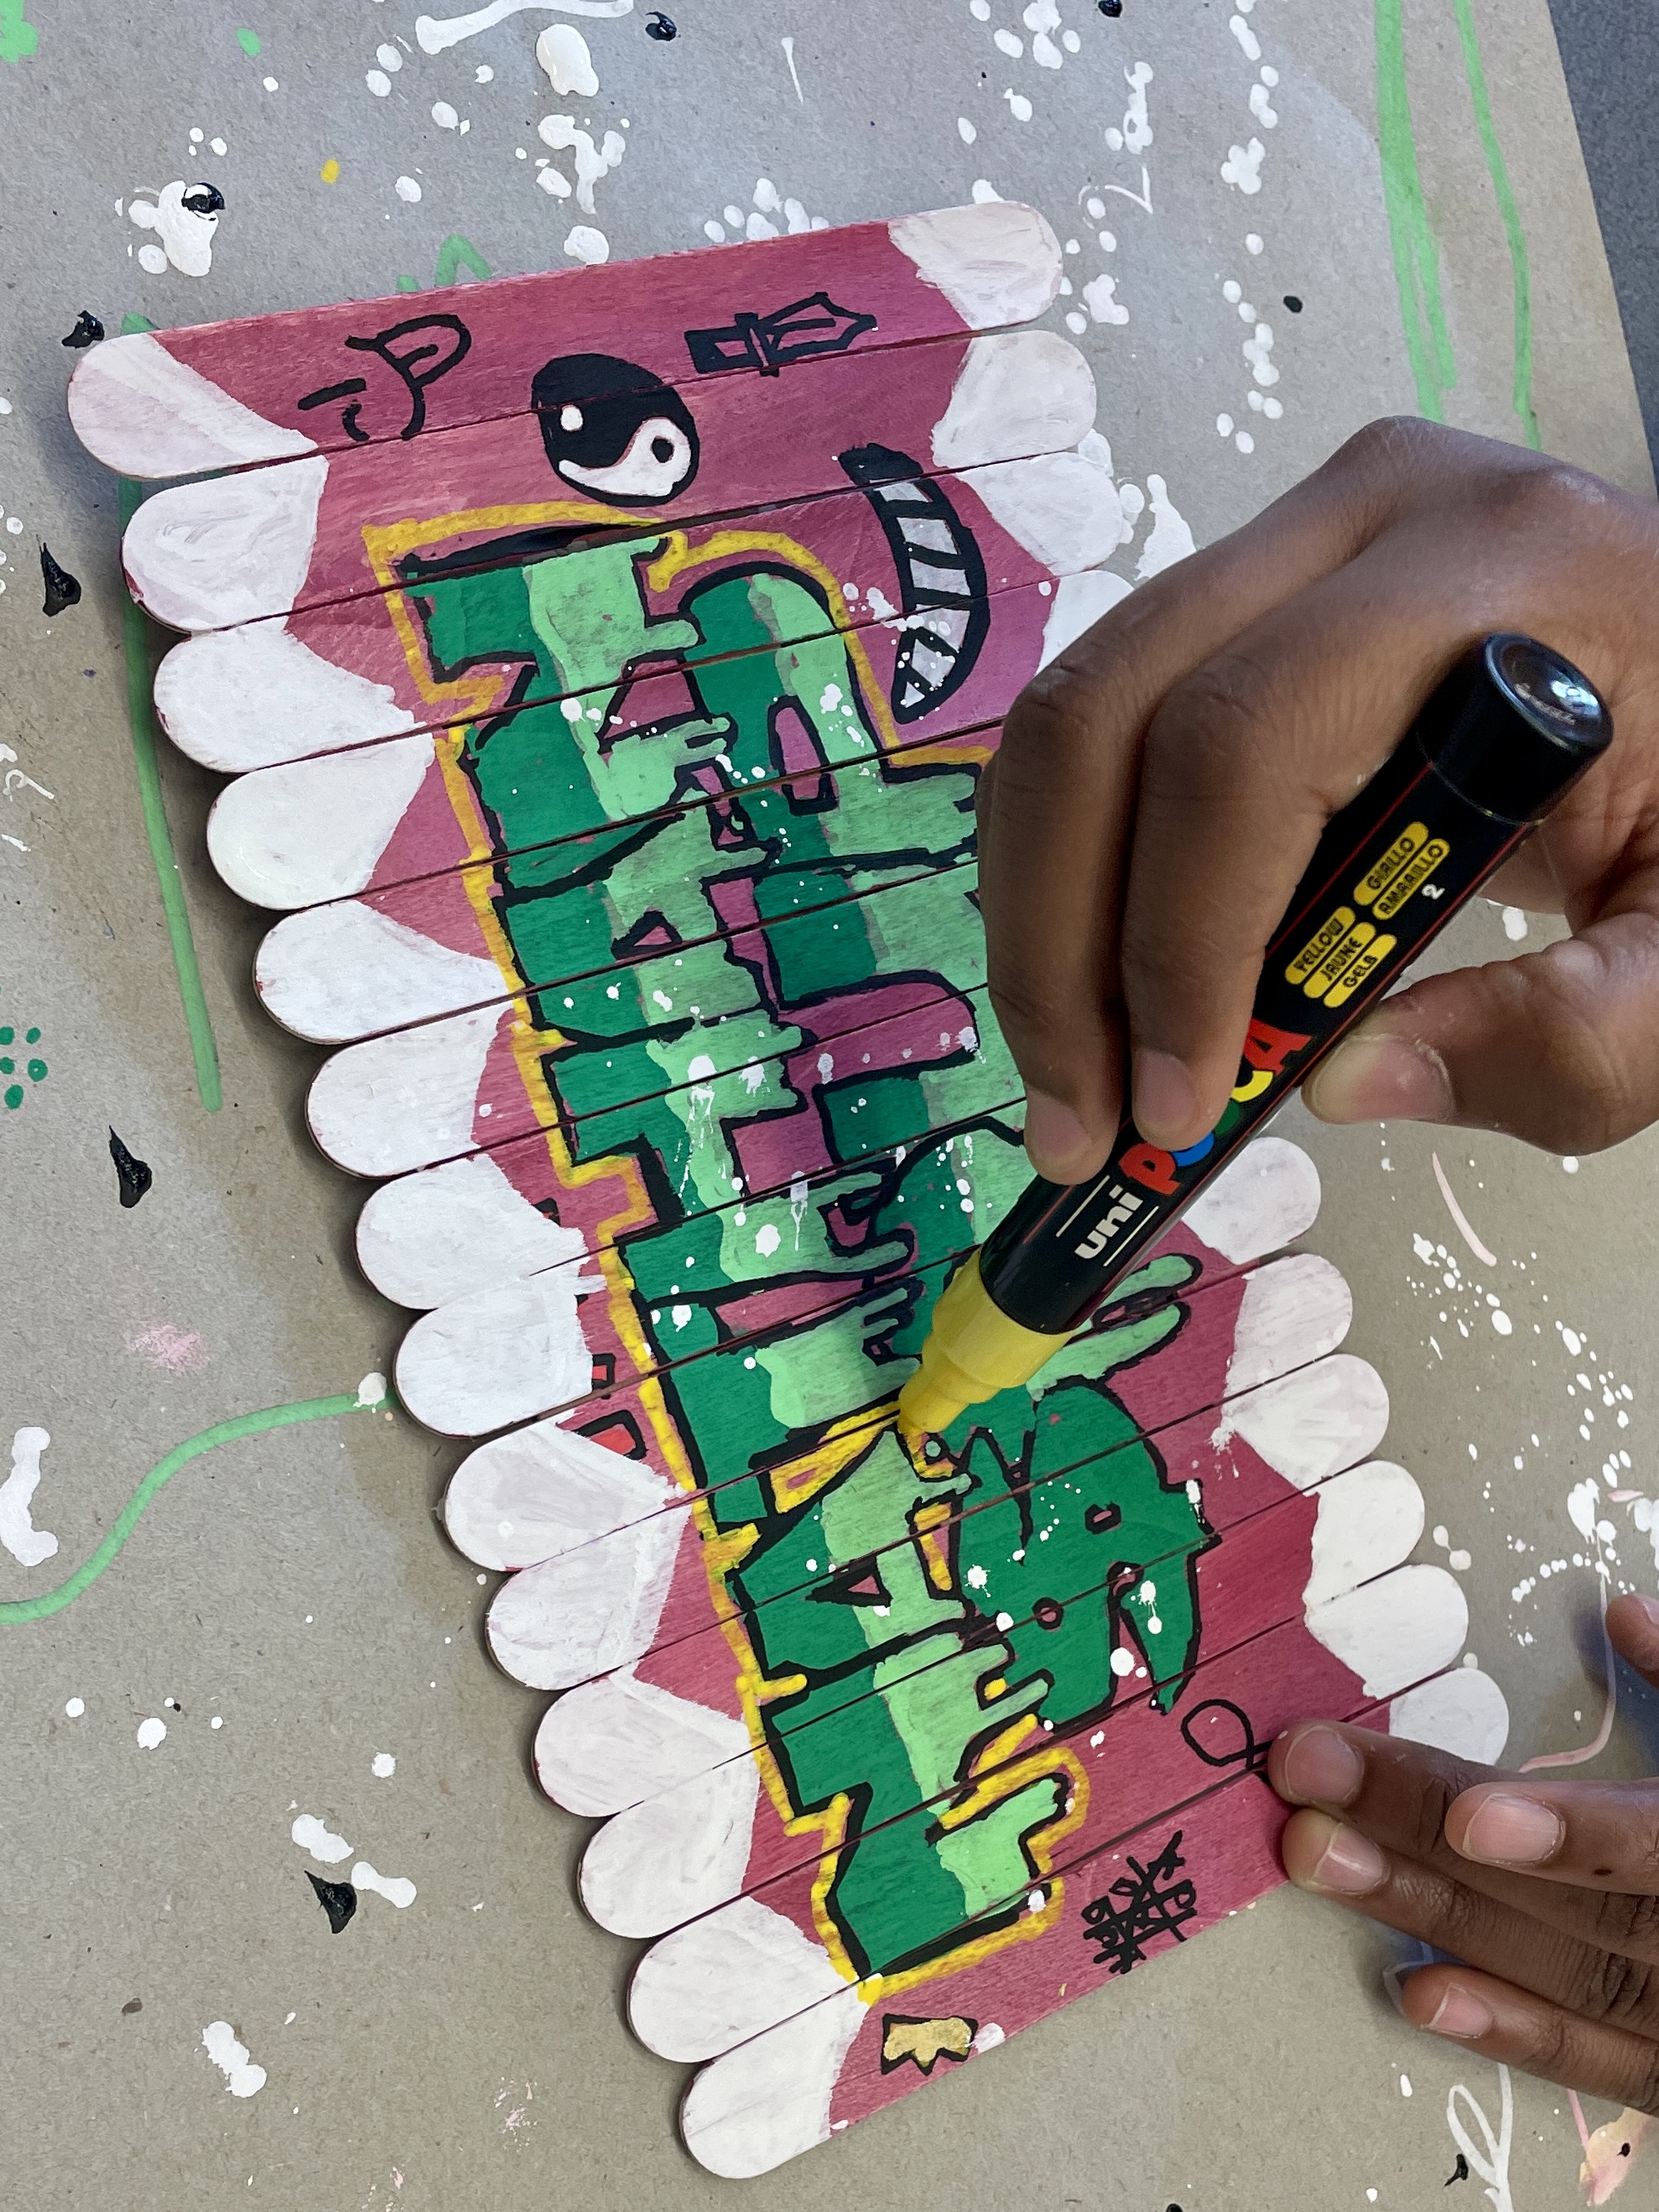
Color came next! (Most exciting material in my classroom: Posca Paint Pens!) We started by Sharpie-ing over the transferred outlines, just to make it easier to see. The basic rules we followed when using the Posca Paint pens was “background to foreground”: Start with the drip/splatter background, then do the letters, finish with the outlines and any surface reflections or “shine” effects you desire. Students also were required to add at least one “bonus feature” in their extra space, and I had various handouts of graffiti doodles from which to draw inspiration.
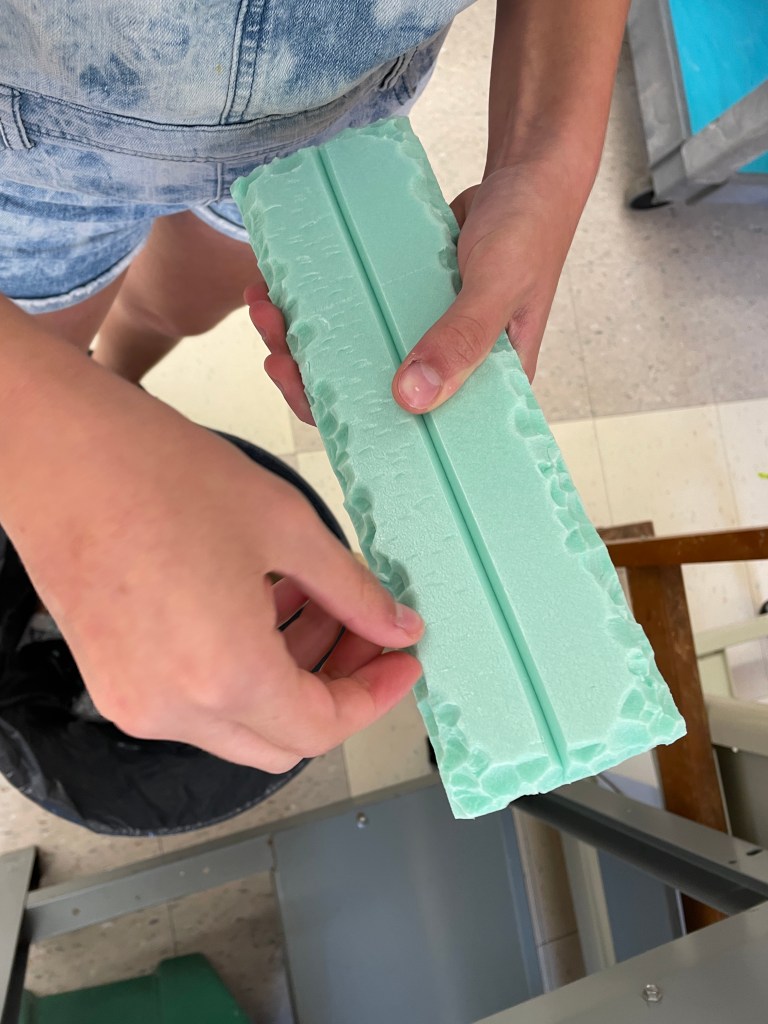
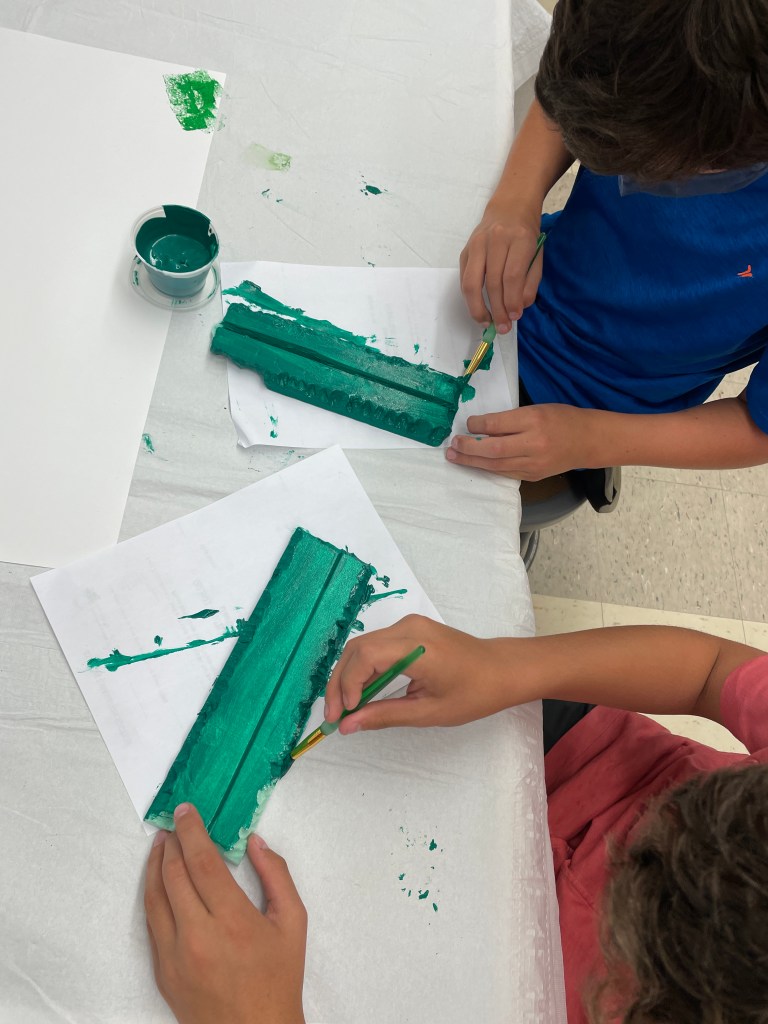
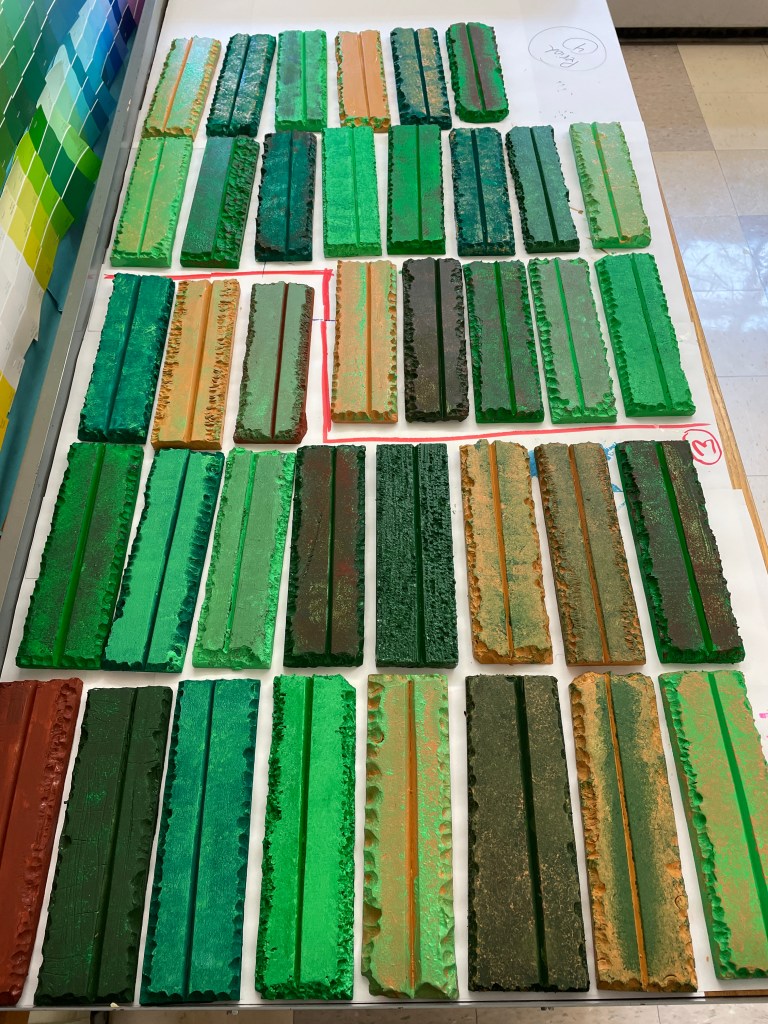
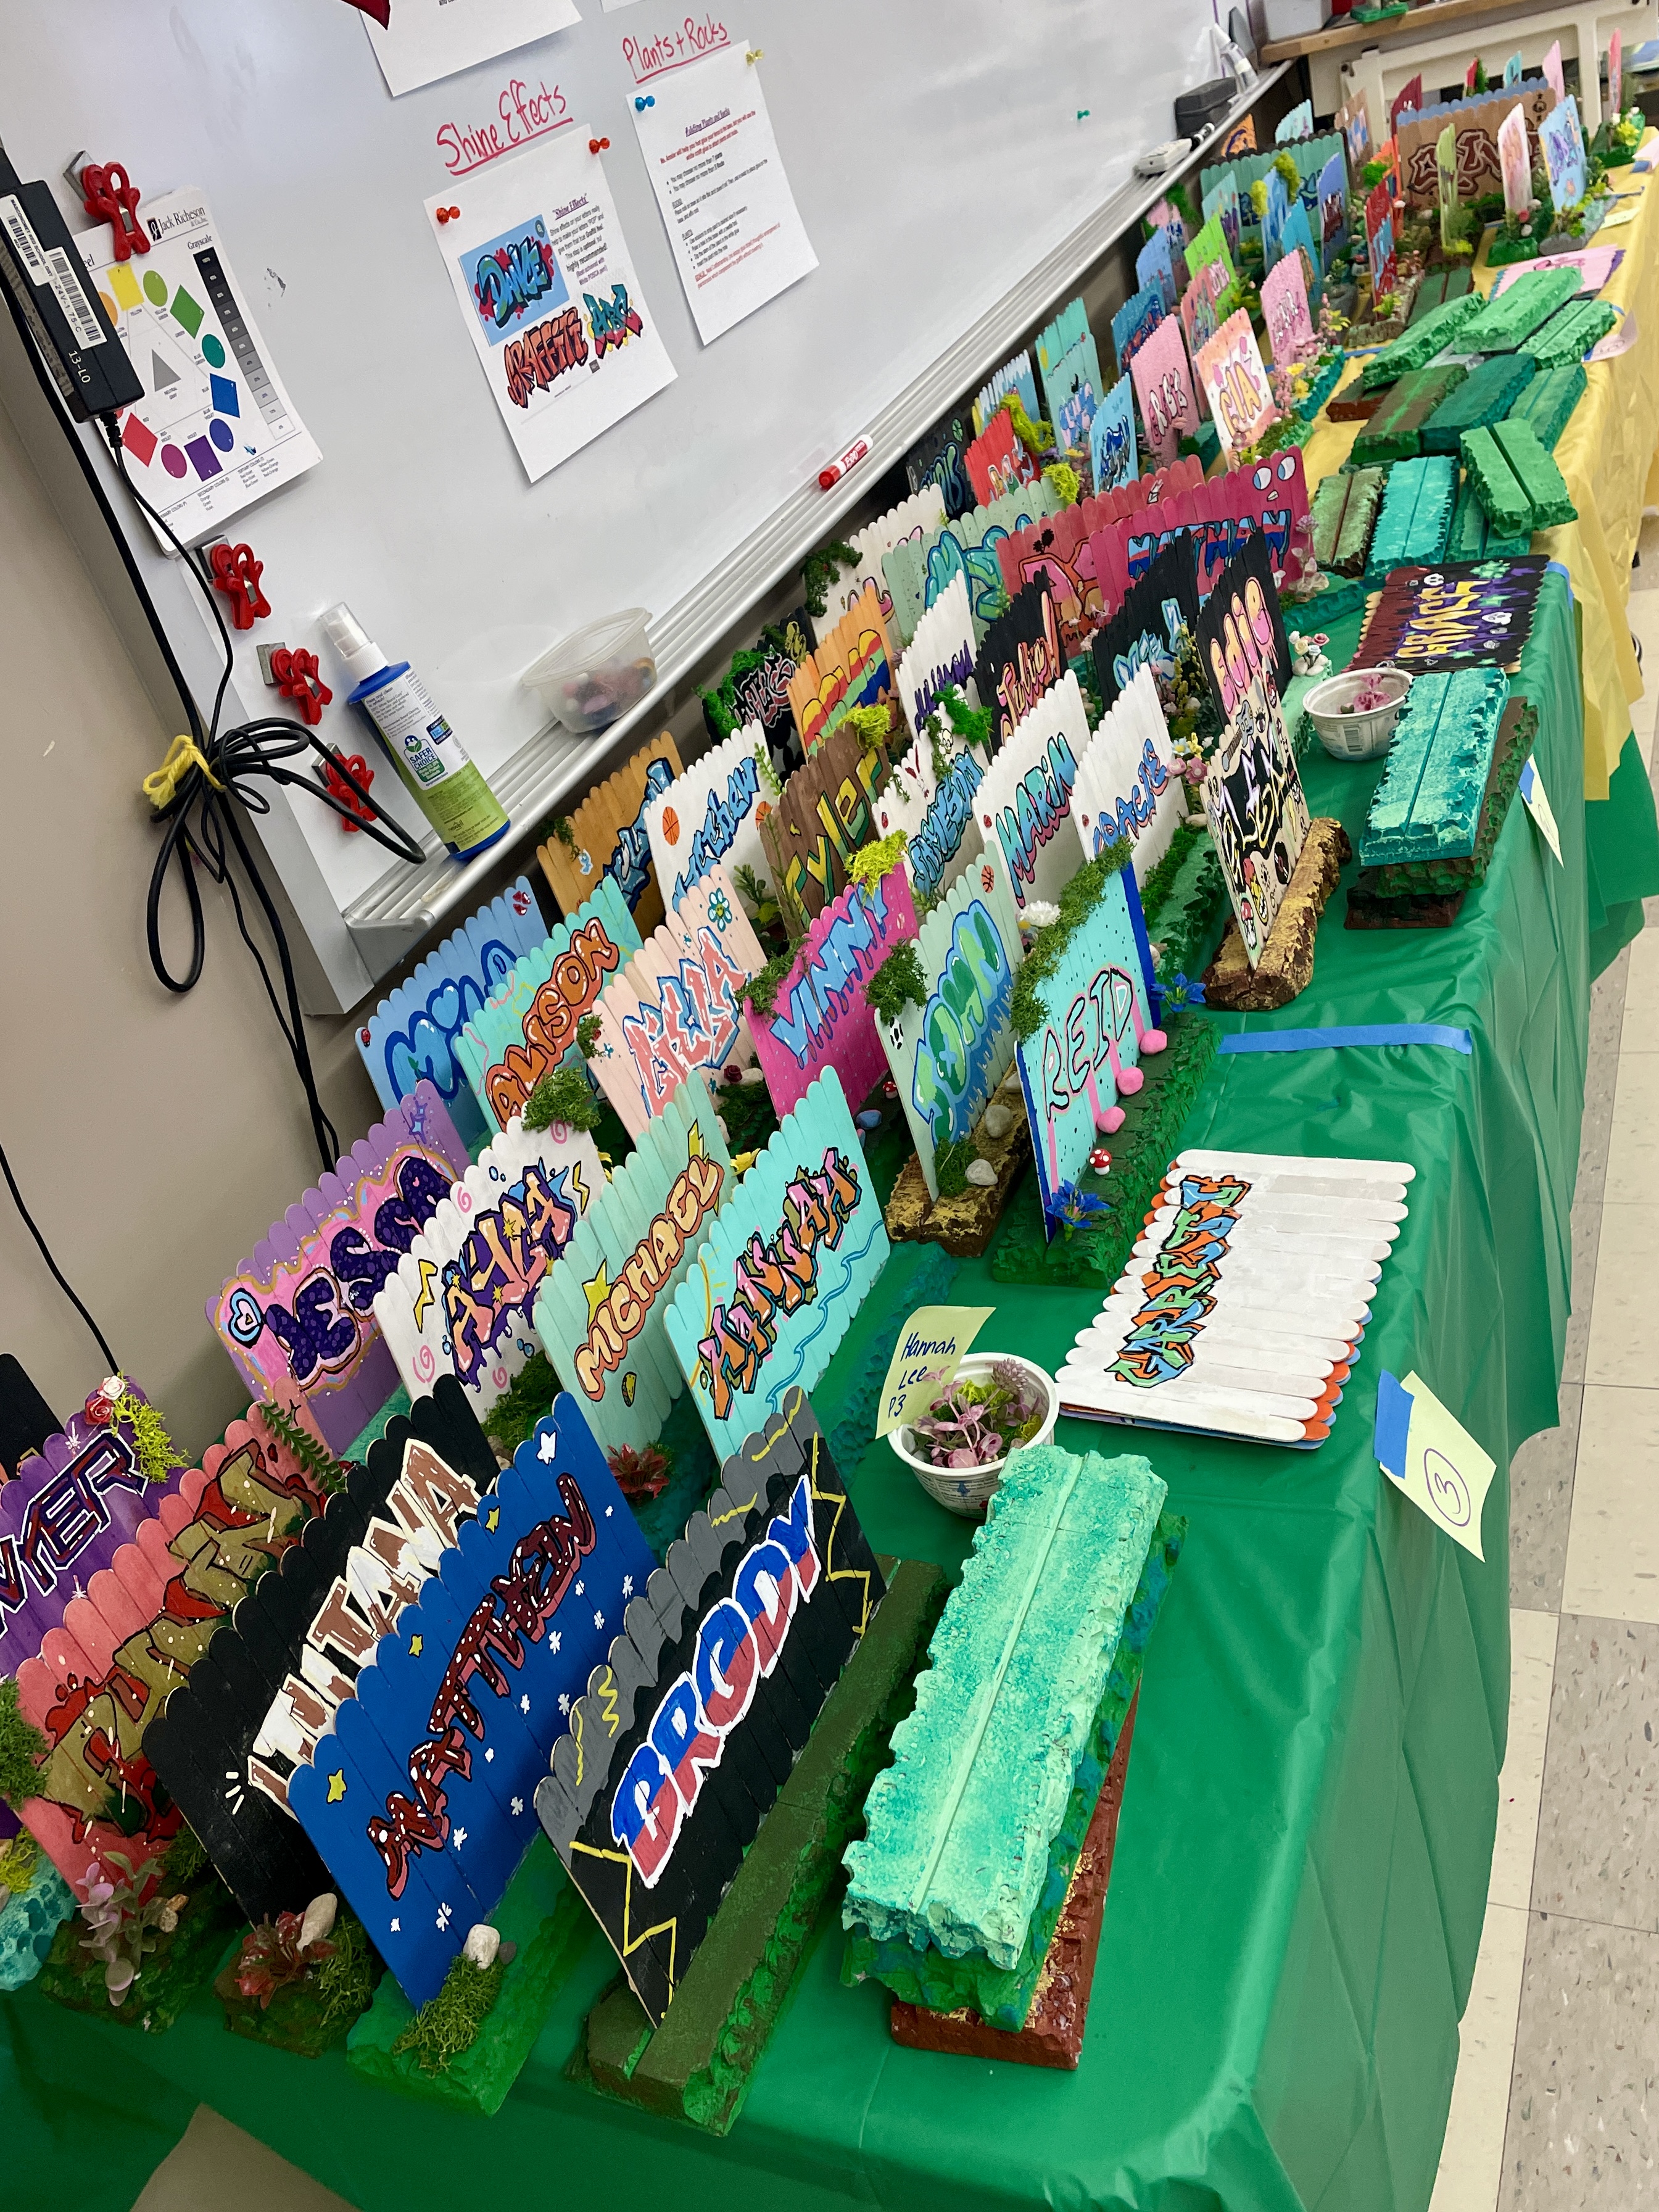
Once our fences were complete, it was time to make the base. We used rigid insulation foam for this. One 4’ by 8’ sheet was enough to make over one hundred 3” by 10” bases. I’ve bought both the ½” and 1″ thickness and it was easy to score and snap with a utility knife. This step was a little labor intensive, and I pre-cut the bases for the kids, as I did not feel up to the challenge of teaching X-acto skills to a large class of 7th graders. I also cut a narrow v-shaped trough in each piece in which we inserted the fence. The kids did distress their own base prior to painting, however, by using their fingertips to break away small chips. This gave the cubic pieces more of an organic appearance. On the day we painted, I set up my six tables with variations of green and brown acrylic paint. Students moved to one table and brushed their base a solid color, then moved to a second table and sponged on a second, contrasting color. The variations achieved by mixing and matching just six color options are pretty cool!
Last but not least, we hot-glued the completed fence into the dried foam base. Students had the option of hot-gluing pebbles, stones, or small pieces of fake plants to their base to complete the look of their graffiti fence scene! Amazon is a great place to buy decorative moss and miniature plants in bulk! Search it up and you’ll see many options!
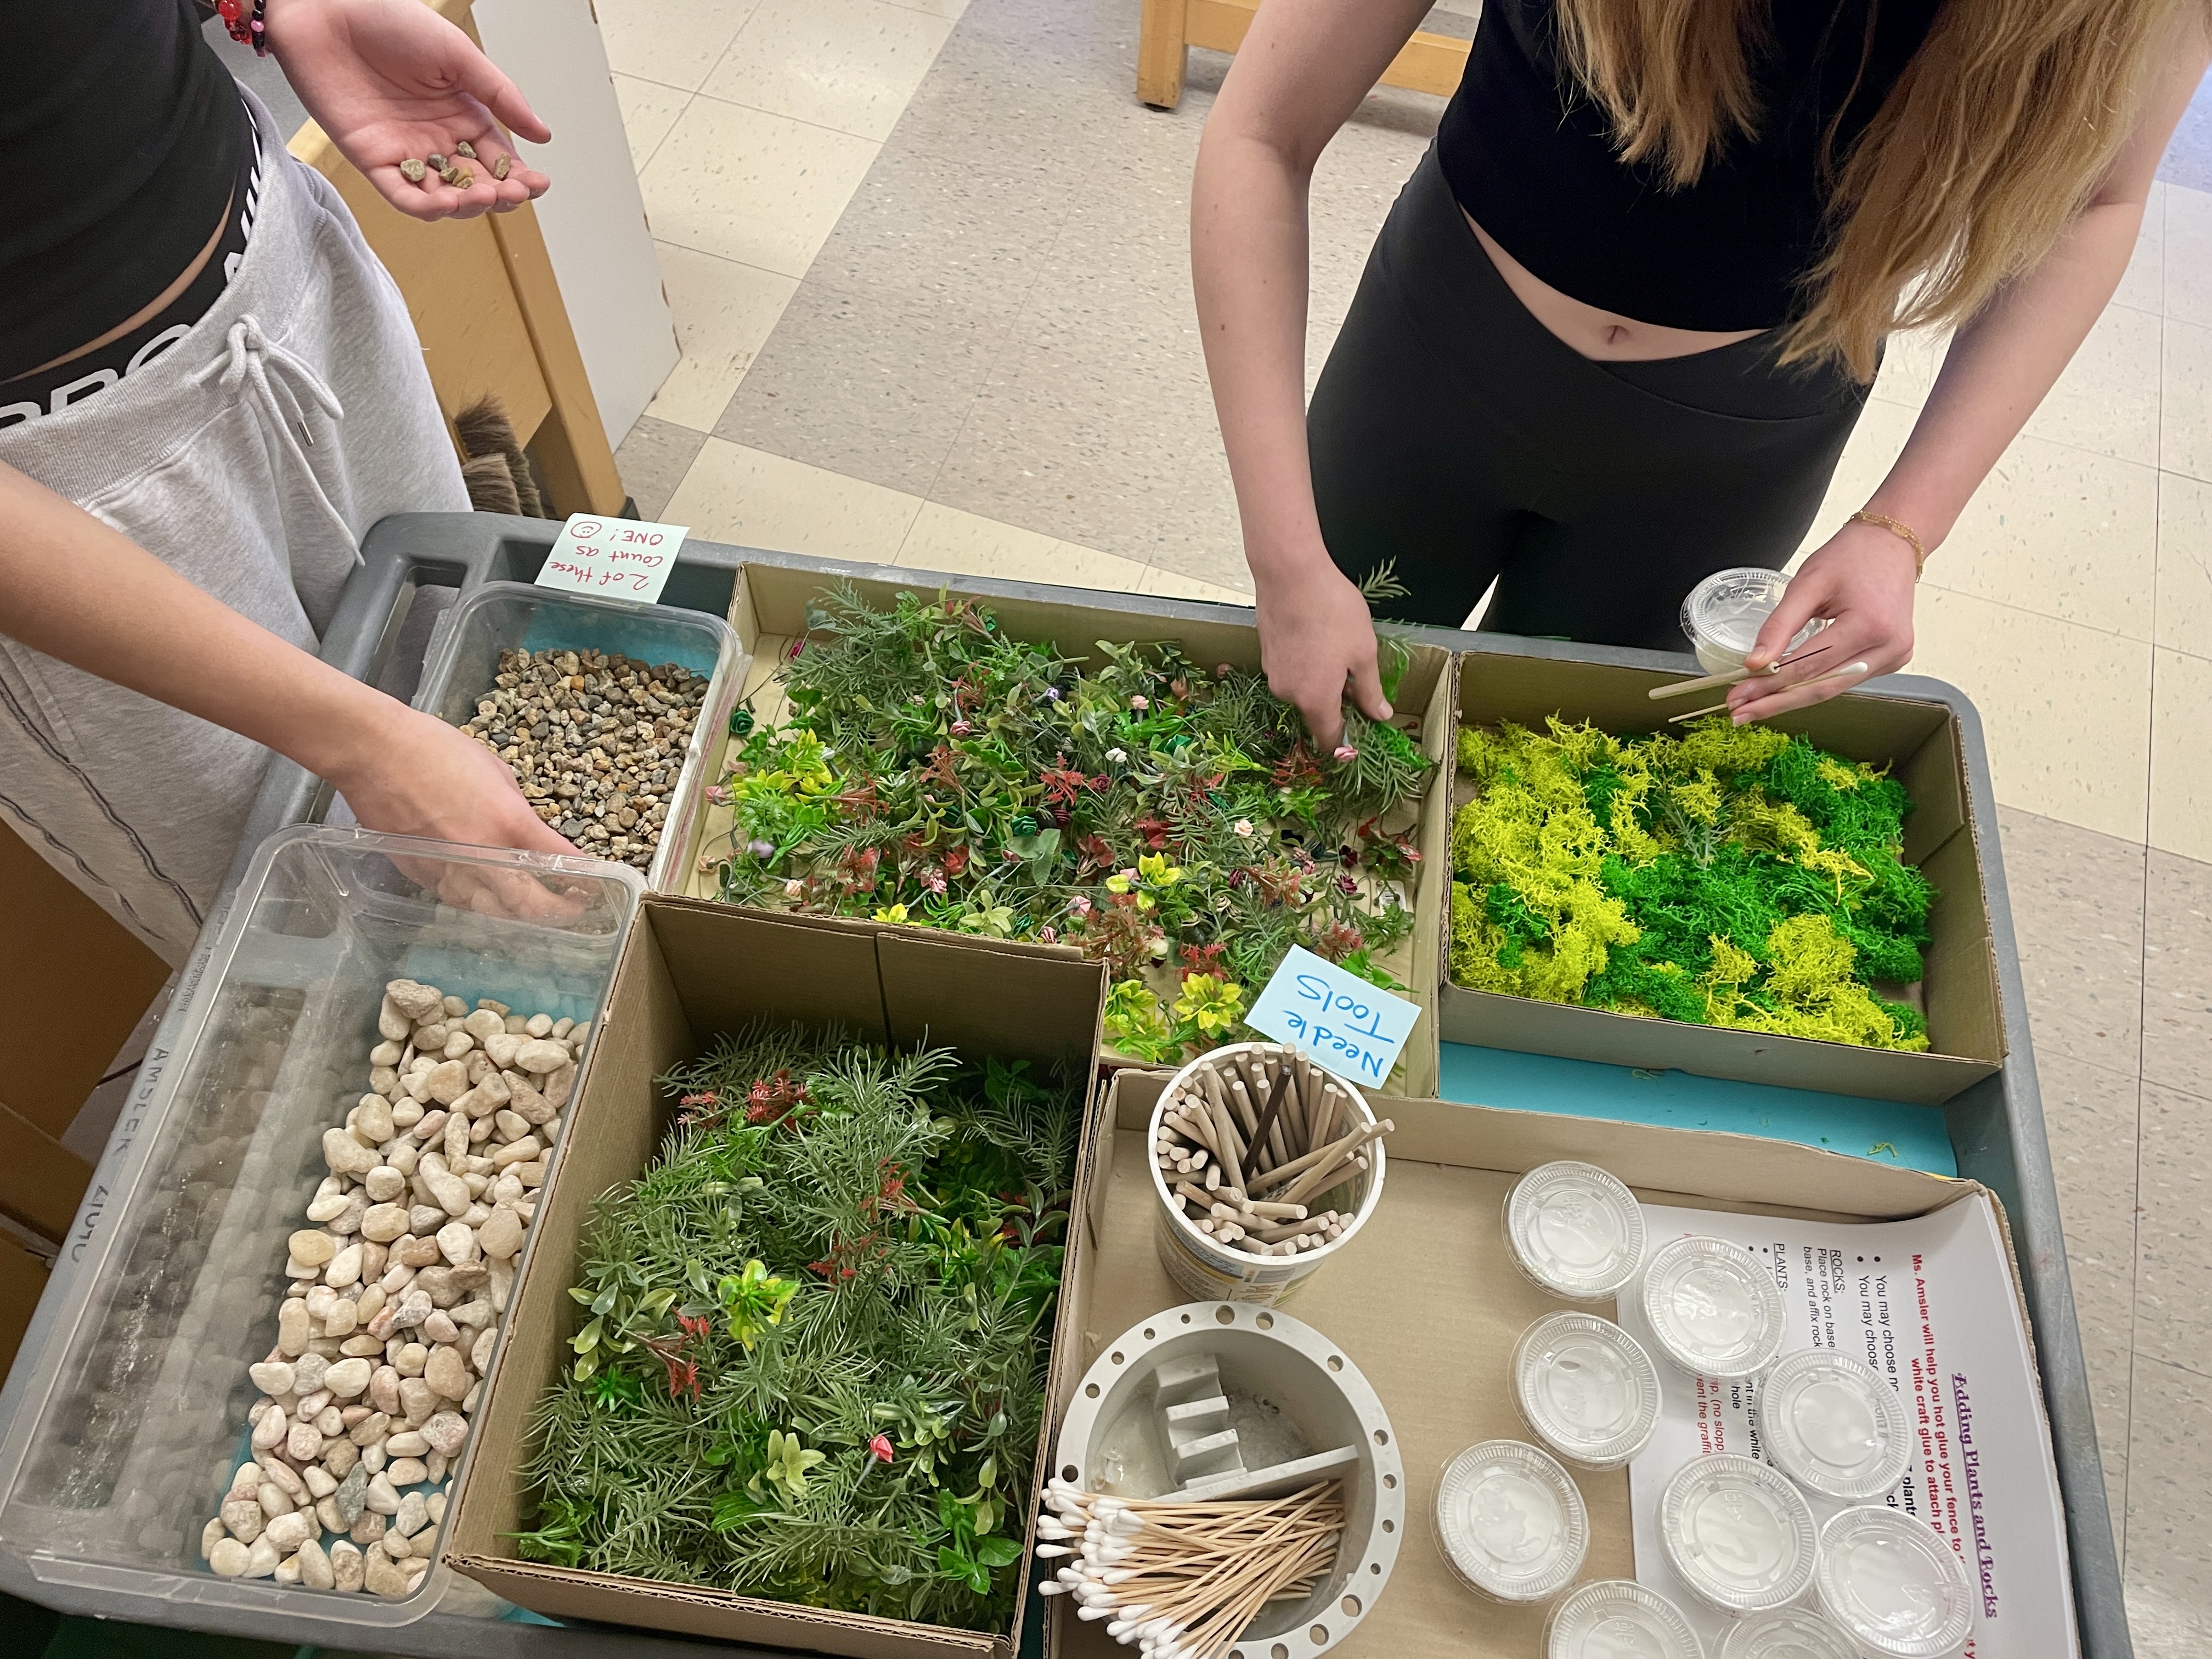
The Plant and Rock Buffet! (I set limits for each)

Adding plants, rocks, and moss
Have Fun if you try this with your students, and let me know how it goes!


May 12, 2023 @ 00:54:21
Love this lesson and your slides! Thanks! One question. Did you glue each popsicle stick to the others before putting the brace pieces on the back of them?
May 14, 2023 @ 18:41:53
Not necessary. Just place the vertical ones. The cross pieces will hold them together. See the step-by-step photos above!
Aug 29, 2023 @ 19:18:45
how did you cut the trough through the middle of the rigid foam? What tool did you use?
Aug 30, 2023 @ 06:16:49
I explain this above. I pre-cut all the bases about 3″ by 8″ . I then use a utility knife and a metal straight edge ruler. I make two angled cuts across the width so the “v-shape” piece is easy to remove.
Aug 30, 2023 @ 01:27:32
Hi, did you use the jumbo popsicle sticks?
Aug 30, 2023 @ 06:09:12
yes I did!
Oct 13, 2023 @ 19:35:30
Love the lesson! Did the half-inch thickness of the base make balance an issue or did you find they all stood up just fine?
Oct 13, 2023 @ 20:09:45
If you center the groove in which you place the “fence”, balance is not an issue!
Nov 24, 2023 @ 13:00:23
Where did you get the rigid insulation foam? I can’t wait to do this with my students. These are so cool!
Nov 24, 2023 @ 21:05:24
Lowes, Home Depot… One 6’by8′ sheet was enough for over 100 students. Bring a mat knife so you can cut it down if you don’t have a big car! LOL
Jan 05, 2024 @ 02:46:25
Do you think you could use air dry clay for the base and they could paint it the way they want when its dry?
Jan 05, 2024 @ 02:50:13
In my opinion it would be difficult to make a substantial base to support the fence with air dry clay. You’d have to really ensure the bottom was flat, and it would require a lot of clay per student… Try a sample yourself. That’s what I always do with a new idea! Good luck.
Jul 29, 2024 @ 15:22:43
Hi there, I was wondering if you would be able to share the handout on symbols?
thanks
Jul 29, 2024 @ 16:06:23
I don’t have a digital copy—but I found it by doing a Google Image search of “Graffiti Doodles”. A lot comes up!
Sep 12, 2025 @ 23:30:34
Thanks for the thorough step-by-step for this project! I’m looking forward to seeing my students’ results. Would you mind sharing how you evaluate it? Do you have an evaluation sheet?
Sep 16, 2025 @ 18:38:22
I do: email me at uamsler@masconomet.org and I will share it with you.